It is a common situation when you are not at your workplace, but need some data urgently. In this case, access through the Internet using a web browser might save you.
It is no doubt that you can develop a web interface for any system. To do this you need to develop, debug and deploy it as well as maintain compatibility with different web browsers. 1C:Enterprise platform allows developers to save efforts on development of the web interface.
The platform allows you almost in a single click publish on the web server entire the application that you have developed in this tutorial. After that, users will be able to access the application using regular web browsers. At the time of writing this book, there are four supported web browsers, they are: Microsoft Internet Explorer, Mozilla Firefox, Google Chrome, and Apple Safari.
This means that users do not need to install any of 1C:Enterprise applications or licenses, the only requirements are the connection to the Internet and one of the supported web browsers. At the same time, you will need to have a server where 1C:Enterprise platform and a web server are installed. At the time of writing this book, there are two supported web servers, they are: Microsoft IIS and Apache.
To install the web server, click Start, then click Control panel, and then click Uninstall a program. On the navigation panel click Turn Windows features on or off. In Windows Features, select Internet Information Services. The default set of features is enough. Click OK to setup and close this window.
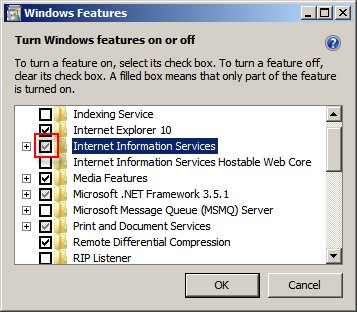
Figure 11-1. Installing the Internet Information Services web server
To publish web client you need to have the Web server extension modules component of 1C:Enterprise platform installed. To install the component, click Start, then click Control panel, then click Uninstall a program, in the list of applications find 1C:Enterprise 8 (training version) (<version number>) and select it. The version must match the version that you use for publishing the application. Then click Change on top of the list. In the installation wizard select the Modify option, and click Next.
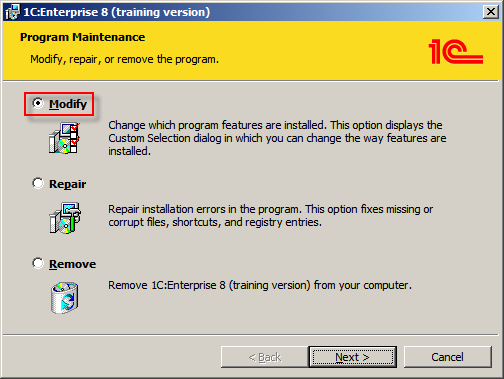
Figure 11-2. Modifying the 1C:Enterprise installation
On the next page select This feature, and all subfeatures, will be installed on local hard drive for Web server extension modules. After that, follow the wizard confirming default settings.
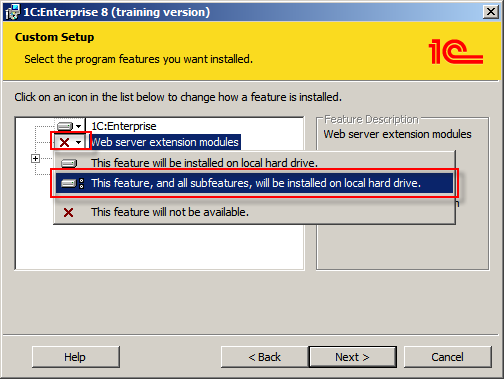
Figure 11-3. Installing the Web server extension modules component
Enabling access to the application through the Internet is simple. Open the application in Designer mode. In Main menu click Administration and then click Publishing on web-server...
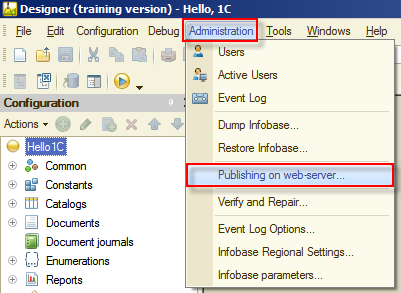
Figure 11-4. Opening the Publish to the web server wizard
In the Publish to web server wizard in Name field input hello_1c and in Directory field see that the last folder is changed to hello_1c. Then, click Publish.
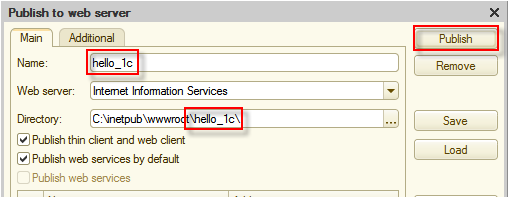
Figure 11-5. Publishing the application on the web server
The platform will ask for confirmations during publishing. Agree with them.
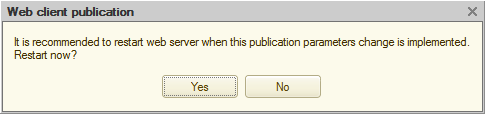
Figure 11-6. An example of the publication confirmation dialog.
After the application is published, you can access it from any place around the world. To connect to the application you will need to know only its URL.
Notice: Details of configuring web servers are skipped in this book. In short, you will need to let IIS_IUSRS user on the server access to 1C:Enterprise installation bin folder, to the folder that you have specified in Directory field of the Publish to web server wizard, and to the folder where your infobase is placed. Then, you need to enable Anonymous Authentication in Authentication settings of the hello_1c IIS application and for 64-bit Windows, you need to set to True value of Enable 32-Bit Applications in advanced settings of the DefaultAppPool application pool.
In the tutorial you run it on your local computer, thus the URL will be local only. To log on type http://localhost/hello_1c in the address bar of your web browser and you will see the 1C:Enterprise interface, with which you are already familiar.
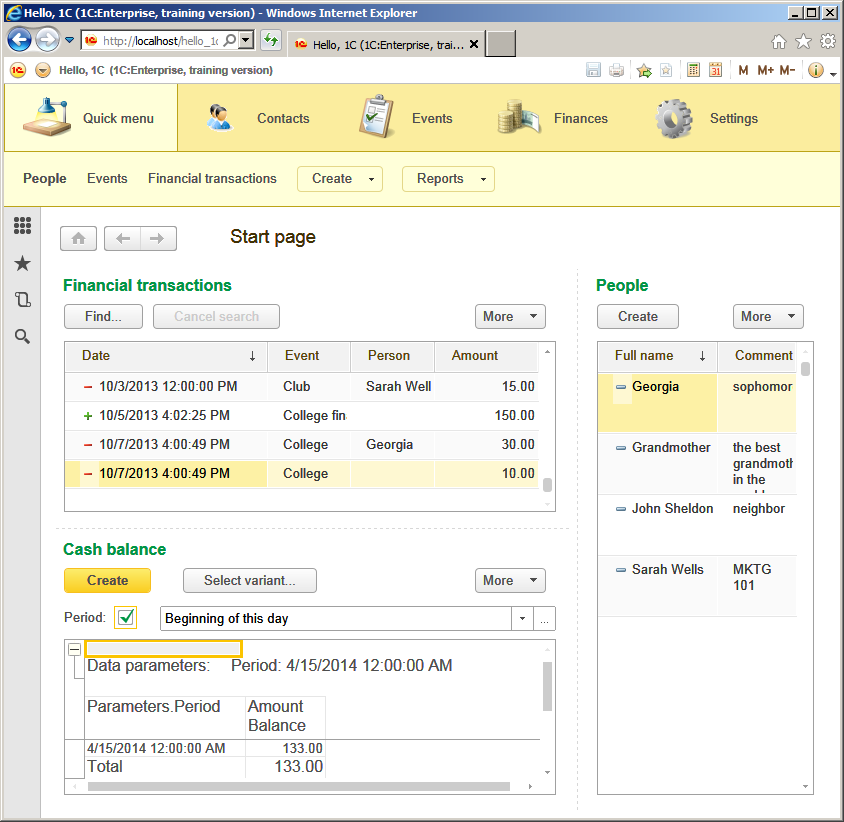
Figure 11-7. Web client in Microsoft Internet Explorer
As it is said above, you can use your favorite web browser to work with your application.
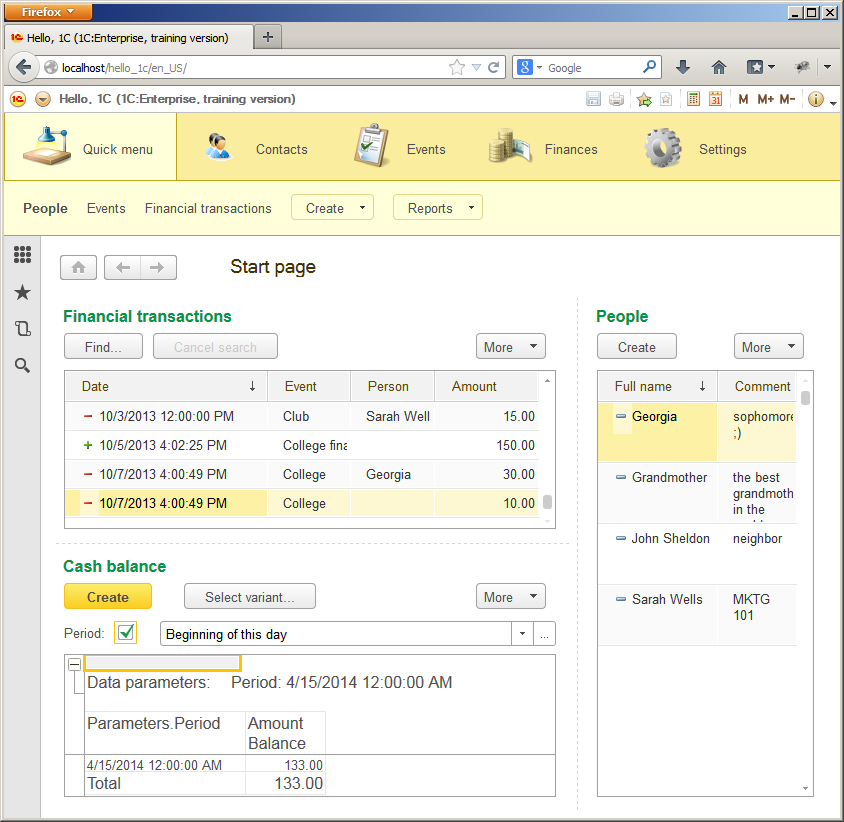
Figure 11-8. Web client in Mozilla Firefox
Notice: The 1C:Enterprise (training version) has a set of limitations, thus you can not protect it with the password as users feature is disabled for the training version. In addition, to log on using the web client you need to quit Designer mode first as there can be only one concurrent user in the training version. The actual at the time of writing this book limitation is listed in 1C:Enterprise 8 (training version) chapter.
You can see the live demo on 1C:Developer Network in Applications section.
Next page: Mobile platform