Task. In the Mobile platform chapter, when you installed the application to the mobile device, you saw that it did not contain accounting data. In this chapter you will supply the application with the synchronization mechanism. In real life it is common when the application is a part of a big accounting system, or when you want to prevent users from duplicate data entry.
You can imagine a scenario where, when one copy of the application is installed on the personal computer and the other one on a mobile device. Both copies must be filled with the same data. The desktop copy will be the main (master) one, and the mobile copy will be subordinated. In fact, you can have several mobile copies.

Figure 18-1. Application interaction schema
Solution. To solve the task, use the built-in the 1C:Enterprise platform mechanisms of data synchronization through web services using SOAP:
Exchange plan will collect the data to be synchronized.
Web service will synchronize the collected data.
Note. Exchange plan is a built-in mechanism intended for synchronizing data between homogeneous and heterogeneous 1C:Enterprise applications. It is based on the XML format. You can use Exchange plans for building distributed infobases and synchronizing data with third-party applications that support the XML format.
Note. The 1C:Enterprise platform includes the fully-fledged SOAP implementation and you do not have to worry about the technical aspects of data synchronization. Moreover, 1C:Enterprise solutions can serve as web service providers for both 1C:Enterprise-based and third-party applications, and also can use third-party web services.
We will not go into details of the task, it has a lot of solutions, we will describe the one that requires minimal application redesign.
First, add Personal computer to Use purposes in the property palette of the main configuration node.
This will supply the desktop version with extended functionality.
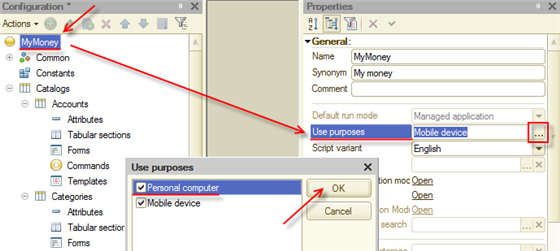
Figure 18-2. Enabling Personal computer features
Add an Exchange plan that will register data changes in all application copies and generate exchange files.

Figure 18-3. Adding the exchange plan
Name it Mobile and then click Content.
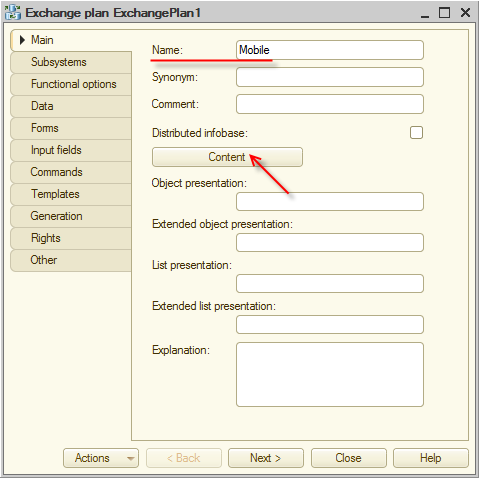
Figure 18-4. Exchange plan
Select the check marks for all objects.

Figure 18-5. Exchange plan content
These are all settings you have to set for the exchange plan. Close the exchange plan window.
Create an XDTO package.
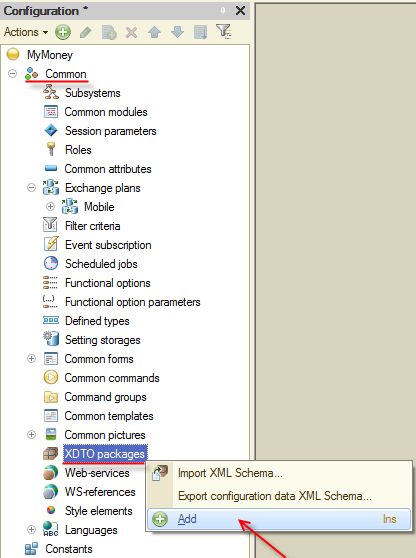
Figure 18-6. Adding the XDTO package
Note. XDTO packages are intended to define a system of types and values for interacting with external data sources, for example, web services.
Click the added XDTO package and type WebExchange in the Name field of the property palette.
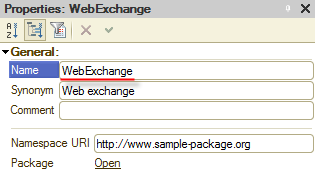
Figure 18-7. Naming the package
In the Namespace URI field type http://localhost/ws1, then press Enter. Once you press it, the platform asks you to confirm the namespace change. Click Yes.
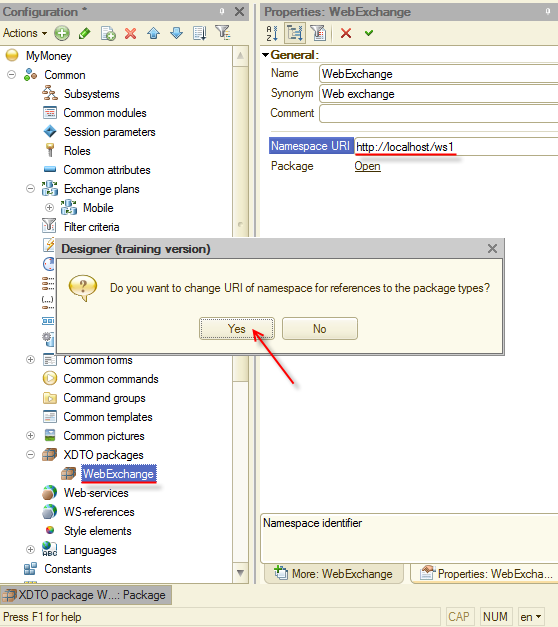
Figure 18-8. Changing the namespace URI
In the window with the list of namespaces to be updated, select all namespaces and click OK.
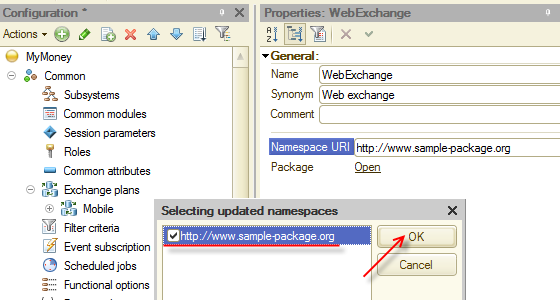
Figure 18-9. Selecting the namespaces to be updated
The main application must contain details of the web service that subordinate applications will call to synchronize data.
Add a Web service.
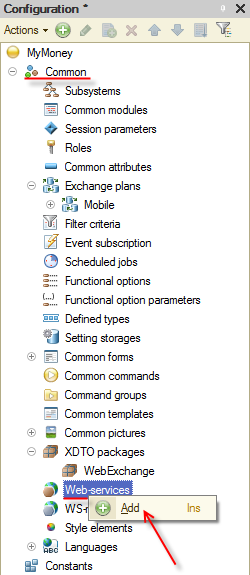
Figure 18-10. Adding a web service
Name it WebExchange and proceed to the Other tab.
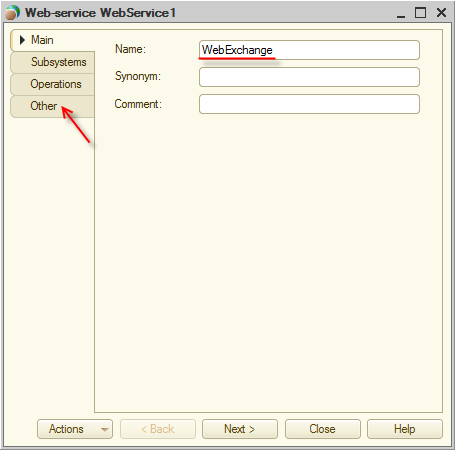
Figure 18-11. Specifying the web service parameters
Type http://localhost/ws1 as Namespace URI, check that Publishing file name is ws1.1cws, and then click ![]() in the XDTO packages field.
in the XDTO packages field.
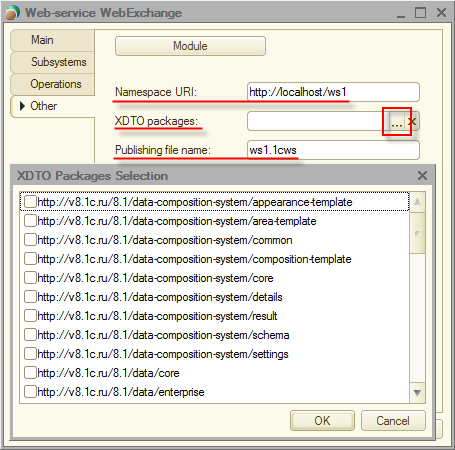
Figure 18-12. Specifying the web service parameters
Select the following XDTO packages:
- http://v8.1c.ru/8.1/data/core
- http://v8.1c.ru/8.1/data/enterprise/current-config
- http://localhost/ws1
Then click OK.
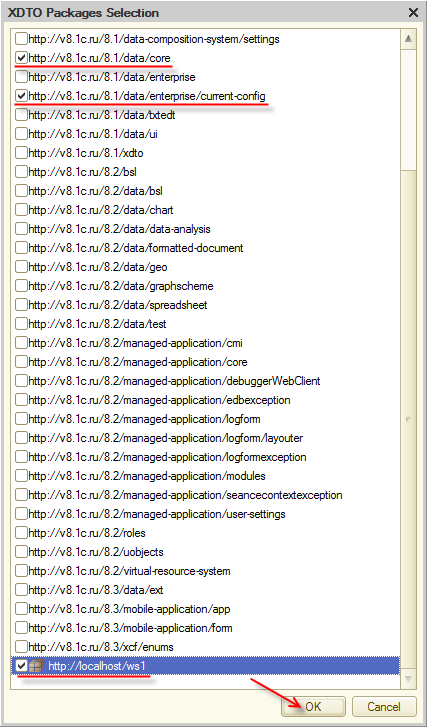
Figure 18-13. Selecting the XDTO packages
Proceed to the Operations tab and click Add operation ![]() .
.
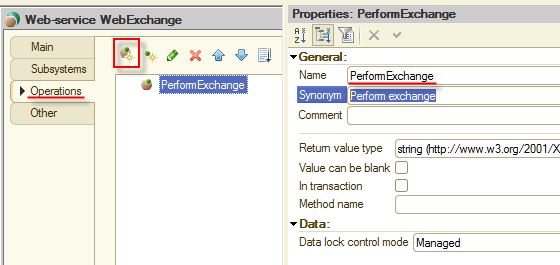
Figure 18-14. Adding the operation
Select Value can be blank and then click ![]() of the Return value type. In the opened window click Value storage of the http://v8.1c.ru/8.1/data/core branch and click OK.
of the Return value type. In the opened window click Value storage of the http://v8.1c.ru/8.1/data/core branch and click OK.
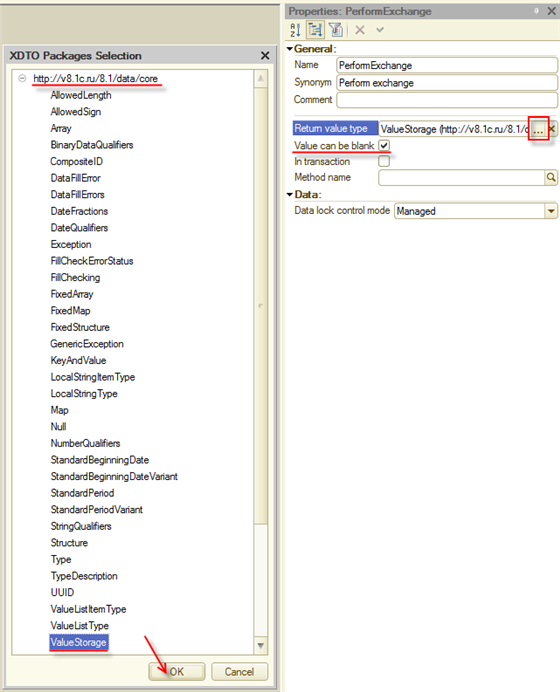
Figure 18-15. Specifying the operation properties
Add two parameters for the PerformExchange operation. To add a parameter, click ![]() . Name them DeviceCode and DeviceData.
. Name them DeviceCode and DeviceData.
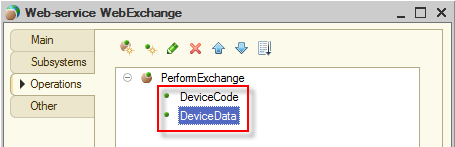
Figure 18-16. Operation parameters
Leave the DeviceCode value type as is. Set the DeviceData value type to ValueStorage (http://v8.1c.ru/8.1/data/core). Set Transfer direction to Input-Output.

Figure 18-17. Operation parameter properties
Now create a method that will implement the PerformExchange operation. To start creating the method, click the ![]() button of the Method name parameter in the PerformExchange operation property palette.
button of the Method name parameter in the PerformExchange operation property palette.
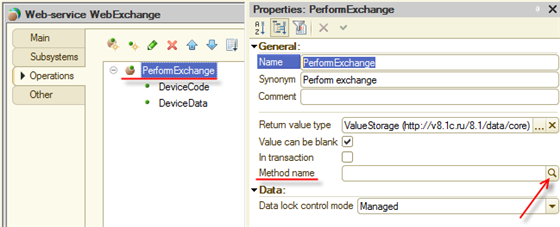 Figure 18-18. Creating the operation method
Once you click ![]() , the PerformExchange() function is generated in the web service module. The platform generates a function but not a procedure because in the web service logic it must return a value. In the function, you have to type a script that will perform actions required for data synchronization. It will have pretty simple logic.
, the PerformExchange() function is generated in the web service module. The platform generates a function but not a procedure because in the web service logic it must return a value. In the function, you have to type a script that will perform actions required for data synchronization. It will have pretty simple logic.
First, remember that web service actions you are about to define are called from a mobile device but are performed in the main application.
Second, the script must retrieve a data package from the mobile device that called it and must update data in the main application.
Third, when data from the mobile device is retrieved and saved, the script must generate a data package to be sent to the mobile device. If there is no data to be sent, the package must be sent anyway so the exchange plan commits the synchronization.
Also, keep in mind that you can have several mobile devices.
All these points are easily implemented with the 1C:Enterprise script. To keep the tutorial simple, just take the content of the web service module from the Web service module.txt file.
Some explanations for the module are given below:
- In section 1. Initialization, there is verification whether the Mobile exchange plan parameters are not filled (in case of initial run). If the parameters are empty, the main node code is set to 001 and the main node name is set to Main. Then the script attempts to find a record matching the mobile device code in the Mobile exchange plan. If the record is not found, a new device is recorded to the Mobile exchange plan.
- In section 2. Retrieving data from the mobile device, based on the code of the mobile device that calls the web service, the script registers new data from the exchange package passed in the DeviceData parameter.
- In section 3. Exporting data to the mobile device the script generates a package with the data changes of the main application to send it to the mobile device as a value that the PerformExchange() function returns. Thus, all main Infobase synchronization features are prepared. The web service in the main application waits for a call from the mobile device. When it is called, it gets a package with up-to-date data from the mobile device and sends back a package with synchronization confirmation and data that the mobile application does not have.
All you left to do is create a mobile part that will be called the web service, pass a package, and retrieve data from the main application.
Allow users to set up the synchronization rate-create a command that they will run from the application menu.
Create a common command.
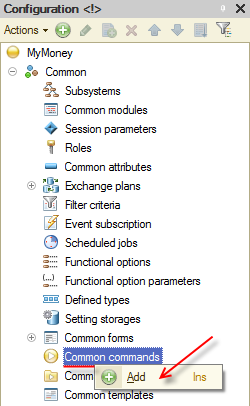
Figure 18-19. Exchange common command
In the property palette, type the command name Exchange.
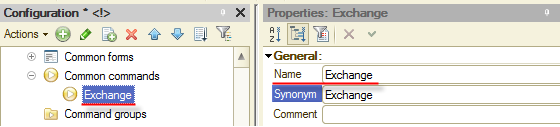
18-20. Common command name
Select Action panel.Tools as Group.
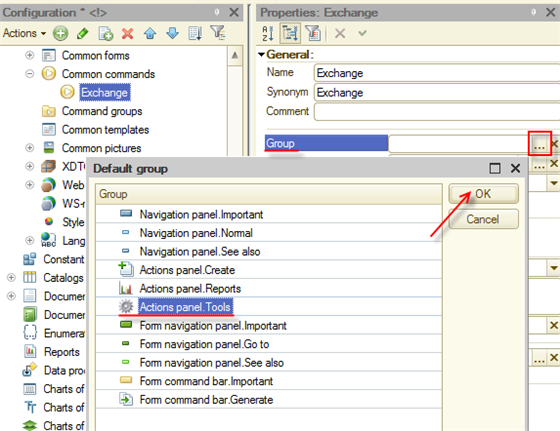
Figure 18-21. Command group
The command module is generated when you add a new command. You can always open it by double-clicking the command in the metadata tree or by clicking the Command module link in the property palette.
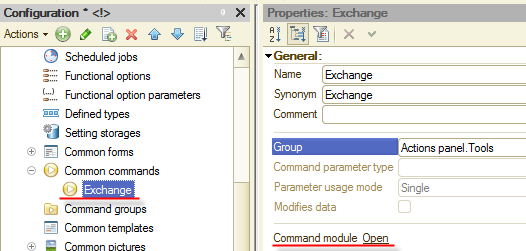
Figure 18-22. Opening the command module
In the Exchange module you must define the behavior of the subordinate applications:
- Calling the WebExchange web service of the main application.
- Passing the package with data received from the Mobile exchange plan. (The exchange package is passed in the DeviceData parameter and the device code is passed in DeviceCode).
- Receiving a data package for the Mobile exchange plan from the web service.
- Saving the received data.
To keep the tutorial simple, take the content of the common command module from the Exchange common command.txt file.
Some explanations for the module are given below:
- The Address variable contains a string address for connecting to the main application web service. Instead of the IP address given in the file, type the address of the computer where your web service runs. /ws/ws1.1cws?wsdl is the address of the application on the web-server (see the Web client chapter). Note: To find out the computer IP address, see its network connection properties. The mobile device and the server should be on the same network. The easiest way of doing that is using a Wi-Fi router. Both the computer with web-server and the mobile device should be connected to it. Correct the connection string in the module based on your web application and web server settings.
- In 1. Initialization section, there is a verification of whether the parameters are filled. In case of initial run, the current node gets a unique code and the main application node gets code 001 in the Mobile exchange plan.
- In 2. Exchange with the main base section the script passes the mobile device code and a data package from the Mobile exchange plan to the WebExchange web service of the main application.
- In 3. Processing data received from the main base section the script processes and saves data received from the WebExchange web service of the main application.
As you see, creating the mobile device part is as easy as creating the main application part.
There is just a little left:
- Save the improvements you have made.
- Publish the WebExchange web service on the web-server.
- Update the application on the mobile device.
Save the configuration.
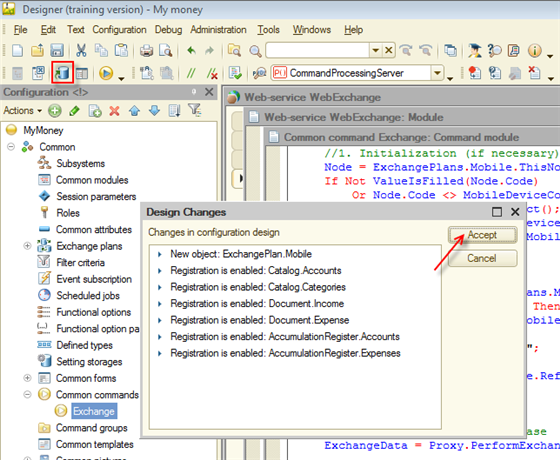
Figure 18-23. Saving the configuration
Update the web-server publication as you did it in the Web client chapter. Note that the Publish web services checkbox must be selected.
Important. Make sure the web service publication name is different from the name of the mobile publication you made in the Mobile platform chapter!
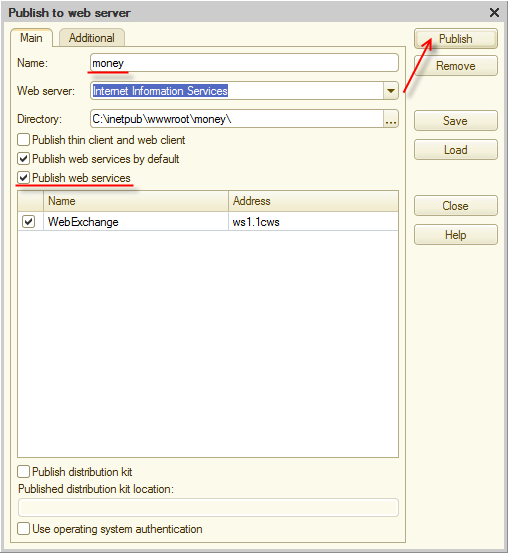
Figure 18-24. Publishing to a web server
Update the mobile application on the web-server.
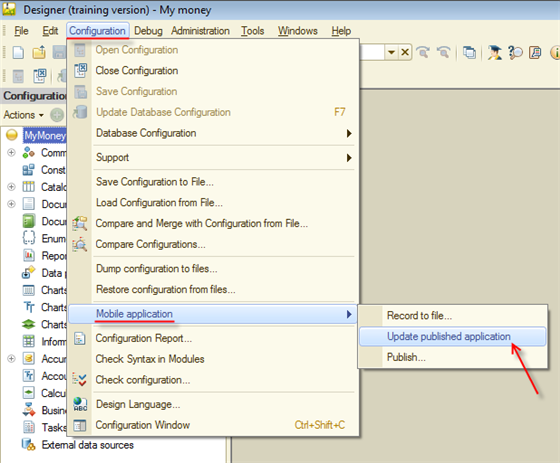
Figure 18-25. Updating the published application
Now, check whether the mobile application URL is set on the mobile device and start it.
Note. In the previous chapters we showed you iPad screenshots, but in this chapter, for variety's sake, we will show you screenshots made on an Android-based device. Installing the 1C:Enterprise mobile platform to an Android-based device is even easier than to an iOS-based device, just copy the .apk file with the platform to your device, start it, and follow the instructions.
Start the 1C:Enterprise platform on your mobile device, call the application list menu (on the most devices, tap and hold the application name in the list for this), and then tap Edit.
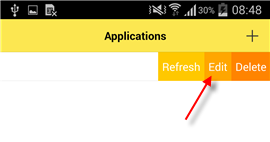
Figure 18-26. Calling the application list menu
Check out the update address and tap Open.
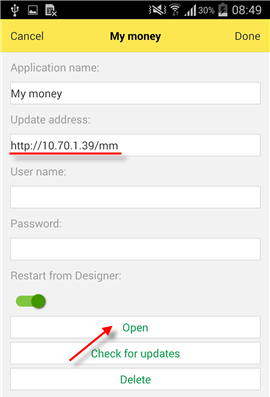
Figure 18-27. Updating the application
The platform connects to the web-server, retrieves an up-to-date application version, updates the application on the mobile device, and starts it.
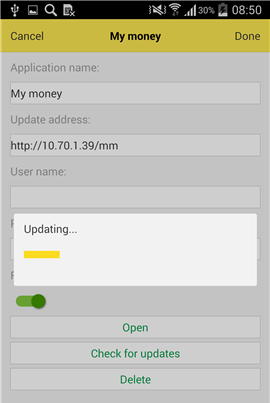
Figure 18-28. Updating the application
Once the application is started, you can see the new interface that includes the improvements you did in homework 2 and 3.
Note. Before taking the screenshots you see below, we made some changes in the interface to make it more appropriate for a small display of the mobile phone. For example, we set Representations of the Income, Expense, and Refresh buttons to Picture instead of Picture and text and decreased their width to 10.
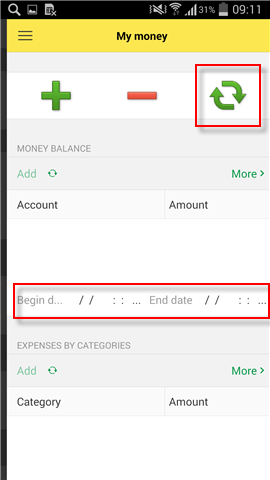
Figure 18-29. Updated mobile application
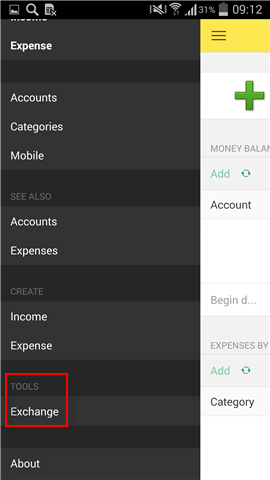
Figure 18-30. Menu command
The application still has no data. Tap Exchange to synchronize it.
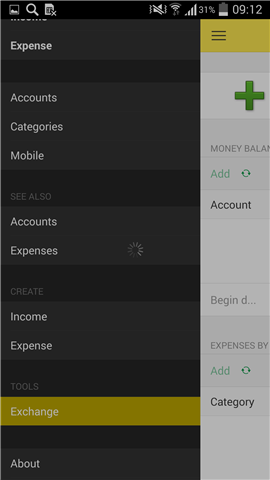
Figure 18-31. Data synchronization
Once you tap Exchange, the application connects to the web-server and retrieves data from the main application.
When the synchronization is finished, you can check out whether all data is in the mobile application by clicking ![]() .
.
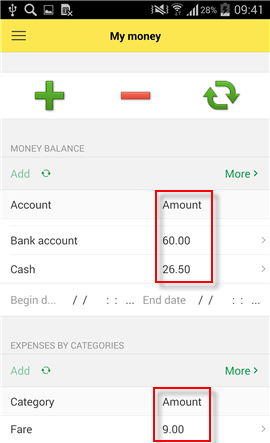
Figure 18-32. Synchronized data
Check out that data is transferred to both directions by adding add the Income document on the mobile device and send it to the main application.
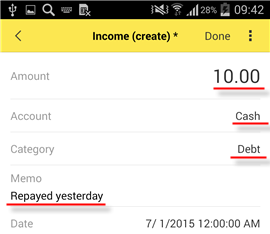
Figure 18-33. Mobile application document
On the mobile device, tap Exchange. You can see that the balance in the desktop copy has changed.
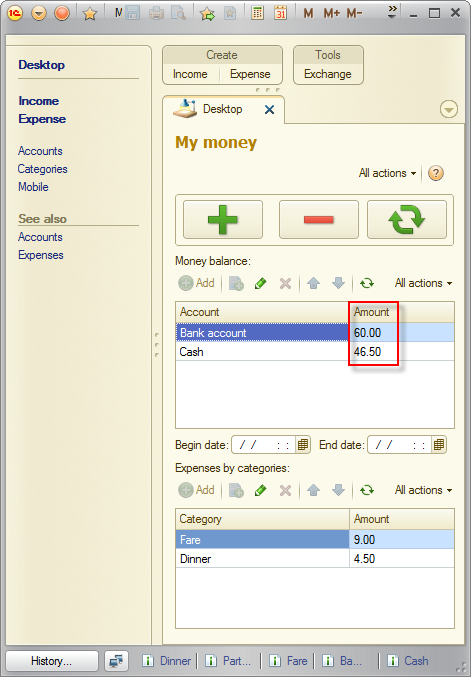
Figure 18-34. Synchronized data
After the synchronization is complete, you can find the document in the main Infobase. You can also see a new Categories catalog item in the main application, and balance is synchronized too.
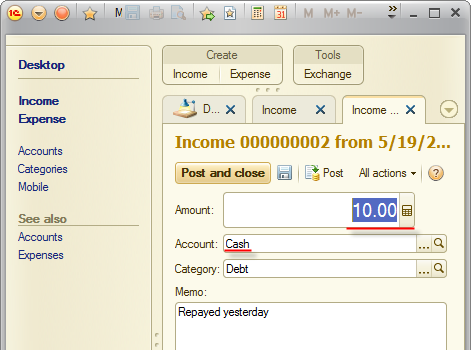
Figure 18-35. Document in the desktop copy
The homework task is complete, data is synchronized in both directions.