Let us enter the values required for data exchange.
- Start the department infobase in the debug mode and open the Departments exchange plan (fig. 24.24).
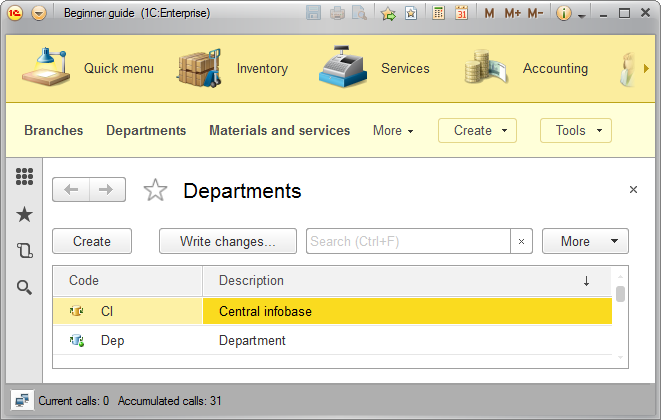
Fig. 24.24. Nodes of the Departments exchange plan
Note that in the infobase of the subordinate node the subordinate node itself (Department) is a predefined exchange plan node, while the central infobase node is marked by a yellow icon, indicating that it is the master of the department infobase. Additionally, the only available commands for the central infobase are Write changes and Read changes.
Now let us test the data exchange. - Set the Numbering prefix to DP.
Note. If you completed Lesson 25 (Functional options) prior to lesson 24, some sections might be hidden from the sections panel (for example, the Accounting section). If this is the case, open the General settings form and check the values of the functional options that define section visibility (for example, the Accounting option). Note that functional options are not transferred between nodes, you have to specify their values independently for each node. - Open the Customers catalog and add a new customer.
- Open the Departments exchange plan, select the Central infobase node (the node where you need to transfer the changes), and click Write changes.
- In the Write message with changes dialog box, click Write and save to file.
- Click Save and specify the message file name (fig. 24.25).
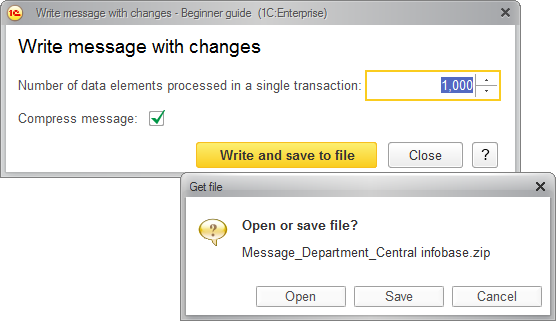
Fig. 24.25. Write message with changes dialog box - In the Write message with changes dialog box, click Close.
- Start the central infobase in the debug mode, open the Departments exchange plan, click the Department node (the node whose changes you need to transfer to the central infobase), and click Read changes.
- In the Read message with changes dialog box, click Select file and read changes.
- Specify the message file name and click Open.
- In the Read message with changes dialog box, click Close.
- Ensure that the new customer created in the department infobase is now available in the central infobase as well.
- Close the 1C:Enterprise window of the central infobase.
Next, let us test how configuration changes are transferred between the master node and subordinate ones. - In Designer of the central infobase, create a constant named NewConstant.
- In the Warehouses catalog, add a predefined item named Office with code 000000003.
When you start creating the predefined item, the platform provides 000000002 as the default code value. But the catalog already includes a Retail warehouse with code 000000002, which was created in 1C:Enterprise mode, so you have to change the code to make it unique. - Update the database configuration and start 1C:Enterprise in the debug mode.
- Open the Departments exchange plan and write the changes for the Department subordinate node.
- Close the 1C:Enterprise window and close Designer of the department infobase.
- Run the department infobase in 1C:Enterprise mode and read the changes from the Central infobase node.
Once the changes are read, the following message is displayed (fig. 24.26).
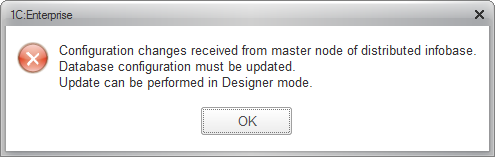
Fig. 24.26. System message - Close the 1C:Enteprise window, open Designer of the department infobase, and ensure that the NewConstant constant is now available in the configuration, as well as the Office predefined item of the Warehouses catalog.
In other words, the changes made to the central infobase configuration have been replicated to the configuration of the subordinate node.
Now everything you need to do is update the infobase configuration in the subordinate node.
We should probably say a few words concerning the order of applying changes when a single message contains changes to both the configuration and the data.
In this case, the base configuration is changed first, and then a message is displayed prompting you to update the database configuration.
But at that point the new data is not yet added. For example, the Office predefined item is not yet present in the Warehouses catalog.
Unlike universal data exchange, the distributed infobase scenario is free of the issue related to duplication of predefined data. This is because the automatic creation of predefined data is not performed in subordinate nodes of a distirbuted infobase.
After synchronizing the configurations, you have to reread the data, and this time all of the data changes stored in the message are applied. The order of applying changes remains the same regardless of whether the changed data refers to existing configuration objects or new ones. - Delete the NewConstant object and the Office predefined item of the Warehouses catalog.