To set up a distributed infobase, you need to create another Exchange plan configuration object.
- In the configuration object tree, add an ExchangePlan configuration object named Departments.
- In the Object presentation field, enter Department.
- Select the Distributed infobase check box (fig. 24.19).
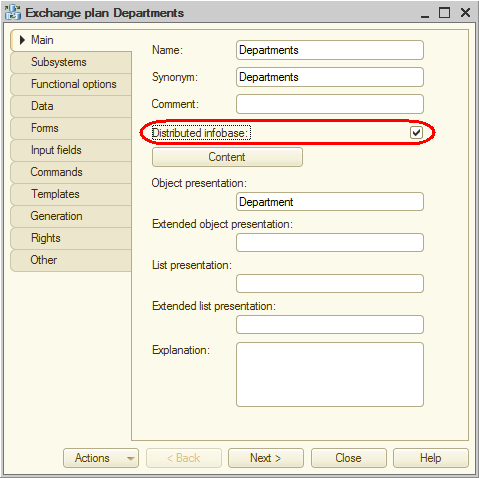
Fig. 24.19. Specifying Distributed infobase property - On the Input fields tab, select the Quick choice check box.
This allows selection of exchange plan nodes from a drop-down list. Next let us define the set of objects that participate in the exchange. - On the Main tab, click the Content button and specify the same data exchange content as the one used in the Branches exchange plan.
Basically you should include all the objects that are not related to accounting and payroll into the exchange. The resulting content of exchange data should look as shown in fig. 24.20.
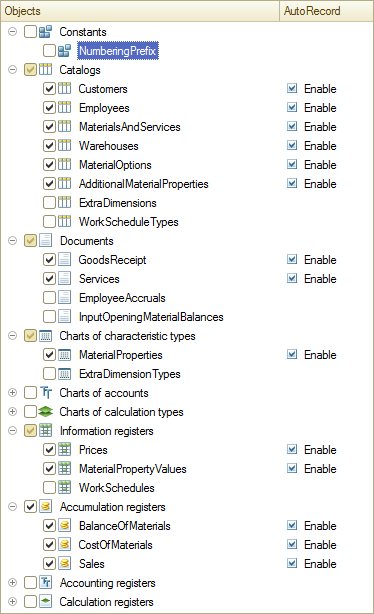
Fig. 24.20. Exchange data content - On the Subsystems tab, include the exchange plan in the Enterprise subsystem.
- In the Enterprise subsystem command interface settings window, move the command that opens the Departments exchange plan to the Navigation panel.Important group, after the Branches command, and make it available to the Administrator role only.
- In the Actions panel.Create group, enable visibility of the Department: create command for the Administrator role only.