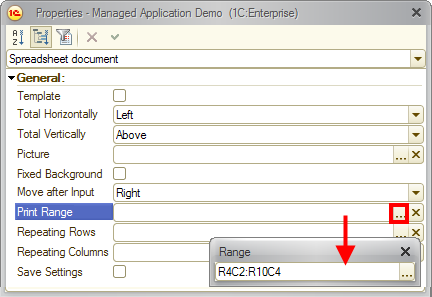
You can print a part of a spreadsheet document (a sequence of rows or columns or a cell group) instead of the entire document. To specify the print area for a spreadsheet, use the Print Range field in the property palette.
You can specify the print area explicitly by entering the range. For example, R5C7:R8C15 describes a rectangular cell range, R3:R9 stands for rows 3-9, and D12 describes a picture. You can also specify an area name. Once you enter an area name, it is replaced with the range describing the area.
You can specify the print area in the Range dialog box that is opened by clicking the selection button in the Print Range field.

Fig. 271. Specifying the print area for a spreadsheet document
In this dialog box, specify a range (see Names) and click the selection button. The specified range is displayed in the Print Range field.
You can also specify the print area using menu commands (see Specifying print area).
Next page: Repeating rows and columns on each page Desktop version