In our publications, we have described how to create a mobile application using 1C. But in all previous publications, we have always described only creating an application, not compiling it. To run this application on a mobile device, we had to publish it on a web server and place a special application from 1C on the mobile device itself. The mobile application we created could already receive from the webserver. Not a very simple scheme, don't you think?
Isn't there an easier way to create a 1C mobile application? Ideally, we should get a ready-made file, a standalone application that can be installed on a mobile device. Of course, there is such a method, and we will now consider it.
The topic of today's publication is how to build a standalone mobile application for the 1C platform.
So, let's first define what we need to build the application.
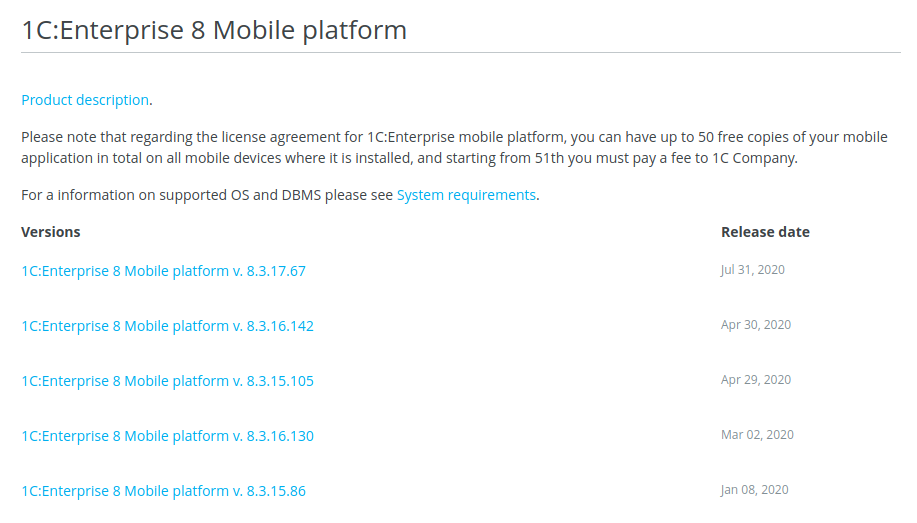
Firstly, it is a distribution kit of the 1C mobile platform. We can download it from the site https://1c-dn.com:
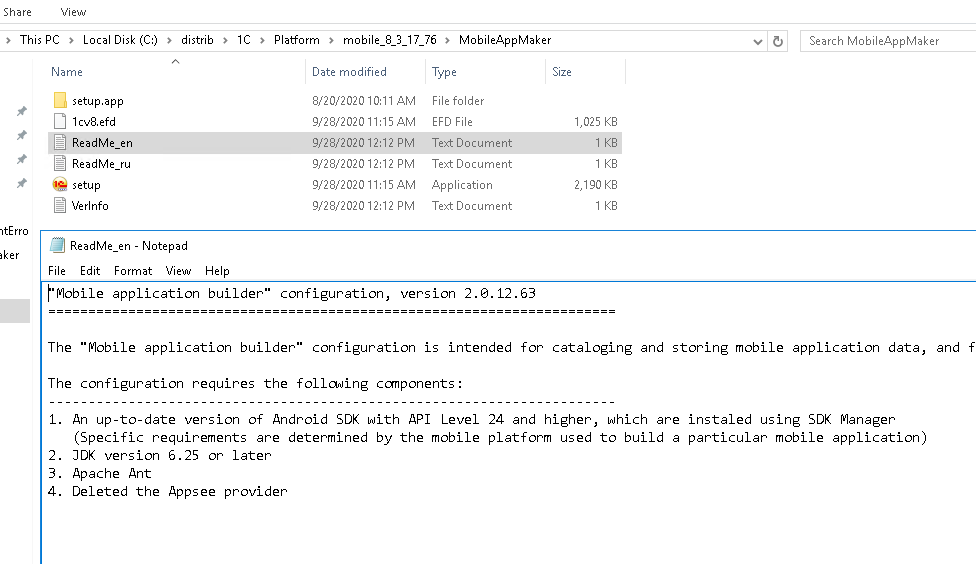
Secondly, in addition to the platform itself, we need a special 1C configuration Mobile app builder, which, in fact, will help us build a standalone mobile application. This configuration is part of the mobile platform.
So, download the mobile platform, unpack it and go to the "MobileAppMaker" folder:
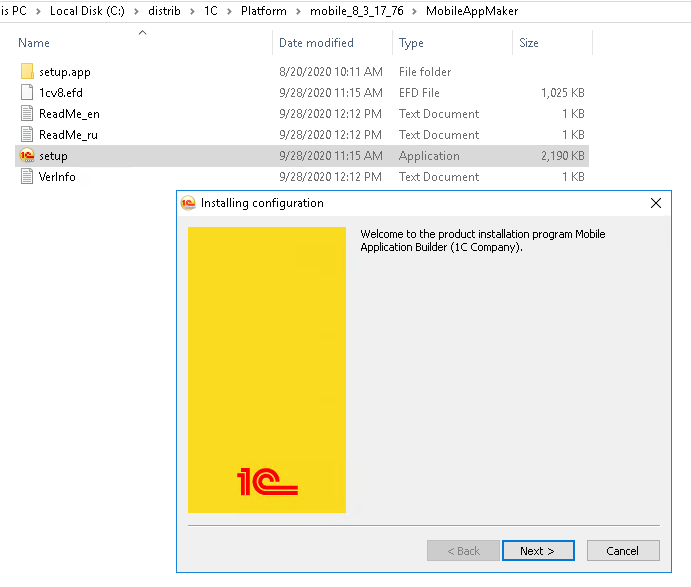
Run the "Setup" file and install the template for this program:
Then we create a new 1C working configuration from this template:
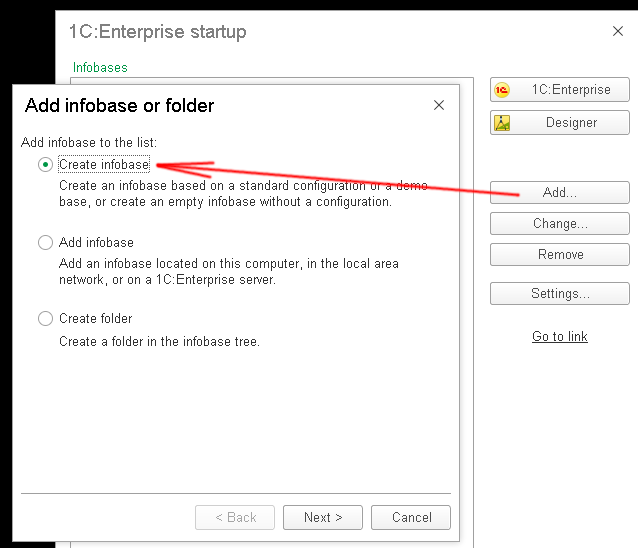
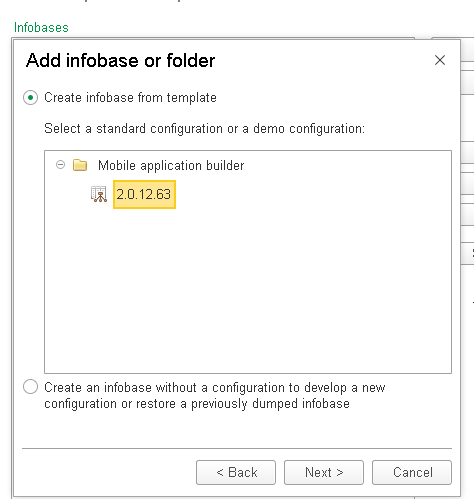
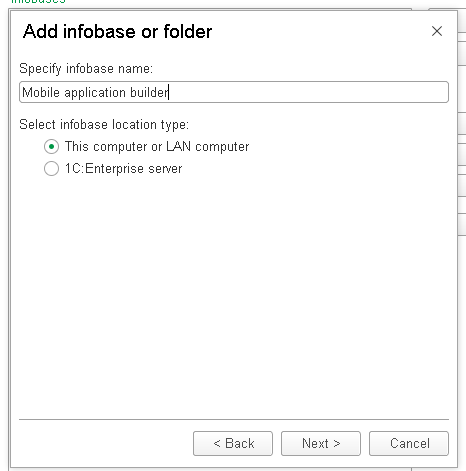
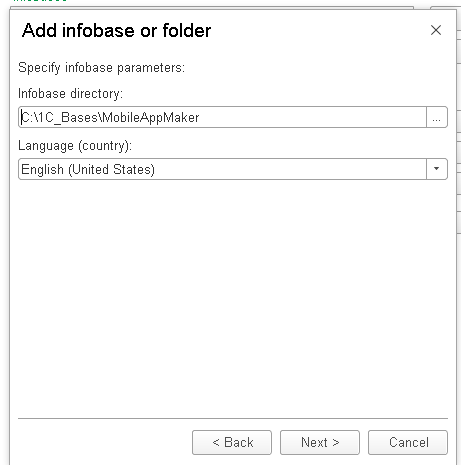
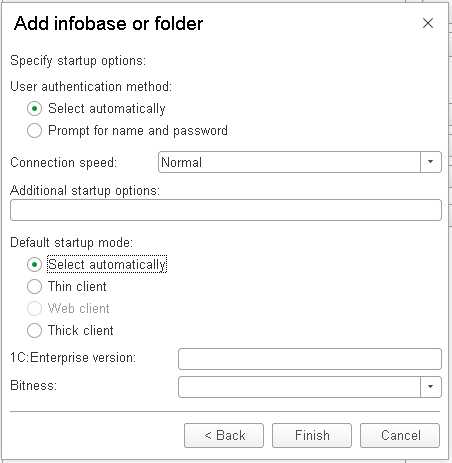
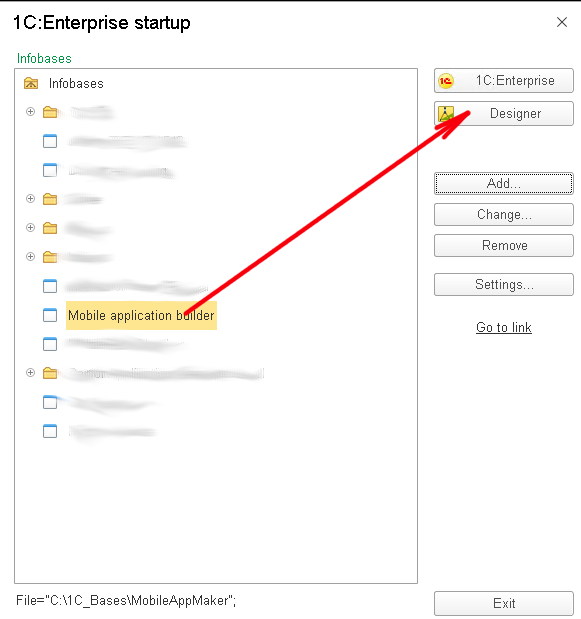
By default, the mobile builder launches with a Russian interface, but it is straightforward to configure it to English. To do this, run it in Designer mode:
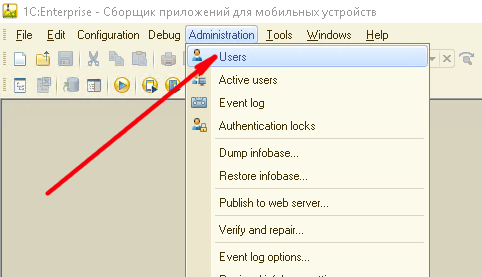
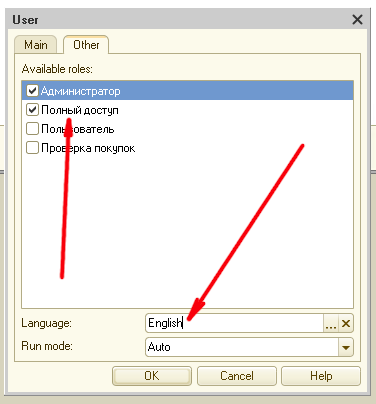
And we create a user there with administrative rights and with an English interface:
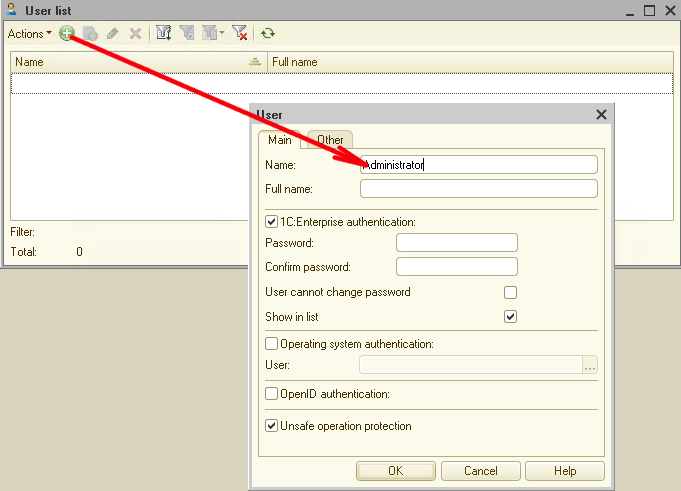
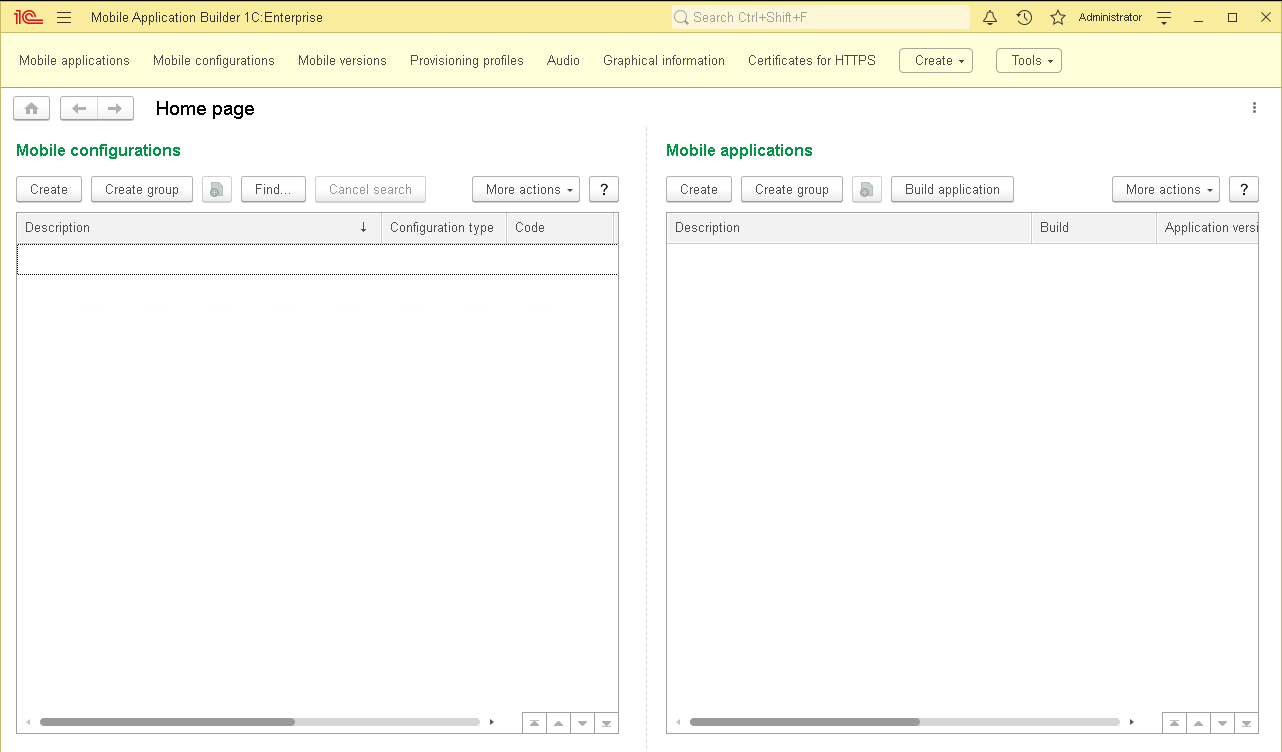
After this initial configuration, MobileAppMaker will start with an English interface:
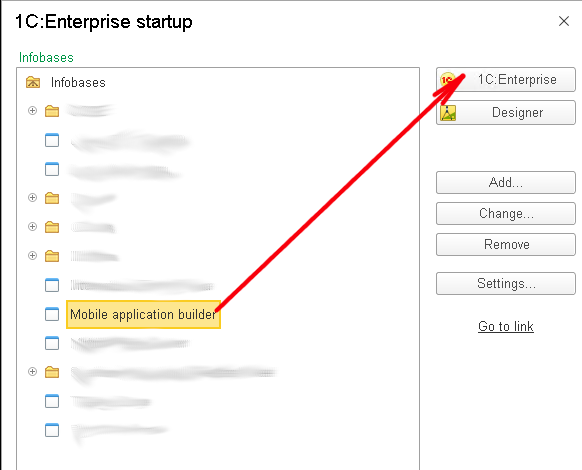
The next component we need to build a mobile application is the Android SDK. You can download it separately using the SDK manager utility or install the entire Android Studio. All this can be downloaded from here: https://developer.android.com/studio
I took the more straightforward route and just downloaded and installed Android Studio in its entirety.
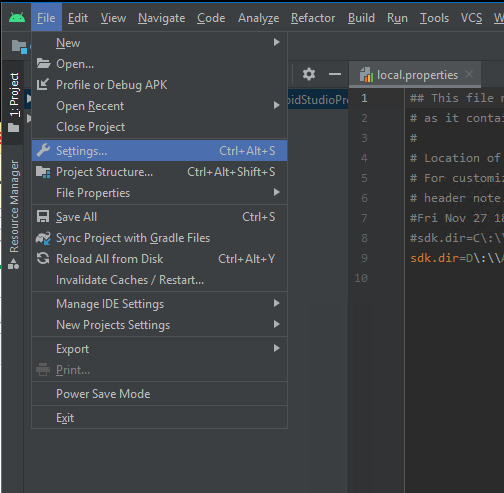
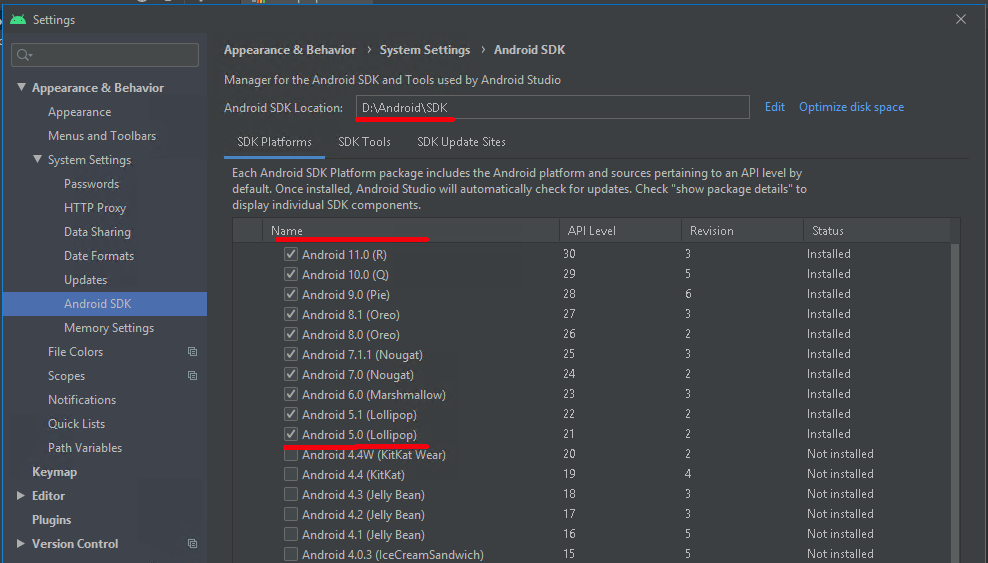
Next, we are interested in the path where the Android SDK located. To find out, launch Android Studio and go to Settings:
We remember the directory where the Android SDK located and also enable support for the desired version of Android OS:
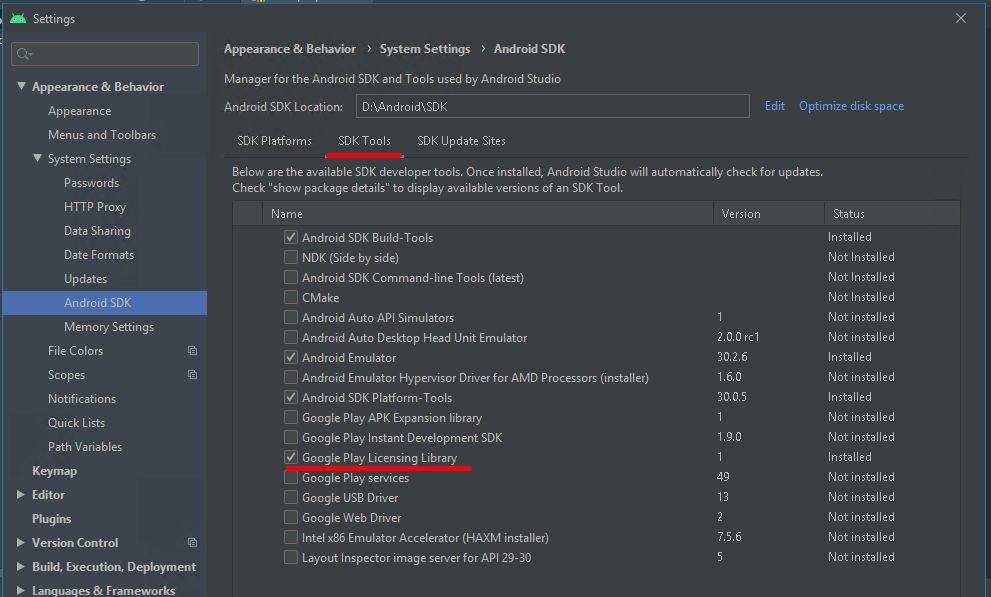
On the SDK Tools tab, we need to activate Google Play Licensing Library support:
And the last component that we need to build the application is the Java Development Kit. I recommend installing the JDK version 11, because if you install a more recent version of the JDK, then later on, you may encounter problems when building the application.
So, download and install the 11th version of the JDK: https://www.oracle.com/java/technologies/javase-jdk11-downloads.html
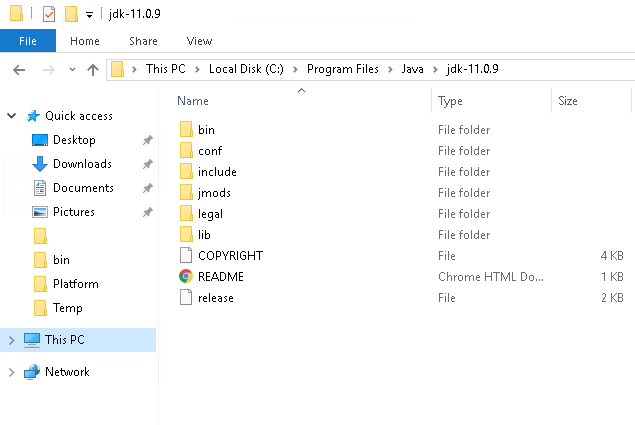
So, we have all the necessary components now to build a mobile application.
For our test task, I propose to build some simple mobile application, for example, this one: https://1c-dn.com/blog/creating-a-mobile-app-for-stock-inventory-using-1c-enterprise-platform- /
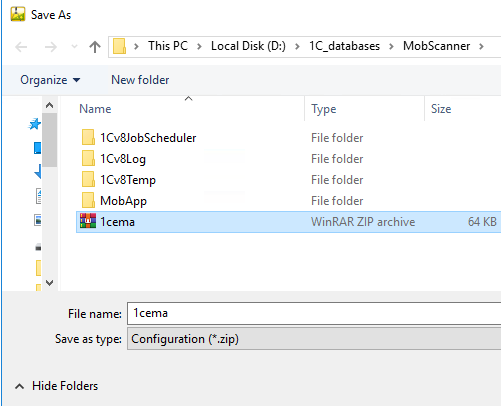
Open this application in the Designer and upload it to a file:
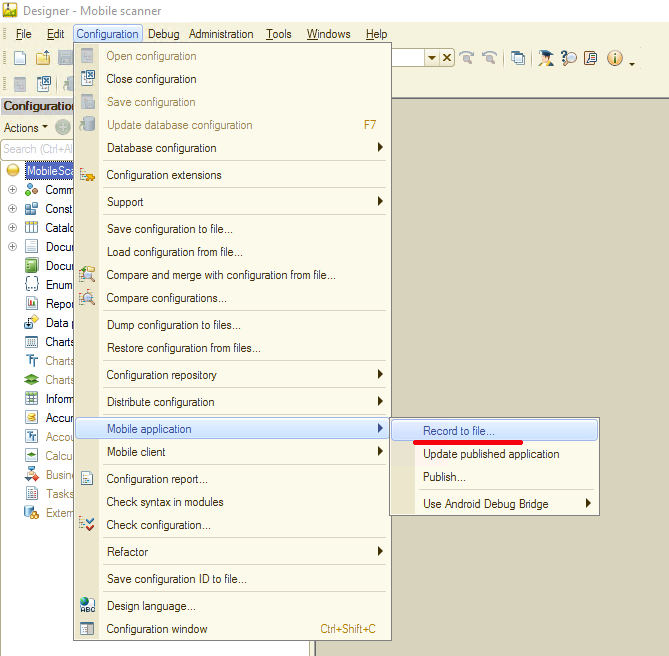
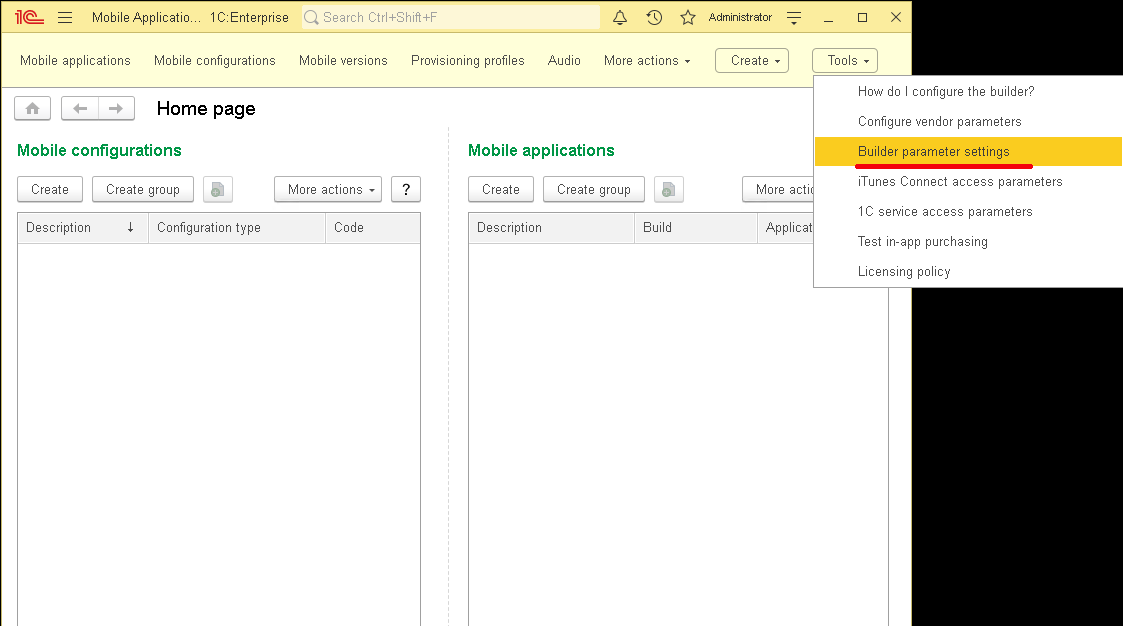
Now we close the Designer with our mobile application, we won't need it anymore. Then go to the previously installed MobileAppMaker and open the menu: Tools -> Builder parameter settings:
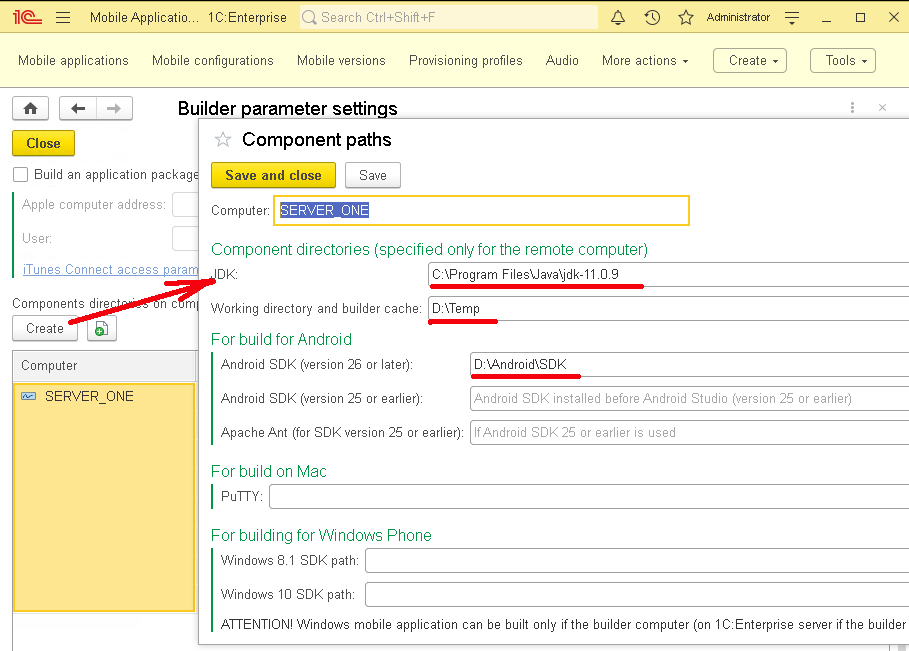
We specify the paths to the Android SDK, to the JDK and to the directory for temporary files:
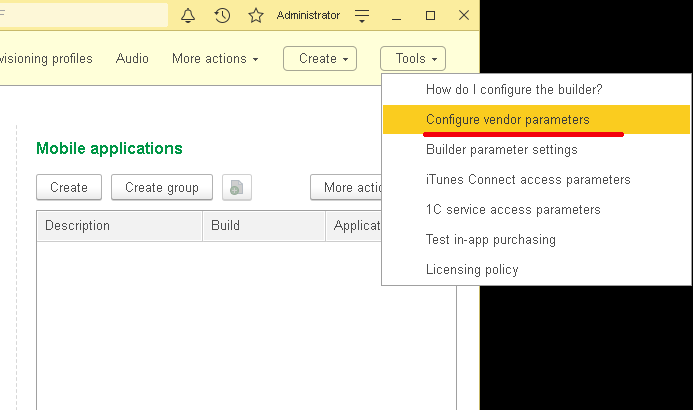
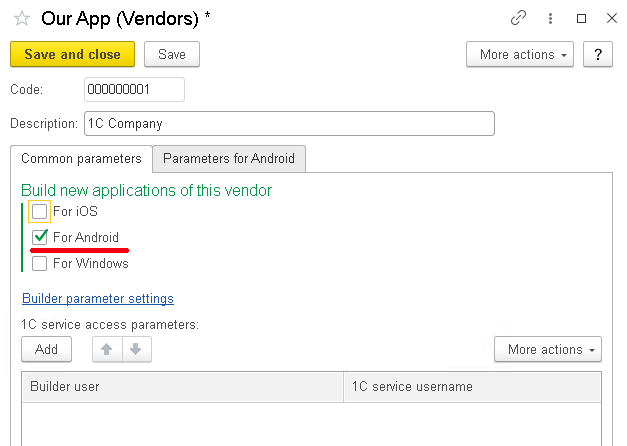
Then open the Tools -> Configure vendor parameters menu:
We will activate the "For Android" flag:
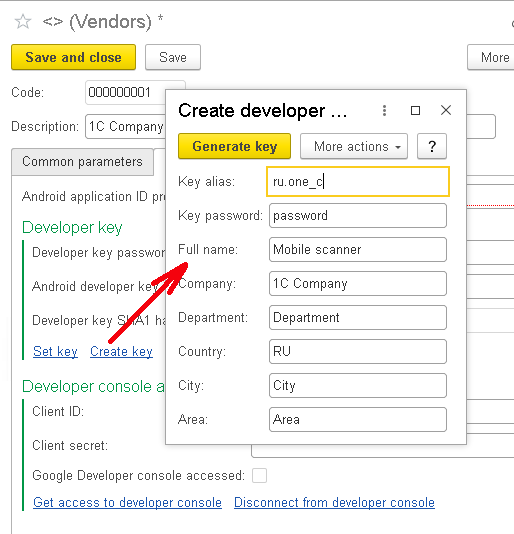
Click "Create key", fill in all the key fields:
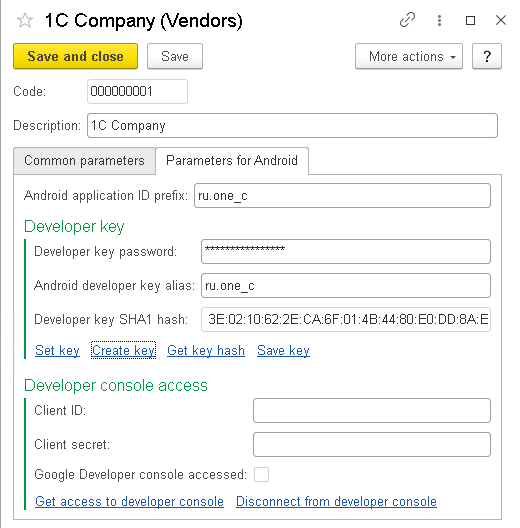
After pressing the "Generate Key" button, the SHA1 Hash of the key is automatically filled in. Fill in the application prefix and close this form:
At the next step, we import the previously downloaded mobile platform into Builder:
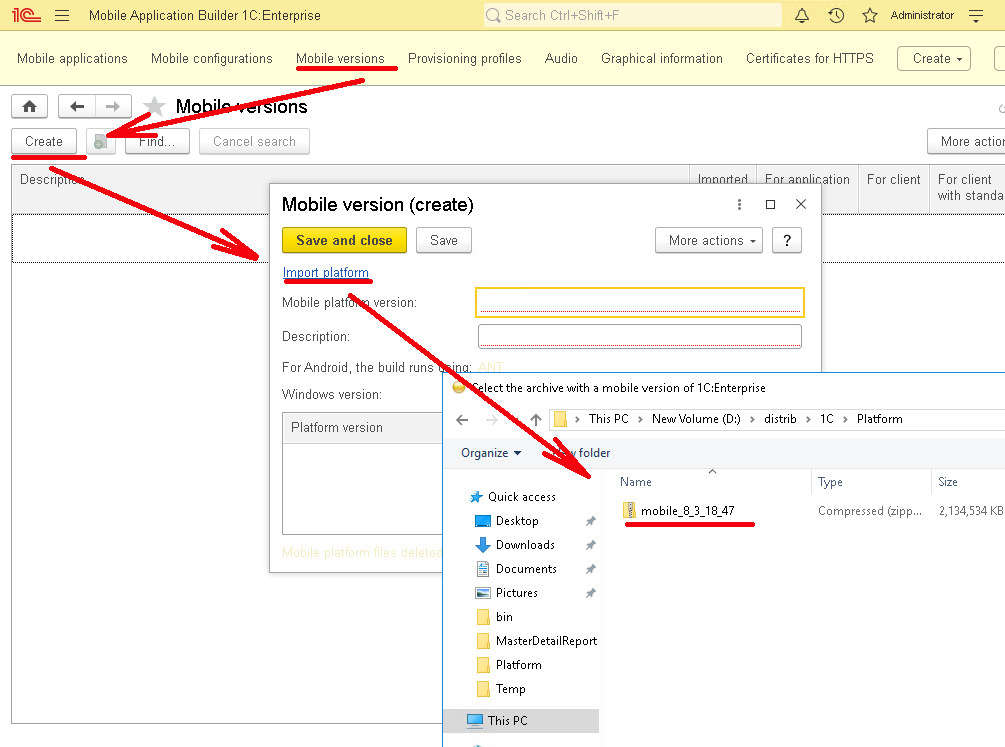
It can take some time:
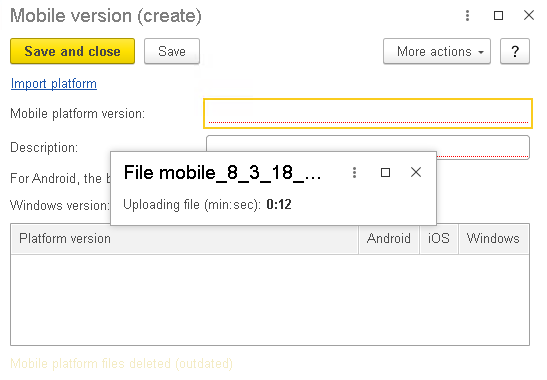
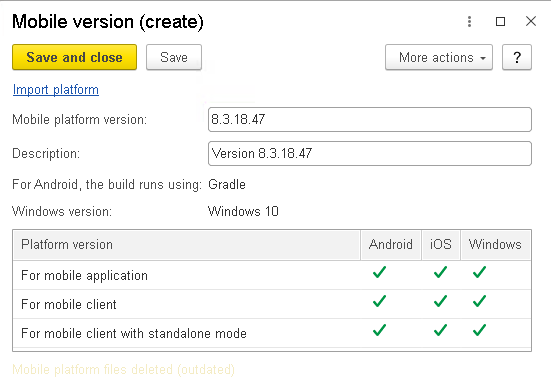
After finishing the import, click the "Save and Close" button:
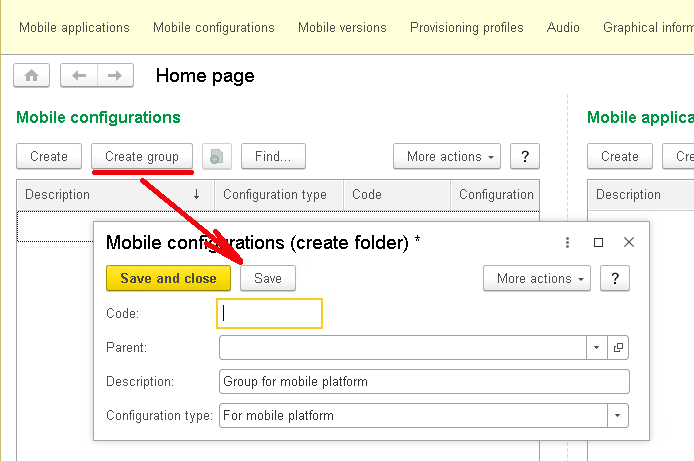
Create a new group in "Mobile configurations":
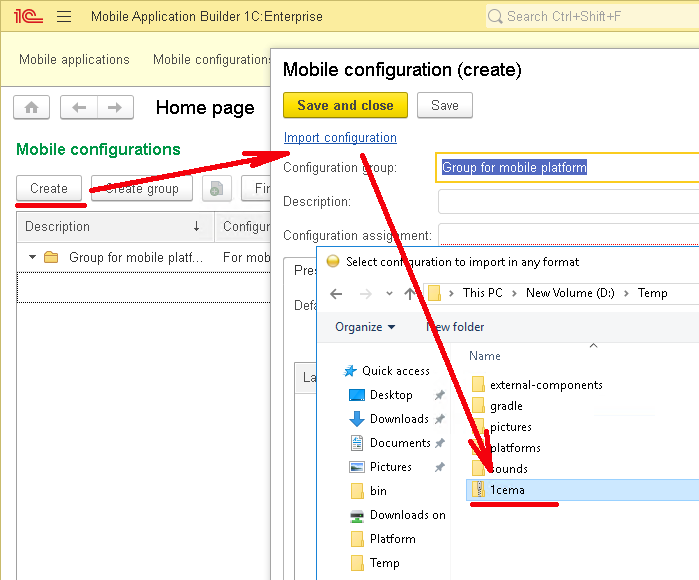
Then, in the created group, create a new element "Mobile configuration" and load our "Mobile scanner" configuration, which we previously unloaded into the "1cema.zip" file:
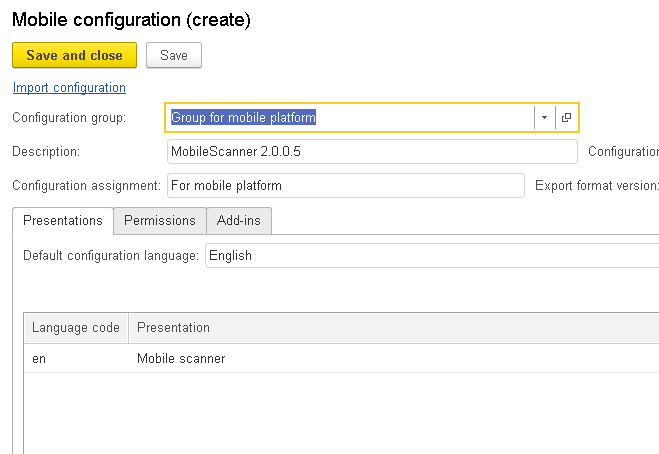
There are just a few steps left, and we can start building the mobile application.
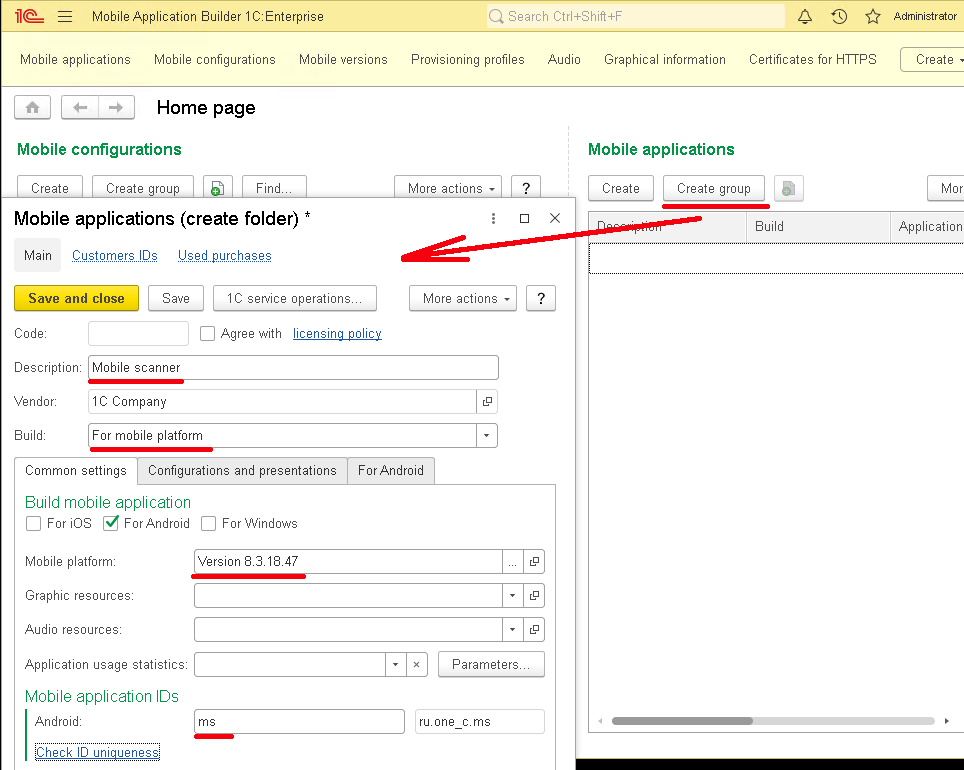
Create a new group in "Mobile applications". Fill in the required attributes:
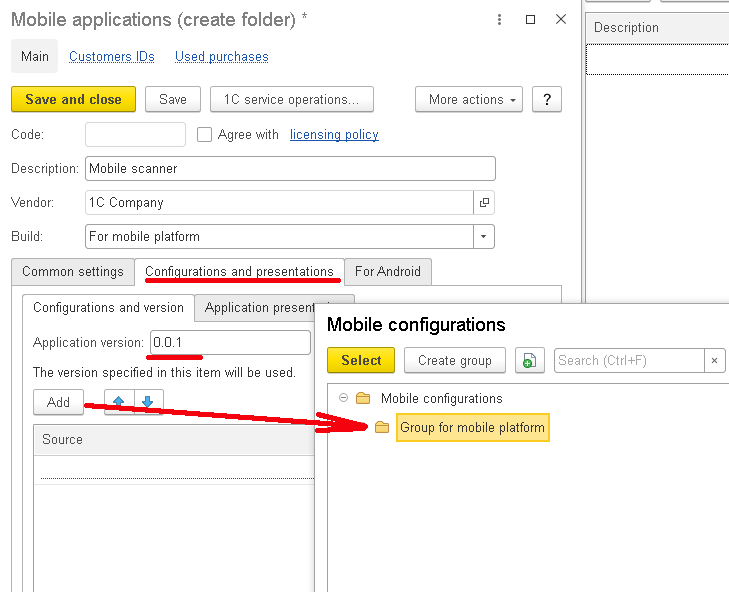
Next, we fill in the application version, and also add the "Mobile configuration" group:
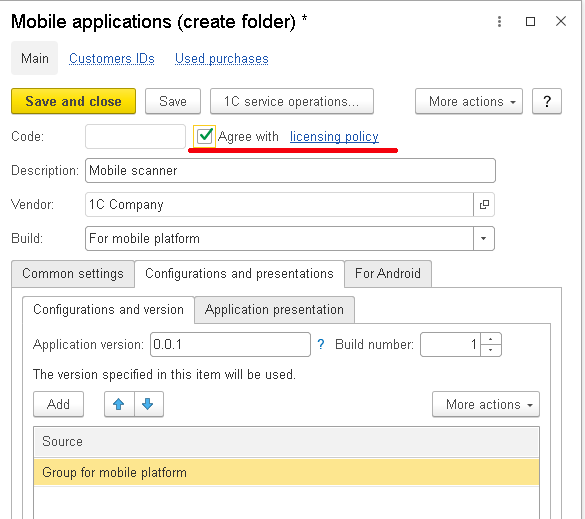
An essential condition - you must confirm your agreement with the licensing policy:
Now in this group, we create the element "Mobile application". If in the previous steps everything is filled in correctly, then everything is filled in automatically:
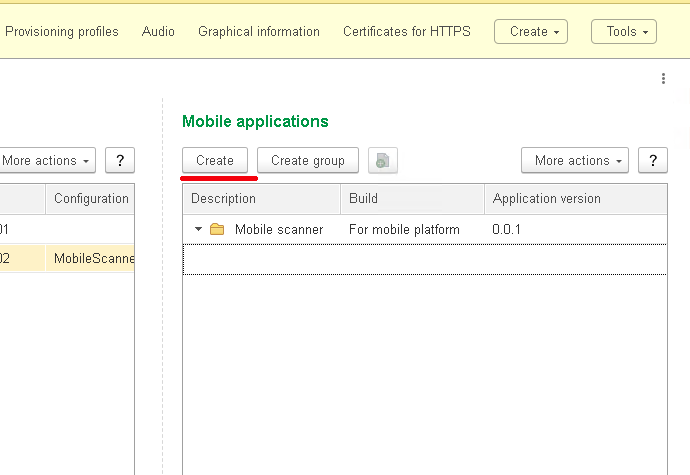
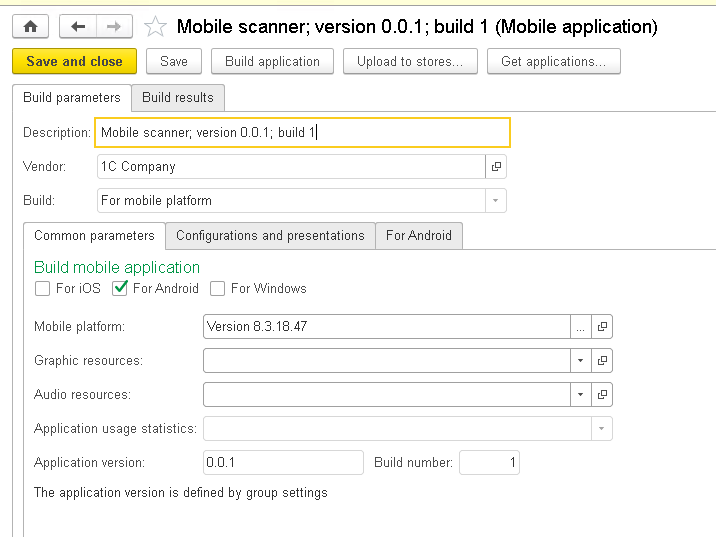
We have only a couple of steps left to reach the goal. So, we save the new element "Mobile application" by clicking the "Save" button. And right after that, we press the "Build Application" button. If everything configured correctly, then the assembly of our mobile application will begin:
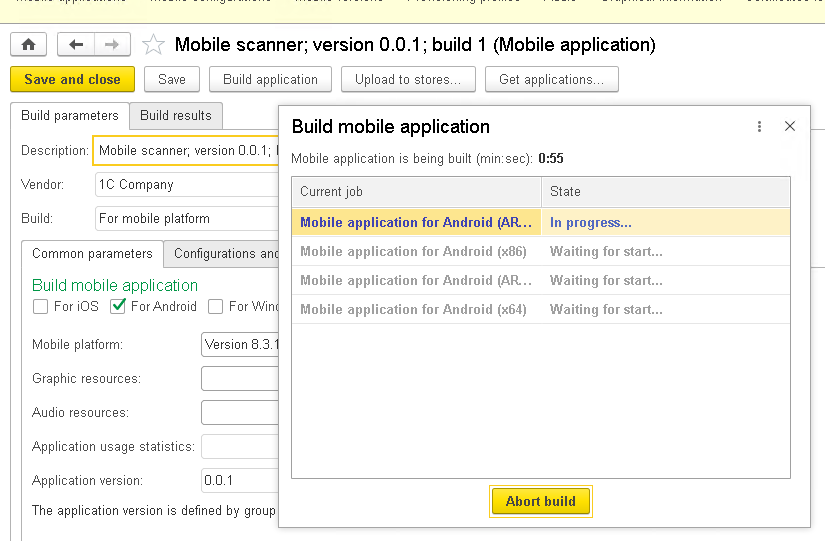
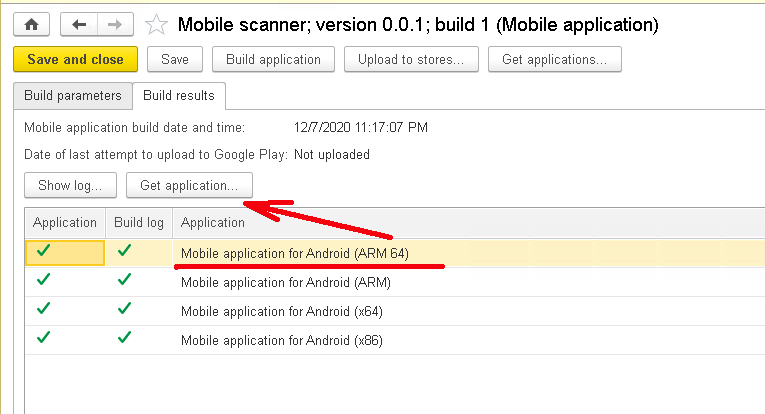
The assembly process can take a long time, so be prepared to wait. As you can see from the screenshot, four versions of the application are being assembled simultaneously for different platforms and different processor bits. If no errors occur during the build process, then you will see the following form:
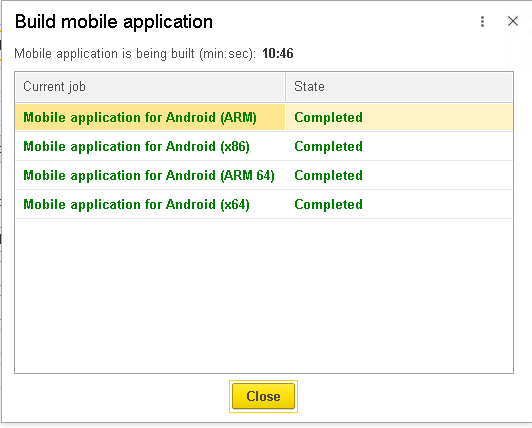
We have to take the last step on the way to our application. So, select the Architecture and bitness of the processor from the list for which we want to get a ready-made application, and click the "Get application..." button:
The program will offer us to save the finished .APK file:
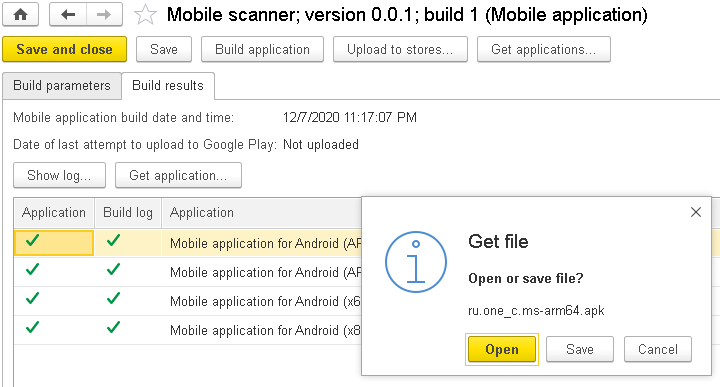
Save the finished .APK file and close MobileAppMaker - we no longer need it.
Now we need to put our finished application on a mobile device and test it in operation.
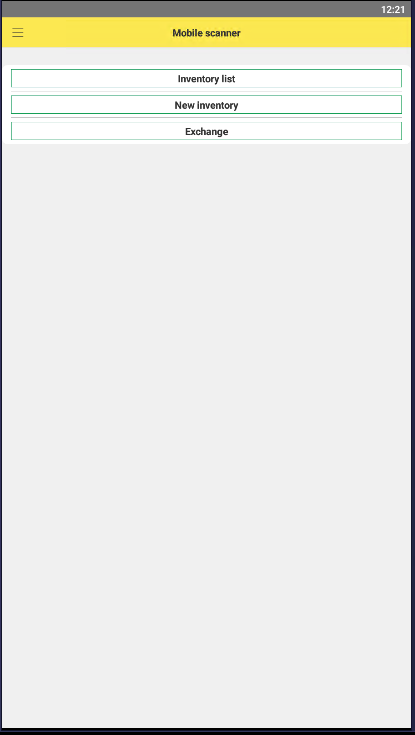
So, we install our application on a mobile device, then launch it. Voila - everything works!
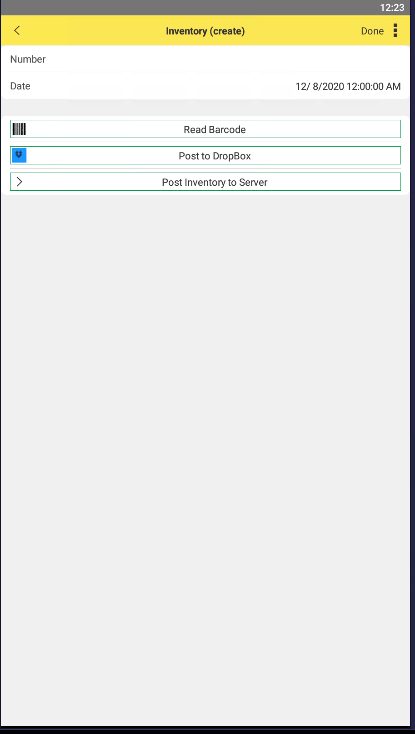
Well, it's time to sum up: so, we figured out what settings are needed to build a standalone mobile application on the 1C platform.
For this, we used several different components: Android SDK, Java Development Kit, a special 1C configuration for assembly. The initial setup may seem somewhat complicated to you, but all that needs to be configured only once, and in the future, you can quickly create any mobile applications on the 1C platform.
And one more small addition - this article describes the assembly of an application directly for the 1C mobile platform. But it is also possible to create a separate application for the 1C mobile client. You can find a small example of such an application here: https://1c-dn.com/blog/work-with-mobile-client-in-1c/
And stay with us - we haven't talked about all the 1C features yet!

