The mobile application market has been growing in recent years and 1C does not stand aside. The latest versions of the 1C platform allow you to create full-fledged mobile applications without requiring knowledge of particular mobile development environments.
You can find several examples of mobile applications on the 1C platform in our blog, for example:
These publications describe the creation of a full-fledged mobile application that can have extensive functionality and can be used to automate various business cases.
But these applications have one drawback - since this is a stand-alone application, additional program code must be created to synchronize data between a mobile device and a remote server.
If we use some third-party solution as a server for storing data, then this approach is justified. But what to do if the 1C application is also used as a server? In this case, the 1C platform offers a more straightforward and flexible solution - Mobile Client.
When creating an application for a Mobile Client, a developer creates a 1C application as usual for a desktop, publishes this application on a WEB server, and then connects to this published application from his mobile device. The 1C platform itself determines that the work is taking place on the mobile client and renders the interface elements accordingly.
But at the same time, all the features characteristic of a mobile device are also available in the Mobile Client: working with a camera, making calls, working with calendars, etc.
So, we can say that the Mobile Client is such a Thin Client, only specifically for a mobile device. The user enters data into the forms and they immediately go to the server. Thus, the developer does not have to worry about data synchronization between the server and the mobile device.
Of course, this technology also has a drawback - the mobile device must have a permanent connection either to the Internet or to the local network of the enterprise, depending on where the server with the data is located. To be fair, it must be said that the Mobile Client also has a so-called Offline mode of operation, which allows you to save data locally on a mobile device. But we will consider this mode of operation next time.
Let’s make a small example of developing a 1C application using the Mobile Client technology.
Suppose we are in the business of automating a retail store, and we need to create a mobile application to check the price tags on goods. That is, the store employee walks past the aisles and, using a mobile device, compares the price on the label and the current price in the ERP system.
Currently, there are many proposals from different vendors to solve this case, but we decided to save money and do everything ourselves. In our case, the task is simplified since we use an application developed on the 1C platform as an ERP system.
Let’s go directly to development. Of course, I’ll not create an ERP system from scratch now - we’ll create a kind of simplified analog.
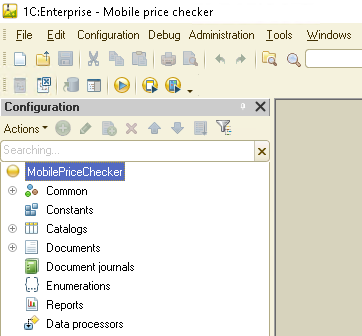
Create an empty 1C configuration:
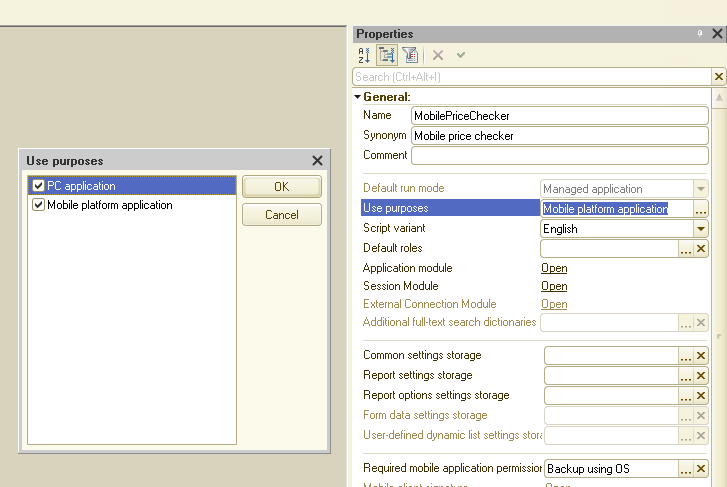
Indicate that the application will work on both desktop and mobile devices:
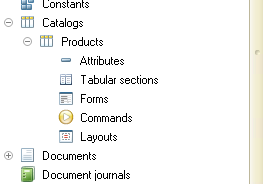
Create a simple catalog “Products” to store a list of products:
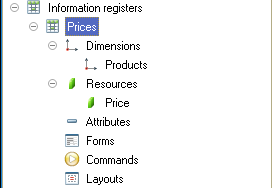
We also need to keep a list of prices and a list of barcodes for each product. To store this information, I suggest using the “Prices” and “Barcodes” information registers:
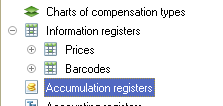
The data structure of these registers is simple: in the “Prices” register, there is one “Products” dimension with the “CatalogRef.Products” type and one “Price” resource with the “Number” type:
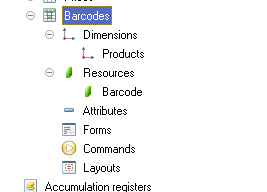
The “Barcodes” register is similarly structured, only instead of the “Price” resource it uses the “Barcode” resource with the “String” type:
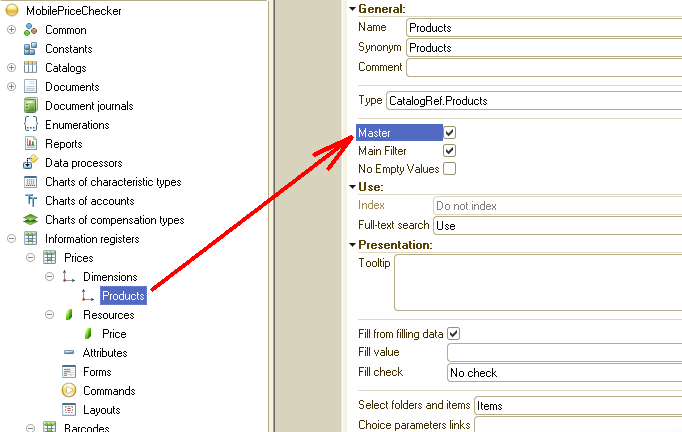
Also, notice the “Master” property of the “Products” dimension in each of the registers:
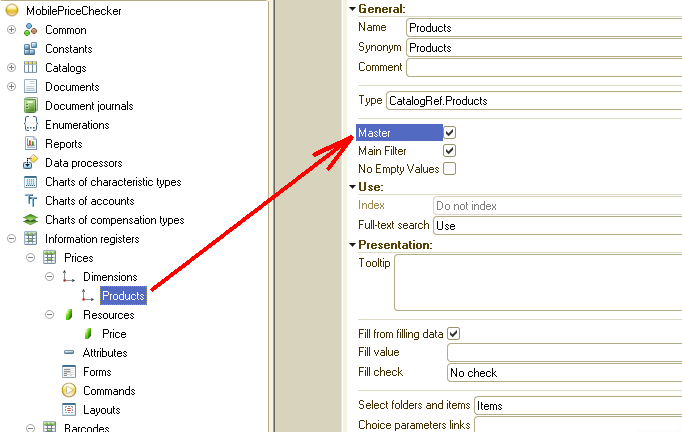
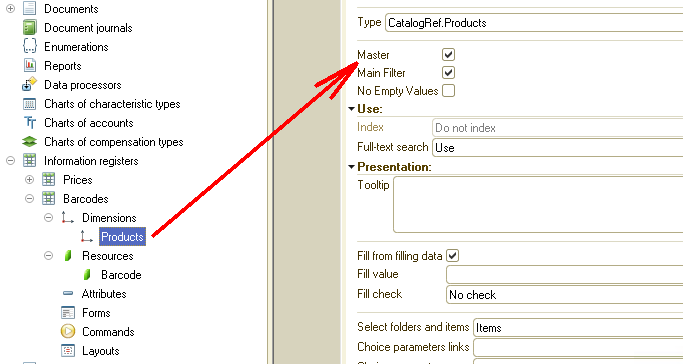
Enabling this property will allow us to “bind” the register entries to the data in the “Products” catalog. By the way, you’ll see how convenient it is now.
Well, in general terms, we have created a skeleton of a desktop application. It contains a catalog of goods, and we can also store prices and barcodes of products.
Note that we haven’t written a single line of code yet! This is the power and beauty of working with the 1C platform!
For further convenience of working with the desktop version of our application, create a new Subsystem “Sales” and include in this subsystem all previously created objects: one catalog and two information registers:
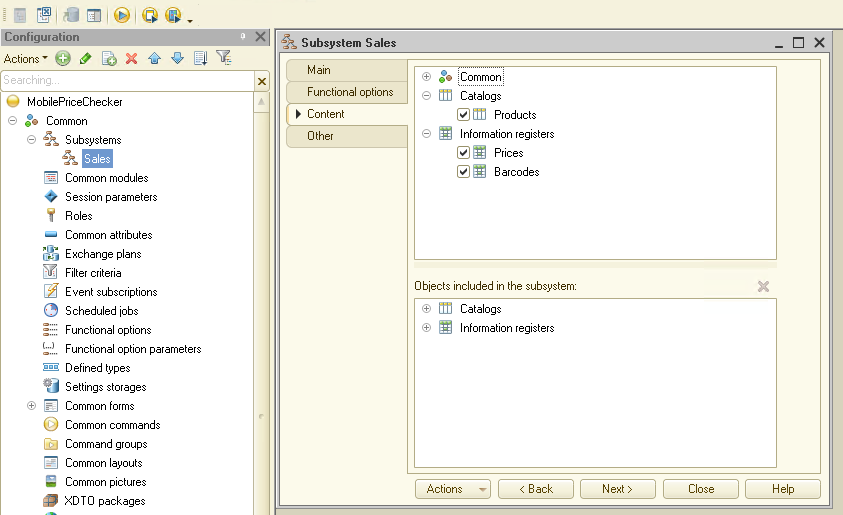
Now everything is ready to run our application on a desktop, but let’s make a more advanced solution and publish it on a web server. This will allow the user to work with our program through a browser, even on a computer on which the 1C platform is not directly installed.
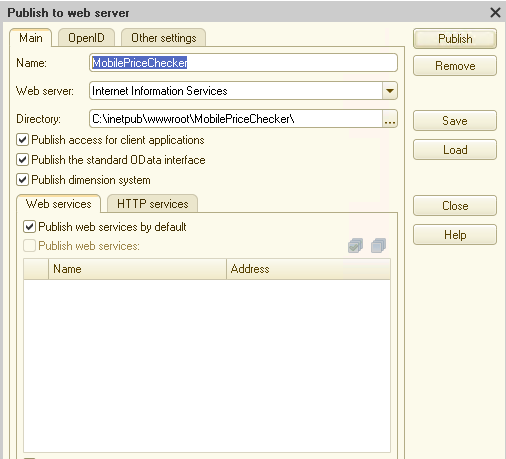
Publish our application to the webserver. As you can see, I use IIS for work:
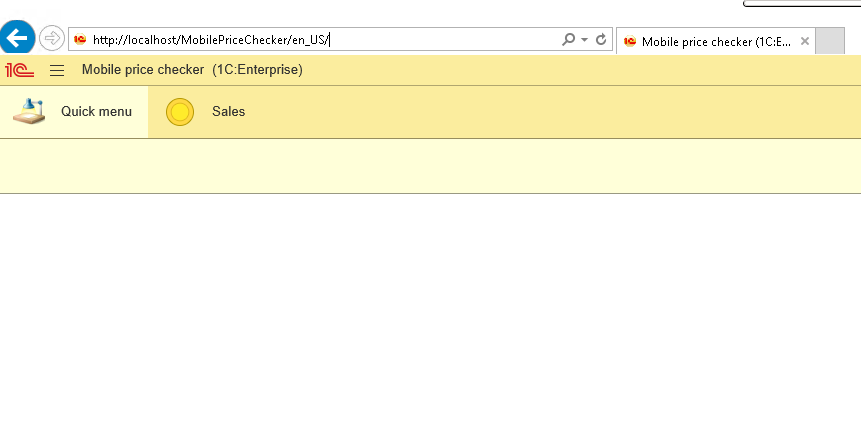
Then we open the link “http://localhost/MobilePriceChecker
/” in the browser and voila - we see our application:
Go to the “Sales” Subsystem, then open the “Products” catalog and press the “Create” button:
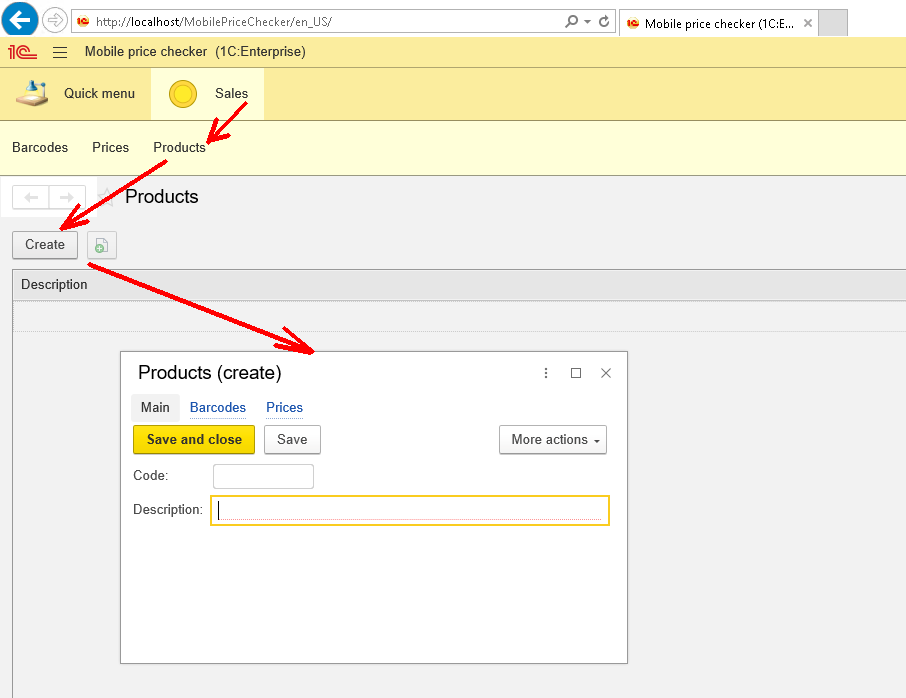
Enter the name of the product, for example, “Item_1” and click the “Save” button. But don’t close the product form itself yet.
Notice the “Barcodes” and “Prices” links at the top of the product form:
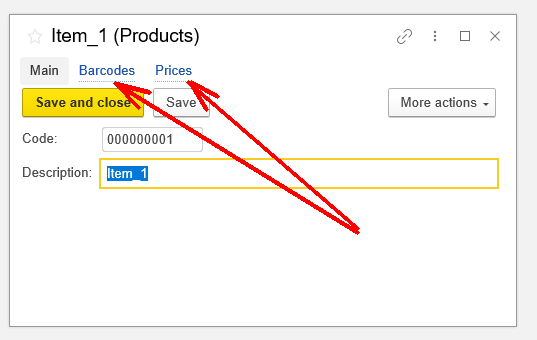
By clicking on these links, we can go to the associated information register “Barcodes” or “Prices” respectively. Moreover, we’ll see only those records in these registers that are associated with our product.
Let me remind you that this relationship occurs due to the inclusion of the “Master” property in both registers:
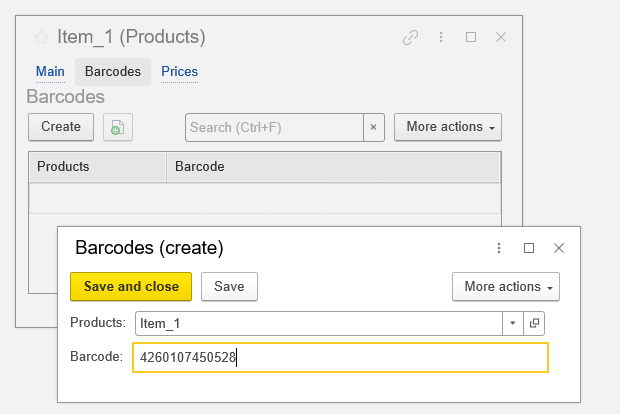
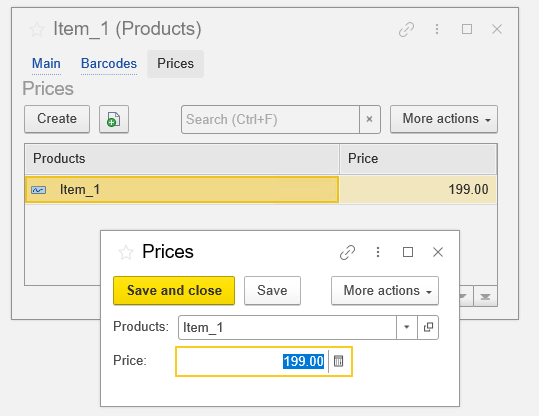
Then, click on the “Barcodes” and “Prices” links, respectively, and fill in the barcode and price for our product:
Similarly, create a second product in the “Products” catalog:
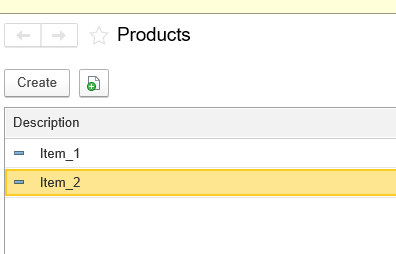
Once again, I want to draw your attention because I have not yet written a single line of source code when I created the basis for a business application!
Ok, now it’s time to move on to mobile development. The Mobile Client itself is a separate mobile application that is supplied as part of the 1C mobile platform, and in this application, we create a connection to our 1C program published on the webserver.
In the screenshot, you can see the composition of the 1C mobile platform, and the composition includes several options for the Mobile Client, for different architectures and bit depth:
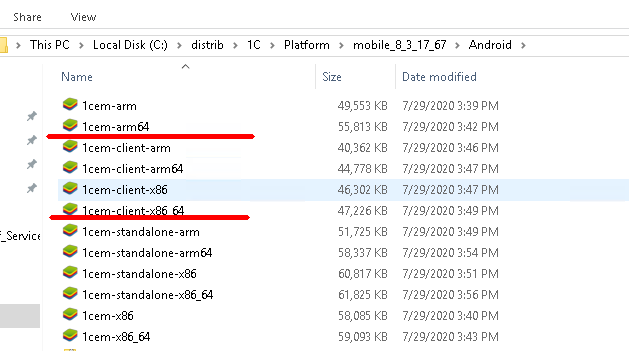
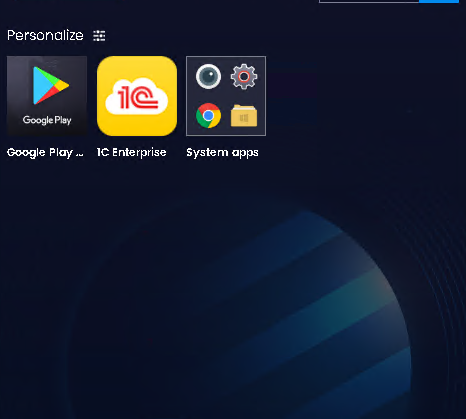
It’s necessary to install on the mobile device (or on the emulator) the variant of the Mobile Client that suits you. After installation, a new application will appear on your mobile device:
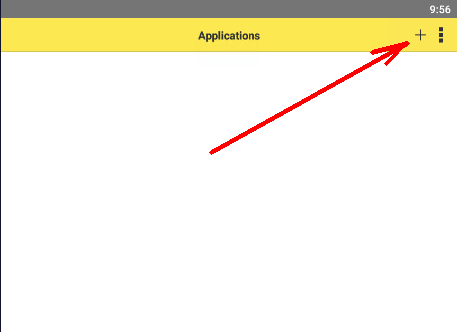
Run this app. It will open, and there you can see a list of your previously configured connections to 1C applications. At the very beginning, this list will be empty. To add our published application, click on the “+” button. The connection settings window will open:
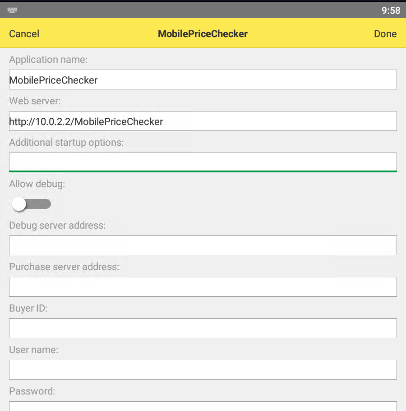
In this window, fill in the name of the application and the connection string to the webserver where we previously published our application. In my example, the address looks like “http://10.0.2.2
/...” - this is the connection string to the web server when accessing the emulator. In your case, the server address will most likely be different.
Press the “Done” button, the settings the window closes, and we see our configured connection in the 1C application:
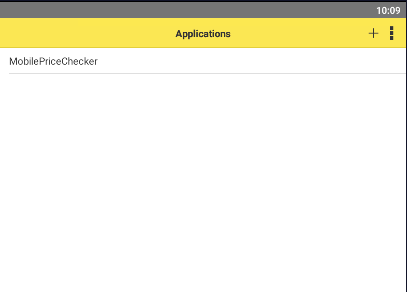
Run our application and voila - the program opens. Please note that at the moment, the application on a mobile device fully matches the functionality of the application on a desktop, but looks different. The Mobile Client automatically creates forms that display optimally on a mobile device.
This is the advantage of using the Mobile Client: we didn’t write a single line of source code but created a fully functional application that works both on a desktop computer and on a mobile device, while on a mobile device, it looks the most optimal.
You can “click” this application, for example, open the “Products” catalog, change “Price” or “Barcode”, and these changes will be immediately written into the database of our program.
Thus, by publishing a 1C application on a webserver and then connecting to it using the Mobile Client technology, we can quickly get a mobile version of our 1C program.
But let’s go ahead and bring our task to an end. Let me remind you that we want to make a “PriceChecker” for a retail store employee.
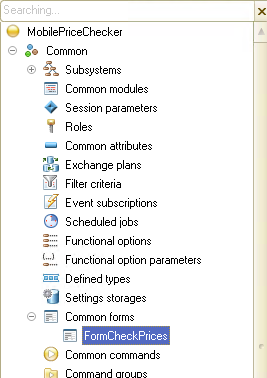
Create a Common Form “FormCheckPrices”:
Then create the command “CheckPrice” on this form:
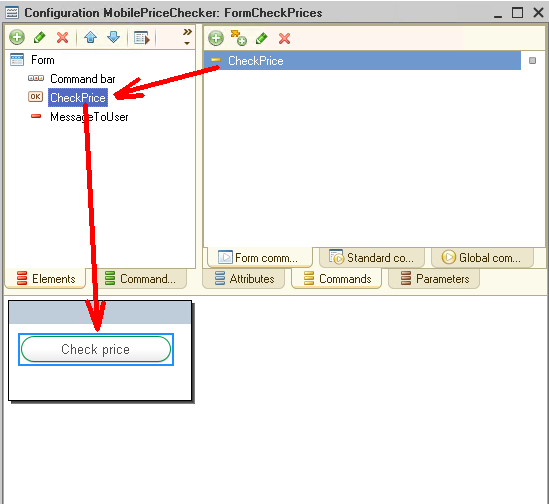
and the “MessageToUser” attribute - messages for the user will be displayed in it:
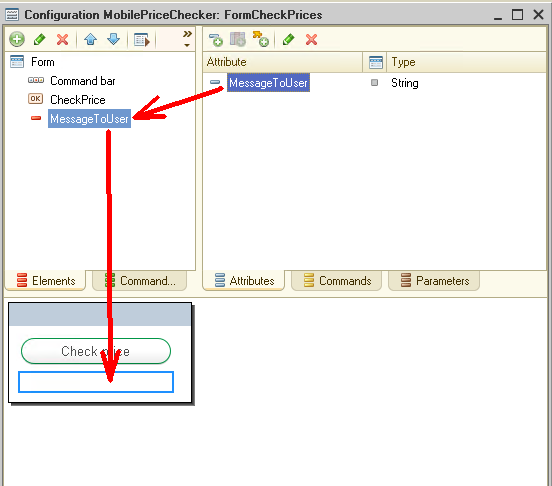
For the “CheckPrice” command, create the following code:
&AtClient
Procedure CheckPrice(Command)
#If MobileClient Then
ScanningHandler = New NotifyDescription("ScanResult", ThisObject);
CloseHandler = New NotifyDescription("ClosingScanWindow", ThisObject);
MultimediaTools.ShowBarcodeScanning("Point the camera to the barcode", ScanningHandler, CloseHandler);
#EndIf
EndProcedure
&AtClient
Procedure ScanResult(BarCode, Result, Message, ExtraOptions) Export
#If MobileClient Then
If Result Then
MultimediaTools.PlaySoundAlert(SoundAlert.Default, True);
MultimediaTools.CloseBarcodeScanning();
resultFinding = FindProductOnServer(BarCode);
If TypeOf(resultFinding) = Type("Structure") Then
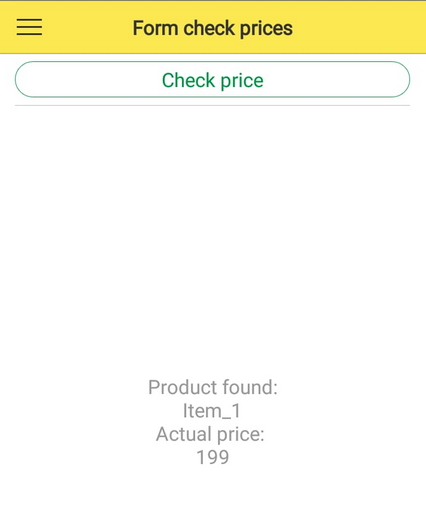
MessageToUser = "Product found:" + Chars.LF + resultFinding.Product + Chars.LF
+ "Actual price: " + Chars.LF + resultFinding.Price;
Else
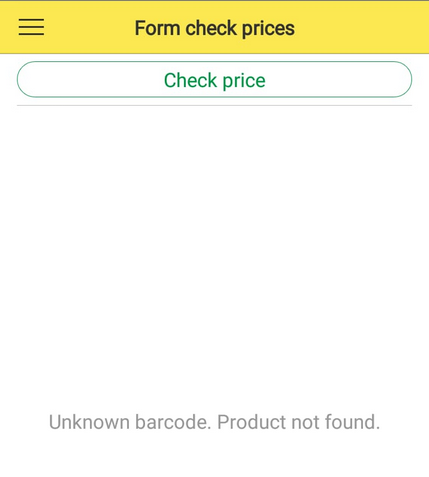
MessageToUser = "Unknown barcode. Product not found.";
EndIf;
EndIf;
#EndIf
EndProcedure
&AtClient
Procedure ClosingScanWindow(ExtraOptions) Export
//
EndProcedure
&AtServer
Function FindProductOnServer(BarCode)
structureResult = New Structure;
Query = New Query;
Query.Text = "SELECT
| Products_.Ref AS Product,
| Prices.Price AS Price
|FROM
| Catalog.Products AS Products_
| INNER JOIN InformationRegister.Barcodes AS Barcodes
| ON Products_.Ref = Barcodes.Products
| INNER JOIN InformationRegister.Prices AS Prices
| ON Products_.Ref = Prices.Products
|WHERE
| Barcodes.Barcode = &Barcode";
Query.SetParameter("Barcode", TrimAll(BarCode));
resultQuery = Query.Execute().Select();
If resultQuery.Next() Then
structureResult.Insert("Product", resultQuery.Product);
structureResult.Insert("Price", resultQuery.Price);
Return structureResult;
Else
Return False;
EndIf;
EndFunction
I’ll not describe in detail how this code works, you can see the details of how to work with the scanner in 1C in our earlier publications, for example:
Creating a mobile app for stock inventory using 1C:Enterprise platform
Just pay attention to the lines “#If MobileClient Then ... #EndIf” - these are the so-called preprocessor instructions. It’s these instructions that tell the platform that, in our case, this code will be executed only on the Mobile Client.
And let’s do one more set. We want the “FormCheckPrices” form to open automatically when the application is launched on a mobile device.
Open the application module and create the “OnStart” procedure in it:
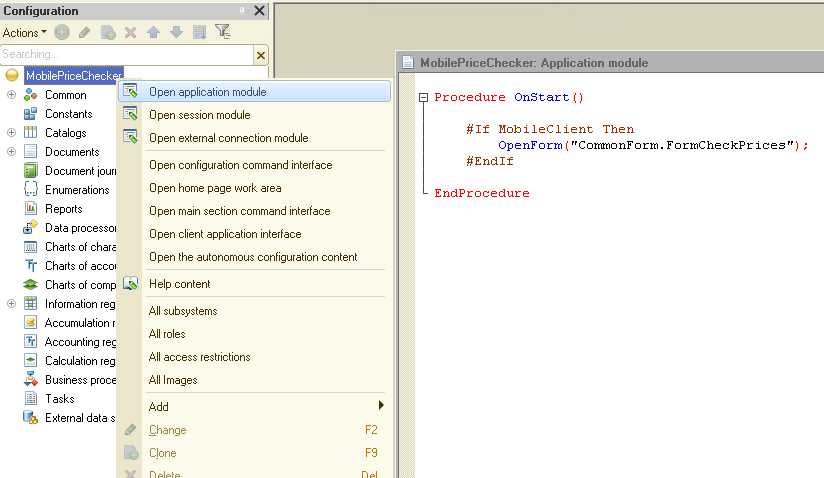
The source code for this procedure:
Procedure OnStart()
#If MobileClient Then
OpenForm("CommonForm.FormCheckPrices");
#EndIf
EndProcedure
As you can see from the source code, the “FormCheckPrices” form will open when the application starts, but only if it is launched on the Mobile Client.
Well, it’s time to test our program in operation. Launch our app on your mobile device. The “Form check prices” form will open immediately:
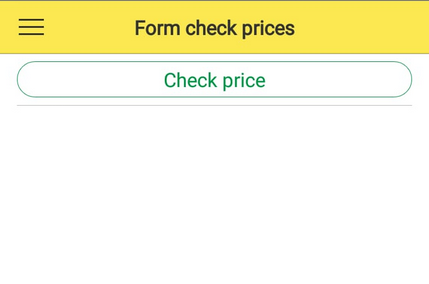
Click the “Check price” button and scan your product:
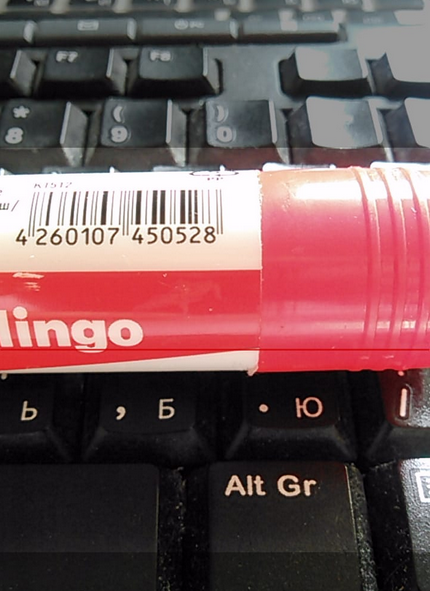
If the barcode of the product is correct, you’ll see the current price for it:
If the product is not in our database, the following message will appear:
Thus, we can quickly check the correctness of prices in all stores, that is, our business problem is solved.
Let’s summarize:
We examined the technology for quickly creating a mobile application on the 1C platform, created a simple application for accounting for goods, their prices and barcodes, and also solved the business problem of price control in retail. This technology can be applied in any business industry, it only depends on your imagination.
And a little about the disadvantages of Mobile Client technology:
1. It’s not always possible to automatically transform the form so that it is displayed usually on a mobile device. This is especially true for complex forms. In this case, you need to create a separate form for the desktop and separately for the mobile device.
2. The Mobile Client requires a permanent connection to the webserver on which 1C is published since there is a constant exchange of data between the server and the mobile device. This drawback can be circumvented by using the Mobile Client in Offline mode.
And this will be the topic of our next publication.
You can download this the Demo Configuration to learn this 1C mechanism properly.
If you have any questions about this article, you can always get answers on our forum: https://1c-dn.com/forum/
Stay with us!


