
Does the 1C:Enterprise Platform Allow Team Development, and Is There a Git Alternative for the 1C:Enterprise Developers?
I will answer the second question right away: there is even more. The 1C:Enterprise platform can work directly with Git. The only condition is that developers use the new IDE from 1C called 1C:EDT.
A little later, we will start posting examples of how to work in this new IDE, but for now, let us return to the good old Designer and ask again: is team development possible in Designer?
And I will answer again. Absolutely, it is certainly possible! For this purpose, the 1C:Enterprise platform has a special tool called configuration repository. So, what is this tool?
The configuration repository allows multi-user development of software products by an unlimited number of developers. With its help, you can see the complete history of configuration development and every step of each developer in detail.
How does the configuration repository work in real life? In fact, it is a special-purpose database where configuration changes are stored.
Each developer in a team creates own infobase and attaches it to the joint configuration repository. Also, if required, we can attach to a repository an infobase already in use. This is how the workflow is organized in general:
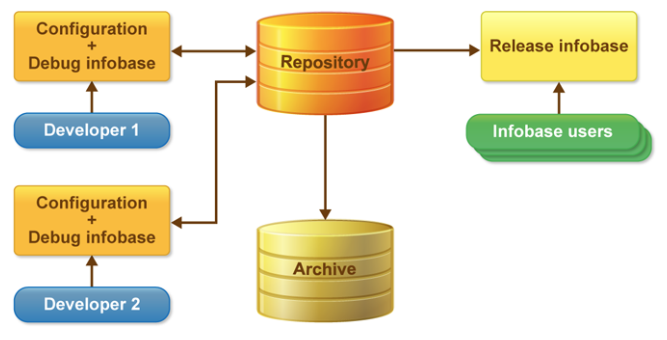
It is essential to understand that each developer works on own set of data, and the repository stores only the infobase configuration, that is, the program code itself.
The configuration repository does not allow two developers to change the same object simultaneously. If it is necessary to change an object, the repository locks it, thus preventing other developers from locking and editing such an object.
So, the first developer works with the locked object, debugs it on own test data, and then, after the job is done, puts this object back into the repository. Thus, only one developer can work with an object at a time. It ensures the integrity of the program code under development.
A developer can either lock an entire object (for example, object SalesOrder) or only its individual attribute (for example, document form of SalesOrder).
Once a developer finishes the work on the object or its attribute, he/she should return it to the configuration repository. At that, changes introduced by the developer in the work process are also added to the repository. Once the object is placed in the repository, it becomes available to other developers, and they can also start working with it, having first retrieved the object from the repository.
You might wonder. Since the configuration repository is a collaborative tool, does it make sense to use it if only one developer is working on the software?
In my opinion, yes. A single developer can use the repository. Indeed, in addition to its main functions of organizing teamwork on code development, the repository also handles versioning of changes that occur in the configuration development process. And it is this function that seems very useful even for a single developer.
So, let us move on from words to action and try to do some work with the configuration repository. To proceed, you can take any ready-made 1C configurations you have. Make sure to add several users for this configuration.
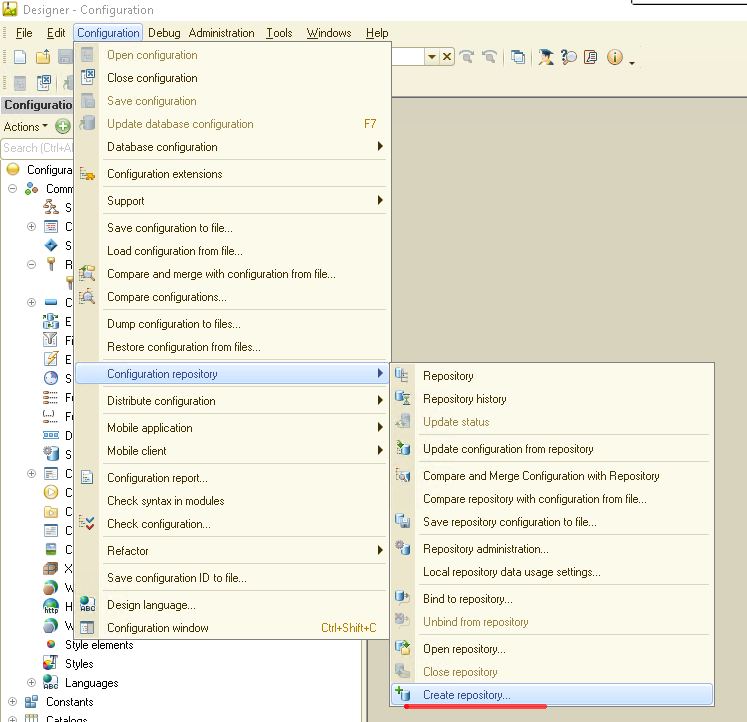
First, let us discuss how to create a repository from scratch. Open a configuration in Designer, select Create repository from the Configaration -> Configuration repository menu:
A directory selection dialog will open. Here, we set the folder to store our repository:
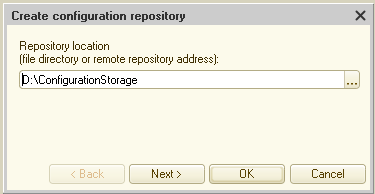
After clicking the Next button, we get to the dialog box where we create a user for the configuration repository and set a password for this user:
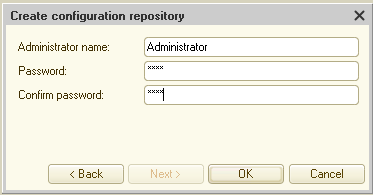
By default, the 1C:Enterprise platform suggests creating an Administrator user.
If you now click OK, you will get to the dialog box with the invitation to attach the current 1C:Enterprise configuration (in which we are now) to the newly created repository:

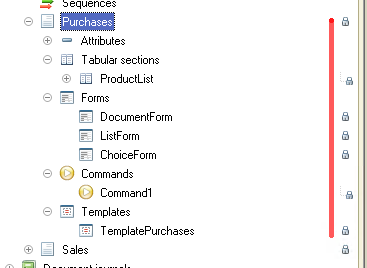
Click Yes, and after some time, which depends on the size of your configuration, lock icons will appear next to all objects in the configuration tree:
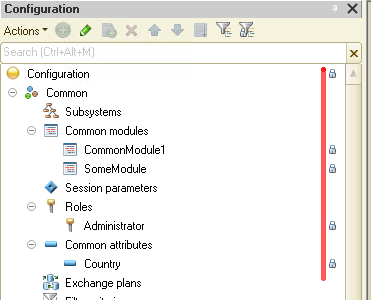
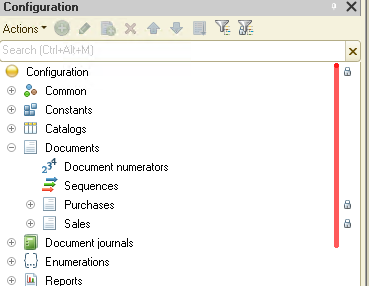
What does it mean? A lock next to an object in the configuration tree indicates that we currently cannot edit this object.
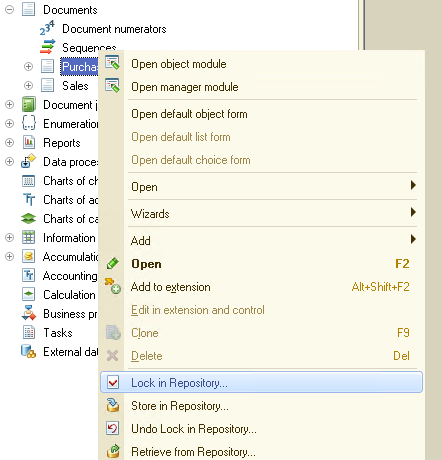
We must lock it in the repository to start working with an object (for example, to add an attribute or make changes to the program code). This is how we do it. Let us say we want to modify document Purchases. We find this document in the configuration tree and right-click on it. In the context menu that opens, we pick item Lock in Repository...:
And get the following dialog box:
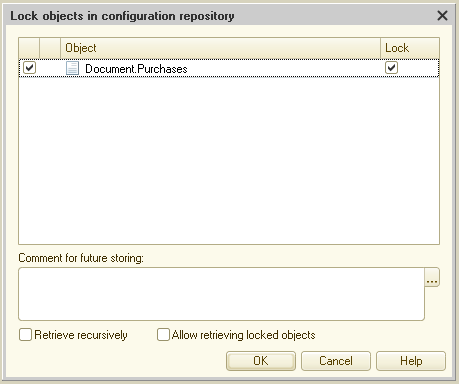
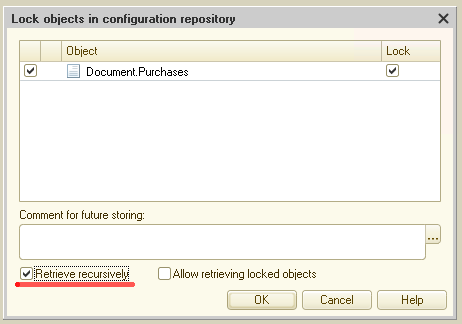
Here, we need to pay attention to the Retrieve recursively flag. When enabled, we lock the entire object (in our case, it is the document with all its forms and print forms):
Let us set the Retrieve recursively flag and see what happens:
Click OK, and find document Purchases in the configuration tree:
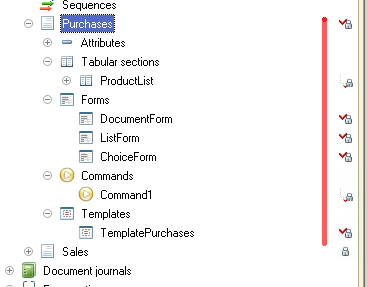
As you can see, the entire document has become available for editing. Developers can now make changes to both the document’s modules and forms and add new attributes to the document.
In the same way, we can lock the entire configuration:
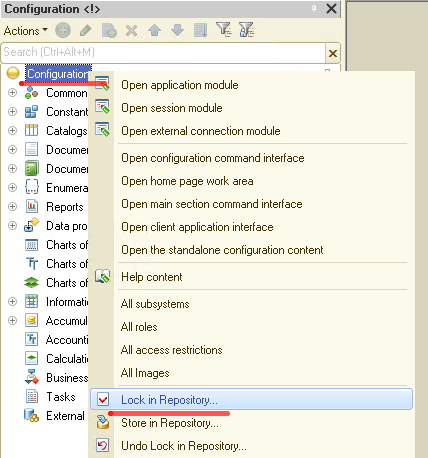
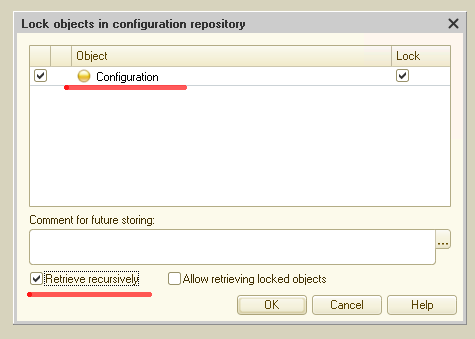
It rarely happens in real life, but let us assume we need to add a new document to the configuration. Here is what we do:
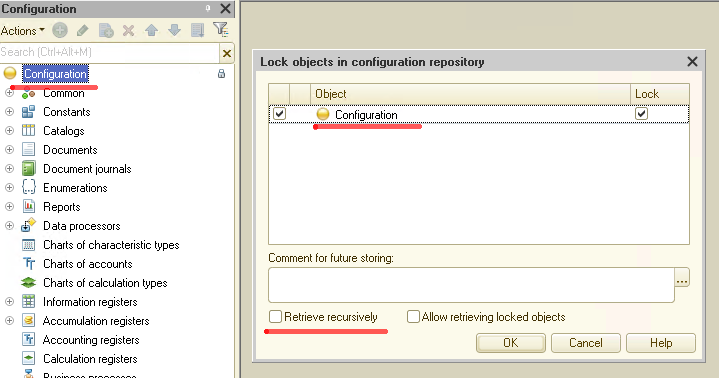
That is, we lock only the root of the configuration:
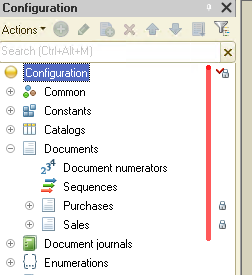
Then, we add a new object to the configuration. For example, a document:
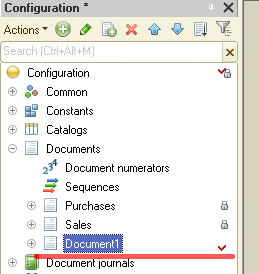
Now, let us step back a little to the Retrieve recursively flag:
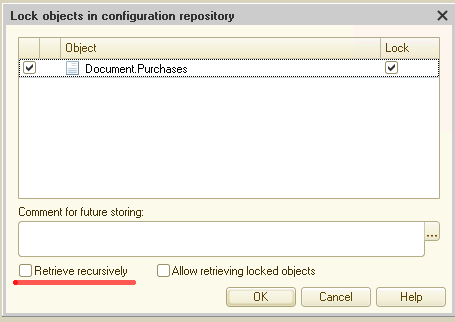
With no flag set, a click on the OK button locks the object root only; many items nested in this object remain unavailable for editing:
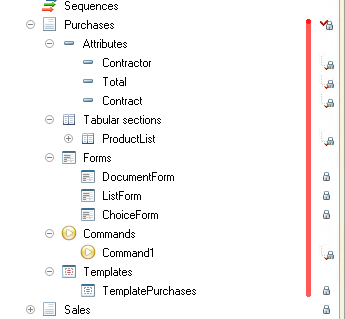
As you can see, in this case, the document form and the print form are not available for editing, but we can add new attributes to this document or edit the ones added earlier.
When can this mode be useful? Assume a developer needs to add a new print form to a document. In this case, there is no need to lock the entire object, but just “grab” the document's root, add a new print form, post the changes to the repository, and start working directly with the newly added object.
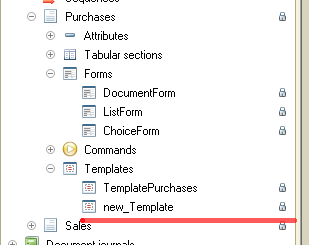
Here is what it might look like:
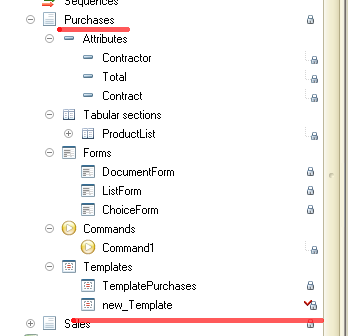
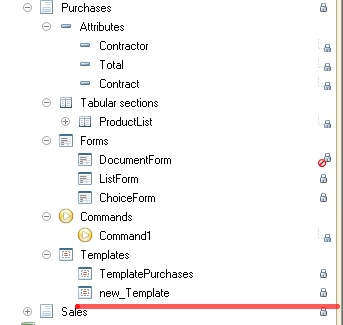
In the current situation, our developer can, without disturbing anyone, work on the new_Template print form, and a colleague can also lock, for example, DocumentForm and work with it.
This way, two developers can work on document Purchases simultaneously without interfering with each other. This is what it will look like for us as developers:
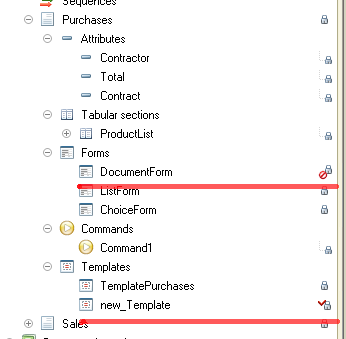
The new_Template object is locked to us, and we can make changes to it, while the DocumentForm object is locked to our colleague, and we can neither make changes to it nor lock this object for editing.
Okay, let us talk about migrating our changes to the configuration repository. So, we added object new_Template, edited it, and now we want to publish these changes to our configuration repository so that other developers can see them.
Here is how we do it:
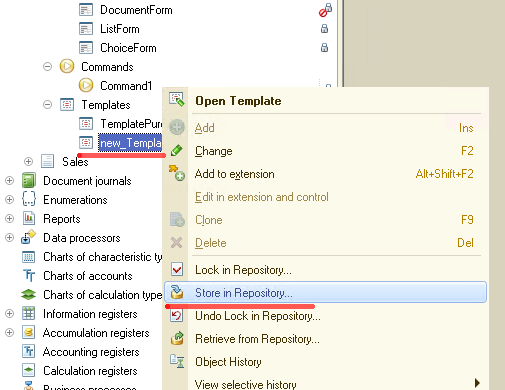
We get the following window:
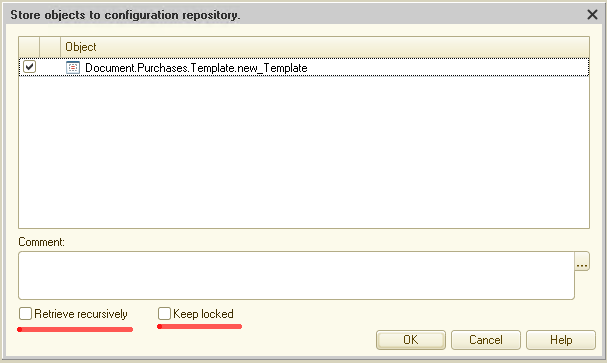
Please note that there is also the Retrieve recursively flag here. How does this flag work in this case?
Assume we add a new document, and inside the document, we put several forms. Now, we upload this new document to the repository. At this moment, we can choose whether to upload only the document without objects embedded in it or upload both the document and all its embedded objects.
Flag Retrieve recursively just determines how to post changes, recursively or not.
In our example, when we added a new print form to an existing document, activating flag Retrieve recursively does not affect anything since the print form does not have nested objects, so the flag can be left unset.
The second flag, Keep locked, allows us to post our changes to the configuration repository, but at the same time, the object that we edit remains locked to us so that we can keep on working with it.
Let us set the Keep locked flag and see what happens:
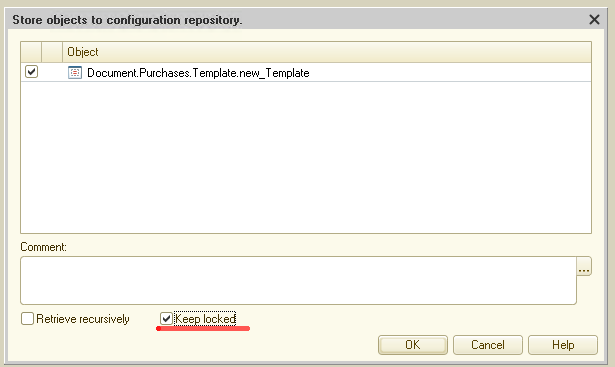
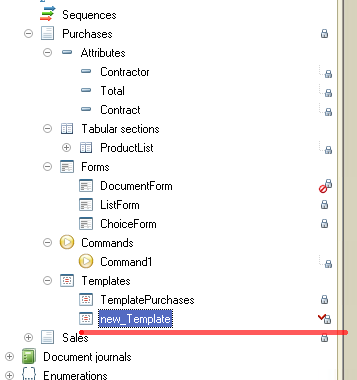
The changes get automatically uploaded to the repository, the object we are editing remains locked, and we can continue working on it.
If the Keep locked flag is not set, our changes get uploaded to the repository, and the object becomes inaccessible to us:
Okay, we have posted the changes to the repository. How can other developers see these changes now?
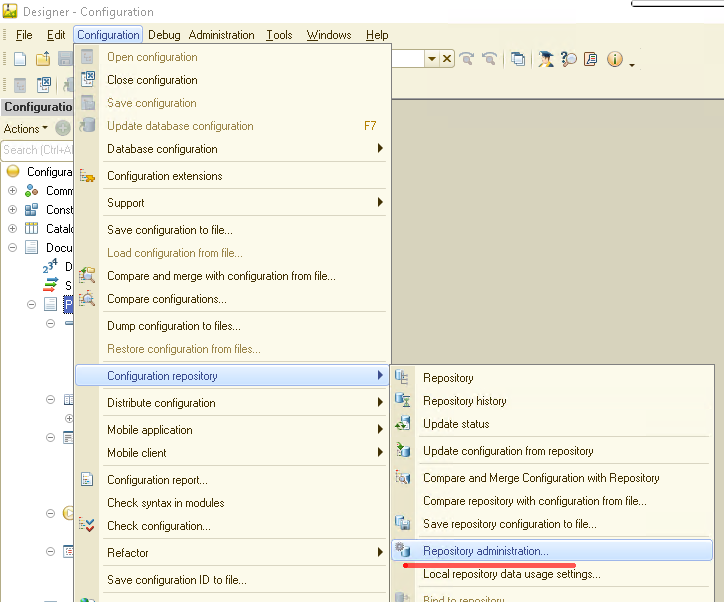
Everything is simple here, too. First, open the menu Configuration -> Configuration repository -> Repository administration:
The repository administration form will open:
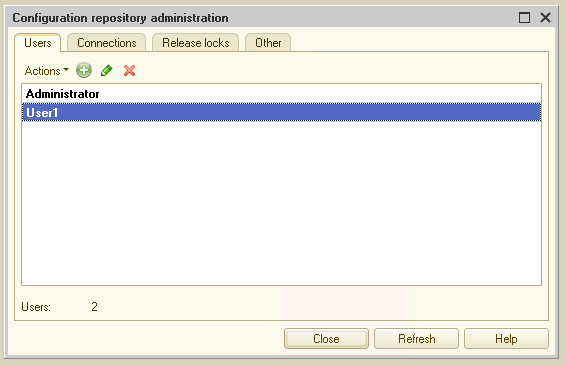
First, we need to add users to the configuration repository. It is advisable to create an individual user for each developer. In our example, I created a new user with the name User1.
Then, the second developer opens his (and this is very important!) 1C configuration and attaches it to the repository as described above. As soon as the connection is established, the entire current 1C configuration is replaced with the one stored in the repository. After this, the second developer can begin working on the configuration, having previously locked the necessary objects.
Now, let us go back to our example. The first developer uploaded a new object to the repository. The second developer has his own configuration, which is already attached to the repository. How can the second developer see the changes made by the first one?
There are several options here. First. If the second developer knows for sure that changes have been made to document Purchases, then he can do this:
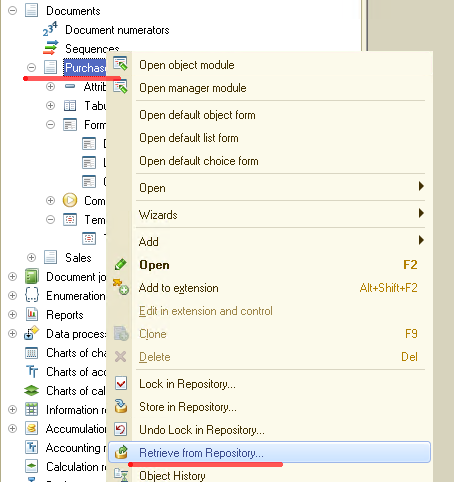
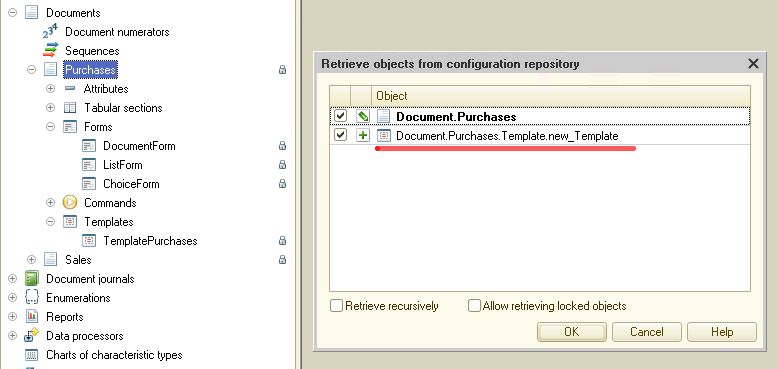
As you can see, the platform itself shows that document Purchases has a new object that we still miss and offers us to get it. The second developer clicks OK, and this new print form new_Template gets added to his configuration.
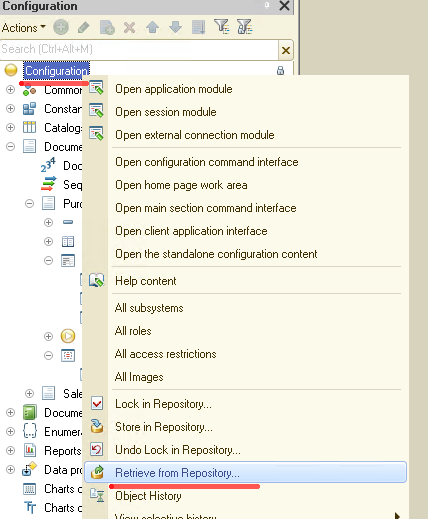
The second option for receiving changes from the repository is when we do not know who and where made changes to the application, or we want to receive all the changes at once. In this case, we select the Retrieve from Repository item, but only for the configuration root:
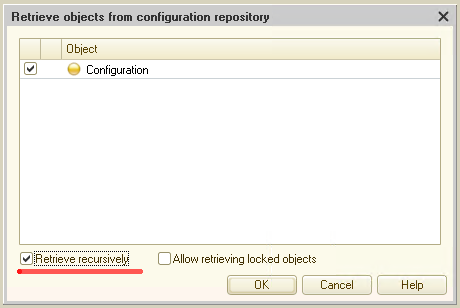
Do not forget to set the Retrieve recursively flag:
We get a form with a list of all the changes added to the repository but still not retrieved by us:
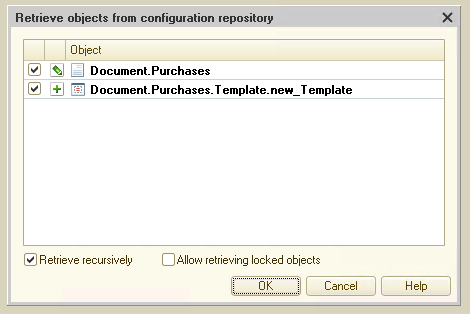
In this case, we see that document Purchases has been changed, and a new object has been added to this document, namely the new_Template print form.
We click OK and get the new object added to the second developer’s configuration:
In this simplest way, we can organize a teamwork of several developers on a single 1C configuration.
In conclusion, let me show you how you can view the history of changes for objects in the repository.
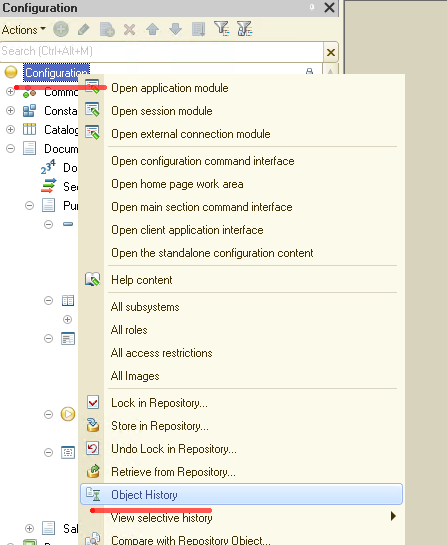
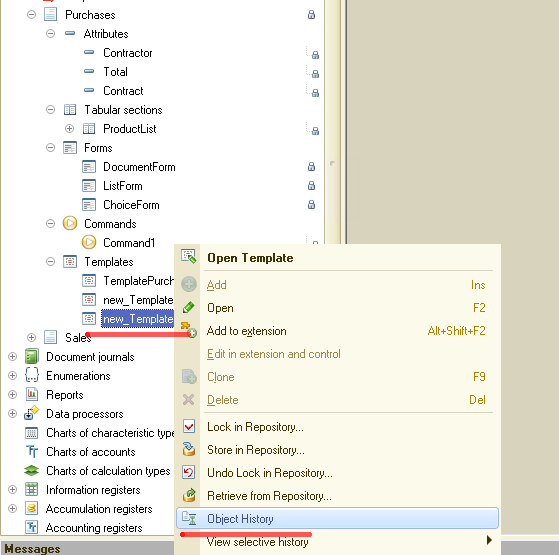
The history of changes can be viewed both for the entire configuration as a whole and for a single object:
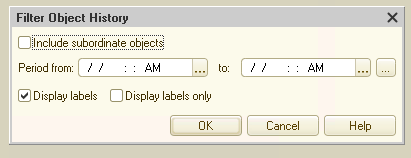
A form will open in which you can select the period for which we want to view the change history:
After clicking OK, we can see the object's modification history:

So, the object was changed twice: first it was added, then it was edited. Each time User1 worked on the object.
Previously, on adding a modified object in the repository, User1 wrote a comment describing what changes were made:
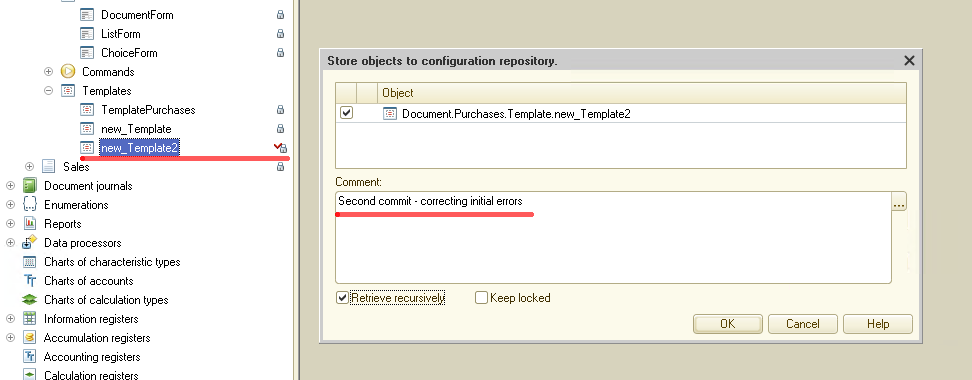
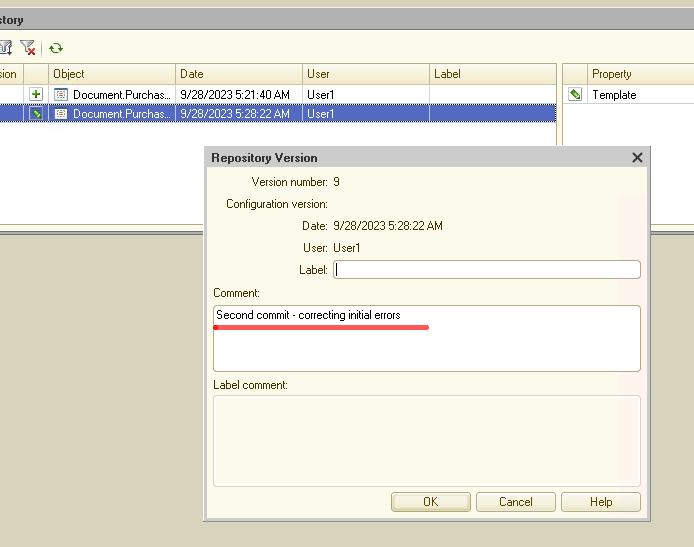
And now, we can see this object in the object’s history. Double-click the second line:

A form opens where we can see the comment added by the second developer:
Above, we showed how to organize the teamwork of several developers on a single 1C configuration. But in the example discussed above, it was assumed that all developers work on the same server, for example, via RDP, and connect to the configuration repository located on the same server.
And, of course, there comes a question if several developers can work remotely using a configuration repository. Obviously, we can open external access to the directory in which the repository files are stored, but the 1C:Enterprise platform has a special mechanism just for this case. It is called a configuration repository server.
The configuration repository server is a web server that allows several 1C developers to connect remotely to the repository and work together on the configuration while being anywhere on the globe.
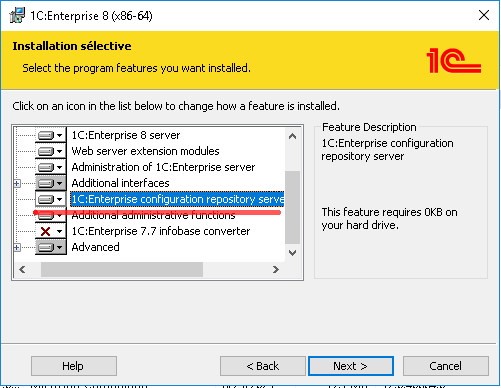
How do we install a configuration repository server? It is simple. When installing the 1C:Enterprise platform, it is enough to select the respective option:
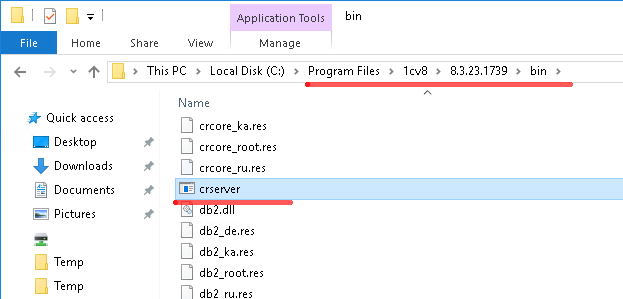
After this, you need to register the repository server service. The repository server executable file is located in the bin directory of the 1C:Enterprise platform:
Let us assume that the configuration repository is physically stored in the ConfigurationStorage folder:
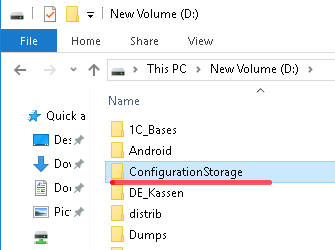
In this case, to register the configuration repository server service, we get to the command line and type: "C:\Program Files\1cv8\8.3.23.1739\bin\crserver.exe" -instsrvc -d "D:\ConfigurationStorage".
If everything is done correctly, a new service will appear in the list of Windows services, namely, the configuration repository server:
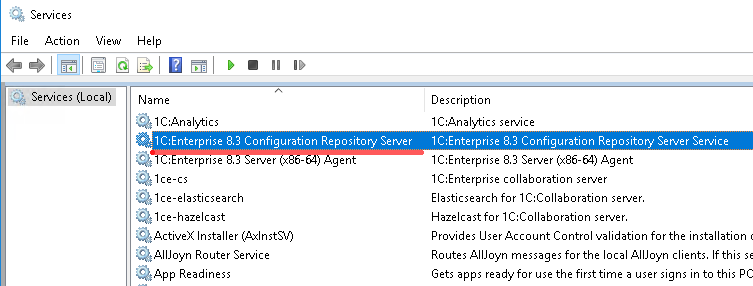
After the configuration repository service is started, you can create a repository for the 1C configuration that remote developers will work on. We repeat the steps described above, with the only difference being that instead of the path to the directory on the disk, we specify the network path to the repository server.
So, we create a repository:
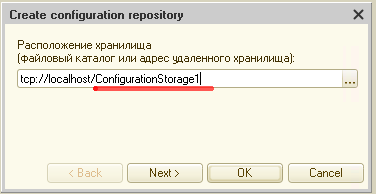
Here, ConfigurationStorage1 is the name of the repository that will be created for the current configuration.
We set the password:
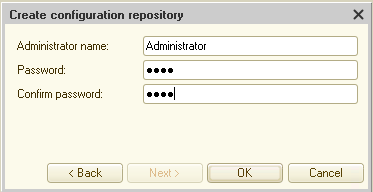
The platform asks if we want to bind the current configuration to the newly created repository:

We click OK, the configuration gets attached to the repository, and items in the configuration tree get lock icons:
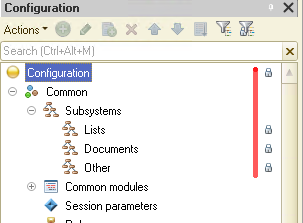
It means the current configuration is attached to the repository, and you can start working as a team. All further work with a server repository is no different from working with a local one, except for the connection stage.
I also wanted to draw your attention to how the repository files are stored on the server:
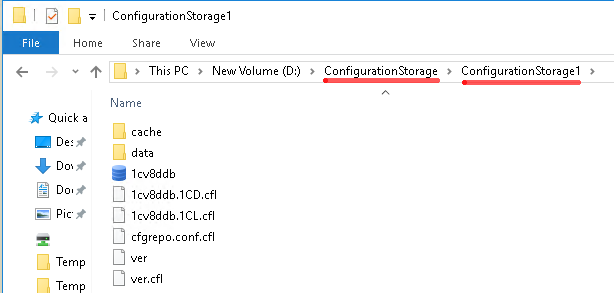
ConfigurationStorage is the main directory of the repository server, where the server writes data. And ConfigurationStorage1 is a subdirectory with data for a specific 1C configuration.
As you can see, one ConfigurationStorage directory can store several subdirectories with data so that the repository server can work with several 1C configurations simultaneously.
This is basically it. In this article, we briefly discussed how to organize the joint work of several developers on a single 1C configuration.
If you have any questions about working with the repository, you can always get support on our forum at https://1c-dn.com/forum/


