How Do You Export Only Modified Data from a 1C:Enterprise Application to a Website?
How Do You Export Only Modified Data from a 1C:Enterprise Application to a Website?
Let us assume we have a small trading company. Customer orders come through our website, and record keeping and accounting are done in an application built on the 1C:Enterprise platform.
Naturally, we need to enable an exchange of information between our 1C application and the website: the application should upload data on goods, their prices, and quantities to the website, while the website should provide information about customer orders.
How do we organize this exchange? What technology do we need? There is no straightforward answer here since the 1C:Enterprise platform supports many different technologies, and developers are free to choose the preferred one when designing the architecture. This can be the good old (and long outdated) file exchange, exchange via the HTTP protocol, exchange via a data bus, and even a direct connection to the database.
However, in this article, I would like to talk about something else.
Assume that our application in catalog Products has 10,000 lines. In other words, our system (both the 1C:Enterprise application and the website) has information about 10 thousand products.
Add to it that each product can have several price types and goods can be allocated to several warehouses. Thus, the amount of information uploaded from the application to the website increases exponentially.
It should be fine when our products' range, prices, and stocks change rarely. But what if it is the other way around? We have a vast trade turnover and must ensure that our site has up-to-date information about goods and stock on the website.
What should we do? Always upload a massive array of data to the site, although there may be few or no changes at all?
Naturally, the most logical move is to upload only the modified data to the site and leave the rest alone. This reduces the amount of uploaded data, ensuring that the website has current prices and balances.
Fine, but how do we get this modified data? How do we gather it?
Of course, you can, using existing objects of the 1C:Enterprise platform, develop your own mechanism for exporting changes, but, fortunately, the 1C:Enterprise platform already has an object specifically designed to register and process data changes. This object is called ExchangePlan.
So again, why might developers wish to consider creating their own exchange plan? Exchange plans help to record changes to objects.
With this, retrieving a list of these objects and exporting them in the required format or processing them as needed becomes possible. After processing these objects (for example, modified products), you can flag them as sent. Note that it is not deregistration but only a flag that the objects have already been processed (sent to a customer). This mechanism is convenient because it allows us to make sure exported data has been received. In order words, we can always know whether our data has reached the destination.
When the destination system gets the exchange packet and successfully processes it, it must send a confirmation of receipt, that is, a list of unique identifiers of the received objects. After that, you can deregister the sent objects in our application (and in our exchange plan). Then, the whole loop is repeated for newly modified objects.
There is also the possibility of a more simplified workflow when changes are only sent from our application, and we do not control whether this data was accepted by the destination system.
Let us take a look at an example of such data upload.
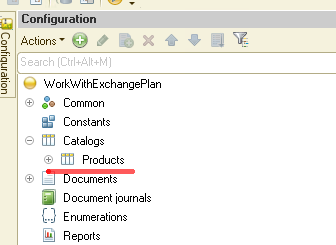
Assume that we have an application built on the 1C: Enterprise platform, and it has catalog Products. We need to receive changes to this catalog for further processing, for example, to upload these changes to the site.
Here, we do not focus on the upload mechanism. As I mentioned, this can be anything: export to files, exchange via REST API, etc.
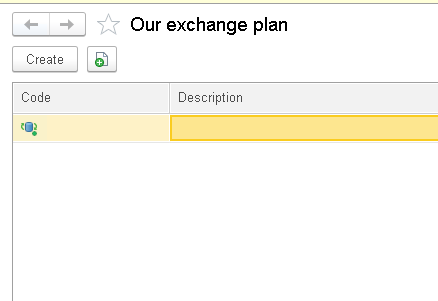
Now, we need to retrieve modified data for this catalog. We create a new object, ExchangePlan, and name it OurExchangePlan:
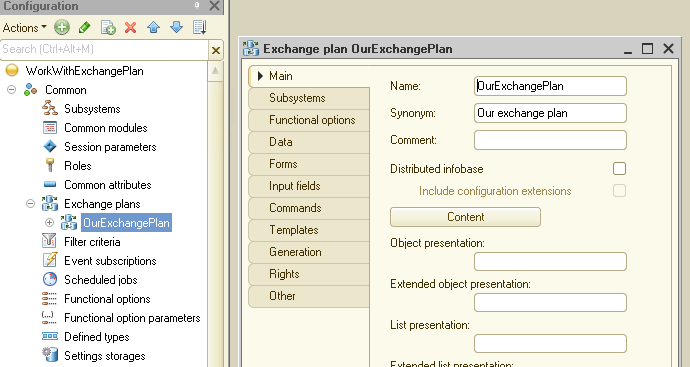
Now, we need to make some settings so that changes in catalog Products are registered by our exchange plan. It is effortless to do. Go to the Main tab in the exchange plan and click the Content button:
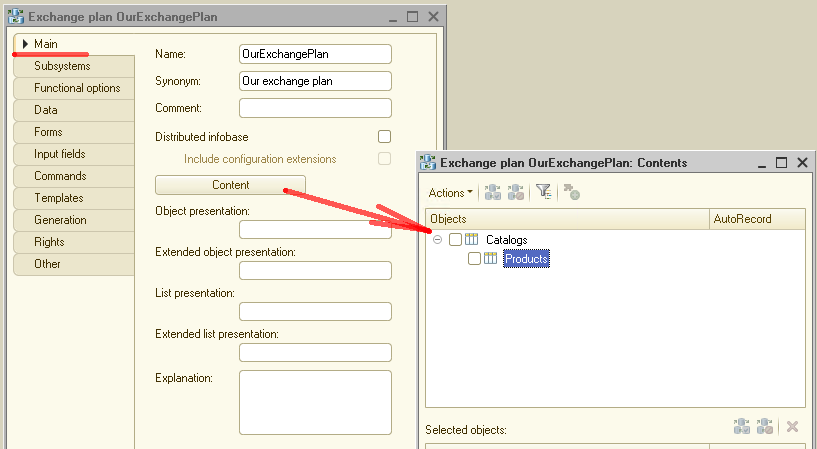
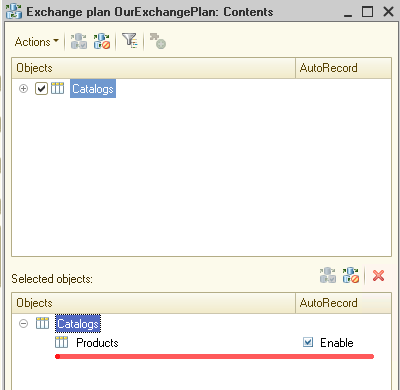
A window opens with the list of objects that exist in our application. In this example, we have only catalog Products. Select it:
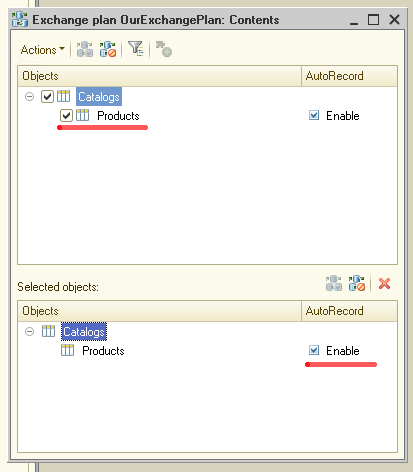
As soon as we select catalog Products in the upper part, it immediately appears in the lower Selected objects section. Pay attention to the AutoRecord parameter. Its values can be either Enable or Disable:
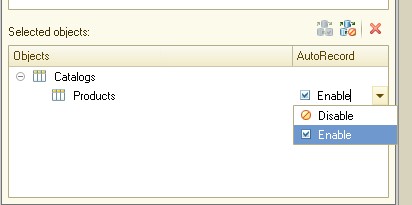
Here is what it means: if the value of this parameter is set to Enable, then any changes to the object (in our case, this is in catalog Products) will be registered. If the parameter is set to Disable, the changes will not be automatically registered; in this case, they must be registered individually with the application code.
This parameter makes sense if we export data (for example, a list of our products) into several applications. One gets the first set of data (for example, only products), and the other receives the second (for example, only goods for repair).
In such a case, a developer creates two exchange plans inside the application, adds catalog Products to both, and sets the AutoRecord parameter to Disable for catalog Products in each exchange plan. Creating a mechanism for registering changes in the catalog is also necessary. We will need to add code for that.
We will look at this example a bit later, but for now, let us set the AutoRecord parameter to Enable.
And see how this mechanism works in general.
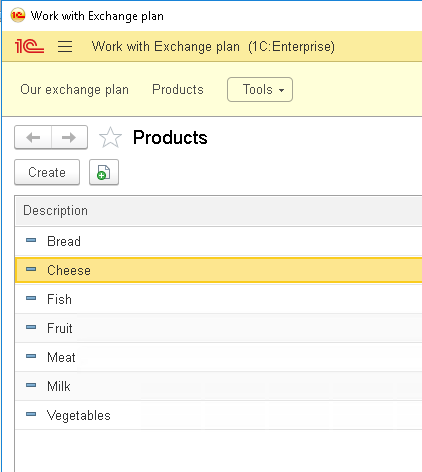
We save our configuration and launch the 1C:Enterprise platform in dialog mode. We add some test data to catalog Products:
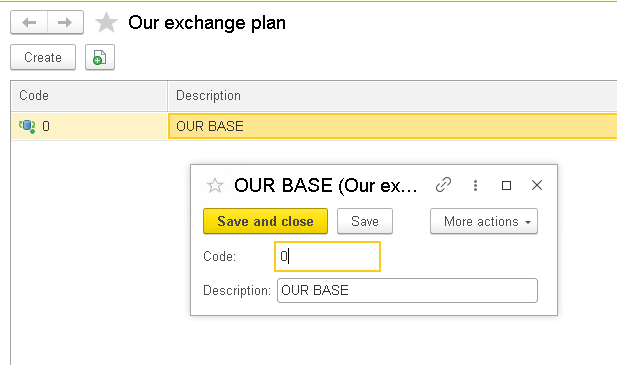
Now, we open OurExchangePlan. And see the following:
This is a list of nodes that will be used for data exchange. Currently, this list is empty, and the only option we have is our central node, which is our application.
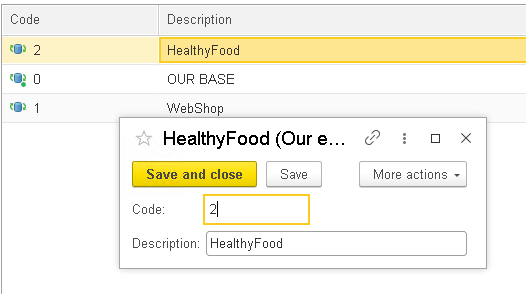
We want to give the node a clear name and code to make it convenient for use. Something like this:
Now, we create a node where we want to send information. It is pretty straightforward:
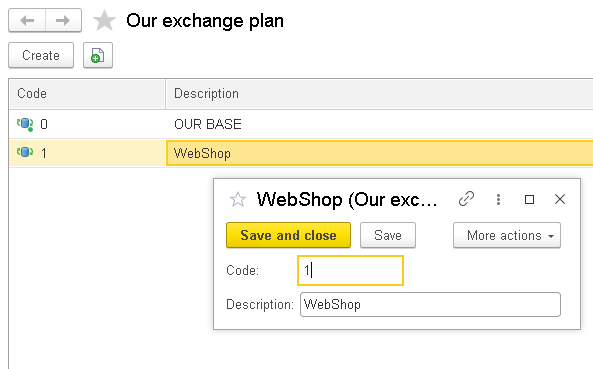
We press the Save button, and this is basically it. We have set our application to export only modified product data.
You might wonder how we select specific objects, in our case, the elements of catalog Products, that have been modified.
It is even easier, you can imagine! As soon as an object is added to an exchange plan, not only the main table of this element but also the so-called change table becomes available to the developer through the query language.
What does it look like? Let us see. The Query Console will help us with this. It is a dedicated data processor that allows you to make queries to the platform in the interactive mode of the application and immediately see the result of these queries.
For your convenience, I have included this data processor in the 1C:Enterprise configuration. As usual, you can find the download link at the end of this article.
So, we launch the Query Console, open the Query Wizard, and click the Show Change Tables button:
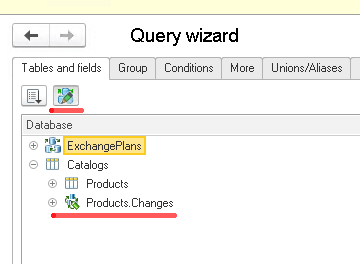
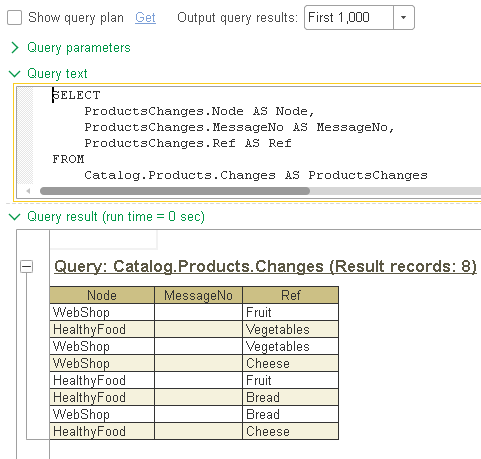
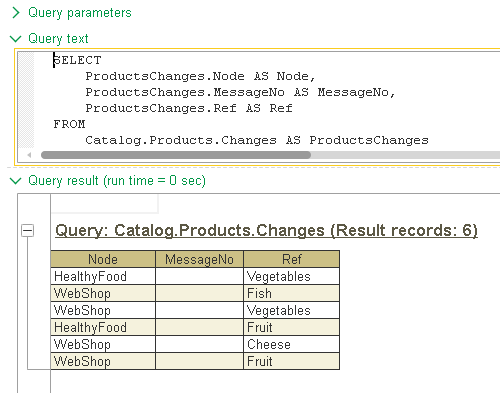
And immediately after that, we see another table, Products.Changes, becomes available for catalog Products. Let us query this table:
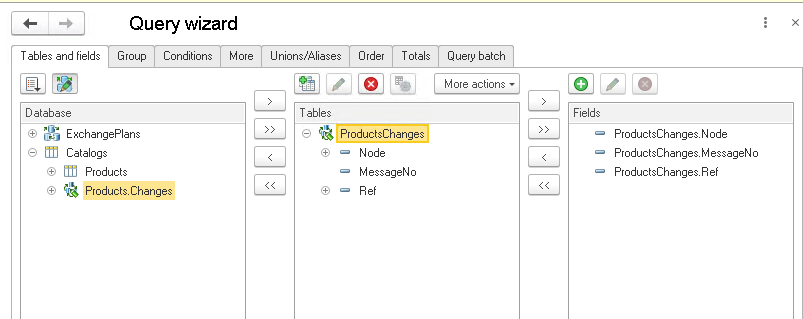
As you can see, the table has three fields.
The Node field is the node for which the data will be uploaded; in our case, it is the WebShop node (see above).
Field MessageNo stores the message number in case we want to use a mechanism to control the delivery of our data to the recipient. In our example, we skip this; our task is simply to select the modified data.
And the Ref field. It is in this field we store the reference to the object that needs to be exported. I mean the one that was modified.
So, the structure of the ProductsChanges table is clear. Let us try running a query directly from the console. We click the Execute button.
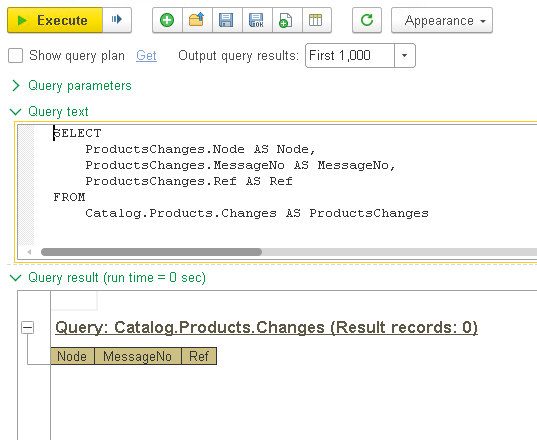
And see that there is no data to upload. The query returned an empty result set.
Fine. We open the Products catalog and either add a new product or change an existing one. Then, we return to the Query Console and try to relaunch the query. Ant this is the result:
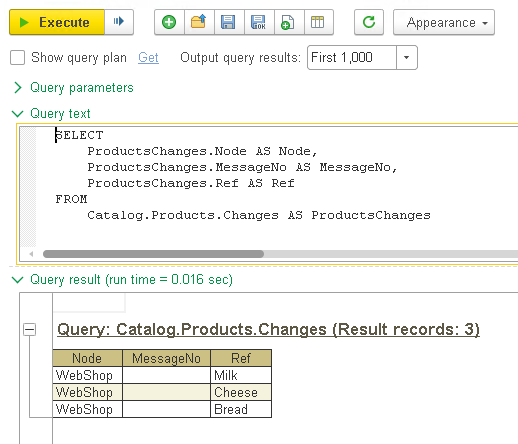
Bingo! The table of changes and, accordingly, the query output only gets the products that were modified! This is precisely what we wanted!
Now we can upload to our website only the necessary information, exactly what has been changed and nothing else!
So, how do we do it? We create one more data processor in the 1C:Enterprise platform, add a form to it, and add the command to the form:

The code for fetching changes might look like this:
|
Procedure cmd_UploadChanges1AtServer()
query = New Query;
query.Text = "SELECT | ProductsChanges.Ref AS ProductRef |FROM | Catalog.Products.Changes AS ProductsChanges";
selection = query.Execute().Select();
While selection.Next() Do
Message(selection.ProductRef);
EndDo;
EndProcedure |
As you can see, the code is quite simple and even primitive. As a result, in the loop, we receive all the modified products that need to be exported.
Well, we received a list of modified products and uploaded these products to the site. Still, when uploading, we need to clear the table of changes so that these products do not get uploaded to the site again! How do we implement this?
It is as easy as that. When the upload is complete, you just need to clear the exchange plan from the objects in it. As a result, the algorithm for uploading modified data to the site will look like this: first, we select all the modified data with a query, then we process it in a loop (for example, we transfer it to the site via REST API), and finally, we remove uploaded objects from changes table.
The modified code for data export, in this case, will look like this:
|
Procedure cmd_UploadChanges1AtServer()
query = New Query;
query.Text = "SELECT | ProductsChanges.Ref AS ProductRef |FROM | Catalog.Products.Changes AS ProductsChanges";
selection = query.Execute().Select();
While selection.Next() Do
Message(selection.ProductRef);
EndDo;
ExchangeNode = ExchangePlans.OurExchangePlan.FindByCode("1"); // WebShop ExchangePlans.DeleteChangeRecords(ExchangeNode);
EndProcedure |
If we now try to query the table of changes in the Products catalog via the query console, we will see that there are no changes now:
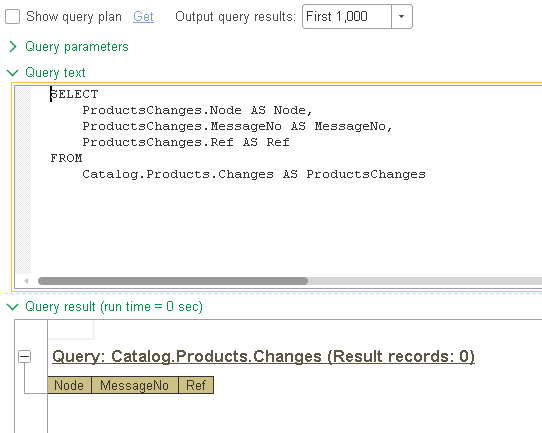
This is precisely the result we were looking for! First, we receive changes to our catalog, process these changes, and, at the very end, remove all changes from the list to prevent repeated processing of the data.
Can we call it a day now? Yes and no. We have described the simplest way to upload modified product data to a website, but what if we need to upload some items to one site and others to another.
Is it possible at all? Of course, it is!
Using the ExchangePlan object, we can select changes only for a specific node and upload certain products (and not only products, any objects) to the node we want.
Let us now look at this complex example.
So, we add one more HealthyFood node to our ExchangePlan. We will use it for vegetables and fruits only.
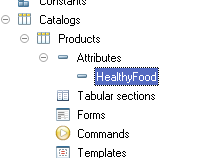
Now, we create the HealthyFood attribute in the Products catalog. We want to use this attribute to determine whether the product is healthy and whether it should be uploaded to the HealthyFood node:
Now, in dialog mode, let us make a few changes to the Products catalog and again create a query to the table of changes. What do we see?
When recording a product, information about it goes to both nodes, WebShop and HealthyFood. And we would like only certain products to be included in the HealthyFood node. How do we do it?
Here, we need to go back to the beginning of our article and talk about the AutoRecord parameter again:
Currently, this parameter is set to Enable, meaning all changes in the Products catalog are automatically registered for all existing nodes.
But our aim is to register all changes only for the WebShop node, while in the HealthyFood node, we want to see changes only for products with the HealthyFood attribute.
Well, go ahead and implement this mechanism!
We start with setting the AutoRecord parameter to Disable:
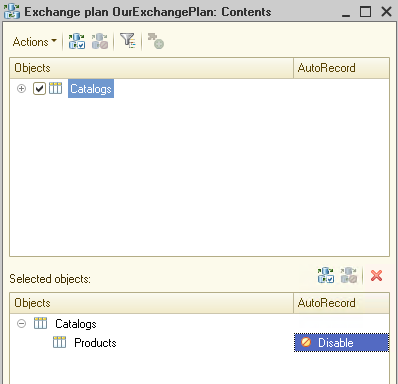
After this, changes in the Products catalog can be included in the exchange plan, but it does not happen automatically! We need to write code to flag products for export.
To catch the event of adding a product to the Products catalog, it is very convenient to use event subscriptions.
So, we create a new subscription to the OnWrite event:
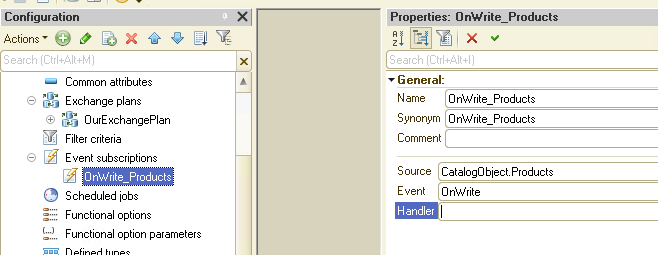
And add the following code that will run as a handler for the OnWrite event:
|
Procedure OnWrite_ProductsOnWrite(Source, Cancel) Export
// Source - reference to the product is here
nodeWebShop = ExchangePlans.OurExchangePlan.FindByCode("1"); // WebShop nodeHealthyFood = ExchangePlans.OurExchangePlan.FindByCode("2"); // HealthyFood
ExchangePlans.RecordChanges(nodeWebShop,Source);
If Source.HealthyFood Then ExchangePlans.RecordChanges(nodeHealthyFood,Source); EndIf;
EndProcedure |
As you can see in the code, we add all products to the WebShop node. It means that any changes to any products will go to our WebShop. Still, for the HealthyFood node, we add only products with the HealthyFood attribute set to True.
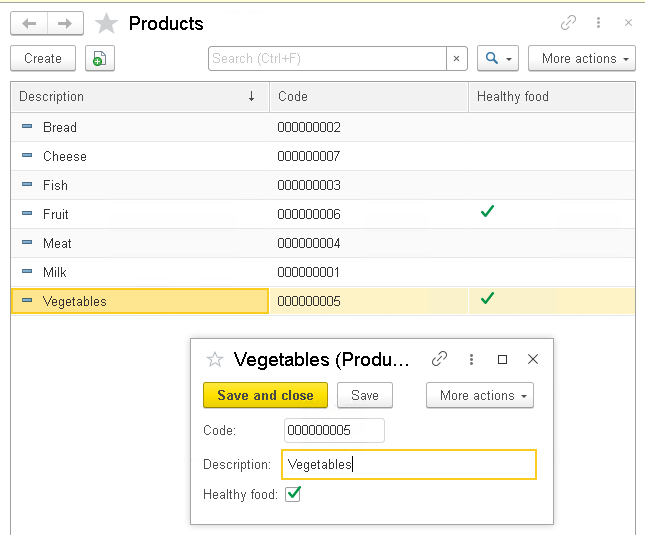
Time to see the code in action! We update our configuration and overwrite several products with the HealthyFood attribute turned off and several ones with the HealthyFood attribute turned on. Then check the result in the query console:
Here, we see that the HealthyFood node received products only with the HealthyFood attribute enabled. All other products were not included in the HealthyFood node.
The WebShop node received all products regardless of the HealthyFood attribute value.
Now, all we have to do as developers is write a procedure to select the required changes and send this data to the right place, the WebShop or the HealthyFood. And we already know how to do it.
Time to sum things up. We learned about a new object of the 1C:Enterprise platform called the ExchangePlan. We had some practice with it and even created a real-life solution that made it possible to upload only modified products to the site.
Needless to say that the ExchangePlan object allows you to perform much more complex actions than described above. For example, we can send data to destination points, wait for the response, and clear the change table only after the data receipt confirmation arrives.
Still, this is a fairly broad topic and far beyond this article's scope. Stay with us. We still have many of the 1C:Enterprise platform goodies to discuss.
As always, the source code of the 1C application is available for download.

Writen by
1C Developer
20+ years of experience in the software industry in Russia, UAE and Germany. My main fields of expertise are developing and implementation of business applications (Retail, CRM, WMS, and Accounting) and integration of software with POS equipment and web portals.


