How to create Progressive Web Apps (PWA) with 1C:Enterprise platform
In October 2020, 1C company released a new version of the 1C:Enterprise platform 8.3.18. You can read more about the new features of this release here.
Among the many new features, I would like to highlight the support for PWA technology
Let's see how this function is implemented in the new version of 1C.
First, a little about the PWA technology itself: this technology allows us to transform the site into a mobile (or desktop) application. In the case of 1C, the technology converts a 1C program published on a web server into an analog of a full-fledged mobile (or desktop) application.
For our example, we need a 1C program, a web server on which we will publish our application. Also, PWA technology only works over HTTPS, which means that we need to obtain and install an SSL certificate on our web server. And we will do all this with you now!
So let's get started!
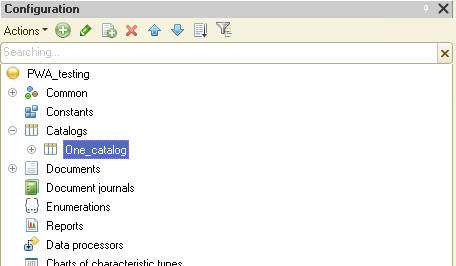
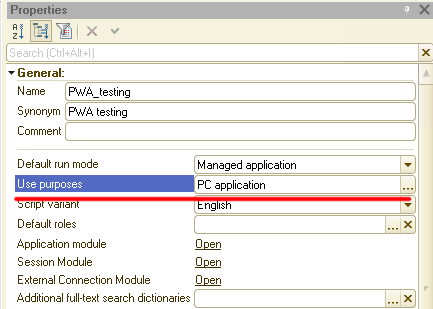
First, we create a simple 1C program that contains only one catalog. For our example, this is enough. You can use any of your own 1C applications for this. Please note that the "Use purposes" property is set to "PC application".
We create a regular 1C desktop application and then publish it on a web server (after that, we can work with this application through a browser). After that, we transform our application into a PWA.
Our next step is to publish the application on the webserver. I usually use IIS for this purpose, but it is also possible to use the Apache server.
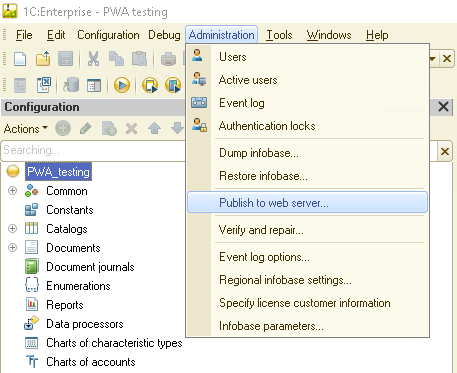
First, let's open (or restart) our Designer as an Administrator (this is required to publish the application):

Then go to the menu "Administration" -> "Publish to web server":
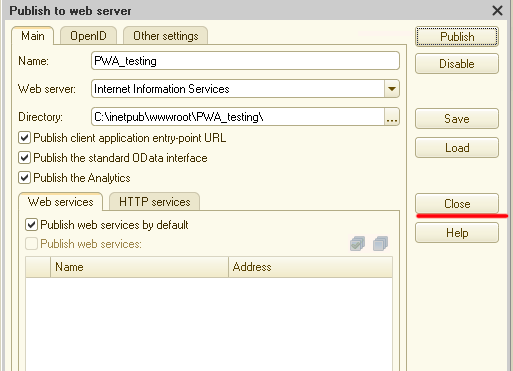
A new form will open in which we can set the application publishing parameters. There are many of these parameters, we will not dwell on them now, but we will leave everything by default. Please remember the name of the publication - we will need it later to access our application via a web browser:

Then press the "Publish" button, and 1C will publish our application on the server:

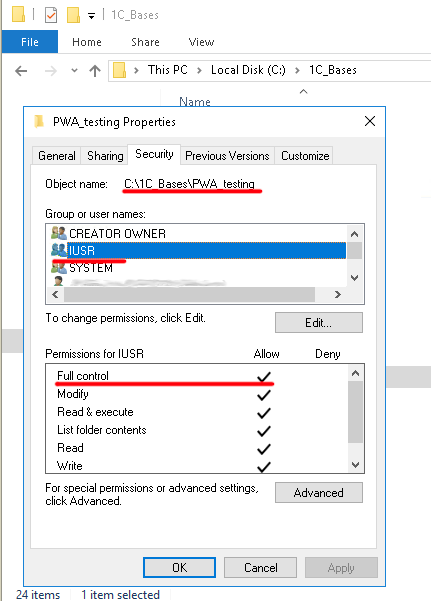
After clicking on the "Ok" button, 1C warns us that it is also necessary to give the ISS user rights to the directory in which our application is located:
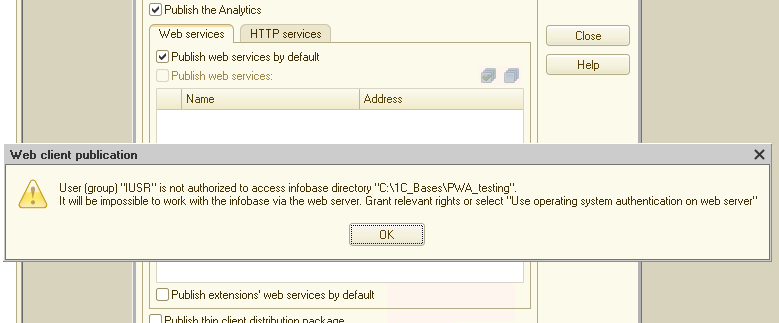
This message may not be there if we set permission for the directory for the ISS user in advance or if we use not the file version of 1C but the SQL version for work.
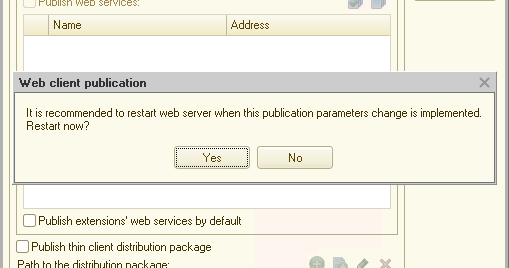
Then 1C offers to restart the webserver. We agree with this.
After that, the publication form can be closed. To do this, press the "Close" button:
At this point, I recommend closing the Designer and reopening it as a regular user, not as an Administrator. This will avoid the error that will occur if we now try to access our application through the browser.
And don't forget to set the rights to the directory with the files of our application:
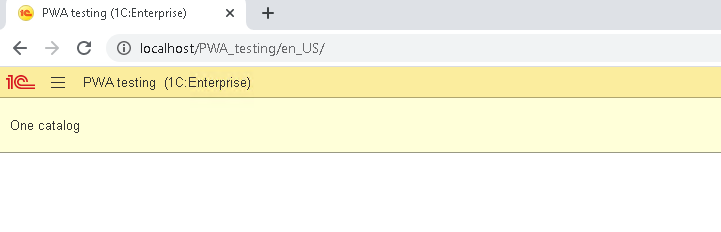
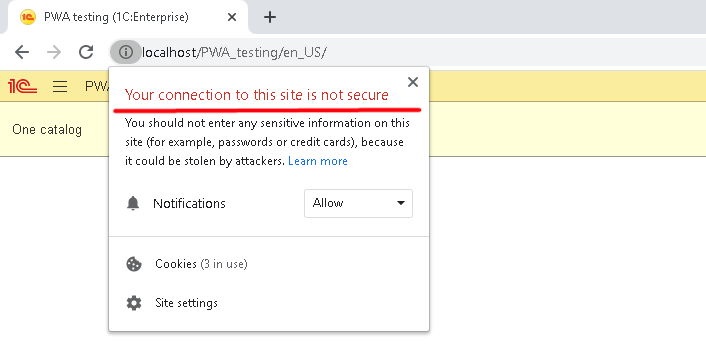
After we have restarted the Designer and specified the rights to the directory with our application files, open the browser and enter the following in the address bar: "http://localhost/PWA_testing". If we did everything correctly, then our application will open in the browser:
So, we have done the first part of the task - we published our application on a web server and configured access to it through a web browser. Now we need to convert this application to PWA. PWA, as we remember, works only over the HTTPS protocol. But our application is currently using the HTTP protocol, which is very easy to verify:
Our next step is this: we need to enable HTTPS support on our web server. For this, we need a valid SSL certificate. You may already have it (for example, your provider may provide a certificate). If you don't have such a certificate, then I'll now describe how to get it.
To get a free SSL certificate, I suggest using the "Let's encrypt" service: https://letsencrypt.org/
This service provides free cryptographic certificates for TLS encryption. The most important thing is that the process of issuing certificates is fully automated. That is, we don't need to call or email somewhere. We'll do everything in a few minutes.
Also, to obtain an SSL certificate from "Let's encrypt", we need a domain name. You may already have it, for example, your ISP may provide it as well. Or you can register a domain name yourself. But if you do not need a "pretty" domain name, then you can use another free service that will allow us to get the required SSL certificate.
For these purposes, I can offer the service https://sslip.io/. This is a free DNS that will link our IP address and a domain name like "our_address.sslip.io". That is, if the IP address of our web server is "111.111.111.111", then using the sslip.io service, we will be able to access our web server using the domain name "111.111.111.111.sslip.io".
And one more note - to receive an SSL certificate from "Let's encrypt", port 80 must be open on the webserver. Without this, we will not be able to obtain a certificate.
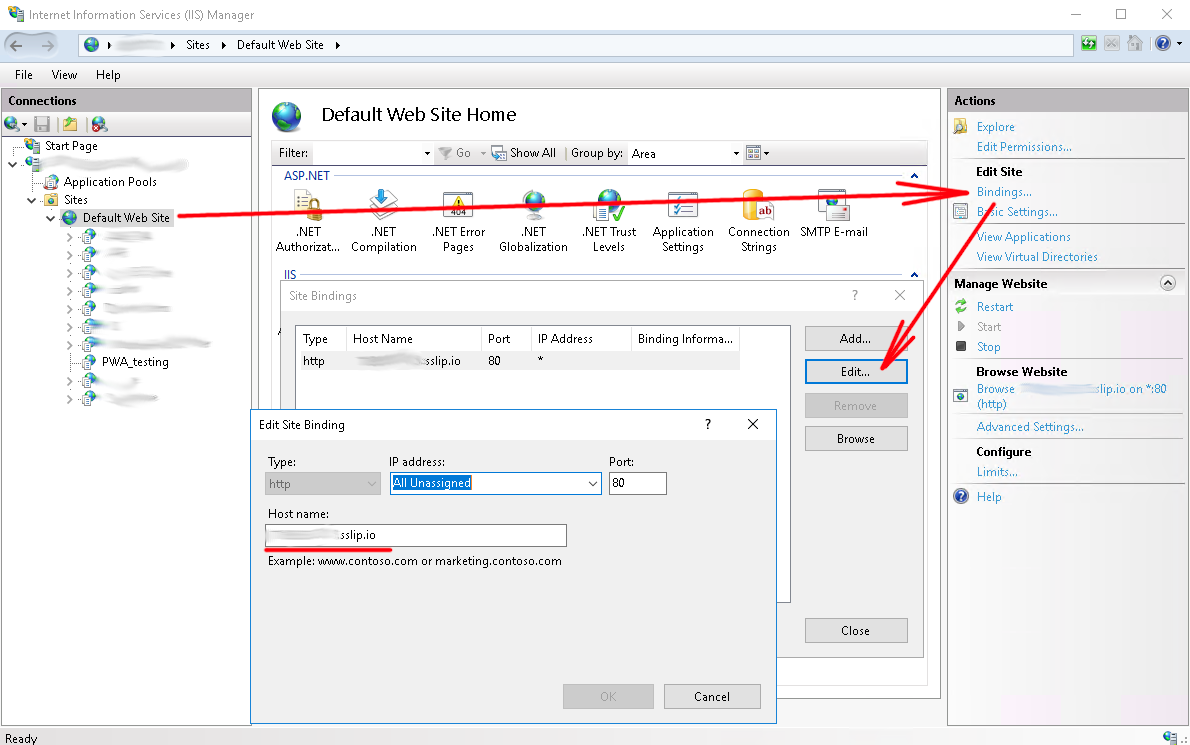
Let's bind our domain name to the default site in IIS. To do this, open IIS Manager and set the domain name. As you can see, now only the HTTP protocol is available to us:
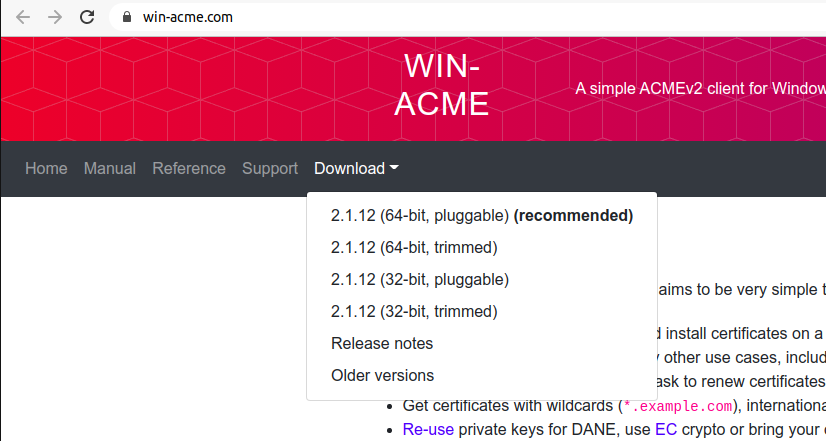
Now let's install the SSL certificate on our web server. For this, we need a dedicated client. There are several such clients, you can choose the appropriate one using this link: https://letsencrypt.org/docs/client-options/.
To write this article, I used the "win-acme" client: https://www.win-acme.com/. So, let's download the recommended client version:
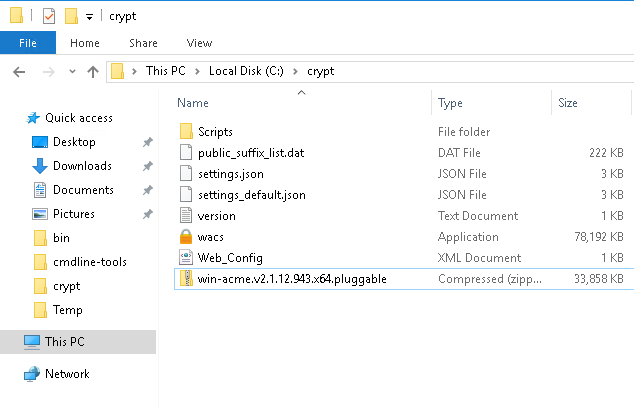
then unpack the downloaded file into a directory (I used the "crypt" directory):
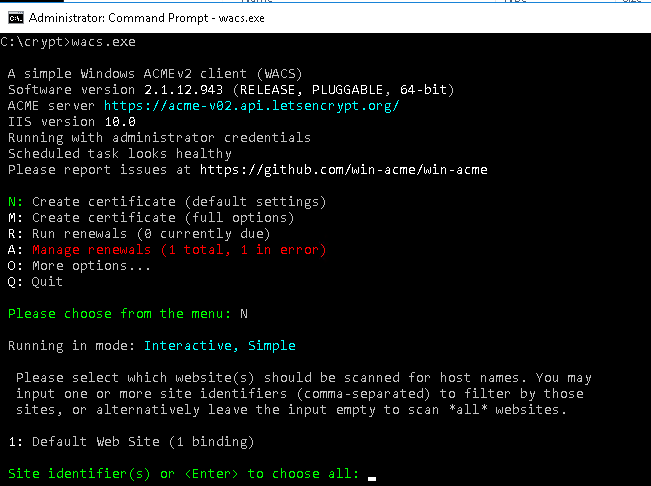
After that, open the command prompt with Administrator rights, go to this directory and run the wacs.exe file. The program will start and offer several options for action. Press the "N" button - create a new certificate with the default settings:
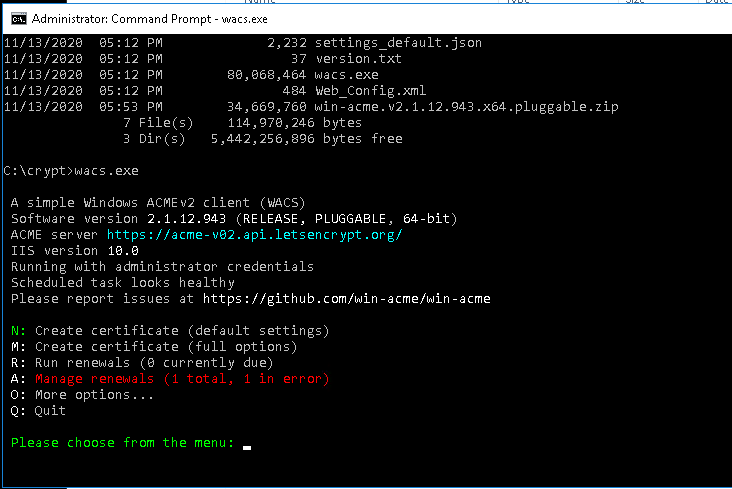
The program will offer to select a site. There is only one site on my IIS (aka the default site), so you can either press 1 or Enter:
At this stage, press "A":
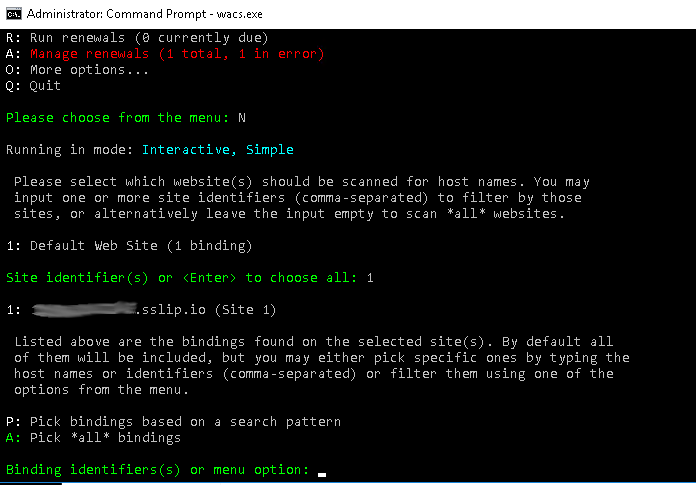
And finally, press "y":

After that, an SSL certificate is generated and installed on IIS. If everything went well, you will see a similar message:
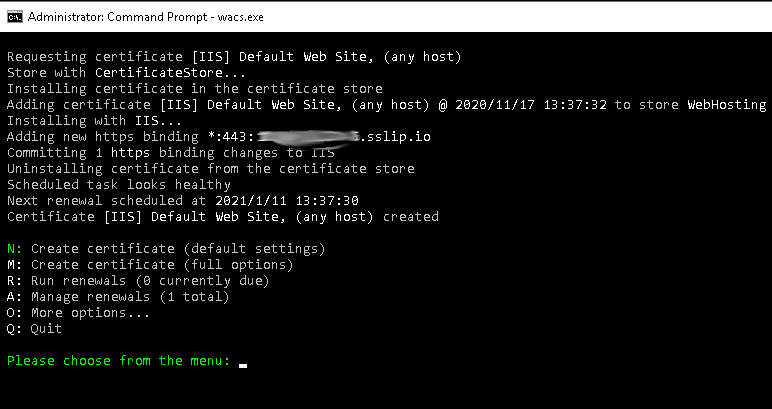
Press "Q" and exit the client. To make sure that the SSL certificate has been installed on the webserver, go to the ISS Manager and look at the list of our server's certificates:
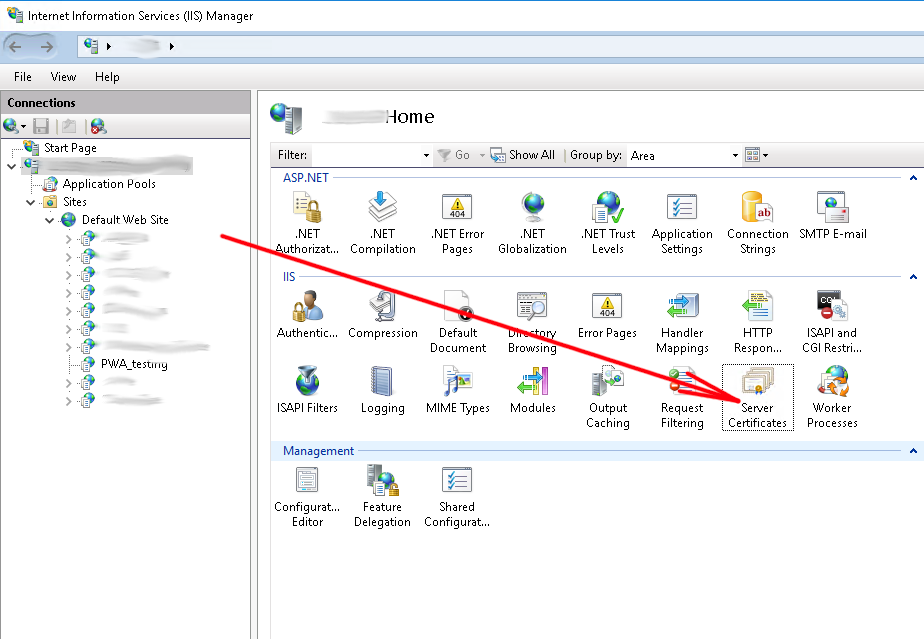
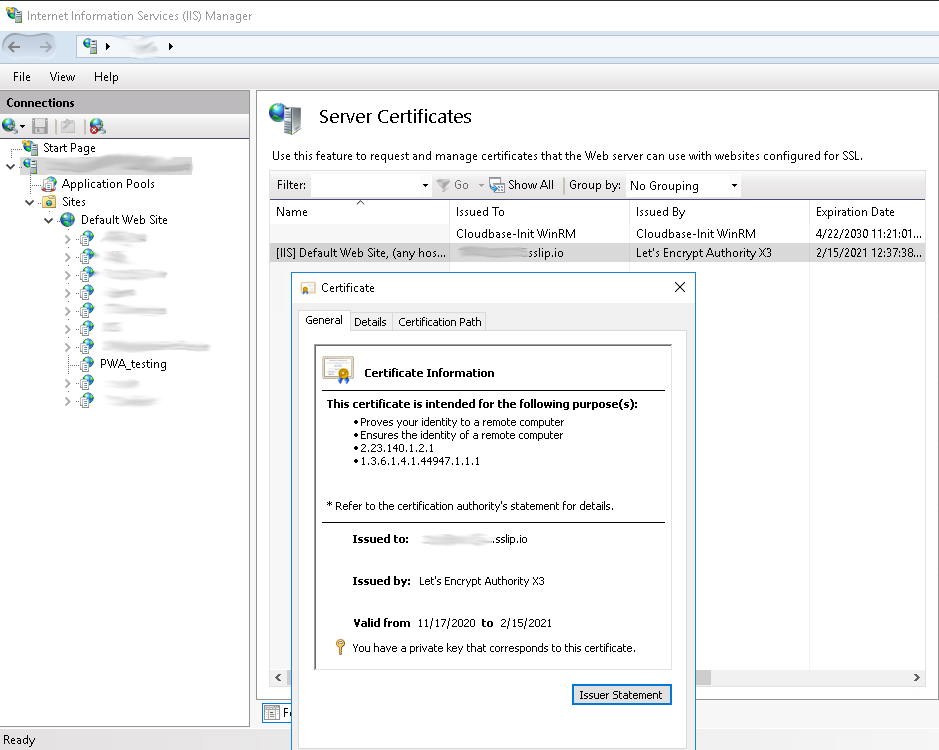
As you can see, the certificate has been successfully installed and ready to use!
Now we try to open our application in the browser at: https://Our_IP_address.sslip.io/PWA_testing/. It opens using the HTTPS protocol and we can check our certificate if we want:

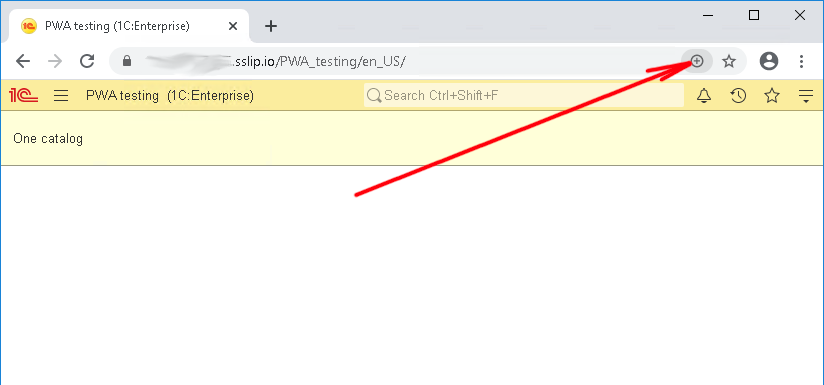
We have already done most of the work, all that remains is to convert our web application to PWA. To do this, open the application in Chrome and press the special "Install PWA" button:
We confirm our actions and click "Install" again:
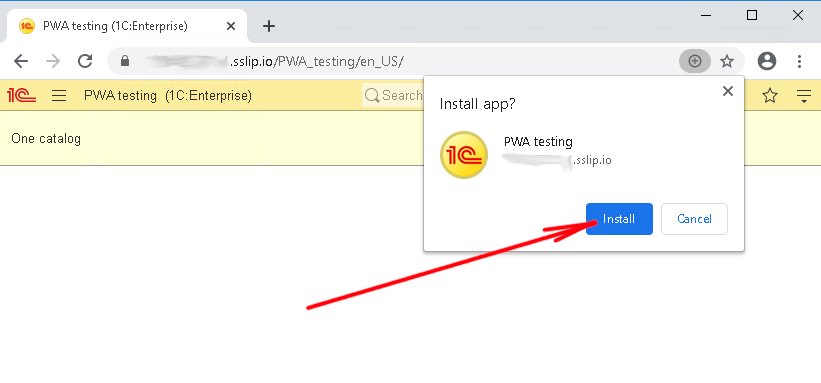
After that, the PWA application is created and immediately launched. Also, note that the app icon is created on the desktop at the same time:
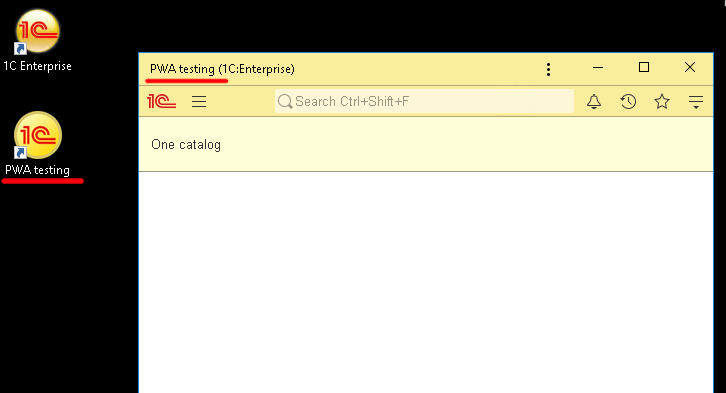
Now we can work with our 1C application as with a regular desktop application.
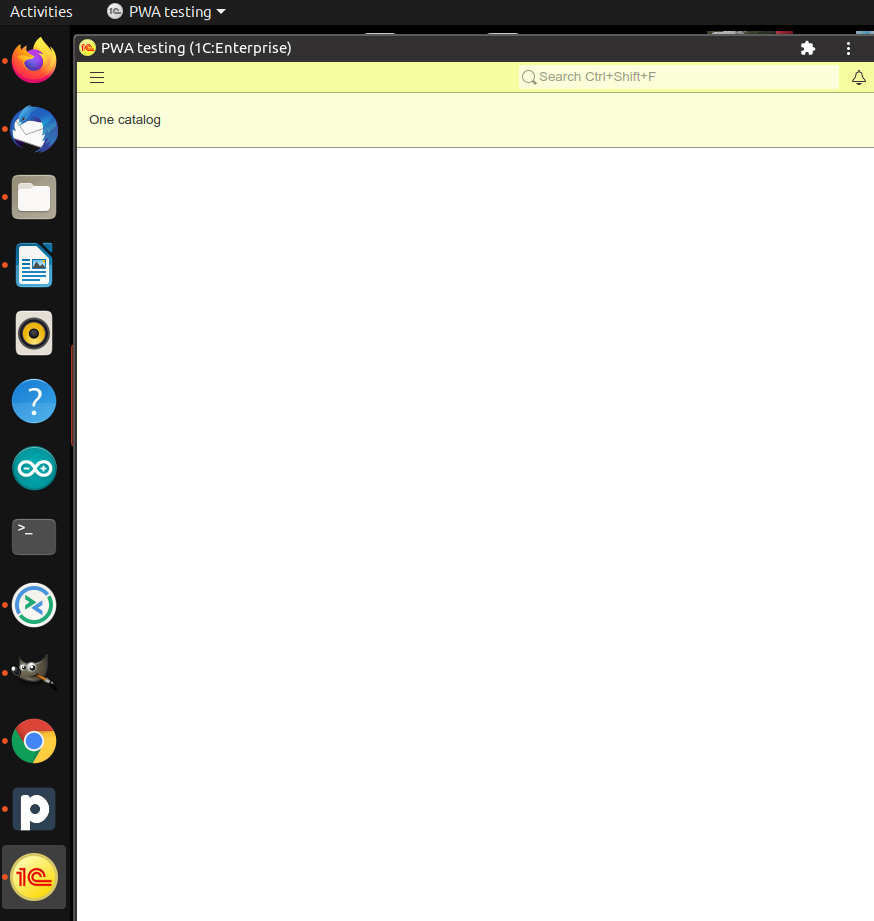
In the same way, we can install a PWA application on Linux, Android and IOS. For example, this is how it looks on Ubuntu:
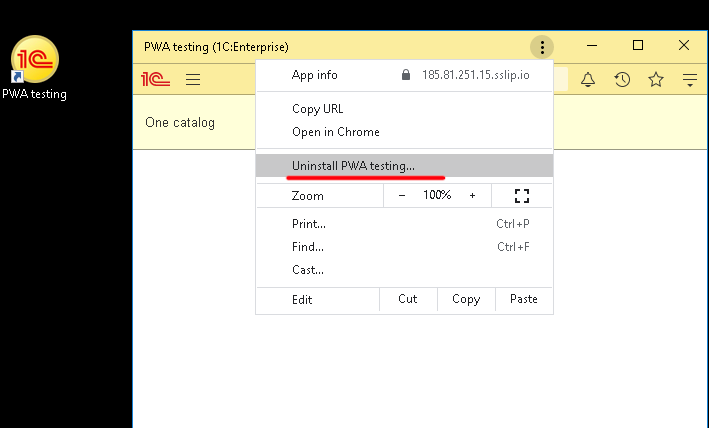
If desired, the PWA application can also be easily uninstalled:
So let's summarize. In the new version of 1C 8.3.18, it became possible to create PWA applications. To do this, we need to publish our 1C application on a web server using the HTTPS protocol, after which the PWA technology becomes available.
A significant advantage of PWA technology is that the site (in our case, the application) is converted into a kind of desktop application. The end-user is much more comfortable working with such an application than through a browser.
Stay with us, we still have a lot of exciting things for you.

Writen by
1C Developer
20+ years of experience in the software industry in Russia, UAE and Germany. My main fields of expertise are developing and implementation of business applications (Retail, CRM, WMS, and Accounting) and integration of software with POS equipment and web portals.


