As you know, the 1C platform is designed to create business applications quickly, and in this, it has no equal. Still, the speed of development limits the creation of various interfaces that many entertainment applications, especially mobile ones, have. Nevertheless, the developer can customize the appearance of the 1C application. For example, he can use the corporate style and splash screen in the application.
Below we will see how this can be implemented.First, let's create a new 1C application and immediately open the general properties of our application. Now we are interested in two properties - Logo and Splash:
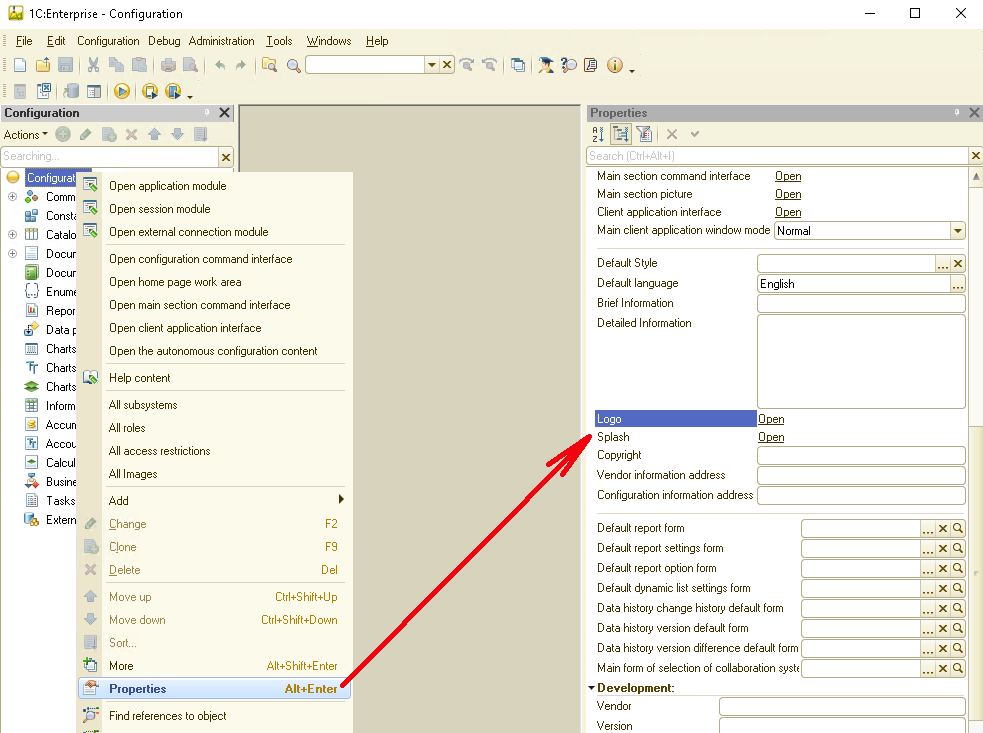
The Logo property is a picture that is displayed in the "About this ..." window. If you click on this property, a dialog will open where you can specify the value of this property:
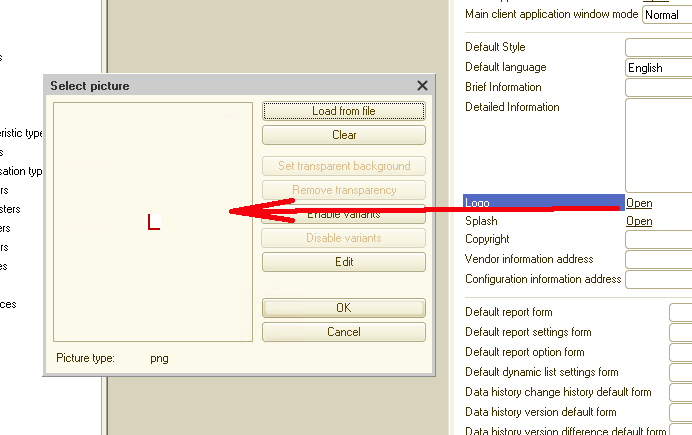
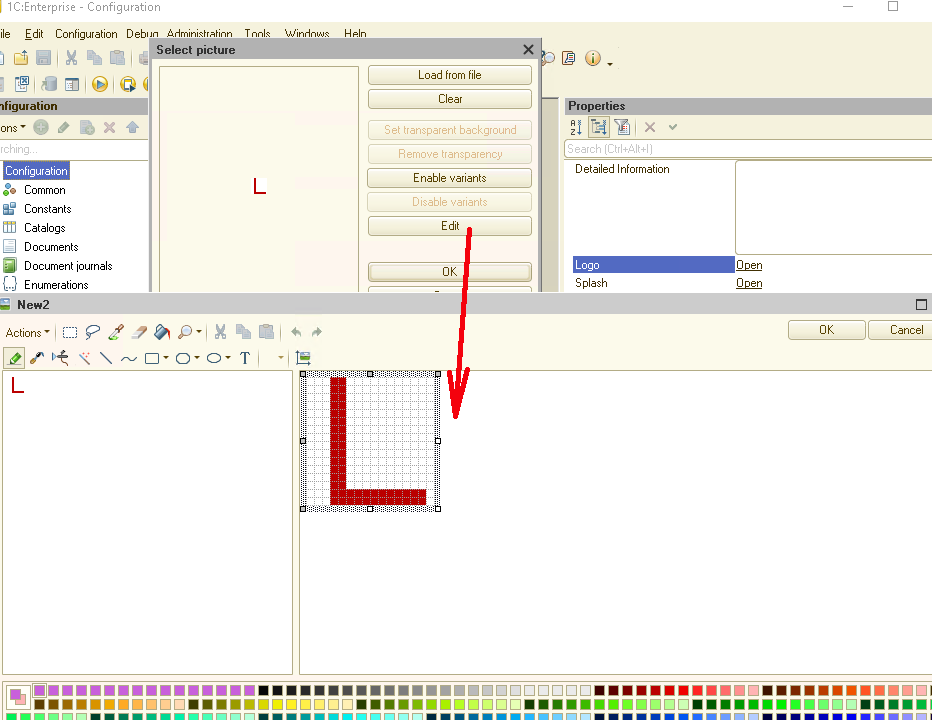
It's possible to load an image from a ready-made file - for this, you need to use the "Load from file" button. The image format can be any of the supported 1C, and the image size is 64 by 64 pixels. And it's also possible to create a logo yourself. To do this, press the "Edit" button, and a graphical editor window will open, in which you can draw the desired logo:
Let's check what we got. Run our 1C application (do not forget to update it so that our changes become available) and open the "About" form:
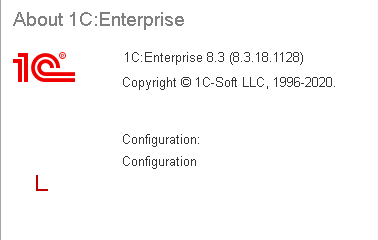
As you can see, changing the logo is not difficult.
In the same way, you can change the initial splash screen of the 1C application. To do this, use the "Splash" property:
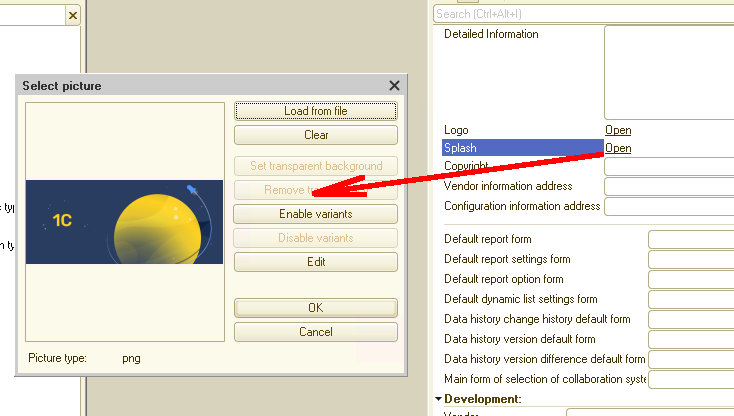
Likewise, an image can be loaded from a file (the image size should be 600 x 255) or created yourself in a graphics editor:
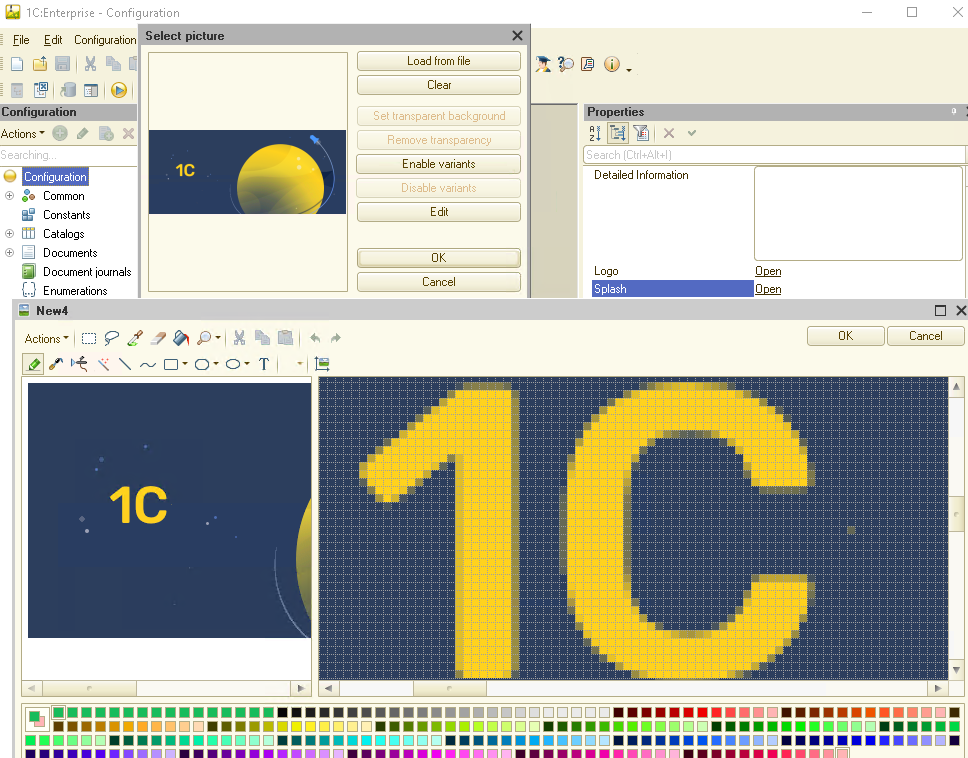
And accordingly, now the splash screen of your application looks like this:

So, we changed the program logo and splash screen, but that's not all. Let's move on.
Go back to the Designer and open the properties of our application. Now we are interested in the "Main section picture" property:
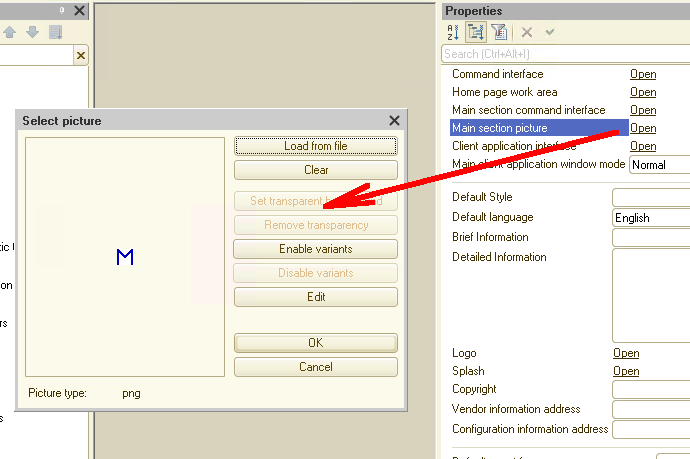
In this case, just as described above, we can either load an image from a file or create it ourselves in the built-in graphics editor.
The next step is to create a Subsystem and one Catalog. Then add this new Catalog to this Subsystem:
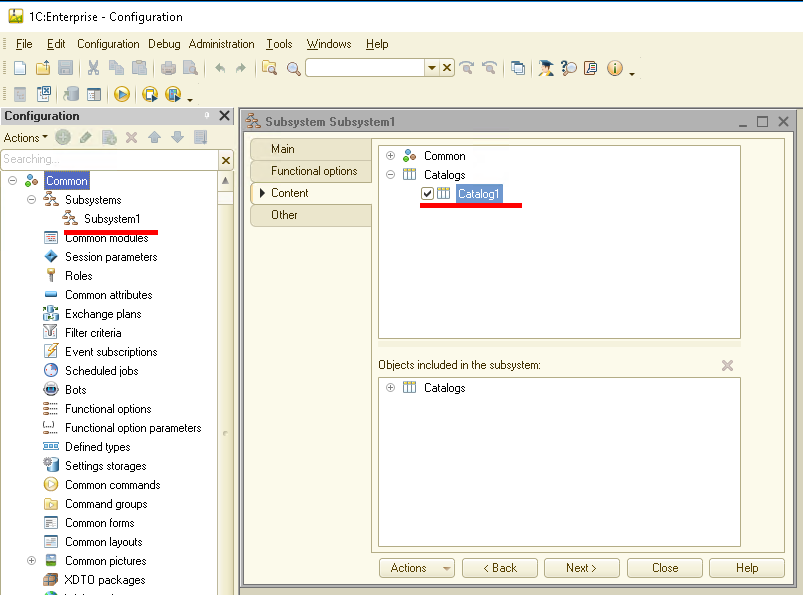
The Subsystem has the "Picture" property. By clicking on the button, we can select an image for the Subsystem both from the standard 1C image library ("Standard" tab) and from images that have already been imported into the application ("From configuration" tab). Please note that the "From configuration" tab contains the image we created earlier:
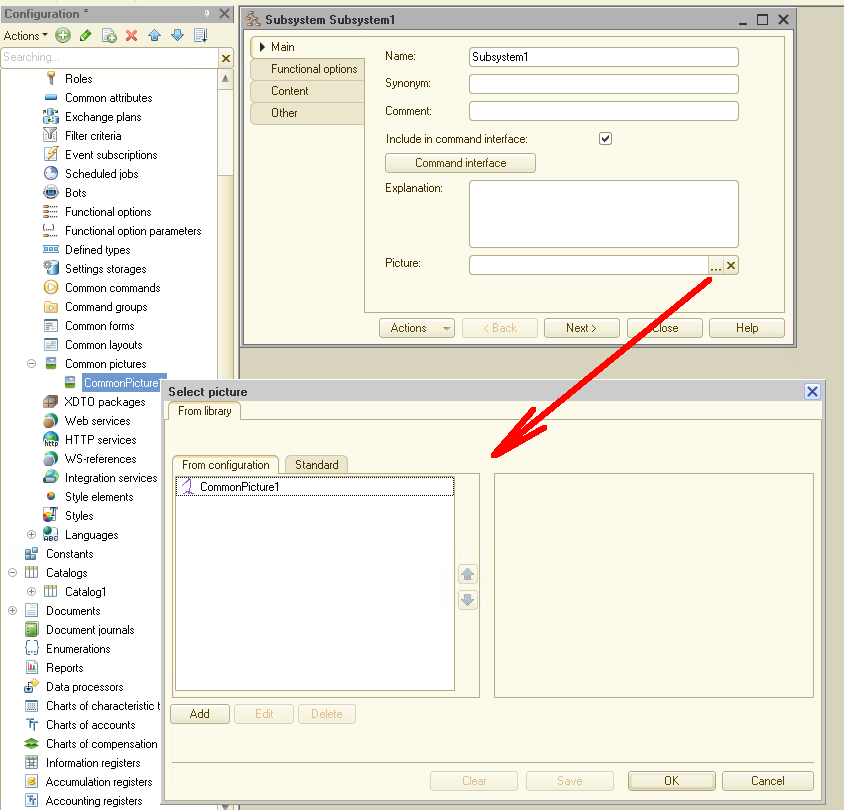
You can choose any suitable picture (for example, I chose "Paperclip" from the standard library), click OK and launch 1C in dialog mode, but do not forget to update the application in the Designer so that all the changes we have made are applied:
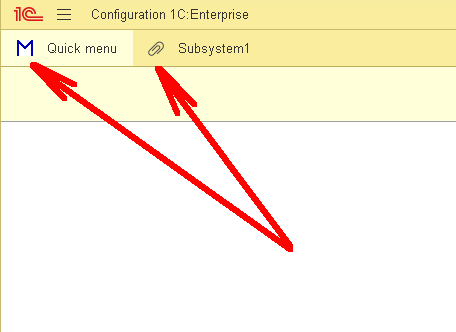
As you can see, the visual changes we made have been applied.
But these are all little things so far! What should we do if we want to change the yellow color of the application (by the way, this is the corporate color of 1C) to some other. For example, let's say we're writing an app for a company whose corporate color is pink. What should be done in this case?
To solve this problem, 1C has a special object - Styles. So let's add a new Style to our app and call it Pink:
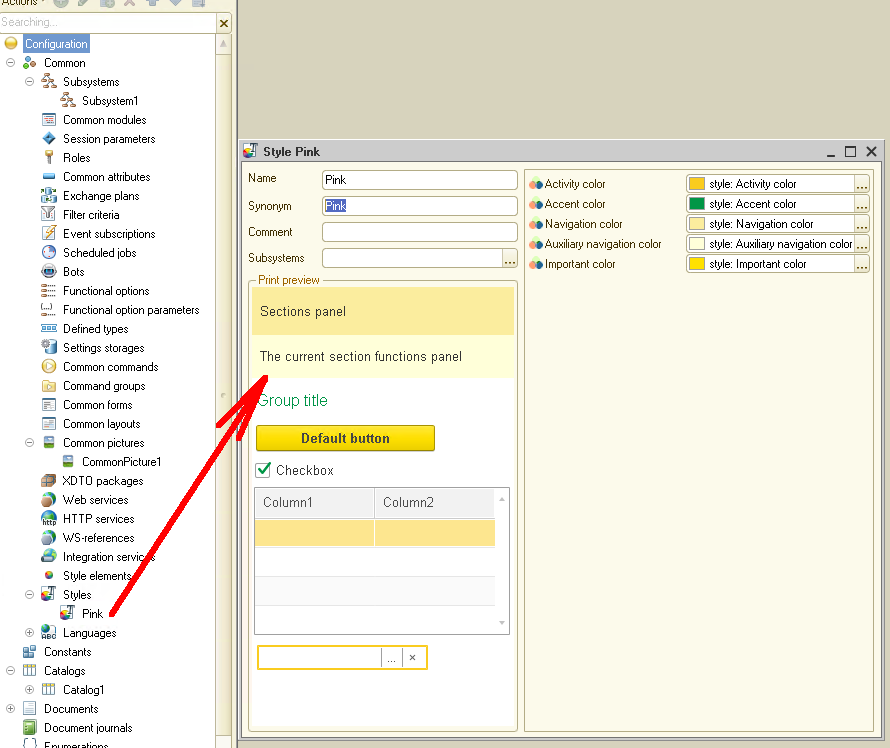
Using the Style object, you can override the five base colors of dialog forms:
"Activity color" applies to the following interface elements:
the frame of the current form element,
background of the current menu item,
background of the current row and table-cell;
"Accent color" applies to the following interface elements:
the group header text,
checkbox, switch and control strip mark,
indicator of the current form in the open panel;
"Navigation color" sets the background color of the section panel;
"Auxiliary navigation color" sets the background color of the current section's function bar;
"Important color" sets the default background color of the button.
Well, let's override the meaning of these colors. Do not forget that we need pink gamma:
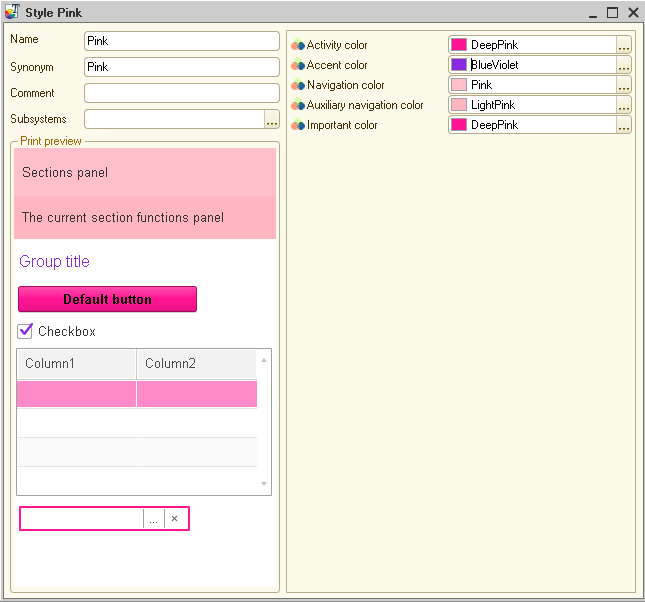
Please note that we are not choosing a color for the font. 1C independently determines the most optimal font color depending on the background color selected by the user.
For example, now we are encouraged to use dark letters that are clearly visible on a pink background. But if we choose a dark background color, 1C will immediately suggest using a light font:
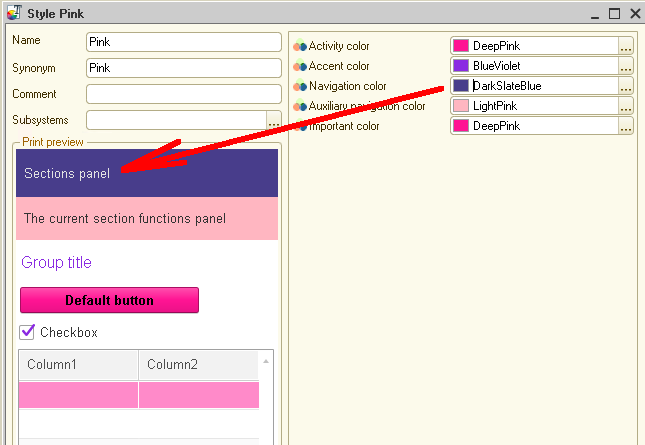
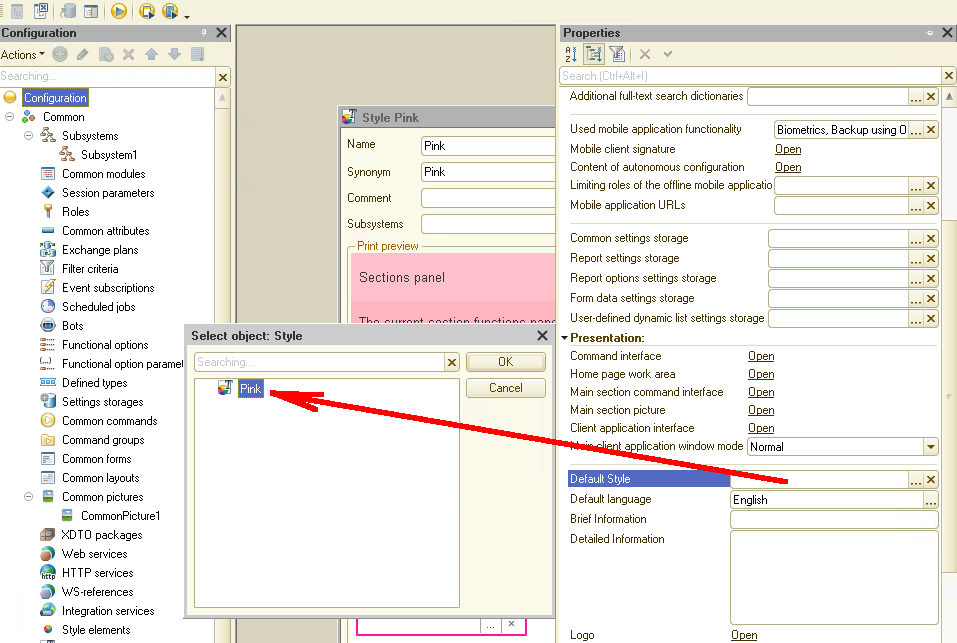
And we have one more step left. We need to set the value of the "Default Style" property and after that, we can launch our application:
Well - that's the result. Somewhat unusual - but it's not always possible to choose corporate colors that are pleasing to the eye :-)
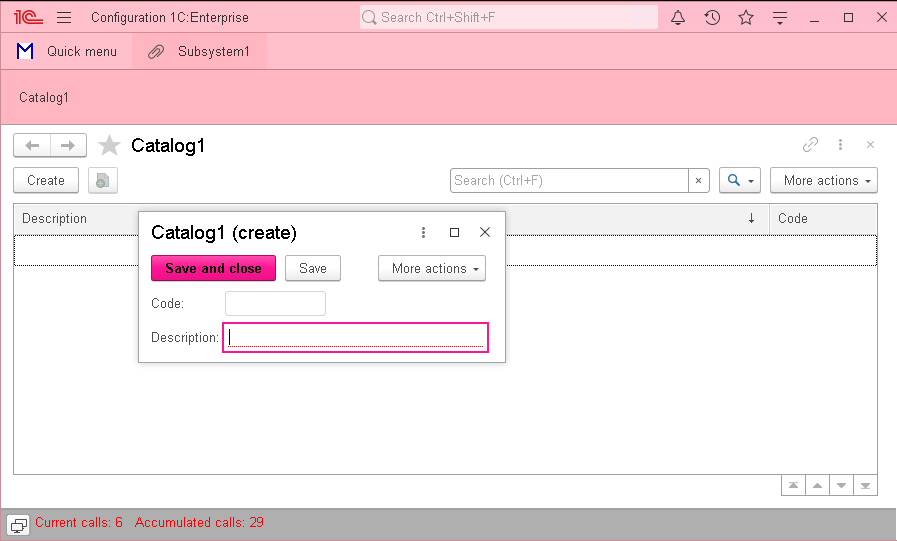
Everything that was said above was related to the desktop application, but in the same way, using the Style object, you can override the colors in the mobile application:
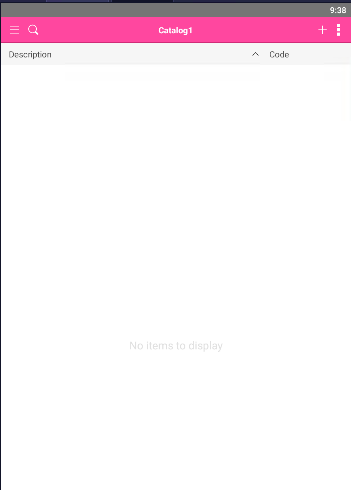
But for the mobile version of the application, we can set only two types of color: "Activity color" and "Accent color".
"Activity color" applies to the following interface elements:
form header background,
background of the current menu item,
background of the current row and table cell,
indicator,
desktop icons;
"Accent color" applies to the following interface elements:
the title text of the selected page,
checkbox, switch and control strip mark,
buttons background.
Besides, when working in the Android operating system "Accent Color" applies:
to the strip in the input field in edit mode,
stripes on the drum when selecting the date.
Like in "ordinary" desktop applications, 1C automatically adapts the text color to the background color (black on a light background, white text on a dark background).
It's time to summarize - in 1C applications, it is possible to customize the application's appearance. Of course, these possibilities are limited, and you cannot create a "designer" application in Andy Warhol's style on 1C. But let's not forget that the 1C platform is designed to create business applications, and for this, the capabilities existing in 1C are quite enough.
Stay tuned, we still have something to tell you.

