How to set up data exchange with a filter by company
1C:Subsystems Library 2.0 includes a demo exchange plan and rules that you can use to set up data exchange between two 1C:Subsystems Library infobases.
In this example, we will set up data exchange between 1C:Subsystems Library 2.0.1.16 Demo (the first infobase) and a 1C:Subsystems library 2.0.1.16 infobase that contains no data (the second infobase).
- In the blank 1C:Subsystems Library infobase, specify a user to be used for establishing connections between infobases during the exchanges. We recommend that you always separate administrative roles and exchange roles by assigning them to different users, but in this educational example we will have a single user. Assign the roles to the user as shown in fig. 1.
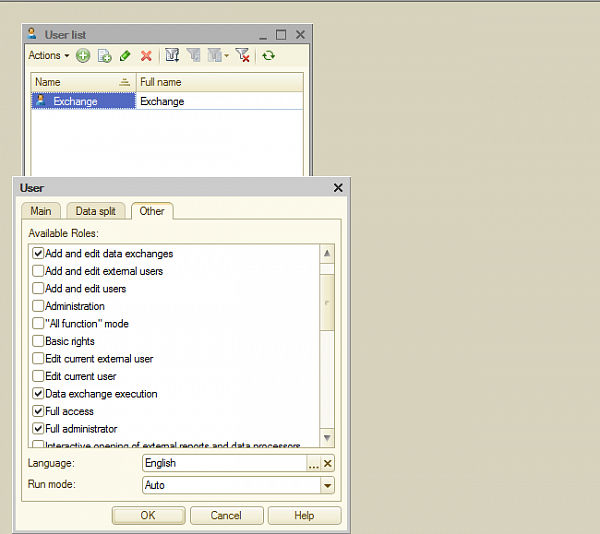
Figure 1
- When you set up data exchange with 1C:Subsystems Library, each application attempts to use its default infobase prefix. In our example, both infobases have identical default prefixes. It’s not a big problem, open the DataExchangeOverridable module in the blank infobase and specify any two-character long prefix except the standard "DM" in the DefaultInfoBasePrefix procedure, or specify an empty string as a prefix as shown in listing 1.
If the infobase is locked for editing, on the Configuration menu, point to Support, click Support Options, click Enable modification, and unlock the infobase for editing.
Function DefaultInfoBasePrefix() Export

   Return NStr("en = ''");

EndFunction
Listing 1
- Run the demo infobase in 1C:Enterprise mode. Let’s assume that the blank infobase must contain accounting data for a single company only. Create this company, in this example, its name is New company. To set up accounting by several companies, in the Settings section, in the Tools menu, click General Settings, and then select the Accounting by general companies checkbox. The _DemoExchangeWithSubsystemsLibrary exchange plan, which is included in 1C:Subsystems Library, contains registration rules only for documents located in the Payroll & HR section, so change a company in any of them to New company.
- The demo infobase already has a data exchange specified. Delete it to prevent any collision between it and the new exchange you are about to set. In the Settings section, click Demo exchange with subsystems library and mark the D2 node for deletion. You can use the Deletion of a marked objects data processor to delete it permanently.
- Your Dashboard contains the Data exchanges panel. If it does not, check out whether the Use data exchange checkbox is selected in General settings. In the Data exchanges panel, click Create and then click Create exchange with the Standard subsystems library. Click Create a new data exchange and then click Next. On the second page, specify the infobase to exchange with, the user that you created in the second infobase, and its password if you specified it earlier (see fig. 2).
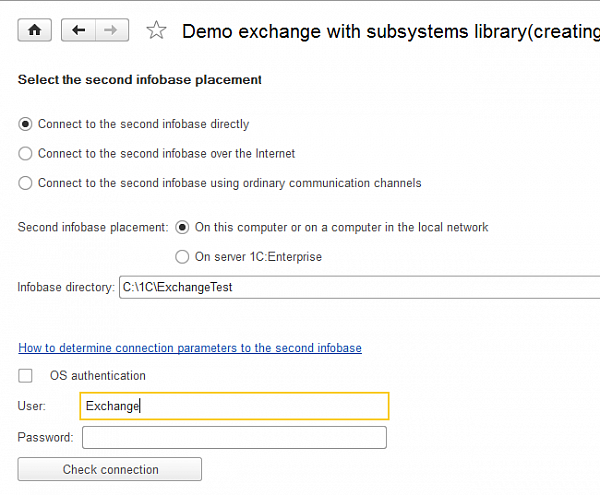
Figure 2
To have only documents of New company replicated to the second infobase, on the next page, specify a filter by this company. Also, specify the document export start date there (see fig. 3).
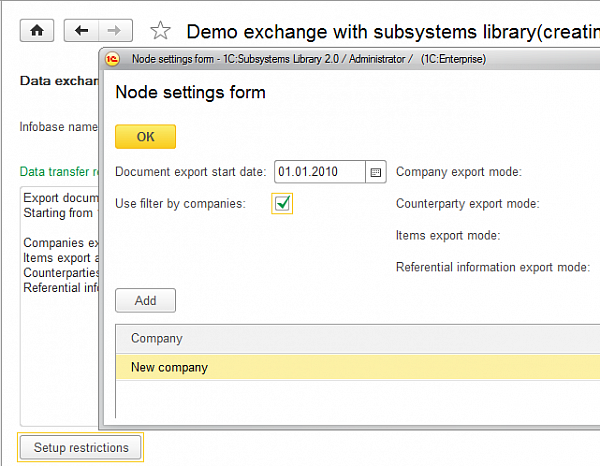
Figure 3
The next page contains the second infobase settings. If you left the default infobase prefix empty, specify it here and click Next to proceed to the summary page.
- Set the mapping between infobase objects. You can use automatic mapping (see fig. 4). Some objects, such as Users, will stay unmapped because they do not have counterparts in the second infobase.
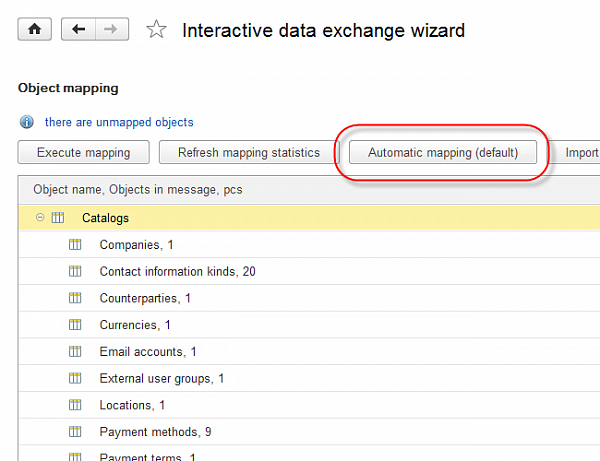
Figure 4
- Finally, the application will prompt you to set up the exchange schedule (see fig. 5).
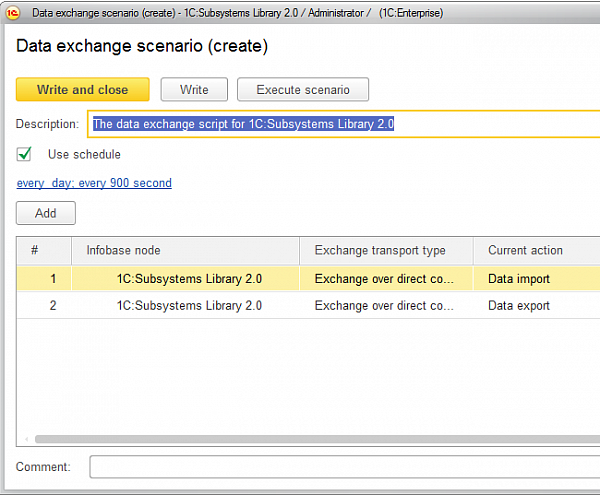
Figure 5
That’s all. Your infobases will exchange their data according to the exchange schedule.

Writen by


