In the previous article, we examined the basic configuration of the access rights system in 1C. Let's continue to study the system of access rights 1C and consider a more sophisticated version of user rights management.
Suppose that in one application, accounting is carried out for several organizations at once.
By the way, on the 1C platform, it's straightforward to implement such a solution.
So, in one application, the data of several organizations are stored, and different users each work with the data of their organization. At this stage, the question often arises - is it possible to configure the program so that users of different organizations can work only with the data of their company, but they can't see the data of another organization at all?
The answer to this question is Yes. It can be done using 1C as a development tool.
The mechanism that allows this to be implemented is called RLS - Record Level Security. RLS allows the developer to very finely differentiate user rights - users may not even be aware of the existence of other data in the system.
The RLS mechanism is an add-on to the basic user rights management system. That is, at first, the developer sets up basic rights: creates roles, distributes rights between roles and 1C objects. And at the second stage, more fine-tuning of rights can be performed, already using the RLS mechanism.
But this mechanism has several drawbacks:
-
Using RLS can cause a drop in system performance. This is due to the fact that when using RLS for each query to the SQL database, the 1C platform adds additional selection conditions.
-
RLS is a potent and flexible mechanism, but sometimes it can be challenging to configure.
1. In one program, invoices from different organizations are introduced. Moreover, the catalog of products is common to all firms.
A user of the first organization works only with documents of his company, while he does not see documents of the second organization at all. Similarly, a user of the second organization can work with documents of his company but does not have access to the documents of the first.
And at the same time, both organizations (and users of these organizations) use a common catalog with products.
2. We have a catalog of suppliers, and we don't want users of one organization to see suppliers of another company.
In this case, users of both firms use a common catalog of suppliers, but the data in this catalog is divided so that each user can only use "their" suppliers.
Naturally, in both cases, there must be a user with administrator rights who can use all the data at once.
This is a rather complicated scheme for managing user rights, but in 1C, all these cases can be easily implemented by tuning without resorting to programming.
Let's look at a few RLS configuration examples.
Create a new 1C configuration. Immediately add a role with full rights to this configuration:
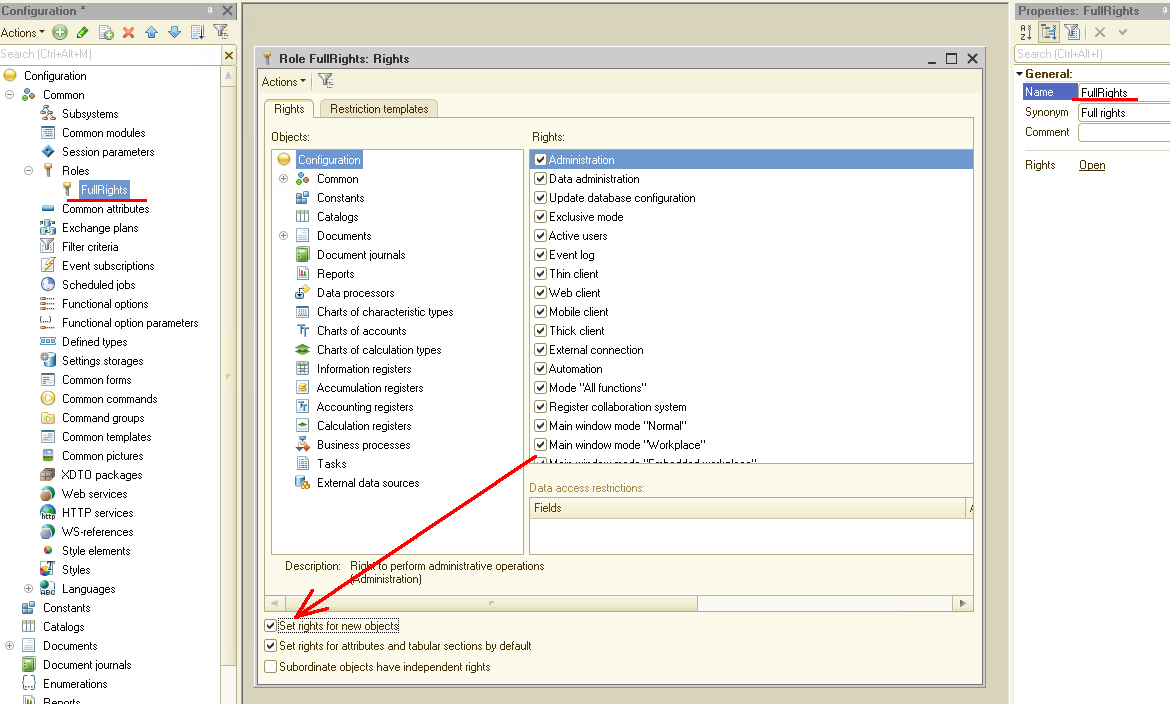
Remember to enable the "Set rights for new objects" flag for this role. This will allow when creating new 1C objects to immediately have access to them to the user with the installed role "FullRights".
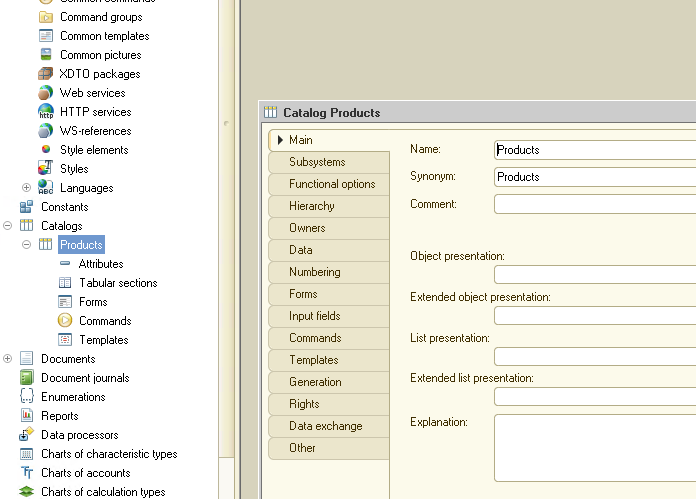
In the next step, create the catalog "Products". A simple catalog with no additional attributes:
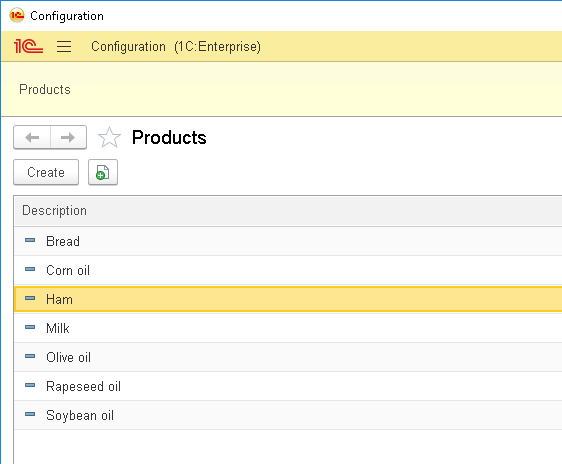
Now run 1C in interactive mode and fill out the catalog "Products" with several values:
Let's now create a role that will only see oils in the catalog "Products". To do this, go back to the Designer and create a new Role "OilManager" there:
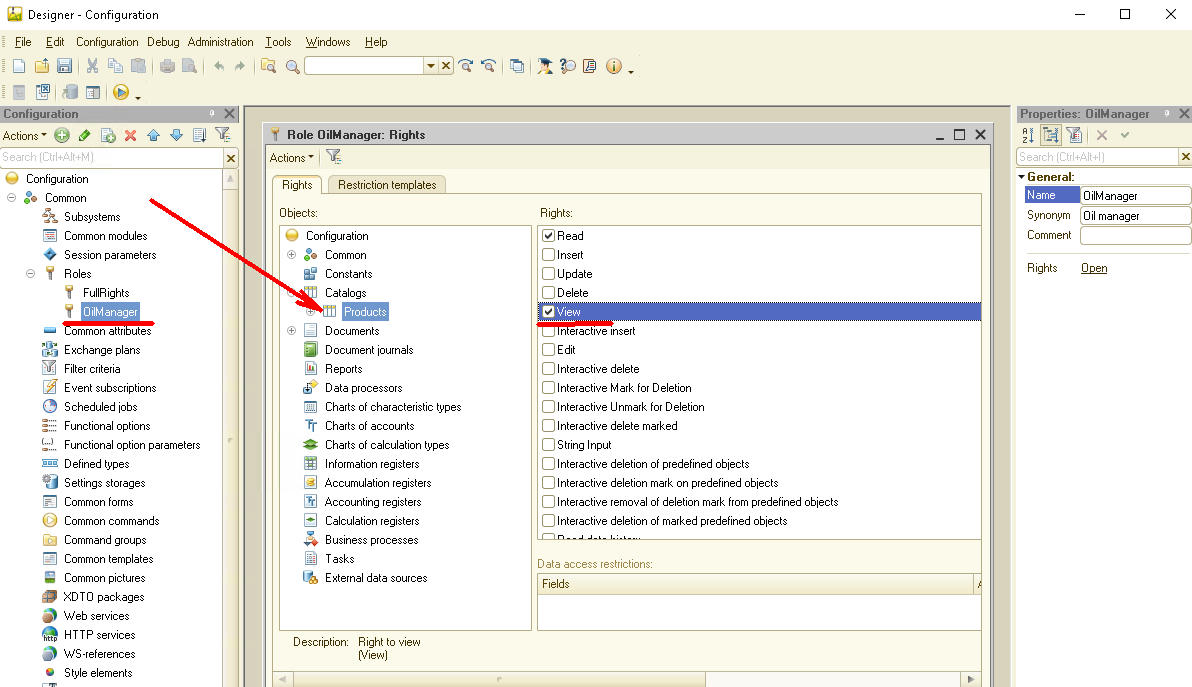
Now we have two roles: with full rights and with reading rights to the catalog "Products". But to continue further, we need to create users and assign each user an appropriate role.
So, we create the user "Administrator" and assign the role "Full Rights" to him. Then create the user "OilManager" and assign him the appropriate role:
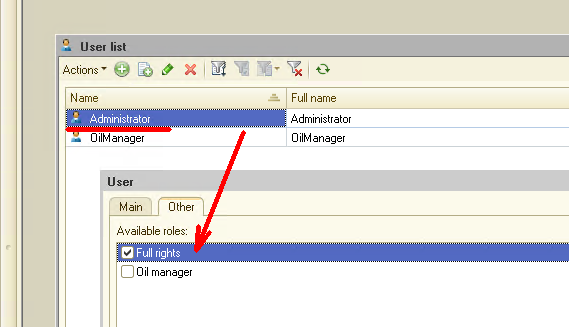
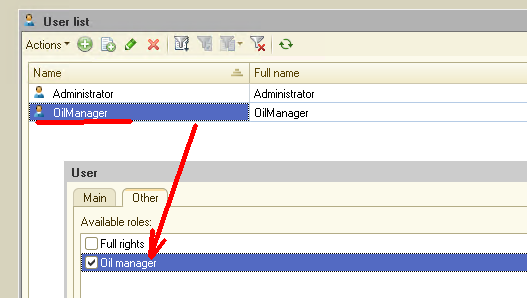
Let's now start 1C from the user "OilManager". We'll see that the catalog "Products" is fully accessible for this user, but the user can only view data, cannot change anything. Everything is fine, this is just what we need:
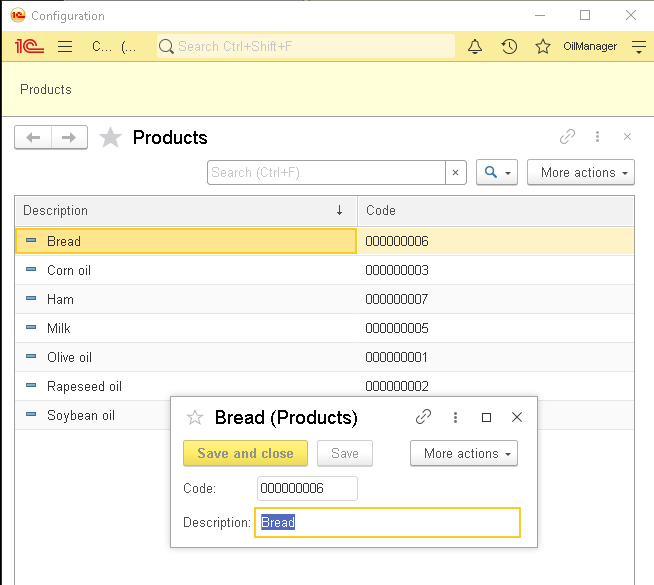
Well - it's time to move on to RLS settings. Let's make it possible for a user with the "OilManager" role to see only products whose name contains the word "Oil".
Let's go back to the Designer, open the "OilManager" role, select the "Products" directory in the list of objects, then select the "Read" right. Now in the lower right corner, pay attention to the panel "Data access restrictions".
It's in this panel that we'll set the access restriction, that is, configure RLS.
Enter the following text: "Products WHERE Products.Description LIKE"% oil% "":
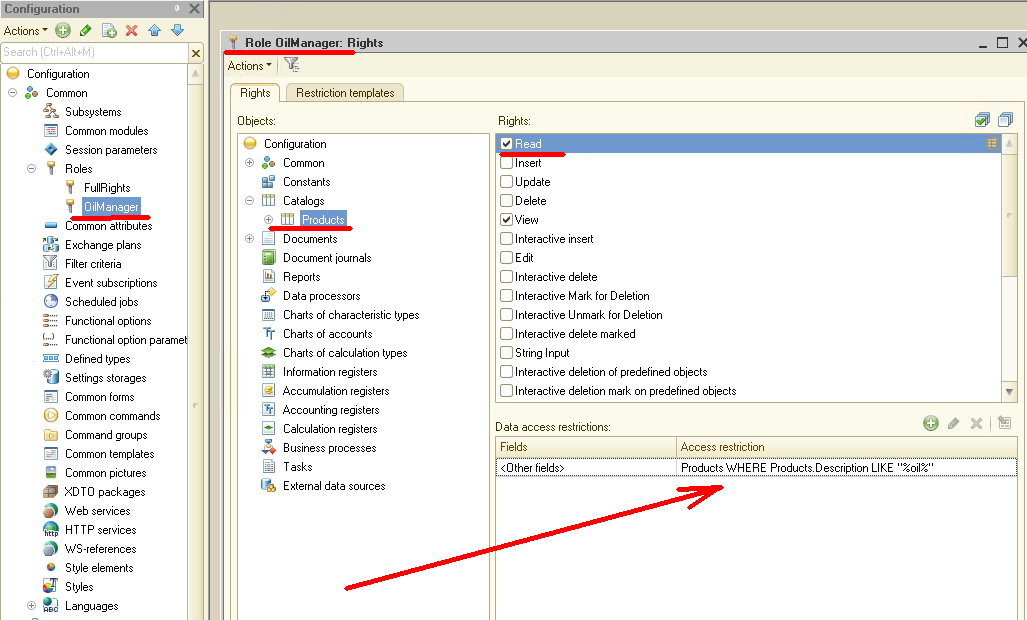
Let's see how it works right away! Launch 1C under the user "OilManager" and open the catalog "Products":
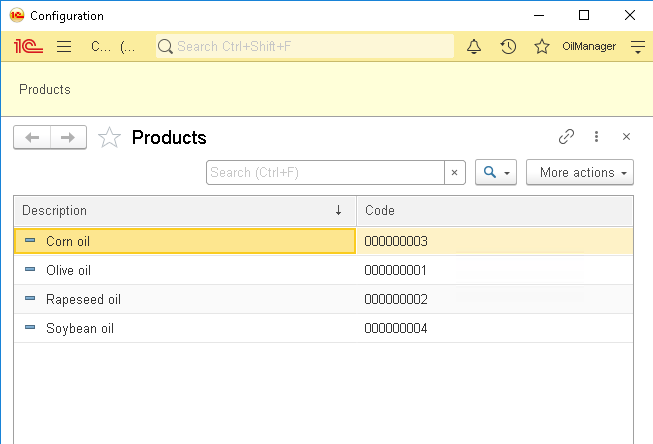
As you can see, the catalog displays only products that have the word "Oil" in the description. Let's go back to the Designer and understand how it works.
All RLS settings are set in the "Data access restrictions" panel. The string we wrote earlier is just a filter for querying the data.
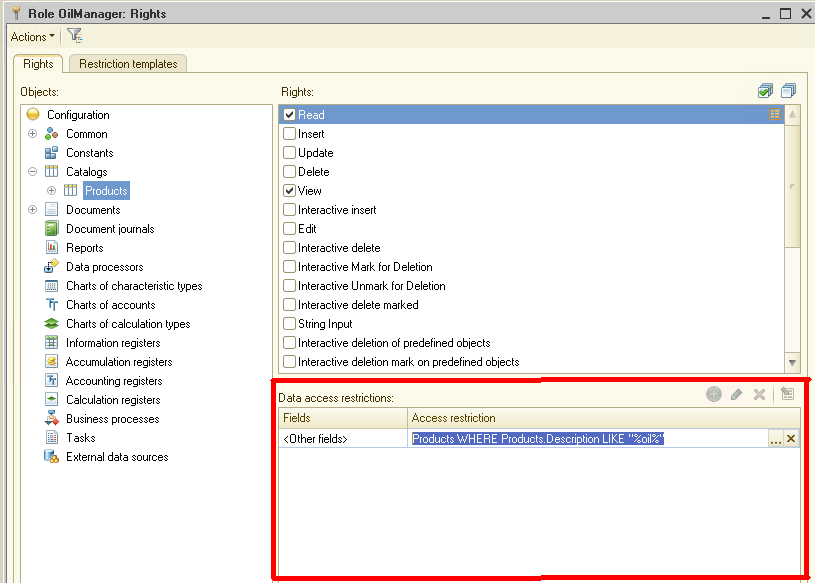
If the condition described by this filter is actual (True), then the data can be read. If the condition is not satisfied (False), then in this case, the data is not available to the user.
For example, in our case, the user can access all the elements of the catalog "Products", which have the word Oil in the description.
Since the RLS condition is part of the data request, you can form this condition using the query builder:
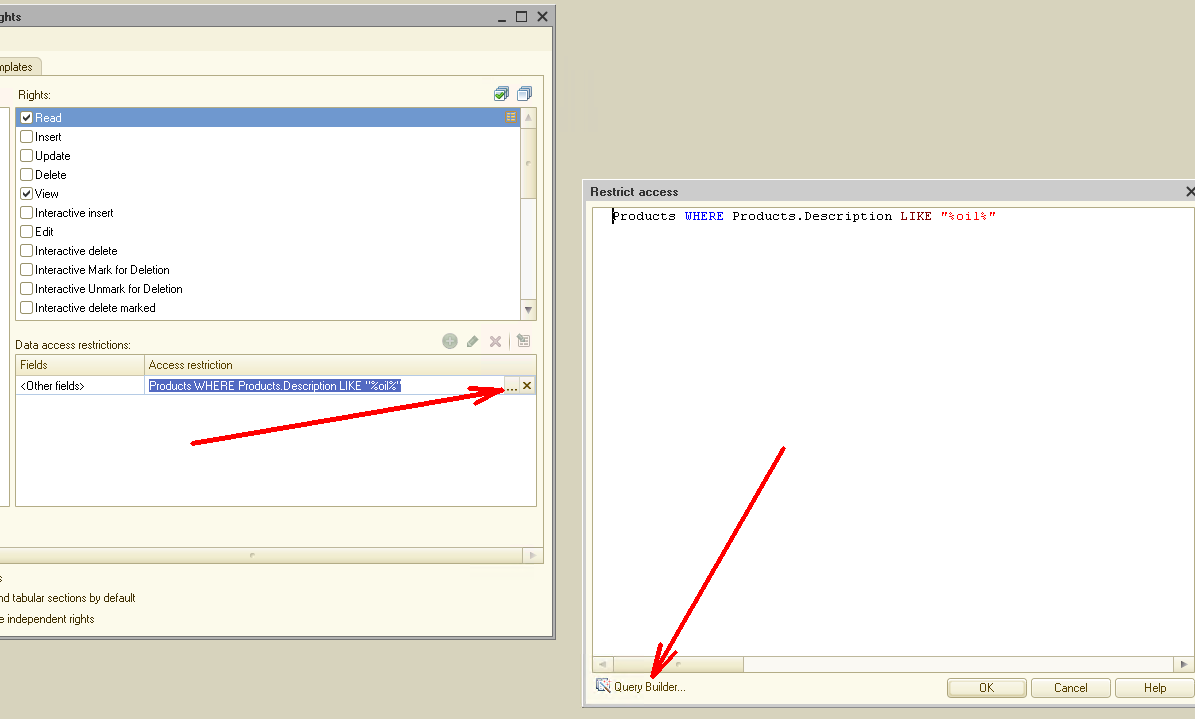
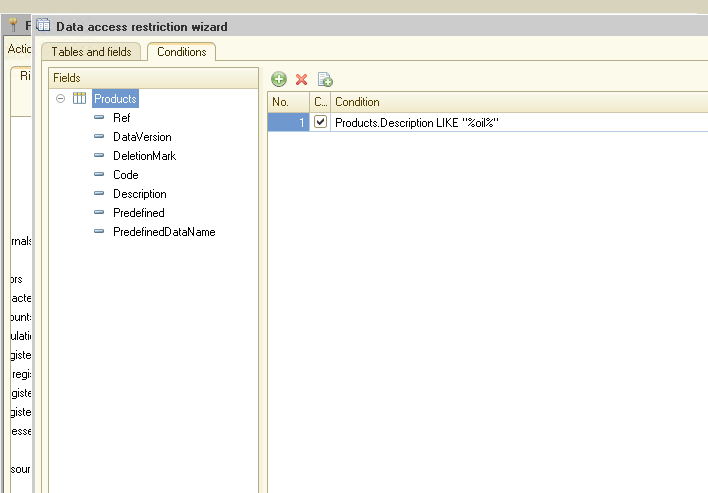
This query builder is very similar to the standard 1C query builder and uses the same syntax. Thus, using it, you can create fairly complex queries and conditions.
Good, but we saw a straightforward example. In real work, it's unlikely that anyone will limit the rights of users in this way. Let's look at a case more complicated.
Create a new catalog, "Counterparties". Add two attributes of type Boolean to this directory: "Customer" and "Supplier":
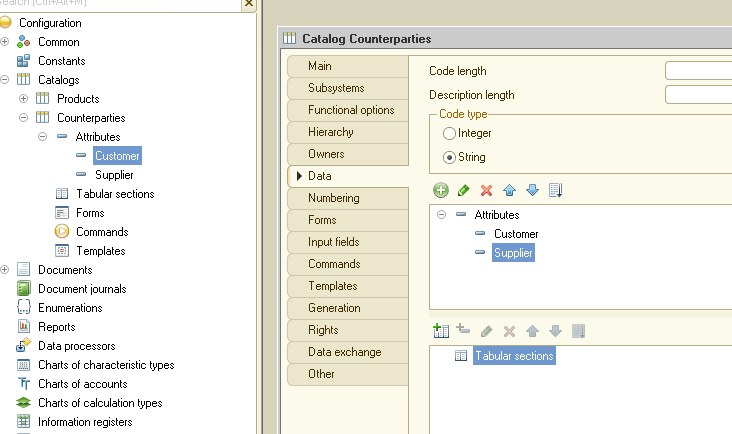
All our counterparties will be stored in this catalog: both buyers and suppliers. But we need to share this data for users so that sales managers only see customers, and purchasing managers only see suppliers.
So, we create two new roles in 1C: "SalesManager" and "PurchasingManager":
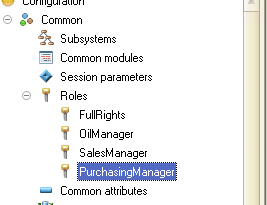
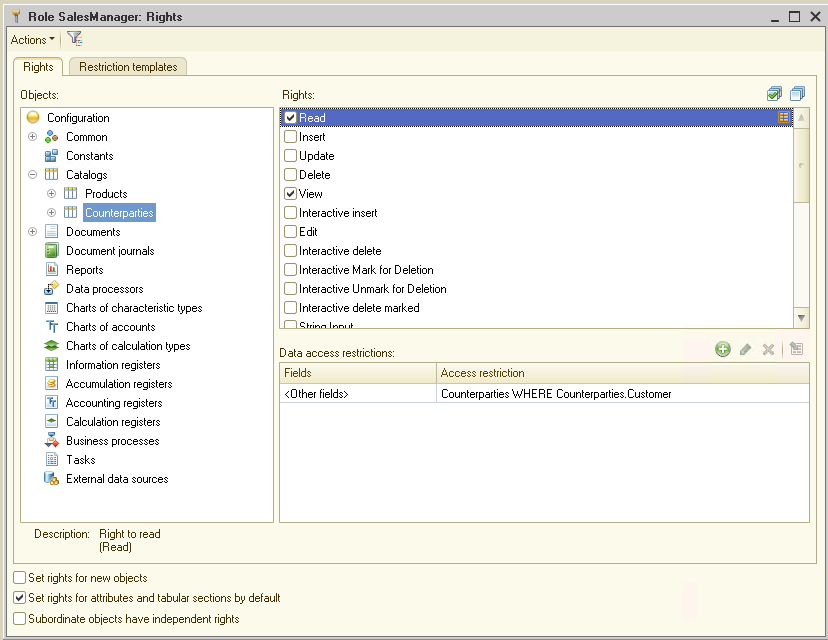
The "SalesManager" role is configured as follows:
And here are the settings for the "PurchasingManager" role:
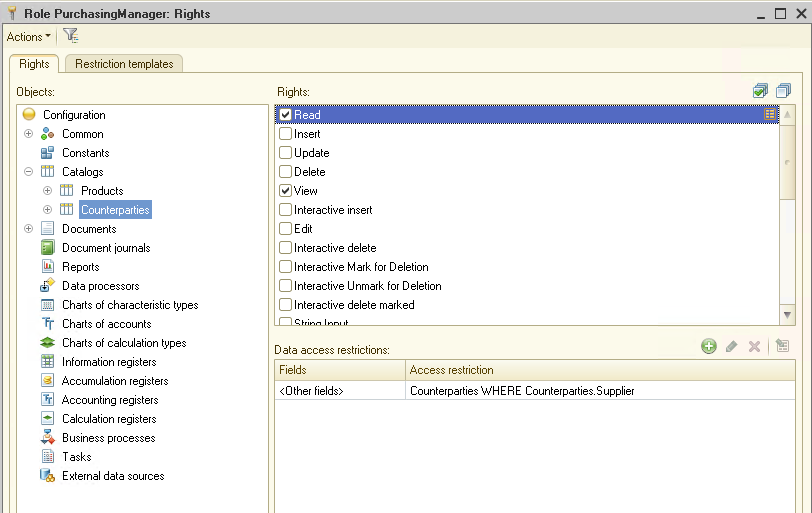
As you can see from the settings, if the counterparty has the "Customer" attribute, only the user with the "SalesManager" role will see it. If the counterparty has the "Supplier" property enabled, then only the user with the "PurchasingManager" role will see it. If the counterparty has both properties enabled, then both users will see it.
Let's check how it works.
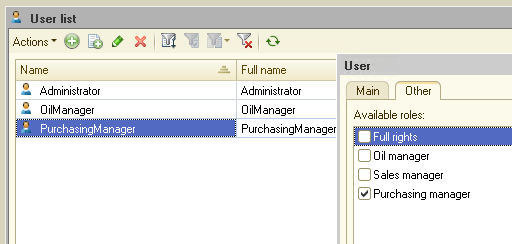
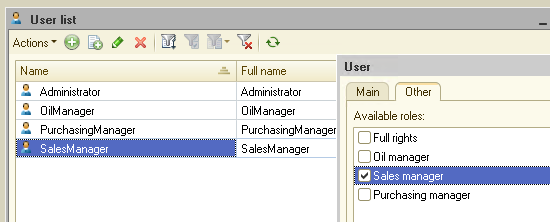
Create two more users, "SalesManager" and "PurchasingManager", and assign them the appropriate roles:
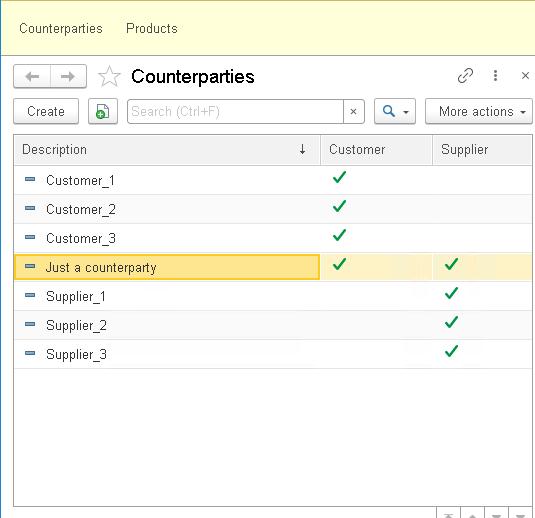
Pre-launch 1C with Administrator rights and fill out the catalog "Counterparties":
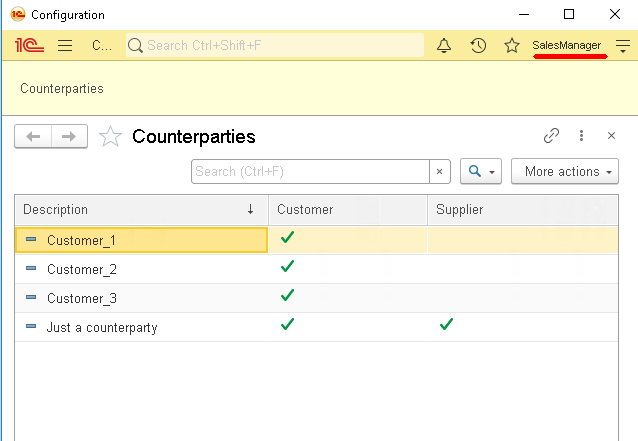
Now run 1C under the user "SalesManager" and open the catalog "Counterparties":
Now run 1C under the user "PurchasingManager":
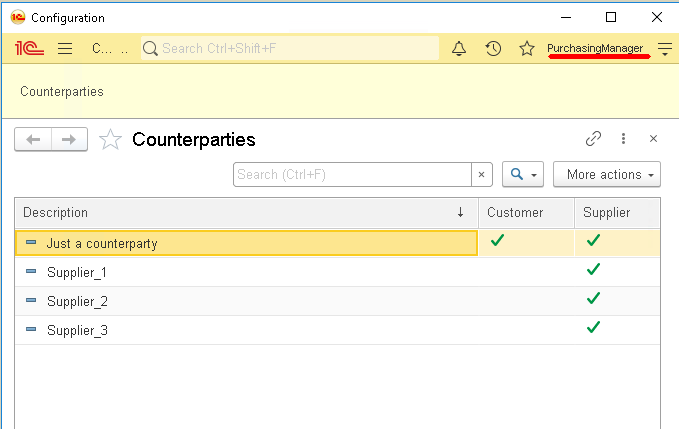
As you can see, each user only sees "their" data. Thus, we performed the separation of data only settings, absolutely without resorting to the creation of program code.
RLS can be applied to all major 1C objects: catalogs, documents, registers. Also, using RLS, you can configure access to these objects not only for reading but also for adding, changing, and deleting.
Let's go back to our catalog "Products" and create a new role that will manage the oils in this catalog.
So, create the "SuperOilManager" role. Set up this role as follows:
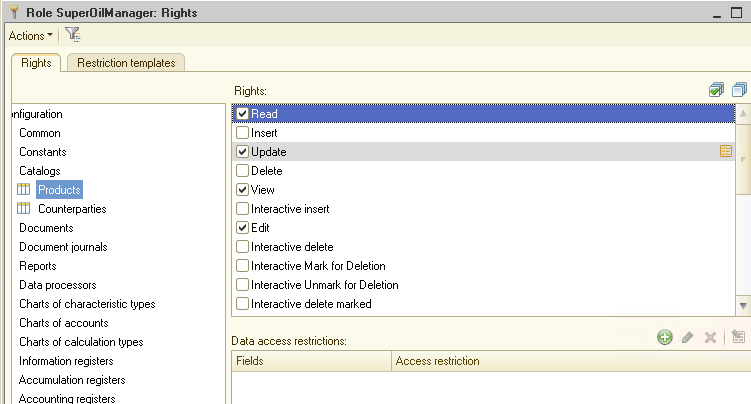
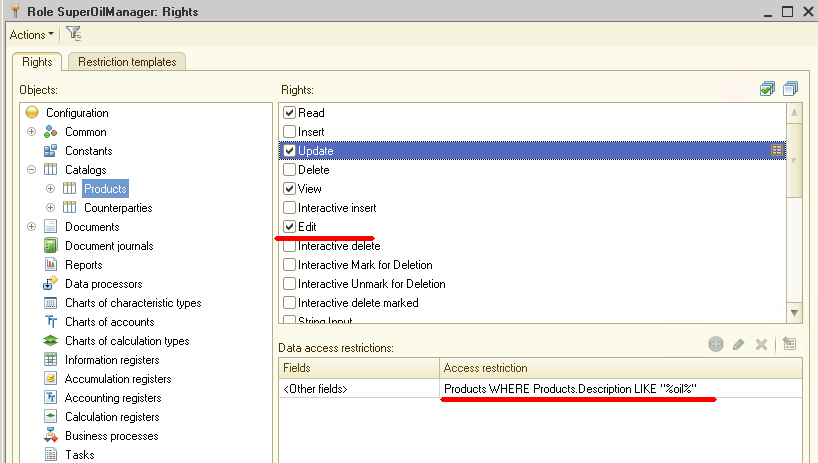
These settings allow the user with the "SuperOilManager" role to see all the data from the "Products" catalog, but he can change only those products whose name contains the word "Oil".
Also, note that we included both the "Update" right in the role (and for this right, we specified the RLS setting) and the "Edit" right. The inclusion of the "Edit" right will allow the user to edit the catalog, and the "Update" right will be available only for products with specific names.
Let's check how it works.
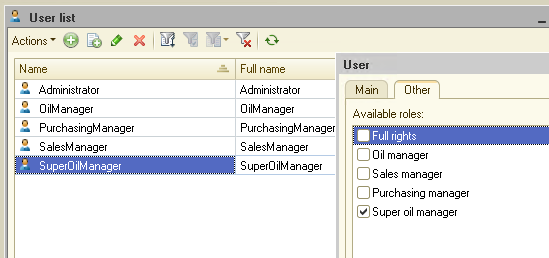
First, create another user "SuperOilManager" and assign him the appropriate role:
Then run 1C under this user and open the "Products" catalog:
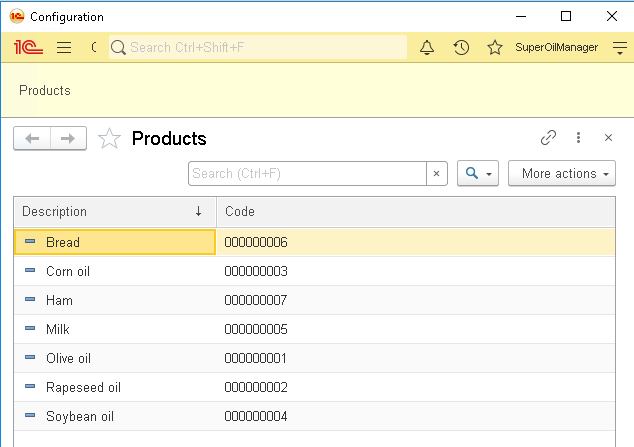
As you can see, the data of the entire catalog is available to the user. Let's try now to change several different products.
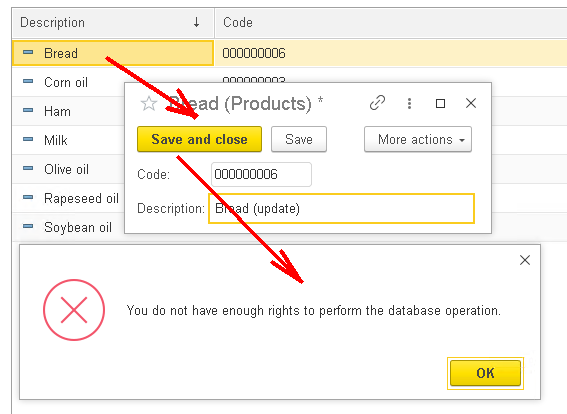
If we edited an element that does not contain the word "Oil" in the description, then at the time of saving, the 1C system will display a message stating that the user does not have enough rights to perform this operation.
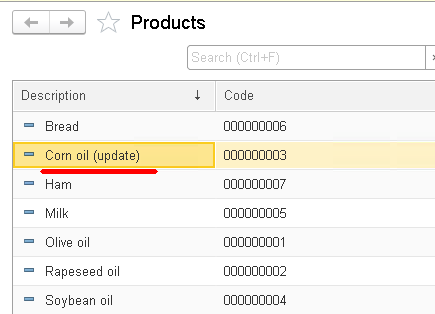
But when we save the element, the description of which contains the word "Oil" (this is the RLS triggering condition), the data is saved and no errors occur.
As you can see, the customization made by us works great!
Now let's summarize: using the RLS system, the developer has the opportunity to very flexibly manage user rights. You can share data between several categories of users by any criterion.
The flip side of this flexibility is the sophisticated configuration of RLS, and there may also be a drop in performance on large data volumes.
What if the developer needs to share data between users, but at the same time, he is not ready to put up with the loss of system performance?
In 1C there is another excellent mechanism for data sharing - "Data separation". This mechanism allows a transparent sharing of data between users without loss of performance. Also, the "Data separation" mechanism is used when starting 1C in the cloud - 1C: Fresh.
In the next part, we'll consider how to build a program on the 1C platform using the "Data separation" technology.
You can download this example for your own application.
If you have any questions about this article, you can always get answers on our forum: https://1c-dn.com/forum/
Stay with us!


