Using MS IIS as a front-end server for 1cfresh
Preface
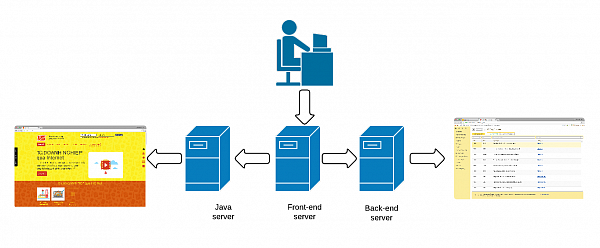
1cfresh solution divides its functionality between two main service points:
• Java server: hosts 1cfresh WWW site and conference
• Backend server: WEB service hosting 1C:Enterprise infobases.
To provide users with a single entry point, 1cfresh uses front-end server - middleware redirecting users' requests depending on their destination.
1cfresh uses nginx running on the Linux server as a front-end. Deploying 1cfresh in 1-V System (Viet Nam) we decided to simplify the infrastructure going without the Linux server and deploying everything on a single Windows server. Nginx has a Windows version but it turns out that it doesn't support SSL which is a deal-breaker for us (we need OpenID to allow transparent login to all resources). At this point, we decided to try IIS as a front end server. Running ahead of the story, this attempt wasn't entirely successful so far (we are still having some issues), but we found out few interesting details on using IIS in this role, and want to share them with you.
Adding front-end entry point
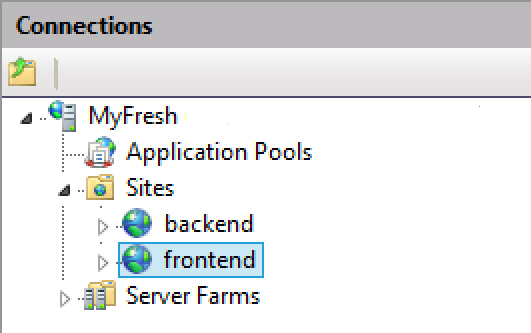
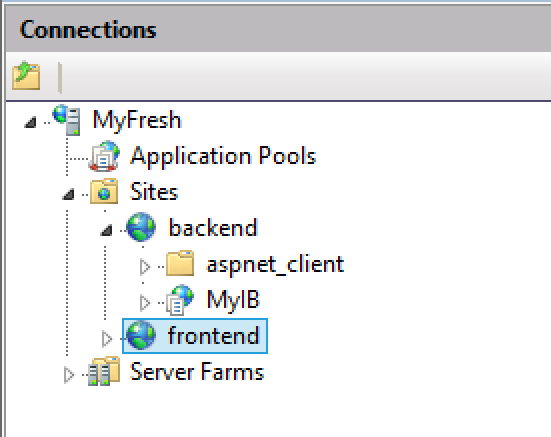
We will use IIS to work as a front-end server and as a host for 1C:Enterprise infobases at the same time. To separate these two roles (and their settings) we need to create two different sites: "front-end" and "backend" correspondingly.
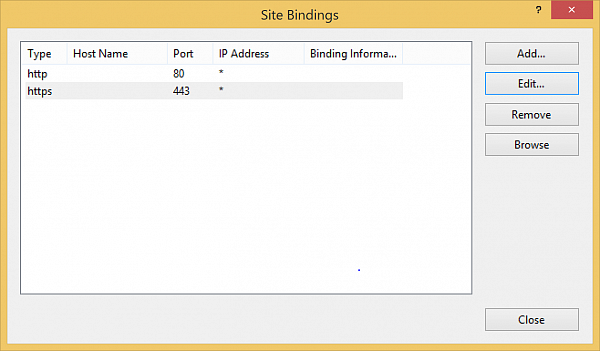
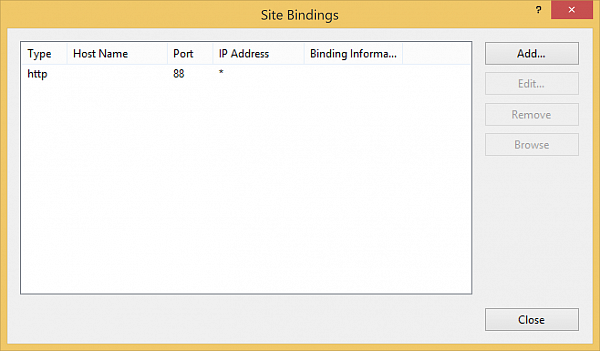
All incoming traffic has to go to front-end, meaning that it needs to listen to port 80. Editing the site bindings:
Backend site bindings should be changed to another port (port 88 in our case). Editing the site bindings:
Enabling SSL
1cfresh service is to store sensitive users' information, so we need all users to work by SSL only. First of all, we need a valid SSL certificate, issued by any SSL certificate provider (like VeriSign). After you get the certificate you need to import it to the "Server Certificates" of your IIS. Then you need to add one more binding to the front-end site, selecting https protocol, 443 port and the certificate you have obtained.
Redirecting to HTTPS
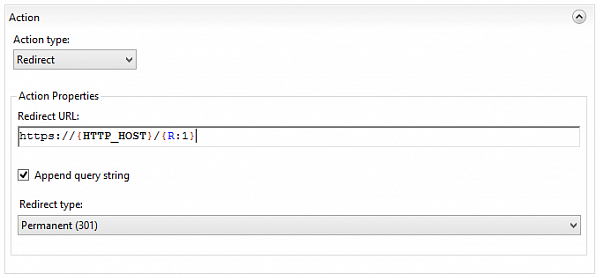
We don't want any requests to be transferred through insecure channels so we cannot allow HTTP traffic. On the other hand we don't want users to get "SSL required" error message when they are trying to connect to the site using HTTP instead of HTTPS. Instead we want them to be automatically redirected to HTTPS. To get this behaviour we need to do the following:
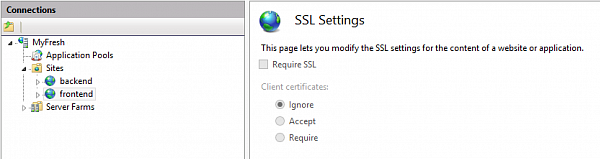
Uncheck "Require SSL" checkbox in SSL Settings of front-end site:
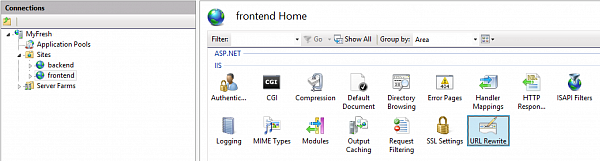
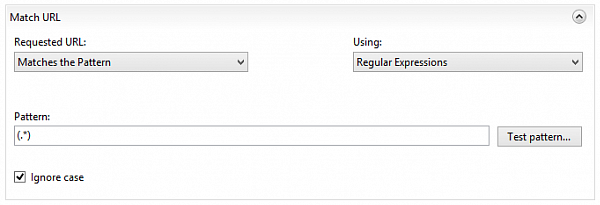
Then we need to open "URL Rewrite" tool for front-end site. Please note, that URL rewrite rules can be declared on different levels of IIS tree structure and the effect of the rule depends on the node it belongs to. You should always keep it in mind in order to get working rules. For the current task (HTTP to HTTS redirection) we need to add a rule to the front-end site.

and define a rule, redirecting all the traffic
(except HTTPS)
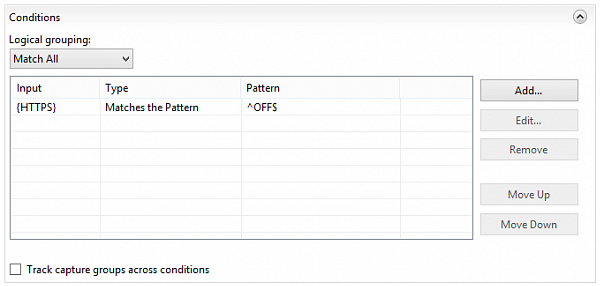
to HTTPS
Redirecting to working 1C:Enterprise infobases
All working 1C:Enterprise infobases have to be published on the backend site:
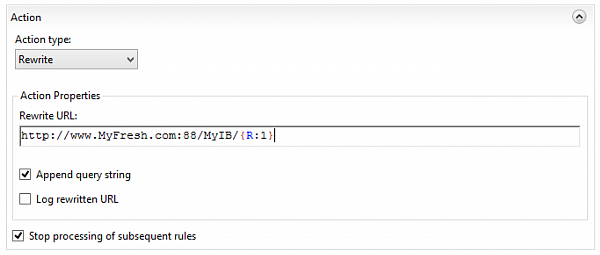
To give users access to these infobases, you need to redirect the corresponding traffic to backend by adding one more URL Rewrite rule for each infobase. These rules are also being added to the front-end site. Each rule has to intercept all requests containing the name of your published infobase

and rewrite it to the URL of this infobase on the backend server
Enabling OpenID
OpenID will allow avoiding repetitive input of user name and login when switching from one part of the service to another. Ideally, the user should input the name and the password once and then browse the service transparently without even knowing that there are boundaries between its different parts. According to the 1cfresh manual, you should publish a separate instance of Service Manager (1C infobase managing the service) to serve as an OpenID provider.
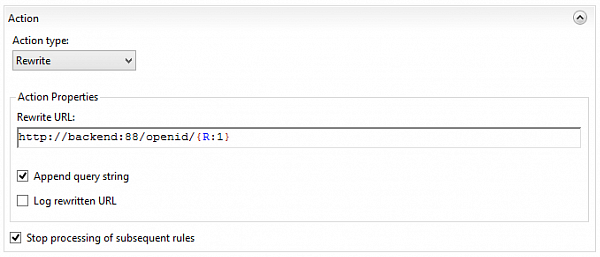
After publishing the infobase (let's name it "openid") you need to add another URL rewrite rule to frontend site. This new rule has to redirect any queries containing "openid"

to backend publication of the OpenID provider
After that, you can download the oid2op file (OpenID provider description) using the link: which shows that the providers started working. The problem is that for OpenID to work properly the file has to contain URI tag exactly the same as the link address:
<URI>https://myfresh.com/openid/e1cib/oid2op</URI> |
Instead you will get the following URI:
<URI>http://backend:88/openid/e1cib/oid2op</URI> |
To fix the issue you need to add URL rewrite rule to openid publication itself. This rule won't redirect any requests. Instead, it will set a few server variables which will correct the URI in the oid2op file. First of all, you need to declare the variables. To do so select "openid" publication in the IIS tree and select "URL rewrite" tool. Then select "View server variables" link in the right part of the window:
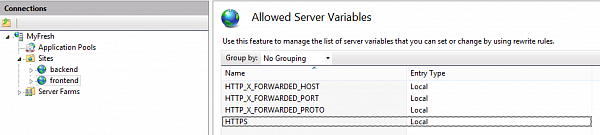
Then add a new URL rewrite rule which will basically rewrite any URL
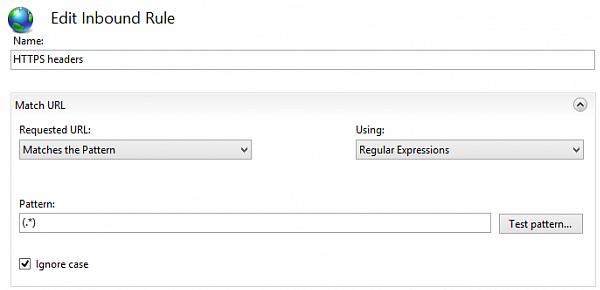
to itself (doesn't change anything)
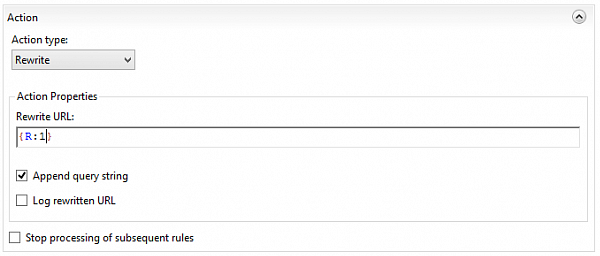
but reassign server variables
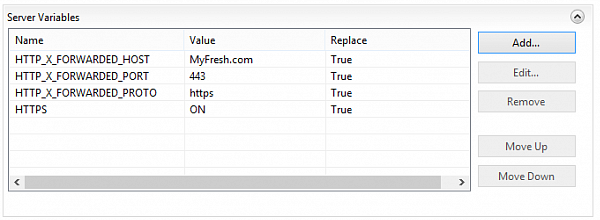
After this OpenID starts working allowing users to enter some infobases (unfortunately not all of them) without login, so we are continuing to work on this issue.
Stay tuned...

Writen by


