Working with Excel from 1C

Or another example: we need to upload data to an Excel file, for example, to generate a new price list.
In all these cases, we are faced with the process of interaction between the 1C platform and Excel.
In general, at present, the 1C platform and its language provide several different ways to work with data that are in Excel files. In this article, we will try to consider some of them.
Perhaps the most ancient way of working with Excel from 1C is using OLE. Well, then let's show the implementation of this method of work first.
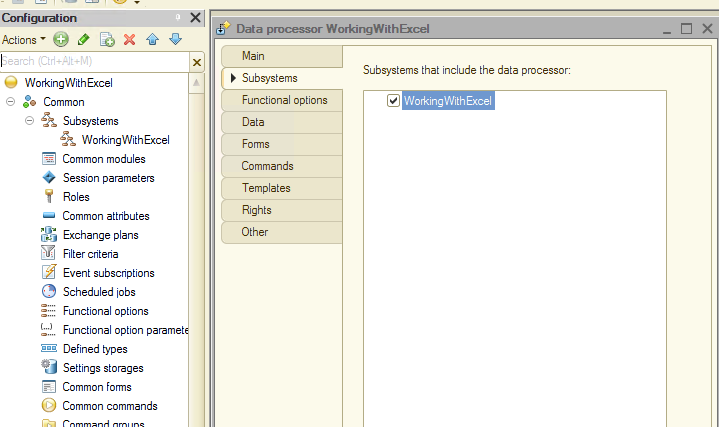
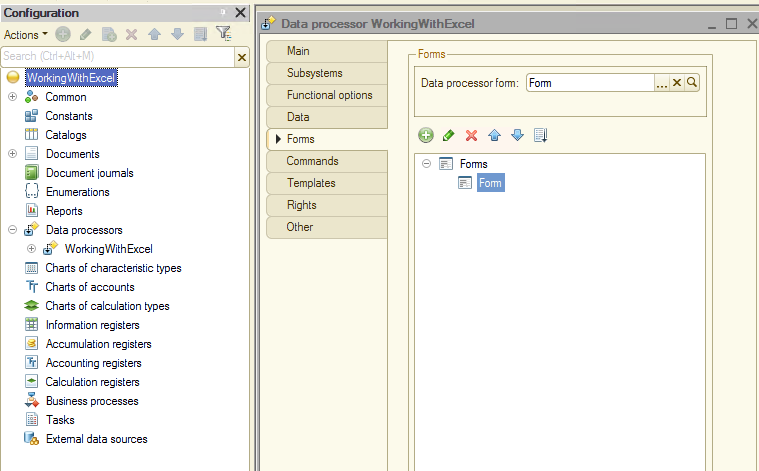
As usual, let's create a new configuration (let's call it "WorkingWithExcel"), and create a subsystem with the same name. Then add a data processor to it and add this processor to a new subsystem:
After that create a new form for the data processor and put the "stringFileName" attribute on this form:
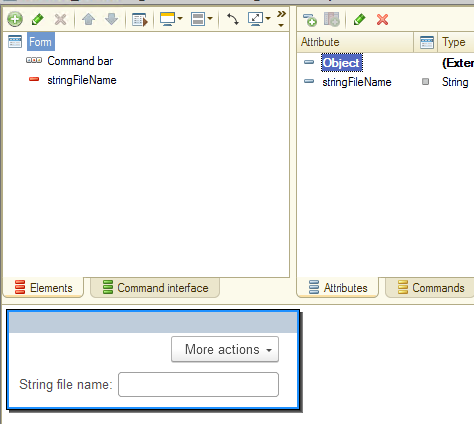
This attribute will store the full path to our Excel file.
Then add the command “cmdWorkingWithOLE” to the form

and create the following handler for this command:
|
&AtClient Procedure cmdWorkingWithOLE(Command)
Try Excel = New COMObject("Excel.Application"); Excel.DisplayAlerts = 0; Excel.Visible = 0; Except Message(ErrorDescription()); Return; EndTry;
excelWorkBook = Excel.Workbooks.Open(stringFileName); countSheets = excelWorkBook.Sheets.Count;
// Looping through sheets For numberSheet = 1 To countSheets Do
sheet = excelWorkBook.Sheets(numberSheet);
countRows = sheet.Cells(1, 1).SpecialCells(11).Row; countColumns = sheet.Cells(1, 1).SpecialCells(11).Column;
// Looping through rows For numberRow = 1 To countRows Do // Looping through columns For numberColumn = 1 To countColumns Do
someValue = sheet.Cells(numberRow, numberColumn).Value; // some actions //... //... EndDo; EndDo; EndDo;
Excel.Workbooks.Close(); Excel.Application.Quit();
EndProcedure
|
As you can see, the source code is not complicated. First, we try to get an Excel COM object, and then we work with it. If any of you have worked with Visual Basic, then they will probably see a lot in common with this code.
Important note:
When using this method, remember to close the Excel workbook and the application itself. Otherwise, it will remain open.
Ok, we were able to read the data from the Excel file, but they still need to be processed ...
For example, suppose we need to download a list of products from a file and then create these products in our Products catalog. And as you must remember, we can only do this (create a new catalog item) on the server.
Thus, the following task immediately arises before us: read the file on the client, but process this file already on the server.
One of the simplest options for implementing this task is as follows:
|
&AtClient Procedure cmdProcessingOnServerOLE(Command)
File = New File(stringFileName);
If Not File.Exist() Then Return; EndIf;
binaryData = New BinaryData(stringFileName);
cmdProcessingOnServerOLEAtServer(binaryData, File.Extension);
EndProcedure
&AtServer Procedure cmdProcessingOnServerOLEAtServer(binaryData, Extension)
fileExcellAtServer = GetTempFileName(Extension); binaryData.Write(fileExcellAtServer);
Try Excel = New COMObject("Excel.Application"); Excel.DisplayAlerts = 0; Excel.Visible = 0; Except Return; EndTry;
// Working with Excel as usual... // //
Excel.Workbooks.Close(); Excel.Application.Quit();
EndProcedure |
The principle of operation of this code is very simple: we read data from an Excel file in the form of binary data. To do this, use a binary data constructor based on a file:
|
binaryData = New BinaryData(stringFileName); |
Then we pass this binary data to a procedure that runs on the server. After that, the binary data is saved to a temporary file, and then we are already processing this temporary file.
As you can see, the first described method of working with Excel files is quite simple. But of course, it also has its drawbacks, and there are many of them.
The first drawback is that Excel must be installed on the server. This is not always possible.
The second drawback follows from the first - this method will only work on a Windows server. (As for me, this is generally the main drawback).
Also, the method of working through COM is rather slow, if the Excel file is very large, processing of such a file can take a long time.
All these shortcomings have led to the fact that such a method of working from 1C with Excel files is difficult to recommend for use, but for sure a situation may arise when a developer wants to use this method. Therefore, I decided to start with this particular way of working.
Well, let's take a look at the following method of working with Excel.
There is one interesting class in the 1C platform - "External data sources". And my next example of working with Excel will use this object.
First, let's talk about the advantages of this method.
Well, firstly, in this case, we do not need to install Excel on the server.
Second, using this method allows the developer to treat the Excel file as a database. That is, we can use the query language to extract the data we need right from the file. This can greatly simplify the task.
And of course, there is a drawback. When using this method, you will have to make changes to your 1C application to add a new object.
Ok, for our experiments, let's create a test Excel file:

Now let's try to connect to this file through an external data source and select only those products that have more than 10 names.
So go ahead!
Let's add an external data source to our application:

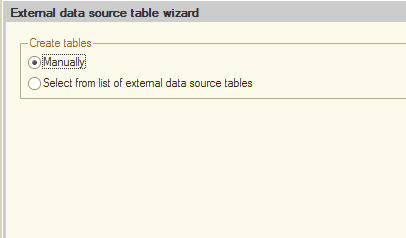
Then go to the "Data" tab and add a new table "Table1". A form will open where you can choose two ways to describe the structure of this table. I recommend doing it manually.
It is to this table that we will refer to in the process of work.

But before that, we need to create fields for this table. Open the table "Table1", immediately go to the "Data" tab and fill in all the required fields:

First, we specify the name of the sheet in Excel and add $ at the end. In our example, this is "Sheet1$". Then we must indicate the key field - "Code". Finally, we create the fields that we want to receive from Excel - "Code", "Product" and "Quantity".
For each field, in addition to its name, you must also specify the name in the data source, in our case it will be the name of the column in Excel.

In principle, this completes the setup, we proceed to write the program code.
Create a new command in the data processor and write the following lines.

|
&AtClient Procedure cmdWorkingWithExternalDS(Command)
cmdWorkingWithExternalDSAtServer();
EndProcedure
&AtServer Procedure cmdWorkingWithExternalDSAtServer()
ConnectionParameters = New ExternalDataSourceConnectionParameters;
ConnectionParameters.ConnectionString = "Driver={Microsoft Excel Driver (*.xls, *.xlsx, *.xlsm, *.xlsb)};DBQ=" + stringFileName + ";";
ExternalDataSources.Excel.SetCommonConnectionParameters(ConnectionParameters); ExternalDataSources.Excel.Connect();
query = New Query();
query.Text = "SELECT | Table1.Code AS Code, | Table1.Product AS Product, | Table1.Quantity AS Quantity |FROM | ExternalDataSource.Excel.Table.Table1 AS Table1 |WHERE | Table1.Quantity > 10";
tableValues = query.Execute().Unload();
EndProcedure |
The code is so simple that I see no reason to even comment on it. Please note that we can use queries when working with data, for example, set filters. This is generally great!
Let's check out how it works right away! Set a breakpoint in the "cmdWorkingWithExternalDSAtServer" procedure, start 1C in interactive mode, and execute the "Working with external DS" command.


As you can see, we selected only those products that had more than 10. Well, and then you can already work with this data as with ordinary data in 1C.
Let's change the text of the data query and sort the items by quantity. In this case, the query text will look like this:
|
query.Text = "SELECT | Table1.Code AS Code, | Table1.Product AS Product, | Table1.Quantity AS Quantity |FROM | ExternalDataSource.Excel.Table.Table1 AS Table1 |WHERE | Table1.Quantity > 10 | |ORDER BY | Quantity"; |
and the result of this query:
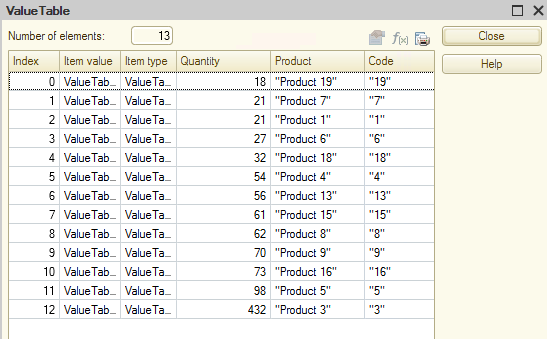
As for me, this is a very convenient way to work from 1C in Excel files.
Important note!
You may not have the Excel driver installed, in which case the described method will not work. If you work with 1C in Windows, then you need to install drivers. You can download them from the Microsoft website:
https://www.microsoft.com/en-us/download/confirmation.aspx?id=13255
But if you use Linux in your work, then the above methods may not work for you. Well, in 1C there are other ways to read Excel files. Moving on!
The 1C platform has a class "SpreadsheetDocument", and this class has a method "Read". And, lo and behold, we can pass the path of our Excel file to this method and it will be loaded into a spreadsheet document. Let's take a closer look at this upload method.
Create another command for our processor, as well as a programmatic routine to handle this command.
|
&AtClient Procedure cmdWorkingWithSpreadsheet(Command)
cmdWorkingWithSpreadsheetAtServer();
EndProcedure
&AtServer Procedure cmdWorkingWithSpreadsheetAtServer()
sheetDocument = New SpreadsheetDocument;
Try sheetDocument.Read(stringFileName); Except Return; EndTry;
tableProducts = New ValueTable;
tableProducts.Columns.Add("Code", New TypeDescription("String")); tableProducts.Columns.Add("Product", New TypeDescription("String")); tableProducts.Columns.Add("Quantity", New TypeDescription("Number"));
countRows = sheetDocument.TableHeight;
For counter = 2 To countRows Do
newRow = tableProducts.Add();
Try newRow.Code = String(sheetDocument.GetArea("R" + Format(counter, "NG=0") + "C" + 1).CurrentArea.Text);
newRow.Product = String(sheetDocument.GetArea("R" + Format(counter, "NG=0") + "C" + 2).CurrentArea.Text);
newRow.Quantity = Number(sheetDocument.GetArea("R" + Format(counter, "NG=0") + "C" + 3).CurrentArea.Text);
Except message = New UserMessage; message.Text = "Failed to load line " + String(counter); message.Message(); EndTry;
EndDo;
EndProcedure
|
As you can see, the source code here is a little more complicated than in the previous example, but the principle of operation is still quite simple.
First, we create an object SpreadsheetDocument, then load the Excel file data into it using the method Read(). Well, then in a loop we process and get all the necessary data.
Let's check with our test Excel file how it works. Set a breakpoint, start 1C in dialog mode and:
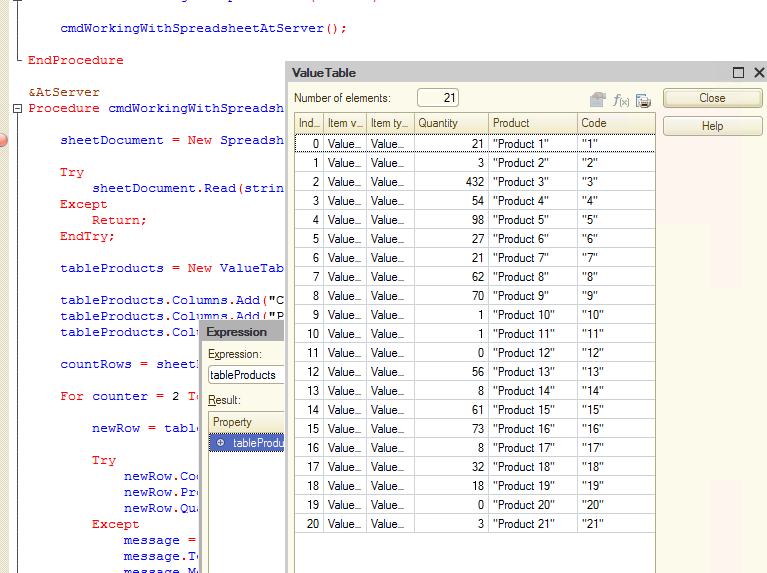
Here they are, our data!
A big plus of this method is that this code will always work, on Windows and Linux, you don’t need to install any additional drivers, and so on.
But I don't like the complexity of the code in this method, these lines annoy me:
|
newRow.Code = String(sheetDocument.GetArea("R" + Format(counter, "NG=0") + "C" + 1).CurrentArea.Text); |
Is there an even easier way to read Excel data? Of course have!
The last method of working with Excel, which I want to describe, is a modification of the previous one, we just simplify it a little now.
So, create another command for our data processor and write the following code:
|
&AtClient Procedure cmdWorkingWithSpreadsheetV2(Command) cmdWorkingWithSpreadsheetV2AtServer(); EndProcedure
&AtServer Procedure cmdWorkingWithSpreadsheetV2AtServer()
SpreadsheetDocument = New SpreadsheetDocument; SpreadsheetDocument.Read(stringFileName);
tableArea = SpreadsheetDocument.Area(1, 1, SpreadsheetDocument.TableHeight, SpreadsheetDocument.TableWidth);
QueryBuilder = New QueryBuilder; QueryBuilder.DataSource = New DataSourceDescription(tableArea); QueryBuilder.Execute();
tableData = QueryBuilder.Result.Unload();
For Each curLine In tableData Do
EndDo;
EndProcedure |
As you can see, there are a few lines of code, but the functionality is the same.
Let's take a closer look at this code. So, first, the "SpreadsheetDocument" object is created and the Excel file is loaded into it. Then we get the workspace in our data:
|
tableArea = SpreadsheetDocument.Area(1, 1, SpreadsheetDocument.TableHeight, SpreadsheetDocument.TableWidth); |
But further, it is interesting. We are starting to use the class "QueryBuilder". Specify the previously obtained area as a data source and call the method Execute(). And the "QueryBuilder" class has the property "Result", the result of the query is located here. So, this result can be dumped directly into the table using the method Unload().
In the end, we get a simple table that contains all our data.
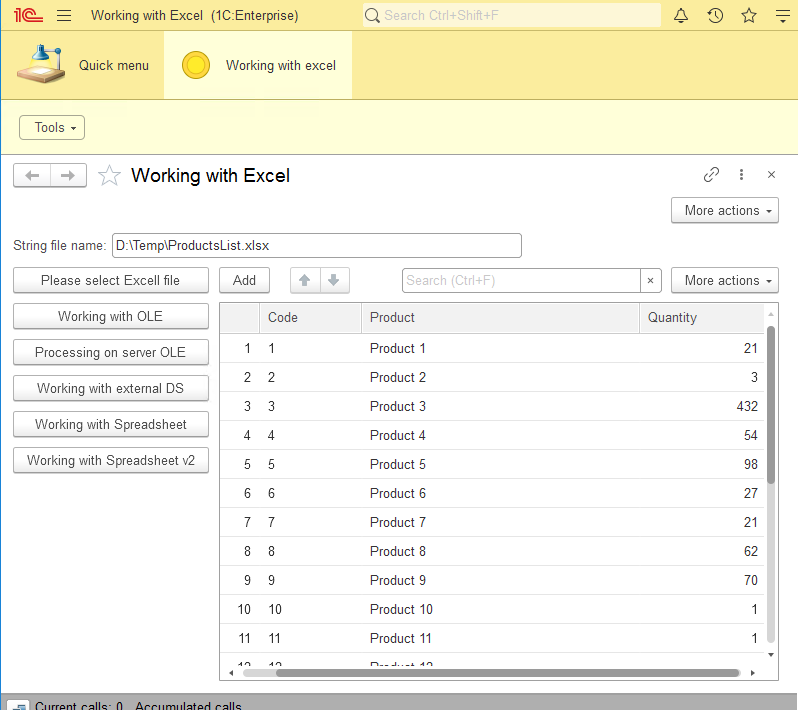
Let's check it out:

All our data is here! As for me, this is the best way to read data from an Excel file.
This is where my story may be ending... but let's still output the data received from Excel to the form and visualize it.
Let's add the tabular section "ProductList" to our Date Processor, and inside the tabular section add three fields: "Code", "Product" and "Quantity". Please note that I gave the names to the fields the same as the columns in our Excel file. This will further simplify the program code.

In the next step, make changes to the form of the Data Processor as well:

Create three groups: "groupGeneral" - with horizontal alignment, "groupButtons" and "groupTable" - with vertical alignment. Place all previously created command buttons into the group "groupButtons", and the tabular section we just created into the group "groupTable".
Then change the last procedure as follows:
|
&AtServer Procedure cmdWorkingWithSpreadsheetV2AtServer()
SpreadsheetDocument = New SpreadsheetDocument; SpreadsheetDocument.Read(stringFileName);
tableArea = SpreadsheetDocument.Area(1, 1, SpreadsheetDocument.TableHeight, SpreadsheetDocument.TableWidth);
QueryBuilder = New QueryBuilder; QueryBuilder.DataSource = New DataSourceDescription(tableArea); QueryBuilder.Execute();
tableData = QueryBuilder.Result.Unload();
Object.ProductList.Load(tableData);
//For Each curLine In tableData Do // // //EndDo;
EndProcedure
|
The changes are actually minimal. I commented out the loop processing on the table “tableData”, and added the following line:
|
Object.ProductList.Load(tableData); |
This code loads data from the table “tableData” into the tabular section “ProductList”. And since the names of the fields both there and there are the same, then everything is loaded automatically.
Let's take a look at the result interactively:
I don't know about you, but I like the result! Fine!
It is up to you as a developer to decide what to do next with the received data. For example, you can create new products in your IT system, or upload inventory results, and much more. The main thing is that now you know how to read data from Excel, and you know how to do it in several different ways.
Well, it's time to summarize. So, we examined several different options for working with Excel files on the 1C platform. It is up to the developer to decide which specific option to choose when working.
Dumping the configuration(.dt file), which was created in the process of creating this article, is traditionally laid out.
And of course, stay with us. We have not yet talked about all the tricks of working with 1C.

Writen by
1C Developer
20+ years of experience in the software industry in Russia, UAE and Germany. My main fields of expertise are developing and implementation of business applications (Retail, CRM, WMS, and Accounting) and integration of software with POS equipment and web portals.


