Calculating Profit from Sales and Creating the Respective Profit Report
Designing Business Applications with the 1C:Enterprise Platform Algorithms. A Detailed Description of the Platform Mechanisms Operation.
Part 6. Calculating Profit from Sales and Creating the Respective Profit Report.
In the previous article of our series, we expanded our application with the functionality to maintain records on product quantity and cost. Thus, our employees now always know how many units they have in the company’s warehouses and the cost of these units. But of course, we remember that the primary goal of any business is to make profit, so our next task as developers is to introduce the functionality that should enable calculating the company's profit.
Let us go back to our application and see what kind of data we have here so far.
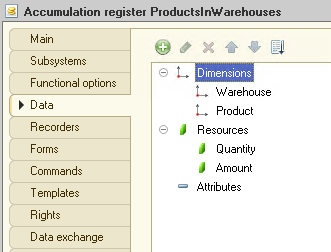
So, we have accumulation register ProductsInWarehouses, which stores data on the quantity and purchase price (cost price) of products:
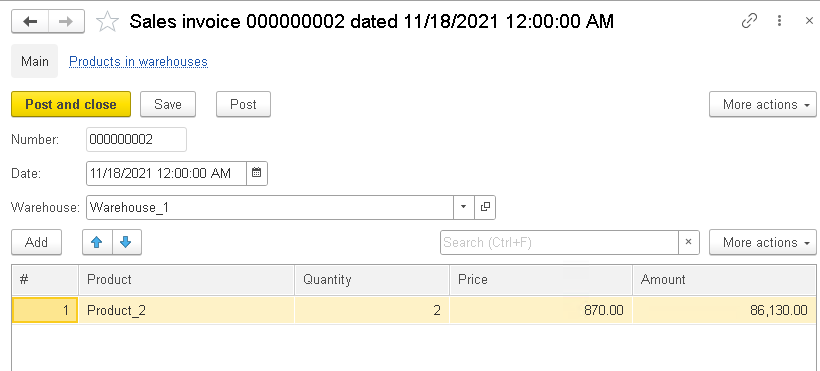
We register sales with document SalesInvoice that, in its turn, contains the sales price:
Basically, by taking sales data from document SalesInvoice and data on the cost of products from register ProductsInWarehouses we might be able to create a report on profit from sales.
Unfortunately, this approach brings up a significant issue! Let me remind you that the role of object Document is to enter data into the system, and it is not optimized for storing information. It is no doubt that developers can retrieve data for their reports directly from documents. Still, with substantial amounts of data, such a solution sooner or later results in a critical drop in performance.
It is the reason we use registers to store and process data in the 1C:Enterprise platform. They are exactly the ones that are optimized for managing a lot of data.
So far, we cannot create a profit report as we do not have a register that stores data on product sales. In order to be able to calculate our profit, we must first create a mechanism (an accumulation register seems to be the most appropriate) to store data on our sales.
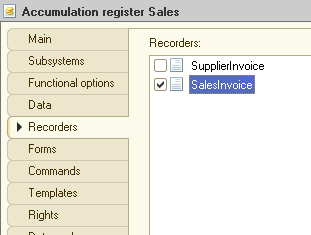
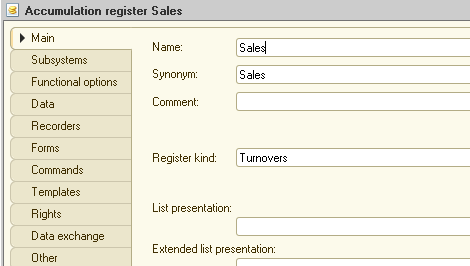
So, let us create a new accumulation register Sales. There is only one document to add records here. It is SalesInvoice.
And it needs only one dimension, that is Product with type CatalogReference.Products:
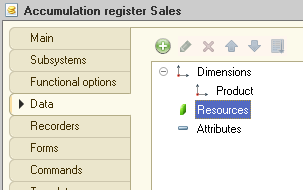
The choice of resources for the new register might vary, but two are a must. These are Quantity and Amount:
In fact, this data is enough to create a profit report: we take sales data from register Sales and data on the cost of products from register ProductsInWarehouses.
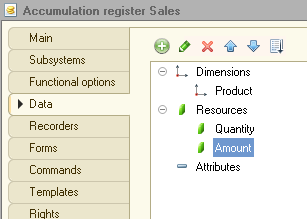
But hold on a second. Is there anything that prevents us from adding data on the product cost directly to register Sales? Nothing at all. When posting document SalesInvoice, we can retrieve relevant data on the cost of a specific product and, along with the respective data on a sale transaction, write it directly to register Sales.
How do we benefit from it? First of all, it speeds up the creation of profit reports. Since all the data required to create the reports is stored in one register (and to be more exact, in a single database table), it is way quicker to pick this data as compared to using connectors for several registers (tables).
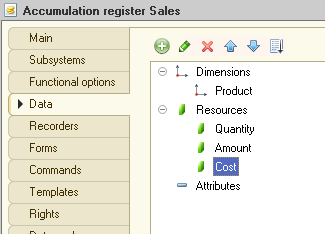
So, back to our register. Let us add another resource Cost. We want to use it to store data on the cost of sold products:
Now, as we clearly understand the structure for the register we want to create, it is time to decide on its kind, Balances or Turnovers. Just a quick reminder that a previously created register ProductsInWarehouses is balance register. It means that it stores product balances only.
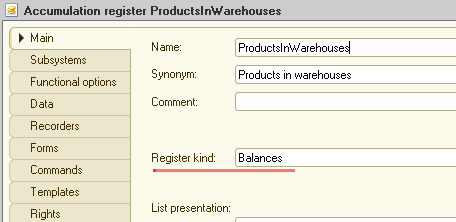
Can we use the same kind for the new register? Obviously not since we need to know the turnover for a certain period to calculate the profit. Therefore, for register Sales, we set register kind to Turnovers:
We are through with the register structure and can proceed to create the program code. Open document SalesInvoice module and go to procedure Posting:
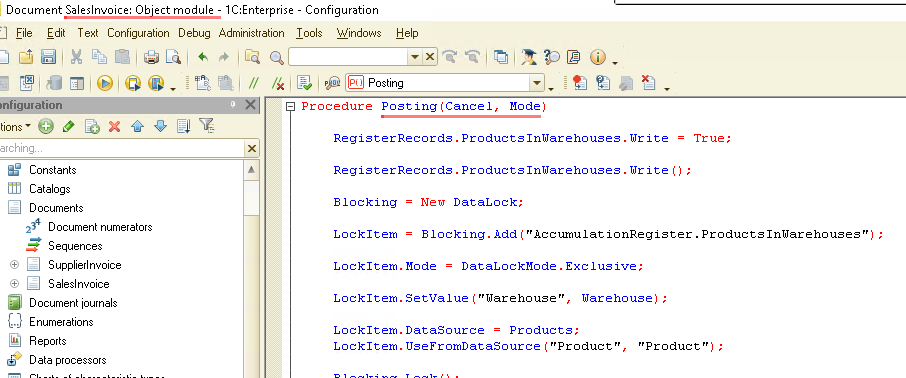
This procedure already contains the code that adds data to register ProductsInWarehouses. We make changes so that the procedure also adds records to register Sales.
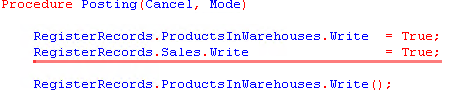
But before that, we need to initialize the register. With this, after procedure Posting is complete, all changes made to the register during the procedure get recorded in the database. To initialize the register, we add a string as follows:
Let me remind you that data gets written to register ProductsInWarehouses in a loop. Before adding a record, the system checks whether the product quantity is sufficient for debiting from the warehouse or not. We need to insert our new code in the same place where we already add records to register ProductsInWarehouses:
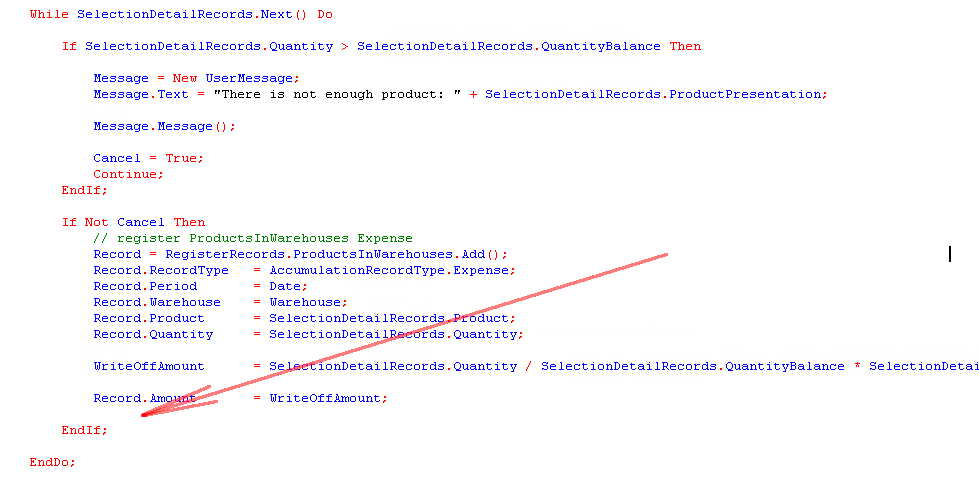
So, let us do it! Here is what we add:
|
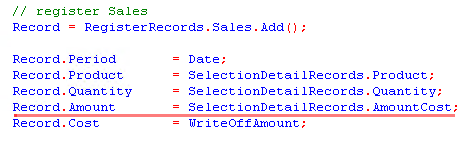
// register Sales Record = RegisterRecords.Sales.Add();
Record.Period = Date; Record.Product = SelectionDetailRecords.Product; Record.Quantity = SelectionDetailRecords.Quantity; Record.Amount = ; Record.Cost = WriteOffAmount; |
This code writes data in register Sales. This data is the product name (Product), sold quantity, and the product cost. You might notice that we have no information on the product sale price, and for this reason, string Record.Amount = ; is empty so far.
To retrieve the product sale price, we need to modify our query by adding the required fields. Currently, the query returns data only on the product quantity and cost:
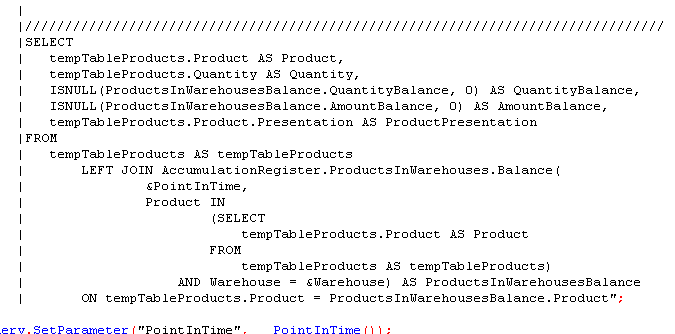
Now we modify the query, so it also returns data on product sale price. We start the query wizard, and in the first section (where we set a temporary table), additionally select field Amount. It is precisely where the application stores product sale prices:
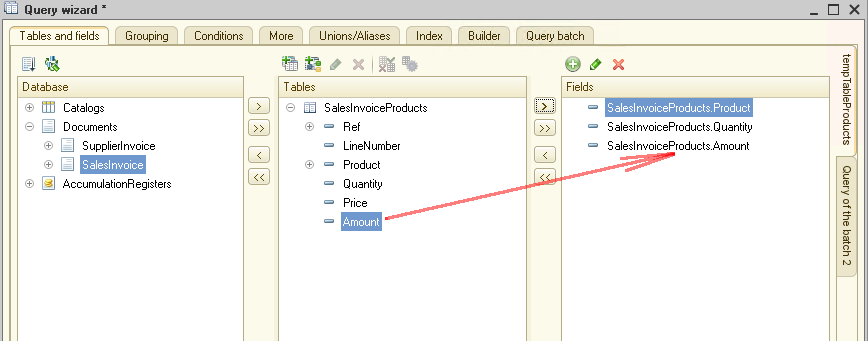
To make things convenient and prevent errors in the future, we immediately assign an alias to this field:
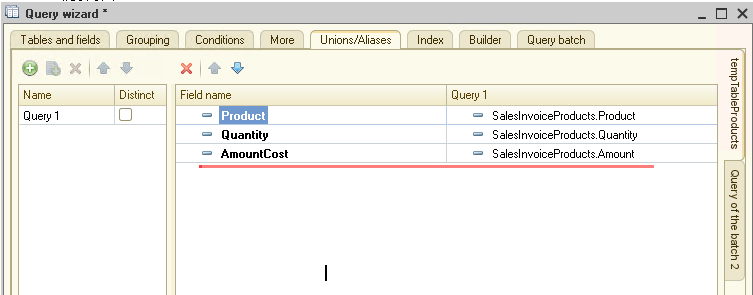
Then, in the second part of the query, we output this field as the result field:
After that, click OK, and our query is ready. Go back to the program code and fill in the last blank string:
Now the loop program code should look like this:
|
While SelectionDetailRecords.Next() Do If SelectionDetailRecords.Quantity > SelectionDetailRecords.QuantityBalance Then Message = New UserMessage; Message.Text = "There is not enough product: " + SelectionDetailRecords.ProductPresentation; Message.Message(); Cancel = True; Continue; EndIf; If Not Cancel Then // register ProductsInWarehouses Expense Record = RegisterRecords.ProductsInWarehouses.Add(); Record.RecordType = AccumulationRecordType.Expense; Record.Period = Date; Record.Warehouse = Warehouse; Record.Product = SelectionDetailRecords.Product; Record.Quantity = SelectionDetailRecords.Quantity; WriteOffAmount = SelectionDetailRecords.Quantity / SelectionDetailRecords.QuantityBalance * SelectionDetailRecords.AmountBalance; Record.Amount = WriteOffAmount;
// register Sales Record = RegisterRecords.Sales.Add(); Record.Period = Date; Record.Product = SelectionDetailRecords.Product; Record.Quantity = SelectionDetailRecords.Quantity; Record.Amount = SelectionDetailRecords.AmountCost; Record.Cost = WriteOffAmount; EndIf; EndDo; |
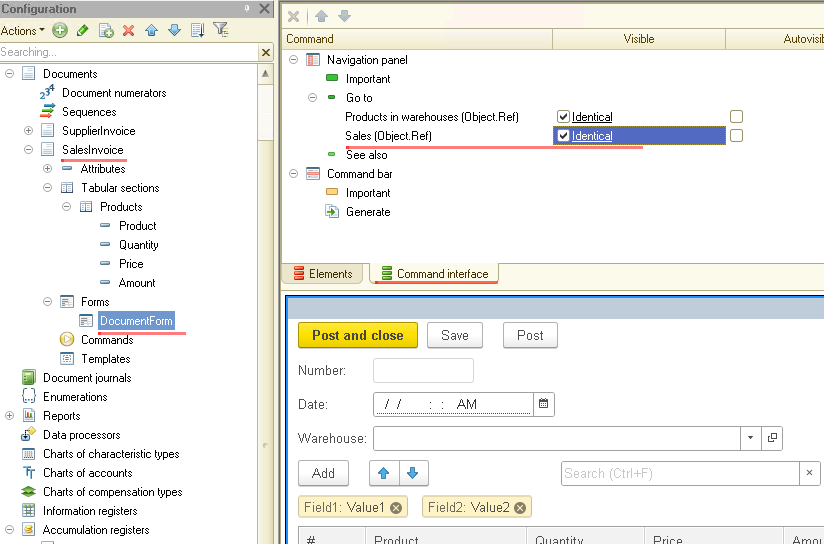
So, we have the code ready, but we need to make one more change in the SalesInvoice document form to make it possible to view records in register Sales directly in the form. To do this, open the document form, go to tab Command interface, and in register Sales, set a flag to option Visible:
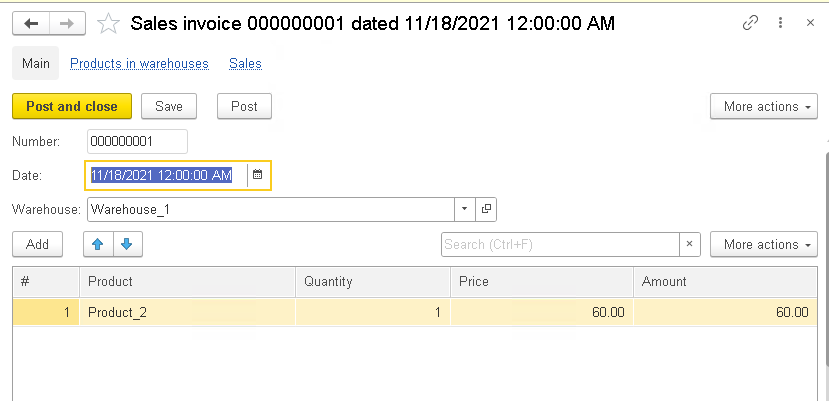
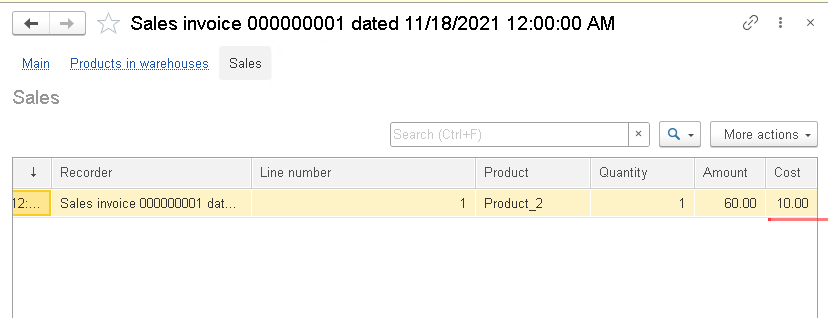
Now it is time to launch the platform in dialog mode, repost existing documents SalesInvoices and see what records these documents add to register Sales.
For example, here is the document:
And here are its records in register Sales:
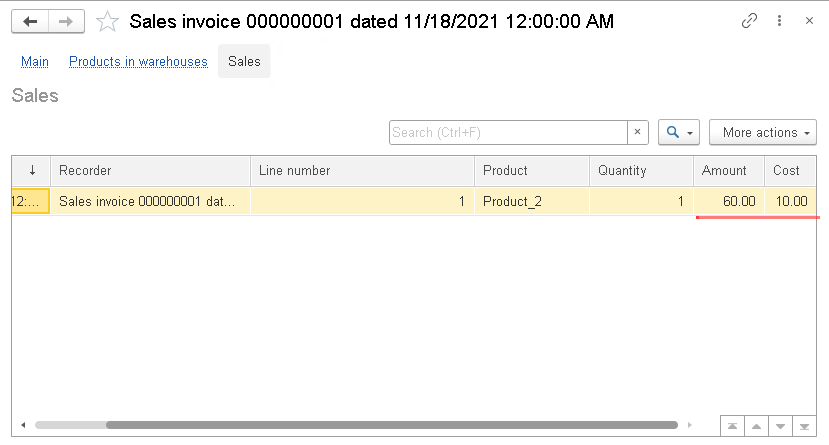
As you can see, both the sale amount of 60 and the cost price of 10 for this product were added to the register.
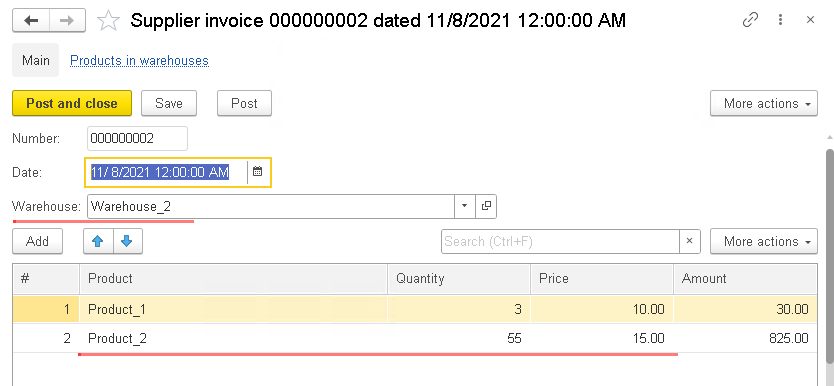
Important! Please note that product cost depends on the warehouse the product is assigned to! That is, if we have the same product purchased at different prices and it is stored in different warehouses, a sale transaction retrieves the product cost recorded for a warehouse that stores products included into the sale transaction.
Let us take a closer look at this.
We have two supplier invoices issued to two different warehouses, and invoices contain different product prices:
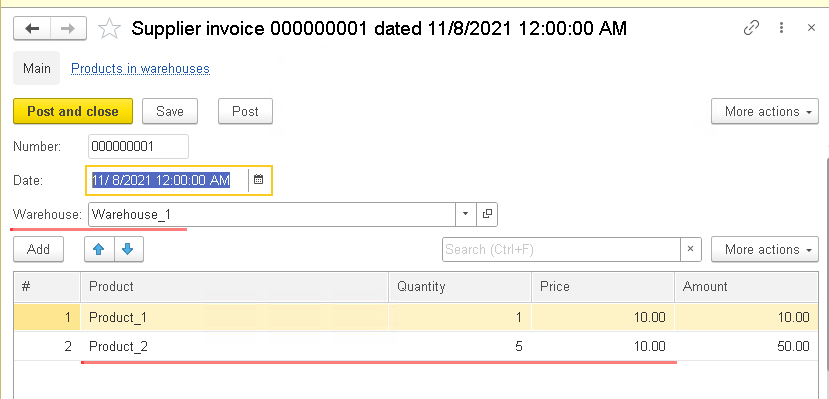
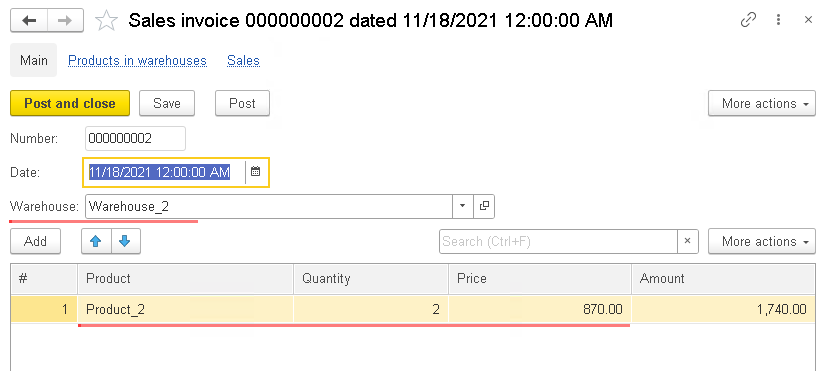
When issuing a SalesInvoice for warehouse #1, the product cost is 10:
Now, if we create a SalesInvoice for the same product but specify a different warehouse, the cost added to register Sales is set per warehouse #2:

As we can see, 30/2=15 is the cost price for warehouse #2.
If we want a sale transaction to use the cost calculated for all warehouses, we need to modify procedure Post in document SalesInvoice.
How we calculate each case's cost depends on the business task, we are dealing with.
Well, we recorded data on sales in the database, and now we need to calculate the profit received by our company from these sales and then visualize these indicators.
We want to do it using a report.
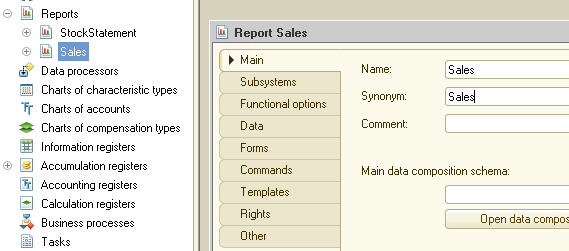
Create new report Sales:
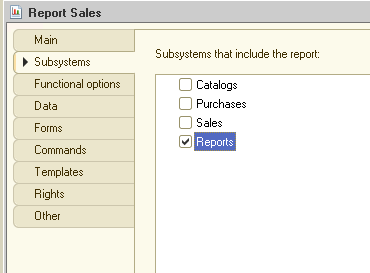
Add it to subsystem Reports:
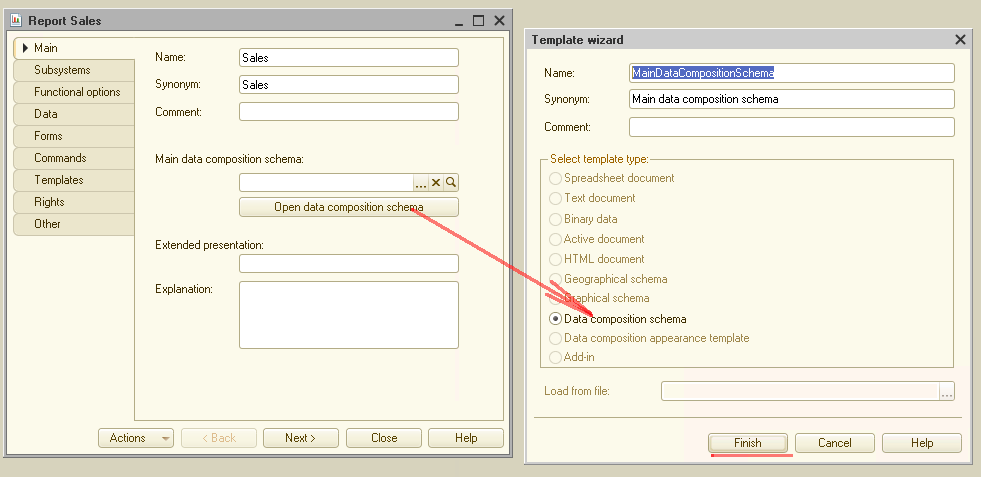
Then create a new data composition schema:
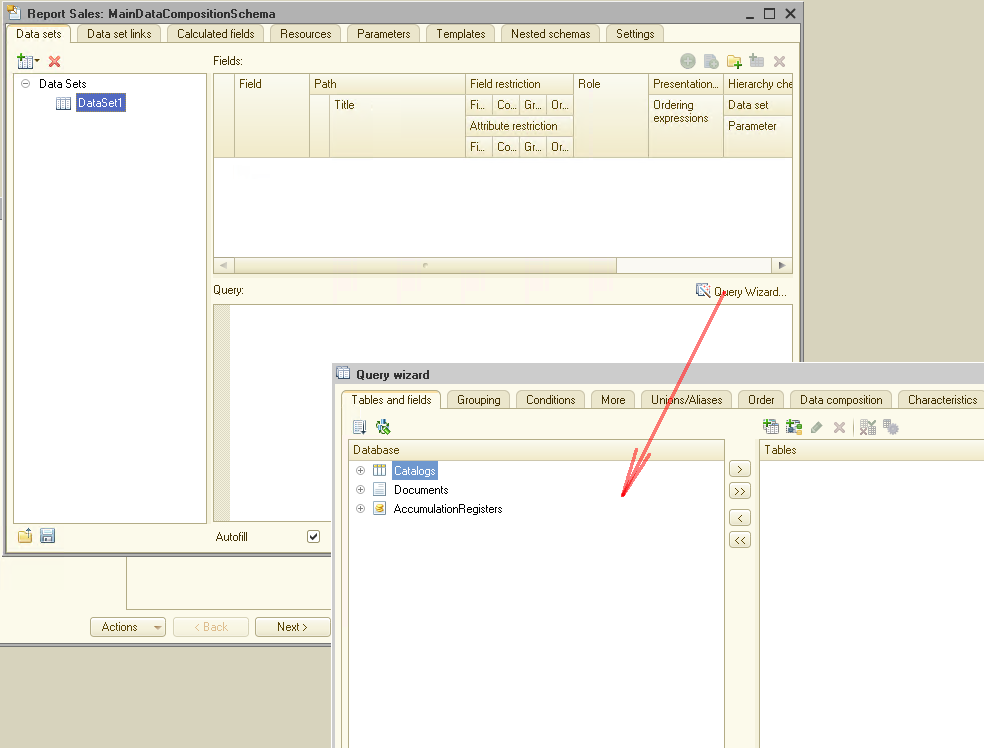
Within this schema, we create a query data set:

And then, using the query wizard, create a query:
Simply pick all data in turnovers table for register Sales:
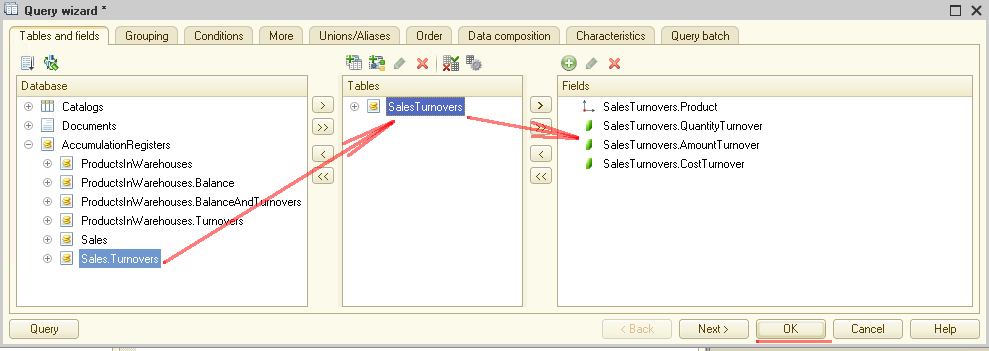
And here is the resulting query. You can also set up aliases for displaying fields in the final report:

As you remember, the primary purpose of our report is to show how much profit we receive from sales. It is time to do it!
Go to tab Calculated fields and create calculable field Profit here:
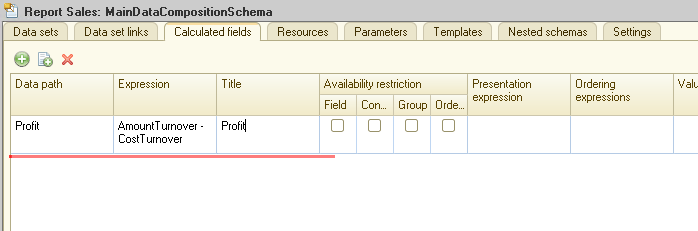
For the Expression, we set AmountTurnover-CostTurnover.
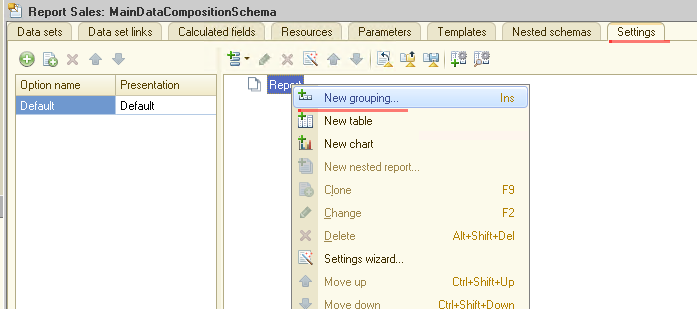
All that remains is to configure the structure of the report being created. Go to tab Settings and create a new group:
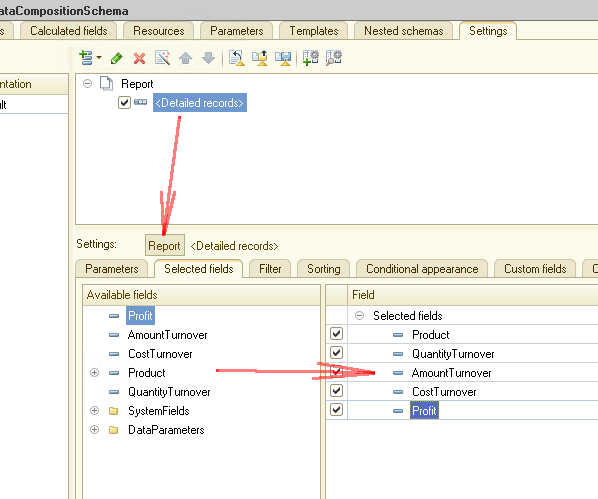
We add to the group all the fields required for the report:
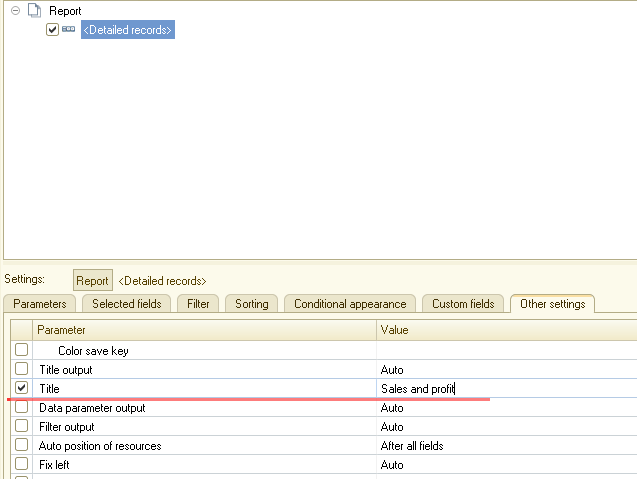
We can also specify the report title:
For user convenience, it is advisable to place the report parameters in quick settings:
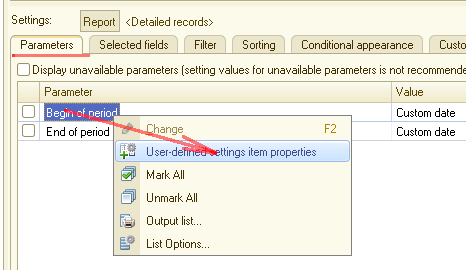
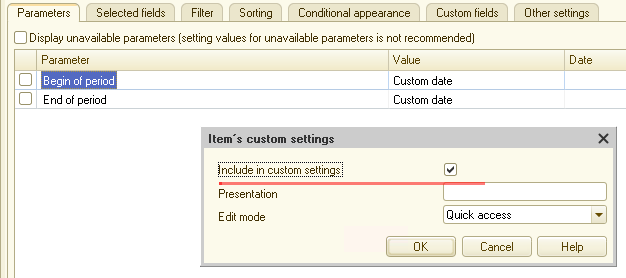
We perform this operation for both parameters. And that is all. We have the things done.
Now all that remains is to launch the platform in dialog mode and check how the newly created report works. Let us do it!
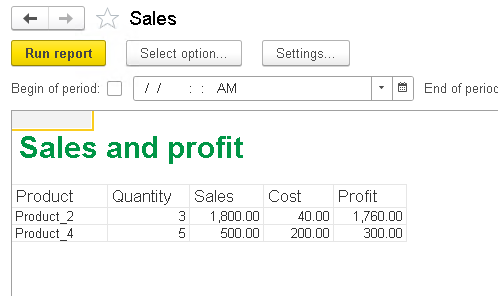
As you can see, the report is fully functional, and we can finally see how much money we were able to earn during all this time!
Clearly, the examples given in this and previous articles are elementary. Still, they are enough to let you understand how to effectively use such powerful 1C:Enterprise platform’s objects as accumulation registers. In fact, developers can build a data accounting system of any complexity using these registers.
More to it, I want to draw your attention to the fact that the 1C:Enterprise platform also has a unique class of objects that can be used for data storage. These are so-called accounting registers, and developers can fully design their applications using only these objects. In the upcoming articles of our series, I will explain how to design an inventory accounting and sales application using these accounting registers.
As usual, here is a link to the infobase described in the article.
Stay tuned for more exciting things to come.

Writen by
1C Developer
20+ years of experience in the software industry in Russia, UAE and Germany. My main fields of expertise are developing and implementation of business applications (Retail, CRM, WMS, and Accounting) and integration of software with POS equipment and web portals.


