Designing Business Applications with the 1C Platform Algorithms. Part 2.

Create Supplier Invoice Document
In the first part of our series on a detailed description of the platform mechanisms operation, we learned how the 1C platform handles data, including saving data into databases and calculating totals. It might seem that such information is of low importance. Still, if developers wish to create elaborate applications capable of handling many data, rest assured, they need to understand how data is processed on the "low level."
Now it is time to put this knowledge into practice and try creating our application.
As you remember, in the first article we wanted to automate operations in a company. It is time to add more details to the task.
So we have some trading company. It gets products from its suppliers, puts them in warehouses (there can be several ones located in different cities), adds a markup, and sells the products to its customers. At that, the company offers delivery services. In order words, the company provides both goods and services.
In order to make informed decisions, the management needs to get reports containing the results of the company's business activities. One of them is the Available Stock Report, as seen below.

Let's analyze it. In fact, it is always a good idea to start designing applications of this kind by analyzing reports that company management needs. As soon as there is a clear understanding of the information included in the report, we can proceed with designing the application architecture.
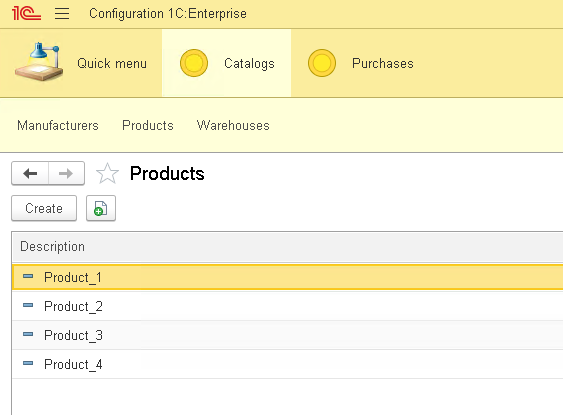
What can we say by looking at the report above? It contains several products. Thus, we need a place for the list of products. 1C platform suggests we place lists in catalogs. Thus, we need a Products catalog.
Let's create it. Start 1C, create a new (clean) configuration. Add the Products catalog to the configuration.


Now, as we get back to the initial report, we can see that the products are grouped by manufacturers. There are several ways of implementing such functionality. One of them is to assign manufacturers' names to groups within the Products catalog. It means that we create groups in the Products catalog and give such groups manufacturers' names. But such simplification of the task potentially leads to issues in the future. Imagine that we might want to add a manufacturer's website or email at some point in time.
It is pretty tricky if a Manufacturer is a group name in the Products catalog.
To avoid such confusion, we want to create a dedicated Manufacturers catalog. To link products to manufacturers, we add a Manufacturer attribute to the Products catalog.
Let's create the Manufacturers catalog.
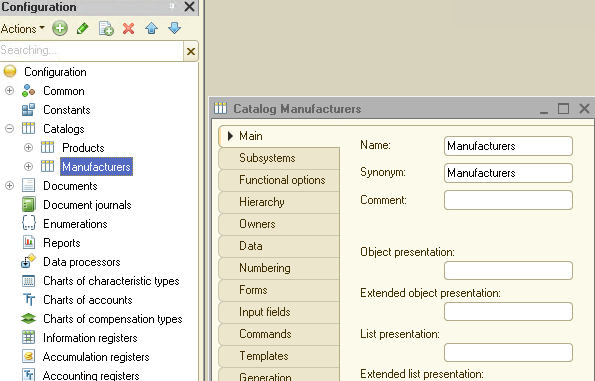
Add the Manufacturer attribute to the Products catalog and assign the CatalogRef.Manufacturers type to it.

Now we have products and manufacturers linked.
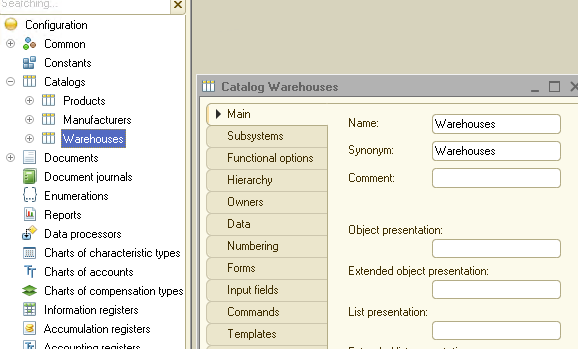
Let's continue with analyzing the report. We can see that in addition to products and manufacturers, there is a list of warehouses. Naturally, we need a Warehouses catalog for it. Let's create it.
Have a look at the original report. As you can see, we have created all the required catalogs and are good to go further. As the report should present available stock, we need a place to store respective data.
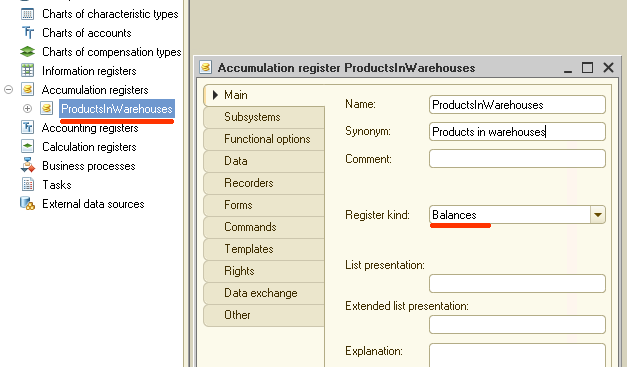
As you remember from the previous article (How the 1C Platform Stores Data. Accumulation Registers.), an object within the 1C platform containing data on a stock (or balances) is called an accumulation register. You certainly remember that such a register can be of two kinds: balances and turnovers.
What kind of register do we need this time? The answer lies in the report we are analyzing. As we deal with stock, we choose balances.
Create a new register and assign the proper kind:
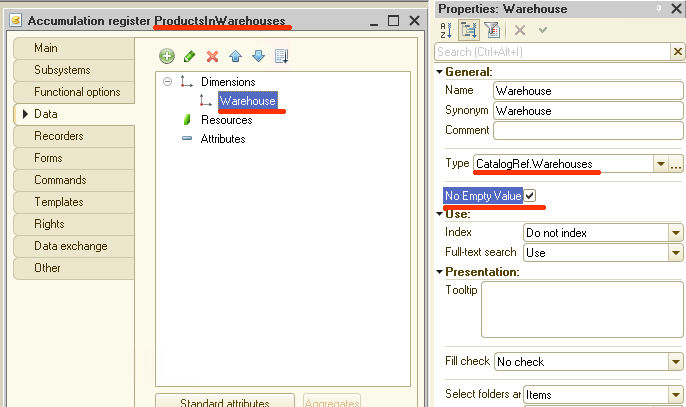
Further analysis of the initial report gives us an understanding of what we should use as dimensions and resources. The generated report should contain data on warehouses, products, and available stock. In our case, warehouses and products are dimensions, while available stock is a resource.
Create these elements in our register. Start with a Warehouse dimension:
Continue to a Product dimension:
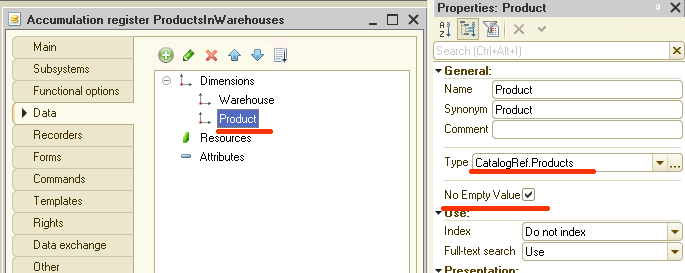
Make sure you have the No Empty Value option flagged. This flag prohibits saving empty value. Should our application attempt to add a blank value instead of a product, the 1C platform prevents it and returns an error.
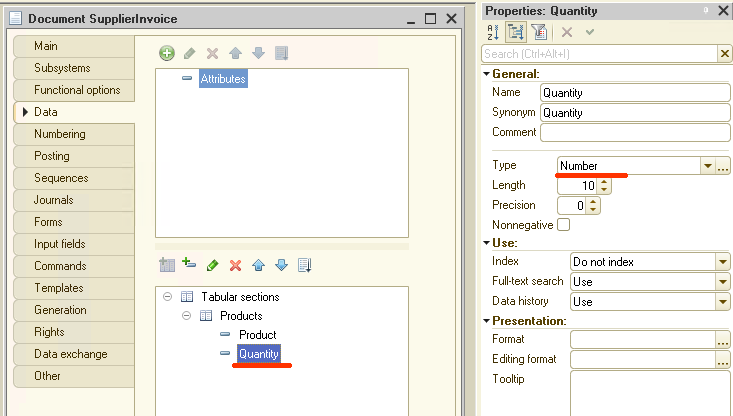
As we are through with dimensions, let's create a Quantity resource:
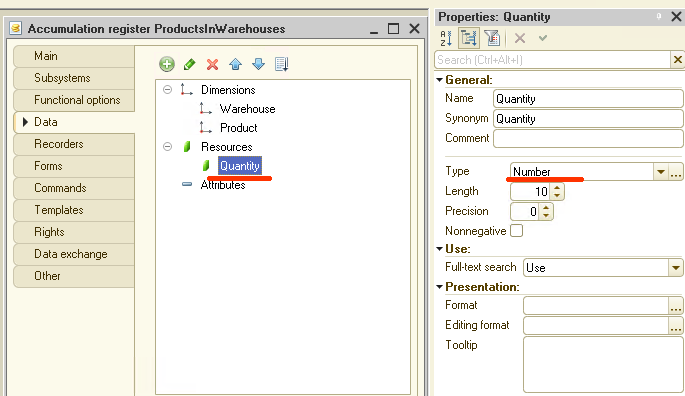
Obviously, we pick the Number for type. Values for the Length and Precision parameters will vary depending on the task. Let's assume our product comes in pieces. Thus, we set the Precision to 0 and the Length to 10.
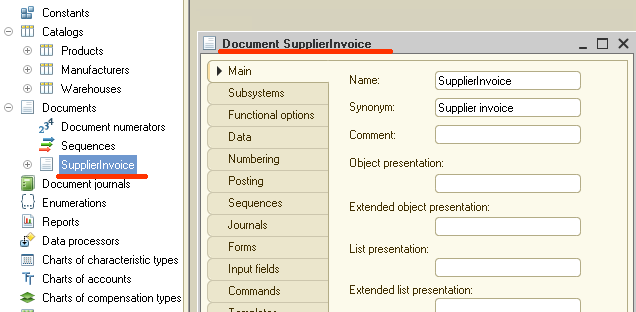
Now we have our register to store the data we need. I'm pretty sure you remember that data for registers in 1C comes through 1C objects that we call documents. It is time to create such a document. Create a SupplierInvoice:
Proceed to the Data tab (now we should define data we need to include into the document to properly generate reports on available stock). Naturally, we need a table. Give it a Products name and add Product and Quantity attributes.
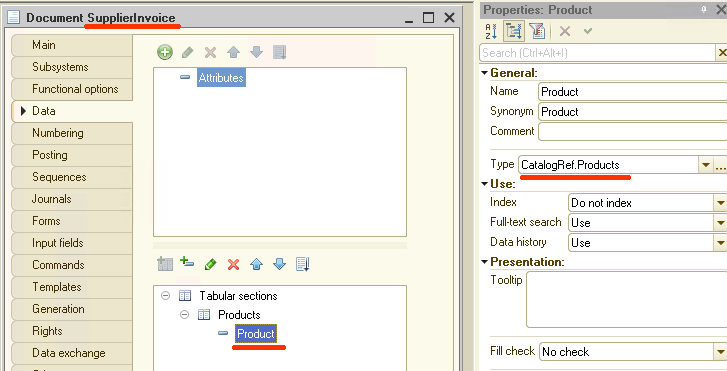
I also suggest we add Price and Amount attributes. They can be of use at a later stage:

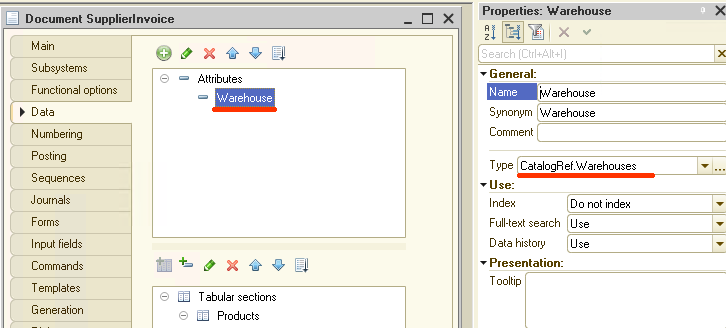
We are through with the products and their quantities. Yet, the report should allow grouping products by warehouses, so we add the respective attribute to the document. The question is, where should this attribute go? Should it be within the table or not?
There is no final answer to it because the decision depends on the current business task. One of the most straightforward solutions is to add the Warehouse attribute to the tabular section of the document. It enables us to allocate products to individual warehouses. Or we can add the Warehouse attribute to the document header and allocate products to the warehouse specified in the header. Should we want to place products in another warehouse, we create one more document and assign it to another warehouse.
For this task, I suggest we use a simple option with warehouses attached to the document's header, or in other words, a single warehouse per document. Create the Warehouse attribute in the SupplierInvoice document header:
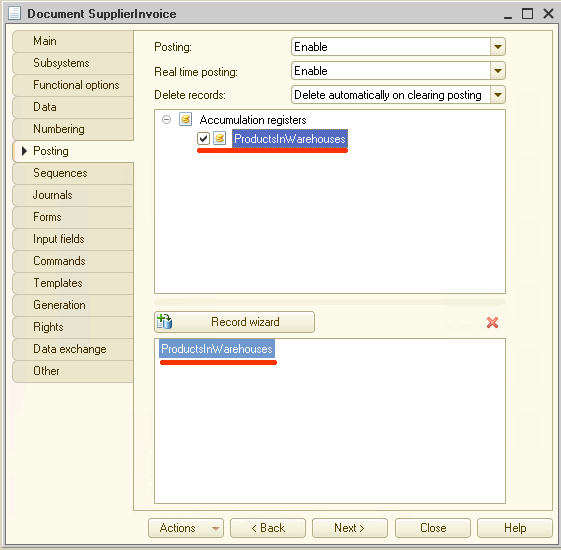
This is it for the Data tab, and it is time to go to the Posting tab where developers assign registers that specified document should be able to modify (add records). In our example we use just one register. Select it:
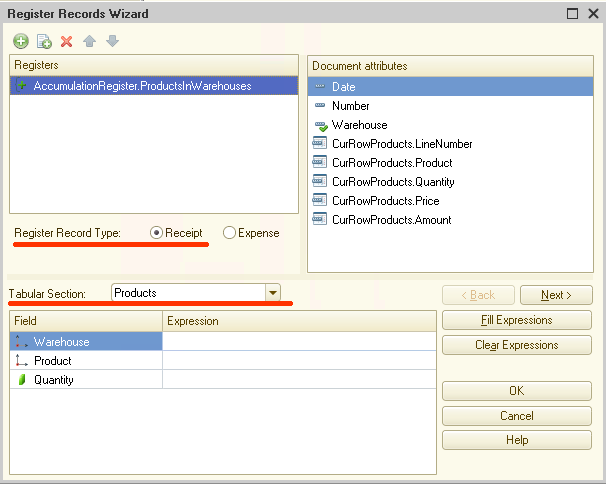
Proceed to create program code that should write data into the register. As we expect it to be pretty straightforward, the Record wizard will do just fine.
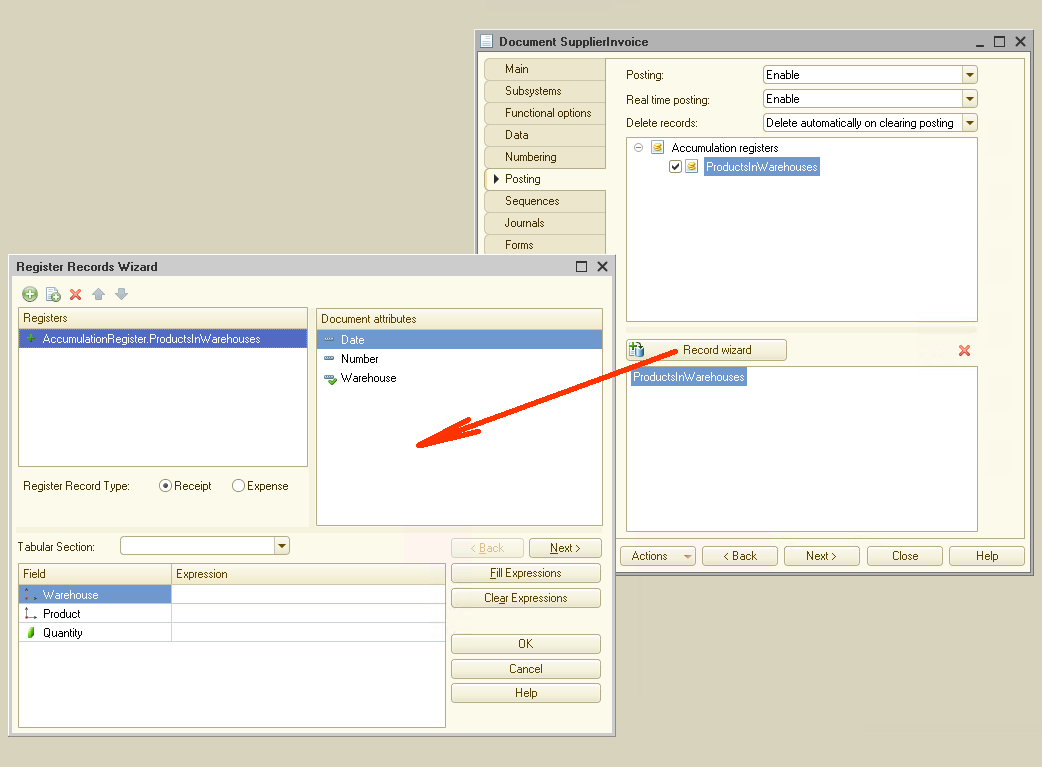
Here we select Receipt for register record type and Products as the source of data for the tabular section:
Click the Fill Expressions button to let the wizard fill the required fields in:
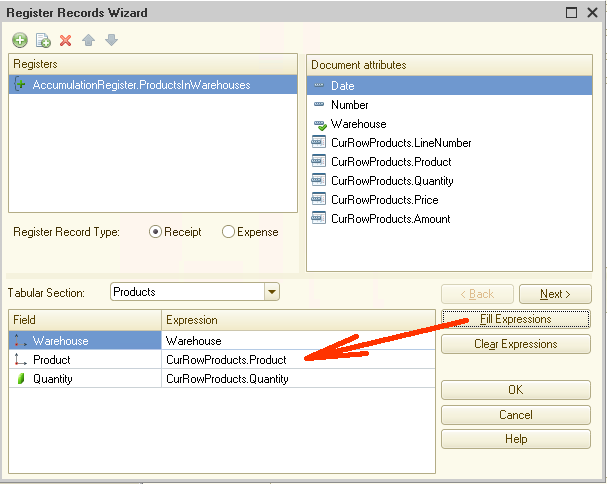
When filling the fields in, the wizard compares both attribute names and their types. Thus, if a document has an Inventory attribute and a register has a Product attribute instead, the automatic scenario fails, and we have to map the fields manually.
In case attribute names are equal, everything runs just fine. Click the OK button and let the wizard create the code:
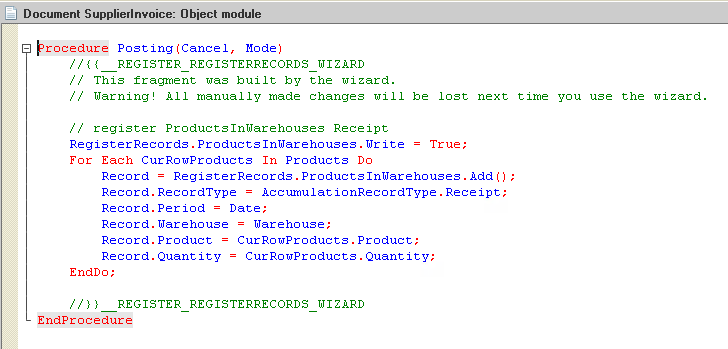
The source code is pretty simple. First, we set the ProductsInWarehouses register into Write=True mode. In this mode, all changes to this register happening during the posting procedure are automatically recorded immediately on completion of the procedure. Thus, developers do not have to call the write method for the register because the system automatically records all changes happening during the posting.
This is the meaning of Write = True mode.
The remaining part of the code is easy to understand. It is a cycle to process the tabular part in the Products document. As a result, the system adds one record to the register per each document line.
The process is fully automatic here, and we do not have to take extra actions to save changes.
Well, it seems we are through with the major part of the work. Why not check how our document works? We can proceed, but let's introduce some minor adjustments to make the process smoother.
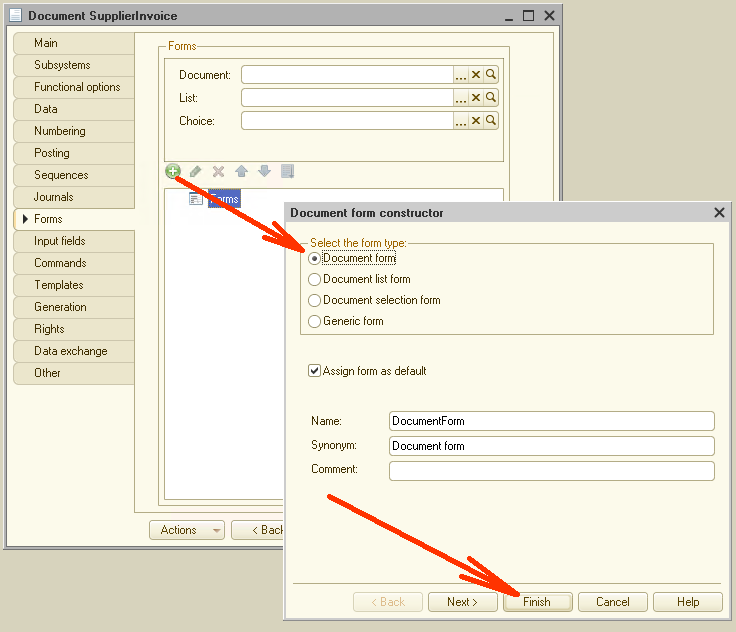
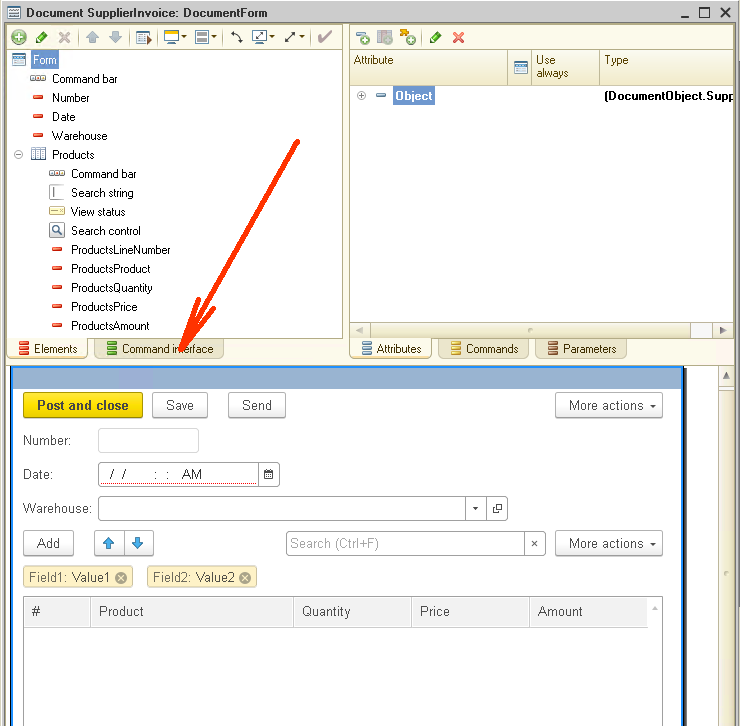
Time to create a form for SupplierInvoice document. In fact, it is optional. If a predefined form is missing, the 1C platform automatically creates one for users. But such "automatic" forms are not always convenient, and I strongly recommend that you build customized ones for your documents (and not only documents).
Here is how you create a Supplier Invoice Form:
Go to the Command interface tab.
Unfold Go to list and set visibility flag for Products in warehouses register:
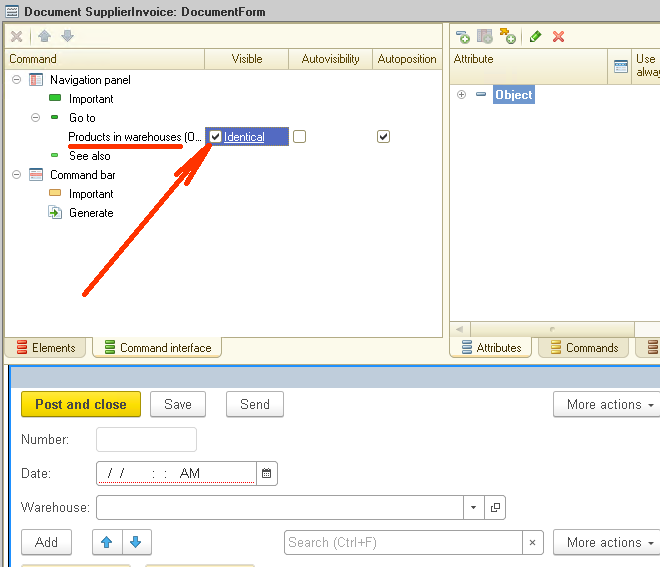
With this option active, you can see all changes in the register right within the document, which is pretty convenient. Basically, this is all we have to do here.
To make a dialog mode in our application more user-friendly, I suggest creating subsystems and allocating previously created objects to them.
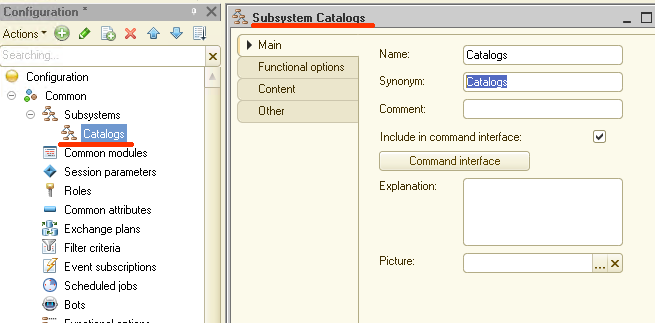
Create a Catalogs subsystem:
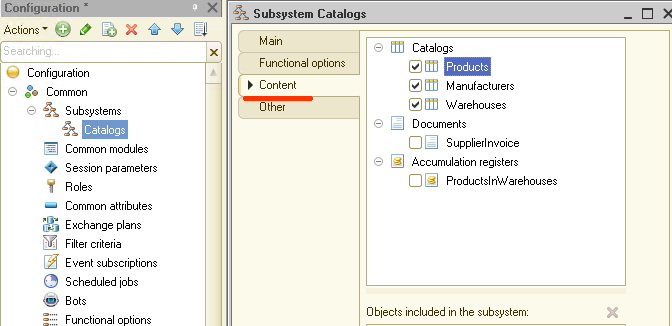
Go to the Content tab and add the abovementioned subsystem to our catalogs:
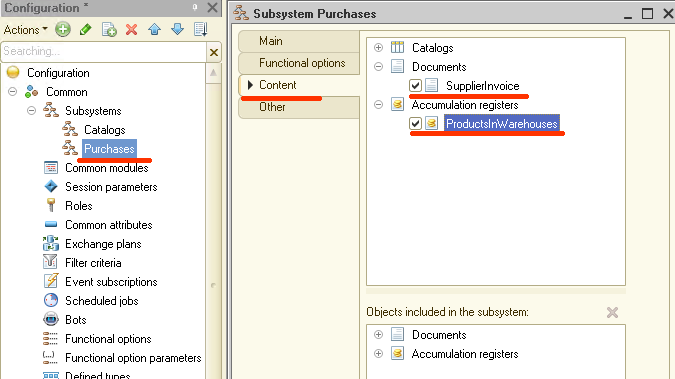
Create a Purchases subsystem and append it with the SupplierInvoice document and the ProductsInWarehouses register:
We are finally ready to start our application in dialog mode to see how it works.
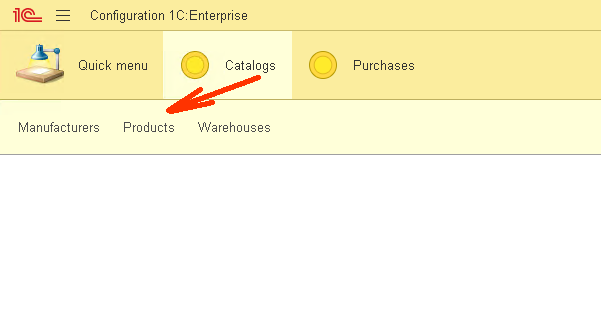
Start the application and go to the Catalogs section. Here we can see the list of catalogs:
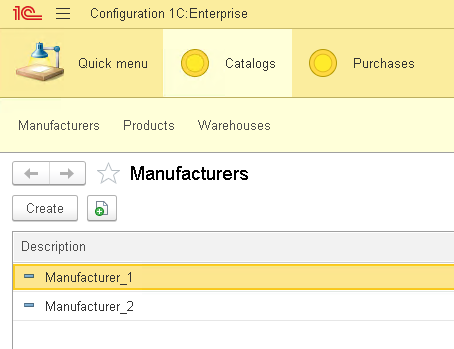
Naturally, we need to add data to these catalogs before we can proceed. Add several items for the Manufacturers:
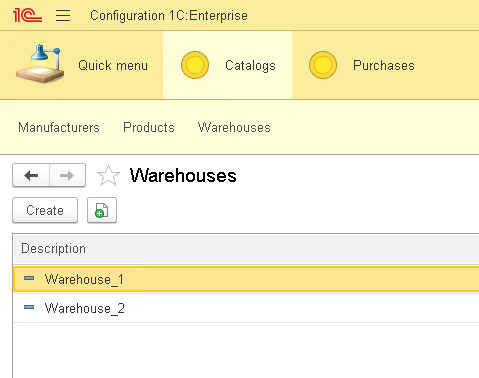
Now add some items for the Warehouses:
And create several items for the Products:
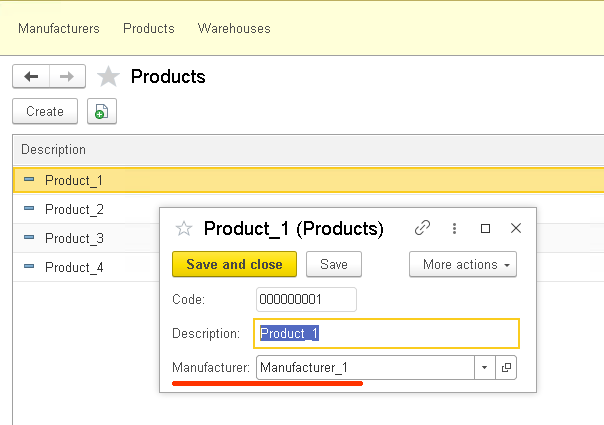
Link each product to a manufacturer from the list:
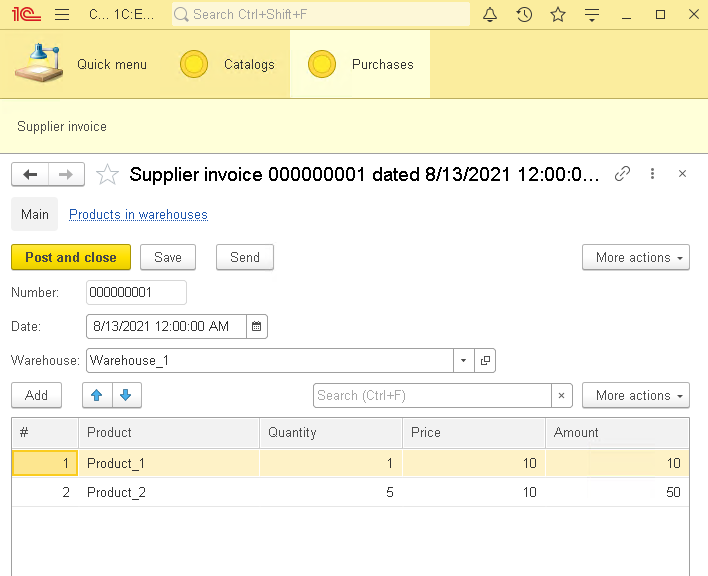
As soon as we are through with the catalogs, we can go to the Purchases section, create a new supplier invoice document and fill it in:
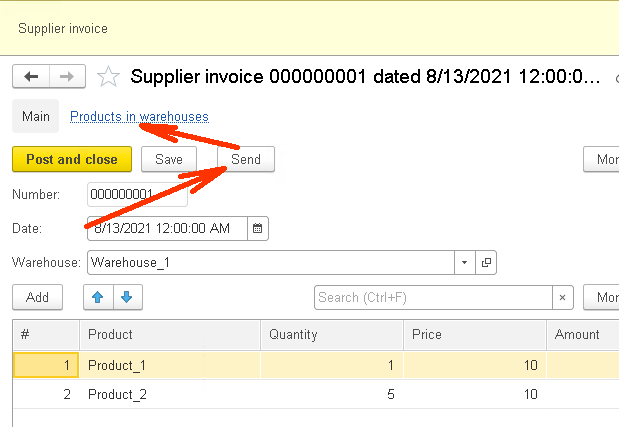
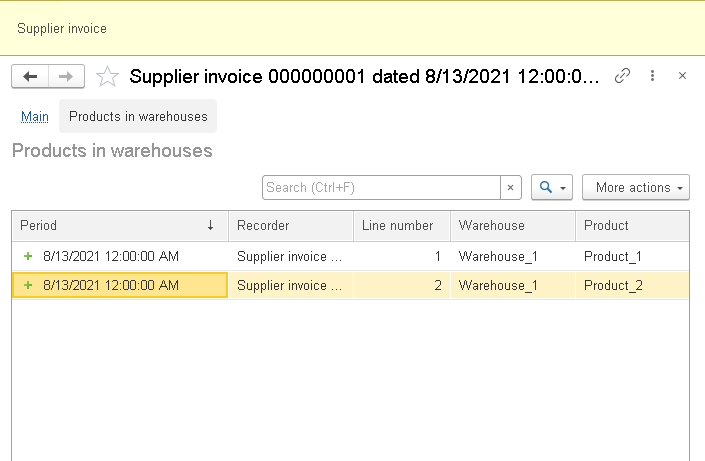
To write the document data into the register, you need to click the Send (or the Post and close) button. Use Send and immediately click the Products in warehouses link:
You should see a form with changes introduced by the document into the ProductsInWarehouses register:
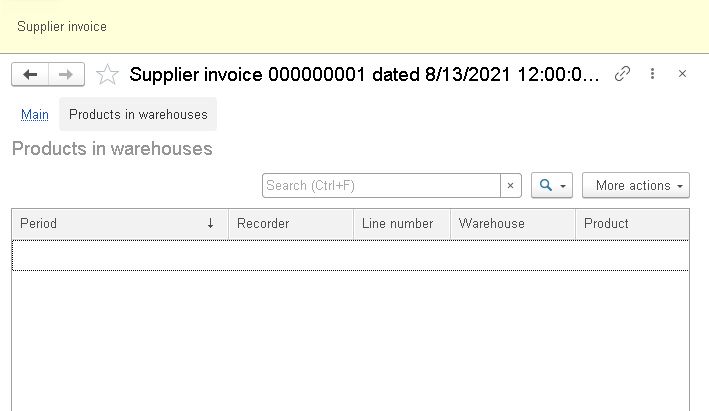
Let's do a small test. Try clearing a document with the Clear posting option:
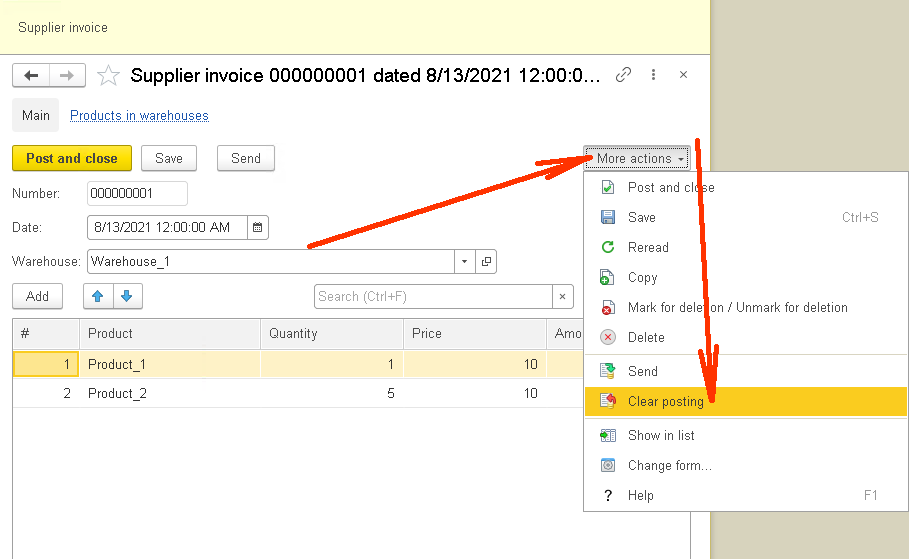
The result is automatic removal of all entries the document had introduced into the register. Check the Products in warehouses link to see if it works the way we expect it to:
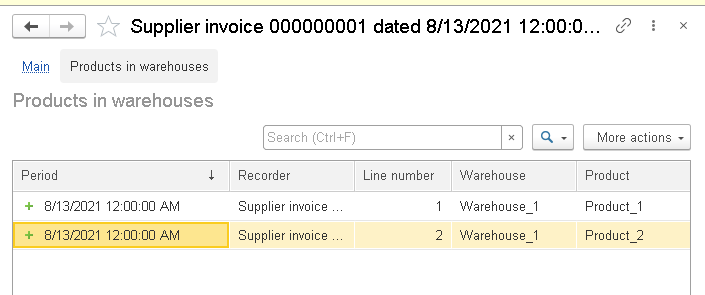
By reposting this document, you can bring added lines back.
Now you can see this is a pretty simple concept.
And this is basically it for today. We have learned to design an application architecture, practiced creating an accumulation register and a document that adds records to a register. Also, we have written some lines of the code and created several catalogs.
As usual, I am glad to share the link to the code we have used in this article.
Our next step will be to create a sales invoice document and a report on the available stock at our companies' warehouses.
Stay tuned!

Writen by
1C Developer
20+ years of experience in the software industry in Russia, UAE and Germany. My main fields of expertise are developing and implementation of business applications (Retail, CRM, WMS, and Accounting) and integration of software with POS equipment and web portals.


