In the first part, we considered a new feature of the 1C platform for the rapid creation of mobile applications.
Using this technology allows you to quickly develop and implement a mobile solution in your enterprise without attracting additional specialists and, accordingly, without additional costs.
But naturally, any technology has both advantages and disadvantages. A mobile client's disadvantage is that a mobile application developed using this technology requires a constant connection to a central server. If the connection to the central server is lost, then the application stops working. Therefore, such an application's scope is quite narrow, and it cannot replace the classic, standalone application.
To fix this shortcoming, 1C has developed a new technology called "Mobile client with offline mode". You can see a small announcement of this technology at this link.
This new technology combines the properties of both a mobile client and a standalone mobile application. A mobile application can also be created very simply using this technology, but this application does not require a constant connection to a central server since part of the application data is stored directly on the mobile device itself. What data store on the device and what on the central server is determined by the developer while creating the application.
Let's now remake our application from the first part of the article to work without a permanent connection to the server, but first, let me tell in more detail about the "Mobile client with offline mode" technology itself.
The slide below shows how a simple mobile client works. As you can see, in this case, the mobile client only displays data on the screen of the mobile device. All other actions (data processing, data storage, etc.) take place on the server.
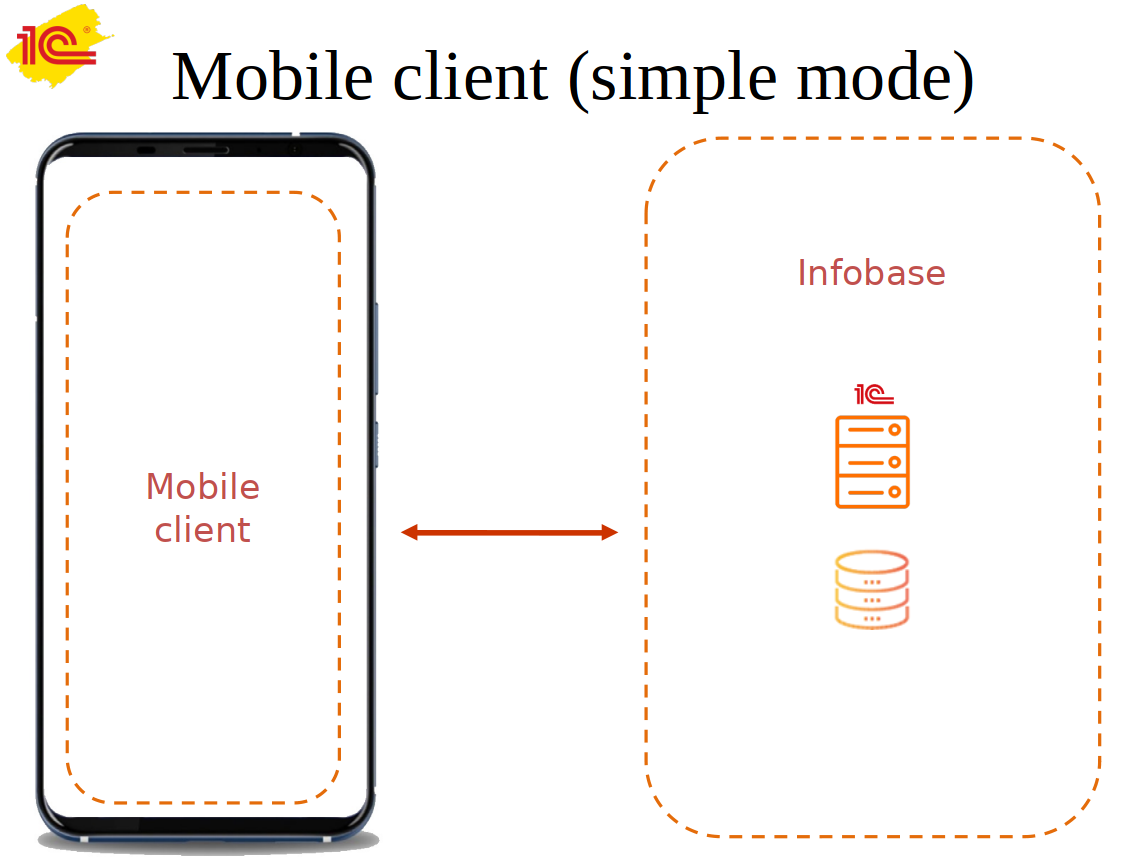
Naturally, as soon as the connection between the mobile device and the server is lost, the mobile application immediately stops working.
There is only one way out of this situation - we need to store data directly on the device. But we remember that our mobile phone's memory is limited, and we cannot just take and make a copy of the data from the server. There is not enough space on a mobile device to store such a volume of data.
1C developers found a way out of this situation and proposed the following: a copy of the data stored on a mobile device, but the copy is not complete, but only part of the data. And what data will be transmitted to the device from the server decide the developer.
Thus, the scheme of work of a mobile client with offline mode looks like on the next slide:
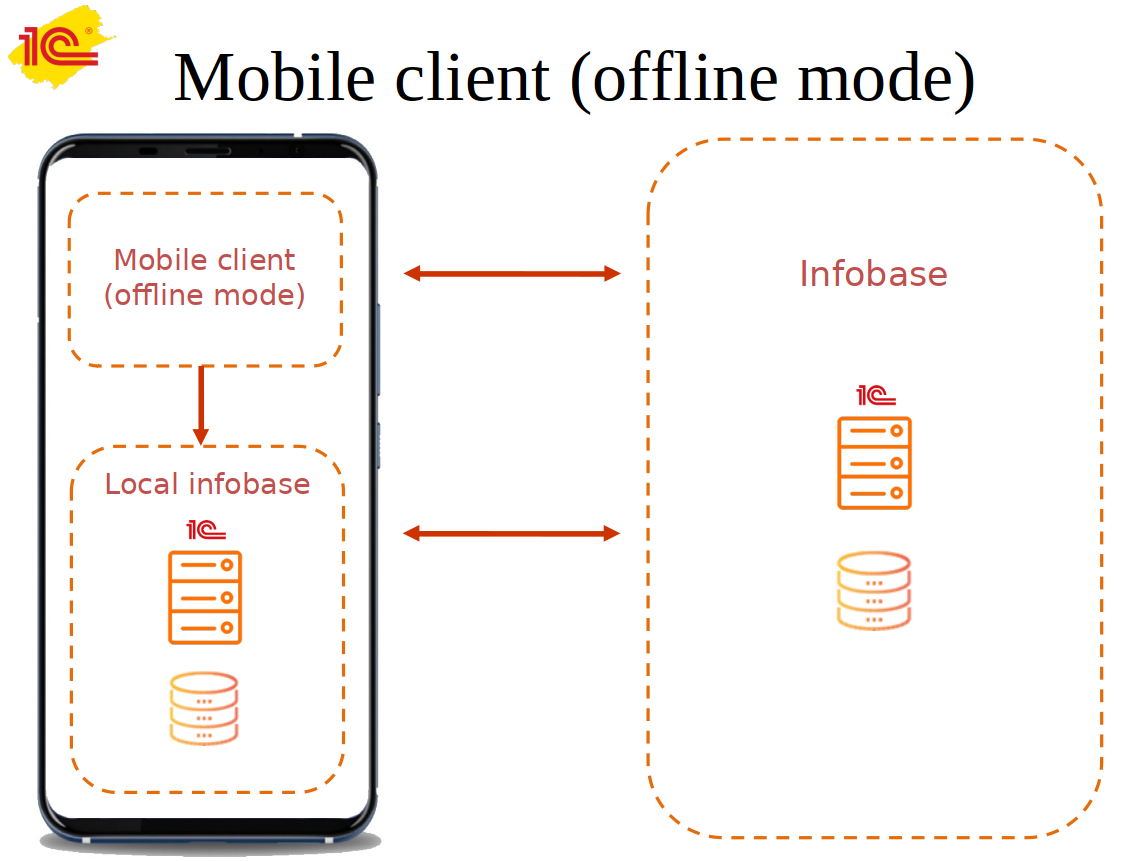
As you can see, a new object, "Local Infobase" has appeared, and it is in this object that local data is stored. Another name for this object is the "Standalone local server".
The local server and the central one exchange data, and the mobile client can access either one server or another. But if there is a loss of connection with the central server, the application continues to work further, as the mobile client continues to take data from the local server.
Of course, there were some drawbacks here. The exchange between the central server and the local one has not yet been implemented at the internal level, and the developer must create this exchange himself. Hopefully, in the new versions of the 1C platform, this drawback will be eliminated. The exchange between the local and central server will be automatic, without additional actions from the programmer.
Well, enough theory, let's start doing something useful at last!
First, we need to install the required version of the mobile client. Please note that the mobile client we used in the first part of our article will not work. For working offline, 1C offers a separate assembly. Please pay attention, otherwise, nothing will come of it :-)
The distribution kit of the mobile client for offline mode is supplied with a regular mobile client and is included in the delivery set of the 1C mobile platform:
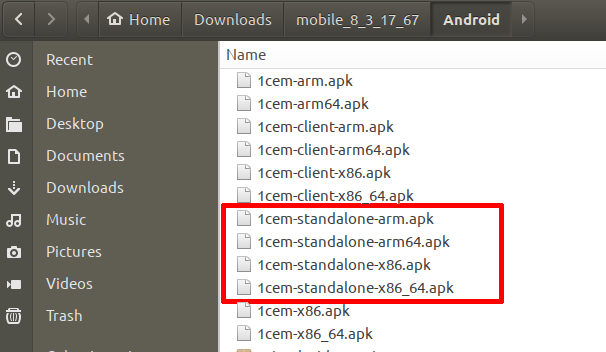
The workflow is entirely the same as working with a regular mobile client. We first install the .apk file on the mobile device, then create a connection to the 1C application published on the webserver.
Moreover, our application from the first part of the article works excellent when using a mobile client for offline mode. Let's check it now.
Let's open the mobile client for offline mode and create a new connection to the previously published application.
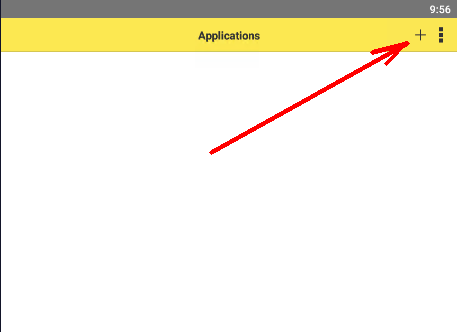
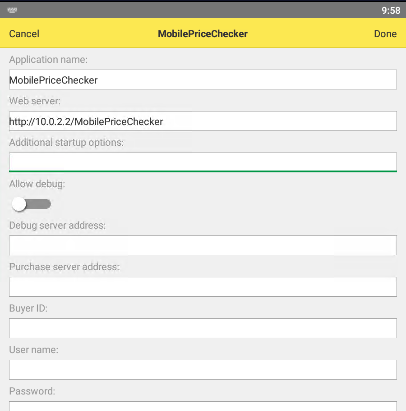
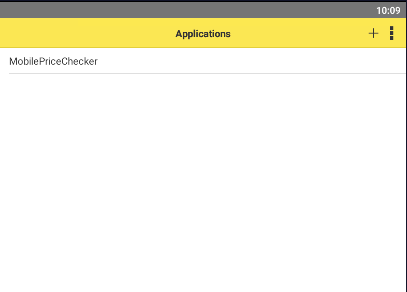
And run our application right away:
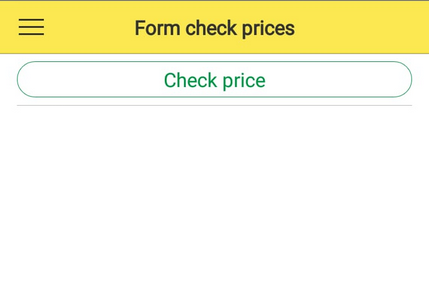
The program works as usual, and you won't see any difference at first. To understand what has changed, let's go to the "Products" catalog:
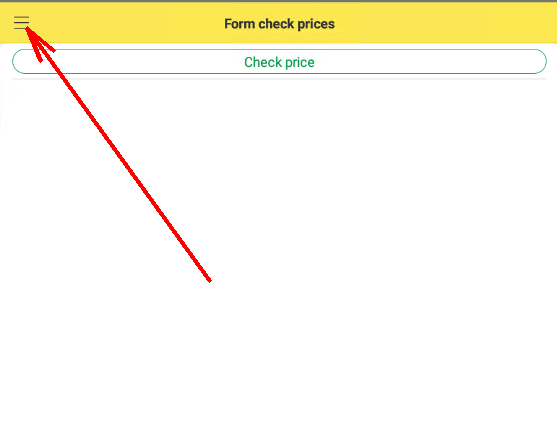
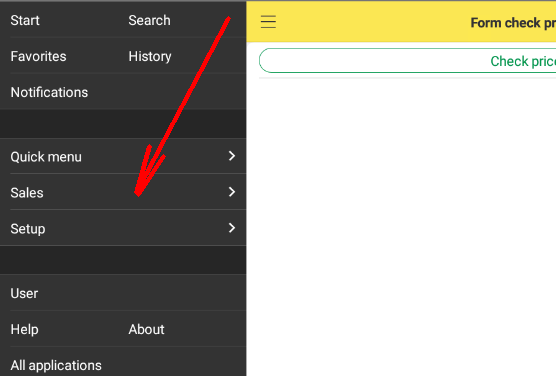
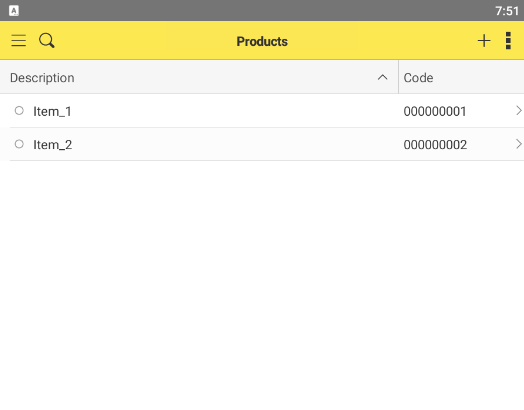
As you can see, the Catalog contains our products (which we added even earlier), we can see the prices of these products or their barcodes.
Now put your mobile device in airplane mode (you can also stop the webserver). Thus, we simulate a break in communication between the mobile client and the 1C server. And as soon as the mobile client "realizes" that the connection is broken, it offers to switch us to offline mode:
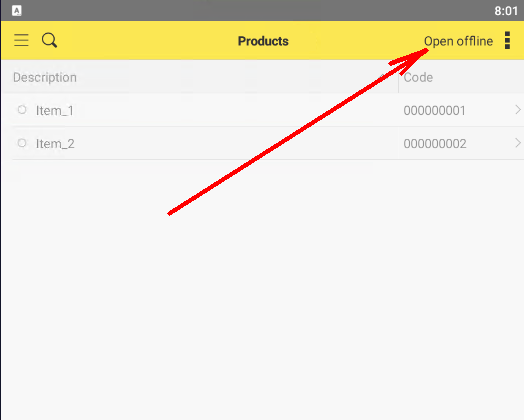
But as soon as we click the "Open offline" button we will see the following picture:
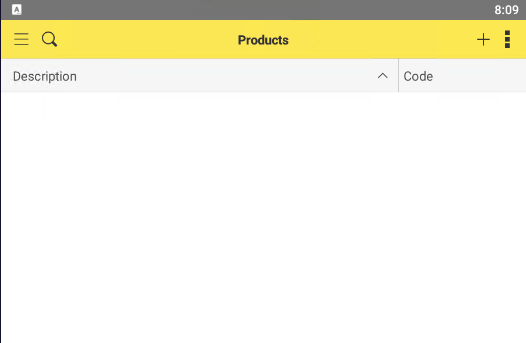
What happened? Where is the list of our products?
The explanation is straightforward. When we looked at the product list with an established connection to the 1C server, the data was taken directly from the server. But when the connection is down, the application tries to fetch data from the local database. But in the local database, it is not yet, since we have not yet done the data exchange between the 1C server and the local database on the mobile device.
By the way, please note that if the connection was lost, our mobile application continued to work, as usual, there were no errors. If it were a simple mobile client, the application would close due to a connection error.
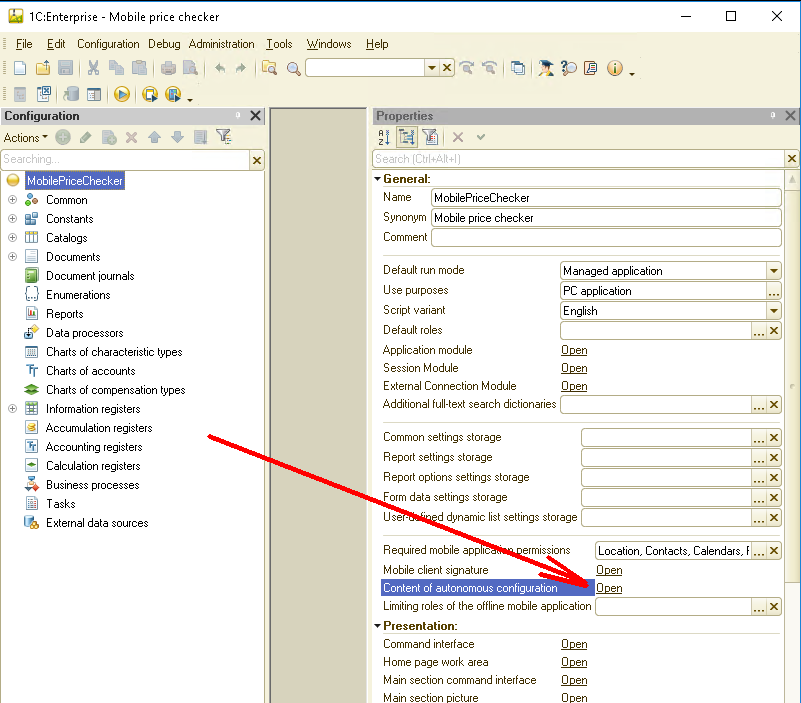
Ok, so we need to write the code for data exchange between the 1C server and the local database on the mobile device. Let's open our app in Designer. Then let's open the "Content of autonomous configuration" property - this is where we can configure what data stored on the server and what data stored in the local database:
A form open in which we can set which objects stored in the local database:
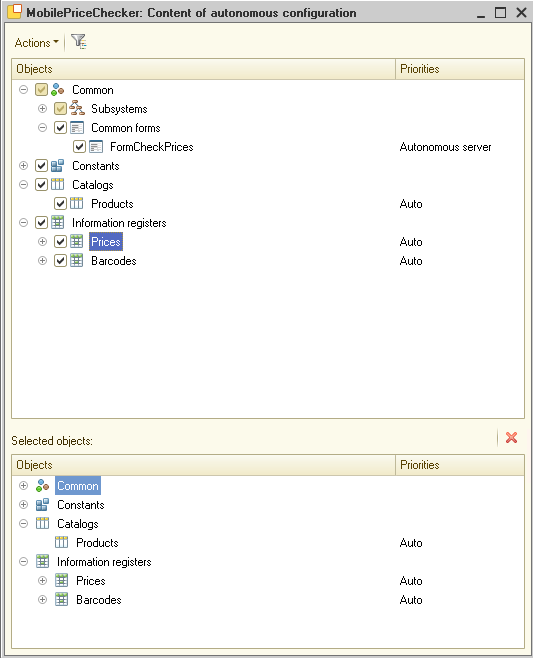
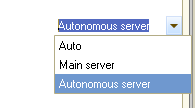
Each object can have three meanings:
"Autonomous server" - in this case, the data will always be taken from the local database,
"Main server" - in this case, data is always taken from the server,
"Auto" - in this case, data is taken from the server, if available. If there is no connection to the server, then the data is taken from the local database.
I also remind you that if we specify the value "Auto" or "Autonomous server", then the mobile client will try to take data from the local database. Still, this data not automatically sent to the local database from the server. The developer must independently download this data from the server, implementing the exchange between the server and the mobile device.
As you probably already know, in 1C, it is possible to exchange various technologies, so here the developer has a choice. In our case, I suggest using the exchange using HTTP, as described earlier in the article.
So let's add a new "ourAPI" HTTP service to our application and add one "GET" method to this service:

The source code for this method is as follows:
Function ourAPIGET(Request) Response = New HTTPServiceResponse(200); MethodName = Request.URLParameters.Get("MethodName"); If MethodName = "pricelist" Then structureResult = New Structure; structureResult.Insert("products", GetArrayProducts()); structureResult.Insert("prices", GetArrayPrices()); structureResult.Insert("barcodes", GetArrayBarCodes()); JSONWriter = New JSONWriter; JSONWriter.SetString(); WriteJSON(JSONWriter, structureResult); result = JSONWriter.Close(); Else Response.StatusCode = 405; result = "Not found Method: " + MethodName; EndIf; Response.SetBodyFromString(result,TextEncoding.UTF8); Response.Headers.Insert("Content-Type","text/html; charset=utf-8"); Return Response; EndFunction |
That is, the service expects a request from the client with the "MethodName" parameter and the value of this parameter "pricelist", and in response, it returns a structure containing a list of goods, a list of prices, and a list of barcodes.
Below is the source code for the procedures that return these lists:
Function GetArrayProducts() arrayProducts = New Array; query = New Query; query.Text = "SELECT | Products.Ref AS Ref, | Products.Code AS Code, | Products.Description AS Description, | Products.DeletionMark AS DeletionMark |FROM | Catalog.Products AS Products"; selection = query.Execute().Select(); While selection.Next() Do structureProduct = New Structure("_GUID,_Code,_Description,_DeletionMark"); structureProduct._GUID = String(selection.Ref.UUID()); structureProduct._Code = selection.Code; structureProduct._Description = selection.Description; structureProduct._DeletionMark = selection.DeletionMark; arrayProducts.Add(structureProduct); EndDo; Return arrayProducts; EndFunction Function GetArrayPrices() arrayPrices = New Array; query = New Query; query.Text = "SELECT | ProductsCatalog.Ref AS Ref, | Prices.Price AS Price |FROM | InformationRegister.Prices AS Prices | INNER JOIN Catalog.Products AS ProductsCatalog | ON Prices.Products = ProductsCatalog.Ref"; selection = query.Execute().Select(); While selection.Next() Do structurePrice = New Structure("_GUID,_Price"); structurePrice._GUID = String(selection.Ref.UUID()); structurePrice._Price = selection.Price; arrayPrices.Add(structurePrice); EndDo; Return arrayPrices; EndFunction Function GetArrayBarCodes() arrayBarCodes = New Array; query = New Query; query.Text = "SELECT | ProductsCatalog.Ref AS Ref, | Barcodes.Barcode AS Barcode |FROM | InformationRegister.Barcodes AS Barcodes | INNER JOIN Catalog.Products AS ProductsCatalog | ON Barcodes.Products = ProductsCatalog.Ref"; selection = query.Execute().Select(); While selection.Next() Do structureBarCode = New Structure("_GUID,_Barcode"); structureBarCode._GUID = String(selection.Ref.UUID()); structureBarCode._Barcode = selection.Barcode; arrayBarCodes.Add(structureBarCode); EndDo; Return arrayBarCodes; EndFunction |
If you remember, now we have implemented the server-side of the code. In response to a request from a mobile client, the server send this data.
Now it's time to write code for the mobile client to receive data from the server and process it.
Let's open the "FormCheckPrices" we created earlier and add the "Exchange" command to it:
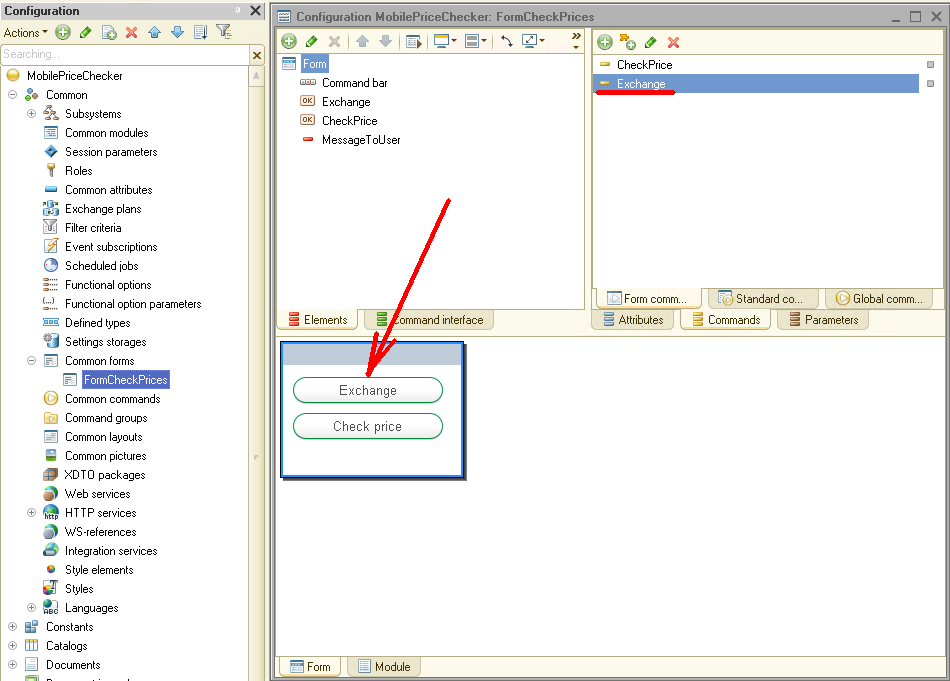
To store the exchange server address, create a Constant named "Server" with the String type:
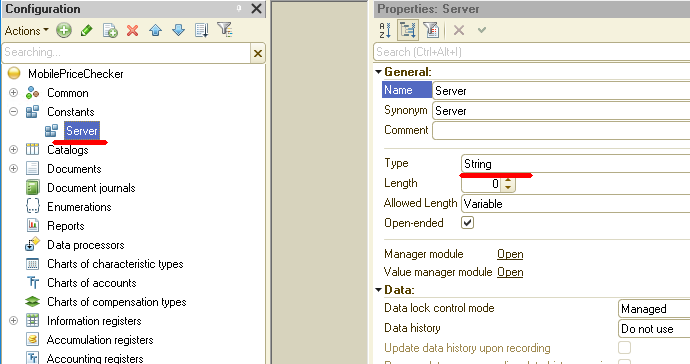
The source code for the Exchange command looks like this:
&AtClient Procedure Exchange(Command) ExchangeAtServer(); EndProcedure &AtServer Procedure ExchangeAtServer() stringServer = TrimAll(Constants.Server.Get()); HTTPConnection = New HTTPConnection(stringServer); HTTPRequest = New HTTPRequest("MobilePriceChecker/hs/ourAPI/V1/pricelist"); HTTPAnswer = HTTPConnection.Get(HTTPRequest); If Not HTTPAnswer.StatusCode = 200 Then Return; EndIf; result = HTTPAnswer.GetBodyAsString(); JSONReader = New JSONReader; JSONReader.SetString(result); structureResult = ReadJSON(JSONReader); If TypeOf(structureResult) = Type("Structure") Then If structureResult.Property("products") Then If TypeOf(structureResult.products) = Type("Array") Then For Each curElement In structureResult.products Do _guid = curElement._GUID; refProduct = Catalogs.Products.GetRef(New UUID(_guid)); objectProduct = refProduct.GetObject(); If objectProduct = Undefined Then objectProduct = Catalogs.Products.CreateItem(); objectProduct.SetNewObjectRef(refProduct); EndIf; objectProduct.Description = curElement._Description; objectProduct.Code = curElement._Code; objectProduct.DeletionMark = curElement._DeletionMark; objectProduct.Write(); EndDo; EndIf; EndIf; If structureResult.Property("prices") Then If TypeOf(structureResult.prices) = Type("Array") Then For Each curElement In structureResult.prices Do _guid = curElement._GUID; refProduct = Catalogs.Products.GetRef(New UUID(_guid)); objectProduct = refProduct.GetObject(); If objectProduct = Undefined Then Continue; EndIf; RecordManager = InformationRegisters.Prices.CreateRecordManager(); RecordManager.Products = refProduct; RecordManager.Price = curElement._Price; RecordManager.Write(True); EndDo; EndIf; EndIf; If structureResult.Property("barcodes") Then If TypeOf(structureResult.barcodes) = Type("Array") Then For Each curElement In structureResult.barcodes Do _guid = curElement._GUID; refProduct = Catalogs.Products.GetRef(New UUID(_guid)); objectProduct = refProduct.GetObject(); If objectProduct = Undefined Then Continue; EndIf; RecordManager = InformationRegisters.Barcodes.CreateRecordManager(); RecordManager.Products = refProduct; RecordManager.Barcode = curElement._Barcode; RecordManager.Write(True); EndDo; EndIf; EndIf; EndIf; EndProcedure |
So, the client forms an HTTP request to the server, if a response comes from the server in the form of a structure, then this structure is sequentially processed. First, the list of products is processed, then the list of prices, and finally the barcodes list.
I won't describe in detail how to work with an HTTP service. You can read about it in more detail in the article.
Also, note that this source code has one major drawback - data is always transferred from server to client in its entirety. That is, the entire list of goods, all prices, and all barcodes are always transmitted. For a small amount of data (or for our case study), this is not critical. If our list of goods contains several thousand or more items, the exchange can take a very long time. In one of the subsequent publications, we consider an example of how you can implement the exchange in the case of a large amount of data.
Now let's get back to our application. We previously published it on a web server, but now an HTTP service has appeared in this application, so it needs to be published again. Open the application publishing form on the webserver and be sure to check the box next to our HTTP service:
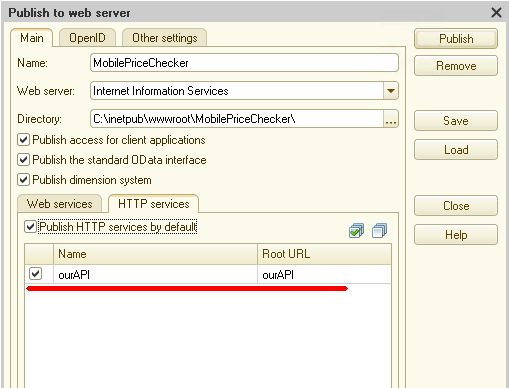
Then press the "Publish" button. That's it, our application is ready for testing!
Open our mobile app again. As you can see, at first glance, nothing has changed. Only a new "Exchange" button has appeared on the initial form. If you switch the device to airplane mode now and then open the list of goods, it remains empty.
Let's return the mobile device to normal mode and set the value of the "Server" constant (remember that this constant stores the exchange server address):
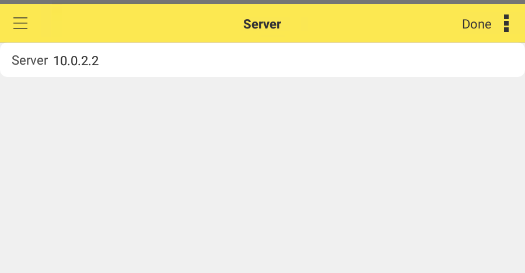
Then run the "Exchange" command by clicking the appropriate button. If everything is configured correctly, then after a while, the exchange will be completed. After that, for example, open the list of goods, and put the phone back into airplane mode. As soon as the mobile client realizes that the connection to the server has been lost, it offers you to go offline mode:
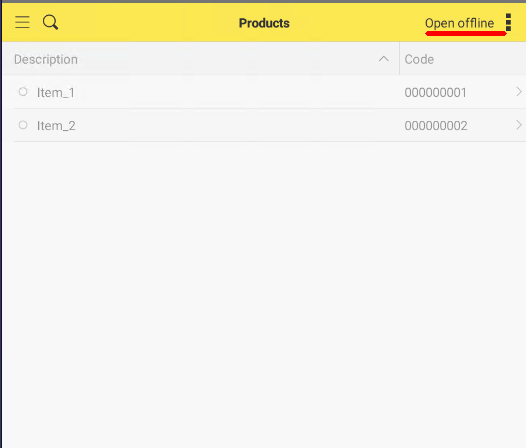
As you can see, the list of products is not active now, but as soon as you click the "Open offline" button, the list of products is activated again, and you can work with it as before.
Just like the products themselves, the prices of these products and their barcodes are now available. Now we can continue to work (I remind you that our application checks prices in the store windows) although there is no connection to the server.
In principle, the task set by us can be considered complete. We have created a mobile application that can work both with data directly on the server and entirely offline.
In the first case, the data is always stored on the server, while the mobile device only displays it.
In the second case, the data is stored directly on the mobile device. What data and in what volume should be stored on a mobile device determines the developer. He must also create a code for exchanging data between the server and the mobile device.
In our case, we used an HTTP service to create an exchange. But the exchange we have implemented has a significant drawback since the data is always transmitted in its entirety. 1C has mechanisms and technologies to get rid of this drawback. We will discuss how to do this in future posts.
One more drawback of the technology described above is that we did not create a ready-made apk application but used a particular constructor from the developer's kit. But 1C allows you to build a completely finished application for Android and iOS, which you can use at your own discretion, even place it in app stores.
And we will consider how to make a ready-made application for Android in our next publication.
You can download this the Demo Configuration to learn this 1C mechanism properly.
If you have any questions about this article, you can always get answers on our forum: https://1c-dn.com/forum/
Stay with us!


