Work with the Telegram chatbot from 1C. Training task.
The most promising field for using chatbots is business. They can not only keep the conversation going but also can help to find the necessary information, accept orders from customers, be used as tech support. A new stage in the development of chatbots began after the integration of the functionalities of various business applications with different messengers.
We use the 1C:Enterprise platform as one of the universal and rapid tools for developing business applications. But here you may wonder if it is possible to create a chatbot to optimize and speed up the company’s processes without using third-party services.
1C:Enterprise is not just a tool for accounting automation. It is quite a universal programming language which allows a user to perform a great number of tasks.
As a training task, we are going to demonstrate the work of a new chatbot in Telegram and perform simple integration with 1C. Please, note that we selected Telegram because it has an open and simple API, and it is not required to go through the verification of the messenger’s support service when developing chatbots.
So, to do this, we find the BotFarther channel in Telegram and send the /newbot command to it. In response, Telegram will ask us for the name of our new bot.
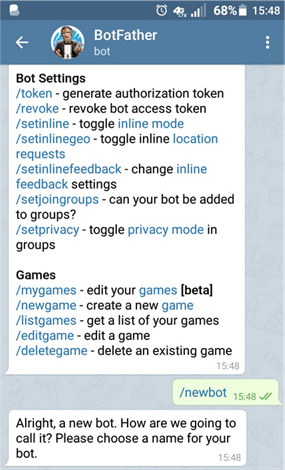
Let it be oneC_dn_bot.
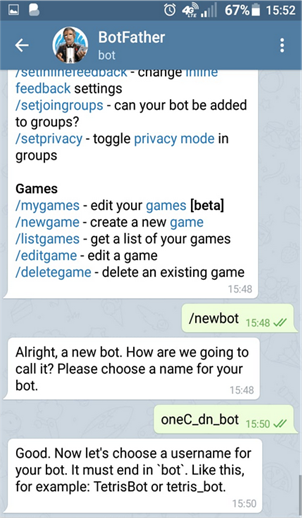
Then BotFarther asks us for the username of our new bot. It must necessarily end in bot. We also introduce oneC_dn_bot.
After that, Telegram verifies the uniqueness of our bot’s username, and if everything is fine, it issues a token to connect to it.

For further work, we will need only the token. Please, note that you should not tell the token to anybody since it allows controlling your bot.
To start the work of the new bot, we need to click the hyperlink sent by BotFarther. Having entered the new bot, we click Start.
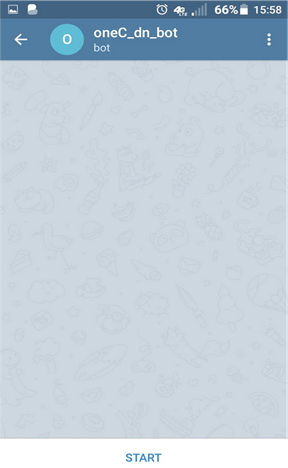
We can even write something in our bot’s channel.
Now the setting from the part of Telegram is finished, let’s proceed to 1C.
In this example, we will demonstrate only the fundamental things of working with Telegram, therefore we are not going to create a new configuration. The whole code will be written in the external data processor.
We create an external data processor and name it WorkWithTelegramBot.
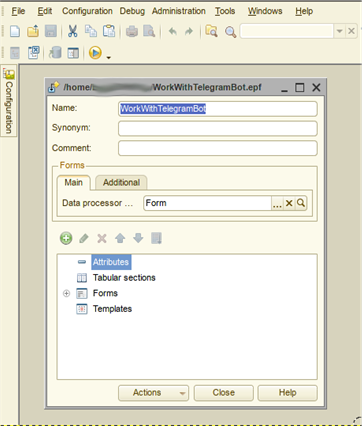
Then we create the form, next we add in the form the following two commands ReadBotTelegram and PostToTelegram, as well as some string attributes ChatID, Token, and SomeText.
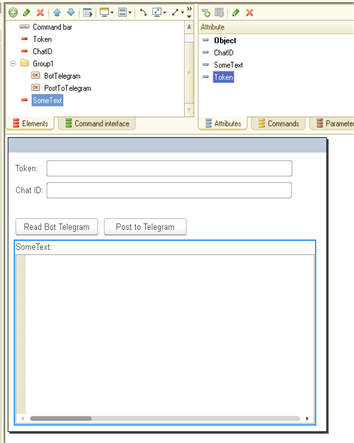
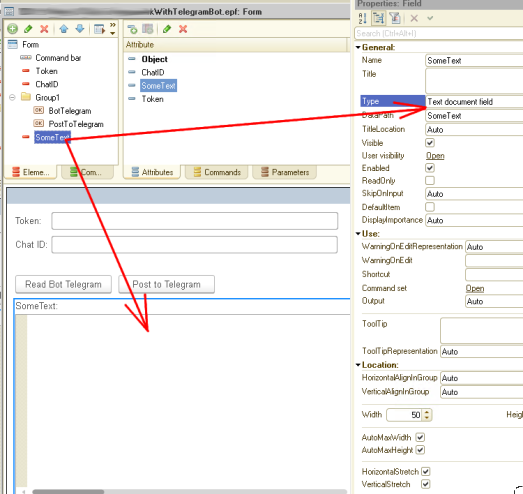
To make the form look prettier, we set the Text document field value for the SomeText attribute.
For the first command ReadBotTelegram, we should prescribe the data processor:
&AtClient
Procedure ReadBotTelegram(Command)
Connection = New HTTPConnection("api.telegram.org",443,,,,,New OpenSSLSecureConnection());
RequestText = "bot" + Token + "/getUpdates";
HTTPRequest = New HTTPRequest(RequestText);
Answer = Connection.Get(HTTPRequest);
JSONReader = New JSONReader();
JSONReader.SetString(Answer.GetBodyAsString());
Result = ReadJSON(JSONReader);
JSONReader.Close();
arrayMessages = Result.result;
SomeText = "";
For Each structureMessage In arrayMessages Do
Sender = "" + structureMessage.message.from.first_name + " " + structureMessage.message.from.last_name;
ChatID = Format(structureMessage.message.chat.id, "NG=");
stringMessage = "" + structureMessage.message.text;
SomeText = SomeText + Chars.LF + (StrTemplate("Sender: %1; Сhat ID: %2; Message: %3", Sender, ChatID, stringMessage));
EndDo;
EndProcedure
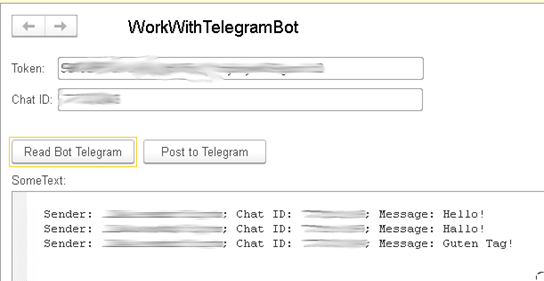
Let’s go through the code briefly: it creates the HTTP Connection to the api.telegram.org resource, in the request text it sends the bot" + Token + "/getUpdates command and makes the Get request.
In response from the server, we get a structure, and one of the entries here is the result array.
We parse this array in the cycle and display the Sender’s first name and last name, the Chat ID and the string message itself.
Also, the ChatID attribute is automatically filled in on the form – we will need it further when sending a message from 1C.
It’s easy!
Well, we can read the message from the Telegram channel. Now, let’s write something in the channel on behalf of our bot.
Go ahead!
The data processor for the second command PostToTelegram looks like as follows:
&AtClient
Procedure PostToTelegram(Command)
Connection = New HTTPConnection("api.telegram.org",443,,,,,New OpenSSLSecureConnection());
RequestText = "bot" + Token + "/sendMessage?chat_id=" + ChatID + "&text=" + SomeText;
HTTPRequest = New HTTPRequest(RequestText);
Connection.Get(HTTPRequest);
EndProcedure
It is even easier!
We can create a simple request and send it to the bot using the token and the Chat ID received in the first command. Here is how it looks in 1C:
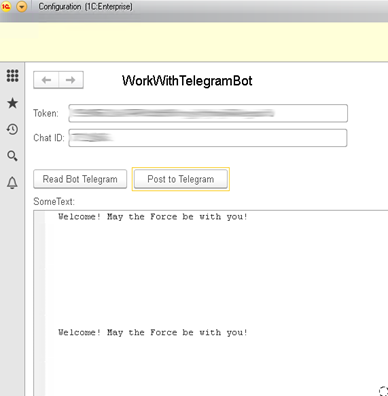
and in Telegram:

Well, we successfully reached our goal!
You can download this Example (*.epf) for your own application.
Next time we will make it so that our bot itself can respond to user commands.
Please, supplement your suggestions for the development of demo applications in our forum.
Stay tuned!

Writen by
1C Developer
20+ years of experience in the software industry in Russia, UAE and Germany. My main fields of expertise are developing and implementation of business applications (Retail, CRM, WMS, and Accounting) and integration of software with POS equipment and web portals.


