1C:Enterprise 8.3. Administrator guide. File Mode.
Contents
Introduction
This book is a guide for administrators of 1C:Enterprise.
Overview
Chapter 1 contains system requirements for 1C:Enterprise deployment and operation.
Chapter 2 describes installation of 1C:Enterprise.
Chapter 3 describes installation of 1C configurations.
Chapter 4 describes system startup and customization of the startup window.
Chapter 5 contains information on managing the list of infobases.
Chapter 6 explains 1C:Enterprise administration capabilities.
Chapter 7 describes standalone server starting and managing.
Chapter 8 describes how to configure web servers to work with 1C:Enterprise.
Chapter 9 describes how to configure web browsers to run the web client.
Chapter 10 describes the unauthorized use protection system and its settings.
Chapter 11 describes the process of updating the system.
Chapter 12 describes the uninstallation process.
Chapter 13 describes administration of the mobile application.
The appendices contain various auxiliary information:
-
Description of the directory structure that will be created after the installation, and descriptions of some files and directories.
-
Description and location of internal files.
-
Description of utilities for infobase testing and correcting, integrity monitoring, and infobase conversion, as well as description of the ring utility.
-
Description of the command line for starting the 1C:Enterprise client applications and Designer.
-
Components and licenses used.
Agreed notations
Keys. Keys such as Enter, Esc, Del, and others are given without quotation marks.
The Arrow keys phrase is used to specify all arrow keys at once. They are individually referred to as Up Arrow, Down Arrow, Right Arrow, and Left Arrow.
Keyboard shortcuts. When a command requires a keyboard shortcut, it will be denoted as Ctrl + F3. All keyboard shortcuts in the guide are specified for PC-compatible computers. On Apple computers, you need to use Cmd instead of Ctrl and Option instead of Alt in the given keyboard shortcuts. So, the keyboard shortcut Ctrl + Alt + Shift + F5 for a PC-compatible computer will look as follows for an Apple computer: Cmd + Option + Shift + F5.
Buttons. Form buttons are given without quotation marks, like OK, Cancel, Delete, and others.
1C:Enterprise language keywords. 1C:Enterprise language keywords are highlighted by specific font and are given as in modules, for example: WorkingDate. This manual contains references to some parts of 1C:Enterprise language description (sections, methods, attributes, and others). For these descriptions, see the application help (the 1C:Enterprise language section).
Menu actions. Menu interactions are described as follows: Menu – Submenu – Submenu – ... – Menu item. For example: "To select the picture scale, click Table – View – Scale" is similar to: "To select the picture scale, use the Scale menu item of the View submenu in the Table menu in the main menu of the application". If any menu, other than the main menu, is referred, it is specified explicitly.
1C:Enterprise modes. Configuration setup and validation (hereinafter referred to as Designer mode), and configuration execution (hereinafter referred to as 1C:Enterprise mode).
In this manual, the "user" refers to a specialist who develops or maintains the configuration.
The following abbreviations and expressions may be used in this document:
| Expression | Description |
|---|---|
| %ALLUSERSPROFILE% | The %ALLUSERSPROFILE% expression means a Windows environment variable with a directory available to all users. If the operating system is installed using default settings, this path looks as follows: |
| %APPDATA% | The %APPDATA% expression means a Windows environment variable that contains a path to the directory (in the user profile) where application data is stored. If the operating system is installed using default settings and the username is Smith, this path looks as follows: |
| %LOCALAPPDATA% | The %LOCALAPPDATA% expression means an environment variable of Windows that contains a path to the directory (in the user profile) where user-specific application data is stored. If the operating system is installed using default settings and the username is Smith, this path looks as follows: |
| %PROGRAMFILES% | The %PROGRAMFILES% expression means a Windows environment variable with a path to the directory that contains data files for applications whose bitness matches the operating system bitness. If the operating system was installed using default settings, this expression equals to |
| %PROGRAMFILES(x86)% | The %PROGRAMFILES(x86)% expression means a Windows environment variable with a path to the directory that contains data files for applications whose bitness does not match the operating system bitness. In other words, this environment variable contains a link to the directory where x32 applications are stored in the x64 operating system. If the operating system was installed using default settings, this expression equals to |
| %SYSTEMROOT% | The %SYSTEMROOT% expression means a Windows environment variable that contains a path to the operating system installation directory. If the operating system was installed using default settings, this expression equals to |
| %USERPROFILE% | The %USERPROFILE% expression means a Windows environment variable that contains a path to the current user profile directory. If the operating system is installed using default settings and the username is Smith, this path looks as follows: |
~/
$HOME |
The $HOME expression or ~/ means a Linux or macOS environment variable with a path to the home directory of the user on whose behalf the current operating system session is running. The specific location of the user directory depends on the operating system used. The ~/.1cv8 expression means the .1cv8 directory located in the home directory of the current user. |
| A.B.C.D | For the 1C:Enterprise version, the A.B.C.D expression means that the full version number of the 8.3.24.123 format is to be used. |
| arch | The description of paths to the components of the installed 1C:Enterprise version (on Linux) can use the arch expression. This expression, unless explicitly stated otherwise, describes the processor architecture of the used version, which can take the following values:
In this case, the path will be described, for example, by the following line: /opt/1cv8/arch/A.B.C.D/conf, and the resulting, actual directory will depend on the system architecture and version. So, for x86 architecture and version 8.3.25.100, the path will be as follows: /opt/1cv8/i386/8.3.25.100/conf. |
All files of the same name that are used simultaneously for Windows OS, Linux OS and macOS, will be mentioned under the same name in this guide, regardless of the OS being used. For example, the 1cestart.cfg file will be stated as is in the guide, as well as on Linux and macOS. However, it will be called 1CEStart.cfg on Windows.
Extensions of executable files are not specified (if any). This means that 1cv8.exe is referred to as 1cv8 in this manual. On Windows, add the .exe extension. On Linux and macOS, do not add anything.
Also, Linux and macOS are case-sensitive, and Windows is not.
Chapter 1. System and hardware requirements
1.1. System requirements
1.1.1. General information
This section contains the minimum characteristic requirements for the computing systems on which 1C:Enterprise is running.
Apple computers support both x86-64 and Apple processors. Apple processors are supported only in translation mode. Translation mode can affect 1C:Enterprise platform performance.
The optimal hardware configuration depends both on the client application type of 1C:Enterprise platform and other factors:
-
Installed software
-
Size and number of infobases
-
Number of connected users
-
Used application configuration
-
Used configuration patches
-
Used configuration extensions
-
Used platform features (for example, Data Accelerator) and many other factors
To get the optimal hardware configuration for comfortable operation, do not rely only on the minimum requirements. It is recommended that you assess the hardware in practice. Perform testing in case of deployments in companies with numerous users. Compare the test results with the desired performance and adjust the resulting system and hardware requirements. To calculate the server hardware parameters, we recommend following the procedure: https://its.1c.ru/db/metod8dev#content:5810 (in Russian).
You can find relevant 1C:Enterprise requirements with notes on the website: http://www.v8.1c.ru/requirements/ (in Russian).
1.1.2. Thin client
Minimum requirements for a client computer:
| Parameter | Value |
|---|---|
| Processor |
|
| RAM | 4 GB or more |
| Storage | Hard drive or solid state drive. Installation requires more than 350 MB |
| Ports | USB port |
| Monitor | Resolution of 1280 x 768 pixels or higher |
| Linux | x86/x86-64 processors:
ARM64 processors:
E2K processors:
|
| macOS | x86/x86-64 processors:
ARM64 processors:
E2K processors:
|
| Windows | x86/x86-64 processors:
Ensure that the latest operating system updates are downloaded and installed.
ARM64 processors:
E2K processors:
|
1.1.3. Thick client
1.1.3.1. End user computer
Minimum requirements for a client computer:
| Parameter | Value |
|---|---|
| Processor |
|
| RAM | 4 GB or more |
| Storage | Hard drive or solid state drive. Installation requires at least 1 GB. |
| Ports | USB port |
| Monitor | Resolution of 1280 x 768 pixels or higher |
| Linux | x86/x86-64 processors:
ARM64 processors:
E2K processors:
|
| macOS | x86/x86-64 processors:
ARM64 processors:
E2K processors:
|
| Windows | x86/x86-64 processors:
Ensure that the latest operating system updates are downloaded and installed.
ARM64 processors:
E2K processors:
|
1.1.3.2. Developer computer
Minimum requirements for an application developer's computer:
| Parameter | Value |
|---|---|
| Processor |
|
| RAM | Minimum: 4 GB
Recommended: 8 GB |
| Storage | Hard drive or solid state drive. Installation requires at least 1 GB. |
| Ports | USB port |
| Monitor | Resolution of 1920 x 1080 pixels or higher |
| Linux | x86/x86-64 processors:
ARM64 processors:
E2K processors:
|
| macOS | x86/x86-64 processors:
ARM64 processors:
E2K processors:
|
| Windows | x86/x86-64 processors:
Ensure that the latest operating system updates are downloaded and installed.
ARM64 processors:
E2K processors:
|
The RAM requirements for thick client and configuration development may vary between configurations.
1.1.4. Web client
The web client requirements are generally defined by the web browser used. Requirements for a web client user's computer:
| Parameter | Characteristic |
|---|---|
| Processor | Intel Celeron processor 2700 MHz or higher |
| RAM | 4 GB or more |
| Storage | Hard drive or solid state drive required for web browser operations |
| Monitor | Resolution of 1280 x 768 pixels or higher |
| Linux |
|
| macOS |
|
| Windows |
|
Progressive web application is supported on a user device if:
-
The following web browsers are used:
-
Google Chrome 73 or later.
-
Microsoft Edge 73 or later.
-
Yandex Browser 22 or later.
-
-
Connection to the web server is established over HTTPS. A valid certificate is installed on the web server.
1.1.5. Mobile version
| OS | Requirements |
|---|---|
| Android |
|
| iOS |
|
| Windows |
|
1.2. Power-saving modes
Power-saving modes are disabled on computers running 1C:Enterprise if:
-
Online dongle is used.
-
Database file is located on a network drive while the infobase is in file mode.
1.3. Supported web servers
1C:Enterprise supports the following web servers:
- Microsoft Internet Information Services (IIS) 5.1, 6.0, 7.0, 7.5, 8.0, 8.5, 10.0.
Web server documentation:
-
IIS 6.0: https://technet.microsoft.com/ru-ru/library/cc785089.aspx.
-
IIS 7.0: https://technet.microsoft.com/ru-ru/library/cc732976.aspx.
-
IIS 7.5: https://technet.microsoft.com/ru-ru/library/cc754281.aspx.
-
IIS 8.0, 8.5: https://technet.microsoft.com/ru-ru/library/hh831725.aspx.
-
Apache HTTP Server 2.0, 2.2, and 2.4.
You can download the latest web server version at: https://httpd.apache.org/download.cgi. Web server documentation:
-
Apache 2.0: https://httpd.apache.org/docs/2.0/.
-
Apache 2.2: https://httpd.apache.org/docs/2.2/.
-
Apache 2.4: https://httpd.apache.org/docs/2.4/.
To use external data sources in infobase file mode that uses a Linux web server, unixOdbc 2.2.11 or above must be available on the web server.
If the web server is used to access the file mode of the infobase, the computer running the web server and web server extension must meet the following requirements:
-
Intel Celeron processor 2700 MHz or higher.
-
RAM: 4 GB or more (8 GB recommended).
-
Hard drive or solid state drive (approximately 1 GB required for installation).
1.4. Other requirements
1.4.1. General requirements
To use some 1C:Enterprise features, you might need to install Java 1.8 or later on computers with the server cluster. The bitness of Java must match the bitness of 1C:Enterprise server cluster. We recommend that you use the Liberica distribution. Features that require Java to be installed:
-
The ring utility and related utilities, for example, the licensing utility (ring license).
-
Full-text data search, version 2.
When using client/server mode, additional or other 1C:Enterprise components might require installing Java.
1.4.2. On Linux
To use other functions, the following libraries might be required:
-
fontconfig:
-
Library name: libfontconfig.
-
Version: 2.3.0 or later.
-
Purpose:
-
Operation of 1C:Enterprise server in managed mode.
-
Using the Chart, GraphicalSchema, or SpreadsheetDocument objects on the server.
-
Saving to PDF.
-
-
-
unixOdbc:
-
Library name: libodbc.
-
Version: 2.2.11 or later.
-
Purpose: operations with external data sources.
-
-
Kerberos:
-
Library name: libkrb5.
-
Version: 1.4.2 or later.
-
Purpose: OS authentication.
-
-
GSS-API Kerberos:
-
Library name: libgssapi_krb5.
-
Version: 1.4.2 or later.
-
Purpose: OS authentication.
-
-
Microsoft Core Fonts.
Libraries are imported by 1C:Enterprise as LibraryName.so.X.Y, where:
-
LibraryName is one of the values listed above.
-
so indicates a library file.
-
X.Y are library suffix digits.
Only libraries registered in runtime dynamic linker cache can be imported. To get this information, execute the ldconfig -p command. If several versions of the library are available, the latest one will be imported.
1.4.3. On Windows
The Windows user that starts the client application must have the List folder contents right for the temporary files directory.
To use the software licensing system (see Software Licensing System), enable WMI (Windows Management Instrumentation, https://msdn.microsoft.com/en-us/library/aa394582.aspx).
Some fonts might require restarting the computer when installed. If the font is used by the client application, the client computer needs restarting. If the font is used by the server, the server needs restarting.
When working in Windows 10 via Remote desktop connection, it is recommended that you disable Visual effects of menus and windows in connection settings. This check box is available in additional parameters of the Interaction tab.
Nonvisual 1C:Enterprise access is supported in Windows 7 and above. Nonvisual access requires:
-
Microsoft UI Automation.
-
NVDA (https://www.nvaccess.org/) screen reader is recommended.
-
For Russian speech, install RHVoice speech synthesizer (https://github.com/Olga-Yakovleva/RHVoice).
Nonvisual access is available:
-
When working with the managed forms.
-
When using Taxi interface with any form item placement functionality.
-
In thin and thick clients.
1.5. Restrictions
For file infobase collaboration, all client applications must have the same version. At the same time, the client applications may use any architecture (32- or 64-bit application) and any operating system (Windows or Linux).
Maximum number of concurrent connections per infobase is 1,024.
Online collaboration using file infobases is only supported for network resources that are accessed via SMB protocol (CIFS). These resources can be located on both Windows and Linux computers.
Client application running on macOS does not support network infobases.
Please remember that bitness of add-ins and COM objects (on Windows) must match bitness of the 1C:Enterprise application used (thin or thick client, server, or web server). In other words, if a COM object only has 32-bit version, it cannot be used in the 64-bit version of 1C:Enterprise.
If you want to use 1C:Enterprise on ARM64-based computer systems, keep in mind the following restrictions:
-
The utility is not supported on Windows.
-
Apple processors are supported only in translation mode.
-
Dongles are not supported.
-
Automatic update of the client application is not supported.
If you want to use 1C:Enterprise on E2K-based computer systems, keep in mind the following restrictions:
-
The utility is not supported on Windows.
-
Dongles are not supported.
-
Automatic update of the client application is not supported.
1.6. Platform and licensing options
1.6.1. General information
1C:Enterprise platform is available in several distribution packages, and several license types that enable some platform features and restrict others.
Below, you can find distribution package options and license types.
1.6.2. Distribution package options
1C:Enterprise distribution packages:
-
Standard version of 1C:Enterprise. Requires a license. Functionality might be restricted by the licenses.
-
Training version of 1C:Enterprise (https://1c-dn.com/developer_tools/1c_enterprise_8_platform_training_version/). Does not require a license. The training version has the following restrictions:
-
It cannot be used for actual enterprise accounting purposes.
-
It cannot be used to build distribution packages of mobile applications intended for publication and replication.
-
Data volume is restricted:
-
Maximum number of records in account tables is 2,000.
-
Maximum number of records in main object tables is 2,000.
-
Number of records in object tabular sections is 1,000.
-
Number of records in record sets is 2,000.
-
Number of records from external data sources is 200.
-
-
Client/server mode is not supported.
-
Infobases are not supported.
-
Local speech recognition is not supported.
-
COM connections are not supported.
-
Passwords and OS authentication are not supported.
-
Printing and saving spreadsheet documents is only supported in Designer mode.
-
Copying multiple spreadsheet document cells is not supported in 1C:Enterprise mode.
-
Training version is slower than the commercial version of 1C:Enterprise.
-
Configuration repository is not supported.
-
Configuration delivery functions are not available.
-
Only one connection can be established per infobase.
-
Separator values are set to separator type defaults.
-
-
1C:Enterprise. File Management (https://v8.1c.ru/metod/fileworkshop.htm). Does not require a license. This distribution package has the following features and restrictions:
-
1C:Enterprise infobases are not supported.
-
The following 1C:Enterprise files can be opened and viewed:
-
Spreadsheet documents
-
Text documents
-
Graphical diagrams
-
Geographical schemas
-
HTML documents
-
-
1.6.3. License types
1.6.3.1. General information
There are various licenses you may need to use 1C:Enterprise. Only the training version can be used without any license. Licenses are required to operate with various application components. You can find the descriptions of available 1C:Enterprise licenses below.
1.6.3.2. Client license
Purpose: required for using client application in file and client/server mode.
Types:
-
CORP client license. Enables all system functionality.
-
PROF client license. Allows you to use the system features in accordance with the limitations of the PROF server license.
-
1C:Analytics client license. 1C:Analytics client license enables concurrent operation of multiple users in 1C:Analytics (one session – one user). The number of simultaneous sessions cannot exceed the nominal value of the license. You can use the client license for 1C:Analytics with any server license for 1C:Enterprise.
If the infobase serves no more than 5 concurrent sessions of client applications, technical features and the license allow you to run one session of 1C:Analytics without 1C:Analytics client license.
When you use a PROF-level 1C:Enterprise server license, the 1C:Analytics client license allows you to use the database copy functionality along with Data Accelerator. In this case, you can start Data Accelerator in a single instance.
-
Basic license. Restricts the system functionality as follows:
-
Only one user can work with the system at the same time. For more information, see Maintaining the user list.
-
Editing a configuration with Designer is not supported.
-
Client/server mode is not supported.
-
Distributed infobases are not supported.
-
Internet services cannot be provided.
-
Web client mode is not supported.
-
External connection mode is not supported.
-
Extensions are not supported.
-
1.6.3.3. Server license
Purpose: required for 1C:Enterprise server cluster. This license is required to use client/server mode of 1C:Enterprise. Besides this license, client/server mode also requires client licenses.
| License type | Description |
|---|---|
| CORP | Information: https://1c.ru/news/info.jsp?id=18887.
The license is only available for 64-bit 1C:Enterprise server. This license enables full functionality of 1C:Enterprise server. |
| PROF | The license is available for 32- and 64-bit 1C:Enterprise servers.
The 32-bit license allows you to run any number of 32-bit working processes on a physical computer. The 64-bit license allows you to run any number of 32-bit and 64-bit working processes on a physical computer.
Any PROF server license provides the use of all the 1C:Enterprise server features, except for the following:
|
| MINI | Information: https://www.1c.ru/news/info.jsp?id=17577.
The license is available for 32- and 64-bit 1C:Enterprise servers. Besides the PROF server license restrictions, the MINI server license has the following restrictions:
|
1.6.3.4. License extensions
- PROF license extension.
Information: https://www.1c.ru/news/info.jsp?id=25491 (in Russian).
If 1C:Enterprise is purchased before 02/11/2019, you can remove restrictions on simultaneous operation of over 500 user sessions (Designer, external connection, any client application) in one infobase and on the usage of over 12 CPU cores by 1C:Enterprise server cluster processes. Actions depend on the used security system:
-
Software license. The update is executed automatically, no additional actions are required.
-
HASP security key. You need to receive free special software licenses of the PROF-level license extension on 1C:ITS Portal. Upon activation, the license must be linked to any available dongle for 1C:Enterprise (client or server). You can use the extension license only with a hardware license for which it is received. The instruction on how to update the license is provided with a PIN.
-
CORP license extension.
Information: https://www.1c.ru/news/info.jsp?id=25491 (in Russian).
Since 09/10/2019, all CORP hardware license features (HASP dongle) are available only after extending the current CORP hardware license using a special software license. You need to get this license from 1C Licensing Center. Upon activation, the license must be linked to any available dongle for 1C:Enterprise (client or server). You can use the extension license only with a CORP hardware license for which it is received. The instruction on how to get the software license is provided to the user with a PIN. If you use a software license for a CORP license, no additional actions are required.
1.6.3.5. Collaboration system server license
Purpose: required for deploying your own instance of the collaboration system server.
Information: https://1c.ru/news/info.jsp?id=26598 (in Russian).
Features: you can deploy your own instance of the collaboration system server if one of the following tools are available:
-
CORP server license.
-
1C:Collaboration server.
1.6.3.6. License for developers (community version)
Purpose: to execute fully-fledged development on 1C:Enterprise platform without purchasing licenses. You cannot use the platform with an activated developer license for commercial purposes.
Information: https://1c.ru/news/info.jsp?id=30506 (in Russian).
Developer license features:
-
You can use it only with 1C:Enterprise version 8.3.23 or later.
-
The license is available only as a software license.
-
You can activate it on one client computer and one server computer at the same time even if these are different computers.
-
The license validity period is one week. The license is updated automatically if the Internet connection is available.
-
Developer licenses cannot be combined.
-
If sessions that use PROF or CORP licenses are connected to the infobase, no more than three client sessions using one developer license can be connected to one infobase at the same time.
-
The license is used in the following cases:
-
For a file infobase: if no other license (basic, PROF, or CORP) is found.
-
For a server infobase: if no other license (PROF or CORP) is found. You can use the developer license both as a client license and as a server license.
-
-
Usage statistics are collected and sent to the Update Control Center. Only statistics on using platform features are sent to the Center. Infobase user data is not passed. The statistics are collected from the developer's computer from an application that uses an activated developer license.
The developer license allows you to:
-
Ensure concurrent operation of the following sessions in one infobase (licenses are provided by 1C:Enterprise server):
-
No more than three sessions with direct connection.
-
No more than one session connected via a web server.
-
No more than one 1C:Analytics client session.
-
No more than one mobile client session.
-
-
Use the CORP license functionality if no more than 10 licensed sessions run in the infobase.
The developer license does not allow you to:
-
Use the license for commercial purposes.
-
Access tools that require a feature testing license.
-
Bind the license to a dongle.
-
Use more than two different developer licenses in one infobase.
-
Use more than one production server in a cluster:
-
When you add a production server, an error occurs.
-
If the cluster already contains more than one production server, only one (arbitrary) production server is used.
-
-
Using PROF or CORP client licenses to access a server cluster that uses a developer license as a server license.
1.6.3.7. Feature testing license
Purpose: required to test features in beta testing (feature testing). A feature testing license is an addition to a client or server license of any type.
Information: http://1c.ru/news/info.jsp?id=25182 (in Russian).
Features of the feature testing license:
-
License is activated on the computer with:
-
1C:Enterprise server cluster.
-
Web server extension running with a file infobase where the feature is used.
-
Client application running with a file infobase where the feature is used.
-
-
License may be issued by the server cluster licensing service.
-
Number of required feature testing licenses:
-
In client/server mode: equal to or greater than the number of server licenses for the server cluster where testing is executed.
-
In file mode: at least one license.
-
-
License does not grant access to a server cluster or a client application without the respective license (server or client).
-
Features available only with a feature testing license are determined upon 1C:Enterprise version release.
-
Final licensing requirements of the tested features are determined at the time these features are withdrawn from beta testing.
To obtain a feature testing license, email a request at betaplatform@1c.ru.
1.6.4. CORP license applicability
All 1C:Enterprise features, including the ones available under the CORP license, except for Data Accelerator, are available if not more than 10 client sessions are connected to each infobase of 1C:Enterprise server cluster at the same time. In this case, both server and all the client licenses can be of PROF level. If a further session is connected to any of the server cluster infobases, an error is returned, whenever a server cluster supports features provided by CORP license, and the number of CORP licenses is insufficient.
If 1C:Enterprise uses the features provided by the CORP license, and the number of user sessions in one infobase exceeds 10, then starting a new user session in this infobase is only possible if there is a sufficient number of CORP client and server licenses.
Number of CORP licenses is considered to be sufficient if all the server licenses used by the cluster are CORP level and one of the two conditions is additionally met:
-
Client application has been granted a CORP client license.
-
Client application has been granted a PROF license and at the time of establishing a new client connection, the ratio of licenses used is as follows: UU \<= 1.1 * CL. In the expression:
-
UU. Number of unique users (uniqueness is tracked by username) of the cluster client sessions with any license type, including the starting session.
-
CL. Number of CORP client licenses available for granting by the 1C:Enterprise server regardless of the actual status of the 1C:Enterprise server license granting flag.
-
Consider an example. A CORP server license and a CORP client license for 50 users are installed on 1C:Enterprise server computer. Such configuration provides for:
-
Arbitrary number of client connections if each client connection has a CORP level license.
-
Connection of client application with the PROF license to the server will be possible if after connecting the server will maintain sessions of no more than 1.1*50 = 55 unique infobase users. Therefore, a user with PROF license can access an infobase, only if upon connection the number of unique server cluster users (including the session which is started) does not exceed 55.
To prevent the majority of users from getting the denial of service due to an error, only certain users with PROF licenses (out of all users with CORP licenses) can sign in to the CORP-level system. Legally, users with PROF licenses cannot operate in a CORP-level system.
Chapter 2. Installing 1C:Enterprise
2.1. General information
1C:Enterprise is a collection of modules used to develop and use applications (configurations) for enterprise accounting and business activities automation and the configuration or configuration collection.
1C:Enterprise modules are universal and compatible with any configuration (within the scope of the corresponding License Agreement).
A security driver preventing unauthorized access is installed together with 1C:Enterprise.
The installer allows you to install multiple 1C:Enterprise versions on a single computer, select components to install, and select 1C:Enterprise server installation mode.
The 1C:Enterprise launcher maintains the unified infobase list for all platform versions (8.0, 8.1, 8.2, and 8.3).
2.2. Installation options
Install 1C:Enterprise using an installer specific to each supported operating system: Linux OS family (hereinafter referred to as "Linux"), macOS, and Windows OS family (hereinafter referred to as "Windows").
For Windows-based installations, use a standalone installer. Depending on the rights of the user performing the installation and the installation parameters, the installation can be performed in two modes: "for computer" or "for user". For more information on how to select an installation mode, see Specifying installation mode.
1C:Enterprise supports several processor architectures for Linux. There are several ways to install the system. You can use a special installer or the package manager of the used operating system. The difference between these options:
-
The installer. A package manager of the operating system is not used in the installer. The installer has a graphical user interface. When using the command-line installer (batch installation), use the startup command-line parameters to select the components to install. The installer is available only for operating systems running on x86/x86-64 processors.
-
The package manager. A standard package manager of the used operating system is used for installation. To select components to install, choose preferred installation packages. There is no graphical user interface. This option is available for all supported processors. This is a more common option for Linux network administrators.
For macOS-based installations, a standalone installer is used. This installer does not allow you to select components to be installed.
Before installation, please make sure that your computer is virus-free, the hard drive does not contain any errors, and enough disk space is available for the installation.
See also:
-
Installation for Linux.
-
Installation for macOS.
-
Installation for Windows.
2.3. Installation on Linux
2.3.1. Rules to name distribution files
Note that installation options are not compatible. In other words, if you install 1C:Enterprise using the package manager, delete the system using the package manager. If you install it using the installer, you can delete the system using the appropriate tool available in the directory of a specific version.
- File names when using the installer
- To install 1C:Enterprise on Linux running on an x86/x86-64 processor, use an installer created based on VMware InstallBuilder. The following installers are available:
-
1C:Enterprise 8. Installs any components. 32-bit and 64-bit versions of the installer are available.
-
1C:Enterprise 8 Thin client. Installs only a thin client and components required to access 1C:Enterprise server. 32-bit and 64-bit versions of the installer are available.
The installers are located in a ZIP archive. ZIP archive and the installer have the same names (accurate to the extension). Archive and installer names look as follows: setup-name-A.B.C.D-arch.ext where:
-
name. General installer characteristic:
-
full. Installs all system components.
-
thin. Installs the thin client and server cluster access components.
-
-
A.B.C.D. Full number of 1C:Enterprise version whose installer is used.
-
arch. Architecture of 1C:Enterprise version to be installed:
-
i386. x86 processors.
-
x86_64. x86-64 processors.
-
-
ext. File extension.
-
zip. Archive of the installer and accompanying files.
-
run. Installer.
-
So, if the installer name is setup-full-8.3.24.100-x86_64.run, it is used to install a 64-bit version 8.3.24.100 of 1C:Enterprise, which will allow installing all system components.
All installers offer similar user experience. Therefore, only general information for 1C Enterprise 8 installation is provided below.
The ZIP archive also contains the installAsRoot executable file. The application simplifies the system installation process for an inexperienced user. If you run this application, the following will happen:
-
The application checks whether you have superuser rights (root).
-
If you do not have them, the acquisition of these rights will be initiated. To get the rights, enter the superuser password in the dialog box opened by the installAsRoot application.
-
If the password is correct, the installer with the superuser rights will be started in interactive graphic mode.
For an experienced user, the installAsRoot application startup is similar to the following command-line option:
sudo ./setup-*.runIn this example, "*" refers to the remaining part of the installer name described earlier in this section. If you run installAsRoot in a directory that has several RUN files, the installer whose file name is the first in the search results for files by the "setup-*.run" mask will be started.
- File names when using the package manager
- When you use a package manager, the 1C:Enterprise distribution package for Linux is provided in several packages. These packages are used to install both client applications and server clusters. Package files have the following names: 1c-enterprise-<version1>-<add-in>_<version2>.<arch>.<extension>, where:
-
<add-in>:
-
client. 1C:Enterprise client applications (thick client and thin client).
-
thin-client. 1C:Enterprise thin client (file infobase mode is not supported).
-
common. Common 1C:Enterprise add-ins.
-
server. 1C:Enterprise server add-ins and the integrity monitoring utility.
-
ws. Adapter for publishing a web client and 1C:Enterprise Internet services on Apache HTTP Server of supported versions.
-
crs. Configuration repository server.
-
An add-in name can end with the "-nls" suffix. This means that a package with this name contains additional national resources (in addition to Russian and English localizations) for the respective package. You can find the server add-in in two files: server (the server and resources in Russian and English) and server-nls (additional national resources).
-
-
<version1>. Full version number of 1C:Enterprise package. All version elements are dot-separated. For example, for 1C:Enterprise version 8.3.22.100, version1 of the package name will contain the 8.3.22.100 string.
-
<version2>. Full version number of 1C:Enterprise package. The first three number elements are dot-separated. The last (fourth) number element is preceded by a hyphen ("-"). For example, for 1C:Enterprise version 8.3.22.100, version2 of the package name will contain the 8.3.22-100 string.
-
<arch>. Processor architecture for which this package is used:
-
aarch64. ARM64 processors (RPM version).
-
amd64. x86-64 processors (DEB version).
-
arm64. ARM64 processors (DEB version).
-
e2k. E2K processors (RPM version).
-
e2k-8c. E2K processors (DEB version).
-
i386. x86 processors.
-
x86_64. x86-64 processors (RPM version).
-
-
<extension>:
-
rpm. RPM package version.
-
deb. DEB package version.
-
If necessary, the required package file name is generated according to the rules above. If the name of the package you install is required, it is specified based on the add-in name. For example, the name of the common package for DEB version 8.3.22.100 looks as follows: 1c-enterprise-8.3.22.100-common_8.3.22-100-arm64.deb.
2.3.2. Installing using the installer
2.3.2.1. About installer
2.3.2.1.1. General information
To begin the installation, start the previously received installer (*.run file). Before you start the installer, make sure it has the execution access right. The access right must be granted to the current user. If necessary, you can configure the access right for a group and other users. To set the execution right, use the chmod operating system command or a dialog box of file properties in the graphical interface. Setting the right might require superuser rights (root).
You can start the installer either in interactive or batch mode. In this section, you can read about the installation in interactive mode.
The installer is an installation wizard. You can proceed through the wizard pages by clicking Next >. On every page of the wizard, provide information required for 1C:Enterprise installation. The installer details will contain the pages to be ignored if you select the "for user" installation mode.
Before the installer starts, the user will be prompted to select the language in which the installer will generate its interface. The same language will be selected to install the respective interface.
The language list contains only those languages in which user interfaces of 1C:Enterprise applications are implemented.
During the installation, the installer might display a list of packages required for the correct operation of 1C:Enterprise. This list is generated if the installer has not found the packages on the computer. Manually install the missing packages (from the displayed list) using the package manager of your operating system. The installation requires superuser rights (root).
Every wizard step is briefly described below. The examples illustrate installation of the full 64-bit 1C:Enterprise distribution package.
2.3.2.1.2. Welcome screen
1C:Enterprise installation wizard starts with Welcome screen.
2.3.2.1.3. Selecting components
On this page, you need to select components to be installed and an installation directory. The component list depends on what exactly you need to have installed. Some standard installation scenarios are described in a special documentation section.
Select components using the check box next to the component description.
You can install the following components:
| Component | Brief description |
|---|---|
| 1C:Enterprise | Main 1C:Enterprise components, including components for file infobase operations. |
| 1C:Enterprise – Thin client | Thin client components only for client/server mode. |
| 1C:Enterprise – Thin client, file mode | Thin client components, including components for file infobase operations. |
| 1C:Enterprise 8 server | 1C:Enterprise server components, including the administration server and the administration utility. |
| Web server extension modules | Web server extension modules required for web client and web services. |
| 1C:Enterprise server administration | Administration server of 1C:Enterprise server cluster. |
| Additional interfaces | User interfaces in various languages. The English interface is installed by default and cannot be uninstalled. |
| 1C:Enterprise configuration repository server | 1C:Enterprise configuration repository server components. |
| Additional administration functions | Administrative console utility. |
| Thin client distribution packages | Allows you to install client application distribution packages. The item becomes available when the following conditions are met:
|
| Liberica JRE | Java Runtime Environment (JRE) is minimal virtual machine implementation required to develop Java applications without a compiler and other development tools. JRE is used, for example, by the optimized feature for updating the database configuration (v2) or the licensing utility. |
| Integrity monitoring | Data integrity monitoring utility (see Integrity monitoring utility). |
2.3.2.1.4. Starting installation
Click Next > to start the installation procedure that:
-
Creates required directories.
-
Copies files for selected components.
-
Creates configuration files.
-
Registers server software components.
-
Creates shortcuts in the application list to start 1C:Enterprise applications.
The installation procedure is displayed with an indicator. Notes to the indicator describe the actions being executed.
2.3.2.1.5. Installation completion
Once the installation is completed, the installer notifies the user of it.
Click Finish to start the installation process. Before the installation of 1C:Enterprise, the following will be made:
-
An attempt to install the add-ins required for 1C:Enterprise operation if these add-ins are absent on the computer or there are versions that do not meet the 1C:Enterprise system requirements.
-
An attempt to install True Type fonts from Microsoft Core Fonts for Web. The installation will be performed as follows:
-
The installer searches for the installed package with the required fonts on the current computer.
-
If no fonts are found, the fonts will be installed from the official repository of the used operating system.
-
If the official repository does not have the required fonts, they will be installed from the following sources:
-
The same actions will take place during the batch installation.
Once the installation is completed, 1C:Enterprise is ready for use.
2.3.2.2. Batch installation
Use the installer to install 1C:Enterprise both in interactive mode and batch mode. In this mode, installation can be performed without the window manager, completely in console mode. Batch installation is applied when you update the client application.
Enable batch mode by specifying the --mode unattended command in the installer command line. To specify components to be installed, use the --enable-components command. Components to be installed are listed by comma-separated parameters of this command. The following parameters are available:
| Description | |
|---|---|
| additional_admin_functions | Install the administrative console utility (see Administrative console utility (1cv8a). |
| client_full | Install thick client with access to Designer operations. |
| client_thin | Install thin client without access to file infobase operations. |
| client_thin_fib | Install thin client with access to operations in any infobase mode. |
| config_storage_server | Install configuration repository server. |
| desktop_icons | Install shortcuts for various 1C:Enterprise add-ins. |
| integrity_monitoring | Install the integrity monitoring utility (see Integrity monitoring utility (). |
| liberica_jre | Install Java Runtime Environment (JRE). |
| server | Install 1C:Enterprise server cluster. |
| server_admin | Install the administration server of the 1C:Enterprise server cluster. |
| v8_install_deps | Install external platform dependencies. |
| ws | Install web server extension modules. |
| Install the application interface in a language that matches the specified ID: | |
| ar | Arabic |
| az | Azerbaijani |
| bg | Bulgarian |
| de | German |
| el | Greek |
| es | Spanish |
| fr | French |
| hu | Hungarian |
| hy | Armenian |
| it | Italian |
| ka | Georgian |
| kk | Kazakh |
| lt | Lithuanian |
| lv | Latvian |
| pl | Polish |
| ro | Romanian |
| ru | Russian |
| tk | Turkmen |
| tr | Turkish |
| uk | Ukrainian |
| vi | Vietnamese |
| zh | Chinese |
Let's consider a simple example. Perform the installation with the following parameters:
-
1C:Enterprise server cluster, administration tools, JRE, and web server operations.
-
1C:Enterprise version 8.3.24.100.
-
Install the Russian and English interface languages.
-
Perform the installation for a 64-bit operating system.
For these parameters, use the installer for the full version. The installation command line will look as follows:
setup-full-8.3.24.100-x86_64.run --mode unattended --enable-components server,ws,server_admin,liberica_jre,ruAs noted earlier, the installer is based on VMware InstallBuilder. This documentation contains only system commands that are required to install 1C:Enterprise. For more information about other commands, see VMware InstallBuilder user documentation.
2.3.3. Installing using the package manager
Systems running on Linux use a lot of package managers that have different names and used commands. For more information on which commands to use to install the software from files, see the documentation of a package manager that is used to install your operating system.
1C:Enterprise packages depend both on other platform packages (this will be mentioned below) and on various libraries that are assumed to be already installed on the computer. To facilitate resolving such dependencies, the distribution package of client applications includes the v8-install-deps.sh batch file. Run this batch file as an administrator (root). While running, it will install the libraries (and specific library versions) required for the 1C:Enterprise platform operation. After resolving the dependencies, you can install the client application.
During installation, consider the following dependencies between packages:
-
common has no dependencies.
-
server depends on common.
-
ws depends on common.
-
crs depends on common, server, and ws.
-
client depends on server.
-
thin-client has no dependencies. No other 1C:Enterprise packages are required for a thin client. It conflicts with the common package. You can install either thin-client or other packages.
-
National resource packages depend on their package.
To install a package, first install all the packages that this package depends on. For example, to install the 1C:Enterprise thick client and Designer, first install the common and server packages, and then install the client package.
See also:
- Dependencies in Linux (see On Linux).
2.4. Installation for macOS
Client application distribution package is stored in the disk image file for macOS (*.dmg files). The installer itself is "inside" the disk image. You cannot choose which components to install. Two distribution delivery options are available:
- To install thin and thick client applications, and 1C:Enterprise server cluster access components. Hard drive image name is clientosx_A_B_C_D.dmg.
- To install thin client application and 1C:Enterprise server cluster access components. Hard drive image name is thin.clientosx_A_B_C_D.dmg.
The A_B_C_D text in the image file name (and further, in the installer names) means the full platform version whose installer is located on the disk image file. The file with the installer distribution image for the thin client version 8.3.13.100 will be named thin.clientosx_8_3_13_100.dmg.
You need to know the name of the user with administrative privileges and the password to complete the installation. To start installation:
-
Double-click the image file. A new window with contents of the image file opens.
-
To install the client application itself, double-click the file named as follows:
-
1cv8-client-A.B.C.D.pkg. Thin and thick client application installer.
-
1cv8-thin-client-A.B.C.D.pkg. Thin client application installer.
-
-
The client application installation wizard opens. On the first page, click Next. On the second page, click Install. After you enter credentials of a user with administrative rights, the 1C:Enterprise client application will be installed.
2.5. Installation for Windows
2.5.1. Available installers
The following installers are available:
-
1C:Enterprise 8. Installs any components. 32-bit and 64-bit versions of the installer are available.
-
1C:Enterprise 8 Thin client. Installs only a thin client and components required to access 1C:Enterprise server. 32-bit and 64-bit versions of the installer are available.
-
1C:Enterprise 8 (x86-64) Server. Allows you to install only a 64-bit 1C:Enterprise server. Only 64-bit version of this installer is available.
All installers offer similar user experience. Therefore, only general information for 1C Enterprise 8 installation is provided below.
2.5.2. About installer
2.5.2.1. General information
An installation wizard carries out the installation procedure. You can proceed through the wizard pages by clicking Next >>. To start the wizard, run setup.exe from the directory containing the distribution package you have selected. On every page of the wizard, provide information required for 1C:Enterprise installation. The installer details will contain the pages to be ignored if you select the "for user" installation mode.
When you start setup.exe using the /S parameter, installation is performed in silent mode. In this case, the installation mode will be defined first. Then its parameters will be obtained from the 1cestart.cfg file that matches the defined installation mode. If this file is not available, the default parameters will be used. Then 1C:Enterprise will be installed in the defined installation mode with the defined parameters.
Using the installer, you can specify whether to search a dongle when starting the installed client application. The installer writes the UseHwLicenses parameter to the 1cestart.cfg file of a user on whose behalf 1C:Enterprise is installed. For the installer to be able to modify the configuration file, use any of the following methods:
- Specify the USEHWLICENSES command line option to start setup.exe:
setup.exe USEHWLICENSES=0- Specify the USEHWLICENSES parameter in the setup.ini file in the CmdLine parameter of the Startup group.
Every wizard step is briefly described below. The examples illustrate installation of the full 64-bit 1C:Enterprise distribution package.
2.5.2.2. Specifying installation mode
To select an installation mode, analyze the following data:
- Value of the InstallForUsers parameter of the 1cestart.cfg configuration file and the ALLUSERS parameter of the installer startup command line.
- Access rights of the user installing 1C:Enterprise.
After the analysis, select the installation mode. The "Parameter value" column (in the table below) contains the resulting installation mode value obtained considering priorities. The resulting parameter value is determined as follows:
-
Parameter value is not specified (first-time installation). In this case, the parameter value is 0.
-
1cestart.cfg configuration file contains a value, the installer command line is blank. In this case, the parameter value is equal to the value from the 1cestart.cfg configuration file.
-
Installer startup command line contains the ALLUSERS parameter. In this case, the parameter value is equal to the value from the command line regardless of the 1cestart.cfg configuration file.
The user is considered to have administrator rights if at least one of the following requirements is met:
-
User is a local administrator of the personal computer.
-
User is a member of the local administrators group.
-
User has the right to install applications (the AlwaysInstallElevated policy).
Installation mode options are shown in the table:
| Parameter value | Administrator | User |
|---|---|---|
| 0: installation depends on access rights | C | D or U |
| 1: install "for computer" | C | D or C |
| 2: install "for user" | U | D or U |
| 3: install "for user" without questions | U | U |
Information to the table:
-
C. Installs "for computer" without providing the user with a choice.
-
U. Installs "for user" without providing the user with a mode choice.
-
D. Opens a dialog box where the user can select an installation mode.
-
If the user does not have administrator rights and the installation mode is between 0 and 2 (inclusive), "D" mode is selected for interactive installation and the second mode is used in other cases.
-
If a mode that requires an administrator password is selected during the installation and the current user does not know this password, the installation cannot be performed.
Depending on the selected installation mode, different directories will be used in further installer dialog boxes as default directories to install the system:
-
Installation "for computer": %PROGRAMFILES% or %PROGRAMFILES(x86)%.
-
Installation "for user": %LOCALAPPDATA%\Programs.
To ensure that installation "for user" is successfully completed, Windows must contain an installed Microsoft Visual C++ Re-distributable package included in 1C:Enterprise version to be installed (file: vc_redist.x86.exe or vc_redist.x64.exe). In any case, the installation of this package requires local administrator or network administrator rights.
If the installation mode must be selected by the user after the actions described above, the User text is the actual name of the user that performs the installation.
Once the user confirms their choice in the dialog box, the installation mode is saved to the 1cestart.cfg configuration file.
See also:
- 1cestart.cfg configuration file.
2.5.2.3. Welcome screen
This is the starting window of the 1C:Enterprise installation wizard.
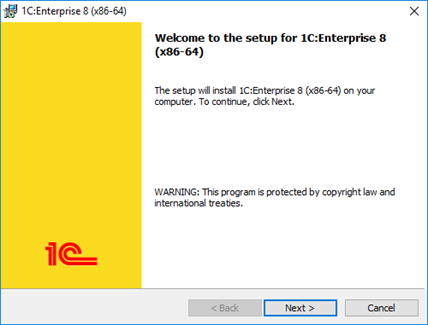
Fig. 1. Welcome screen
2.5.2.4. Selecting components
On this page, you need to select components to be installed and an installation directory. The component list depends on what exactly you need to have installed. Some standard installation scenarios are described in a special documentation section.
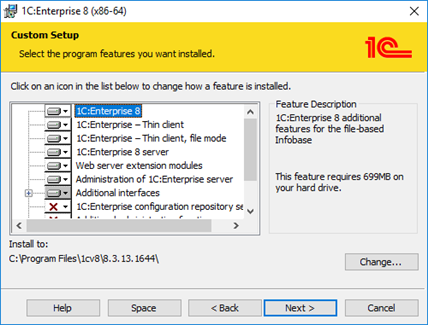
Fig. 2. Selecting components
If a component needs to be installed, select it in the list. If a component is not required, do not select it. To select a component, click an icon to the left of its name or press Spacebar. Select the item you need.

Fig. 3. Component installation menu
Components to be installed or skipped are displayed as shown below:
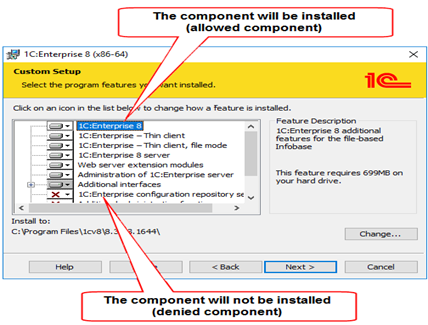
Fig. 4. Components to be installed or skipped
The following items are numbered:
- Component that will be installed on the user computer (selected component).
- Component that will not be installed on the user computer (skipped component).
You can install the following components:
| Component | Brief description |
|---|---|
| 1C:Enterprise | Basic 1C:Enterprise components, including administration components, configuration development components, thick and thin clients. |
| 1C:Enterprise – Thin client | Thin client components only for client/server mode. |
| 1C:Enterprise – Thin client, file mode | Thin client components, including components for file infobase operations. |
| 1C:Enterprise 8 server | 1C:Enterprise server components, including the administration server and the administration utility. |
| Web server extension modules | Web server extension modules required for web client and web services. |
| 1C:Enterprise 8 server administration | Additional components for administering 1C:Enterprise server cluster. |
| Additional interfaces | User interfaces in various languages. The English interface is installed by default and cannot be uninstalled. |
| 1C:Enterprise 8 configuration storage server | 1C:Enterprise configuration repository server components. |
| Additional administration functions | Administrative console utility |
| 1C:Enterprise 7.7 infobase converter | 1C:Enterprise 7.7 infobase converter. |
| Liberica JRE | Java Runtime Environment (JRE) is minimal virtual machine implementation required to develop Java applications without a compiler and other development tools. JRE is used, for example, by the optimized feature for updating the database configuration (v2) or the licensing utility. |
| Integrity monitoring | Data integrity monitoring utility (see Integrity monitoring utility). |
Regardless of the 1C:Enterprise installation directory (the Folder: field and the Edit button), some directories of the installed system will have predefined locations. The installation directory depends on the installation mode as well as the operating system and 1C:Enterprise bitness. The default directories are:
-
Installation "for computer":
-
1C:Enterprise x32 in x64 operating system: %PROGRAMFILES(x86)%\1cv8\A.B.C.D.
-
Otherwise: %PROGRAMFILES%\1cv8\A.B.C.D.
-
-
Installation "for user":
-
1C:Enterprise x32 in x32 operating system: %LOCALAPPDATA%\Programs\1cv8\A.B.C.D.
-
1C:Enterprise x32 in x64 operating system: %LOCALAPPDATA%\Programs\1cv8_x86\A.B.C.D.
-
1C:Enterprise x64 in x64 operating system: %LOCALAPPDATA%\Programs\1cv8_x64\A.B.C.D.
-
After installation, a local configuration file will be generated. The file will have two specified parameters: InstalledLocation and InstallComponents. The values of these parameters will be set according to settings specified during installation. The location of this configuration file depends on the selected installation mode: "for computer" or "for user".
The integrity monitoring utility is installed by default to the same directory as 1C:Enterprise. Installation directory can be changed, if needed. To change the installation directory, select the Integrity monitoring component and click Edit….
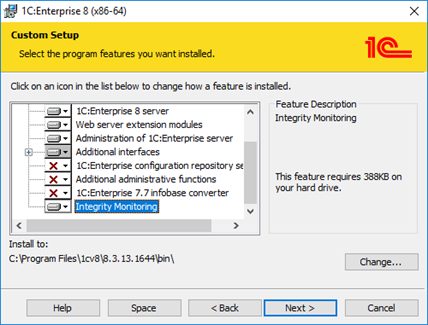
Fig. 5. Installing integrity monitoring utility
The installation directory of integrity monitoring utility cannot be changed if the component is skipped.
Installation of the integrity monitoring utility is not recorded in the local configuration file. When installing any version of 1C:Enterprise, you need to manually mark this utility for installation.
2.5.2.5. Selecting default interface language
At the next step, the installer prompts you to select the default interface language.
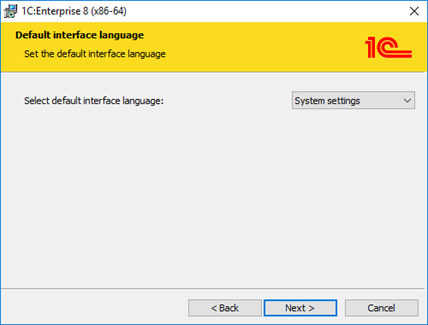
Fig. 6. Selecting interface language
You need to specify one of the interface languages as a default interface language.
After the installation is completed, the conf.cfg file that describes the default interface language is created in the C:\Program Files\1cv8\conf directory.
To use 1C:Enterprise with a non-default interface language, specify the language at startup using the /L command-line parameter.
Interface language |
Language code |
|---|---|
| Azerbaijani | az |
English |
en |
Armenian |
hy |
Bulgarian |
bg |
Hungarian |
hu |
Vietnamese |
vi |
| Greek | el |
Georgian |
ka |
| Spanish | es |
| Italian | it |
Kazakh |
kk |
| Chinese | zh |
Latvian |
lv |
Lithuanian |
lt |
German |
de |
Polish |
pl |
Portuguese (Brazil) |
pt_BR |
Romanian |
ro |
Russian |
ru |
Turkish |
tr |
Turkmen |
tk |
Ukrainian |
uk |
French |
fr |
2.5.2.6. Installing 1C:Enterprise server
If the 1C:Enterprise 8 server component is selected for installation, a wizard page will be available. On this page, you can select the 1C:Enterprise server installation mode and the user to run the server if it is installed as a Windows service.
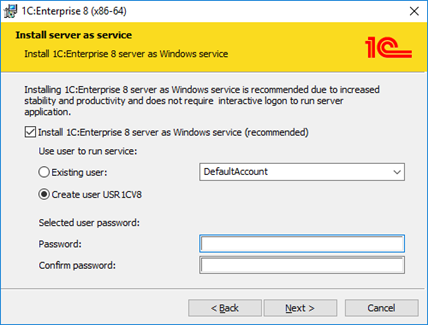
Fig. 7. 1C:Enterprise server installation mode
If 1C:Enterprise is already installed as a Windows service on the computer, the installer will reinstall the service.
2.5.2.7. Installation start
Click Install to start the installation procedure that:
-
Creates required directories.
-
Copies files for selected components.
-
Creates configuration files.
-
Registers server software components.
-
Creates 1C:Enterprise startup shortcut on the desktop.
-
Starts 1C:Enterprise server if you install the server as a Windows service.
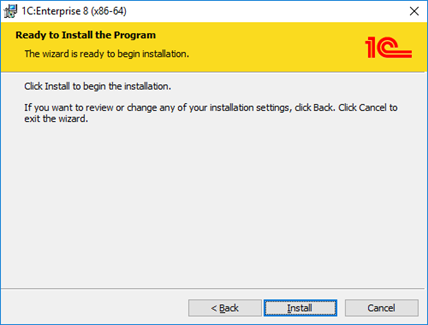
Fig. 8. Starting installation
In addition, a separate entry will be created for each version in the Install and delete applications component on Windows control panel. Entries must be of the following kind: 1C:Enterprise 8 (A.B.C.D).
2.5.2.8. Installing the protection driver
After the installation is completed, the installation wizard prompts you to install HASP Device Driver to protect you from unauthorized software use.
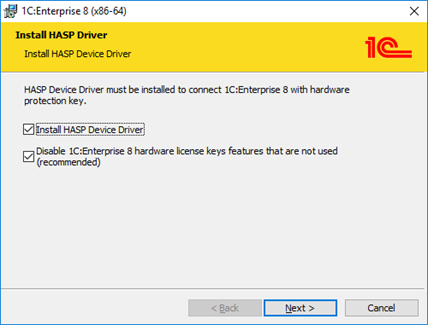
Fig. 9. Installing the protection driver
You have to install the driver if you have a dongle for plugging into a USB port of this computer and:
-
User has License Agreement for the use of the 1C:Enterprise main distribution kit.
-
User has the 1C:Enterprise client license for at least one workplace.
-
User has the 1C:Enterprise server license.
When installing the protection driver, a web-based driver management interface is installed automatically. To minimize risks and increase safety for 1C:Enterprise servers and user workstations, it is recommended that you disable the web-based protection driver interface when installing the driver. To do this, select the Disable 1C:Enterprise 8 hardware license key features that are not used (recommended) check box.
2.5.2.9. Installation completion
If the installation is successful, the final page of the installation wizard opens. On this page, you can decide whether to open a file with information recommended for reading before using this system version (to do it, select the Open Readme file check box). You can also install client application distribution packages to simplify the automated update of these applications on user computers.
To install client application distribution packages, select the checkbox: Store thin client distribution packages in the installation folder to update clients automatically. We recommend that you install it only on computers which support the web server extension on the installation wizard page. The check box becomes available when the following conditions are met:
-
Web server extension modules component is selected for installation.
-
Directory with 1C:Enterprise installation files contains a file of the following kind: win-mac-clients-distr_A.B.C.D.exe or all-clients-distr_A.B.C.D.exe.
The checkbox state is saved to the InstallComponents parameter of the 1cestart.cfg file (using the COPYTHINCLIENTDST key). Installation of the client application distribution package requires administrator rights.
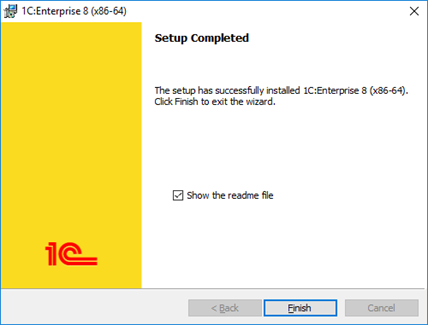
Fig. 10. Installation completion
Click Done to complete the installation. Further behavior (after closing the installer dialog box) depends on the check boxes selected on this page:
-
Show Readme opens the readme.htm file in the default interface language.
-
Store thin client distribution packages in the installation folder to update clients automatically… starts the installation of client application distribution packages.
See also:
-
Automated update of client applications (see Automated client application update on a remote computer).
-
1cestart.cfg configuration file.
2.5.3. Recommendations for component registration
The installer registers some components such as COM connection. The registration method depends on the installation mode.
-
Installation "for the computer". COM connection (the V83.COMConnector COM object) and client application (the V83.Application COM object) are registered "for the computer".
-
Installation "for the user". COM connection (the V83.COMConnector COM object) and client application (the V83.Application COM object) are registered "for the user".
1C:Enterprise version to which the COM connection is established (using V83.COMConnector) and 1C:Enterprise version from which the COM connection is generated must be identical or differ in the first two digits. In other words, 1C:Enterprise 8.3 can establish a COM connection with 1C:Enterprise 8.2, 8.1, and so on, but 1C:Enterprise 8.3.6 cannot establish a COM connection to 8.3.5. At the same time, 1C:Enterprise 8.3.6.2100 can a establish COM connection with 8.3.6.2100.
If during component registration using regsvr32, The module ... was loaded but the call to DllRegisterServer failed with error code 0x80070005 error message is displayed, it means that the current user does not have sufficient rights to edit the system registry or files in the System32 directory. In this case, you need to register the components on behalf of the user that has administrative rights. When starting regsvr32, use Run as administrator context menu command.
2.6. Typical 1C:Enterprise installation scenarios
2.6.1. On Linux
2.6.1.1. General information
This section contains typical scenarios of installing 1C:Enterprise components on Linux broken down by different installation options. Each installation scenario includes a list of components and packages to install. You will also find installation specifics to consider, if any.
After installation of the client applications, shortcuts for the launcher (1cestart), thin client (1cv8c), and thick client (1cv8) are added to the application menu of the desktop environment. The shortcuts are only created for installed applications. The shortcuts are created in the Finance subcategory of the Office category.
Installation requires superuser (root) rights.
2.6.1.2. Thin and thick client
- 1C:Enterprise installer
- Allow installation of the following components:
-
1C:Enterprise
-
1C:Enterprise – Thin client, file mode
- Package manager
- Install the following packages:
-
common and, if required, the common-nls resources
-
server and, if required, the server-nls resources
-
client and, if required, the client-nls resources
- Result
- The following applications can be started:
-
Designer
-
Thin client
-
Thick client
The following infobases can be used:
-
File infobase (local version)
-
File infobase (network version)
-
Client/server mode
-
Any infobase with access via web server
2.6.1.3. Thin client
- 1C:Enterprise installer
- Allow installation of the following components:
- 1C:Enterprise – Thin client, file mode
- Package manager
- Install the following packages:
- thin-client and, if required, the client-nls resources
- Result
- Thin client can be started.
The following infobases can be used:
-
File infobase (local version)
-
File infobase (network version)
-
Client/server mode
-
Any infobase with access via web server
2.6.1.4. Configuration repository server (TCP protocol)
- 1C:Enterprise installer
- Allow installation of the following components:
- 1C:Enterprise configuration repository server
- Package manager
- Install the following packages:
-
common and, if required, the common-nls resources
-
server and, if required, the server-nls resources
-
crs and, if required, the crs-nls resources
- Result
- You can start the server of 1C:Enterprise configuration repository over TCP.
2.6.1.5. Configuration repository server (HTTP protocol)
- 1C:Enterprise installer
- Allow installation of the following components:
-
Web server extension modules
-
1C:Enterprise configuration repository server
- Package manager
- Install the following packages:
-
common and, if required, the common-nls resources
-
server and, if required, the server-nls resources
-
ws and, if required, the ws-nls resources
-
crs and, if required, the crs-nls resources
- Result
- You can start the server of 1C:Enterprise configuration repository over HTTP.
2.6.1.6. Enabling web client publication
- 1C:Enterprise installer
- Allow installation of the following components:
- Web server extension modules (in addition to the selected components)
- Package manager
- Install the following packages in addition to other packages:
-
common and, if required, the common-nls resources
-
server and, if required, the server-nls resources
-
ws and, if required, the ws-nls resources
- Result
- To publish a web client or a web service, use a dialog box for web server publication in Designer or the webinst utility (for the web client only). For more information, see Setting up web services for 1C:Enterprise.
2.6.1.7. Integrity monitoring utility
- 1C:Enterprise installer
- Allow installation of the following components:
- Integrity monitoring (if necessary, you can change the installation directory)
- Package manager
- Install the following packages:
- server and, if required, the server-nls resources. To install it to another directory, use package manager parameters of the operating system.
- Result
- You can use the integrity monitoring utility.
2.6.1.8. Administrative console utility
- 1C:Enterprise installer
- Allow installation of the following components:
- Additional administration functions.
- Package manager
- Install the following packages:
-
client and, if required, the client-nls resources
-
server and, if required, the server-nls resources
- Result
- You can use the administrative console.
2.6.2. On macOS
Client application installer for macOS does not support configurable installation options. All available components are installed.
2.6.3. On Windows
2.6.3.1. General information
This section contains typical examples of 1C:Enterprise components installation on Windows.
For each installation option, a list of components to be installed and specific installation instructions (if any) are provided.
2.6.3.2. Thin and thick client
To install this installation option of 1C:Enterprise, mark the following components for installation:
-
1C:Enterprise
-
1C:Enterprise – Thin client, file mode.
If the local client key is used, install HASP Device Driver. The driver must be installed before the protection key is inserted into the USB port of a computer. If the network protection key is used, there is no need to install the HASP Device Driver. For more information about customizing access to the protection key, see Protection against unauthorized use: features and settings.
The following applications can be started:
-
Designer
-
Thin client
-
Thick client
The following infobases can be used:
-
File infobase (local version)
-
File infobase (network version)
-
Client/server mode
-
Any infobase with access via web server
2.6.3.3. Thin client
For this 1C:Enterprise installation option, mark the 1C:Enterprise – Thin client, file mode component for installation.
If the local client key is used, install HASP Device Driver. The driver must be installed before the protection key is inserted into the USB port of a computer. If the network protection key is used, there is no need to install the HASP Device Driver. For more information about customizing access to the protection key, see Protection against unauthorized use: features and settings.
Thin client can be started.
The following infobases can be used:
-
File infobase (local version)
-
File infobase (network version)
-
Client/server mode
-
Any infobase with access via web server
2.6.3.4. Thin client – client/server mode
For this 1C:Enterprise installation option, mark the 1C:Enterprise – Thin client component for installation.
If the local client key is used, install HASP Device Driver. The driver must be installed before the protection key is inserted into the USB port of a computer. If the network protection key is used, there is no need to install the HASP Device Driver. For more information about customizing access to the protection key, see Protection against unauthorized use: features and settings.
Thin client can be started.
The following infobases can be used:
-
Client/server mode
-
Any infobase with access via web server
2.6.3.5. Thick client
To install this installation option of 1C:Enterprise, mark the 1C:Enterprise component for installation.
If the local client key is used, install HASP Device Driver. The driver must be installed before the protection key is inserted into the USB port of a computer. If the network protection key is used, there is no need to install the HASP Device Driver. For more information about customizing access to the protection key, see Protection against unauthorized use: features and settings.
The following applications can be started:
-
Designer
-
Thick client
The following infobases can be used:
-
File infobase (local version)
-
File infobase (network version)
-
Client/server mode
2.6.3.6. Configuration repository server (TCP protocol)
To install 1C:Enterprise configuration repository server on a computer and use it via TCP, mark 1C:Enterprise configuration repository server component for installation.
2.6.3.7. Configuration repository server (HTTP protocol)
To install 1C:Enterprise configuration repository server on a computer and use it via HTTP, mark the following components for installation:
-
Web server extension modules
-
1C:Enterprise configuration repository server
2.6.3.8. Enabling web client or web service publication
To enable publication of web client on the computer used for installation, mark Web server extensions modules component for installation.
To publish web client or web service, use web server publication dialog box or webinst utility (for web client only). For more information, see Setting up web services for 1C:Enterprise.
2.6.3.9. Enabling Designer usage
To enable Designer usage, mark 1C:Enterprise component for installation.
2.6.3.10. Installation with Windows administrative tools
2.6.3.10.1. Installation using group policies
When installing using group policies, specify the language transformation file to select the installation language. File names match Microsoft Windows LCID in decimal format (with .mst extension). Transformation file for the Russian language is called 1049.mst.
Besides, select adminstallrestart.mst transformation file. In this case, 1C:Enterprise will offer to restart the computer and install the newer version in case of client and server version mismatch. Administrators need to make sure that distribution package is added to group policies prior to the installation.
Several 1C:Enterprise versions can be installed using group policies. To install a new version, create a new installation in group policies.
2.6.3.10.2. Installation with logon script
The system can be installed using the script that is executed during user authorization in the domain. The domain administrator starts the script job.
If the user does not have software installation rights, the administrator needs to specify that the installation script is started on behalf of the user that has such rights. For an example of such script, see adminstall.cfg.
The script allows you to install and delete several versions of 1C:Enterprise. To do this, call installOrUninstall procedure with the required parameters (for the script example, see adminstall.cfg).
To install the new version, the administrator only needs to edit the shared network resource paths and specify the product code that can be found in setup.ini file.
Additionally, adminstallrelogon.mst transformation file must be specified. In this case, 1C:Enterprise will offer to finish the current session and install the newer version in case of client and server version mismatch. The administrator needs to ensure that the script is updated and the distribution package with the new version is available on the network resource.
2.6.3.10.3. Version update
When installing the 1C:Enterprise language using administrative tools, the adminstall.cfg file is created in the configuration file directory (see adminstall.cfg).
If the required 1C:Enterprise version is not found on a computer when starting and the user does not have sufficient rights to install the required version, the user will be offered to take action specified in the adminstall.cfg file: restart the computer or sign out and sign in again.
2.6.3.11. Integrity monitoring utility
To install this installation option of 1C:Enterprise, mark the Integrity monitoring component for installation. Edit the installation directory if needed.
2.6.3.12. Administrative console utility
To install this installation option of 1C:Enterprise, mark the Additional administration functions component for installation.
2.7. Recommendations for system deployment
To simplify automated installation of new 1C:Enterprise versions on the user computer (including the initial system installation), the following file structure in a network directory is recommended (an option of a server directory on a computer running Windows is described):
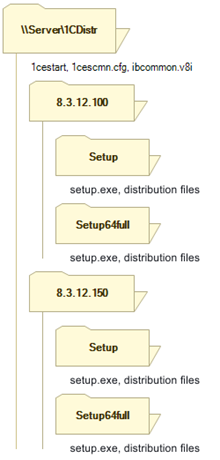
Fig. 11. Directory structure
On the figure above:
-
\Server\1CEDistr is a directory on Server where files required for the system deployment are located. On a computer running Linux or macOS, the \Server\1CEDistr directory must be mounted on the computer. Using UNC paths on Linux and macOS is not supported.
-
1cestart is the launcher. For initial installation, start the launcher from this network directory. You can start the launcher from the local hard drive if paths to distribution packages are correctly set up in configuration files and the launcher settings allow automatic installation of the new application version.
It is recommended that you import the launcher from the latest 1C:Enterprise version that is installed in a local network.
-
ibcommon.v8i is a list of shared infobases (the name can be changed).
-
1cescmn.cfg is a common configuration file. It is recommended that you specify the following parameters in it:
-
CommonInfoBases=FileNameWithTheListOfCommonInfobases.v8i. Set this parameter to display the list of infobases in the launcher.
-
InstallComponents. Use this parameter to specify the components you need to install on user computers.
-
DistributiveLocation. Use this parameter to specify 1C:Enterprise distribution package directory.
-
-
8.3.18.100 is a directory with the following 1C:Enterprise distribution packages:
-
Win32. Distribution package directory of the 32-bit application version for Windows.
-
Win64. Distribution package directory of the 64-bit application version for Windows.
-
macOS. Distribution package directory of the application version for macOS. The distribution packages are located in the *.dmg files.
-
Lin32. Distribution package directory of the 32-bit application version for Linux. The distribution packages are located in the *.run files.
-
Lin64. Distribution package directory of the 64-bit application version for Linux. The distribution packages are located in the *.run files.
-
-
8.3.18.150 is a directory with 1C:Enterprise distribution packages. The directory structure is similar to the directory with version 8.3.18.100 (see the previous paragraph).
In this example, the following common configuration file is used to install all components and two languages: Russian and English:
Content of 1cescmn.cfg file:
CommonInfoBases=ibcommon.v8iDistributiveLocation=\\Server\1CDistrDistributiveLocation=/Volumes/Server/1CDistrDistributiveLocation=/mnt/server/1CDistrInstallComponents=DESIGNERALLCLIENTS=1 SERVER=1 WEBSERVEREXT=1 CONFREPOSSERVER=1 SERVERCLIENT=1 CONVERTER77=1 LANGUAGES=ruWhen a new 1C:Enterprise version is released (for example, 8.3.18.200), do the following:
-
In the \Server\1CDistr directory, for version 8.3.18.200, create a directory structure similar to the previously created versions.
-
Place the distribution package files in the matching directories considering the operating system and the bitness (for Windows).
1C:Enterprise will automatically complete the installation on startup. Remember the following features when using such a deployment scheme:
-
On Windows:
-
Launcher always installs 1C:Enterprise into the default folder. To change the installation directory, run the installer for the required version (setup.exe) manually.
-
Only the InstallComponents parameter from the common configuration file is used during installation. Other parameters do not affect the installation process and are not copied from the common configuration file to the local configuration file. In the example above, the following components are used:
-
InstallComponents=DESIGNERALLCLIENTS=1 SERVER=1 WEBSERVEREXT=1 CONFREPOSSERVER=1 SERVERCLIENT=1 CONVERTER77=1 LANGUAGES=ru-
During installation, the CommonCfgLocation parameter is written to the local configuration file. Its value is the path to the common configuration file, which is located in the deployment directory. In the example above, the path to this file is: \server\1cdistr\1cescmn.cfg. Parameters specified in this file will be used by both the launcher and in the startup dialog box of the client application (see Startup window settings).
-
On Linux:
-
Server directory where the installation files are located must be mounted on the client computer in any way possible. On all client computers running Linux, this directory must be mounted at a mount point with the same name. In the example above, the \Server\1CDistr directory is mounted at the /mnt/server/1CDistr mount point. Use forward slashes ("/") to specify the path.
-
InstallComponents parameter of the common configuration file is ignored.
-
-
On macOS:
-
Server directory where the installation files are located must be mounted on the client computer in any way possible. On all Apple client computers, this directory must be mounted at the mount point with the same name. In the example above, the \Server\1CDistr directory is mounted at the /Volumes/Server/1CDistr mount point. Use forward slashes ("/") to specify the path.
-
InstallComponents parameter of the common configuration file is ignored.
-
If the infobase is accessed via a web server, you can use other delivery methods for a client application distribution package (see Automated client application update on a remote computer).
2.8. Installing and configuring additional software
2.8.1. On Linux:
2.8.1.1. Recommendations for using file infobases
When you use infobases in file mode on a Linux-based computer, please consider the following:
-
When you connect a network resource on Linux using the mount.cifs command, do not use the nobrl key (https://www.samba.org/~ab/output/htmldocs/manpages-3/mount.cifs.8.html). \$\$\$remove it\$\$\$
-
When you grant access to the infobase directory using Samba, do not specify the locking=no parameter for a resource to be published in the smb.conf file (https://www.samba.org/~ab/output/htmldocs/manpages-3/smb.conf.5.html).
-
If multiple users are expected to access a file infobase on the same computer, consider the following:
-
On Linux, the user that started the file creation process is specified as the owner of the created file. Files created in 1C:Enterprise have permission to be read and written only by their owner or the owner group. As a result, when several concurrent users access a file infobase, only the first user can access the created files. To work with the infobase concurrently, all users need to be in the same group and this group needs to be set as the owner of the infobase directory. After this, select the set-group-ID check box for this directory using the chmod g + s ib_dir command, where ib_dir is an infobase directory name. As a result, the group that owns the main infobase directory is assigned as the owner of any files to be created in this directory, instead of the main group of a user who creates the files.
-
On Linux, 1C:Enterprise creates files with explicit 0660 permissions (read/write privileges for the file owner and owner group). Manually setting a value for file creation mode mask (umask) in the environment can only result in clearing some set permissions and toughening file creation rules. Since access permission flags for other users are not set for the platform-created files, you cannot modify them using umask.
-
If the infobase is accessed using a Linux-based web server, add the user on whose behalf Designer is started to the www-data or apache group. Then, make it the owner of the infobase directory and set the set-group-ID flag for this directory. Next, add the umask 0002 string to one of the files: /etc/apache2/envvars, /etc/default/apache2, or /etc/sysconfig/httpd, depending on the distribution package used. Adding this string prevents users from clearing a flag that allows the owning group to write (g-w) to the files created by Apache web server.
-
If the OS manages services using the systemd service, edit the /etc/systemd/system/apache2.service.d/override.conf or /etc/systemd/system/httpd.service.d/override.conf configuration file of the Apache2 service. For that, run the following command on behalf of the superuser (root): systemctl edit apache2 or systemctl edit httpd and enter information about changing the umask value into the file:
[Service]UMask=0002This procedure is also used to configure Linux for shared access to configuration repository. However, the configuration repository directory is used instead of the infobase directory.
2.8.1.2. Installing fonts
To ensure correct 1C:Enterprise behavior on Linux, install the fonts from the Microsoft Core Fonts set. These fonts can be installed using any of these methods:
-
Use the fonts package that is included in general distribution package (checked in each distribution package).
-
For RPM version of Linux, installation instructions are available at: https://corefonts.sourceforge.net/.
-
Manual installation is available as well. To do this:
-
Download all font files from: https://sourceforge.net/projects/corefonts/files/the%20fonts/final/.
-
Unpack the files.
-
Place the font files into the ~/.fonts directory of the user on whose behalf 1C:Enterprise is started. Here, ~ is a home directory of the user.
-
2.8.1.3. Operating system authentication when using Apache web server
When using Apache web server, operating system authentication can be configured for thin client and web client. This section assumes that Apache web server is already installed on the computer and configured for web client access.
Follow these steps:
-
Install mod_auth_kerb authentication module. It is included in most distribution packages. You only need to install the package. For Fedora, this package is called mod_auth_kerb, and for Debian, it is called libapache2-mod-auth-kerb. If your operating system does not include this module, you can download the source code from the project homepage: https://modauthkerb.sourceforge.net/.
-
The following installation options are available:
-
Install the module from the OS distribution package. In this case, you only need to restart the web server to activate the module.
-
If you compile and install the module separately (the installation manual is available at: https://modauthkerb.sourceforge.net/install.html), add the string below to the Apache web server configuration file (httpd.conf) and restart Apache:
-
LoadModule auth_kerb_module /path_to_the_file/mod_auth_kerb.soTo authenticate, the module needs a private Kerberos key for HTTP/Server.domain@DOMAIN. You need to generate this key according to Kerberos authentication setup documentation. Note that for the account associated with the HTTP/Server.domain@DOMAIN name, you need to select the Account is trusted for delegation check box.
For example, let us assume that the file with the key is called HTTP.keytab and it is located in the home directory of usr1cv8 user.
You need to add the following strings to the section describing the virtual directory of the web server:
<Directory "/home/usr1cv8/www/MyApp">AllowOverride NoneOptions NoneOrder allow,denyAllow from allSetHandler 1c-applicationManagedApplicationDescriptor /home/usr1cv8/www/MyApp/default.vrdAuthName "1C:Enterprise web client"AuthType KerberosKrb5Keytab /home/usr1cv8/HTTP.keytabKrbVerifyKDC offKrbDelegateBasic offKrbServiceName HTTP/Server.domain@DOMAINKrbSaveCredentials onKrbMethodK5Passwd offKrbMethodNegotiate onRequire valid-user</Directory>Make sure that the key file path is correct. The user on whose behalf Apache is started must be able to access this file.
2.8.1.4. Installing client application distribution packages
To update client applications on remote computers using a web server extension, install client application distribution packages on the computer running the web server extension.
To do this, follow these steps:
-
From https://releases.1c.ru/, download one of the following files:
-
all-clients-distr-A.B.C.D-i386.run
-
all-clients-distr-A.B.C.D-x86_64.run
-
win-mac-clients-distr-A.B.C.D-i386.run
-
win-mac-clients-distr-A.B.C.D-x86_64.run
-
Select a package from the list according to the version, bitness, and package manager of the target operating system.
-
Install the selected package. The installation requires superuser rights (root). You can perform installation in batch mode. In the startup command line of the RUN file, specify the --mode unattended parameter.
-
This will create the distr directory in 1C:Enterprise directory. Depending on the installed packages, this directory will contain client application distribution packages for the following operating systems:
-
Win-mac-clients* file is installed for macOS and Windows.
-
All-clients* file is installed for all operating systems that support client application update over HTTP(s).
-
See also:
- Automated update of client applications using the distr directory (see Setting up the update using the ).
2.8.2. On Windows
2.8.2.1. Nonvisual access for visually impaired users
- To install the NVDA screen reader that enables nonvisual access to 1C:Enterprise interface, download the software from https://nvda.ru/ (in Russian) or https://www.nvaccess.org/ and install it on a client computer.
- For interface voice-over, a variety of speech synthesizers can be used. You can download them at https://github.com/nvaccess/nvda/wiki/ExtraVoices. For the Russian language, using RHVoice speech synthesizer is recommended. You can download it from https://github.com/Olga-Yakovleva/RHVoice/wiki.
2.8.2.2. Installing client application distribution packages
To update client applications on remote computers using a web server extension, install client application distribution packages on the computer running the web server extension.
To do this, follow these steps:
-
From https://releases.1c.ru/, download the following file:
-
all-clients-distr-A.B.C.D.exe
-
win-mac-clients-distr-A.B.C.D.exe
-
If you place this file in the directory with the installation files of the respective application version, distribution packages will be installed with the platform.
-
Install the selected package. The installation requires administrator rights.
-
This will create the distr directory in 1C:Enterprise directory. Depending on the installed packages, this directory will contain client application distribution packages for the following operating systems:
-
Win-mac-clients*.exe file is installed for macOS and Windows.
-
The all-clients*.exe file is installed for all operating systems that support client application update over HTTP(s).
-
When you install client distribution packages, the program searches for the installation directory of a specific version (with the same number) and installs them in the directory of the found version. If the computer contains several options of a specific version, distribution packages are installed in the first available directory from the following list:
-
Installation directory of the 64-bit 1C:Enterprise server.
-
Full 1C:Enterprise distribution package (64-bit version).
-
Full 1C:Enterprise distribution package (32-bit version).
You can start the file with distribution packages using the /D=<PathToDirectory> command. In this case, distribution packages are installed in the specified directory. The program does not search for installed versions.
There is also a simpler installation method that is described in the section about installing 1C:Enterprise on a computer running Windows.
See also:
-
Automated update of client applications using the distr directory.
-
1C:Enterprise installation for Windows.
2.8.3. Configuring Java
Some components of 1C:Enterprise require Java. These components can require different settings of the Java virtual machine. You can find these settings in this section.
- Full-text data search, version 2
- The settings depend on the Java version:
-
Java version is below 17: no settings are required.
-
Java version is 17 or later: add the FtsJavaOpts parameter, which must be set to --add-opens java.base/java.lang=ALL-UNNAMED, to the conf.cfg configuration file.
- Licensing utility (ring license)
- The settings depend on the Java version:
-
If Java version is earlier than 1.8 update 151, install JCE.
-
If Java version is 1.8 update 151 or later, two options are possible:
-
Set the crypto.policy parameter in the java.security file to unlimited (add the crypto.policy=unlimited line to this configuration file or remove the comment from this line).
-
Install JCE.
-
-
Java version 9 or later: Set the crypto.policy parameter in the java.security file to unlimited (add the crypto.policy=unlimited line to this configuration file or remove the comment from this line).
Depending on the Java version and the Java version in use, the java.security configuration file is located in different places:
-
Java 1.8:
-
JDK. %JAVA_HOME%\jre\lib\security.
-
JRE. %JAVA_HOME%\lib\security.
-
-
Java 9 or later: %JAVA_HOME%\conf\security.
See also:
- FtsJavaOpts parameter of the conf.cfg file.
Chapter 3. Installing configurations
3.1. General information on template directories
Infobases are created from the templates. The templates are installed using a dedicated installer created during distribution package generation in Designer. A template is a collection of distribution files, manifest file and accompanying files used to create the infobase.
To use configurations and infobases as templates, install them on the user computer in a particular way. All templates must be stored in subdirectories of a predefined directory, together with manifest files that describe the installed templates.
The system supports multiple template directories that can be located on local disks or on network drives. This allows you to create a unified list of template directories the users can access to install or update configurations.
By default, the template directory is called tmplts. The template directory location depends on the operating system used:
-
Windows: %APPDATA%\1C\1cv8\tmplts.
-
Linux: ~/.1cv8/1C/1cv8/tmplts.
-
macOS: ~/.1cv8/1C/1cv8/tmplts.
Users can change location of the template directory and specify links to other directories (with arbitrary names). For details on how to specify new template directories, see Startup window settings. In this documentation, you can find out how to work with a default template directory. This information will also be applicable to other template directories.
A template directory is divided into provider subdirectories. Each solution provider chooses a subdirectory based on their company name. For example, solutions of 1C Company are stored in the 1C directory. Names of solution subdirectories within a provider subdirectory are not regulated. However, it is recommended to choose subdirectory names based on the corresponding solution names.
Each solution directory contains subdirectories according to versions of the solution. For example, tmplts\1C\Accounting\1.5.7.5.
It is recommended to maintain the naming arrangement to avoid confusion between providers.
The examples of configuration template installation are provided for Windows-based computers.
3.2. Installing configuration templates
To install a configuration, you need to install its template. Download or otherwise obtain an archive with the installation files. Then, uncompress the archive on the computer where you plan to install the template. Then, run the executable file located in a directory with the uncompressed files:
-
Windows: the setup.exe file.
-
Linux: the setup file.
-
macOS: the setup.app distribution package.
After starting the template installer, the installation wizard will be displayed.
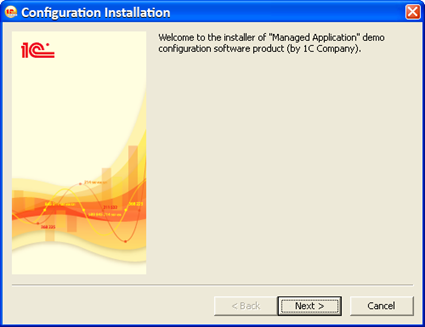
Fig. 12. Configuration installation
Select a directory to install the configuration template. The default path to the template directory is specified as follows:
-
ConfigurationTemplatesLocation parameters in file 1cestart.cfg are searched for the local template directory that the user has a permission to write. If 1cestart.cfg contains more than one parameter with such directories, the first directory will be chosen.
-
If no local directories are found, a directory will be created at the default location. This directory will be used as the default template directory. Besides, the record about this directory will be specified as the first ConfigurationTemplatesLocation parameter in 1cestart.cfg.
The user can change the proposed default path and choose another directory. Then, installation of the configuration template into the specified directory is attempted. If successful, the directory is specified as the first ConfigurationTemplatesLocation parameter in 1cestart.cfg. \$\$\$remove it\$\$\$
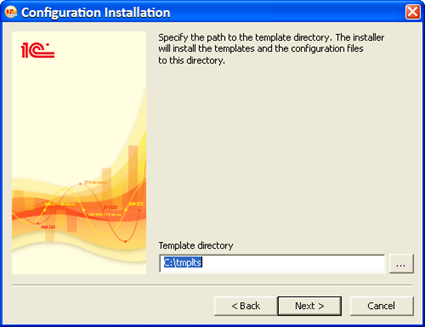
Fig. 13. Choosing the template directory
Then, the installer copies the configuration template file into the specified directory.
To skip some steps of configuration template installation, run setup.exe with /s parameter. In this case, only the startup dialog box and configuration template copying progress bar will be displayed. The configuration template directory from the 1cestart.cfg file will be used. If the file does not contain information on template directory location, the default directory will be created. The path to the created directory will be set as default. Besides, the record about this directory will be specified as the first ConfigurationTemplatesLocation parameter in 1cestart.cfg.
3.3. Creating an infobase from a template
To create a specific infobase using an installed template, run 1C:Enterprise, and then click Add….
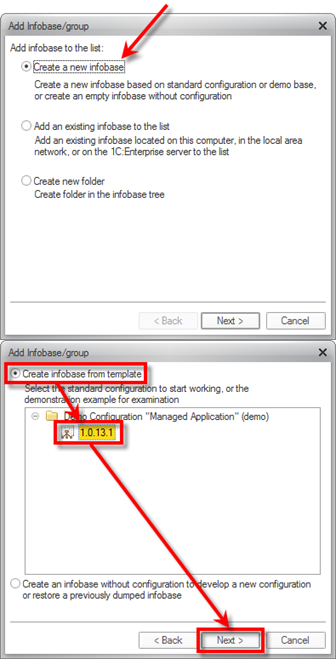
Select the previously installed template and click Next > to proceed with the installation. Template tree generation can take a while.
If you choose to create an infobase from the launcher, you can use any template version (that is 1C:Enterprise 8.0, 8.1, 8.2, or 8.3). If it is created using the thick client, you can select only templates of the same version as the file to open.
Fig. 14. Selecting a template
Then, select the infobase name and parameters. After this, the system will create the infobase.
If you are planning to restore an infobase from a dump file (*.dt) or develop a new configuration, select Create an infobase without a configuration… in the Add infobase or folder window.
Chapter 4. Running system components
4.1. General information
4.1.1. On Linux:
When you install 1C:Enterprise, the following application links are created in the window manager menu:
1C:Enterprise A.B.C.D1C:Enterprise A.B.C.D – Thin client1C:Enterprise A.B.C.D – Thick clientIn the above list:
Item |
Purpose |
|---|---|
| 1C:Enterprise A.B.C.D | Starts the interactive launcher (1cv8s) A.B.C.D version. |
| 1C:Enterprise A.B.C.D – Thin client | Starts 1C:Enterprise in thin client mode for A.B.C.D version. |
| 1C:Enterprise A.B.C.D – Thick client | Starts 1C:Enterprise in thick client mode for A.B.C.D version. |
4.1.2. On macOS
When you install 1C:Enterprise, the following structure is created in the Programs menu:
1C:Enterprise 8 (folder)1C:EnterpriseA.B.C.D (folder)1C:Enterprise1C:Enterprise – Thin client1C:Enterprise – Thick clientRemove 1C:EnterpriseIn the above list:
Item |
Purpose |
|---|---|
| 1C:Enterprise | Starts the 1C:Enterprise launcher (1cestart). |
| A.B.C.D | Version application directory with full number A.B.C.D. |
| 1C:Enterprise | Starts the interactive launcher (1cv8s). |
| 1C:Enterprise – Thin client | Starts 1C:Enterprise in thin client mode. |
| 1C:Enterprise – Thick client | Starts 1C:Enterprise in thick client mode. |
| Remove 1C:Enterprise | Removes 1C:Enterprise of the version whose number is included in the name of the folder containing this menu item. |
In this table:
- Specifying the name of an application without specifying a version means the application or file from the version that was installed latest.
4.1.3. On Windows
When you install 1C:Enterprise, the following structure is created in the Start – Programs menu (see example for Windows 10):
1C:Enterprise1C:Enterprise 8 (folder)1C:Enterprise (A.B.C.D)Thin client (A.B.C.D)Thick client (A.B.C.D)Designer (A.B.C.D)ReadMe – Additional informationRegister server administration utility (A.B.C.D)1C:Enterprise server administrationStart server (A.B.C.D)Install protection driverRemove protection driverIn the above list:
Item |
Purpose |
|---|---|
| 1C:Enterprise | Starts the 1C:Enterprise launcher (1cestart). |
| 1C:Enterprise (A.B.C.D) | Starts the interactive launcher (1cv8s). |
| Thin client (A.B.C.D) | Starts 1C:Enterprise in thin client mode. |
| Thick client (A.B.C.D) | Starts 1C:Enterprise in thick client mode. |
| Designer (A.B.C.D) | Starts 1C:Enterprise in Designer mode. |
| Install protection driver | Starts installation of the protection driver. |
| Remove protection driver | Starts removal of the protection driver. |
| ReadMe – Additional Information | Additional information not included in the documentation. |
| 1C:Enterprise 7.7 infobase converter (A.B.C.D) | Converts infobases from 1C:Enterprise 7.7 format. |
| 1C:Enterprise server administration | Server cluster administration utility (if any 1C:Enterprise server cluster access components are installed). |
| Start server (A.B.C.D) | Starts 1C:Enterprise server as a service (if the Install 1C:Enterprise 8 server as Windows service check box was selected during server installation) or as an application (if the Install 1C:Enterprise 8 server as Windows service check box was cleared during server installation). In this case, server shutdown is identical to closing a regular application. |
| Register server administration utility (A.B.C.D) | Registers the 1C:Enterprise server administration utility (radmin.dll) for a specific version, so that you can connect to the servers of this version using the administration utility. |
In this table:
-
Specifying the name of an application without specifying a version means the application or file from the version that was installed latest.
-
Specifying (A.B.C.D) next to an application name means that a separate menu item is created for each installed version, where A.B.C.D means the full number of the installed version. For example, if both versions 8.3.12.100 and 8.3.12 150 are installed, two menu items will be created, Thin client (8.3.12.100) and Thin client (8.3.12.150).
-
If the 64-bit version of 1C:Enterprise is installed, x86-64 will be included in the folder name and names of items in this folder.
-
If 1C:Enterprise server is installed in "For user" mode, it cannot be started as a Windows service.
4.2. Operating modes
1C:Enterprise supports the following operating modes:
Operating mode |
Description |
|---|---|
Designer |
System configuration mode. In this mode, you can edit data structures, update configurations, create user lists, assign access rights to users, import and export data. |
1C:Enterprise |
Standard mode. You can enter and process data (perform operations with catalogs, documents, reports, and so on) based on the data structures created and configured in Designer.
Three options are available for this mode:
Thick client can run configurations created for earlier 1C:Enterprise versions, as well as configurations created in managed application mode.
Thin client and web client can only run configurations created in managed application mode. |
4.3. Starting client application or Designer
4.3.1. General information
There are several ways to start 1C:Enterprise:
-
Launcher (1cestart). Recommended.
-
Interactive launcher (1cv8s).
-
Executable file for the thick (1cv8) or thin (1cv8c) client of a specific version.
-
Web browser (web client only).
To start 1C:Enterprise, the following configuration files are used:
-
1cestart.cfg. Local configuration file.
-
1cestart.cfg. Local configuration file for all users.
-
1cescmn.cfg. Common configuration file (except for Linux).
Each method is described below in more details.
See also:
-
1cestart.cfg
-
1cescmn.cfg.
4.3.2. Launcher
4.3.2.1. General information
For details on the 1cestart file location, see 1cestart.
Launcher starts all types of client applications (thick client, thin client, web client), as well as Designer.
The launcher can be started without parameters or with a reference to a specific infobase.
If the client computer is Windows-based:
-
Launcher can also be located on a network resource (no additional software components required). It can be used both for initial installation of 1C:Enterprise and installation of new versions. If the launcher finds a shared configuration file in its directory, a link to this configuration file is saved as a value of the CommonCfgLocation parameter of the local configuration file.
-
When you install 1C:Enterprise from the launcher, you might be prompted to restart the operating system.
4.3.2.2. Starting without parameters
If you start the launcher without parameters, the startup procedure is as follows:
-
If the launcher is started from a network disk, the launcher searches for a shared configuration file in the launcher directory. If the file is found, the launcher reads the parameters from the file.
-
Launcher searches for the 1cestart.cfg local configuration file. The search is performed in the configuration file location directories used both in the "for computer" and "for user" installation modes. If the file is found, the launcher reads the parameters from the file.
-
Launcher searches for installed 1C:Enterprise versions using the data read from InstalledLocation parameters of the configuration files. If this parameter is not specified in configuration files, the launcher closes and an error message is displayed.
-
Latest installed 1C:Enterprise version is determined.
-
Launcher determines the latest version available for installation in directories read from DistributiveLocation parameters of the configuration files.
-
If a later version available for installation is found, the new version is automatically installed with parameters read from InstallComponents parameters of the configuration files. If this parameter is undefined, thin client, thick client, and 1C:Enterprise server access components are installed.
The required installation mode depends on the rights of the current user (see Specifying installation mode).
- Interactive launcher is started from the directory of the 1C:Enterprise version with the max number. The /AppAutoCheckVersion parameter is specified for the startup.
4.3.2.3. Starting with an infobase specified
If you start the launcher with an infobase name specified in the /IBName parameter, the startup procedure is as follows:
-
Data is read from local (1cestart.cfg) and shared (1cescmn.cfg) configuration files.
-
Common list of infobases is created from the local infobase list (the ibases.v8i file) and CommonInfoBases parameters of the configuration files.
-
If the specified infobase name is not found in this list, the launcher closes and an error message is displayed.
-
If the infobase name is found, the client is started with startup parameters determined by infobase properties. The following parameters are determined by the infobase properties:
-
Client type
-
Version number required
-
Bitness of the client application in use
-
Other parameters stored in infobase properties
-
-
The /AppAutoCheckVersion parameter is specified for the startup.
4.3.3. Interactive launcher
4.3.3.1. General information
Launcher starts all types of client applications (thick client, thin client, web client), as well as Designer and 1C:Enterprise Development Tools.
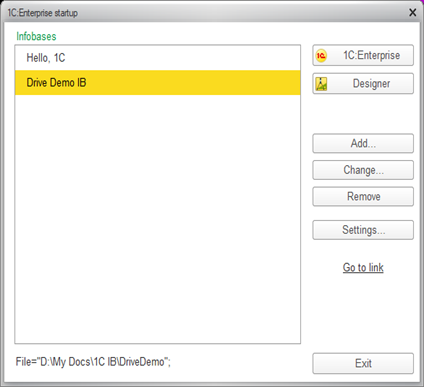
Fig. 15. Interactive launcher
You can click 1C:Enterprise to start a client application for the current infobase. You can click Designer to access the infobase in Designer if the infobase access method allows it. If the infobase is published via a web server, you cannot access it in Designer or click the button. You can click 1C:EDT to start 1C:Enterprise Development Tools for the current infobase in the list. You can manage the button availability in the startup window settings (for details, see Startup window settings). If 1C:Enterprise Development Tools is not installed on the current computer, you will be prompted to install this tool. You can start 1C:Enterprise Development Tools only interactively from the interactive launcher form.
The interactive launcher uses some 1C:Enterprise components, so starting a client application that matches version of the interactive launcher is faster than starting an arbitrary client application. You can start the interactive launcher both interactively and using the launcher (see Launcher).
After the first startup, the interactive launcher generates a common list of infobases and writes it to the ibases.v8i file. This list includes infobases for all 1C:Enterprise versions. When transferring lists of infobases for 1C:Enterprise 8.0 and 8.1, user confirmation is required. Further automatic updates of infobase lists are not supported. During the first startup, paths to configuration template directories of previous versions are determined and written to the ConfigurationTemplatesLocation parameter of the 1cestart.cfg file. The 1cestart.cfg file depends on where the interactive launcher was started from.
The interactive launcher can be started without parameters or with a reference to a specific infobase.
4.3.3.2. Starting without parameters
If you start the interactive launcher without parameters, you are prompted to select an infobase (see Maintaining the infobase list).
After the infobase is selected, the interactive launcher follows this procedure:
-
If the interactive launcher is started from the launcher or in interactive mode (with or without the /AppAutoCheckVersion+ parameter):
-
1C:Enterprise version required to start the infobase is determined and the executable files of this version are found (see Specifying run mode).
-
If the required 1C:Enterprise version is not installed and cannot be installed on the computer, the launcher closes and an error message is displayed.
-
Name of client to be started and other startup parameters are determined. The client is started with the specified parameters (including /AppAutoCheckVersion parameter) from the directory of the required 1C:Enterprise version.
-
If the version directory does not contain the required client, the launcher closes and an error message is displayed.
-
-
If the interactive launcher is started from the directory of a specific version with /AppAutoCheckVersion- parameter specified:
-
Executable files of the client must match 1C:Enterprise version whose interactive launcher was started.
-
If the auto client type selection is enabled for the infobase, the thin client is started and the /AppAutoCheckMode parameter is passed to it (see Specifying run mode).
-
4.3.3.3. Starting with parameters
Starting the interactive launcher with an infobase specified (using the /IBName parameter) is identical to starting the regular launcher.
4.3.4. Infobase connection methods
There are several ways to deploy an infobase and to connect to it. To specify a method for a specific infobase, go to the infobase adding dialog box (see Adding infobases):
- Infobase is located on a local computer or a computer in a local network.
It is used by the thin and thick client in file mode.
When the thin client runs in file mode on the computer where the thin client was started, a specialized environment is set. In this specialized environment:
-
Server components required for the system operation are loaded.
-
Application configuration is loaded.
-
Other actions needed for normal infobase operation are performed.
Interaction between the thin client and the specialized environment is organized over the same protocols that are used when working in client/server mode or via the web server. Thus, the specialized environment operates as a server for the thin client. The environment is not a separate OS process; instead, it runs as a part of the thin client process.
- The infobase is located on the 1C:Enterprise server.
It is used by the thin and thick clients in client/server mode.
- The infobase is located on a web server.
It is used by the thin client and web client in file mode and client/server mode.
To connect to the infobase via the web server, install and configure the web server properly.
When connecting to the infobase via the web server, specify the URL as an infobase connection string. For example, http://MyServer/DemoBase.
4.3.5. Selecting an infobase
The next step of 1C:Enterprise startup is infobase selection. For this, use the 1C:Enterprise launch window.
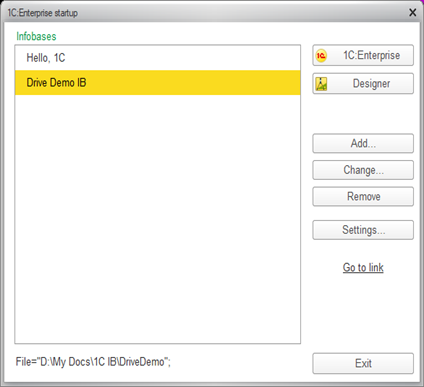
Fig. 16. Starting 1C:Enterprise
The Infobases list contains the list of infobases. Each item in this list points to a directory where 1C:Enterprise infobase files are stored (for file mode) or to a server and server infobase (for client/server mode).
Select any infobase from this list. To select the infobase, double-click its name.
To manage the 1C:Enterprise infobase list, use the Change, Add, and Remove buttons. You can also use shortcuts: F2, Ins, and Del. For the details on the purpose of these buttons, see: Maintaining the infobase list.
The window is resizable. Size and location of the window are memorized after the session ends.
When all 1C:Enterprise startup parameters are specified, click 1C:Enterprise to run 1C:Enterprise, or Designer to run Designer. Click Exit to cancel the 1C:Enterprise startup.
The Go to link command is used to run the client application when the external URL of the application object is available. After clicking this hyperlink, a dialog box opens where you can type in the URL and click Go to. For more information on the actions performed when running the client application using an external URL, see Auxiliary parameters.
As an alternative to selecting an infobase from the list (see Maintaining the infobase list), you can run 1C:Enterprise using the .v8i file and specifying the infobase parameters in the startup command line of the client application (see Startup command-line options of 1C:Enterprise). In this mode, you can use infobases that are not included in the infobase list. When accessing an infobase not included in the local infobase list, remember that the configuration data will not be cached for this infobase. As a result, many operations will be considerably slower. To avoid this slowdown, add the infobase to the infobase list.
4.3.6. Selecting and using the client application
4.3.6.1. General information
In this section, you will learn how to choose a client application to run (and its bitness), as well as the system behavior when client application versions mismatch in client/server and file infobase modes. The section describes commands of the command line for client application startup. For details on these commands, see General startup commands.
4.3.6.2. Client for a specific 1C:Enterprise version
A specific client (thin or thick) can be started in two ways:
-
By selecting the respective menu item (depends on the client operating system used). The client application type will be determined based on the words "thin client" or "thick client" in the menu item name.
-
By running the executable file of the required client (depends on the client operating system used).
-
To start a thin client of a particular version, start the 1cv8c file.
-
To start a thick client of a particular version, start the 1cv8 file.
-
-
When starting a file infobase, installation of the latest version of a client application is attempted first (using DistributiveLocation parameter of the configuration files), and then the infobase is opened using the latest version installed on the computer. To disable installation of new versions, use /AppAutoCheckVersion- command-line option of the client application startup. To enable or disable installation of a new version, use the Automatically install a new version checkbox in the dialog box of startup window settings (see Startup window settings) or the /AppAutoInstallLastVersion command-line option of the client application startup (see General startup commands).
If the client is started without the /AppAutoCheckMode parameter, it is attempted to start the infobase using the selected client of a specific version without picking the client application type.
4.3.6.3. Determining application bitness and using applications of different bitness
You can select client application bitness only if the computer runs 64-bit Windows. If your computer runs Linux, use the application whose bitness matches the operating system bitness. If the computer runs macOS, only 64-bit version of the applications is available.
Several versions of the client application with different bitness can be installed on the client computer. In some situations, you might need to specify not only the version of the client application but also its bitness for a specific infobase. You can specify client bitness for each infobase if necessary.
To specify bitness of a client application, you can use (in descending priority order):
-
/AppArch startup command line parameter
-
Infobase property
-
Interactive launcher property
All these options allow you to specify one of 4 client bitness options:
-
32 (x86). Gives priority to the 32-bit version of a client application. 64-bit versions of the client application will be ignored, even if there are newer versions among them.
-
64 (x86-64). Gives priority to the 64-bit version of a client application. 32-bit versions of the client application will be ignored, even if there are newer versions among them.
-
32 (x86) priority. Gives priority to the 32-bit version of a client application. However, if a 64-bit version has a later release date, it will be used instead.
-
64 (x64) priority. Gives priority to the 64-bit version of a client application. However, if a 32-bit version has a later release date, it will be used instead.
-
Automatically. Bitness of a client application is not explicitly specified. In this case, 32 (x86) priority will be used.
Consider that the system performance does not depend on the bitness (operating system and processor) of client applications or a server cluster (for client/server mode). It means that the infobase can be simultaneously operated by client applications with different bitness, on different processors, and in different operating systems. In client/server mode, cluster server bitness can differ from client application bitness, operating system, and processor. Application bitness and the operating system it is intended for are important when:
-
COM connection is used (only for Windows).
-
Add-ins are used. An add-in must include an add-in file whose characteristics match the application where you plan to use the add-in. An add-ins contains a manifest that describes which startup options the add-in developer built this add-in for. For details on the add-in manifest, see 1C:ITS portal (https://its.1c.ru/db/metod8dev#content:3221:hdoc). For all environments that support add-ins.
See also:
-
Startup window settings (see Startup window settings).
-
Command-line options (see General startup commands).
-
1cestart.cfg.
-
1cescmn.cfg.
-
*.v8i
4.3.6.4. Client/server version mismatch
When in client/server mode, the client application version might differ from the server version. In this case, 1C:Enterprise cannot run. The client and server versions must match exactly.
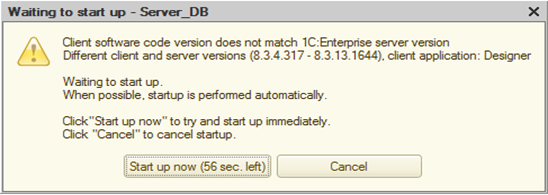
Fig. 17. Client/server version mismatch
In case of client and server version mismatch, the client application (thin or thick client) searches for and installs the version that matches the server version. The search for distribution packages of the client application is performed in the following order:
-
1C:Enterprise installation directory (specified in InstalledLocation property of 1cestart.cfg and 1cescmn.cfg files).
-
Directories specified as locations of distribution packages of new versions (DistributiveLocation property of 1cestart.cfg and 1cescmn.cfg files, as well as CommonCfgLocation property of 1cestart.cfg file).
-
URL that is returned in the server version mismatch exception (the PublishDistributiveLocation parameter of the conf.cfg file and the pubdst attribute of the ws element in the default.vrd file).
-
Internet services used to obtain client application distribution packages.
Please keep in mind that:
-
Thin client is used to search for and get the distribution package using the Internet services only if you connect to the infobase via HTTP.
-
Thin client is used to get the distribution package from the URL specified in the client and server version mismatch exception in any client/server connection.
-
If the infobase list (*.v8i file) includes a version that is not available for installation, the latest version available on the computer is used to open the infobase. In this case, the path to distribution package of the required client version can be received from the 1C:Enterprise server.
4.3.6.5. FIle mode version mismatch
When in file mode, all client applications working with an infobase at the same time must have the same version. The required version is determined by the version of the client application that established first connection to 1Cv8.1CD file of the infobase. First connection is a connection that was established when no other client applications were connected to the infobase.
4.3.7. Web client
4.3.7.1. General information
To run the web client, start the browser and type in an infobase URL. Make sure the browser is set up properly. For setting details, see Configuring web browsers to operate in the web client. You can open one infobase (the same URL) on different tabs of a web browser.
4.3.7.2. Language and regional settings
You can select the language of web client interface using one of the following methods (in ascending priority):
-
Preferred language settings in your web browser
-
Command-line parameter L
When you choose an interface language:
-
Locale language is chosen while processing the query to a resource that corresponds to the infobase (for example, http://localhost/demo):
-
If URL contains the L parameter, the value of this parameter is read. For example: http://localhost/demo?l=en to specify English for the localization. If the language is not chosen after reading the parameter, the Accept-Language header is read.
-
If the URL does not have any parameters, the Accept-Language standard HTTP header that contains information on the preferred languages set in the browser is read.
-
-
Language is chosen based on the locales available on the server:
- If an exact match is not found (for example, the option specifies en_US language, which is not available), the language name is truncated and a new search is performed (the search for en).
-
If no matching language is found, the default English (en) language is used.
- The selected language is added to the base application URL (in the example, the result is http://localhost/demo/en), and the web browser is automatically redirected to this new URL.
Regional settings of a web client session affecting how certain values are displayed (for example, Day and Date) can be specified using the following methods (in ascending priority):
-
Preferred language settings in your web browser
-
Command-line parameter VL
The regional settings of a session are configured in the following way:
-
If the URL contains VL parameter, the regional settings matching the locale code in this parameter are used. For example: http://localhost/demo?vl=en to specify regional session settings for the English language. If the parameter contains an invalid locale code, the web client closes and an error message is displayed.
-
If the URL does not have any parameters, the Accept-Language standard HTTP header that contains information on the preferred languages set in the browser is read.
4.3.7.3. Authentication with a POST request
In some situations, you may need to run 1C:Enterprise without the standard user authentication window. This option might be necessary if you need to make authentication in 1C:Enterprise using a dedicated form (for example, integrated into a website) or if infobase user credentials are stored in a separate database.
To meet these requirements, you can authenticate a web client session using POST request to infobase resource: e1cib/start. In this case, the startup process follows this procedure:
-
POST request is made to authenticate the client.
-
If the authentication is successful, the session is created on behalf of the user specified in the POST request.
-
Web client is started and the following parameters from the POST request are passed to the web client command line: LowClientConnectionSpeed, LaunchParameter, LocaleCode, and Zone.
-
Web client connects to the session authenticated in step 2.
The request contains the following parameters:
- Usrrequired
- Username.
- Pwdnot required
- User password.
The default value is empty string.
- LowClientConnectionSpeedoptional
- Connection speed.
Values:
-
on. Low connection speed.
-
off. Normal connection speed (default).
- LaunchParameteroptional
- Parameters to be passed to the application. It is similar to the C parameter of the web client command line.
The default value is empty string.
- SystemLanguageoptional
- Interface language. If not set, to set the interface language and regional settings, see Language and regional settings.
- LocaleCodeoptional
- Interface language. If not set, to set the interface language and regional settings, see Language and regional settings.
- Zoneoptional
- Separator values.
- AuthFailHandlingoptional
- Determines the system behavior in case of authentication error. Values:
-
error. Returns error code 402 and an error message.
-
start. Runs web client with the 1C:Enterprise authentication request.
-
redirect. Redirects to URL passed in the AuthFailRedirectURL parameter.
The default value is error.
- AuthFailRedirectURLoptional
- Contains the URL to follow in case of authentication error, if the AuthFailHandling parameter is set to redirect. This URL must be absolute.
Example:
This HTML page illustrates a native authentication form of an infobase located at http://localhost/demoapp.
<HTML xmlns="http://www.w3.org/1999/xhtml"><HEAD><META http-equiv="Content-Type" content="text/html; charset=utf-8" /><BODY><FORM action="http://localhost/demoapp/e1cib/start" method="post">User: <INPUT id="usr" name="usr" /><BR />Password: <INPUT id="pwd" type="password" value="" name="pwd" /><BR />Low speed: <INPUT id="lowclientconnectionspeed" type="checkbox" name="lowclientconnectionspeed" /><BR />Startup parameter: <INPUT id="launchparameter" name="launchparameter" /><BR />Interface language: <SELECT id="systemlanguage" name="systemlanguage"><OPTION value="ru" selected="">Russian</OPTION><OPTION value="en">English</OPTION></SELECT><BR />Session localization code: <SELECT id="localecode" name="localecode"><OPTION value="ru" selected="">Russian</OPTION><OPTION value="en">English</OPTION></SELECT><BR />Data area: <INPUT id="zone" name="zone" /><INPUT id="authfailhandling" type="hidden" value="error" name="authfailhandling" /><P><INPUT type="submit" value="ОК" /> </P></FORM></BODY></HTML>As a result, the following authentication form will be displayed:
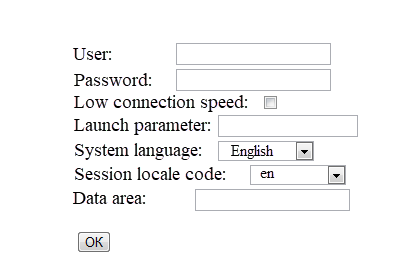
Fig. 18. POST request form
4.3.8. Infobase users
4.3.8.1. User authentication
If a list of users allowed to access the infobase (to create or edit this list, use Designer) is available, the user authentication dialog box will be opened. At the top of the dialog box, under the 1C logo, there is a name of the infobase that the user is trying to access. This name is displayed if the authentication dialog box opens from the launcher, to whose infobase list the current database is added. If you access the infobase using a web client or by specifying access parameters in the command line of the client application startup, "1C:Enterprise" is displayed under the 1C logo.
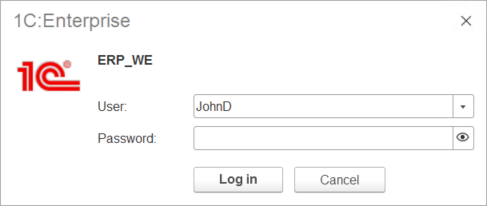
Fig. 19. User authentication
There are several ways to specify a username in this dialog box:
-
Click the User field and choose a name from a list. You can use this method if there are users that can be displayed in the choice list in the settings.
-
Type the username in the User field if the list is very long or the Show in list option is not enabled in the user settings (see Adding new users).
Once at least one username is specified in the authentication dialog box, after successful authentication, this name will be added to the list of recent users. This list contains up to 4 usernames.
If a password is set for the user, enter the password in the Password field. Then, click Sign in to complete the user authentication and proceed. To close the authentication window (and refuse to connect to the infobase), click the X button in the upper-right corner of the dialog box.
The button on the right side of the password field allows you to see the password in clear text.
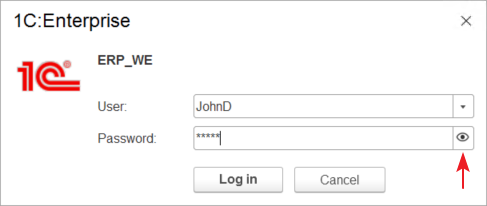
Fig. 20. Hidden password
Click the button to see the password in clear text not covered by *. In this case, the button changes its image, as is evident from the figure below.
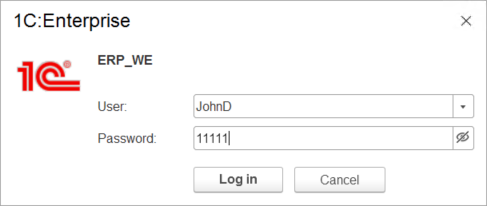
Fig. 21. Open password
If you click the button in the password input field several times, you can switch between the password view modes: hidden – displayed. When you open the user authentication dialog box, the password is entered in mask mode.
If you select the Remember checkbox in the authentication dialog box, the next time you authenticate to the specified infobase on this computer, the user authentication attempt will not be performed. Instead, the user whose name that was specified in the dialog box before the checkbox was selected will be signed in (in the example on the figure, this will be Administrator (JohnSmith)).
If self-service password recovery is enabled in the infobase, the Forgot your password? hyperlink will be displayed in the dialog box.
Clicking the hyperlink will run the user's password recovery. For more information on how to set up and use this feature, see Password recovery.
If several authentication types are configured for the infobase, the authentication dialog box displays all the configured authentication types.
The authentication types are displayed at the bottom of the dialog box (Sing in via...). QR code authentication is displayed separately. If this feature is enabled, the Sign in using QR code hyperlink is displayed under the Sign in button. The authentication dialog box displays the following authentication types: standard authentication, email authentication, QR code authentication, OpenID authentication, and OpenID Connect authentication. You can set up and use several OpenID Connect authentication providers (they all will be displayed). Active authentication (whose parameters are displayed at the top of the dialog box) is highlighted with an underscore under the authentication picture.
For the authentication dialog box to display the authentication types available to the user, the following conditions must be met:
-
Configure an authentication type for this infobase.
-
Enable the authentication type selection for this infobase.
To configure all the above settings, use the default.vrd configuration publication setup file. To set up the OpenID and OpenID Connect authentication, use the <openid> and <openidconnect> elements. To specify the location of mobile applications that can be used to sign in by QR code, use the <mobileApps> element. To display a particular authentication type, as well as to specify the order of the configured authentication types in the authentication dialog box, use the <authentication> element. Note that hiding the authentication type in the <authentication> element has a higher priority than the settings in other sections of the default.vrd file. If OpenID authentication is configured in the default.vrd file (and the provider is available to the client application) but disabled in the <authentication> element, you cannot select the OpenID authentication in the authentication dialog box of this infobase. Note that enabling the display of any authentication type (the <authentication> element) will not automatically configure this authentication type.
If a picture is specified in the OpenID Connect authentication settings for the provider (the image field of the provider description), the provider will be displayed with this picture in the authentication dialog box. The value of the title field of the provider description will be displayed for the OpenID Connect provider as a tooltip.
If an access error occurs (no free license, prohibition from the external session management service, or exclusive infobase/area access error) during authentication when starting the client application (thin client, web client, mobile client, thick client, or Designer), the following happens:
-
If an authenticated user has no other sessions in the current infobase/area, an error notification appears. Client application does not start.
-
If an authenticated user has other sessions in the infobase/area after the respective client applications started on the same computer were closed, the sessions end automatically and another authentication attempt is made.
-
If there are sessions in the infobase/area, but the client applications are still running, or they were started on another computer, a dialog box with a list of sessions appears, and the system prompts you to close all or some of the sessions. If you agree, the system attempts to close the selected sessions and authenticate again.
See also:
- default.vrd file details.
4.3.8.2. Authentication when accessing infobase data
4.3.8.2.1. General information
Before getting access to infobase data, the client application must specify who will access data and check whether this user is authenticated. You can use the 1C:Enterprise client application or any other software that can get access to data via external application interfaces as a client application. You can get access to data using the file infobase or the 1C:Enterprise server (over TCP/IP) or using the web server (over HTTP(s)). Client application can be authenticated as follows:
-
With a username and password (authentication using 1C:Enterprise tools, standard authentication). With this authentication method, you can use two-factor authentication if it is set up on the 1C:Enterprise side. For more information about two-factor authentication, see Two-factor authentication. For more information about authentication using 1C:Enterprise tools, see 1C:Enterprise authentication.
-
With operating system authentication. For more information, see Operating system.
-
With OpenID and OpenID Connect protocols. OpenID providers can use various kinds of two-factor authentication. It depends on the provider settings.
-
With a special access token.
-
QR code authentication. For more information, see Using QR code.
-
Email authentication. For more information, see By email.
Depending on how you access 1C:Enterprise data, you can use different authentication kinds.
In terms of authentication kinds and participating system components, the easiest way to access data is to directly access the file infobase or the 1C:Enterprise server cluster. In this case, access only the infobase without secondary servers.
During the direct connection, you can use the following authentication kinds:
-
OS authentication.
-
Authentication using 1C:Enterprise tools.
-
Email authentication (for interactive authentication only).
If you connect over HTTP(s), the following is used during the connection:
-
Proxy server. This is a server that acts as an intermediary between the client application and the target server. Let us assume that the proxy server is in computer networks of the client application.
-
Web server. This is a server that grants access to the infobase or the 1C:Enterprise server cluster over HTTP(s). Let us assume that the web server is located in the same computer network as the server cluster or infobase.
You can transfer data between the proxy server and the web server via the Intranet and Internet. The proxy server is optional for getting access.
It is also worth mentioning that HTTPS or secure connection is supported. This protocol is not directly related to authentication but, with secure connection, you can be sure that the client and the server are truly the subjects they pretend to be. In this section, you can find a brief description of secure connection. The secure connection is established between the client application and the web server where the 1C:Enterprise infobase is published and only if HTTPS is supported by the web server for the required infobase. To specify that the client application must use secure connection, do the following:
-
When you use the web client, all actions are performed by the browser. Install root certificates to the computer. With the certificates, you can check the web server certificate.
-
When you use the thin client, use the launcher to set up certificates. During the setup, you can specify how to check the web server certificate and which certificate will be used by the client application.
-
When you operate from 1C:Enterprise language, establish secure connection using the OpenSSLSecureConnection object. The parameters of this object are similar to the launcher settings.
So, the following items are involved in the authentication process: a client application located on a client device, a proxy server, a web server, and the 1C:Enterprise server cluster or the web server extension for the file infobase.
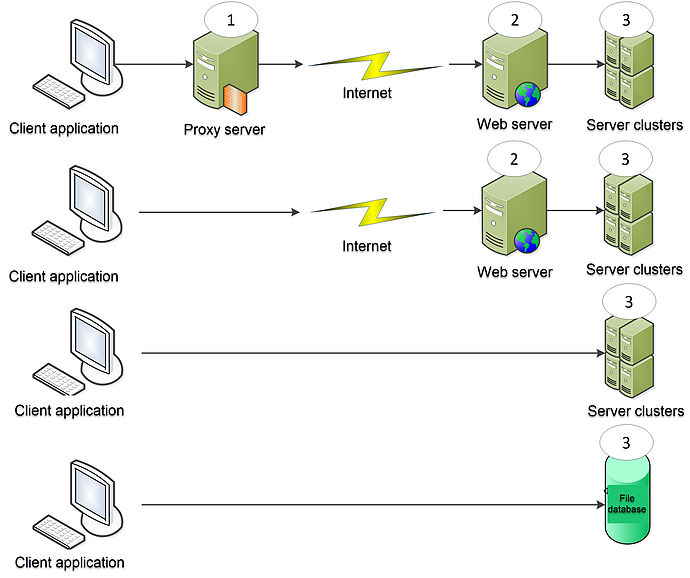
Fig. 22. Authentication options
The figure shows the main authentication options. You can combine these options. For example, you can connect your device to the web server that operates with the file infobase. The client application initiates authentication process and ensures that all participants get data required to complete each step of the process. The following authentication options are numbered:
-
Authentication on the proxy server.
-
For authentication, you can use:
-
Authentication using 1C:Enterprise tools.
-
OS authentication.
-
-
Specify the parameters for authentication on the proxy server:
-
In the settings to access the infobase in the launcher.
-
Using the /Proxy command-line option for the client application startup.
-
Using the InternetProxy object if you access data programmatically.
-
Using the inetcfg.xml configuration file.
-
-
-
Authentication on the web server.
-
For authentication, you can use:
-
Authentication using 1C:Enterprise tools.
-
OS authentication.
-
-
Specify the parameters for authentication on the web server:
-
Using the /WSA, /WSN, and /WSP command-line options for the client application startup.
-
Using the InternetProxy object if you access data programmatically.
-
-
You can also use secure connection (HTTPS).
-
-
Authentication in the infobase.
-
For authentication, you can use:
-
Access token.
-
OS authentication.
-
Authentication using various OpenID protocol options.
-
QR code.
-
Username and password.
-
Email authentication (interactive login only).
-
-
Specify authentication parameters for the infobase as follows:
-
Access token:
-
Using the /AccessToken command-line option for the client application startup.
-
Using the AccessToken parameter of the infobase connection string.
-
Using the Authorization: Bearer header of the HTTP infobase request.
-
-
OS authentication:
-
Using the /WA command-line option for the client application startup. You can enable or disable this authentication method.
-
Using the UseOSAuthentication parameter of the HTTPConnection or WSDefinitions object constructor.
-
-
Authentication using OpenID:
-
Using the /OIDA command-line option for the client application startup. You can enable or disable this authentication method. Authentication parameters are determined by the publication settings of the infobase you want to access.
-
Using the Authorization: Bearer header of the HTTP infobase request.
-
-
Using the username and password:
-
Using the /N and /P command-line options for the client application startup.
-
Using the parameters of the infobase connection string.
-
Using the Authorization: Basic header of the HTTP infobase request.
-
-
Email authentication:
- Using the /EmailAuth command-line option for the client application startup.
-
-
See also:
-
Startup command-line options (see Authentication settings).
-
Authentication kinds in 1C:Enterprise (see Authentication types).
-
Integration methods in 1C:Enterprise.
4.3.8.2.2. Interactive authentication
4.3.8.2.2.1. Authentication on the web server
When you access the infobase manually, authentication on the web server is performed as follows:
-
Thin client:
-
If the /WSA- parameter is specified, a web server requests a username and password for authentication.
-
If the correct /WSN and /WSP parameters are set, a specified user is authenticated on the web server.
-
If the /WSN parameter is not specified, OS authentication is performed. If authentication fails, a username and password are requested.
-
If the /WSN parameter is specified and the /WSP parameter is not set or is set incorrectly, a web server requests a username and password for authentication.
-
-
Web client:
- The browser manages this process.
See also:
-
Startup command-line options (see Authentication settings).
-
Authentication kinds in 1C:Enterprise (see Authentication types).
4.3.8.2.2.2. Authentication in the infobase
If you connect to the server/infobase (thin and thick clients) directly or if you connect to the infobase via the web server (thin client or web client), authentication in the infobase is as follows:
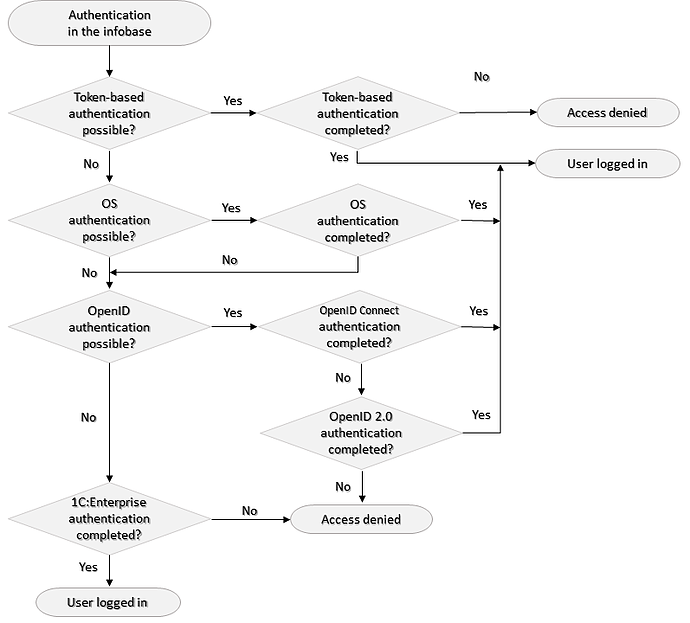
Fig. 23. Interactive authentication
During the interactive authentication, the following takes place:
- If possible, authentication using the saved authentication token is performed.
- If possible, JWT authentication is performed.
If authentication fails, other authentication methods cannot be used.
- If possible, OS authentication is performed.
If authentication fails or the /WA- command is specified, further attempts to use other authentication methods are made.
-
Authentication with a username and password is performed (if one or both authentication parameters are specified in the command line):
-
If the /N and /P parameters are set, a specified user is authenticated.
-
If the /N parameter is not set, a username and password are requested.
-
If the /P parameter is not set or is set incorrectly, an authentication attempt is made (an empty password is used for authentication). If authentication fails, a username and password are requested (authentication window).
-
If the authentication attempt fails and the /N parameter is specified, in the authentication window that opens, the /N parameter value will be specified in the username field.
-
-
The user selects the required authentication method in the dialog box and attempts to authenticate using this method. To set up the authentication dialog box, use the default.vrd publication description file (the <authentication> element). If any authentication type is disabled in the default.vrd file, you will not be able to select this authentication type in the dialog box, even if other settings are correct. If the /OIDA- option is specified in the command line, the OpenID authentication will not be available for selection.
See also:
-
Startup command-line options (see Authentication settings).
-
Authentication kinds in 1C:Enterprise (see Authentication types).
4.3.8.2.3. Authentication when accessing the infobase programmatically
4.3.8.2.3.1. Authentication on the web server
When you access the infobase programmatically, set up authentication on the web server using the HTTPConnection or WSDefinitions object depending on the service kind you use:
-
Authentication on the web server is determined by the UserName, Password, and UseOSAuthentication parameters of the HTTPConnection and WSDefinitions object constructors:
-
The UseOSAuthentication parameter is set to True:
-
OS authentication is enabled in the web server settings:
-
OS is authenticated.
-
If the UserName and Password parameters are specified, their values are used for authentication over NTLM and Kerberos protocols. Specify the UserName as DOMAIN\user or user@domain.
-
If the UserName and Password parameters are not specified, the parameters of a user on whose behalf the current session is running will be used.
-
-
OS authentication is disabled in the web server settings:
-
Authentication on the web server is not performed.
-
To access the infobase, UserName and Password will be used.
-
-
-
The UseOSAuthentication parameter is set to False:
-
If UserName and Password are specified, use the username and password for authentication.
-
Do not specify the infobase username and password that are specified in the infobase URL. In some cases, it can lead to errors that are hard to find.
-
-
See also:
-
Authentication kinds in 1C:Enterprise (see Authentication types).
-
Integration methods in 1C:Enterprise.
4.3.8.2.3.2. Authentication in the infobase
Once you authenticate on the web server, the web server extension tries to authenticate in the infobase:
-
If the Authorization: Bearer HTTP request header is specified, an attempt to authenticate using an access token is made. If the attempt fails, you will not be able to access the infobase.
-
If the Authorization: Basic HTTP request header is specified, an attempt to authenticate using a username and password is made.
-
If standard headers are not used, the web server extension tries to get a username and password from the infobase connection string from the default.vrd file. If parameters are determined, internal request headers are used to transfer the parameters.
-
If a username and password are not determined, an attempt to use OS authentication is made. If OS authentication fails, you will not be able to access the infobase.
See also:
-
Authentication kinds in 1C:Enterprise (see Authentication types).
-
Integration methods in 1C:Enterprise.
4.3.9. Using certificates
4.3.9.1. General information
When sending information over public communication channels (Internet), protecting this information from interception and spoofing is particularly important. This chapter examines the issue of establishing secure connections in a 1C:Enterprise-based system.
Let us review the general procedure of establishing a secure connection. It is based upon Public Key Infrastructure (PKI) that associates public keys with respective user identities using a certification authority.
A simple example illustrates how PKI operates. Let us assume that any person can contact a certificate issuer to check validity of any certificate issued by it.
Let us further assume that a Policeman meets a Stranger and wants to verify that the person they just met is indeed the Stranger. To do this, the Policeman asks the Stranger to show their ID. Before showing the ID, the Stranger wants to make sure that the person in front of them is indeed the Policeman. They ask the Policeman for their badge, call the Police HQ, and ask them to check the badge number to verify that the person in front of them is the Policeman. After the authentication, the Stranger shows their ID to the Policeman. The ID has a unique number. It also says it is issued by the Ministry of Documents. The Policeman contacts the Ministry of Documents and asks them to check the ID number to verify that the person in front of them is the Stranger.
However, if the Stranger travels to another country, the above authentication algorithm will not work, because the Policeman in another country knows nothing about the Ministry of Documents. Therefore, the Stranger will be detained until another method to determine their identity is found.
Now, let us translate this into terms of PKI objects and network infrastructure. 1C:Enterprise client application acts as a Stranger. Web server used by the client application to access the infobase acts as a Policeman. Ministry of Documents and Police HQ are Certification authorities. Certificates used to establish the HTTPS connection serve as Stranger's ID and Policeman's badge.
Let us go through the procedure once again, now in the correct terms. When a client application attempts to connect to the web server, the client application verifies the server certificate. The verification is performed via certification authority specified in the web server certificate if the certification authority is in the list of root certification authorities on the computer with the client application. If verification is successful, the client application provides its client certificate to web server for verification. The server verifies the certificate using its list of root certification authorities. If the verification is successful, the client application and the web server establish a secure HTTPS connection. The client application then encrypts data sent to the server and decrypts data received from the server using the server's public key, while the server encrypts and decrypts data using its private key. The client application and the web server use different private keys unknown to the other party.
This is a general description of establishing a secure connection. The next section contains a more detailed description.
4.3.9.2. Methods for establishing a secure connection
A secure connection can be established between the thin client or web client and the web server used to access the infobase. Depending on certificate availability at client or server, several methods can be used to establish a secure connection. These methods are described below. Please keep in mind that all HTTPS connections are encrypted.
| Server | Client | Description |
|---|---|---|
Certificate+
Root- |
Certificate-
Root- |
Server and client certificates are not verified.
This is the only mode available in versions prior to 8.3.3. |
Certificate+
Root- |
Certificate-
Root+ |
Server certificate is verified. Client certificate is not verified. |
Certificate+
Root+ |
Certificate-
Root-
or
Certificate-
Root+ |
Not supported |
Certificate+
Root+ |
Certificate+
Root- |
Server certificate is not verified. Client certificate is verified. |
Certificate+
Root+ |
Certificate+
Root+ |
Both client and server certificates are verified. |
Terms used in the table:
-
Certificate. Indicates that a certificate is available (Certificate+) or unavailable (Certificate-):
-
Server certificate for a server.
-
Client certificate for a client.
-
-
Root. Indicates that a certificate authority (CA) list to verify the presented certificate is available (Root+) or unavailable (Root-). CA list must allow verification of certificates presented by the client application or web server.
When using a web client, availability of a certificate or a root certificate list is determined by certificates installed in the certificate storage used by the web browser.
For the thin client, you can specify the certificate (and lists of root certificates) using the startup command-line parameters or infobase startup parameters (see Infobase startup parameters).
4.3.9.3. Certificate sources and formats
The following storages can be used as sources of certificates:
-
System certificate store for macOS and Windows.
-
Certificate storage on Linux is located in the /etc/ssl/certs directory. All certificates located in this directory are considered as trusted.
Some Linux distribution packages also support the following directories for root certificate storages:
-
Debian, Mint, Ubuntu: the /etc/ssl/certs/ca-certificates.crt directory.
-
CentOS, Fedora, RedHat: the /etc/ssl/certs/ca-bundle.trusted.crt or /etc/pki/tls/certs/ca-bundle.crt directory.
-
Alt Linux: the /etc/share/ca-certificates/ca-bundle.crt directory.
-
File certificates for Linux, macOS, and Windows.
Available file certificate formats:
-
PEM (base-64 encoded X.509). Encrypted keys and certificates under the X.509 standard in text format. Certificate and key data is encoded using base 64 encoding. Private certificate keys are protected with passwords. This certificate file format is used by default by Apache web server, among others. If the private key of the client certificate is stored in a separate file, the content of this file must be added to the client certificate file.
-
P12/PFX (PKCS#12). Encrypted keys and certificates under the PKCS#12 standard. The file can be protected with a password. This is the primary format for exporting and importing the system certificate storages in Windows. It is used, for example, by Microsoft Internet Information Services web server. The client certificate file must contain its private key.
File extension determines format of the file:
-
.p12, .pfx: P12 file format.
-
*.pem: PEM file format.
-
The default file format is PEM.
4.3.9.4. Self-signed certificates
4.3.9.4.1. General information
When you use the TLS protocol for connection, make sure that the client and server have a corresponding certificate. The server must have a certificate that is used for server authentication. The client must have a certificate that is used for client authentication. The certificates must be verified by trusted certificate authorities. If you establish secure connection for infobases, the certificates you use must be issued by trusted certificate authorities. The certificates must comply with various regulations of national legislation or national regulatory authorities.
To test or deploy any infrastructure in the enterprise Intranet, you might not need to use certificates issued by trusted certificate authorities for various reasons (cost, issuing certificates can take too long, and other). In this case, you can use self-signed certificates. Self-signed certificates are similar to certificates issued by trusted certificate authorities. Advantages of self-signed certificates:
-
You can create as many certificates as you want.
-
You do not need to pay for creating certificates.
Disadvantages of self-signed certificates:
-
Your certificate authority is not supported in the third-party software.
-
Third parties do not trust your certificate.
-
You cannot revoke certificates.
-
There is a high risk to lose data that is transferred via the connection secured by self-signed certificates.
Despite all the disadvantages, it is better to use self-signed certificates for testing and internal enterprise systems if the risks above can be ignored when using self-signed certificates.
4.3.9.4.2. Creating certificates
4.3.9.4.2.1. General information
In this section, you can find out how to create the following set of certificates:
-
Certificate of the root certificate authority.
-
Server certificate.
-
Client certificate.
Below, you can see the examples of how to create certificates using the OpenSSL and Java packages. The result will be the same. Two different packages were used to make the examples clearer. In the example, the certificate will be created for the server.com domain. When you create certificates, specify the following parameters:
-
For root certificates
-
Country Name: RU
-
State or Province Name: Moscow
-
Locality Name: Moscow
-
Organization Name: Company
-
Organizational Unit Name: Department
-
Common Name: Root CA
-
Email Address: admin@company.site
-
-
For server certificates:
-
Country Name: RU
-
State or Province Name: Moscow
-
Locality Name: Moscow
-
Organization Name: Company
-
Organizational Unit Name: Department
-
Common Name: server.com
-
Email Address: admin@company.site
-
Specify these parameters in the console when you create a certificate.
The examples given in this section demonstrate how to create certificates. They are not complete and exhaustive. For more information on how to create certificates, read the documentation for the respective software.
4.3.9.4.2.2. Creating a certificate of the root certificate authority
In this section, we will show how to create a certificate that will be used to authorize the server certificate.
Using OpenSSL:
openssl req -x509 -days 3652 -newkey rsa:2048 -keyout root-ca.key -out root-ca.crtUsing Java:
keytool -genkey -alias root-ca -keyalg RSA -keystore root-ca.jks -keysize 2048 -startdate 2023/01/01 -validity 3652In the examples:
-
Certificate is valid for 10 years.
-
Certificate validity period will start:
-
For OpenSSL: when the certificate is generated.
-
For Java: from the date specified in the -startdate parameter.
-
-
When you create a certificate, enter the certificate parameters in the console.
Both utilities will request a password that encrypts the private key of the root certificate authority.
To get a certificate file from JKS (when using Java), use the following command:
Using Java:
keytool -exportcert -rfc -keystore root-ca.jks -alias root-ca -file root-ca.crtAs a result, the following will be created:
-
For OpenSSL:
-
The root-ca.key file. Private key of the root certificate.
-
The root-ca.crt file. Root certificate.
-
-
For Java:
-
The root-ca.jks file. File of the Java certificate store (Java KeyStore).
-
The root-ca.crt file. Root certificate.
-
4.3.9.4.2.3. Creating server certificates
When you use the root certificate, create a certificate of our server. The steps are different for OpenSSL and Java.
First, let us take a look at how to use OpenSSL.
Create the server.ext file that will be located in the directory with the certificates. The file must contain the following information:
authorityKeyIdentifier=keyid,issuerbasicConstraints=CA:FALSEsubjectAltName = @alt_names[alt_names]DNS.1 = server.comThen:
openssl req -newkey rsa:2048 -keyout server.key -out server.csropenssl x509 -req -CAkey root-ca.key -CA root-ca.crt -in server.csr -out server.crt -CAcreateserial -days 365 -extfile server.extIn this example:
-
The first command creates a private key of the server certificate (server.key) and the certificate request file. When the private key is being generated, enter the key parameters in the command line.
-
The second command creates a certificate for the server that will be authorized by the root certificate created in the previous step.
-
The validity period of the certificate is 365 days. The period starts from the creation date.
Using Java:
keytool -genkey -alias server.com -keyalg RSA -keystore server.jks -keysize 2048keytool -certreq -keystore server.jks -alias server.com -ext san=dns:server.com -file server.csrkeytool -gencert -rfc -infile server.csr -outfile server.crt -keystore root-ca.jks -alias root-ca -ext honored=all -startdate 2023/01/01 -validity 365In this example:
-
The first command creates a private key of the server certificate and locates it in the server.jks storage. When the private key is being generated, enter the key parameters in the command line.
-
The second command creates a certificate request for the server.com server.
-
The third command creates a certificate for the server that will be authorized by the root certificate created in the previous step.
-
The validity period of the certificate is 365 days. The period starts from the date specified in the -startdate parameter.
To get the private key of the server (the OpenSSL package is required):
keytool -importkeystore -srckeystore server.jks -destkeystore server.p12 -deststoretype PKCS12openssl pkcs12 -in server.p12 -nocerts -nodes -out server.keyAs a result, the private key of the server (server.key) and the test server certificate (server.crt) will be generated.
4.3.9.4.2.4. Creating client certificates
The creation of client certificates is similar to the creation of server certificates. The steps are different for OpenSSL and Java.
First, let us take a look at how to use OpenSSL.
Create the client.ext file that will be located in the directory with the certificates. The file must contain the following information:
authorityKeyIdentifier=keyid,issuerbasicConstraints=CA:FALSEThen:
Using OpenSSL:
openssl req -newkey rsa:2048 -keyout client.key -out client.csropenssl x509 -req -CAkey root-ca.key -CA root-ca.crt -in client.csr -out client.crt -CAcreateserial -days 365 -extfile client.extIn this example:
-
The first command creates a private key of the client certificate (client.key) and the certificate request file. When the private key is being generated, enter the key parameters in the command line.
-
The second command creates a certificate for the client that will be authorized by the root certificate (to find out how to create a certificate, see Creating a certificate of the root certificate authority).
-
The validity period of the certificate is 365 days. The period starts from the creation date.
Using Java:
keytool -genkey -alias client -keyalg RSA -keystore client.jks -keysize 2048keytool -certreq -keystore client.jks -alias client -file client.csrkeytool -gencert -rfc -infile client.csr -outfile client.crt -keystore root-ca.jks -alias root-ca -ext honored=all -startdate 2023/01/01 -validity 365In this example:
-
The first command creates a private key of the client certificate and locates it in the client.jks storage. When the private key is being generated, enter the key parameters in the command line.
-
The second command creates a certificate request for the client.
-
The third command creates a certificate for the client that will be authorized by the root certificate (to find out how to create a certificate, see Creating a certificate of the root certificate authority).
-
The validity period of the certificate is 365 days. The period starts from the date specified in the -startdate parameter.
4.3.9.4.3. Using self-signed certificates
4.3.9.4.3.1. General information
The certificate contains the public key of the respective object and additional information (certificate validity period and other). You can install the certificate to your computer. This is a public information.
4.3.9.4.3.2. Installing self-signed certificates to the web server
Install self-signed certificates to the web server according to the documentation of the used web server.
4.3.9.4.3.3. For web client
If you access the infobase via the secure connection using the web client, indicate to the browser on the computer that a self-signed certificate of the certificate authority (root-ca.crt) can be used to verify the server certificate. To do this, import the certificate to the personal certificate store of the computer from which you access the infobase.
4.3.9.4.3.4. For thin client
If the infobase is published on the web server to which a self-signed certificate is installed, do the following for the thin client to connect to the infobase:
-
As a path to the infobase, specify a URL on the web server that uses HTTPS.
-
In additional connection settings:
-
In the Select client certificate group, specify the Certificate file value and select the client.crt file. To establish the secure connection between the thin client and the web server where the infobase is published, do not specify this certificate.
-
In the Select server certificate validation method group, specify the CA certificate file value and select the root-ca.crt file.
-
4.3.9.4.3.5. For mobile client
If the infobase is published on the web server to which a self-signed certificate is installed, in the mobile application builder, do the following for the mobile client to connect to the infobase:
-
Open the Certificates for HTTPS list and import the client.crt and root-ca.crt certificates to the list. For the second certificate, select the To verify the server certificate check box.
-
When you set up the application list, in the Web server address field, specify a URL on the web server that uses HTTPS.
-
In the Server certificate validation method field, select Specified certificate. In the Server certificate field, select the element that corresponds to the root-ca.crt file.
-
In the Client certificate field, select the certificate that corresponds to the client.crt file. To establish the secure connection between the mobile client and the web server where the infobase is published, do not specify this certificate.
4.3.9.4.3.6. For collaboration system
To make sure that the collaboration system server uses the secure connection (the WSS protocol), set up the collaboration server accordingly (https://its.1c.ru/db/csdoc/bookmark/cs/TI000000020). Set the full path to the server.jks file as the value of <cs_keystore_path>.
4.4. Restarting 1C:Enterprise
In some cases, the client application cannot get access to the infobase. 1C:Enterprise notifies the user of it and prompts to retry the infobase connection in 60 seconds. It happens when:
-
You try to start Designer when it is already started for this infobase.
-
Exclusive mode is enabled for the infobase.
-
Versions of 1C:Enterprise client and server do not match.
-
1C:Enterprise server is not found.
-
Database server is not found.
-
Connection to the infobase is prohibited:
-
Session start is locked using the client application startup command line, the cluster console, or the SetSessionLock() 1C:Enterprise language method.
-
External session management service.
-
If you cannot connect to the infobase, a dialog box with related information is displayed, and the user is prompted to retry starting 1C:Enterprise in 1 minute or close the 1C:Enterprise launcher.
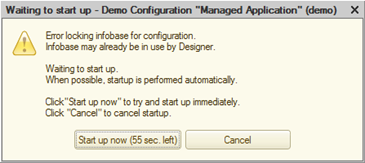
Fig. 24. Waiting for restart
In this dialog box, the situation description can be displayed both as a simple text and as a formatted text. 1C:Enterprise attempts to display the situation description as a formatted string when:
-
Exclusive mode is enabled for the infobase. The situation description is displayed as a formatted string if the message text is set to a value of the FormattedString type when you set exclusive mode.
-
Session start is locked using the SetSessionLock() method. The situation description is displayed as a formatted string if the SessionsLock.Message parameter is set to a value of the FormattedString type. For more information on the session start lock, see Manually, for all.
-
Session start is forbidden by the external session management service. The situation description is displayed as a formatted string if the external session management service returns the ErrorDescription parameter. The parameter value is received from the value of the FormattedString type using the XDTOSerializer.XMLString() expression.
A text message is considered a formatted string if the following expression is executed: String(XDTOSerializer.XMLValue(Type("FormattedString"), Text)) <> Text, where Text is a string passed by third party applications (the external session management service, the cluster console, the rac utility, and so on).
If you load the infobase from a DT file in Designer, you will be prompted to restart Designer after the infobase is loaded.
When a critical error occurs in 1C:Enterprise mode, you are prompted to restart the client application with the same parameters as used by the client application that is abnormally terminated.
Chapter 5. Maintaining the infobase list
5.1. General information
The 1C:Enterprise startup window includes the following controls for infobase list management: add new infobases and infobase folders, move infobases between folders, edit infobase properties, and delete unnecessary infobases from the list.
The list of infobases is presented as a list (by default) or a tree. You can change the list display mode in the dialog box of 1C:Enterprise startup settings.
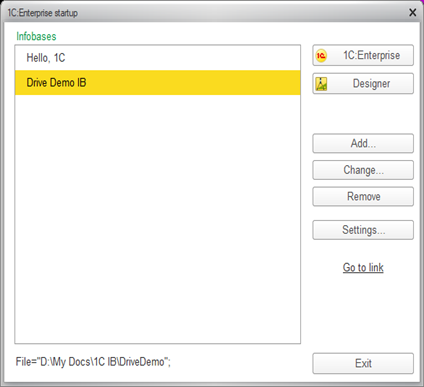
Fig. 25. Starting 1C:Enterprise
5.2. Adding infobases
5.2.1. Adding new infobases
5.2.1.1. General information
To add a new infobase to the list, click Add…. A dialog box will be displayed.
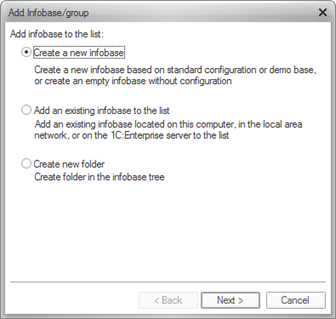
Fig. 26. Choosing the infobase adding mode
Select Create infobase to create an infobase based on the template, or create an empty infobase.
Click Next>. A dialog box will be displayed.
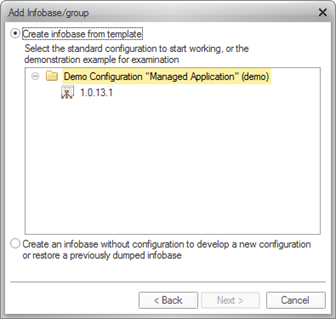
Fig. 27. Selecting the configuration to add
If you choose to create an infobase from a template, select the source template from the list.
Click Next> to specify the infobase name and location type.
Type in the infobase name. This name will be displayed in your infobase list. Maximum infobase name length is 255 characters. You are free to provide a long descriptive name for your infobase. The infobase name must be unique in the infobase list.
5.2.1.2. Creating an infobase in file mode
To create an infobase in file mode, select the infobase location type.
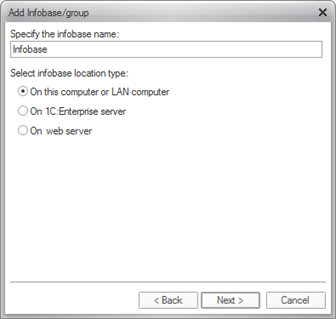
Fig. 28. Selecting file mode for an infobase
Specify the directory where the infobase will be located. If a non-existent directory is specified, it will be created automatically when 1C:Enterprise starts.
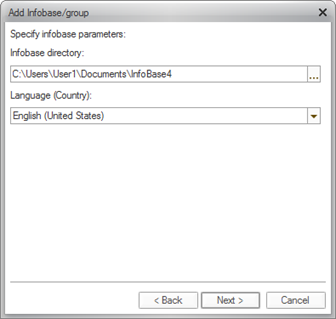
Fig. 29. Specifying infobase directory and language
Click Select to open the standard dialog box for selecting an existing directory.
If you choose to create an empty infobase, select the infobase language in the Language field. Language rules will regulate storing and sorting of data in the infobase. If you have selected a template, the language field might not be displayed.
Click Next > to open the page for setting the startup parameters (see Infobase startup parameters).
If an empty infobase was created and configuration files are not found in the specified directory, the window for selecting the infobase creation mode will also be displayed when you select 1C:Enterprise run mode. If you choose to create an infobase from a template, the infobase is created based on this template.
You can create a database in different version formats: 8.2.14 and 8.3.8. By default, the database is created in 8.3.8 version format. To change the default format, use the conf.cfg file. To convert the 1Cv8.1CD file into different formats, use the cnvdbfl utility.
5.2.1.3. Creating an infobase in client/server mode
5.2.1.3.1. General information
To create an infobase in client/server mode, select the type of infobase location as shown in fig. 30.
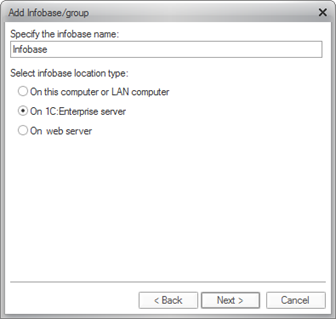
Fig. 30. Creating infobases on the server
An infobase in client/server mode is described by two parameters:
-
Address of 1C:Enterprise server cluster
-
Infobase name
As noted above, the 1C:Enterprise server cluster address consists of the main server name and the number of the network port used by the cluster manager (for example, Test_Server:1541). If the cluster manager uses the default network port (1541), you can skip it and specify the server name only. The infobase name is unique within the 1C:Enterprise server cluster.
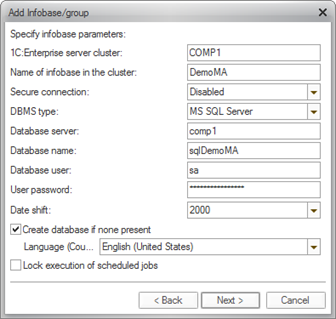
Fig. 31. Creating a new infobase
The infobase name in a cluster is not case-sensitive (it is also true for all technical operations, including functionality assignment rules).
Information characteristics entered in this window and required for infobase creation depend on the DBMS used. Requirements by DBMS are provided in the following sections.
5.2.1.3.2. Microsoft SQL Server
-
DBMS type: Microsoft SQL Server.
-
Database server: server name. It can be specified based on the computer name if a single instance of the server is installed on the computer or based on the name of the specific instance if multiple server instances are installed on the computer. For example, Server/instance.
If 1C:Enterprise server, Microsoft SQL Server, and Native Client for the Microsoft SQL Server are installed on the same computer, you can use the SHARED MEMORY protocol to establish connection between the servers. To do this, add lpc: prefix before the Microsoft SQL Server name. The DBMS server name will look as follows: lpc:Server/instance.
-
Database name: the database name begins with a Latin letter or an underscore (). The database name may contain Latin letters, digits, as well as and $ characters. Maximum length of the name is 63 characters. No spaces are allowed in the name. The database name cannot match any reserved word of server database query language.
-
Database user: name of the database server user on whose behalf the database is accessed. To be able to edit structure of the selected database, the user must be the database server administrator (sa) or database owner. In the latter case, the user must have permission to read master database as well as full access to tempdb database. Moreover, the user must have the fixed server role assigned (processadmin or sysadmin).
If the database username and password are not specified in the connection settings, the server cluster will connect to the DBMS using OS authentication. A user on whose behalf a specific instance of the working process (rphost) that accesses the DBMS is running will be authenticated.
-
User password: password of the user on whose behalf the database is accessed.
-
Date offset: 0 or 2000. Determines the number of years that is added to dates when storing them to Microsoft SQL Server database and subtracted when retrieving the dates. This parameter depends on the specifics of date storing procedure implemented in Microsoft SQL Server. DATETIME type used in Microsoft SQL Server allows you to store dates from January 1, 1753, to December 31, 9999. If you need to store the dates that are earlier than that, set Date offset to 2000. If you do not expect to store such dates, set Date offset to 0. This value cannot be changed after the infobase is created.
5.2.1.3.3. PostgreSQL
-
DBMS type: PostrgeSQL.
-
Database server: server instance name. If you specify a network port that differs from the default port, specify it using the port keyword: <instance_name> port=<port_number>;. For example: localhost port=6432;.
-
Database name: the database name begins with a Unicode 3.2 character or an underscore (). The database name can contain Unicode 3.2 characters, an underscore (), and a dollar sign ($). Maximum length of the name is 63 characters. No spaces are allowed in the name. The database name cannot match any reserved word of server database query language.
-
Database user: name of the database server user on whose behalf the database is accessed. The specified user must have the SUPERUSER rights only when the infobase is created. Once the infobase is created, you can revoke the SUPERUSER right from the database server user. For example, for dbuser, the command will look as: alter user dbuser with nosuperuser;.
5.2.1.3.4. IBM Db2
-
DBMS type: IBM Db2.
-
Database server: server instance name. If any non-default database server instances are installed on the computer, specify the name of the installed IBM DB2 instance after a slash. Example: computer/db2name.
-
Database name: the database name must be unique within its location in the directory. In the DB2 database manager for Linux, this location is a directory, and in Windows, this is a logical drive. The database name must begin with a Latin letter. Further, it can contain Latin letters and digits. Maximum length of the name is 8 characters.
-
Database user: name of the database server user on whose behalf the database is accessed. The user needs to have the CREATEDB or SUPERUSER privileges, or to be the database owner. Maximum length of the username is 8 characters.
After creating a new infobase, we recommend that you configure the database settings using Configuration Advisor:
-
IBM Db2 v9.5:\ https://www.ibm.com/support/knowledgecenter/ru/SSEPGG_9.5.0/com.ibm.db2.luw.admin.dbobj.doc/doc/r0021350.html.
-
IBM Db2 v9.7:\ https://www.ibm.com/support/knowledgecenter/ru/SSEPGG_9.7.0/com.ibm.db2.luw.admin.dbobj.doc/doc/r0021350.html.
-
IBM Db2 v10.1:\ https://www.ibm.com/support/knowledgecenter/ru/SSEPGG_10.1.0/com.ibm.db2.luw.admin.dbobj.doc/doc/r0021350.html.
-
IBM Db2 v11.1:\ https://www.ibm.com/support/knowledgecenter/ru/SSEPGG_11.1.0/com.ibm.db2.luw.admin.dbobj.doc/doc/r0021350.html.
5.2.1.3.5. Oracle Database
-
DBMS type: Oracle Database.
-
Database server: server instance name. When creating an infobase, specify TNS name as the database server name. Enter the database server name in format //DB_server_name/service_name (or similar).
-
Database name: database in 1C:Enterprise terms matches data schema in Oracle Database terms. When you create an infobase in 1C:Enterprise, an infobase user and their data schema are created in Oracle Database. Name of the data schema must only contain the Latin letters, digits, and underscore(_). The database name must begin with a Latin letter. Maximum name length is 30 characters.
-
Database user: when creating an infobase in 1C:Enterprise, specify the user on whose behalf the database will be accessed. Specify a user that has DBA rights (for example, SYSTEM) if the data schema is created by the system. Starting from version 12.2, this user must be granted the CREATE ANY TABLE and EXECUTE ANY PROCEDURE privileges. Specify another user if the data schema is already created by the Oracle Database administrator. This can be the user whose data schema is used for 1C:Enterprise, meaning the Database name and Database user can be identical.
- Notes on rightsrequired
- If an existing data schema is used, the user on whose behalf the database will be accessed does not need the DBA right. The user may have the following rights instead of DBA:
-
CREATE SESSION
-
CREATE PROCEDURE
-
CREATE TRIGGER
-
CREATE SEQUENCE
-
CREATE TABLE
Instead of granting each right to the user, you can assign the following roles to them:
-
CONNECT
-
RESOURCE
If you plan to terminate sessions from the management console of the 1C:Enterprise server cluster, the user on whose behalf the database is accessed needs the ALTER SYSTEM access right.
Besides, the following tablespace quotas must be granted to the user: V81C_DATA, V81C_INDEX, V81C_LOB, and V81C_INDEX_BIG (if available).
To grant access rights, you can use the following example:
create user <username> identified "<password>"grant create session to <username>grant create table to <username>grant create trigger to <username>grant create sequence to <username>grant create procedure to <username>grant alter system to <username>alter user <username> quota UNLIMITED on v81c_dataalter user <username> quota UNLIMITED on v81c_indexalter user <username> quota UNLIMITED on v81c_lob- Notes on password expiration
- When using Oracle Database 11 with the default settings, the password expires in 180 days. An error might occur after 180 days: Database server is not found. A DBMS error: ORA-28002: password validity period expires in 7 days. In this case, change the password using DBMS functionality:
-
Run the SQL*Plus utility.
-
Connect to the database.
-
Execute the ALTER USER <UserName> IDENTIFIED BY <Password> command.
\$\$\$remove it\$\$\$ Remember that 1C:Enterprise server stores passwords in the settings file and the next authentication attempt will use the old password. To avoid this, you can specify the old password when executing ALTER USER command, meaning the password will not be changed but only prolonged.
To disable password expiration, refer to documentation for the relevant version of Oracle Database.
5.2.1.3.6. General parameters
The form shown on fig. 31 contains a number of parameters that are not directly related to any DBMS. This section contains the description of these parameters:
-
User password: password of the user (specified in the Database user field) on whose behalf the database is accessed.
-
If the Create database if none present check box is selected, the database will be created if the specified database server does not contain the database with the specified name. If this check box is not selected, the database will not be created.
-
Value of Language (Country) parameter is selected from the list and determines the set of regional settings that will be applied to the infobase. Later, it can be changed in Designer. If an infobase is created based on a template that includes the infobase dump file (*.dt), the Language parameter is not displayed because the language information is already present in the infobase dump file.
-
If the Disable execution of scheduled jobs check box is selected, execution of scheduled jobs will be disabled in the created infobase. If this check box is not selected, any scheduled jobs will be started immediately upon establishing server connection.
-
The Deny local speech recognition checkbox allows you to disable speech recognition in the client/server infobase.
5.2.1.3.7. Creating a database
If all parameters are specified correctly, the following actions are performed:
-
Attempt to connect to the specified database on the specified database server using the specified user parameters is made.
-
If the database is unavailable and the Create database if none present check box is selected, an attempt to create the database is made. When creating an infobase in Oracle Database, the user is created with the same username and password. When the user is created, their account is locked. When connecting to the Oracle Database, the 1C:Enterprise server uses username and password specified during creation of the infobase.
-
If an existing 1C:Enterprise infobase is found in the database, an attempt to connect to this infobase is made. If no such infobase is detected, a new infobase is created. If a template was specified in parameters while creating the new infobase, the template will be applied upon initialization.
For more information on the page for specifying infobase startup parameters, see Infobase startup parameters.
5.2.1.3.8. Simultaneous use of a database by several infobases
When creating an infobase on the 1C:Enterprise server, the same database can be assigned for several infobases. However, the structure of internal cluster data implies that one set of internal data corresponds to one database. Simultaneous use of several internal data instances with one database breaks their logical integrity.
When several infobases use the same database simultaneously, the following is disabled:
-
Infobase locks (in particular, running two instances of Designer may lead to irreparable configuration damage).
-
Object locks.
-
Lock manager.
-
Getting current timestamps.
-
Other tools that use separated data stored by the cluster manager.
Simultaneous data modification in such conditions might lead to irreparable data damage. When several infobases read the same data simultaneously, results might be unreliable for all infobases if at least one infobase modifies or locks the data in any way.
That is why it is not recommended that you use one database with several infobases.
At the same time, simultaneous connection of several infobases to one database might be useful for configuration debugging and error analysis in configuration and platform. That is why connecting several infobases to one database is not directly prohibited in 1C:Enterprise. However, when you use this feature, do it with a clear understanding of the above features and restrictions.
5.2.2. Adding an existing infobase
5.2.2.1. General information
If you choose to add an existing infobase, you can add any infobase located on a local computer, in the local network, on the 1C:Enterprise server, or the web server to the list (for a thin client and a web client only, see Web server-based infobase).
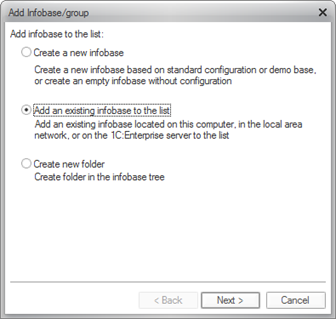
Fig. 32. Adding an existing infobase
After clicking Next >, the dialog box for specifying the infobase name, its location type, and parameters is displayed.
Type in the infobase name. This name will be displayed in your infobase list. Maximum infobase name length is 255 characters. You are free to provide a long descriptive name for your infobase.
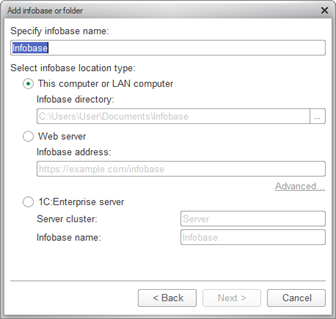
Fig. 33. Configuring infobase parameters
In the dialog box, you need also to select and specify parameters for accessing the infobase.
You can select the infobase type manually or have it automatically detected from your clipboard content. If the clipboard contains a path to infobase directory (paths to infobases in file mode must not include quotation marks) or URL for web server access, 1C:Enterprise attempts to automatically identify the infobase location type as soon as the infobase adding dialog box is opened. If the attempt is successful, the Select infobase location type radio button will be set and the infobase parameters will be filled. The same applies if you paste the content of the clipboard to the infobase name field and press Tab.
5.2.2.2. File mode
In the dialog box, select the This computer or LAN computer infobase location type. Then, select the directory where the infobase is located. If a non-existent directory is specified, it will be created automatically when 1C:Enterprise starts.
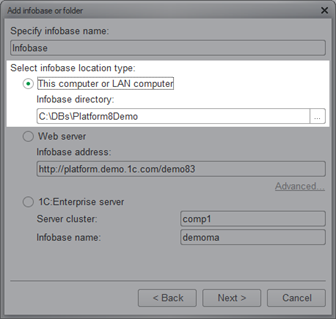
Fig. 34. File infobase
Click Select to open the standard dialog box for choosing the infobase directory.
For more information on the page for specifying infobase startup parameters, see Infobase startup parameters.
5.2.2.3. Client/server mode
In the infobase adding dialog box, select the 1C:Enterprise server infobase location type.
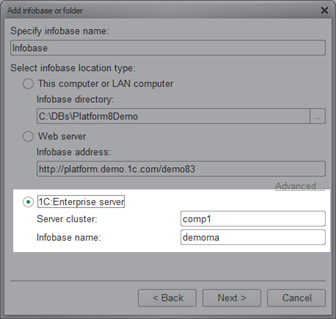
Fig. 35. Adding an existing infobase
Specify the following data in the fields:
-
1C:Enterprise server cluster address. The cluster address is the address of the main cluster server with the specified number of cluster manager process network port (by default, 1541).
-
Infobase name.
No checks are made to make sure that the infobase with the specified parameters is available.
If the infobase with the specified parameters is not found during Designer startup, the user will be prompted to create a new infobase. If the user confirms, Designer displays the Create an infobase or folder form.
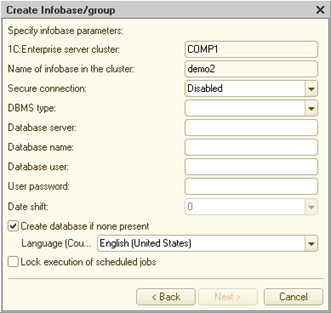
Fig. 36. Infobase parameters
In this form, enter the parameters for creating the new infobase.
For more information on the page for specifying infobase startup parameters, see Infobase startup parameters.
5.2.2.4. Web server-based infobase
To add an existing infobase located on web server, run the 1C:Enterprise thin client (1cv8c file).
In the infobase adding dialog box, select the Web server infobase location type.
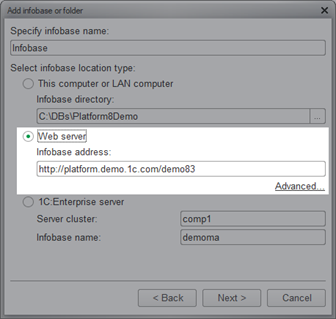
Fig. 37. Adding an infobase to the web server
If you need to specify additional parameters for web server connection, such as proxy server parameters and web server authentication method, click Additional… under the Infobase address line.
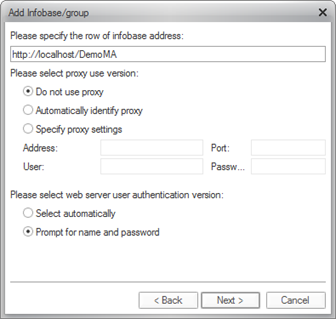
Fig. 38. Parameters for web server connection
The Select web server authentication method parameter allows you to select the authentication method:
-
Select automatically. Attempts to log on using operating system authentication. If the attempt failed, request login/password in an explicit way.
-
Prompt for username and password. Always prompts for the username and password for web server authentication.
For more information on the page for specifying infobase startup parameters, see Infobase startup parameters.
The Development management address parameter specifies the address of the server that can perform various administrative commands. It can be either an address of Designer running in agent mode or an address of a standalone server that services the published infobase. Specify an address as follows: host:port.
See also:
-
Designer in agent mode (see Running Designer in agent mode).
-
Standalone server (see Standalone server).
5.2.3. Infobase startup parameters
On this page, you can specify the infobase startup parameters.
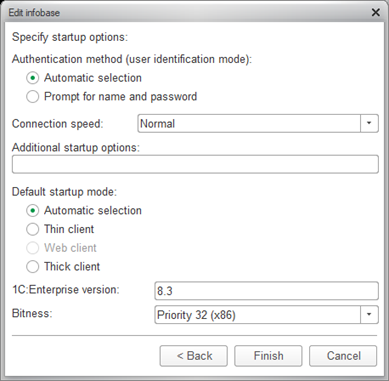
Fig. 39. Infobase startup parameters
Authentication method can take the following values:
-
Select automatically. Attempts to log on using operating system authentication. If the attempt fails, prompts for the username and password.
-
Prompt for username and password. Always prompts for the username and password for authentication.
The Connection speed parameter determines the expected speed of connection to the infobase or 1C:Enterprise server. The parameter can take values:
-
Select on startup. Select connection speed manually every time you start the infobase using the Slow connection check box in the 1C:Enterprise startup window. If a specific value is specified in the infobase properties (Standard or Low), the Low connection speed checkbox in the 1C:Enterprise startup dialog box cannot be changed and shows the value specified in the infobase properties.
-
Normal. Standard connection speed. Normal operation.
-
Low. Low connection speed. For more information on using 1C:Enterprise 8.3 in this mode, see 1C:Enterprise 8.3 Developer Guide. \$\$\$remove it\$\$\$
The Slow connection check box in the 1C:Enterprise startup dialog box of the thin client is available for editing if the infobase list has at least one infobase with 1C:Enterprise version 8.2 and later and the Connection speed parameter set to Select on startup. In other situations, the check box displays the connection speed specified in infobase properties and its state cannot be changed.
In the Additional startup options field, specify command-line options for the executable file. For more information about command-line parameters, see 1C:Enterprise help (1C:Enterprise 8 startup and startup parameters section). The L and VL parameters specified in this field will only be effective if you start the infobase using the interactive launcher (see Interactive launcher).
The Default run mode parameter defines which client will be used to access the infobase:
-
Select automatically. In this mode, the client application type is determined based on the Default run mode configuration property and the Run mode user property.
-
Thin client. Thin client will be used for startup.
-
Web client. Web client will be used for startup. This type of client is available only if the infobase is accessed via the web server.
-
Thick client. Thick client will be used for startup. This type of client is unavailable if the infobase is accessed via web server.
In the 1C:Enterprise version field, specify the 1C:Enterprise version to be used for infobase access. Moreover, you can set it to 8.1 or 8.0. In this case, 1C:Enterprise 8.1 or 8.0 installed on the computer will be used to access the infobase. You do not need to specify the version then.
The Bitness field allows you to specify bitness of the client application to be used with this infobase. This field is only available if infobase properties are edited on 64-bit Windows. For details on how to select the client application bitness, see Determining application bitness.
5.2.4. Certificate settings
If you add an infobase located on the web server (see Web server-based infobase) and HTTPS is specified in the Infobase address field (for example, instead of http://localhost/DemoMA, the address is https://localhost/DemoMA), when clicking Additional…, the page with certificate settings becomes available together with additional web server access parameters.
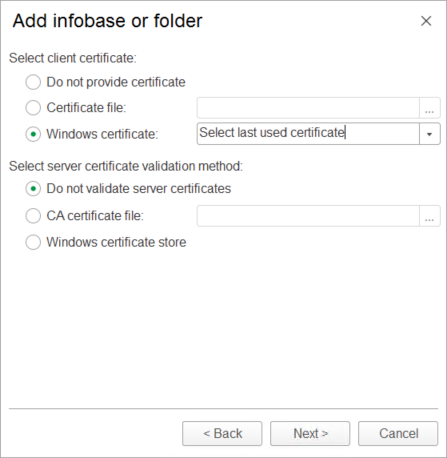
Fig. 40. Certificate settings (Windows)
On this page, you can specify the source location for client certificates and verification method for server certificates. Let us review these parameter groups in detail:
-
Select client certificate. Selects the location of the client certificate:
-
Do not provide certificate. Connection can be established only to web servers that do not require a client certificate.
-
Certificate file. Allows you to select a file with a client certificate and its private key. If the file is protected with a password, the user will be offered to enter the password when establishing connection.
-
Windows certificate/Linux certificate/macOS certificate. Client certificate is received from the system certificate store in the operating system used (Windows or macOS) or the dedicated Linux directory. If the system has several client certificates suitable for the connection to establish, you can tell the system what to do:
-
Select last used certificate. User is prompted to select a certificate using the system dialog box for certificate selection. Further, this certificate will be selected automatically.
-
Always prompt to select certificate. User is prompted to select a certificate using the system dialog box for certificate selection regardless of whether any certificates were selected earlier. The selected certificate can be automatically selected in the future if the Select last used certificate option is selected.
-
Select certificate automatically. Suitable certificate is selected and used automatically. The certificate selection dialog box is not displayed.
-
-
-
Select server certificate validation method. Indicates how to verify the certificates provided by the web server:
-
Do not validate server certificates. Web server certificate is not verified and the certification authority's (CA) certificates are not used.
-
CA certificate file. Allows you to choose a file where CA certificates are stored. If the file is protected with a password, the user will be offered to enter the password when establishing connection.
-
Windows certificate store/Linux certificate store/macOS certificate store. Specifies that CA certificates need to be received from the certificate store in the operating system used (Windows or macOS) or the dedicated Linux directory.
-
See also:
-
Using certificates
-
Self-signed certificates.
5.3. Infobase editing
To change the name or directory of an infobase from the list, select the infobase name and click Edit. The infobase properties are edited in a dialog box similar to the dialog box used to add an existing infobase (see Adding an existing infobase).
5.4. Deleting infobases from list
To delete an infobase from the infobase list, select its name in the list and click Delete. The selected infobase will be deleted from the list.
When removing the infobase from the list, the infobase service directories located in the following directories are also deleted:
-
Windows: %APPDATA%\1C\1cv8 and %LOCALAPPDATA%\1C\1cv8.
-
Linux: ~/.1cv8/1C/1cv8.
-
macOS: ~/.1cv8/1C/1cv8.
5.5. Order of infobases in the list
If sorting by name is not enabled in the startup dialog box settings (see section below), you can change the order of infobases in the list using the mouse or context menu commands.
To move an infobase up or down in the list, click and drag it up or down. As you drag the infobase, an outline of its new position is displayed.
Then, release the mouse button.
You can also change the order in the infobase list using the context menu commands: Move up (Ctrl + Shift + Up arrow) and Move down (Ctrl + Shift + Down arrow). When you attempt to move up an infobase at the top of the list, it is moved to the bottom of the list; and vice versa.
You can also use the Sort ascending and Sort descending commands to order the infobase list.
If tree view is enabled in the startup dialog box settings (see Startup window settings), please be informed that while dragging an infobase:
-
If the outline is displayed on a folder, the dragged infobase will be placed at the end of that folder.
-
To place an infobase or folder to a specific position within a folder, expand the folder first.
5.6. Maintaining the hierarchical infobase list
This section describes operations for creating and reorganizing the infobase list with tree view.
5.6.1. Adding an infobase folder
It is recommended that you create an infobase list when you use multiple infobases of the same type or when you use so many infobases it is hard to find the one you need.
Folders can be created if the Display as a tree mode is enabled in startup dialog box settings.
When this mode is enabled, the infobase list is displayed as a tree with the Infobases root folder. This folder cannot be changed or deleted.
To add an infobase folder, select the folder where you want to create the new folder, and click Add. This opens the add mode selection dialog box.
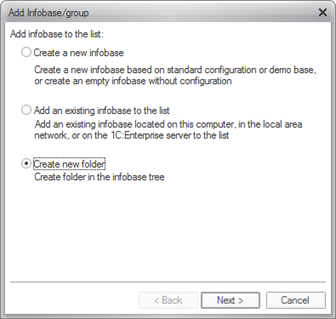
Fig. 41. Creating a new group
Select the Create a new folder mode and click Next >.
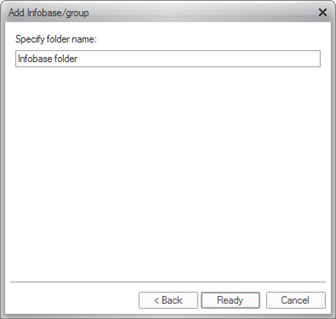
Fig. 42. New folder name
Specify the folder name (the / character is not allowed) and click Finish. The created folder is placed in the specified infobase folder (at the end of the folder if sorting by name is not enabled).
5.6.2. Editing infobase folders
To change the infobase folder name, select the folder in the tree and click Change. The Edit folder window opens. It contains the name of the selected infobase folder.
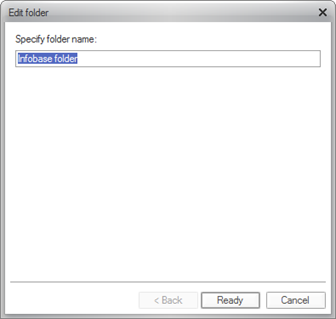
Fig. 43. Editing a folder
Enter the new folder name (the / character is not allowed) and click Finish.
5.6.3. Deleting infobase folders
To delete an infobase folder from the list, select it in the list and click Remove. The selected folder will be deleted from the infobase list.
5.7. Startup window settings
Click Settings in the startup dialog box. This opens the startup settings dialog box.
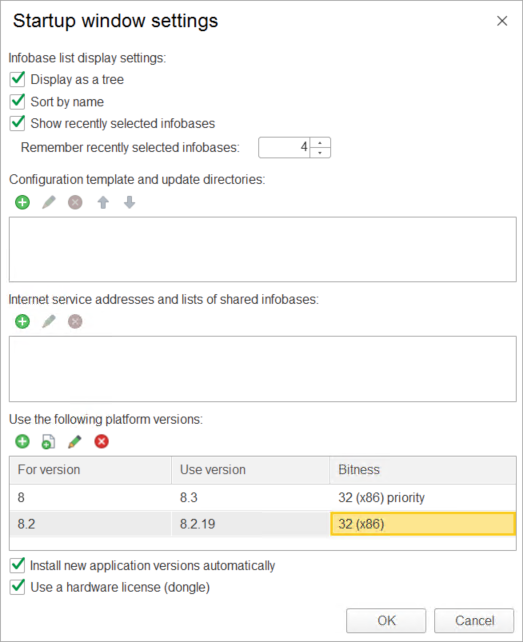
Fig. 44. Startup settings
This dialog box is used to change settings from the interactive launcher. When changing settings from the thick client (1cv8), the settings window does not include the Versions used field. When changing settings from the thin client (1cv8c), the Configuration and update templates directories field is excluded.
If the Display as a tree check box is selected, the infobase list will be displayed as a tree.
If the Sort by name check box is selected, the infobase list is sorted by name.
If the Show recently selected infobases checkbox is selected, in the Remember recently selected infobases field, the number of recently used infobases is specified.
The list of recently used infobases is displayed at the top of the infobase list. Names of the recently used infobases are highlighted in bold font. This list is displayed in historical order, meaning that the infobase used most recently is at the top of the list. List sorting by name does not affect the order of recently used infobases. You cannot move these infobases up or down. To edit or delete an infobase, click it in the infobase list.
The list of directories with configuration and update templates is specified in the Configuration template and update directories field. For example, this list might include a directory containing templates for the entire company, or a local template directory.
The Lists of shared infobases field contains editable lists of shared infobases. When starting 1C:Enterprise, infobases from the shared infobase lists are automatically added to the general infobase list. If the local configuration file has the CommonCfgLocation parameter set, the infobases specified in the CommonInfoBases parameters (if any) of the shared configuration file (1cescmn.cfg) will be added to the main infobase list. Infobases obtained via Internet services will also be added to the infobase list. For details on Internet services for getting the list of shared infobases, see Internet service for getting the list of shared infobases.
Paths to the template directory or the list of shared infobases are displayed in the settings window only when these paths are specified in parameters of the 1cestart.cfg local configuration file. If these paths are specified in the shared configuration file (1cescmn.cfg), they are not displayed in the settings window.
The Used versions field contains the detailed list of 1C:Enterprise versions available. This list is used when the user needs to work with the infobases using a 1C:Enterprise version that is different from the latest version installed on a computer. For example, when matching string 8.3=8.3.24.100 is specified, the infobase properties will display version 8.3, and version 8.3.24.100 will be used to open the infobase instead of the latest version. The Bitness column allows you to specify the bitness of the client application that will be used for startup. For details on how to select the client application bitness, see Determining application bitness.
The Use hardware license (dongle) parameter searches for a dongle when starting the client application. Changes made to this parameter take effect at the beginning of the next session, changing the value of the UseHwLicenses parameter in the 1cestart.cfg file.
The Automated installation of the new version parameter controls auto installation of new versions. Changing this checkbox affects the AppAutoInstallLastVersion parameter in the 1cestart.cfg file.
The Allow 1C:Enterprise Development Tools parameter controls the visibility of the 1C:EDT button, clicking on which starts 1C:Enterprise Development Tools for the current infobase.
Click Delete unused versions to open the dialog box that allows you to set up automatic deletion of outdated versions (for details, see Deleting versions automatically).
In the dialog box:
-
Select/clear the Automatically delete unused versions check box to enable or disable this feature.
-
Select the Delete later versions parameter to set the criteria of version obsolescence.
-
In the Never delete versions table, you can specify versions that cannot be automatically deleted.
5.8. Shared infobase lists
Lists of shared infobases are stored in files with v8i extension. They contain links to shared infobases.
Set the location of shared infobase lists in the CommonInfoBases parameter of configuration files. Lists of shared infobases have the same format as the main infobase list.
A list of shared infobases can be generated manually or by saving existing infobase links to a file. To save an infobase link, execute the Save reference into file context menu command in the infobase list.
The list of shared infobases can be used to start 1C:Enterprise. When opening a file with the v8i extension, 1C:Enterprise will be started and the startup dialog box will contain the links from the list of shared infobases.
You can also specify an Internet service address that will provide a list of shared infobases when it is unavailable on the local network. For example, an infobase can be used over the Internet (connection via web server). For details on Internet services for getting the list of shared infobases, see Internet service for getting the list of shared infobases.
When the list of shared infobases is obtained for the first time, this list is placed at the root of the list or within a folder in this list. When the list is obtained again, the infobase information is updated but location of the shared infobase in the user list remains the same. If the user moves the shared infobase to another folder in the list and obtains the list of shared infobases again, position of the shared infobase in the list does not change.
Chapter 6. Infobase administration
6.1. General information
When working with 1C:Enterprise, you might need to perform system administration duties, such as:
-
Maintaining the user list
-
Assigning user rights
-
Creating backups
-
Generating technological log for error analysis
Designer includes a variety of administrative tools designed to perform the above tasks.
In 1C:Enterprise, you can create a list of users authorized to use the application. This list is used for user authorization when signing in. Consider that the list of 1C:Enterprise users is not included in the application. This list is created individually by a company that uses the application.
A password for signing in can be set for each user. The password is used to verify user rights to operate 1C:Enterprise.
Creating backups is another example of a crucial administrative task. To ensure data recovery with minimum losses in case of database damage, the backup procedure must be performed on a regular basis. \$\$\$remove it\$\$\$ The greater amount of data changes daily, the more frequent backup is required.
This chapter covers the 1C:Enterprise administration activities that can be performed in Designer.
6.2. Maintaining the user list
6.2.1. General information
To open the user list, click Administration - Users.
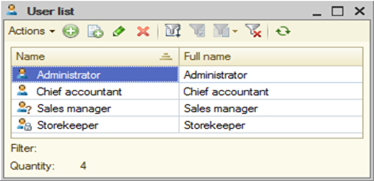
Fig. 45. List of users
The window with the user list includes a toolbar and a tabular field with two columns:
-
Name column contains the list of users allowed to sign in to 1C:Enterprise 8.
-
Full name column contains full names of the users.
Users with access passwords are marked with the lock icons (for example, Seller in fig. 45).
Users with no role or authentication defined are marked with question mark icons (for example, Sales manager in fig. 45).
In the Actions menu, you can add or delete users, configure the list appearance (filters, column content and order, sorting), or export the list to a spreadsheet or text document.
You can change the infobase user property using 1C:Enterprise language. To do it, use the InfobaseUsers global context property and an object of the InfobaseUser type.
6.2.2. Adding new users
To add a new user, in the User list window, click Actions - Add. The window for editing user parameters appears.
On the Main tab, the name and full name of the user are displayed.
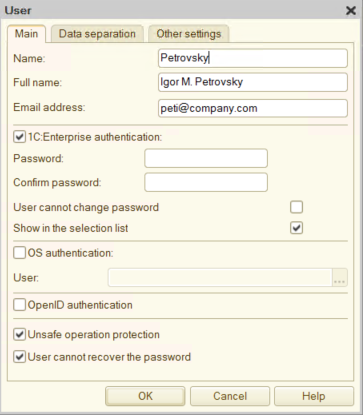
Fig. 46. New user
We do not recommend that you use the : character in user names. Uniqueness if infobase users is determined by a combination of three fields: name, full name, and OS username (if OS authentication is enabled). Uniqueness is determined by the first 64 characters of the Name field, the first 128 characters of the Full name field, and the first 128 characters of the User field provided that OS authentication is enabled. It is recommended that you do not exceed the 64 characters limit for the Name field.
If you fill in the Email address field, you will be able to use email authentication (described further). Besides, the Email address and User cannot recover the password fields refer to the user password recovery functionality. If the Email address field value is not specified, this user cannot recover their password by email, only via the website. Every infobase user must have a unique email (regardless of the character case). The email must not exceed 128 characters. If the User cannot recover the password check box is selected, the password can be recovered by the system administrator only.
You need to assign an authentication method to the user. For more information about the authentication types supported by 1C:Enterprise, see Authentication types.
Each Authentication… checkbox (1C:Enterprise authentication, OS authentication, OpenID authentication, OpenID Connect authentication, Access token authentication, QR code authentication, and Email authentication) indicates whether a corresponding authentication method is enabled (for more information about authentication methods, see Authentication types). These check boxes do not affect the order of authentication attempts. When assigning authentication types, please remember:
-
When no Authentication… check boxes are selected, the user will not be able to sign in to the application.
-
To attempt authentication using the OpenID, OpenID Connect, or QR code, configure the infobase publication on a web server in a certain way (see OpenID ).
-
A user will not be able to sign in to the application if they are authenticated using the OS, OpenID, OpenID Connect, or QR code authentication, but the checkbox allowing this authentication type is cleared.
-
To disable OS or OpenID authentication, you can also use the client application startup command-line parameters.
To enable the operating system authentication, select the OS authentication checkbox, and then map the operating system user and the infobase user. To do this, specify the operating system user in the User field. It becomes available after selecting the OS authentication checkbox. The value of the User field will be used to search for the infobase user that matches the current operating system user. Specify the operating system user as follows: \domain_name\username. The operating system username cannot exceed 128 characters.
To enable email authentication, select the Email authentication checkbox and specify the user's email address in the Email address field.
If the User cannot change password check box is selected, the user cannot change their password (this option only applies to 1C:Enterprise authentication).
If the Show in list check box is selected, the user is displayed in the user selection list when connecting to the 1C:Enterprise infobase. If 1C:Enterprise authentication is disabled for the user, the Show in list check box becomes unavailable and the user is not displayed in the user selection list when connecting to the infobase.
The Unsafe operation protection checkbox specifies whether protection from unsafe operations is enabled for this user.
On the Other tab, available roles and the language are displayed. If multiple roles are defined in the configuration, you can assign several roles to the user. Besides, you can select the 1C:Enterprise run mode for the user. When using Auto value, the run mode specified in the Run mode configuration property is used. When a user requires a special run mode, you can assign it here. For example, when a user works in managed application mode, set the Run mode field to Managed application.
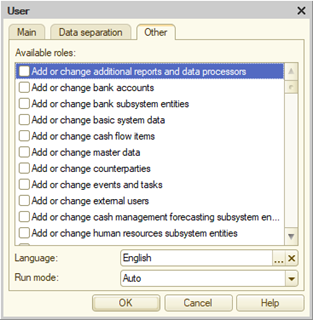
Fig. 47. Other parameters of a new user
The Assignment rule key property allocates user connections to production servers.
You do not have to fill all fields in the dialog box for editing user properties. You can do it later.
If user separation is enabled, the data separation tab is also displayed in the user parameters.
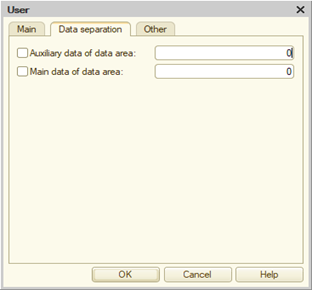
Fig. 48. Data separation
On this tab, all available separators (not all common attributes) are displayed. For each separator, you can specify a value and usage upon user authentication. If the check box to the left of the separator name is selected, the value of the selected separator applies to the current user. The value itself is specified in the input field to the right of the separator name. If the separator value is set for the user (not only the value but also the usage flag), changing the User separation and Authentication separation separator properties affects visibility and availability of this user for selection and authentication purposes.
6.2.3. Copying users
Cloning an existing user is a fast and easy method of creating a new user. When you clone a user, you do not have to create the user from scratch. You simply copy the user and then edit their properties.
To clone a user, select the user from the user list and click Actions - Copy.
Name of the user might be transformed while cloning to ensure uniqueness. All other properties of the cloned user are identical to the source user (except the password).
6.2.4. Setting password
To avoid signing in to 1C:Enterprise under another username, a personal password can be set for each user allowed to sign in. Just like a username, the password confirms user rights to access 1C:Enterprise.
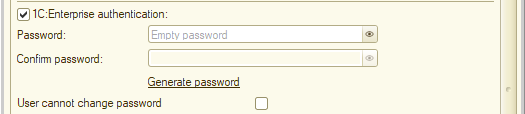
Fig. 49. Setting user password
Enter the password in the password entry field. The password must comply with the password policy set for the infobase or the user. You can view the password policy set for the user only using 1C:Enterprise language. Password length must not exceed 255 characters. The password you enter is displayed as a string of asterisks.
If the user does not want to create their own password, they can use the built-in password generator. To do this, they need to click the Generate password hyperlink. The password generated this way corresponds to the state of infobase parameters. Parameters of system-generated passwords depend on the minimum password length specified in the infobase parameters:
-
The minimum length is set to less than 7 characters. In this case, the password consists of lowercase Latin letters only.
-
The minimum length is set to 7 or more characters. In this case, the password consists of digits, lowercase and uppercase Latin letters. The password meets the password complexity settings regardless of the respective infobase parameter state.
-
The minimum password length is not controlled and is set to 0. In this case, the password is complex and 7 characters long. The password consists of digits, lowercase and uppercase Latin letters.
The Password confirmation field availability depends on how the value in the Password field is generated:
-
The user generates the password. In this case, they can specify the set password in the Password confirmation field again. If the passwords do not match, the following warning is displayed once you click OK: Password and password confirmation do not match. The password is not set.
-
The password is generated using the built-in password generator. In this case, the Password confirmation field is unavailable. The system will automatically put the new password there. If the user is not satisfied with the generated password, they can generate a new one by clicking Generate password again (the number of clicks is unlimited).
If the user changes the password, it can be viewed until the user clicks OK. For this purpose, there is a button on the right side of the Password and Password confirmation fields. The password display mode is changed by repeated clicking. The password is displayed in real or disguised characters. Once the password is set and the form is opened again, you cannot see the password. The password entry field displays Password is set, but does not show the password.
To clear the password, in the Password or Password confirmation field, press Shift + F4. If the password is generated by the system, it will be cleared in both input fields. If the password is created manually by the user, it will be cleared in the current input field.
To cancel the password change, click Cancel. Please understand that clicking Cancel cancels both the password change and any other changes you might have made in this dialog box.
There are several ways to recover the forgotten password:
-
Set a new password. This requires administrative access to the user list.
-
Recover the password. This procedure must be configured in the infobase, and the user must be allowed to perform this action.
Users with passwords are marked with the lock icon in the user list.
See also:
- Infobase parameters.
6.2.5. Password policy
6.2.5.1. General information
Depending on the infobase and the user access level, requirements for complexity, uniqueness, and lifetime of the password might change. For example, some users can use simple passwords with a certain number of characters, but other users require complex passwords with a certain lifetime.
For this purpose, 1C:Enterprise provides password policies. A password policy is a set of requirements aimed at enhancing the infobase security by establishing requirements for user passwords.
You can set a password policy both for the entire infobase and for specific users. If you configure a password policy for the entire infobase, use the dialog box for editing infobase parameters. This dialog box uses the Password requirements group that contains a set of parameters. The same set of parameters will be used to access the application using 1C:Enterprise language. In this case, the UserPasswordPolicy object is used.
6.2.5.2. Password policy parameters
The user password policy is described by a certain set of parameters. You can change these parameters both interactively and via the UserPasswordPolicy object from 1C:Enterprise language. Therefore, the property name of this object is given for each parameter in parentheses.
- Password complexity check (PasswordStrengthCheck)
- When this parameter is enabled, user passwords must meet the following requirements:
-
The minimum password length must be greater than or equal to 7 or the Minimum password length property if its value is greater than 7.
-
Password must include characters from at least three of the following groups:
-
Uppercase letters
-
Lowercase letters
-
Digits
-
Special characters
-
-
Password must not match the username.
-
Password must not be an alphabetical sequence of characters.
Enabling these restrictions for infobase user passwords does not affect the existing passwords. Restrictions will be applied only after the current password is changed or a new infobase user is added. However, password verification is performed according to the current infobase settings. In particular, this means case-sensitivity check is enabled for passwords when Password complexity check is enabled.
For example, if the user password is PaSs and the Password complexity check parameter is disabled, the user can enter their password as pass, PASS, or PasS, and still be able to sign in. After enabling Password complexity check parameter, the user cannot sign in until they enter the case-sensitive password PaSs.
- Password compromise check (PasswordCompromiseCheck)
- This parameter indicates that passwords in this infobase will be checked not only for complexity (if the corresponding parameter is set), but also for the possibility of specifying them. There may be various reasons for this, for example, the password has been compromised many times, or it does not comply with the corporate stop word list.
You can set up the password compromise check parameters in the Additional authentication settings dialog box or using 1C:Enterprise language.
- Minimum password length (PasswordMinLength)
- Defines the minimum length of a user password. If Password complexity check is enabled, the minimum length of the user password is 7 characters. However, you can use 1C:Enterprise language to set any password length, even if this property is set in the password policy settings.
- Action if passwords violate requirements on authentication ActionOnPasswordRequirementsViolationOnAuthentication
- If a password does not match the current system or user password policy, the administrator can choose what action the platform will take in this case. Possible options (the value of the ActionOnThePasswordRequirementsViolationOnAuthentication system enumeration):
-
None. Do nothing.
-
SuggestPasswordChange. Inform the user that the password does not comply with the current policy and prompt to change the password (a form opens). The event is logged. You can continue working without changing the password.
-
RequirePasswordChange. Inform the user that the password does not comply with the current policy and prompt to change the password (a form opens). The event is logged. You cannot continue without changing the password. If the user is not allowed to change the password, an exception is generated and the user cannot authenticate in the infobase.
- Maximum user password lifetime (PasswordMaxEffectivePeriod)
- Defines a period after which you need to change the password. The "period" denotes a time interval from the moment the current password is set. The specified time interval is set in seconds.
If you set the parameter to 0, it will not result in any actions.
- Minimum user password lifetime (PasswordMinEffectivePeriod)
- Defines a period before which you will not be able to change the password. The "period" denotes a time interval from the moment the current password is set. The specified time interval is set in seconds.
If you set the parameter to 0, it will not result in any actions.
- Password expiration notification period (PasswordExpirationNotificationPeriod)
- The parameter specifies a time interval before the current password expiration when the application starts notifying the user that they need to change the password. The specified time interval is set in seconds.
If you set the parameter to 0, it will not result in any actions.
- Deny password reuse among recent ones (PasswordReuseLimit)
- With this parameter, you can specify how many recent passwords the application will use when verifying the uniqueness of the new password. For example, if the parameter value is set to 5, the new password must not match any of the last 5 passwords of this user.
If you set the parameter to 0, it will not result in any actions.
6.2.6. Additional authentication settings
6.2.6.1. General information
1C:Enterprise allows you to manage some parameters of the authentication dialog box, configure parameters for restoring a forgotten user password, configure password compromise check, and some other parameters. You can do it in the Additional authentication settings dialog box in Main menu – Administration – Additional authentication settings.
6.2.6.2. Authentication
On the Authentication tab, you can configure the authentication feature.
- Additional information
- Select the Show the "Need help?" link checkbox to set the value of the Link address property. In this field, enter a URL to follow when clicking the question mark icon in the authentication dialog box. The parameters of the data area for which the authentication dialog box is opened will be added to this hyperlink before navigation. Data area parameters are set in the same way as the Z command-line option of the client application startup. The resulting URL will be as follows: URL?Z= "separator values".
- Saving authentication group
- The Allow saving authentication checkbox enables the Remember checkbox in the authentication dialog box. Using this checkbox, you can remember the authentication parameters entered and do not enter the username and password for some time. To set the time during which the authentication parameters will be saved, use the Saved authentication lifetime (seconds) parameter. You can also set these parameters using the default.vrd infobase publication file. The settings set in the default.vrd file have priority over the settings in the Additional authentication settings dialog box.
When authentication is saved, the password that the user used for authentication is not saved on the computer (this is not secure). Instead of the password, a special token is stored, which is limited by lifetime and depends on the password. When the password changes, the token becomes invalid.
If there is a danger of unauthorized access to the infobase using a compromised secure access token, we recommend that you, firstly, replace passwords for all users whose secure access tokens are compromised or suspected of compromise, and secondly, prohibit the authentication method that the compromised users used. The second method will lead to users with up-to-date (not compromised access data) passwords/saved access tokens not being able to access the infobase. Choose the solution depending on the size of the alleged compromise, the access level of compromised users, and other information security parameters in the company.
To "forget" the saved user authentication, change this user's password in Designer or using the administrative application tools. On all devices where the user saved authentication using the checkbox in the authentication dialog, they will need to authenticate with a new password.
We do not recommend that you enable both saving authentication and idle session termination (see Idle session termination) if idle session termination is enabled to minimize the risk of unauthorized data access. In this case, forced session termination will not protect against unauthorized access, as an attacker can still get access to the infobase using saved authentication credentials.
The enabled Save authentication by default checkbox allows you to configure the user authentication dialog box so that the authentication method successfully used by the user becomes the default method for the next authentication attempt in the application.
See also:
- default.vrd file.
6.2.6.3. Email authentication
On the Email authentication tab, you can enable/disable and configure the email authentication feature.
To enable email authentication, select the Use email authentication checkbox. If the feature is enabled and configured, select email authentication in the user selection dialog box.
The fields for entering the user's email address will appear on the form.
Enter the email address in the field with the Email address hint. If there is a user with such email in the system, an email with a verification code will be sent to them.
By entering the verification code in the next dialog box, the user is authenticated in the infobase.
The verification code sent by email is managed by a set of parameters that are configured on the tab:
-
Code length. Specifies the length of the user authentication verification code.
-
Maximum number of failed attempts to enter the code. Specifies how many times the user can make mistakes when entering the confirmation code. Once the maximum number of attempts is exceeded, the received code becomes invalid. The user will need to request a new authentication verification code.
-
Lock duration of confirmation code update request. Interval between two consecutive requests of the user authentication verification code.
-
Verification code validity period. Defines the validity period for the sent authentication verification code. If expired, request a new authentication verification code.
-
Verification code alphabet. Contains a set of characters for the verification code generation. The string can be empty or contain from 10 to 256 various characters. If the string is empty, the alphabet consists of decimal digits from 0 to 9 (including).
-
Use standard sending service. Allows you to send a verification code via the standard 1C:Enterprise email service. In this case, you cannot change the email sender, subject, format, and content. Emails will always be sent from <authentication@1c.com> with the Login verification code subject.
If this check box is cleared, you can configure parameters for sending verification code messages. Specify these parameters in the Sender parameters group.
- Sender parameters group
- In this group, you can specify verification code message parameters and parameters of an email server used to send them.
The Fill in from password recovery settings hyperlink allows you to fill in the mail server settings with the same settings as specified for the mail server used to recover the user's password.
Specify sending parameters using the following parameters:
-
SMTP server address. Allows you to specify an SMTP server address.
-
SMTP user and SMTP password. Contain the username and the password required for authentication on the SMTP server.
-
SMTP port. Network port used for SMTP:
-
Port 465 for secure connections (used by default).
-
Port 25 for unsecure connections.
-
-
Use SSL. Specifies that SSL must be used to connect to the SMTP server.
Email parameters are specified using the following parameters:
-
Sender name. Text to be displayed in the email message as the email author (the From field).
-
Message header. Text to be specified in the message header (the Subject field).
-
Message text. Opens the HTML document editor to write a message. You can use the following pseudo-variables to specify email parts that change:
-
ApplicationPeresentation. Presentation of the configuration used in the current infobase.
-
UserName. Username.
-
UserPresentation. Full user name.
-
VerificationCode. Authentication verification code.
-
The variable values must begin with "&", for example: Good afternoon, &UserPresentation!.
You can also set up email authentication using 1C:Enterprise language. For this purpose, you can use the AdditionalAuthenticationSettings global context property.
See also:
- Setting up email authentication using 1C:Enterprise language.
6.2.6.4. Password recovery
The Password recovery tab contains parameters that are used to configure the user's password recovery.
1C:Enterprise offers several ways to recover a forgotten user password. There are several settings that control this functionality. Some of them are located in the infobase user properties and the others are contained in the settings dialog box:
-
User settings:
-
Email address. Email address to which the code required to set a new password will be sent.
-
User cannot recover the password. If you select this check box, you will not be able to recover your password by email. You will be able to do it only with the help of the infobase administrator.
-
The option to recover a password by navigating to a URL (for example, to a website) depends on the logic of this page.
- The password recovery settings are located on the Password recovery tab of the Additional authentication settings dialog box.
You can recover the password using either a web page or a recovery code sent by email. You cannot select both password recovery methods at a time.
For OpenID authentication, the password is changed on the side of the authentication provider because it performs authentication. Once the password is changed, the user navigates to the provider authentication form. In this case, the password recovery method depends on capabilities provided by the OpenID provider used.
The Follow the URL check box enables password recovery by opening a web browser page whose address is specified in the Link address property of the setup dialog box. The parameters of the data area for which the authentication dialog box is opened will be added to this hyperlink before navigation. Data area parameters are set in the same way as the Z command-line option of the client application startup. The resulting URL will be as follows: URL?Z= "separator values". Implement the whole password recovery logic on the page whose address is specified in the settings.
Select the Send the code to the email check box to enable password recovery by sending a code to the user email address. In this case, the following dialog box is opened:
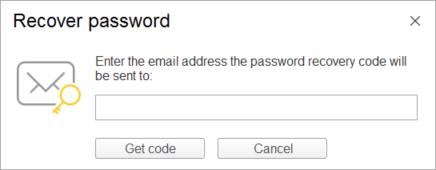
Fig. 50. Email address input window
If the email address specified in the dialog box exists, the confirmation code will be sent to this address and the following dialog box will be shown:
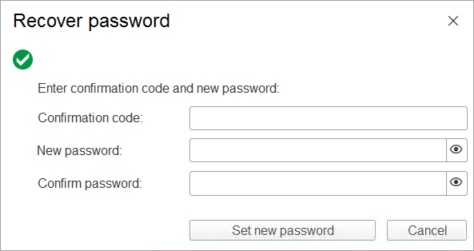
Fig. 51. Entering a confirmation code and a new password
This dialog box specifies the address the email was sent to. It also prompts the user to enter a confirmation code from this email and a new password. When you specify a new password, the application checks whether the password meets the password policy requirements that are set for the user who recovers the password or for the infobase (if no policy is specified for the user or a policy with this name does not exist in the infobase). To use a system-generated password, click Generate password. Such password will meet all the established requirements for user passwords. For more information about the system-generated password, see Setting password.
If the specified email address does not match any user, a diagnostic message will be displayed. If the user is not allowed to recover their password, an error will be displayed after entering the email address.
The dialog box with additional authentication settings also contains the following parameters:
-
Code length. Specifies the length of the confirmation code to set a new password.
-
Maximum number of failed attempts to enter the code. Specifies how many times the user can make mistakes when entering the confirmation code. Once the maximum number of attempts is exceeded, the received code becomes invalid. The user will need to request a new password recovery code.
-
Lock duration of confirmation code update request. Interval between two consecutive requests to change a password verification code.
-
Verification code validity period. Defines the validity period for the sent password recovery code. If expired, request a new password recovery code.
-
Use standard sending service. Allows you to send a verification code via the standard 1C:Enterprise email service. In this case, you cannot change the email sender, subject, format, and content. Emails will be always sent from <recoverypassword@1c.com >.
If this check box is cleared, you can configure parameters for sending verification code messages. Specify these parameters in the Sender parameters group.
- Sender parameters group
- In this group, you can specify verification code message parameters and parameters of an email server used to send them.
Specify sending parameters using the following parameters:
-
SMTP server address. Allows you to specify an SMTP server address.
-
SMTP user and SMTP password. Contain the username and the password required for authentication on the SMTP server.
-
SMTP port. Network port used for SMTP:
-
Port 465 for secure connections (used by default).
-
Port 25 for unsecure connections.
-
-
Use SSL. Specifies that SSL must be used to connect to the SMTP server.
Email parameters are specified using the following parameters:
-
Sender name. Text to be displayed in the email message as the email author (the From field).
-
Message header. Text to be specified in the message header (the Subject field).
-
Message text. Opens the HTML document editor to write a message. You can use the following pseudo-variables to specify email parts that change:
-
ApplicationPeresentation. Presentation of the configuration used in the current infobase.
-
UserName. Username.
-
UserPresentation. Full user name.
-
VerificationCode. Confirmation code to change the password.
-
The variable values must begin with "&", for example: Good afternoon, &UserPresentation!.
You can also set up password recovery using 1C:Enterprise language. For this purpose, you can use the AdditionalAuthenticationSettings global context property.
6.2.6.5. Password compromise check
You can configure the password compromise check feature on the Password compromise check tab.
When users change or set passwords on their own, they tend to choose simple, well-known, or easily guessable passwords. To prevent this, 1C:Enterprise provides a password compromise check feature.
Password compromise check is configured in different places:
-
The data sources for check feature are configured on the Password compromise check tab of the Additional authentication settings dialog box.
-
The need for the check and the actions to perform are configured in the infobase parameters and in the password policies assigned to specific users.
There are three compromise check channels available. Each of them is enabled separately (all the channels are used simultaneously):
-
Standard platform list.
-
Custom list of unwanted passwords.
-
External password compromise check service.
If the Use standard password compromise check list checkbox is selected, the platform will perform a password compromise check using a built-in list, which is updated when the platform version changes. In this case, the password information will remain in the infobase.
If the Use specified password compromise check list checkbox is selected, the list of unwanted passwords, which you can set for each infobase, will be used for the check. You can set the list either using 1C:Enterprise language or the Password compromise check list group commands. The Import from file command allows importing a list of unwanted passwords from a file. The Clear command clears the list of imported compromised passwords. The size of the custom list of unwanted passwords cannot exceed 100,000 entries.
The Use password compromise check service checkbox allows you to specify that a specialized HTTP service will be used for password compromise check. The Service address field allows you to enter the address of such service. The Service request timeout field allows you to specify what timeout will be set for a request to this service (in other words, the maximum time the platform will spend on a request to the password compromise check service). If the request to the service exceeds the set timeout, the platform considers the request was completed with an error. If the Ignore service errors checkbox is selected, error information is only logged, and operations continue as if the external password compromise check service is missing. If the checkbox is cleared, the error is displayed to the user and the password being checked is considered compromised.
To access the password compromise check service, use the GET request of the <URL>/abcde type, where:
-
<URL> is the value specified in the Service address field.
-
abcde are the first 5 characters of the SHA-1 hash value of the password being checked (the hash "prefix").
If the service finds hashes starting with the specified prefix, all found hashes are returned to the calling side. Then, the calling side searches for the remaining hash characters in the result of service work. If other characters are found, the password is in the list of compromised ones. So, the service does not know the full hash of the password being checked and cannot restore the password using the passed hash. You can write such service using the 1C:Enterprise platform. In this case, you can fill in the base used for password checks centrally. What's more, you can include words that are prohibited (even though these words can pass the universal password compromise check) as passwords in the company that implemented this service.
As a public password compromise check service, you can use, for example, the "Have I Been Pwned" service (https://haveibeenpwned.com/), which offers an HTTP interface with the https://api.pwnedpasswords.com/range/ address. You can find the description of this interface here: https://haveibeenpwned.com/API/v3#SearchingPwnedPasswordsByRange. The 1C:Enterprise platform expects the password compromise check service to function exactly as described in the given link.
The password compromise check (provided that this feature is enabled and configured correctly) is performed when:
-
Writing a value of the InfoBaseUser type.
-
Editing or creating a user in Designer.
-
Changing the password when restoring the user password.
-
Changing the password during the authentication process.
-
The password has expired.
-
The password compromise was revealed.
-
The check is performed if the password has passed other checks in accordance with the current password policy. If any check is disabled, it is skipped. It does not cancel the remaining checks.
See also:
-
Infobase parameters (see Infobase parameters).
-
Operations with the password compromise check list.
6.2.7. Deleting users
To delete a user, select them in the user list and click Actions - Delete in the User list window.
To confirm user deletion, click Yes when prompted.
6.2.8. Editing user properties
To edit user parameters, click Administration – Users in the Designer menu. Select the user in the list and click Actions – Change in the User list window.
In the User window, you can change parameters of the selected user.
6.2.9. Applying filters
To streamline viewing of the user list, you can use filters. In the user list, click Actions – Set filter…
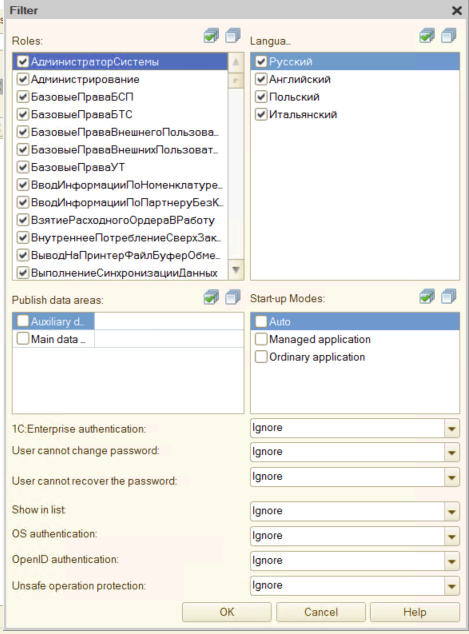
Fig. 52. Applying filters
The list can be filtered based on the role, language, run mode, or user authentication type. If separators (common attributes with Data separation property set to Separate) are enabled, you can also filter users by separators.
6.2.10. Authentication types
6.2.10.1. General information
Authentication is a procedure that verifies whether the provided ID (name) belongs to the user. 1C:Enterprise supports multiple authentication types, which are described in further sections. Not that authentication differs from authorization. Authorization is granting rights to a certain person or group of persons to perform certain actions, as well as confirming these rights when trying to perform this action.
6.2.10.2. 1C:Enterprise authentication (standard authentication)
The user can be authenticated by 1C:Enterprise by providing their username and password (typed in authentication dialog box, passed as command-line parameters, or passed in the infobase connection string for an external connection or automation server). In this case, username and password verification is performed by 1C:Enterprise.
6.2.10.3. Operating system
The user can be authenticated implicitly using the operating system functionality. To enable this authentication type, you need to match the 1C:Enterprise user to an operating system user. On startup, 1C:Enterprise prompts the operating system for information on the currently authenticated OS user. For this purpose, Windows uses the SSPI interface and Linux uses GSS-API. Then, the system checks whether the given operating system user is mapped to a 1C:Enterprise user. If the matching user is found, the 1C:Enterprise user is authenticated and the authentication dialog box is not displayed.
Specify the operating system user as follows: \domain_name\username. The username contains Latin letters only. The format of domain name and username might depend on settings of the domain controller and its accounts. Correct name of the operating system user can be found in the records of CONN event in the technological log. Look for Txt property that starts with Srvr: DstUserName2. For example, the 30:30.551013-0,CONN,2,process=rmngr,OSThread=24204,t:clientID=3,Txt=Srvr: DstUserName2: d1.d2\user1(d1.d2\user1) event means that you must specify the OS username in the infobase user description as follows: \d1.d2\user1.
When forced 1C:Enterprise authentication is required, specify /WA- command-line parameter in the startup command line of the client application. The /WA+ command-line parameter forces OS authentication (enabled by default).
See also:
- Technological log (see Technological log).
6.2.10.4. Using OpenID
OpenID (https://openid.net/) is a protocol that allows a user to authenticate in many unrelated resources, systems, and other using a single account. 1C:Enterprise uses a protocol based on OpenID 2.0 under Direct Identity model.
The general procedure is as follows:
-
User attempts to sign in to 1C:Enterprise.
-
1C:Enterprise identifies that OpenID authentication is enabled for the infobase using the default.vrd publication file.
-
Authentication request is sent to OpenID provider. OpenID provider must be able to receive requests from the address of the infobase publication.
-
If an interactive action is needed (for example, the first authentication for this user ID is performed, or the user authentication data has expired), the provider informs 1C:Enterprise that username and password are required. 1C:Enterprise performs the interactive action and returns the requested data to the OpenID provider.
User authentication data is stored in cookie files located in web browser storage. Thin client uses own storage.
- If the provider authenticates the user, a flag is returned to 1C:Enterprise indicating that the user is authenticated.
OpenID authentication only works when the infobase is accessed over HTTP or HTTPS. This means that OpenID authentication is only available for web client, mobile client, and thin client connected to the infobase via the web server. Upon OpenID authentication, there might be cross-domain requests if you use a thin client or Mozilla Firefox, Google Chrome, and Safari.
An OpenID provider can be a 1C:Enterprise infobase published on a server in a special way, or an information system that has OpenID Authentication 2.0 and extension of this protocol implemented on the 1C:Enterprise platform. The address of the OpenID provider is specified in the default.vrd file (<rely> element) when publishing an infobase that is an OpenID provider's client.
It is important to understand that the key field used to match the 1C:Enterprise infobase user and OpenID provider user is a value specified in the Name property of the infobase user. In other words, a user can sign in to the infobase if the Name property in the infobase contains an ID returned by the OpenID provider. For description of an ID to be returned, refer to documentation of the OpenID provider used.
User password is set at the OpenID provider. If a 1C:Enterprise infobase acts as the OpenID provider, the password is set in this infobase. The password set in the infobase that operates as the OpenID provider's client is ignored during OpenID authentication. If a third-party OpenID provider is used, the password is set by this provider. After the user password is changed in the OpenID provider user storage, the 1C:Enterprise follows the following rules:
-
User is considered authenticated in any currently running sessions until these sessions are terminated.
-
When creating a new session, the user is prompted for the password even if the user authentication data has not expired yet.
When forced OpenID authentication is required, specify /OIDA+ command-line parameter (enabled by default) in the startup command line of the client application. The /OIDA– command-line option is used to forcibly disable the OpenID authentication.
For more information on how to set up OpenID authentication in a web server, see OpenID authentication support settings.
Currently, when authenticating using OpenID, users are not shown a window with a request to change the password in the following cases:
-
When the password has expired.
-
When the password is about to expire.
-
If the password does not meet the requirements during authentication (when the password strength check is enabled).
This is because OpenID authentication does not support these features.
See also:
-
OpenID Authentication 2.0 (see https://openid.net/specs/openid-authentication-2_0.html).
-
Additional requirements for an OpenID provider (see Requirements for external OpenID providers).
6.2.10.5. Using OpenID Connect
OpenID Connect (https://openid.net/connect/) is a protocol that is an extension of the OAuth 2.0 authorization protocol. OpenID Connect allows 1C:Enterprise to verify user identities based on the authentication by the third-party provider. This protocol is applicable when using thin, mobile or web client. 1C:Enterprise cannot be the OpenID Connect provider. Third-party providers are used for this purpose. OpenID Connect protocol support also means the option to use the Unified System for Identification and Authentication (USIA).
To map 1C:Enterprise users and authentication provider users, the following data is used:
-
On the authentication provider side, the email address as a key parameter is used by default. When setting up access to the OpenID Connect provider, you can specify an authentication token field to be used as a key field.
-
On 1C:Enterprise side, the key parameter is located in the Name property of the infobase user by default. You can set the OSUser or Email property, as well as a value from the UserMatchingKeys collection as a key field.
If the UserMatchingKeys collection is used for mapping, you can fill it using 1C:Enterprise language only. The code can be as follows:
IBUser = InfobaseUsers.Find(UserCode);IBUser.UserMatchingKeys.Insert("googleIV", "user-name@google.com");IBUser.Write()The UserMatchingKeys collection element is used if the provider list in the default.vrd file contains a description of a provider whose name property is equal to the googleIV value. The user who is identified by the UserCode variable value will be used upon session startup if the mapping field value from the token returned by the OpenID Connect provider is user-name@google.com. See the googleIV provider details in the example for the openidconnect.providers element of the default.vrd file.
OpenID Connect authentication (including USIA) is supported in a separated infobase. Separator values will be used to correctly identify the authenticated user. However, for separator values to be used in the system, you may need to additionally set up the default.vrd file (the redirect_uri parameter in the provider description).
So far as a mobile client is concerned, authentication is provided using a web browser supported by a mobile device:
-
Android: Google Chrome.
-
iOS: version 9.0 or later.
If your mobile device is not in compliance with the requirements above, you might need to authenticate again on the side of OpenID Connect provider in a mobile client. To start forced authentication when you sign in next time, run Log out command in the mobile client.
See also:
-
OpenID Connect operations.
-
default.vrd file details.
6.2.10.6. Using JWT
Token is a tool to authenticate a user or a separate session in the application. JSON Web Token (JWT) is a standard for access token creation based on JSON format. JWT is described in the RFC 7519 standard (https://datatracker.ietf.org/doc/html/rfc7519). JWT is used for user authentication in client/server applications.
JWT authentication is available only in infobases that are published on the web server. To specify JWT, use the AccessToken command of the client application startup command-line.
A published infobase must be configured in a certain way. To set up a publication, use the default.vrd file.
To authenticate in the selected infobase using JWT:
-
Publish the infobase on the web server.
-
Specify the Access token authentication property.
-
In the default.vrd file of the published infobase, generate the accessTokenAuthentication element with the correct parameters. Note that:
-
If you search for a user by the field whose name is different from the infobase user, specify the authenticationUserPropertyName attribute value of the issuer element.
-
The name attribute of the issuer element.
-
The accessTokenRecipientName subordinate element must contain a unique application name that will be used during JWT generation.
-
-
Using the AccessToken object, create an access token for each user. In this token:
-
Set the value of the Issuer property to the name attribute value of the issuer element. The iss payload claim will be generated.
-
Add the value that is specified in the accessTokenRecipientName element of the default.vrd file to the list of recipients. The aud payload claim will be generated.
-
Depending on the value specified in the default.vrd file in the authenticationUserPropertyName attribute of the issuer element, the UserMatchingKey property must contain the value of the key field for the required user. The sub payload claim will be generated.
-
Fill the rest of the token parameters and get its string presentation.
-
-
Pass the token string value to a specific user to specify as a value of the AccessToken parameter when starting the client application.
See also:
-
JWT operation description.
-
default.vrd file.
6.2.10.7. Using QR code
When using a QR code, the following bundle is used: a mobile application (mobile client) in which the user is authenticated and another client application that the same user wants to use to access the same infobase. It works as follows: if the user wants to authenticate in the infobase, they use a mobile application to scan the QR code displayed in the client application. To successfully perform the operation, the user trying to sign-in in another client application must already be authenticated in the same infobase in the mobile application.
This authentication is possible only if the infobase is published on a web server and configured in the required way. To set up a publication, use the default.vrd file.
QR code authentication is divided into two steps:
-
The required mobile application is missing on the mobile device.
-
The required mobile application is installed on the mobile device.
Let's look at each of these steps in more detail:
-
The required mobile application is missing on the mobile device:
-
The user tries to sign in the infobase and selects the QR code authentication in the authentication dialog box.
-
The client application displays a QR code that needs to be scanned by a mobile device.
-
The user uses any available QR code scanning application to scan the QR code. After that, they follow the URL encoded in the code.
-
After following the link, the application displays links to mobile applications that can be used to access this infobase on different mobile operating systems. To configure the list of applications, use the <mobileApps> element in the default.vrd file.
-
The user selects and installs the required mobile application.
-
The user proceeds to the step when the required mobile application is installed on the mobile device.
-
-
The required mobile application is installed on the mobile device:
-
The user uses the mobile application to access the required infobase.
-
The user wants to access the same infobase from another device. To do this, they start the client application on another device and select the QR code authentication in the authentication dialog box.
-
In the mobile application, the user selects Main menu – Settings and service – Sign in on another device and scans the QR code provided by the infobase on another device.
-
The infobase authenticates a new user session.
-
In this case, that authentication is confirmed by owning a mobile device with a mobile application in which the user is authenticated.
See also:
- default.vrd file.
6.2.10.8. By email
Email authentication is a type of password-free authentication. To authenticate via email, select this type of authentication in the user selection dialog box and then enter the email address specified when the user was created. The system will send an email message containing a verification code to the specified address.
Enter the verification code into the form that will open after the system sends an email with the code. If the code is entered correctly, the user is authenticated.
For email authentication to work, perform two actions:
-
You can configure such authentication in the Additional authentication settings dialog box.
-
Enable email authentication for the user.
Please note that email authentication is not supported for parameterized launch mode and when disabling startup dialog boxes during client application launch.
See also:
-
User profile settings.
-
User selection dialog box.
-
Additional authentication settings.
6.2.10.9. Two-factor authentication
6.2.10.9.1. General information
The platform can perform user authentication independently, or it can use the results of authentication performed by another resource that it trusts (operating system or OpenID provider). In any case, the user enters a username and a password. If the correct username/password pair is entered, the platform considers that the user is identified and grants them access to the application.
This conventional scheme is simple and convenient, but has one significant drawback. You need to remember the password, and it must be short and simple for that. But such password is easy to hack. For a password to be difficult to hack, it must be long and complex. But such password is not easy to remember. For this reason, in reality it all comes down to people using simple and the same passwords for different resources.
Two-factor authentication is a method that allows you, on the one hand, to complicate access to user data for hackers, and, on the other hand, it is a solution that mitigates the disadvantages of classic password protection to some extent.
Two-factor authentication requires the user to have two of the three possible types of authentication data:
-
Something they know and remember. This is the username and password.
-
Something they own. This can be a user cell phone or email.
-
Something inherent to them. This can be a physical feature of the user, such as a fingerprint, a portrait, or an iris pattern.
The point of two-factor authentication is that the user must double-confirm their identity to get access to the application. Moreover, they need to do that in different ways. For example, entering the username and password will be the first authentication factor and entering the code sent to the cell phone will be the second authentication factor.
The verification of the first authentication factor is performed by 1C:Enterprise platform itself, and a third-party service, which is called the second factor provider, is used to process the second authentication factor.
Second factor provider (also called "provider" in this section) is an HTTP service that provides API for performing certain actions. A 1C:Enterprise infobase can act as the second factor provider if a set of HTTP services for forwarding messages and performing authentication is implemented in the infobase. It can be a third-party service that sends SMS or e-mail messages, it can be a service that generates codes of the second authentication factor or a service that interacts with the user through its own mobile application, and so on. All that matters is that the provider can be accessed via HTTP requests.
You can use the two-factor authentication only for authentication with 1C:Enterprise tools (standard authentication) in any infobase mode and for any client application.
See also:
- 1C:Enterprise authentication (see 1C:Enterprise authentication).
6.2.10.9.2. Options for using the second factor
So, the standard 1C:Enterprise authentication (the first factor) is as follows:
-
The user starts the client application. The client application asks the user for the first authentication factor: the username and password. The user enters the username and password, and the client application sends them to the server.
-
Server checks the username and password for correctness.
-
If the data entered is correct, the server checks that the user needs only one authentication factor to use the application. If the second factor is not used, it is considered that the user is fully identified and can start operations. This is a common authentication scenario.
If two-factor authentication is set for the user, the first two steps are performed as before: the user enters the username and password, and the 1C:Enterprise server checks this data.
The use of the second factor can be performed in two ways:
- 1C:Enterprise server itself generates a second factor and checks if the user correctly entered the value of this factor. The provider only performs the transport function. It transmits the second factor value to the user. In this case, both 1C:Enterprise server and the user know the channel used to transmit the second factor value.
The procedure is as follows:
-
1C:Enterprise server informs the application that the user needs to specify a second authentication factor.
-
Application displays the second factor input form.
-
1C:Enterprise server generates and sends the value of the second factor (for example, a certain number) to the user. The user must enter this value in the form opened by the application. The second factor value can be sent to the user by e-mail or SMS.
-
User receives the second factor data and enters it in the dialog box opened by the application. The application sends the second factor data to 1C:Enterprise server.
-
1C:Enterprise server verifies that the entered data matches the data generated and sent to the user by the server.
-
If the second factor value transmitted by the application and the one generated by the 1C:Enterprise server match, the user is identified and granted access to the application.
-
1C:Enterprise server uses a third-party service that sends the result of applying the second factor by the user to 1C:Enterprise server. In this case, 1C:Enterprise server has no information on the type of the used second factor. The method for transmitting the second factor is also determined by the selected second factor provider. The 1C:Enterprise server only has information that there is a trusted service that in response to the requirement to use the second authentication factor informs whether the second factor is applied successfully or not.
The procedure is as follows:
-
1C:Enterprise server informs the client application that the user must authenticate the second factor on the provider side.
-
Client application shows the form to the user, where the user must perform a certain action after being authenticated by the second factor provider.
-
Server sends an HTTP request to the provider with a request to authenticate the user.
-
Provider begins the authentication procedure. The authentication method is at the discretion of the provider.
-
After the authentication procedure is completed, the user reports this to the client application.
-
Client application passes this information to 1C:Enterprise server, which requests the second factor provider for authentication results.
-
Provider reports the authentication result to the server. If authentication is successful, the user is considered identified and they are granted access to the application.
Each method reviewed in this section has a certain support from the 1C:Enterprise application. Setting of the second authentication factor is reviewed in the next section.
6.2.10.9.3. Second factor setting
Setting of using the second factor in 1C:Enterprise is divided into several parts:
-
Configuring templates of requests that are sent to providers.
-
Binding a request template to an infobase user.
-
Requests parameterization.
Let's take a closer look at each part.
To describe the HTTP request to be sent to the provider, the SecondAuthenticationFactorSettingTemplate object is used. One of the options of the second authentication factor is selected while setting the template parameters. If it is necessary to implement the first option of the second authentication factor (1C:Enterprise server generates, sends and checks the second factor value), the AuthenticationHTTPRequest and the AuthenticationHTTPRequestMethod properties are used. The first property contains description of the HTTP request (an object of the HTTPRequest type), and the second parameter allows you to specify which HTTP method will be used to request the second authentication factor to the provider.
If it is necessary to implement the second authentication option (the 1C:Enterprise server only initiates authentication in the second factor provider and receives its result), the parameters reviewed above remain. They are used for the second authentication factor. To check the authentication result, use the following additional properties: AuthenticationResultVerificationHTTPRequest and AuthenticationResultVerificationHTTPRequestMethod.
Each template has its own name (property of the same name), which allows you to identify the template when performing further actions.
When creating an HTTP request for setting any property, keep in mind the following features:
-
HTTP method is specified as a string. This is because the HTTP specification allows usage of custom verbs (methods).
-
Request text may contain parameters. A parameter is a text starting with the "&" character. For example, you can use the & user_name parameter to specify a username. These parameters will be replaced with real values at the time of sending the request (will be reviewed below). The reason for this decision is the assumption that the HTTP requests of the second authentication factor for different users will be almost the same. Differences will be observed only in some information that is specific to a particular user. For example, a conditional request to send a text message with the second factor code looks as follows: http://provider.example.com/sendsms/&phone_number. When sending a request, replace the &phone_number parameter with the user's actual phone number.
The platform provides the predefined &secret variable, which contains the value of the second factor generated by the platform.
Having all the information, let's look at an example of creating a template for working with the second factor according to the first option (the platform generates, sends, provides input and verification of the second factor):
Request = New HTTPRequest;Request.Resource Address = "&addr";Request: SetBodyFromString ("Enter the & secret value. Do not tell this value to anyone!", "utf-8");Provider = SecondAuthenticationFactorSettingsTemplates.CreateTemplate();Provider.AuthenticationHTTPRequest = Request;Provider.AuthenticationHTTPRequestMethod = "POST";Provider.Name = "Request - response";Provider.Record();The first three strings form the HTTP request that will be used by the platform. The remaining strings create the template of the second factor provider, which will send the request using the POST method and have the Request - response name.
If it is necessary to create a template for the second factor provider used according to the second option (all actions are performed by the provider, the platform only initiates the operation start and requests the authentication result), then the above example is to be changed in such a way that:
-
Authentication request meets the requirements of the provider used.
-
Request to check the authentication results is created and set in the template. This request will be made after the user "informs" the client application that they passed authentication at the provider.
After saving one or several templates for providers, you can assign one of the templates to the user. Keep in mind that you can assign multiple templates to one user and specify how they will be processed.
To set up user settings, two properties of the InfobaseUser object are used:
-
SecondAuthenticationFactorSetting. Here you need to assign an array of objects of the SecondAuthenticationFactorSetting type.
-
SecondAuthenticationFactorSettingsProcessing. Describes what the platform will do if several second factor providers are specified and the first (in the traversal order) provider returns an error.
After specifying the above properties, the object describing the infobase user is to be recorded.
The last point to consider is where the platform will get the values that will replace the variables in HTTP requests. For this, let's have a look at the SecondAuthenticationFactorSetting object. This object contains two fields:
-
SettingTemplateName. In this field, specify the name of the template of the second factor provider setting, which was specified in the Name property when setting the provider template.
-
Parameters. You need to assign a match to this property. The map must contain as many items as there are parameters in the template of the second factor provider setting (excluding the &secret parameter). A parameter name (without the "&" character) acts as a map item key, and a variable value is a value.
Now we have all the information we need to indicate to the infobase user that two-factor authentication is required when signing in to the infobase.
ProviderParameters = New Map;ProviderParameters.Insert("addr", "http://example.com/resource");UserSetting = New SecondAuthenticationFactorSetting;UserSetting.SettingTemplateName = "Question - answer";UserSetting.Parameters = ProviderParameters;UserSettings = New Array;UserSettings.Add(UserSetting);User = InfobaseUsers.FindByName("Seller");User.SecondAuthenticationFactorSettings = UserSettings;User.SecondAuthenticationFactorSettingsProcessing = SecondAuthenticationFactorSettingsProcessingType.UseNextIfFailed;User.Record();The platform will replace parameter names with the actual values in the following properties:
-
HTTPRequest.ResourceAddress property.
-
HTTPRequest.Headers property.
-
HTTPRequest object request body. The method of specifying the request body does not affect the substitution.
-
SecondAuthenticationFactorSettingTemplate.AuthenticationHTTPRequestMethod property.
-
SecondAuthenticationFactorSettingTemplate.AuthenticationResultVerificationHTTPRequestMethod property.
Note that if the second factor provider selected for the user is "broken", the user cannot get access to the infobase. In this case, the term "broken" means any event that does not allow the provider to complete its task: no Internet connection for access from the server to the provider, no Internet connection for access from the provider to the user, an error on the provider side, and so on.
It is also necessary to understand that if you plan to use a third-party provider of the second factor, then the services of this provider may be paid and the provider may put forward additional conditions and restrictions that lie outside the 1C:Enterprise system and are not considered in this documentation.
6.2.10.9.4. OpenID Authentication and two-factor authentication
1C:Enterprise supports authentication using the OpenID protocol. If the information system uses OpenID authentication, the second factor is to be requested by the OpenID provider. This is true as well if a 1C:Enterprise infobase is specified as an OpenID provider. In other words, two-factor authentication must be configured in the infobase that is the OpenID provider.
6.2.10.10. Use of biometrics to log in through a mobile client
So far as devices which support biometric authentication (i.e. they have a fingerprint sensor, face or iris scanner, and so on) are concerned, Use biometrics check box is available in a mobile client infobase setting and authentication (on a mobile device) dialog boxes. Whenever this check box is checked, the following mechanism is activated:
-
When you sign in for the first time, usernames and passwords you enter for the infobase and authentication using OpenID and web server are stored in a secure storage.
-
The next time you sign in, the following logic is implemented:
-
First, an attempt to sign in is made without using data available in a secure storage to verify that authentication is not currently required or there is relevant authentication data disclosed by OpenID provider. If a mobile device stores relevant authentication data, a request to provide biometric data for authentication purposes is made only when authentication data life cycle expires.
-
If the previous step failed, a user is prompted to undergo biometric authentication using a mobile operating system interface. The authentication type specified in mobile device user settings is requested.
-
If biometric authentication is abandoned by a user, the standard authentication dialog box with the username and password is displayed.
-
If biometric data is accepted by the mobile device, data saved during prior successful authentication is recovered from the secure storage. The said data is used for authentication purposes.
-
If this data is not accepted by a mobile device, data saved during prior successful authentication is deleted from the secure storage. Then, the standard authentication dialog box with username and password is displayed.
-
-
No biometric data is used if authentication is made through OpenID Connect as in this scenario a protected web page of OpenID Connect provider is used to perform authentication. On this page, the previously saved username and password for this provider cannot be inserted automatically. Moreover, OpenID Connect supports repeated authentication on this device without any time limit for entering username and password.
If your mobile device supports authentication through OpenID Connect, this method is used for authentication purposes. Whenever authentication through OpenID Connect is abandoned, you can sign in fast using biometric data. To attempt to re-use OpenID Connect authentication, an unsuccessful login attempt must occur.
6.2.11. Users and extensions
If the infobase user is assigned with native roles from the extension, the user is marked in the list with a special icon.

Fig. 53. A role from extension is assigned to the user
Roles that are present in the extensions connected to the infobase are available in the list of roles that can be assigned to the user. Extension roles are located at the end of the role list in the extensible configuration. You can mark or unmark extension roles.
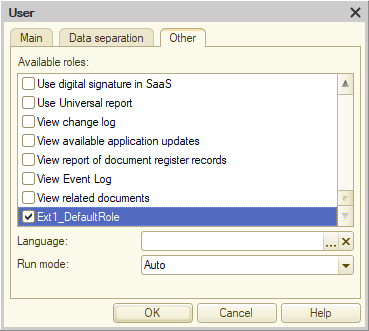
Fig. 54. Displaying extension roles
6.3. Active users list
Sometimes you need to find out which users are connected to the infobase at the moment.
To get the list of active users, click Administration – Active users. A window with a list of users who currently use the database will open.
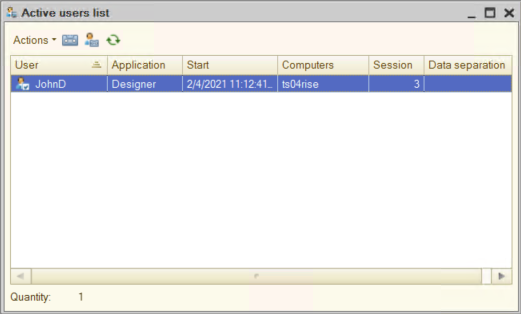
Fig. 55. Active users list
The current line displays data of the user who opened the form (current session). The current user is marked in the list with an icon. Data separation column specifies details of separators which are specified for a user in Designer (see Data separation tab in user properties). There are no values disclosed in this column for separators which apply to a specific session when a form is opened.
Using the Actions menu, you can customize appearance of the list or export it to a spreadsheet or text document. The list of active users can be sorted by any column.
6.4. Session operations
6.4.1. External session management
When you use information systems, you might face some situations when you need to manage the capability to create a new session with infobases:
-
Restrict the number of concurrent infobase users.
-
Ensure a guaranteed reserve of licenses when working with an infobase. For example, with 100 licenses available, to provide guaranteed access to the infobase for two users with particular names.
-
Perform other similar tasks.
The external session management feature is designed to address these problems. The feature requires a dedicated web service that allows or prohibits session creation. The feature operates both with client/server and file infobases. File infobase operation is supported if all the following conditions are met:
-
1C:Enterprise client application version 8.3.22 or later.
-
External session management web service version 4 or later.
The feature operates as follows:
-
When the system attempts to start a session, 1C:Enterprise notifies the web service that a session needs to be created and provides the web service with a set of parameters that define all characteristics of the session to be created (infobase name, username, client application IP address, and so on).
-
The web service decides whether to allow session creation and returns control to the calling party. If required, the web service can keep records of created sessions broken down by requested sections.
-
At the end of the session, 1C:Enterprise notifies the web service that the session is ending.
-
If the session enters or leaves the Hibernating state, 1C:Enterprise notifies the web service of this event. This feature is available only if you use the web service that supports the operation protocol of version 2 or later.
The external session management service possesses exact information on the current number of open sessions in infobases under its control and can make appropriate decisions.
The external session management service is only called for the sessions that require a client license:
-
Designer
-
Thick client
-
External connection
-
Thin client
-
Web client
-
Mobile client
-
1C:Analytics client
When you start other session kinds, the external session management service is not called.
To set up the external session management service, use the following:
-
In the file infobase, the conf.cfg configuration file.
-
In the server infobase, server cluster infobase properties.
For details on the web service of external session management, see External session management web service.
6.4.2. Session start lock
6.4.2.1. Manually, for all
Interactive method
1C:Enterprise allows you to prohibit users from creating new sessions with the infobase. In this case, when users attempt to access the infobase, an error message with the reason for prohibition is displayed. This capability can be useful when, for example, you need all current users to close their sessions and make sure that no new users can connect to the infobase.
When using client/server mode, you can enable this lock with the administration utility of the 1C:Enterprise server cluster.
To connect to the infobase regardless of the lock, use the UC command-line parameter and the UC connection string parameter. If a non-empty access code is specified for the lock, enter this code in the UC parameter to bypass the lock and connect to the infobase. If the access code contains spaces, you need to enclose it in quotes.
When using a web client or a thin client running via a web server, you can also specify the access code in the UC connection string parameter of a descriptor file. In this case, additional publication of the infobase on a web server is recommended.
When the session start lock is set and the access code is set to 123, you need to enter /UC123 in the client application startup command line in order to bypass the lock.
Software method
In any infobase mode, you can enable session start lock using 1C:Enterprise language. The SessionsLock object of the 1C:Enterprise language is used for this purpose. You can create it in constructor and configure the required properties for locking new connections. You can specify a message to display to a user (using the SessionsLock.Message property) as a simple text string or a formatted string.
The SetSessionLock() global context method enables the lock, and the GetSessionsLock() method gets the enabled lock.
6.4.2.2. By default, when password is under attack
Password attack is one of the methods which can be used to be granted unauthorized access to infobase data. In this scenario, a malicious user tries to hack a password using a pre-defined algorithm, until it is cracked and a password for a selected user becomes available thereto. To avoid the said manipulations, 1C:Enterprise supports a dedicated mechanism available in the infobase client/server mode only.
An administrator manages this feature by configuring the following infobase parameters (to open the dialog box, go to Main menu – Administration – Infobase parameters):
- Maximum number of failed authentication attempts. Defines the number of attempts allowed to be made by a user to enter their password before access is blocked. Access is blocked as soon as the aggregate number of consecutive unsuccessful attempts to authenticate becomes equal to N, where N is the parameter value. In other words, if this parameter is equal to 3, a user will be blocked as soon as their third attempt to authenticate fails. The user will be notified about blocking after N+1 authentication attempt.
If this parameter is set to 0, the feature is disabled and the platform does not monitor the number of failed authentication attempts.
-
Lock duration on exceeding the maximum number of failed authentication attempts (in seconds). Defines the time period when a user is unable to authenticate if they attempt to enter a wrong password in excess of the number of attempts specified in the Maximum number of failed authentication attempts parameter.
-
User name add-on codes when authentication is blocked. Allows you to block authentication attempts made by the already blocked user. Add-on codes are separated by ";". In this case, a username is generated based on the name of the blocked user and one of the add-on codes. A user with username generated with the help of add-on codes has as many authentication attempts as an ordinary user. As soon as all available attempts to authenticate are made, the said "extra" user is blocked as well.
This feature works as follows:
-
Malicious user enters a username and attempts to hack a password by entering a password expected to be a valid password of a user. As soon as the aggregate number of failed attempts to authenticate is exceeded, the username entered by a malicious user is blocked.
-
If the blocked user attempts to sign in using their name and password, a warning is displayed specifying that the user is blocked.
-
Whenever add-on codes are specified in an infobase, these can be used by a user. To do it, the user must enter their name with an add-on code. When you use add-on codes, consider that an add-on code is analyzed only if the specified username is not included in the list of infobase users. Username add-on codes specified in the settings are successively subtracted from a username. Then, it is checked whether an infobase user with such name is available in the infobase or not. Therefore, we recommend that you avoid creating add-on codes that are similar to the end of an existing username. If such a user is blocked using the block feature, they will not be able to sign in using add-on codes. Moreover, we recommend that you start each add-on code with the so-called "technical" characters, which are unavailable in the username, for instance, "!", "^", and so on.
To view a list of blocked users, in Designer, click Main menu – Administration – Blocked authentication. This form is available to each user with the Administration or DataAdministration rights assigned. Information about blocked users is available in the event log.
Data about blocked users is stored by the auxiliary cluster function service. It means that:
-
If a single administrator is blocked, to sign in using their username, reload the server cluster.
-
Unsuccessful sign-in attempts are counted from the last successful sign-in without any time limitation. However, when you reload the server cluster, all counters for all infobase users are reset.
To manage the block feature, use the AuthenticationBlock global context object. Use this object to change settings of the feature (GetSettings() and SetSettings() methods). Moreover, a list of current blocks can be displayed using the GetBlocks() method.
In 1C:Enterprise language, you can force unblock all or certain blocked users. For that purpose, get a list of current blocks displayed as the InfoBaseUserAuthenticationLock object array. Then, define the list of users to unblock (based on the InfoBaseUserAuthenticationLock object properties). Call the Unlock() method of this object for the selected blocked users.
6.4.3. Idle session termination
It may be required to disable users who do not perform any actions in their infobase for a certain period of time. You may need it to effectively use licenses or to reduce the likelihood of unauthorized access to the infobase data. The 1C:Enterprise platform allows terminating an infobase session when the user is inactive.
For this, specify two parameter values in the list of infobase parameters:
-
Idle session termination timeout This parameter allows you to specify the time interval after which the session will be terminated if the user is inactive.
-
Time before warning about idle session termination. This parameter specifies the time interval after which the user is notified that their session will be automatically terminated if they do not resume operations in the session.
These parameters are used only with client sessions in the following applications: thin client, thick client, mobile client, and mobile application. You cannot terminate Designer sessions this way.
Depending on the client application type, "user activity" refers to:
-
Thin and thick clients: keystrokes, mouse movements in the application window, and participation in Collaboration system videoconferences.
-
Mobile client and mobile application: pressing on-screen buttons, scrolling forms, and touching various parts of forms.
The inactivity warning dialog box displays a countdown timer, after which the session will be terminated. The application will not be terminated. The dialog box will be displayed on the screen with information that the session is terminated due to user inactivity and a suggestion to shut down or restart the client application.
We do not recommend that you enable both saving authentication and idle session termination if idle session termination is enabled to minimize the risk of unauthorized data access. In this case, forced session termination will not protect against unauthorized access, as an attacker can still get access to the infobase using saved authentication credentials.
See also:
-
Infobase parameters.
-
Saving authentication.
6.5. Regional infobase settings
Regional infobase settings affect the format of date, time, numbers, logical constants, as well as string order in infobase lists. To start this mode, click Administration – Regional infobase settings.
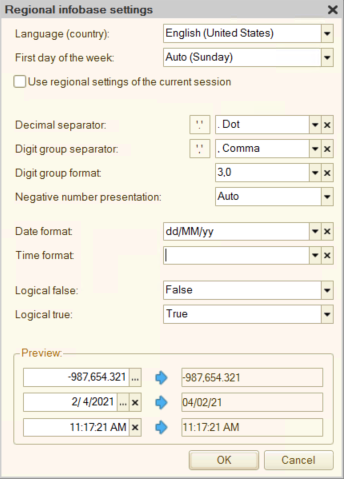
Fig. 56. Regional settings
If a property is not set, the default 1C:Enterprise settings for numbers, dates, and time for the specified language (country) will be used. Language (country) is specified during infobase creation.
Language (Country). Select the language (country) for this infobase.
First day of the week property is used to specify what day of the week is considered the first day of the week in the country. If you set this property to Auto, the first day of the week is chosen based on the country specified in Language (Country) property. For example, if you choose English language, Sunday will be set as the first day of the week, and if you choose Arabic, Saturday will be the first day. Any day of the week can be chosen as the first day of the week.
In infobases created with 1C:Enterprise 8.3.6 or older, the value of the first day of the week is not stored in the infobase. If compatibility with 8.3.6 and earlier versions is enabled for an application deployed in this infobase, Monday will be used as the first day of the week (and you will not be able to change this value). If the compatibility mode is set to Not used for this infobase (or compatibility version is earlier than 8.3.6), the first day of the week will be selected according to Language (Country) property. The First day of the week property is assumed to be set to Auto.
In infobases created with 1C:Enterprise 8.3.7 or later, the value of the first weekday is stored in the infobase. When creating an infobase, the First day of the week property is set to Auto. The value of this property can be changed; the changed value is stored in the infobase. Setting the mode for compatibility with 8.3.6 and later will make Monday the first day of the week and the First day of the week property will be uneditable. However, the actual settings will be saved and will become effective after setting the compatibility mode to Do not use (or if the compatibility version is later than 8.3.6). If you edit regional settings in 1C:Enterprise 8.3.6 and later, the value of First day of the week property will be cleared.
If the Use regional setting of the current session property is set, the values similar to Number and Date are displayed (including input fields, calendar, and calculator) according to regional settings of a current session. These settings are determined based on the regional settings of a client computer, but can be re-configured using the /VL command-line parameter.
In the lower part of the dialog box, examples of number, date and time formats for the selected regional settings are displayed.
Values of Boolean type are displayed in accordance with the interface language. This can be set using the /L parameter.
Decimal separator. You can choose a separator between integer and fractional parts of a number from the drop-down list, or type it in the input field. An example is displayed to the left of the input field.
Digit group separator. You can choose a separator of digit groups in a number from the drop-down list, or type it in the input field. An example is displayed to the left of the input field.
Grouping. This property sets the format for digit grouping in the integer part of a number. You can choose the format string from the drop-down list, or enter it manually. The grouping format is: <A><separator><B>. Any character can be used as a separator, except digits. A format string allows you to set one or two digit groups counting from right to left. Each character (A and B) specifies the number of digits in its group.
Consider an example of format strings for number 987654321, where a group separator is the character "/". The description also goes from right to left:
-
Grouping – 3,2, presentation – 98/76/54/321:
-
First group includes the first 3 digits.
-
It is followed by the group separator specified in OS settings or in Group separator property.
-
All other digits are grouped by twos.
-
-
Grouping – 3,0, presentation – 987/654/321:
-
Each group contains 3 digits.
-
Groups are separated by a separator character.
-
-
Grouping – 4, presentation – 98765/4321:
-
First group includes 4 digits.
-
Groups are separated by a separator character.
-
Remaining digits are not grouped or separated.
-
Negative number format. You can choose the negative numbers format from the drop-down list. If you select Auto, negative numbers format is defined by the operating system settings.
Date format. Specifies the date format. You can use the following characters in different combinations:
| Characters | Description |
|---|---|
| D | Day of month. Numbers below 10 are displayed without a leading zero. |
| Dd | Day of month. Numbers below 10 are displayed with a leading zero. |
| M | Month number. Month numbers below 10 are displayed without a leading zero. |
| MM | Month number. Month numbers below 10 are displayed with a leading zero. |
| MMMM | Month name (in words). |
| Y | The last two digits of the year. Years below 10 are displayed without a leading zero. |
| Yy | The last two digits of the year. Years below 10 are displayed with a leading zero. |
| Yyyy | All four digits of the year. |
The above mentioned characters and groups of characters can be entered in any sequence. You can specify the separators for day, month, and year.
Time format. Specifies the time format. You can use the following characters in different combinations:
| Characters | Description |
|---|---|
| h, H | Hours, in 12-hour (h) or 24-hour (H) format. Hours below 10 are displayed without a leading zero. |
| hh, HH | Hours, in 12-hour (hh) or 24-hour (HH) format. Hours below 10 are displayed with a leading zero. |
| m | Minutes. Minutes below 10 are displayed without a leading zero. |
| mm | Minutes. Minutes below 10 are displayed with a leading zero. |
| s | Seconds. Seconds below 10 are displayed without a leading zero. |
| ss | Seconds. Seconds below 10 are displayed with a leading zero. |
The above mentioned characters and groups of characters can be entered in any sequence. You can specify the separator characters to separate hours, minutes, and seconds.
False. True. Specifies logical constants. You can choose these from the drop-down list, or enter manually.
See also:
- Converting values to a string and back.
6.6. Infobase parameters
6.6.1. General information
Infobase parameter settings allow you to specify the following set of parameters:
-
Authentication parameters
-
User password requirements
-
Data lock timeout
-
Passive session operation parameters
-
Number of totals recalculation jobs
-
Mobile client signature behavior
These parameters are located in the Infobase parameters dialog box in Main menu – Administration – Infobase parameters.
6.6.2. Authentication tab
This tab is used to configure user authentication parameters.
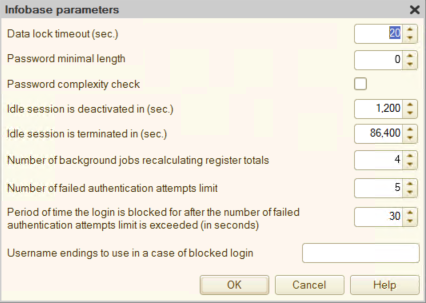
Fig. 57. Infobase parameters. User authentication
Authentication parameters are divided into two groups: general parameters and parameters described by the password policy.
General parameters of the "Authentication" group are:
- The maximum number of failed authentication attempts
- For details on the parameter, see By default, when password is under attack.
- Lock duration on exceeding the maximum number of failed authentication attempts (in seconds)
- For details on the parameter, see By default, when password is under attack.
- Username add-on codes used when authentication is blocked
- For details on the parameter, see By default, when password is under attack.
- User password hashing algorithm
- User passwords are stored in the infobase not in an open format, but as a result of a hash function that prevents the original password recovery. As a result, even after gaining access to the list of infobase users, the attacker will not be able to see the passwords explicitly. The platform supports several hash functions (hashing algorithms) that can be used to hash passwords: SHA-1, SHA-256, SHA-512, and PBKDF2-SHA256. When selecting a hash function for passwords, consider the following:
-
If it is necessary that users can access the infobase from any 1C:Enterprise system version, use the SHA-1 algorithm.
-
If the infobase will be accessed from 1C:Enterprise system version 8.3.26 or later, you can use any hash function. All the following comments are significant only when the infobase is accessed from version 8.3.26 or later.
-
To make it as difficult as possible to brute force a password, use the PBKDF2–SHA256 algorithm, while additionally protecting the infobase from DOS/DDOS attacks (denied of service). This recommendation is based on the fact that the PBKDF2-SHA256 algorithm is approximately 2,000 times slower than the SHA-1 algorithm. If you try to guess a password using numerous connections, you will force the 1C:Enterprise server cluster to only calculate password hash function values to check whether the authentication is possible.
-
If we take the speed of the SHA-1 algorithm as 1, the SHA-256 algorithm's speed is 2*SHA-1, the SHA-512 algorithm's speed is 3*SHA-1, and the PBKDF2-SHA256 algorithm's speed is 1915*SHA-1.
To change the password hashing algorithm of the infobase, you can use one of the dialog boxes for interactive configuration of infobase parameters (in Designer or from standard functions) or use the GetUserPasswordHashAlgorithmType()/SetUserPasswordHashAlgorithmType() global context methods. To identify what hash function is used for a password of a particular infobase user, use the InfoBaseUser.PasswordHashAlgorithmType property. For all hashing algorithms except for SHA-1, "salt" is added to each password during hashing. "Salt" is an arbitrary and random string of data that is added to the hashed password to eliminate the situation when the same hash is generated for one set of input data (password). The "salt" changes with each password change and for each user.
To change the password hashing algorithm, use the following sequence of actions:
-
The administrator changes the password hashing algorithm using one of the available methods.
-
The administrator terminates all active sessions of infobase users for all users to go through the authentication procedure again.
-
During authentication, a user re-enters their password, which is hashed using a completely new algorithm. A new hash function value is written to the corresponding InfoBaseUser object (with the new hash function algorithm).
-
After some time, for example, 1 month, the administrator can check users who still have the password hashing algorithm that was before the algorithm was changed, and force these users to change passwords and send new passwords by email. You can do this using 1C:Enterprise language.
If some infobase users have the remembered authentication parameters, after changing the hash function, all issued tokens will become invalid, and these users will need to authenticate again with the Remember checkbox.
The Password requirements group describes a set of parameters that you can apply for the entire infobase and for certain users.
See also:
-
Infobase user parameters (see Adding new users).
-
User password policies (see Password policy).
-
Infobase user authentication (see User authentication).
6.6.3. Additional tab
This tab contains the parameters for operating with the infobase and configuring the Designer behavior when operating with a mobile client signature.
- Data lock timeout (in seconds)
- Determines the maximum waiting time before the transaction lock is set by the database server. For example, when the current transaction needs to set lock on a database record but the record is already locked by another transaction, the current transaction will wait until the lock is released or the number of seconds specified in this parameter passed. The parameter also determines transaction lock timeout in 1C:Enterprise managed lock mode.
Changing this parameter (using this dialog box or 1C:Enterprise language) requires administrative rights and enables exclusive mode for infobase access.
Changes of the data lock timeout value become effective immediately for all databases except IBM DB2. In IBM DB2, you need to restart the database after the data lock timeout value is changed.
To access using 1C:Enterprise language, you can use the GetLockWaitTime()/SetLockWaitTime() methods.
- Passive session hibernation timeout (in seconds)
- A session that has no activity within the specified time becomes Hibernating.
Before the user is authenticated, the session state changes to Hibernating after 20 seconds of the client application inactivity.
To access using 1C:Enterprise language, you can use the GetPassiveSessionHibernateTime()/SetPassiveSessionHibernateTime() methods.
- Hibernating session termination timeout (in seconds)
- The hibernating session is terminated after the specified period of time.
Before the user is authenticated, the hibernating session is deleted after 20 minutes.
To access using 1C:Enterprise language, you can use the GetHibernateSessionTerminateTime()/SetHibernateSessionTerminateTime() methods.
- Number of totals recalculation jobs
- Defines the number of system background jobs used to recalculate register totals upon infobase restructuring or testing and introducing respective patches. The default value is 4. It means that to recalculate totals, 4 background jobs are started at the same time. This parameter is applicable in infobase client/server mode only.
- Time before warning about idle session termination (in seconds)
- If there is no activity in the user session, a dialog box with information that the session will be terminated will be displayed after the specified time interval. In the dialog box, you can select not to end the session. If the value is 0, the warning is not displayed.
To access using 1C:Enterprise language, use the GetInactivityTimeForTerminateSessionNotification()/SetInactivityTimeForTerminateSessionNotification() methods.
For more information on the automatic session termination, see Idle session termination.
- Idle session termination timeout (in seconds)
- A user session with no activity will be terminated after the specified time interval. If the value is 0, the user session is not terminated.
To access using 1C:Enterprise language, use the GetInactivityTimeForTerminateSession()/SetInactivityTimeForTerminateSession() methods.
For more information on the automatic session termination, see Idle session termination.
- Use additional indexes
- Enables additional indexes in the infobase.
To access using 1C:Enterprise language, use the SetAdditionalIndexesUsage()/GetAdditionalIndexesUsage() methods.
6.6.4. Parameters available only using 1C:Enterprise language
Some infobase parameters can be changed and received only using 1C:Enterprise language. Such parameters include:
-
Infobase time zone: GetInfoBaseTimeZone()/SetInfoBaseTimeZone().
-
First year of the century: GetInfoBaseBeginningOfCentury()/SetInfoBaseBeginningOfCentury()/SessionBeginningOfCentury().
The parameter is used if it is necessary to define the whole year of the date from the last two digits. When the first year of the century is set to "1950" (the default value), then the numbers of the year "49" will correspond to the year "2049", and the numbers of the year "50" will correspond to the year "1950".
If you set infobase parameters in a transaction, the method of getting the parameter will return:
-
In current session:
-
Before transaction end: the latest value.
-
After transaction commitment: the latest value.
-
After transaction rollback: the value as of transaction start.
-
-
In another session:
-
Outside the transaction in record-locking DBMS (Microsoft SQL Server, IBM DB2): the latest value, not later than 20 seconds after the value is set. After transaction rollback: the value as of transaction start, not later than 20 seconds after the rollback.
-
In the transaction and for versioned DBMS (file mode, PostgreSQL, Oracle Database): the latest value, not later than 20 seconds after committing the transaction where the value was set.
-
In the client/server mode, when the parameter value is set from the thick client side, the change is immediately visible at the server side, and vice versa.
6.7. Dumping an infobase to a file
An infobase can be saved to a file on hard drive. To save the infobase data to a file, click Administration – Dump infobase. This will open the standard file selection dialog box. Select a directory and specify the name of infobase data dump file.
The export file will contain all the infobase data, as well as data of all connected binary data storages. Binary data storage data will be included in the export if the export is performed from a client/server infobase, and a binary data storage is created for this infobase.
The export functionality allows you to:
-
Obtain an infobase image regardless of the data storage method.
-
Transfer an infobase between DBMS's or file modes.
Before exporting the infobase, it is recommended that you test it using Designer or a third-party utility, and fix all the issues found.
It is recommended that you do not use this method to create infobase backups because:
-
Export file may be impossible to load if the exported infobase contains errors.
-
Export procedure takes a long time.
-
Export procedure requires exclusive mode.
-
Export procedure has high RAM requirements.
See also:
- Binary data storage.
6.8. Importing infobases from file
To restore an infobase from a file, click Administration – Restore infobase.
This will open the standard file selection dialog box. Select a directory and specify the name of the infobase data dump file.
When restoring the infobase from a file, you need to ensure that free disk space (for temporary files) approximately equal to the expanded size of the infobase is available:
-
For file mode: on the computer where the infobase restoration is performed.
-
For client/server mode: on the computer hosting the 1C:Enterprise server.
The size of the resulting database may be several times larger than the size of the .dt data dump file.
To speed up the infobase import when using Microsoft SQL Server, set the recovery mode for the database to Simple or With incomplete logging. You can change the mode temporarily, before import, or permanently if you do not need to restore the database often. Before changing the database restoring mode, back up the database.
An infobase dump file (.dt) created by 1C:Enterprise 8.1 and 8.2 can be imported to 1C:Enterprise 8.3. If you try to import a configuration with unknown compatibility mode, an error is displayed indicating the required version. Importing 1cv8.dt files generated in version 8.3.1 and later into 1C:Enterprise versions prior to 8.3.1 is not allowed. The only exception is when the configuration property Compatibility Mode is set to Version 8.2.16 in 1C:Enterprise 8.3.1 and later.
6.9. Infobase backup
6.9.1. Infobase file mode
You can create infobase backups in any file management application. Open the infobase directory in the file manager of your choice. To create an infobase backup, simply copy the 1Cv8.1CD file to another directory. To restore the infobase from backup (in case of data loss, damage, and so on), just copy the backup file to the original infobase directory.
You can use specialized software to back up and restore data.
To make a backup more informative, we recommend that you include log files (for more information, see Event log) stored in the 1Cv8Log subdirectory of the infobase directory. We also recommend that you restore the infobase together with the logs (1Cv8Log directory). This provides you with history of infobase operations performed before the backup.
6.9.2. Client/server mode of infobase
It is recommended to perform infobase backup in client/server mode using available DBMS tools.
Backup consists of the following steps:
-
Back up the database.
-
Back up the event log. Do it if you need to view the log after restoring a backup.
-
Back up the binary data storage. To back up the storage, use 1C:Enterprise language or the Binary data storage management standard function.
In this case, the infobase is restored from the backup as follows:
-
Restore the database from the backup.
-
Restore the event log from the backup if the event log was previously backed up. Do it when the server cluster is stopped.
-
Restore the binary data storage from the backup if the binary data storage was previously backed up.
See also:
- Binary data storage.
6.9.3. Mobile devices
On iOS, use the standard system functionality to create infobase backups. On Android OS, use specialized utilities.
You can set up backup creation procedure directly on the mobile device. Two backup options are available:
- Before application update
- Before application start
To set up backup options, open the dialog box of the application properties and click Administration. Select Backup from the menu.
Specify the following backup settings:
-
Backup location (on this device) field contains the path in the local file system of the device where the backups are created. By default, this property contains backup directory located in the document directory on the mobile device.
-
Create backup on application update radio button enables backup creation on application update.
-
Auto backup frequency (days) property specifies the backup frequency. If this property is set to 0, backups are not created automatically. Otherwise, the backup is created before the application start if the number of days since the previous backup is greater than the value of this property.
-
Number of backups property determines capacity of the backup storage. If this property is set to 0, the number of backup copies is only limited by the free space available on the selected drive. Backups created before mobile application updates are also considered when calculating the number of backup copies.
The form also contains buttons for creating backups (Create backup) and restoring a database from backup (Restore...). When you choose to restore a database, you are prompted to select the backup from which the database will be restored. The list is retrieved automatically from the contents of the directory specified in the Backup location (on this device) property.
6.10. Verifying and repairing an infobase
6.10.1. General information
A variety of abnormal situations can occur while 1C:Enterprise is running: computer or mobile device power loss, operating system stops responding, hardware failures, and so on. If such an emergency occurs while writing data to 1C:Enterprise infobases (especially when in file mode), it can damage an infobase. External signs of infobase damage can vary; in more severe cases, the damaged infobase cannot be opened.
Verify and repair procedure is designed to diagnose and eliminate damage in infobases in file or client/server mode. This procedure can be used both for infobases used on personal computers and for infobases used on mobile devices.
6.10.2. On a personal computer
To start the repair procedure, click Administration – Verify and repair in Designer. The following dialog box opens:
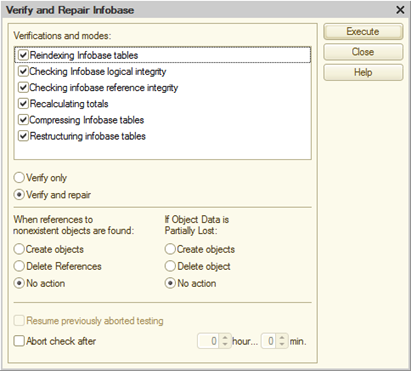
Fig. 58. Verifying and repairing an infobase
In the list of checks and verification modes, select the actions you need to perform. Multiple checks can be performed independently. In both modes (file and client/server), you can check the logical and referential data integrity, recalculate totals, restructure and re-index the database tables. In the file mode, you can also compress database tables. In client/server mode, you can check integrity of the binary data storage.
You can check the logical integrity, reference integrity, and the integrity of the binary data storage only for the specified list of configuration object kinds. You can use such list to reduce the check time or if you suspect issues, for example, only in the information registers of the current infobase. When you check the logical and reference integrity, keep in mind that despite the number of selected metadata object types, all tables of all configuration objects will be checked.
For some distributed infobases that can provide data containing references to objects not located in the tested infobase, clearing the Check referential infobase integrity check box allows you to disable creation of "non-existent" data and, as a consequence, prevents copying such data to other nodes of the distributed infobase.
While verifying and repairing the infobase, the main table of each object (dictionary, chart of characteristic types, chart of calculation types, or chart of accounts) is checked for containing no more than one record per predefined item of each data area. If any duplicates are found, the predefined data flag is cleared from them and the deletion mark is set instead.
You can enable the Restructuring of configuration extension tables check only if you also select the Check logical integrity of configuration extensions check and set Verify and repair mode at the same time. If configuration extensions are included in the separators (the Configuration extension separation property is set to Use for one or several separators), you can specify data areas where operations with extensions will be performed. To do this, use the Configuration extension data separation table. Each table row describes one data area. You can specify area parameters in one row where each separator has a column.
The Reindex infobase tables mode re-indexes all indexes that are created for a specific table (including additional object indexes).
The Check and enable CORP functionality mode checks ("verification only" mode) or updates ("verification and repair" mode) the state of the infobase depending on various settings:
-
The Use additional indexes infobase parameter:
-
The parameter is set. All additional indexes found are checked for compliance with those specified in the configuration. Non-compliant indexes are recreated with the required structure. The compliant ones remain unchanged. Additional indexes that exist in the configuration, but are missing in the infobase are created. A diagnostic message with a list of objects for which additional indexes are created is generated.
-
The parameter is cleared. All additional indexes found are deleted from the infobase. A diagnostic message with a list of objects for which additional indexes are deleted is generated.
-
Several groups of settings are located below the list of verification modes:
-
In the first group, select the action to perform: verify only or verify and repair. In the first case, the infobase is checked but no changes are made to it. In the second case, the infobase is checked and actions specified in the second group of settings are performed. The names of radio buttons are self-explaining.
-
In the second group, select actions to perform if any references to non-existent objects are found or a partial loss of data in existing objects is detected.
-
In the third group of controls, you can perform time-consuming verification and repair procedures in multiple sessions.
The Pause verification in check box specifies the time interval after which verification will be interrupted and the verification and repair parameters will be saved for the next Designer session.
The Resume verification check box allows you to continue the verification procedure paused in the previous verification and repair session.
Verification and repair events are displayed in the event log.
Click Execute to start verification. Verification can be interrupted by pressing CTRL + Break.
If the Check logical integrity of configuration extensions or Restructuring of configuration extensions parameter is selected when setting up verification and repair of the infobase, exclusive mode for the entire infobase is not required and is not set. In other cases, an attempt to set the exclusive mode for the required actions will be made.
If installation is not possible, a warning message is displayed: Cannot switch to exclusive mode. There are active users. To get information about active users, open the list of active users (click Administration – Active users).
After exclusive mode is set (if required), actions specified when setting up verification and repair are started. The protocol of performing this operation is displayed in the message window.
If exclusive mode was set before performing verification and repair, exclusive mode will be removed at the end of this operation.
When Compress infobase tables is selected for file mode, the infobase file is additionally optimized by moving all data required to open the infobase to a continuous data block in the beginning of 1Cv8.1CD file. \$\$\$remove it\$\$\$\$ This optimization accelerates the opening of the infobase, especially for configurations with a large number of infobase tables and configurations located on the network resources. After restructuring the infobase tables, the effect of table compression is lost and it is recommended to compress the infobase tables again.
You can perform the actions from this dialog box using the /IBCheckAndRepair command-line option of Designer batch mode (for more information, see Configuration and extension checks).
The distribution package includes the utility for restoring the file database (chdbfl).
6.10.3. On a mobile device
To start the repair procedure, open the application properties for editing and click Administration. Click Verify and repair in the menu.
In the verification settings form, specify:
-
What actions to perform.
-
Verify only, or verify and repair (the Repair automatically check box).
-
What to do if references to non-existent objects are found.
-
What to do if partial loss of the infobase object data is detected.
Then, click Execute in the upper right corner.
Execution of the selected actions starts and verification progress information is displayed. To interrupt verification and repair procedure, click Cancel. \$\$\$remove it\$\$\$
6.11. Cancelling the distributed infobase master node assignment
To cancel assignment of the distributed infobase master node, use the /ResetMasterNode command in Designer batch mode command line. This operation is equivalent to calling the SetMasterNode(Undefined) method of the ExchangePlansManager object.
This may be necessary, for example, when you need to separate a subtree of the distributed infobase into an independent infobase or to reassign a distributed infobase node.
6.12. Deleting data areas or infobases
To delete a data area or the entire infobase, use the /EraseData command in Designer batch mode command line. The area to delete is determined by using the /Z parameter of the startup command line.
To delete data, the user on whose behalf the deletion is performed needs the Administration right and exclusive access to the infobase.
6.13. Event log
6.13.1. General information
To perform administrative duties, it is often required to find out which events occurred at a particular point in time or what actions a particular user performed.
You can find this information in the event log. This log can record various events. Using the event log, the administrator can get the history of user operations.
The event log is not a part of a database and is not saved when exporting/importing an infobase.
1C:Enterprise logs the major actions by users who modify infobases, perform routine operations, sign in, sign out, and so on.
Event log is supported both in Designer mode and 1C:Enterprise mode. For the instructions on how to use the event log in 1C:Enterprise mode, see the help to the standard Event log function. For how to access standard functions, see Standard functions.
Event log can be generated in either of two formats:
-
Sequential format (.lgf).
-
SQLite format (.lgd). Version 8.3.5 supports this format. Starting from version 8.3.22, you cannot use this format in new infobases and convert into this format. In later versions, this format will no longer be supported. In previous documentation versions, you can read about SQLite format operations.
Depending on 1C:Enterprise version, different default log formats are used:
-
In 1C:Enterprise 8.3.4 and previous versions, you can use only the sequential event log format.
-
In 1C:Enterprise versions 8.3.5 to 8.3.11, the default format is SQLite. Event log format change is not supported.
-
In 1C:Enterprise 8.3.12 and later versions, the default format is sequential. You can change the format of the used event log.
-
In 1C:Enterprise 8.3.22 and later versions, the sequential format is used for new infobases. Event log format change is disabled. You can view the event log in SQLite format.
When you change the event log format while the system is running, the selected event log format is saved in the infobase. As a result, when you restore an infobase from a backup or a dump file (.dt), the event log format is also restored. Consider that if you want to restore an infobase in version 8.3.22 (or later) and this infobase is set to SQLite format and was dumped to a dt-file in previous versions.
Each event in the event log is identified by a string. The system events use a combination of $ and $ characters (for example, $InfoBase$.MasterNodeUpdate or $PerformError$). $InfoBase$.MasterNodeUpdate will be displayed as a string: Infobase. Master node change. Using these character combinations in names of events written by the WriteLogEvent() method is prohibited. The events generated by this method are displayed as is.
6.13.2. Event log in .lgf format
The event log in .lgf format is stored in text files with the following extensions:
-
1Cv8.lgf. General information about the event log.
-
*.lgp. Event log fragment.
-
*.lgx. Index file of the event log fragment with the same name. The index file size is about 10% of its own event log file.
Generating an event log index file depends on the used mode:
-
For file mode, the event log is not indexed. The index file is not created or used.
-
For client/server mode, the event log is indexed. Create and use index files. The number of indexing streams is equal to half of the number of working cores on the server cluster manager computer. In general, there can be no more than 8 streams or less than 1 stream.
Log location:
-
For file mode: in the 1Cv8Log subdirectory of the infobase directory.
-
For client/server mode: in the 1Cv8Log subdirectory of the infobase directory in the directory of internal cluster files. The directory name can be determined from the data registry file of the cluster.
6.13.3. Saving event log
To save the event log, open it and click File – Save copy. This will open the dialog box for selecting the directory and file to export the event log to, as well as the file type (*.lgf by default). You can also export the log in XML format (for the format description, see Description of the event log elements).
Example of event log export:
<v8e:EventLogxmlns:v8e = "http://v8.1c.ru/eventLog"xmlns:xsd = "http://www.w3.org/2001/XMLSchema"xmlns:xsi = "http://www.w3.org/2001/XMLSchema-instance"><v8e:Event><v8e:Level>Warning</v8e:Level><v8e:Date>Event date</v8e:Date><v8e:Application>Enterprise</v8e:Application><v8e:ApplicationPresentation>1C:Enterprise</v8e:ApplicationPresentation><v8e:EventName>event name</v8e:EventName><v8e:EventPresentation>event presentation</v8e:EventPresentation><v8e:UserID>00000000-0000-0000-0000-000000000001</v8e:UserID><v8e:UserName>Ivanov</v8e:UserName><v8e:Computer>Ivanov</v8e:Computer><v8e:MetadataName>Catalogs.Items</v8e:MetadataName><v8e:MetadataPresentation>Catalogs Items</v8e:MetadataPresentation><v8e:Comment>Comment</v8e:Comment><v8e:Data xsi:type="xsd:string">Some data</v8e:Data><v8e:DataPresentation>Data description</v8e:DataPresentation></v8e:Event></v8e:EventLog>6.13.4. Viewing event log archive
To view the archive entries of the event log:
-
In Designer, click Main menu – File – Open. In the standard dialog box for selecting files, specify the Event log (.lgd, .lgf) file type. Select an archive file and click Open. Indexing of the file being opened will be performed in the background. Index files will be created in the temporary file directory of Designer and deleted after you close the log.
-
In the standard event log viewer, click More – View from file. In the standard dialog box for selecting files, select the required archive file and click Open.
To set up automatic update and the update interval, use the list customization feature, which is standard for a tabular field.
Viewing the event log archive created in 1C:Enterprise version 8.0 or 8.1 is not supported.
6.13.5. Event log settings
6.13.5.1. General information
In Administration – Event log settings, you can specify the detail level of event logging. In case of network operation, you can save the selected setting only when no one except for the administrator is using the configuration.
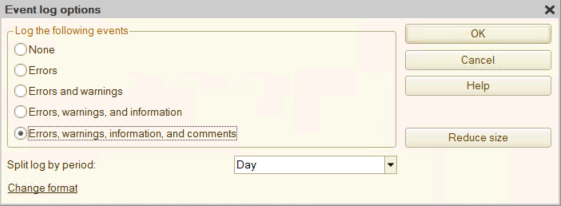
Fig. 59. Event log settings
When you create a new infobase, events of all severity levels are logged and a new log file is created weekly.
You can split the event log by periods. This is because the log records are stored in files. Each file contains records for a specific period. The period length is specified in the Split event log storage by periods field. A new file is opened each (as specified in the settings):
-
Hour
-
Day
-
Week
-
Month
-
Year
6.13.5.2. Reducing size of event log
A large number of records may accumulate in the event log eventually. To reduce the number of records, open the event log settings and click Reduce size. This opens the following window:
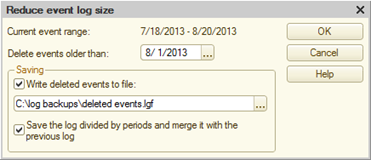
Fig. 60. Reducing size of event log
All records preceding the date specified in the Delete events older than field are deleted. When you reduce the event log, all records preceding the specified date are deleted. After reducing, the event log contains records for the edge date (starting from 12:00 AM on the edge date) and subsequent data. When you reduce the event log, the system takes into account the active log splitting mode (both for all previous periods and the current one).
If you need to save the event data before deleting the records, select the Write deleted events to file check box and specify the name of the archive file.
You can reduce the event log on a regular basis and still be able to view the deleted log events. To do this, if you reduce the log by writing the deleted entries to a file, select the Keep log storage split by period and merge with the previously saved log check box.
6.13.5.3. Converting the event log to the sequential format
If the current infobase contains the event log in SQLite format, you can convert it to the sequential format. Reverse conversion is not supported.
Depending on the infobase mode, different types of access to the infobase file are required to change the log format:
-
File mode: exclusive access to the infobase file is required.
-
Client/server mode: format can be changed while users are signed in. Where:
-
When you change the log format, no log events can be lost, even those that were written during and after the format change.
-
If an error occurs during event log conversion from SQLite to sequential format, the log retains SQLite format if the error occurs while writing the sequential log; or the log retains sequential format if the error occurs while reading from the SQLite log.
-
When you change the format, a corresponding event is recorded to the event log: Infobase. Event log settings update ($InfoBase$.EventLogSettingsUpdate). The comment indicates to which format the event log was converted.
If the current event log is in SQLite format, the following dialog box appears when you open the event log setup form.
If you click Switch to sequential format (recommended), you will see the setup dialog box of event log conversion. The dialog box looks as follows:
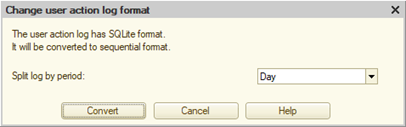
Fig. 61. Converting to sequential format
During conversion, you can also enable the event log splitting by periods.
Once you successfully change the event log format to the sequential one, delete the event log file in SQLite format.
6.14. Technological log
6.14.1. General information
1C:Enterprise supports maintenance of technological log storing information from all 1C:Enterprise applications.
The technological log is intended as an assistance tool for 1C technical support service to diagnose and detect errors in 1C:Enterprise applications and to analyze the technological characteristics of application performance.
The components and properties of the technological log may change when the platform updates are released.
Since the technological log is a set of text files stored in different directories, it can be used by application developers to analyze operating modes of the 1C:Enterprise and applications.
The technological log can be stored on any computer where 1C:Enterprise is installed. The technological log settings are stored in a configuration file that describes:
-
Directory where the technological log files are kept.
-
Types of data written to the technological log.
-
Retention time of technological log files.
-
Structure of storing technological log files, rotation rules, format, and whether to archive files.
-
Parameters of dump files generated on application crash.
By default, no configuration file is available. This means that the technological log is enabled and configured to keep the minimum dumps into the following directory on application crash (on Windows):
%LOCALAPPDATA%\1C\1cv8\dumpsIf necessary, you can configure the event log by using a separate configuration file. This file must have logcfg.xml name and be located in the 1C:Enterprise configuration files directory. For details on the structure and capabilities of the configuration file, see logcfg.xml.
Every 60 seconds, 1C:Enterprise automatically polls the configuration files directories for logcfg.xml file and, if found, analyzes its content. Thus, you can modify the parameters of the technological log immediately, without having to restart the 1C:Enterprise applications.
The configuration file allows you to specify various settings that will help you structure the technological log, select its format, and configure the lifetime of the log files.
You can configure crash dump generation using the technological log configuration file only if the system is running Windows. When running Linux or macOS, dump generation is configured using the tools of these operating systems.
6.14.2. Technological log configuration file
A basic configuration file looks like this:
<config xmlns="http://v8.1c.ru/v8/tech-log"><log location="c:\1c\logs" history="1"><event><eq property="name" value="conn"/></event></log><dump location="c:\1c\dumps" create="1" type="2"/></config>This configuration file specifies that:
-
All events of establishing or losing connection to the server are written to the technological log.
-
Technological log files are located in the C:\1c\logs directory.
-
Technological log files are stored for 1 hour.
-
Dump files are placed in the C:\1c\dumps directory.
-
Dump files contain all available information (the entire process memory).
If the configuration file is not available, the following parameters are used:
-
Technological log is disabled.
-
Technological log is enabled by default (see Default technological log).
-
Dumps of the minimum size.
-
Dumps are saved in the %LOCALAPPDATA%\1C\1cv8\dumps directory of the current user profile.
The configuration files in Linux and macOS are almost identical to Windows, with the following exceptions:
-
The configuration file must be located in the 1C:Enterprise configuration files directory.
-
The directory where the technological log will be generated must be writable for the user on whose behalf the application (server, client applications, web server extensions, and so on) writing data to the technological log is running.
6.14.3. Default technological log
The default technological log is intended to record events that occur in emergencies (as determined by 1C:Enterprise). A fixed event filter is automatically created for this log; this filter cannot be changed.
The default technological log has the following settings:
-
The default directory with technological log files:
-
Windows: %LOCALAPPDATA%\1C\1cv8\logs.
-
Linux: ~/.1cv8/1C/1cv8/logs.
-
macOS: ~/.1cv8/1C/1cv8/logs.
-
-
Records are deleted from the default technological log after 24 hours.
-
SYSTEM events with the ERROR level are written to the default technological log.
You can change these settings using the <defaultlog> element. To configure the event generation rules for the default technological log, use the <system> element.
6.14.4. Technological log structure
The technological log is a directory with subdirectories containing files with accumulated technological data. For the description of technological log files, see Technological log files. For the description of configuration file of technological log, see logcfg.xml.
6.14.5. Setting up memory dump generation
For details on how to configure generation of crash dumps of the 1C:Enterprise system components, see \<dump>.
6.14.6. Sample technological log files
In the examples below, it is assumed that 1C:Enterprise is installed in the default directory C:\Program Files\1cv8.
Please take note that volume of the technological log can be significant. Therefore, you need to ensure there is enough free space on the disk where the technological log files will be stored.
Below are some examples of logcfg.xml files containing the most common technological log configurations.
6.14.6.1. Technological log is disabled
If the logcfg.xml file is missing in the 1C:Enterprise configuration file directory, the technological log is not created. If the logcfg.xml file is required to configure dump generation properly, it should contain no log elements. In the following example, it is defined whether to generate a complete dump on application crash. Dump files are saved to the C:\v8\dumps directory.
<config xmlns="http://v8.1c.ru/v8/tech-log"><dump location="C:\v8\dumps" create="1" type="3"/></config>6.14.6.2. Full technological log
The configuration file below is for writing all events, together with all properties, to the technological log. The log will be retained for 1 week (168 hours). The volume of the technological log files will be very large; however, it can be useful for analyzing complicated emergencies. This configuration is recommended for use during the testing phase and during error investigation.
<config xmlns="http://v8.1c.ru/v8/tech-log"><log location="C:\v8\logs" history="168"><event><ne property="name" value=""/></event><property name="all"></property></log></config>6.14.6.3. Database calls
The following configuration file specifies that the technological log will contain only 1C:Enterprise database calls and error information. The volume of the technological log files is less than for the full technological log, but it still can be significant.
<config xmlns="http://v8.1c.ru/v8/tech-log"><log location="C:\v8\logs" history="168"><event><eq property="name" value="dbmssql"/></event><event><eq property="name" value="dbpostgrs"/></event><event><eq property="name" value="db2"/></event><event><eq property="name" value="dboracle"/></event><event><eq property="name" value="excp"/></event><property name="all"></property></log></config>6.14.6.4. Administrator actions and errors
This configuration file creates a compact technological log that contains information about starting and closing applications, establishing and closing connections with the 1C:Enterprise server cluster, cluster administrator actions, and 1C:Enterprise errors. This detail level is generally sufficient for investigating errors both in the configuration and in the 1C:Enterprise platform.
<config xmlns="http://v8.1c.ru/v8/tech-log"><log location="C:\v8\logs" history="168"><event><eq property="name" value="admin"/></event><event><eq property="name" value="conn"/></event><event><eq property="name" value="excp"/></event><event><eq property="name" value="proc"/></event><event><eq property="name" value="qerr"/></event><event><eq property="name" value="scom"/></event><property name="all"/></log></config>6.14.6.5. Errors and long-running operations
This configuration file generates a technological log that includes all information from the previous example and information on all operations that take longer than 10 seconds. This can be useful for detecting user actions that required a long time to complete, for optimization purposes. The duration of events is expressed in hundreds of microseconds.
<?xml version="1.0" encoding="UTF-8"?><config xmlns="http://v8.1c.ru/v8/tech-log"><dump create="false"/><log location="C:\v8\logs" history="168"><event><eq property="name" value="admin"/><gt property="duration" value="100000"/></event><event><eq property="name" value="conn"/><gt property="duration" value="100000"/></event><event><eq property="name" value="excp"/><gt property="duration" value="100000"/></event><event><eq property="name" value="proc"/><gt property="duration" value="100000"/></event><event><eq property="name" value="qerr"/><gt property="duration" value="100000"/></event><event><eq property="name" value="scom"/><gt property="duration" value="100000"/></event><property name="all"/></log></config>6.15. Referential integrity monitoring
6.15.1. Basic concepts
A large portion of 1C:Enterprise data is stored in reference form. For example, when entering documents, many document attributes can be filled in by selecting a value from a value list or a document from a document list. Such attributes are references to the items of the respective lists.
Using references allows you to avoid storing multiple copies of the same data in different places. For example, after entering and printing a number of documents, it turned out that the name of the organization of the counterparty to which these documents were written out was indicated incorrectly. Since the counterparty name was entered into the documents by selecting a value from the list of counterparties, it is enough to edit the counterparty name only in the list. The changed name will be reflected in the documents automatically and it will be enough just to rebuild the print forms.
However, if you remove the counterparty from the list, all the documents where it was used will contain so-called "unresolved references". These are references to a non-existent object.
To avoid such situations, 1C:Enterprise includes a feature for referential integrity monitoring, which will be discussed further in this section.
The referential integrity monitoring feature implements a two-stage procedure for deleting data objects referenced in lists or documents.
During the first stage, the user marks the objects for deletion. At the same time, an object marked for deletion is practically no different in use from an ordinary object.
At the second stage, the system administrator or another person with the corresponding rights (the InteractiveDeleteMarked right for respective types of lists and documents) performs a special procedure to delete marked objects. This procedure is implemented as the standard Delete marked objects function (see Standard functions). During this procedure, all references to marked objects are analyzed. Only objects that are not referenced or referenced to objects also marked for deletion can be deleted.
In fact, the procedure for deleting objects marked for deletion is a scheduled procedure. It is recommended that you perform this procedure on a regular basis as the marked objects accumulate over time.
6.15.2. Enabling referential integrity monitoring
1C:Enterprise allows you to delete unnecessary or outdated information in two modes:
-
Direct object deletion. It is not analyzed whether an object to be deleted is used in other database objects.
-
Referential integrity monitoring. Objects are first marked for deletion and then availability of references to these objects in other objects is checked.
If the user works in direct deletion mode, additional responsibility is put on the user and on the system administrator that assigns user rights and determines system response to unresolved links. Referential integrity monitoring may be disabled, for example, for application debugging purposes. If referential integrity monitoring is not used, the objects are deleted directly without marking them for deletion, and unresolved references might appear.
The most radical method to enforce referential integrity monitoring is to disable the rights to directly delete objects for the entire configuration. This ensures that users cannot directly delete any objects in the application. The users will only be able to mark objects for deletion.
Rights for direct deletion, marking for deletion, and clearing deletion marks are granted for each type of configuration objects separately. If the selected set of rights (role) is assigned the InteractiveDelete right for an object type, users with this role can directly delete objects of this type. Rights are granted during application development stage.
The right to mark objects for deletion and clear deletion mark is granted in a similar way.
Of course, only disabling the InteractiveDelete right in the configuration ensures that all users use the referential integrity monitoring feature consistently.
6.15.3. Direct deletion of objects
If the referential integrity monitoring mode is not used (the InteractiveDelete right is granted to a specific user for a specific type of configuration objects), the user can use the Delete directly menu item (Shift + Del key combination or the matching toolbar button) to delete objects from lists of lists or document journals. The objects will be deleted without checking whether they are referenced by other objects.
6.15.4. Setting and clearing deletion marks
When using the referential integrity monitoring feature in lists of lists or document journals, Mark for deletion/Unmark for deletion item is available in the More (All actions) menu. Select this menu item to mark an object for deletion. Objects marked for deletion are marked with a crossed-out object icon on the left.
Clicking More actions – Mark for deletion / Unmark for deletion (All actions – Mark for deletion / Unmark for deletion) marks an object for deletion. If an object is already marked for deletion, it removes the deletion mark from it.
Ability to set or clear deletion marks is also regulated by access rights of a user (separate rights are required for setting and clearing deletion marks).
6.15.5. Using objects marked for deletion
Mostly objects marked for deletion are used in the same way as regular objects. They are displayed in lists, they can be searched for, and so on. Objects marked for deletion can be opened and modified normally.
Documents marked for deletion cannot be posted. If you attempt to post a document marked for deletion, an error message is displayed and the document is not posted.
6.16. Standard functions
Standard functions is a set of system tools designed to perform various service operations that might be required for infobase administration.
You can access standard functions only in 1C:Enterprise mode. To get access to standard functions, you must enable the respective parameter in the settings window (Service – Parameters – Technician mode).
Below is a complete list of standard functions with their brief descriptions.
| Brief description | |
|---|---|
| Active users | Displays a list of users currently signed in to 1C:Enterprise.
Access requires the ActiveUsers right. |
| Authentication lock | Allows you to view the list of users for whom authentication is locked and to unlock them. Allows you to configure the automatic user lock upon password attack.
For a description of the automatic user lock, see By default, when password is under attack. |
| Additional authentication settings | Provides access to additional authentication settings of the infobase. |
| Event log | Allows you to view the event log.
Access requires the
|
| Data change history | Allows you to view the data change history. In terms of viewing history, this standard function is similar to the form that opens by clicking Change history in the form of the object item whose data history is enabled. In terms of filtering and functions to be executed, the standard function provides more options.
To access it, you need rights related to the data history of certain objects. |
| Configuration license | Allows you to specify 1C:ITS Portal access parameters to check the application license validity.
For more information on protection against misuse of applications, see Protection against misuse of applications. |
| Event log settings | Provides access to the infobase event log settings.
For a description of a similar Designer dialog box, see Event log settings. |
| Infobase parameters | Provides access to the setup dialog box of infobase parameters.
For a description of a similar Designer dialog box, see Infobase parameters. |
| Find references to objects | Allows you to find objects that refer to a selected object. |
| License acquisition | Allows you to activate a software license (without using Designer). |
| Users | Provides access to the list of infobase users. Allows you to edit the list of users. |
| Document posting | Allows you to post and re-post documents for the selected period. Allows you to restore posting sequences in the configuration. |
| Regional infobase settings | Allows you to edit regional settings of the infobase. |
| Mobile application build service | Provides access to the mobile application builder service. |
| Delete marked objects | Allows you to delete objects marked for deletion. |
| Managing external data sources | Provides access to the setup dialog box to configure parameters of connection to external data sources.
To display an external data source, you need the Use right. To edit parameters of connection to an external data source, you need the Administration right. |
| Totals management | Allows you to perform scheduled operations with registers. |
| Database copies management | Allows you to create database copies and generate a structure of copies to be created. |
| Management of error processing settings | Allows you to configure the view of errors (by categories) for all or certain users in the current infobase.
Access requires the DataAdministration right. |
| Full-text search management | Allows you to manage full-text search. |
| Speech recognition management | Allows you to manage the speech recognition functionality on 1C:Enterprise platform. |
| Configuration extensions management | Allows you to manage configuration extensions in 1C:Enterprise mode.
Access requires the ConfigurationExtensionsManagement right. Users may need the Administration right to specify the security profile for the extensions activated. |
| Server management | Provides access to the dialog box of 1C:Enterprise server cluster administration. You can access only those servers for which the administration server of the server cluster is deployed.
This standard function is similar to a cluster console that runs only under Windows. |
| Management of integration services | Allows you to manage integration services in the configuration. |
| Analytics system management | Allows you to configure the interaction between 1C:Enterprise and 1C:Analytics. |
| Collaboration system management | Allows you to register an infobase with 1C:Dialog. |
| Database tablespace management | Allows you to manage user database tablespaces. |
| Binary data storage management | Allows you to manage the binary data storage in server infobase mode. |
To call a standard function, open the Functions for technician window, select the Standard functions branch, and select the required standard function from the list (if it is available).
For more information about standard functions, see the help.
Chapter 7. Standalone server
7.1. General information
Standalone server is a special server application that is used to perform operations with an infobase of a managed application of any client application and Designer. The client application and the standalone server can interact over HTTP and TCP/IP (depends on the standalone server settings). At each moment of time, a standalone server allows you to work with one database. To work with different databases, simultaneous operation of multiple instances of a standalone server is supported. The database can be either a database of one of the supported DBMS or a 1Cv8.1CD file.
A standalone server contains a built-in web server. Therefore, the publication of an infobase does not require the presence of an external (relative to the 1C:Enterprise system) web server.
A standalone server provides a list of capabilities that are basically the same as the capabilities of a server cluster of the same version (including when working with a file version of the infobase). The administration and management tools for a standalone server are significantly different from those for a server cluster. A special command line utility is designed to administer a standalone server (ibcmd).
A standalone server is an application (ibsrv), which implements everything necessary for the operation of the 1C:Enterprise server. A standalone server uses components of the installed 1C:Enterprise instance of its own version.
See also:
-
Command line of the administration utility.
-
Command line of the standalone server.
7.2. Specifics and limitations
A standalone server does not support the following features:
-
Serving multiple infobases with one standalone server.
-
Operation of several standalone servers with one infobase.
-
Operations with an ordinary application. The standalone server can maintain only managed application infobases.
-
Standalone server tools (the standalone server itself and the server management utility) in infobases that are currently running on 1C:Enterprise server cluster. Attempts to use the standalone server tools in these infobases might destroy the used database.
-
Operation with the infobase using an external connection (COM connection).
-
Microsoft SQL Server if the standalone server runs on Linux.
-
Management of a standalone server using a ras server.
-
For a standalone server, there are no graphical management tools (analogous to the cluster console).
-
Using background restructuring.
-
Server management using the V83.ComConnector COM object.
-
Operation via HTTPS. To use the standalone server over HTTPS, use an arbitrary web server that operates in reverse proxy mode and ensures operation of the client application over HTTPS.
-
Using operating system authentication.
-
Operation with 1C:Analytics.
-
Using integration services.
-
Using collaboration system bots.
-
Loading the configuration from XML files that were exported in linear format.
7.3. Using the feature
7.3.1. System requirements
The system requirements for a standalone server are similar to the system requirements for 1C:Enterprise server cluster. This is also true when using infobase file mode. This rule has the following exceptions:
- Standalone server is not supported on 32-bit Windows OS.
7.3.2. Installation
A standalone server is installed at the same time as the 1C:Enterprise server cluster. Separate actions to install a standalone server are not required.
7.3.3. Standalone server startup
7.3.3.1. General information
The standalone server and the server management utility are started from the command line. Specify all the required parameters in the standalone server configuration file or startup command line. Information about performing a specific action is output to a standard output stream (stdout). If successful, the return code is equal to 0. Otherwise, the return code is non-zero and an error message will be sent to the standard error stream (stderr).
In the documentation, you can find a command line description for both the standalone server (see Standalone server (ibsrv)) and the administration utility (see Standalone server administration utility (ibcmd)). The standalone server and the server management utility also contain built-in Help. To get a reference information, use the following option to run utilities:
ibsrv helpibcmd helpIf you need to get a description of the selected server management utility mode (the example contains the help for the server mode), use the following command:
ibcmd help serverYou can save the help for further use via operating system tools for standard output stream redirection:
ibcmd help server > .\server.descWhen a standalone server (ibsrv) is running, connection to the database is implemented in a shared mode.
See also:
-
Command line of the standalone server (see Standalone server (ibsrv)).
-
Command line of the administration utility (see Standalone server administration utility (ibcmd)).
7.3.3.2. Standalone server startup
A standalone server can be started as a regular operating system application, as well as an operating system service (for Windows OS) or in daemon mode (for Linux OS).
A standalone server does not provide built-in tools for registering itself as a service of the operating system. Management tools (start and stop) are also not provided by the service. For these operations, you should use the operating system tools (sc utility).
The standalone server configuration file is used to specify standalone server instance parameters. The configuration file is used both by the server and administration utility. You can specify certain server parameters using the command line (both of the server and management utility) or a configuration file. The last option allows you to manage all the standalone server parameters, except for location paths of internal standalone server directories (see Specify the location of the standalone server service directories). There is no default location for the standalone server configuration file. Each time you start the standalone server (or the management utility), specify the location of this file. Generate a configuration file of the standalone server in the YAML format. For its description, see Standalone server configuration file.
When starting a standalone server, do not forget about following features:
-
When starting a standalone server, the parameters necessary for its operation are defined as follows:
-
The values of all parameters specified in the startup command line are received.
-
An attempt to get values of the remaining parameters using the server configuration file is made.
-
If you cannot get the values of the remaining parameters using the server configuration file, the default values are used.
-
The parameter values specified in the startup command line have priority over the values from the configuration file.
-
-
Create a server configuration file using a special command (ibcmd server config init) or manually.
-
Either one standalone server instance or one server management utility can operate with the same data directory at the same time. Specify a data directory (the --data parameter) for simultaneous operation of several standalone server copies or for almost any operation with the standalone server.
-
Only one application from the following list can operate with the same database at the same time:
-
Standalone server.
-
Standalone server management utility (in offline mode).
-
1C:Enterprise server cluster.
-
Client applications running in the file mode upon direct connection (not via a standalone server).
-
When describing the start command line, it is assumed that the start is executed from the bin directory of the required version of the 1C:Enterprise system.
- Application start, file option
- Start a standalone server to use a file infobase. The infobase data directory is located in c:\db\ss-data\demo. In this case, all operating parameters of the standalone server will be set to default values.
ibsrv --data="c:\db\ss-data\demo"The infobase file (1Cv8.1CD) is located in the following directory: c:\db\ss-data\demo\db-data.
If you start the standalone server with absolutely no parameters, the standalone server will attempt to start with file mode of the infobase, which is located in the default data directory.
- Application start, client-server mode
- The standalone server is started to operate with client/server mode of the infobase, which has the following parameters:
-
Microsoft SQL Server DBMS is used.
-
To access the DBMS, the dbUser user with the dbUserPassword password will be used.
-
The database name in DBMS is dbName.
-
It is assumed that the database exists and is truly a 1C:Enterprise database.
ibsrv --dbms=mssqlserver --database-server=dbServerName --database-user=dbUser --database-password=dbUserPassword --database-name=dbName --data="D:\ss-data\dbName-data"If both commands (--database-path and --dbms) are not specified when starting the standalone server, the standalone server will be started with the file infobase, which is located in the following directory:
-
Windows: %LOCALAPPDATA%\1C\1cv8\ss-data\db-data.
-
Linux: ~/.1cv8/ss-data/db-data.
- Server registration service (Windows OS)
- In order to register a standalone server as a Windows OS service, you can use the following command file (or take it as a basis for further upgrades).
Register-ss.bat file:
@echo offrem %1. Full 1C:Enterprise version number.rem %2. Instance number of the registered service.rem %3. Server configuration file location.rem %4. Infobase data directory.set SrvcUserName=<standalone server user>set SrvcUserPwd=<password of the standalone server user >set SrvcName="Standalone server %2"set BinPath="\"C:\Program Files\1cv8\%1\bin\ibsrv.exe\" --service --config=\"%~3\" --data=\"%~4\""set Desctiption="1C:Enterprise 8.3 Standalone Server. Parameters: %1, instance #%2, data directory %4"sc stop %SrvcName%sc delete %SrvcName%sc create %SrvcName% binPath= %BinPath% start= auto obj= %SrvcUserName% password= %SrvcUserPwd% displayname= %Desctiption%When starting this command file, the following parameters are used:
-
The full number of 1C:Enterprise version from which a standalone server will be used.
-
The instance number of the service to register. In the above example, the existence of a service with the given number is not checked. Due to the fact that the standalone server serves one database, with this parameter you can register your OS service for each served infobase.
-
The full path to the configuration file for this instance of the standalone server (must be enclosed in double quotes). This configuration file must contain all parameters used to start the standalone server, including database parameters. Different service instances must have their own configuration files.
-
The full path to the infobase data directory. This directory contains infobase service data: an event log, a full-text search index, a temporary directory, and so on.
Example of starting the command file (administrator rights are required):
register-ss.bat 8.3.24.100 2 "d:\1C DB\ss-data\demo\demoma.yml" "d:\ss-data\demoma"After starting the command file with these parameters, the following actions will be executed:
-
Service name: Standalone server 2.
-
1C:Enterprise version: 8.3.24.100.
-
Command line for service startup: "C:\Program Files\1cv8\8.3.24.100\bin\ibsrv.exe" --service --config="d:\1C DB\ss-data\demo\demoma.yml" --data="d:\ss-data\demoma".
-
Displayed name: 1C:Enterprise 8.3 Standalone Server. Parameters: 8.3.24.100, instance #2, data directory d:\ss-data\demoma.
-
Service start mode: Automatic.
In this case, the following operating system commands should be used to manage the service:
-
Start service: sc start "Standalone server 2"
-
Stop service: sc stop "Standalone server 2"
-
Delete service: sc delete "Standalone server 2"
By the time the service starts, the configuration file must contain all the necessary parameters for starting the standalone server.
- Server start in daemon mode (Linux)
- To start a standalone server in daemon mode on Linux OS, execute the following command:
ibsrv --daemon --config="configuration file path" --data="data directory path"By the time the standalone server starts in daemon mode, the configuration file must contain all parameters required to start the standalone server.
See also:
- Configuration file of the standalone server (see Standalone server configuration file).
7.3.4. Connecting to standalone server
The client application can connect to the standalone server similarly to the connection to the server cluster. Connection can be established over HTTP or TCP/IP. If you connect over HTTP, you can connect a client application only. If you connect over TCP/IP, you can use a thin client application and Designer.
When you connect over TCP/IP, make sure that the name of the infobase which is specified in the connection parameters of the client application and the name of the infobase which is specified during the standalone server startup are the same (the --name command of the command line for standalone server startup or the respective parameter of the configuration file). If the names are different, the client application cannot connect to the infobase.
Let us assume that the standalone server (for the file infobase) is started using the following command:
ibsrv.exe --name=docs-db --data="D:\ss-data\fs-data"In this case, start Designer using the command line (from the same computer where the standalone server is running) that looks as follows:
1cv8.exe designer /S localhost\docs-dbAs a result, Designer will be started. It will connect to the infobase served by the standalone server.
If you change the infobase name, for example, if you use this startup line:
1cv8.exe designer /S localhost\docsdbA dialog box where you can create a new infobase appears.
To connect the thin client, use the following startup line (the first one is for connecting over HTTP, the second one is for direct connection to a standalone server):
1cv8c.exe enterprise /WS"http://localhost:8314"1cv8.exe enterprise /S localhost\docs-dbTo start the web client, specify the URL of the following type to the browser:
http://localhost:8314All settings are given for the default state. If publication parameters were changed in the settings, edit the respective startup line so that it corresponds to the parameters for starting the standalone server.
7.3.5. Standalone server management
7.3.5.1. Standalone server connection methods
7.3.5.1.1. General information
As mentioned above (see Standalone server startup), you can specify standalone server parameters using the configuration file or the startup command line. There are several ways to specify the instance of a managed standalone server:
- The --data command-line parameter of the ibcmd utility. In this case, the management utility performs actions with the infobase that is described by the data directory specified in the --data parameter. This management mode can be referred to as offline mode since you do not need a standalone server instance to execute commands. If a standalone server instance runs with a data directory, offline management mode is unavailable.
- The --pid command-line parameter of the ibcmd management utility. In this case, the management utility connects to a standalone server instance running on the same computer where the ibcmd utility will be running. The --pid parameter value is an operating system process number of the running standalone server instance. The process number is specified in values of the operating system where the standalone server is running.
For example: --pid 16453.
- The --pid command-line parameter of the ibcmd management utility. In this case, the management utility connects to a standalone server instance running on a remote computer. The standalone server running on a remote computer must be configured so that it provides access to the infobase and the server over SSH protocol. The standalone server instance is identified using a URL and a port that hosts the standalone server.
For example: ssh://server1C:8282.
You do not need to specify the --data parameter or other parameters that describe the infobase access parameters if a "remote" server is administered. The standalone server already contains all the required information. It is specified in the configuration file or the ibsrv startup command-line parameter. Any instance of the standalone server started using the --pid or --remote parameters is considered "remote" in this case.
Not all management utility commands are available for a "remote" standalone server. Unavailable commands are listed below in the respective sections.
When you use the standalone server, an infobase session is created to perform commands that use access to the infobase. The user on whose behalf the session is created must have access rights to perform an action that is initiated by the command to be performed. If a command sent to the standalone server does not require access to the infobase but requires full access to the server (for example, to receive the session list), this command must be performed on behalf of the user with administration rights in the infobase that is serviced by this standalone server instance. Authentication is performed either interactively or using command-line options:
-
Specify a username: --user.
-
Specify a user password: --password.
The standalone server is administered with a restriction. If a directory is specified as a data directory of the running standalone server instance (the --data parameter), this directory cannot be used in the following cases:
-
When starting another standalone server instance.
-
When the administration utility operates in offline mode.
The order of session creation and authentication:
-
If access is provided via a remote connection (SSH), a session is created on behalf of the user who is authenticated in the SSH gateway.
-
If access is provided via a local connection (a standalone server instance is selected on a local computer) or a configuration file is being configured, a session is created on behalf of 1C:Enterprise user with full administration rights.
7.3.5.1.2. Offline mode
The standalone server can perform all management utility commands. It can operate only on the same computer as the infobase data directory. The standalone server and the management utility cannot use the same infobase data directory (the --data parameter).
7.3.5.1.3. Connecting to a standalone server instance on a local computer
When you manage the standalone server using the management utility, you can use all the utility commands, except for the ones used to:
-
Initialize the standalone server configuration (all config commands).
-
Create an infobase (the ibcmd infobase create command).
-
Restore infobase integrity (the ibcmd infobase repair command).
7.3.5.1.4. Connecting to a standalone server instance over SSH protocol
When you manage the standalone server using the management utility, you can use all the utility commands, except for the ones used to:
-
Initialize the standalone server configuration (all config commands).
-
Create an infobase (the ibcmd infobase create command).
-
Restore infobase integrity (the ibcmd infobase repair command).
When SSH support is enabled for the standalone server, it can act not only as a server, but also as Designer running in the agent mode. In this mode, you can connect to the standalone server (except for the ibcmd utility) using third-party SSH and SFTP clients and perform certain commands. Commands that you can perform using SSH client are similar to Designer commands in agent mode, but only the following commands are supported:
-
help. Display help information for commands.
-
common. Common commands:
-
connect-ib. Connect to an infobase.
-
disconnect-ib. Disconnect from an infobase.
-
-
options. Configure the current session:
-
get. Get a parameter value.
-
list. Get a parameter list.
-
set. Set a parameter value.
-
-
config. Configuration editing commands:
-
dump-cfg. Save a configuration to a file.
-
dump-config-to-files. Dump a configuration to XML files.
-
dump-external-data-processor-or-report-to-files. Dump an external data processor/report to XML files.
-
extensions. Operate with configuration extensions.
-
generation-id. Get a generation ID for metadata.
-
load-cfg. Restore a configuration from a file.
-
load-config-from-files. Restore a configuration from XML files.
-
load-external-data-processor-or-report-to-files. Load an external data processor/report from XML files.
-
manage-cfg-support. Disable configuration support.
-
mobile-app-write-file. Save a mobile application configuration to a hard drive.
-
mobile-client-digi-sign. Generate a digital signature for the mobile client configuration.
-
mobile-client-write-file. Save a mobile client configuration to a hard drive.
-
sign-cfg. Digitally sign a configuration.
-
update-db-cfg. Update a database configuration.
-
-
infobase-tools. Get service information about an infobase:
-
data-separation-common-attributes-list. Get a list of common attribute names.
-
debug-info. Get information about the debugger.
-
dump-ib. Dump an infobase to a file.
-
erase-data. Delete infobase data.
-
restore-ib. Restore a configuration from a file.
-
Files and directories created using SFTP are placed in the user data directory.
See also:
- Designer in agent mode (see Running Designer in agent mode).
7.3.5.2. Available standalone server features
You can manage the availability of standalone server features. To do it, use special startup command line parameters or parameters of the features section of the configuration file. You can manage the following features:
-
A gateway for direct connection to a standalone sever over TCP/IP. If the gateway is disabled, you cannot connect with the thick client or, in general, any client application that connects over TCP/IP. Debugging over TCP/IP also becomes unavailable.
-
Enable the gateway: --enable-direct-gate or the direct-gate: true parameter of the features section in the configuration file of a standalone server.
-
Disable the gateway: --disable-direct-gate or the direct-gate: false parameter of the features section in the configuration file of a standalone server.
-
By default, the gateway is enabled.
-
-
A gateway for connection to a standalone server over HTTP. If this gateway is disabled, connection over HTTP becomes unavailable for all client applications, including web client, mobile client, and other. Debugging over HTTP also becomes unavailable.
-
Enable the gateway: --enable-http-gate or the http-gate: true parameter of the features section in the configuration file of a standalone server.
-
Disable the gateway: --disable-http-gate or the http-gate: false parameter of the features section in the configuration file of a standalone server.
-
By default, the gateway is enabled.
-
-
A gateway for connection to the infobase over SSH protocol. Besides, you can execute commands using these protocols.
-
Enable the gateway: --enable-ssh-gate or the ssh-gate: true parameter of the features section in the configuration file of a standalone server.
-
Disable the gateway: --disable-ssh-gate or the ssh-gate: false parameter of the features section in the configuration file of a standalone server.
-
By default, the gateway is enabled.
-
-
Availability of extended Designer functionality. If it is disabled, you cannot use some standalone server capabilities, for example, save configurations for mobile devices to a file.
-
Enable the gateway: --enable-extended-designer-features or the extended-designer-features: true parameter of the features section in the configuration file of a standalone server.
-
Disable the gateway: --disable-extended-designer-features or the extended-designer-features: false parameter of the features section in the configuration file of a standalone server.
-
By default, the gateway is disabled.
-
See also:
-
Standalone server gateways.
-
Managing standalone server capabilities.
7.3.6. Debugging using the standalone server
7.3.6.1. General information
The standalone server supports all debug protocols, including an external debug server when using HTTP. To enable debugging, use the --debug command-line parameter or the debug section in the configuration file. Debugging capabilities over TCP/IP or HTTP depend on the availability of the corresponding gateways in the standalone server configuration.
To enable debugging in a standalone server, specify the --debug parameter in the server startup command line. In this case, a debug method depends on the standalone server settings. The debug method is selected as follows:
-
Debugging over TCP/IP if the direct connection gateway is not disabled.
-
Debugging over HTTP if the gateway for connection over HTTP is not disabled.
-
Debugging over HTTP using an external debug server if the external server parameters are specified in the command line (--debug-server-url) or in the configuration file.
-
Debugging is disabled in all other cases.
So, if the default debug mode is enabled for a standalone server, without specifying the debug mode, and both gateways (direct connection and HTTP) are enabled, debugging will be performed over TCP/IP. If you need to select another debug method in such case, specify it in the --debug parameter value (with respective commands) or in the configuration file.
You cannot use both debugging protocols (TCP/IP and HTTP) at the same time. So, if you need to use a certain debug method, we recommend that you specify this method in the --debug parameter value or in the configuration file.
See also:
-
The gates section of the configuration file of the standalone server (see gates).
-
The debug section of the configuration file of the standalone server (see debug).
7.3.6.2. Using an external debug server
For the standalone server to use an external debug server, run an external debug server and specify its connections in the standalone server settings. The scheme of debugging is as follows:
-
The debug server starts.
-
The standalone server starts. For this server, an option of using the debug server started in the previous step is indicated. The infobase configuration of the standalone server must completely match the configuration you plan to debug.
-
The standalone server infobase will be used to receive the configuration structure and source texts. While debugging, data will be received from the database under debugging.
When starting the standalone server, you must specify the location of the debug server. To do it, use the --debug-server=<dbgs-address> command. The debug server address is formed from the name of the computer on which the debug server is running, and the port number specified at startup. To start by default, use the http://localhost:1550 address.
The standalone server can be started with the address of the debug server when the debug server is not physically started. You can start the debug server later when debugging is required.
See also:
- Application debugging.
7.3.7. Dumping an infobase to a file
Using the standalone server management utility (ibcmd), you can dump an infobase to a DT file. To do this, use the command:
ibcmd infobase dump --dbms=mssqlserver --database-server=dbServerName --database-user=dbUser --database-password=dbUserPassword --database-name=docs-db --data="d:\ss-data\dbName-data" 1cv8.dtWhen you execute this command, make sure that the infobase to be dumped to a DT file has no connections. Due to this restriction, several server applications (both standalone and ordinary) cannot operate with the infobase to be dumped at the same time. Otherwise, it can lead to integrity violation of the infobase dump file to be created (DT file).
You also need to remember that infobase dumping is not used for infobase backup. To back up a database, use the respective tools (see Infobase backup).
7.4. Examples of managing and starting the standalone server
7.4.1. General information
This section contains examples of managing and starting the standalone server. Note that the examples provided in this section are not complete. They are intended to demonstrate some features of working with the standalone server.
When configuring the standalone server operation parameters, it is always recommended to explicitly set the name of the infobase with which the standalone server works. To do it, use:
-
The infobase.name parameter in the configuration file of the standalone server.
-
The --name command-line parameter.
In the examples, there may be no explicit indication of the name of the infobase, which was done in order to reduce the size of the examples. When execute real actions, is strongly recommended to specify the infobase name.
To execute management utility (or standalone server) commands, you must completely identify the infobase and infobase data directory using one of the following methods:
-
Use startup command-line parameters (to operate on a local computer).
-
Specify a path to the standalone server configuration file in the startup command line (to operate on a local computer).
-
Specify a standalone server instance on a local or remote computer.
Infobase operations require authentication. To specify a user and a password, use the --user and --password command-line parameters. In the examples, we will use the ibuser user with password 123. Obviously, this password cannot be used in real systems for security purposes.
See also:
- Configuration file of the standalone server (see Standalone server configuration file).
7.4.2. Create a configuration file using command line parameters
ibcmd server config init --dbms=postgresql --database-server=dbServerName --db-user=dbUser --database-password=dbUserPassword --database-name=dbName --name=docsIB --http-base=/webAccessAs a result of executing this command, the following configuration file will be output to the standard output stream (stdout):
server:address: localhostport:database:dbms: PostgreSQLserver: dbServerNamename: dbNameuser: dbUserpassword: dbUserPasswordinfobase:id: 7b88938e-5aa8-4933-afea-8a9ec121724fname: docsIBdistribute-licenses: yesschedule-jobs: allowhttp:base: /webAccessYou can save this information to a file using the --out parameter of the ibcmd utility or the stdout redirection to the > file.ext file.
It is also worth noting that the standalone server running with such a configuration file will start the web client when accessing the http://localhost:8314/webAccess address.
See also:
- Configuration file of the standalone server (see Standalone server configuration file).
7.4.3. Create a configuration file by server infobase parameters
ibcmd server config import --cluster-data="d:\1C srvinfo" --name=demoma --out=d:\ss-cfgs\demoma.ymlAs a result of this command, the following configuration will be placed in the d:\ss-cfgs\demoma.yml configuration file:
server:address: localhostport: 8314database:dbms: MSSQLServerserver: <server name>name: <database name>user: sapassword: <user password>infobase:id: 1a39d42c-4da6-4f1c-bd78-98884d27578bname: demomadistribute-licenses: yesThis command imported information about the demoma infobase from a cluster whose data directory is located at d:\1C srvinfo address. Thus, if you need to start several infobases that are already registered in the working cluster using the standalone server, the parameters of these databases do not have to be manually transferred to the configuration file.
At the same time as importing information about the infobase, you can import publication data. To do this, specify the path to the default.vrd file in the import command line (--publication parameter):
ibcmd server config import --cluster-data="d:\1C srvinfo" --name=demoma --publication=c:\inetpub\wwwroot\demoma\default.vrd --out=d:\ss-cfgs\demoma.ymlIn this example, the demoma infobase and publication parameters specified in the c:\inetpub\wwwroot\demoma\default.vrd file will be imported. The import result will be a single configuration file of the standalone server. It should be remembered that the import mechanism of the publication file ignores the command line for access to the infobase, which is specified in the ib attribute of the point element of the default.vrd file. The user executing import should carefully indicate the parameters of the imported database and publication file.
See also:
- Configuration file of the standalone server (see Standalone server configuration file).
7.4.4. Create infobase from (*.cf) configuration file
ibcmd server config init --database-path="D:\ss-data\file-db\db-data" --name=docsIB --http-base=/webAccess --out="D:\ss-data\file-db\file-db.yml"ibcmd infobase create --config="D:\ss-data\file-db\file-db.yml" --load="D:\Cfgs\MyApp\1Cv8.cf" --data="D:\ss-data\file-db"This example consists of two steps:
- The first line generates a standalone server configuration file (ibcmd server config init).
- The second line creates an infobase and a database file based on the configuration file (ibcmd infobase create).
In general, the creation of the infobase based on the configuration file can be executed with one command. In this case, the choice of the solution method depends on several parameters, for example, the database parameters are set in one place of the information system, and the database is created in another, but using the configuration file created in the previous step. If you only need to create the infobase from the command line based on the configuration file, this action can be performed as follows:
ibcmd infobase create --data="D:\ss-data\fs-data" --database-path="D:\ss-data\file-db\db-data" --load="D:\Cfgs\MyApp\1Cv8.cf"After you execute any of the examples mentioned above, an infobase is created in the D:\ss-data\fs-db\db-data directory, and system operations will be output to the standard output stream (stdout):
[ INFO] Creating infobase...[ INFO] Infobase created[ INFO] Importing configuration...[ INFO] Configuration is importedIf by the time of command execution, the 1Cv8.1CD database file is created, the command execution completes with an error.
Creation of an infobase in client/server mode does not fundamentally differ from creating an infobase in file mode. Obviously, in case of the infobase in client/server mode, a larger number of parameters will be required:
ibcmd infobase create --dbms=mssqlserver --database-server=dbServerName --db-user=dbUserName --database-password=dbUserPassword --database-name=my-db --name=docsIB --data="D:\ss-data\cs-data" --create-database --load="D:\Cfgs\MyApp\1Cv8.cf" --applyAs a result, the my-db database will be created in Microsoft SQL Server. The configuration from the D:\Cfgs\MyApp\1Cv8.cf file will be imported to this database. Repeated command execution will cause an error as the database will already exist.
It should also be remembered that the command to create the infobase from the configuration file does not lead to the creation of the database configuration. In order for the database structure to correspond to the configuration used (to create the information database), you should use a specific parameter that is responsible for updating the database configuration:
ibcmd infobase create --dbms=mssqlserver --database-server=dbServerName --db-user=dbUser --database-password=dbUserPassword --database-name=my-db --name=docsIB --data="D:\ss-data\cs-data" --create-database --load="D:\Cfgs\MyApp\1Cv8.cf" --apply --forceIn this case, the output will contain information about updating the database configuration:
[INFO] Creating infobase...[INFO] Infobase created[INFO] Importing configuration...[INFO] Configuration is imported[INFO] Database configuration update...[INFO] Validating metadata...[INFO] Process database structure...[INFO] Processing data…[INFO] Collecting service information...…[INFO] Accepting changes...[INFO] Building help index...[INFO] Help index is built[INFO] Database configuration update completed.7.4.5. Load configuration from (*.cf) file
ibcmd infobase config load --user=ibuser --password=123 --dbms=mssqlserver --database-server=dbServerName --db-user=dbUser --database-password=dbUserPassword --database-name=docs-db --data="D:\ss-data\cs-data" --name=docsIB 1Cv8.cfibcmd infobase config apply --user=ibuser --password=123 --dbms=mssqlserver --database-server=dbServerName --db-user=dbUser --database-password=dbUserPassword --database-name=docs-db --name=docsIB --data="D:\ss-data\cs-data" --forceThe first command will actually restore the configuration to the infobase, and the second command will update the database configuration and restructure it if necessary.
Command execution result:
>ibcmd infobase config load …[INFO] Importing configuration...[INFO] Configuration is imported>ibcmd infobase config apply …[INFO] Database configuration update...[INFO] Validating metadata...[INFO] Accepting changes...[INFO] Configuration generation is created: 99bf6cd4045c8f43a86244a0dab4f24000000000[INFO] Database configuration update completed.It should be noted that the export file in this command is indicated without any named parameter. It is the last value in the command line. All commands that require a file as an input parameter will have the same feature.
Configuration generation information can be useful when you need to verify that the configuration has not changed relative to the last configuration update. The configuration generation that is received after the update (ibcmd infobase config apply) will be located in the update log (the [INFO] Configuration generation is created: line). You can get the current configuration generation using the ibcmd infobase config generation-id command. Information about the created configuration generation will be output when executing the config update-db-cfg command of Designer agent or when connecting to a standalone server over the SSH protocol.
To manage a dynamic infobase update, use the --dynamic parameter of the ibcmd infobase config apply command. This parameter allows you to deny dynamic update or force it.
7.4.6. Create an infobase from the export file (*.dt)
ibcmd infobase create --dbms=mssqlserver --database-server=dbServerName --db-user=dbUser --database-password=dbUserPassword --database-name=docs-db --data="D:\ss-data\cs-data" --create-database --restore=1cv8.dtCommand execution result:
[ INFO] Creating infobase...[ INFO] Infobase created[ INFO] Infobase import...[ INFO] Infobase importedAs a result of this command, the following actions will be executed:
-
The docs-db database will be created in Microsoft SQL Server with the dbServerName name.
-
To access the DBMS, the dbUser user is used. The dbUserPassword password is set for them.
-
If a database is not available, it is to be created.
-
After creating the database, information from the 1cv8.dt file is to be imported to the database. The file is located in the directory where the above command is started from.
7.4.7. Import data from the export file (*.dt) to the infobase
ibcmd.exe infobase restore --user=ibuser --password=123 --dbms=mssqlserver --database-server=dbServerName --db-user=dbUser --database-password=dbUserPassword --database-name=docs-db --data="D:\ss-data\cs-data" --database-name=dbName .\1cv8.dtCommand execution result:
[ INFO] Infobase import...[ INFO] Infobase importedNote that a DT file in this command is specified without any named parameter. It is specified as the last value in the command line.
If you need to import a DT file to the infobase that is currently being serviced by the standalone server, execute one of the following commands:
ibcmd.exe --pid=ProcessID infobase restore .\1cv8.dtibcmd.exe --remote=ssh://Server1C:8282 infobase restore .\1cv8.dtThese commands perform the same action but they have different location of the standalone server instance that restores the infobase from a DT file:
-
The --pid command is specified. The standalone server runs on the same computer as the ibcmd utility. ProcessID indicates the operating system process number of the running standalone server.
-
The --remote command is specified. The standalone server and the ibcmd utility run on different computers. ssh://Server1C:8282 indicates an address of the configured standalone server SSH gateway that imports the infobase.
See also:
-
Standalone server management (see Standalone server management).
-
Configuring access to a standalone server over SSH.
7.4.8. Starting the standalone server in debug mode
In the examples of this section, it is assumed that used gateways are not disabled in the configuration file of the standalone server (if used). If the required gateway is disabled, enable this gateway in the startup command line of the standalone server.
To debug using a standalone server over TCP/IP, start the standalone server as follows:
ibsrv --dbms=mssqlserver --database-server=dbServerName --db-user=dbUser --database-password=dbUserPassword --database-name=docs-db --name=docs-db --data="D:\ss-data\cs-data" --debug=tcpTo debug over HTTP, use the following command:
ibsrv --dbms=mssqlserver --database-server=dbServerName --db-user=dbUser --database-password=dbUserPassword --database-name=docs-db --name=docs-db --data="D:\ss-data\cs-data" --debug=http7.4.9. Request a DBMS user password over the standard input stream
The password for the DBMS user on whose behalf the standalone server is running is placed in the configuration file or command file in clear text. This situation may be unacceptable.
In this case, use the --request-db-pwd parameter to get the password from the standard input stream (stdin).
ibsrv --dbms=mssqlserver --database-server=dbServerName --db-user=dbUser --database-name=docs-db --name=docsIB --data=d:\ss-data\cs-data --request-database-passwordIf this command is specified, the standalone server will wait for the DBMS user password (dbUser in the example above) from the standard input stream. It should be remembered that the server will not invite the user to execute input in any way.
Another option for specifying a password is to redirect a file to stdin of the standalone server or to output another program:
ibsrv --dbms=mssqlserver --database-server=dbServerName --db-user=dbUser --name=docsIB --database-name=docs-db --data=d:\ss-data\cs-data --request-database-password < sqlpwd.txt7.4.10. Specify the location of the standalone server service directories
Various services of the standalone server use a disk drive to host service data while the standalone server is running. Different services use different directories for their work. By default, service directories are stored in the standalone server data directory. When you change the location of the data directory, the location of all other directories whose location is not specified explicitly changes. At the same time, the standalone server allows you to specify the individual location of various service directories:
| Standalone server command | Description |
|---|---|
| --binary-storage-data | Directory of the binary data storage.
Default directory: binary-storage-data of the server data directory. |
| --clnt-notif-data | The data directory of the client application notification service from the server side.
Default directory: clnt-notif-data of the server data directory. |
| --data | Standalone server data directory. In fact, it is a data directory of the infobase. This directory contains the rest of the service directories by default. The --data parameter is required unless you specify a running standalone server instance or standalone server parameters using a configuration file. |
| --db-path | 1C:Enterprise file database directory. If you use a relative path, the full path is received relative to the server data directory.
Default directory: db-data of the server data directory. |
| --ftext2-data | The full-text search index directory for full-text search version 2.
Default directory: --ftext2-data of the server data directory. |
| --ftext-data | Full-text search index directory.
Default directory: --ftext-data of the server data directory. |
| --log-data | Event log directory.
Default directory: --log-data of the server data directory. |
| --openid-data | Directory to store OpenID authentication contexts.
Default directory: openid-data of the server data directory. |
| --session-data | Session data directory.
Default directory: session-data of the server data directory. |
| --temp | Directory of temporary infobase files. It should also be noted that temporary files used by the standalone server itself are created in the temporary files directory of the user on whose behalf the server is running. This directory can be redefined using the TEMP operating system environment variable.
Default directory:
|
| --users-data | User configuration data directory.
Default directory: users-data of the server data directory. |
7.4.11. Infobase publication
"Publication" of the infobase for operating via web server is performed automatically when the standalone server starts. The standalone server acts as the web server. The standalone server provides the same web server access features as a regular publication: web client, thin client via a web server, Internet services, and standard OData interface. The ability to use one or another access method is controlled by the configuration file parameters, with the help of which it is possible to manage the publication parameters.
Some of the publishing parameters can be changed using the standalone server command line:
-
--http-base. Allows you to specify a path to a resource that will be used to access the application. The default path is /. This means that you can log in to the web client at http://localhost:8314 address (for default settings). If you specify a value for this parameter, for example, --http-base=/standalone/example, then to access the application you will need to use the http://localhost:8314/standalone/example address.
-
--http-port. Network port to be used to access the application. The default value is 8314.
-
--http-address. This parameter describes which network interface of the computer will be used to access the publication. The default value is localhost. Other possible values:
-
any. Use all available network interfaces.
-
xxx.xxx.xxx.xxx. Use the network interface to which the specified IPv4 address is assigned.
-
xxxx:xxxx:xxxx:xxxx:xxxx:xxxx:xxxx:xxxx. Use the network interface to which the specified IPv6 address is assigned.
-
Let's consider a simple example. Suppose we have the standalone server operating with the infobase in file mode. This standalone server is started by the command line:
ibsrv --database-path="c:\db\ss-data\demo"In this case, the infobase of this server will be accessible at http://localhost:8341 when accessed from the computer on which the standalone server is running.
Suppose you want to provide web access to this infobase at the http://<pc-addr>:8080/standalone/demo address. For that, start the standalone server with the following command line:
ibsrv --database-path="c:\db\ss-data\demo" --http-base=/standalone/demo --http-port=8080 --http-address=<pc-addrt>In this example, the <pc-addr> text means specifying one of the network interfaces of the computer, on which the standalone server is running.
It should also be remembered that the standalone server provides the feature to serve several publications of the same infobase. This feature is available only by specifying the appropriate parameters in the standalone server configuration file.
Configuration file example:
server:address: localhostdatabase:dbms: PostgreSQLserver: dbServerNamename: dbBaseuser: postgrespassword: postgresinfobase:name: clusterDbNamedistribute-licenses: yesschedule-jobs: denyhttp:– base: /lkodata:publish: truereuse-sessions:mode: dontuse– base: /partnerweb services:service:– name: RemoteManagementalias: RemoteManagment.1cwspublish: truereuse-sessions:mode: autouseodata:publish: truereuse-sessions:mode: dontuseSee also:
-
Infobase publication (see Publication types).
-
Configuration file of the standalone server (see Standalone server configuration file).
-
The http section of the configuration file of the standalone server.
7.4.12. Operations with separators
Separators are configured using the standalone server configuration file. To configure, use the http.zones section of the configuration file (see Separator parameters (zones)).
Example:
http:– base: /clientszones:– specify: falsesafe: false– specify: truesafe: falseIn this example, arrangement of web access to the infobase is considered with the following parameters:
-
Home directory for access: /clients.
-
Information about separators:
-
Two separators are used in the application.
-
The first separator should not be specified in the access URL (the specify parameter is equal to the false value) and it cannot be changed from 1C:Enterprise language (the safe parameter is equal to the false value).
-
The second separator must be specified in the access URL (the specify parameter is equal to the true value) and it cannot be changed from 1C:Enterprise language (the safe parameter is equal to the false value).
-
To receive a list of separators for an infobase that is serviced by a certain standalone server instance, execute the following operation:
ibcmd --pid=ProcessID infobase config data-separation listIn this command, ProcessID is an ID of the standalone server instance process. The management utility connects to the server infobase and receives a list of separators from it.
See also:
-
Data separation feature.
-
Standalone server configuration file.
7.4.13. Dumping configurations to files/Restoring configurations from files
The standalone server allows you to dump and load a configuration to XML files. Dumping and loading are always executed in hierarchical format. Linear dump format is not supported by the standalone server. The standalone server supports both configuration dumping and loading options: full and partial.
To perform full dumping, use the following command:
ibcmd infobase config export --user=ibuser --password=123 --config=config.yml d:\cfg_xmlThe following command allows you to synchronize the configuration and export directory:
ibcmd infobase config export --user=ibuser --password=123 --sync --config=config.yml d:\cfg_xmlDump in the d:\cfg_xml directory is updated if:
-
The d:\cfg_xml directory contains the ConfigDumpInfo.xml file.
-
Root object UUIDs match in the configuration and in the ConfigDumpInfo.xml file.
-
Version numbers of XML dumping format match for the configuration and the ConfigDumpInfo.xml file.
-
In the d:\cfg_xml directory, dumping data is in hierarchical format.
-
Synchronization does not require full configuration dumping.
When importing, it automatically determines the format of the importable export. To fully import the configuration from the files, use the following command:
ibcmd infobase config import --user=ibuser --password=123 --config=config.yml d:\cfg_xmlIt should be understood that this command will completely replace the configuration in the infobase, which is described by the config.yml configuration file.
To perform partial configuration loading, use the following command:
type d:\fileList.lst|ibcmd infobase config import files --user=ibuser --password=123 --http-base-dir d:\cfg_xmlWhere:
-
Only files in the d:\fileList.lst file are imported.
-
The d:\fileList.lst file contains the list of full paths to files to be imported. One line contains a full path to one file.
-
The d:\cfg_xml directory contains a directory with exported data.
See also:
-
Dumping configurations to files/Restoring configurations from files.
-
Configuration file of the standalone server (see Standalone server configuration file).
7.4.14. Getting a list of sessions
ibcmd --pid=ProcessID session listIn this command, ProcessID is an ID of the standalone server instance process. The management utility connects to the server infobase and receives a list of infobase sessions.
See also:
- Sessions and connections.
7.4.15. Getting a list of locks
ibcmd --remote=ssh://Server1C:8282 lock listIn this command, ssh://Server1C:8282 is an SSH gateway address. You can use it to access a specific standalone server instance.
See also:
- Configuring access to a standalone server over SSH.
7.4.16. Creating and importing an extension to the infobase
ibcmd --pid=ProcessID infobase config extension create --user=ibuser --password=123 --name=PatchExtension1 --name-prefix=patchEx1 --purpose patchibcmd --pid=ProcessID infobase config load --user=ibuser --password=123 --extension=PatchExtension1 patchExt1.cfeibcmd --pid=ProcessID infobase config apply --user=ibuser --password=123 --extension=PatchExtension1 --forceIn this command, ProcessID is an ID of the standalone server instance process.
7.4.17. Migration between infobases without dumping to a DT file
To migrate an infobase between two SQL servers without an intermediate dump format (dt file), run the following command:
ibcmd infobase replicate --data=d:\ss-data\cs-data --dbms=MSSQLServer --database-server=localhost --database-name=dbMsSql --database-user=msUser --database-password=123 --target-dbms=PostgreSQL --target-database-server=localhost --target-database-name=dbPgSql --target-database-user=pgUser --target-database-password=123 --target-create-databaseIn this example:
-
Standalone server data directory: d:\ss-data\cs-data.
-
DBMS, source: Microsoft SQL Server.
-
DBMS, destination: PostgreSQL.
-
Infobase, source: dbMsSql.
-
Infobase, destination: dbPgSql.
-
Both DBMS run on the local computer.
-
If there is no database in the destination, create one.
-
DBMS access parameters (username and password) are given for demonstration only. We do not recommend that you use these access parameters in your databases.
Chapter 8. Setting up web services for 1C:Enterprise
8.1. General information
This chapter describes how to set up web servers for operation with web client and web services and how to configure OpenID authentication support. After publishing, access to the published components is as follows:
-
Access to web client. To start the web client, use an address generated as follows: <Web server host name>/<Virtual directory name>. If the virtual directory name is DemoCfg, type the following URL to start the web client (to get access from a local computer): http://localhost/DemoCfg.
-
Call the web service. To access the web service, use an address generated as follows: <Web server host name>/<Virtual directory name>/ws/<Web service name> or <Web server host name>/<Virtual directory name>/ws/<Web service address>.
For example, the virtual directory name is DemoWS, the web service name in Designer is OperationDemoWS, and the address is DemoWorkWS. In this case, you can access the web service via two addresses at the same time (to get access from a local computer): http://localhost/DemoWS/ws/OperationDemoWS or http://localhost/DemoWS/ws/DemoWorkWS.
-
Access to HTTP service. To access HTTP service, use an address generated as follows: <Web server host name>/<Virtual directory name>/hs/<path to resource>.
-
OpenID authentication. It is performed automatically.
Web servers of Internet Information Services (hereinafter referred to as IIS) family are delivered with an operating system. To make it easier for understanding which server you are using, refer to the lookup table of OS and web server versions:
| IIS version | OS version |
|---|---|
| IIS 7.5 | Windows 7 |
| IIS 8.0 | Windows 8 or Windows Server 2012 |
| IIS 8.5 | Windows 8.1 or Windows Server 2012 R2 |
| IIS 10.0 | Windows 10, 11 or Windows Server 2016 and later |
You can download Apache web server distribution package (for Windows or Linux) from the project website: https://httpd.apache.org/download.
8.2. General requirements
On a computer where the publication is done, a supported web server must be installed and configured. To install the Internet Information Services web server, you may need a distribution package of the operating system used. When installing the web server, you must install support for ISAPI extensions. To install the web server, you need the administrative privileges on the computer.
If you perform publication to operate with an infobase engaged in commercial operation via the Internet, HTTP is not recommended. HTTP does not ensure safe web server connection. It is strongly recommended that you use HTTPS instead. To enable HTTPS on the used web server, see the web server documentation.
Publication can be performed in two ways:
-
Using the publication dialog box on the web server if Designer of required bitness can be started on the computer with the web server.
-
Using webinst utility.
To perform publication on the web server, you need the administrative rights on the computer:
-
To publish on Windows, open Designer by clicking Run as administrator in the application or launcher context menu. If the publication is performed with the webinst utility, the administrator starts either the utility itself or the Windows command line interpreter.
-
For Linux, to perform the publication, you need to get the superuser rights (root) using the su command or start the application that performs the publication using the sudo command.
When you try to perform the publication, the software checks for the necessary privileges to perform the operation. If the privileges of the current user are not sufficient to perform the publication:
-
When publishing from Designer, the user is asked whether to continue publishing. The dialog box displays the reason for asking this and recommendations on how to obtain the necessary privileges.
-
When publishing using the webinst utility, the user gets a diagnostic message, but the publication continues.
Publication is possible only if 1C:Enterprise is located on a computer with a web server. To work with the configuration via web server, the configuration needs to be blank.
Operation via a web server has some specifics concerning both the operation and web server settings:
-
When using an infobase in file mode via a web server, operation with the database file is performed by the web server extension. If several client applications work with the publication, then requests from these client applications are executed sequentially, in the order of request arrival to the web server extension. Each working web server process ensures operation of the single web server extension instance.
-
Due to specifics of getting background job results when using the infobase in file mode, it is recommended that you configure the web server so that each 1C:Enterprise infobase publication is served by no more than one working web server process.
-
When using IIS server:
-
For IIS 7.x and later web servers, publishing is not supported if the Directory property (the dir parameter of the webinst utility) points to the %SYSTEMDRIVE%\inetpub\wwwroot directory.
-
Publication is always performed for the default website (Default Web Site) and for the default application pool (DefaultAppPool). If operations of different 1C:Enterprise versions must be supported in one IIS instance, create your own application pool for each unique 1C:Enterprise version. In this case, you can perform publication only manually.
-
For the application pool used for 1C:Enterprise, the .NET environment support must be disabled. To do this, set the application pool property Versions of the .NET Framework to No managed code.
-
For details on IIS setup, see Internet Information .
-
-
When using Apache server:
-
Publication is not supported if Designer bitness does match bitness of a web server instance used for publication.
-
If operations of different 1C:Enterprise versions must be supported on one computer, create a web server instance for each unique 1C:Enterprise version. In this case, you can perform publication only manually.
-
For Linux OS, it is recommended that you the worker multiprocessing module. Other available modules are not recommended.
-
For details on Apache setup, see Apache.
-
8.3. Publication types
8.3.1. General publication procedure
The general publication procedure is as follows:
-
The request processing module (web server extension module) corresponding to the web server is registered.
-
A virtual application is registered on the web server.
-
The virtual application directory is created. The default.vrd file is placed in this directory and configured.
-
Users are granted permissions to access the directory with the database file (for file mode only).
To publish the web client, use the 1C:Enterprise version that is used for the infobase to be accessed via the web client. If two versions are installed on the computer (for example, 8.3.24.100 and 8.3.24.150) and the 1C:Enterprise server version 8.3.24.150 is running, use Designer or the webinst utility of exactly the same version for publishing.
When publishing, remember that the bitness of the registered web server extension must match the bitness of the web server. To determine the publishing method, use the following table:
| 32-bit web server | 64-bit web server | |
| 32-bit 1C:Enterprise | Fully | Partially |
| 64-bit 1C:Enterprise | Not supported | Fully |
Fully. Both Designer and the webinst utility support publishing.
Partially. You can publish a 32-bit 1C:Enterprise application to use it with a 64-bit IIS web server.The webinst utility is called from the bin directory of the 32-bit version of 1C:Enterprise. On Linux, such publication is not supported.
To publish from Designer, use the publication dialog box. Click Administration – Publishing on web server...
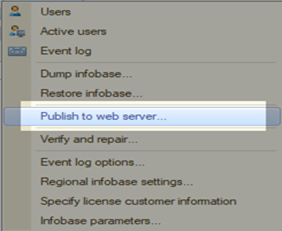
Fig. 62. Publishing on web server
Then follow these steps:
-
Enter the name of the virtual directory in the Name field. The name of the virtual directory only contains Latin letters.
-
In the Web server field, specify the type of web server for which you are publishing.
-
In the Directory field, specify the physical location of the directory where files describing the virtual directory will be located. For Apache web server, the directory name contains only Latin letters.
-
Select the Publish access for client applications and Publish web services checkboxes if necessary.
-
For IIS web server, you can specify OS authentication on the web server.
-
If necessary, select the Web services to be published. The Address column can be edited. This column defines a Web service synonym. You can access the Web service both by name and by synonym.
-
If necessary, customize the rest of the publishing parameters.
-
To start the publishing process, click Publish. To delete the publication from the selected web server, click Disable.
After the publication is complete, you will be prompted to restart the web server in the following cases:
-
1C:Enterprise version was changed.
-
Path to the web server extension module was changed.
-
A new publication was made for the Apache web server.
-
Publication was disabled.
When using anonymous authentication and file infobase, when publishing is performed, the user on whose behalf anonymous access is performed is checked for access rights to the infobase directory. If the user does not have the necessary rights, a warning is displayed that this infobase cannot be accessed via a web server. It is recommended to either grant access rights for the directory with the infobase, or select the Use OS authentication on a web server check box.
The publishing dialog box and the command line parameters of the webinst utility will be described in other subsections of this section.
8.3.2. Publish dialog box
The publish dialog box is used to create a publication or to prepare a template file for publication using the webinst utility (using the -descriptor command line parameter).
All parameters that can be edited when creating a publication are located in two tabs. For more details, see below.
8.3.2.1. Dialog buttons
The Publish button performs publication on the web server. When publishing, a directory is created on the hard drive and the web server is configured to operate with 1C:Enterprise. Note that publication on the IIS web server is always performed for the default website (Default Web Site) and for the default application pool (DefaultAppPool).
On Linux, the following actions are performed:
-
For the directory where the default.vrd file is located, the group of the user on whose behalf the web server is running is set as the owner group.
-
The group of the user on whose behalf the web server is running is assigned access rights to read the default.vrd file.
When publishing a file infobase, the group of the user on whose behalf the web server is running is set as the owner group of the infobase file directory. The owner group inheritance is configured to operate with the infobase.
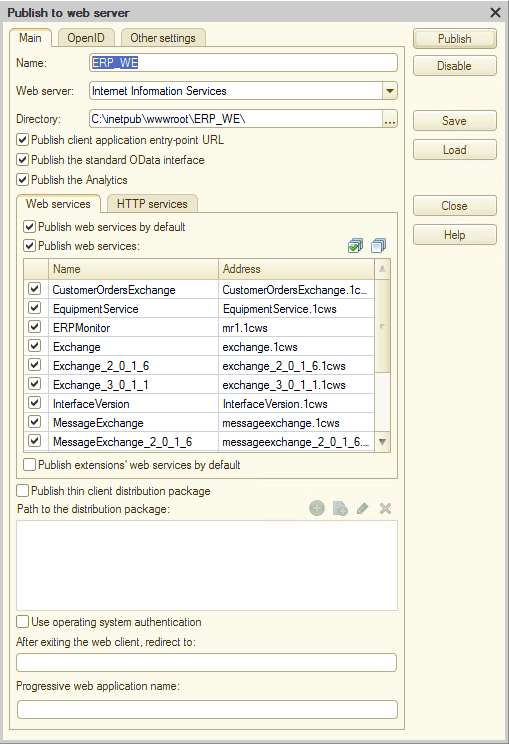
Fig. 63. Publishing on web server
The Disable button removes the application from the web server and from the publication directory, if necessary.
The Save button saves the parameters specified in the publish dialog box to a file. When saving, you are prompted for the name and location of the file to be saved. Saving will be performed in the default.vrd file format. Using this command, you can create template files that will be used as the -descriptor parameter of the webinst utility. The parameters of the source infobase are written to the values of the ib and base attributes of the point element.
The Download button opens the default.vrd file for editing. When loading, the ib and base attributes of the point element in the file to be loaded are ignored.
The Close button closes the dialog box.
The Help button opens a window with reference information about the publication dialog.
8.3.2.2. Main tab
8.3.2.2.1. General parameters
In this tab, you can set the general parameters of the publication.
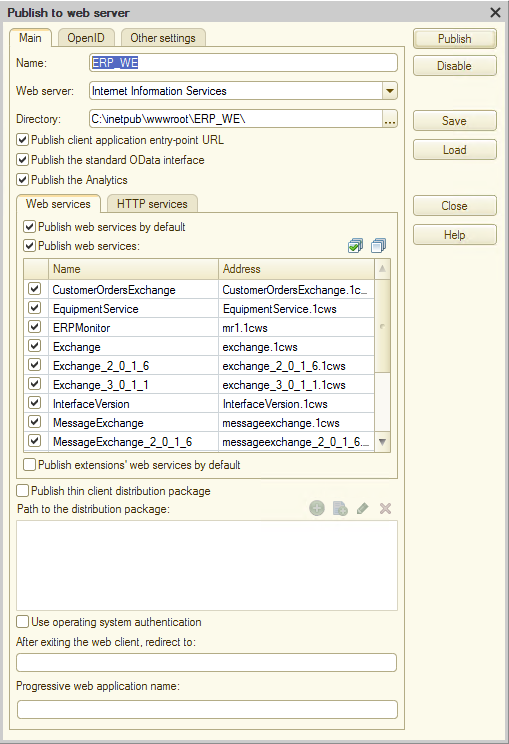
Fig. 64. Publishing on web server. Main
Name. Specifies the publication name. When publishing using the webinst utility, it is described by the -wsdir parameter. In the default.vrd file, it corresponds to the base attribute of the point element.
Web server. Specifies web server used for publishing. Apache web servers are added to the list if they are found on the computer. When publishing using the webinst utility, the web server used is indicated by one of the following parameters: iis, apache2, apache22, or apache24. When operating in Linux, publishing is only possible for the Apache web server.
If the version of the Apache web server installed on the computer (2.2 or 2.4) cannot be determined, both versions of the web server will be listed. Please consider that for the Apache web server version 2.2 and 2.4 there are differences between the changes made in the configuration file of the web server. Therefore, the incorrectly specified version of the web server will result in the unavailability of the publication.
Directory. Specifies the physical directory on the hard drive in which the default.vrd file will be located and where the virtual directory of the web server will be displayed. The directory must already exist. When publishing using the webinst utility, it is described by the -dir parameter.
Publish access for client applications. Enables access to the published infobase using a thin client, mobile client, and web client. If the check box is selected, the published infobase can be accessed using a thin client, mobile client, or web client. In the default.vrd file, it corresponds to the enable attribute of the point element.
Publish standard OData interface. Enables access to the standard OData interface of the application. In the default.vrd file, it corresponds to the enableStandardOData attribute of the point element.
Publish 1C:Analytics. Enables interaction between 1C:Analytics server and 1C:Enterprise. After publication, the command to open 1C:Analytics web interface becomes available in the client application interface. In the default.vrd file, it corresponds to the analytics element.
Publish thin client distribution package. Determines whether the client application (thin client) can be obtained and installed if the versions of the client application and the server do not match. ZIP archive is used as the distribution package. For the ZIP archive structure description, see \<point> (root element). For more information on how to set up client application update, see Automated client application update on a remote computer. In the default.vrd file, each row from the distribution package list corresponds to an attribute from the pubdst* family of the point element.
Use OS authentication. Allows OS authentication on IIS web server.
URL to open after exiting the web client. Allows you to specify the transition URL to open after the web client is closed. In the default.vrd file, it corresponds to the exitURL element (see \<exitURL>).
In Progressive web application name, you can specify the name that will be displayed in the progressive web application header when installing and using this application. In the default.vrd file, it corresponds to the progressiveWebApplication element (see \<progressiveWebApplication>).
8.3.2.2.2. Web services tab
Publish web services. If you select the checkbox, web services created in the configuration and listed in the table below the checkbox will be published. In the default.vrd file, it corresponds to the enable attribute of the ws element. If the check box is cleared, this is equivalent to the absence of the ws element in the default.vrd file or the presence of the ws element with the enable attribute set to true value.
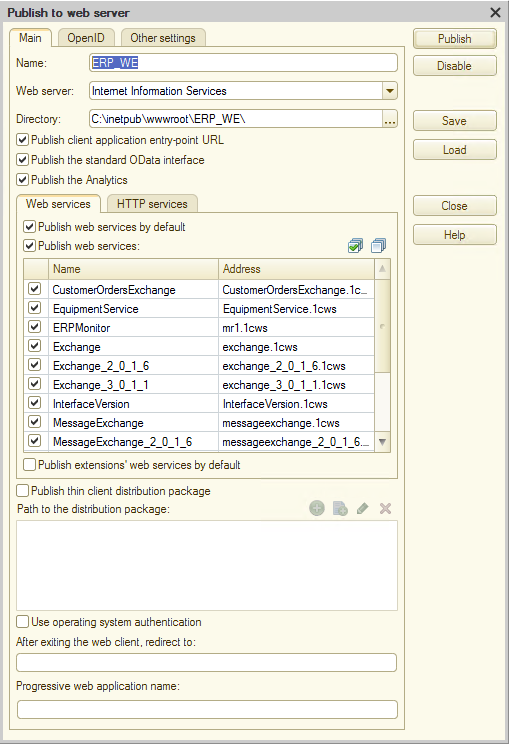
Fig. 65. Publishing web services
Publish Web services by default. Enables use of Web services that are published without explicit permission to use. In the default.vrd file, it corresponds to the pointEnableCommon attribute of the ws element.
The table below the Publish Web services check box contains a list of published Web services and allows you to manage publication of each Web service. The first column controls publication of each Web service. If the check box is cleared, the Web service will be disabled (it cannot be called). In the default.vrd file, it corresponds to the enable attribute of the point element.
The second column (Name) contains the name of the Web service as defined when it was created. In the default.vrd file, it corresponds to the name attribute of the point element.
The last column of the table (Address) contains the alias of the name of the published web service. The Web service can be accessed both by name and by alias. You can edit the Web service alias in the publish window. In the default.vrd file, it corresponds to the alias attribute of the point element.
Web services that are located in the connected extensions are not displayed in this table and can be published only by editing the default.vrd file manually.
Publish extensions Web services by default. Enables use of Web services supplied in configuration extensions. In the default.vrd file, it corresponds to the publishExtensionsByDefault attribute of the ws element (see \<ws>).
8.3.2.2.3. HTTP services tab
The HTTP services tab is designed to control the application access over HTTP services.
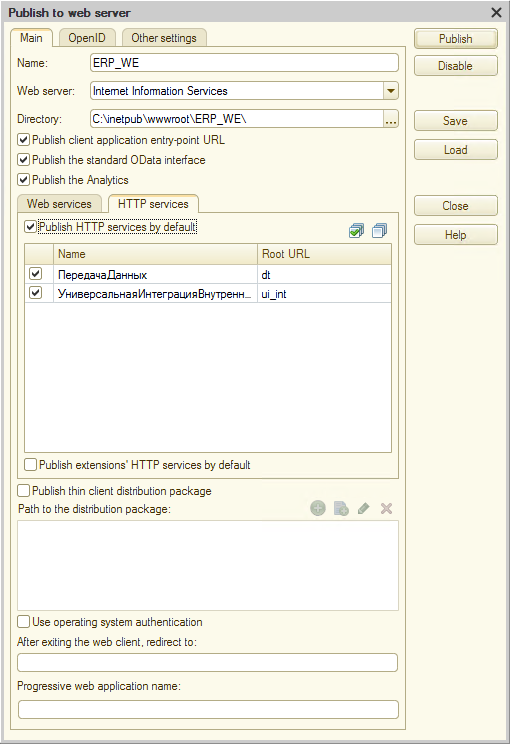
Fig. 66. Publishing HTTP services
Publish HTTP services by default. If you select the check box, HTTP services created in the configuration and listed in the table below the check box will be published. In the default.vrd file, it corresponds to the publishByDefault attribute of the httpServices element. If the check box is cleared, this is equivalent to the absence of the httpServices element in the default.vrd file or the presence of the httpServices element with the publishByDefault attribute set to false.
The table below the Publish HTTP services by default check box contains a list of published HTTP services and allows you to manage the publication of each HTTP service. The first column controls publication of each HTTP service. If the check box is cleared, the HTTP service will be disabled (it cannot be called). In the default.vrd file, it corresponds to the enable attribute of the service element.
The second column (Name) contains the name of the HTTP service as defined when it was created. In the default.vrd file, it corresponds to the name attribute of the service element.
HTTP services that are located in the connected extensions are not displayed in this table and can be published only by editing the default.vrd file manually.
Publish extensions HTTP services by default. Enables use of HTTP services supplied in configuration extensions. In the default.vrd file, it corresponds to the publishExtensionsByDefault attribute of the httpServices element (see \<httpServices>).
8.3.2.3. OpenID tab
On this tab, you can configure the OpenID authentication settings for the publication to be performed.
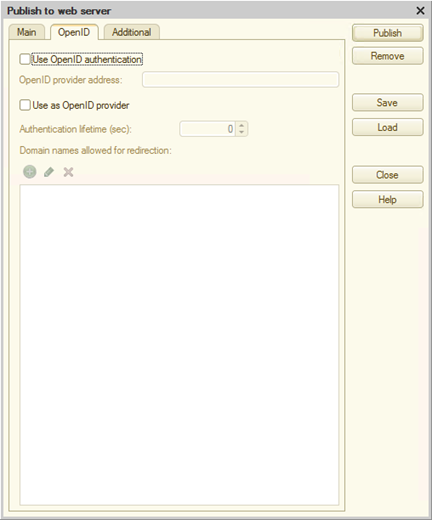
Fig. 67. OpenID authentication settings
The Use OpenID authentication check box enables OpenID authentication for this infobase. In this case, the OpenID Provider Address property contains the address of the infobase that acts as OpenID provider. You can access this infobase only over HTTPS (see OpenID authentication support settings).
If the published infobase acts as an OpenID provider, it is necessary to select the Use as an OpenID provider check box.
In fact, this tab is used to configure the openid element of the default.vrd file. For more information, see \<openid>.
8.3.2.4. Additional tab
In this tab, you can set the auxiliary parameters of the publication.
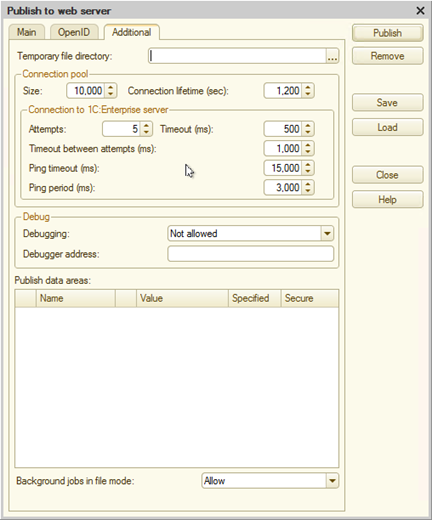
Fig. 68. Auxiliary parameters of the publication on the web server
Temporary files directory. Specifies a temporary files directory for the web server extension or the infobase file mode. In the default.vrd file, it corresponds to the temp attribute of the point element. For more information, see \<point> (root element).
Connection pool group. Describes the pool element of the default.vrd file. For more information, see \<pool>. The group parameters also manage the system for connection break monitoring.
Debug group. Describes the debug element of the default.vrd file. For more information, see \<debug>.
Data separation. Describes the zones element of the default.vrd file. For more information, see \<zones>. More detail on the structure of the separators table is provided below.
The table contains all independent separators that exist in a configuration or in a downloaded file. The first column (without a name) determines whether a zone element needs to be created for the selected separator. Remember that the element is mapped not by the name of the separator, but by its ordinal position in the list. If the first separator is disabled, it makes sense to disable all others, since the parameters of the zones element will be applied automatically to other separators.
The Name column contains the name of the separator as defined in the properties of the general attribute. The check box in the next column determines whether the separator value will be specified in the zone element. If the check box is selected, the value from the Value column will be used as the Value attribute.
The check boxes in the Safe and Specify columns are responsible for the safe and specify attributes of the zone element of the default.vrd file.
The parameter Background jobs in the file mode determines whether background jobs can be used in the file mode of the infobase (attribute allowexecutescheduledjobs of the root point element). For more information, see \<point> (root element).
8.3.3. Webinst utility
8.3.3.1. General description
The utility is designed to configure web servers to support the web client operation. The utility can be used in Windows or Linux environment. It is part of the 1C:Enterprise distribution package. For more details on the utility command line, see Web server publishing utility (webinst).
8.3.3.2. Publication examples
Example of publish command for IIS 7.0 and later:
webinst -publish -iis -wsdir demo -dir "c:\inetpub\demo" -connstr "Srvr=server:1741;Ref=demo;"In this example, a web client with the following parameters is published:
-
Virtual directory: demo (the -wsdir demo parameter).
-
Physical directory where the virtual directory is displayed: C:\inetpub\demo (the -dir "c:\inetpub\demo" parameter).
-
Infobase connection string: Srvr=server:1741;Ref=demo; (the -connstr "Srvr=server:1741;Ref=demo;" parameter, an infobase in client/server mode).
Example of publish command for Apache 2.2:
webinst -publish -apache22 -wsdir DemoWS -dir "c:\apache.www\demows" -connstr "File=""c:\my db\demows"";" -confpath "C:\Program Files\Apache Software Foundation\Apache2.2\conf\httpd.conf"In this example, a web client with the following parameters is published:
-
Virtual directory: DemoWS (the -wsdir demoWS parameter).
-
Physical directory where the virtual directory is displayed: C:\apache.www\demows (the -dir "c:\apache.www\demows" parameter).
-
Infobase connection string: File="c:\my db\demows"; (the -connstr "File=""c:\my db\demows"";" parameter, an infobase in file mode).
-
Apache web server configuration file: C:\Program Files\Apache Software Foundation\Apache2.2\conf\httpd.conf (parameter -confpath "C:\Program Files\Apache Software Foundation\Apache2.2\conf\httpd.conf").
Example of publishing using a template file:
webinst -publish -iis -wsdir demoMA -dir "c:\inetpub\wwwroot\demoMA" -connstr "Srvr=server:1741;Ref=demo;" -descriptor template.vrdIn this example:
-
Publication to IIS web server (-publish -iis parameters) is performed.
-
Virtual directory: demoMA (the -wsdir demoMA parameter).
-
Physical directory where the virtual directory is displayed: c:\inetpub\wwwroot\demoMA (the -dir "c:\inetpub\wwwroot\demoMA" parameter).
-
Infobase connection string Srvr=server:1741;Ref=demo; (-connstr "Srvr=server:1741;Ref=demo;")
-
The remaining publication parameters will be obtained from the template.vrd template file (-descriptor template.vrd parameter).
Example of a command for deleting a publication for IIS:
webinst -delete -iis -wsdir DemoWSIn this example, the publication made in the virtual directory is deleted:
- Virtual directory: DemoWS (the -wsdir DemoWS parameter). The remaining parameters are automatically determined from this name.
8.4. Setting up client application support
8.4.1. General information
This section contains instructions for setting up various web servers to operate using the web client. It describes both the actions necessary for publishing from Designer, and the actions necessary for publishing using the webinst utility.
When describing a publication, the values that are key to the publishing will be described. The remaining parameters must be configured if necessary.
8.4.2. On Linux
8.4.2.1. General information
This section describes how to configure the Linux-based web servers for the web client operation. Once the publication is performed, grant a user running Apache the rights to the executable file directory of a specific 1C:Enterprise version (read and execute). For infobase file mode, grant the rights to edit the infobase directory to the user on whose behalf the web server is running.
8.4.2.2. Apache 2.0
8.4.2.2.1. Publish dialog box
In the Web server field, specify Apache 2.0.
If necessary, specify the remaining publishing parameters on the Additional tab of the publishing dialog box.
8.4.2.2.2. Webinst utility
To configure Apache 2.0 web server using the webinst utility, run the following command (the parameters are given as an example, replace them with the real values).
Example:
webinst -apache2 -wsdir DemoWS -dir /var/www/DemoWS -connstr "Srvr=server:1741;Ref=demo;" -confpath /etc/apache2/httd.conf8.4.2.3. Apache 2.2
8.4.2.3.1. Publish dialog box
In the Web server field, specify Apache 2.2.
If necessary, specify the remaining publishing parameters on the Additional tab of the publishing dialog box.
8.4.2.3.2. Webinst utility
To configure Apache 2.2 web server using the webinst utility, run the following command (the parameters are given as an example, replace them with the real values).
Example:
webinst -apache22 -wsdir DemoWS -dir /var/www/DemoWS -connstr "Srvr=server:1741;Ref=demo;" -confpath /etc/apache2/apache.conf8.4.2.4. Apache 2.4
8.4.2.4.1. Publish dialog box
In the Web server field, specify Apache 2.4.
If necessary, specify the remaining publishing parameters on the Additional tab of the publishing dialog box.
8.4.2.4.2. Webinst utility
To configure Apache 2.4 web server using the webinst utility, run the following command (the parameters are given as an example, replace them with the real values).
Example:
webinst -apache24 -wsdir DemoWS -dir /var/www/DemoWS -connstr "Srvr=server:1741;Ref=demo;"8.4.3. On Windows
8.4.3.1. General information
This section describes how to configure the Windows-based web servers for the web client operation.
To publish a web client, select the Publish thin client and web client check box.
8.4.3.2. Internet Information Services
8.4.3.2.1. General description
Besides specifying the parameters of the publication (described below), you must additionally make the following settings:
-
Grant read rights to the user on whose behalf the requests are executed (IUSR_ <PC_NAME> user for IIS versions 5.1 and 6.0 or IIS_IUSRS group for IIS versions 7.x and later) to the bin file directory of a specific 1C:Enterprise version.
-
Grant edit rights to the user on whose behalf the queries are executed (IUSR_ <PC_NAME> user for IIS versions 5.1 and 6.0 or IIS_IUSRS group for IIS versions 7.x and later) to the infobase directory (only in the case of the file mode).
8.4.3.2.2. Publish dialog box
In the Web server field, specify Internet Information Services. If you need the operating system authentication on a web server, select the Use operating system authentication on a web server check box.
If necessary, specify the remaining publishing parameters on the Additional tab of the publishing dialog box.
8.4.3.2.3. Webinst utility
To configure the IIS web server using the webinst utility, run the following command (the parameters are given as an example, replace them with real values).
Example:
webinst -publish -iis -wsdir demo -dir "c:\inetpub\demo" -connstr "Srvr=server:1741;Ref=demo;" -osauth8.4.3.3. Apache 2.0
8.4.3.3.1. General description
Besides specifying the parameters of the publication (described below), you must additionally make the following settings:
-
Grant read rights to the user on whose behalf the web server is running to the bin file directory of a specific 1C:Enterprise version.
-
Grant edit rights to the user on whose behalf the web server is running to the infobase directory (for file mode only).
8.4.3.3.2. Publish dialog box
In the Web server field, specify Apache 2.0.
If necessary, specify the remaining publishing parameters on the Additional tab of the publishing dialog box.
8.4.3.3.3. Webinst utility
To configure Apache 2.0 web server using the webinst utility, run the following command (the parameters are given as an example, replace them with the real values).
Example:
webinst -publish -apache2 -wsdir demo -connstr "Srvr=server:1741;Ref=demo;" -dir "c:\apache.www\demows" -confpath "C:\Program Files\Apache Software Foundation\Apache2.2\conf\httpd.conf"8.4.3.4. Apache 2.2
8.4.3.4.1. General description
Besides specifying the parameters of the publication (described below), you must additionally make the following settings:
-
Grant read rights to the user on whose behalf the web server is running to the bin file directory of a specific 1C:Enterprise version.
-
Grant edit rights to the user on whose behalf the web server is running to the infobase directory (for file mode only).
8.4.3.4.2. Publish dialog box
In the Web server field, specify Apache 2.2.
If necessary, specify the remaining publishing parameters on the Additional tab of the publishing dialog box.
8.4.3.4.3. Webinst utility
To configure Apache 2.2 web server using the webinst utility, run the following command (the parameters are given as an example, replace them with the real values).
Example:
webinst -publish -apache22 -wsdir demo -connstr "Srvr=server:1741;Ref=demo;" -dir "c:\apache.www\demows" -confpath "C:\Program Files\Apache Software Foundation\Apache2.2\conf\httpd.conf"8.4.3.5. Apache 2.4
8.4.3.5.1. General description
Besides specifying the parameters of the publication (described below), you must additionally make the following settings:
-
Grant read rights to the user on whose behalf the web server is running to the bin file directory of a specific 1C:Enterprise version.
-
Grant edit rights to the user on whose behalf the web server is running to the infobase directory (for file mode only).
8.4.3.5.2. Publish dialog box
In the Web server field, specify Apache 2.4.
If necessary, specify the remaining publishing parameters on the Additional tab of the publishing dialog box.
8.4.3.5.3. Webinst utility
To configure Apache 2.4 web server using the webinst utility, run the following command (the parameters are given as an example, replace them with the real values).
Example:
webinst -publish -apache24 -wsdir demo -connstr "Srvr=server:1741;Ref=demo;" -dir "c:\apache.www\demows"8.5. Web service support settings
8.5.1. General information
Setting support for Web services is to configure your web server for operation with Web services and to set the access rights to the directories of executable files and the database (for the file mode of operation).
To publish Web services, select the Publish Web services check box on the Web services tab, and select the services to be published in the table below the check box.
8.5.2. On Linux
8.5.2.1. General information
This section describes the publication of Web services for Linux-based web servers. It is assumed that the web server is already installed.
To publish Web services, select the Publish Web services check box on the Web services tab, and select the services to be published in the table below the check box.
Once the publication is performed, provide a user running Apache the rights to the executable file directory of a specific 1C:Enterprise version (read and execute). For infobase file mode, grant the rights to edit the infobase directory to the user on whose behalf the web server is running.
8.5.2.2. Apache 2.0
8.5.2.2.1. Publish dialog box
In the Web server field, specify Apache 2.0.
If necessary, specify the remaining publishing parameters on the Additional tab of the publishing dialog box.
8.5.2.2.2. Webinst utility
Before publishing, you need to create a template file (in Designer):
-
In the Web server field, specify Apache 2.0.
-
Select the Publish web services checkbox.
-
Select the parameters of web services to publish.
-
If necessary, specify the remaining publishing parameters on the Additional tab of the publishing dialog box.
-
To save the template file, click Save. Enter the template file name apache-template.vrd.
Perform publication using the template file.
Example:
webinst -publish -apache2 -wsdir demo-ws -dir /var/www/demo-ws -connstr "Srvr=server:1741;Ref=demo;" -confpath /etc/apache2/httd.conf -descriptor apache-template.vrd8.5.2.3. Apache 2.2
8.5.2.3.1. Publish dialog box
In the Web server field, specify Apache 2.2.
If necessary, specify the remaining publishing parameters on the Additional tab of the publishing dialog box.
8.5.2.3.2. Webinst utility
Before publishing, you need to create a template file (in Designer):
-
In the Web server field, specify Apache 2.2.
-
Select the Publish web services checkbox.
-
Select the parameters of web services to publish.
-
If necessary, specify the remaining publishing parameters on the Additional tab of the publishing dialog box.
-
To save the template file, click Save. Enter the template file name apache-template.vrd.
Perform publication using the template file.
Example:
webinst -publish -apache22 -wsdir demo-ws -dir /var/www/demo-ws -connstr "Srvr=server:1741;Ref=demo;" -confpath /etc/apache2/httd.conf -descriptor apache-template.vrd8.5.2.4. Apache 2.4
8.5.2.4.1. Publish dialog box
In the Web server field, specify Apache 2.4.
If necessary, specify the remaining publishing parameters on the Additional tab of the publishing dialog box.
8.5.2.4.2. Webinst utility
Before publishing, you need to create a template file (in Designer):
-
In the Web server field, specify Apache 2.4.
-
Select the Publish web services checkbox.
-
Select the parameters of web services to publish.
-
If necessary, specify the remaining publishing parameters on the Additional tab of the publishing dialog box.
-
To save the template file, click Save. Enter the template file name apache-template.vrd.
Perform publication using the template file.
Example:
webinst -publish -apache24 -wsdir demo-ws -dir /var/www/demo-ws -connstr "Srvr=server:1741;Ref=demo;" -descriptor apache-template.vrd8.5.3. On Windows
8.5.3.1. General information
This section describes the publication of Web services for Windows-based web servers. It is assumed that the web server is already installed.
8.5.3.2. Internet Information Services
8.5.3.2.1. General description
Besides specifying the parameters of the publication (described below), you must additionally make the following settings:
-
Grant read rights to the user on whose behalf the requests are executed (IUSR_<PC_NAME> user for IIS versions 5.1 or 6.0 or IIS_IUSRS group for IIS versions 7.x and later) to the bin file directory of a specific 1C:Enterprise version.
-
Grant edit rights to the user on whose behalf the queries are executed (IUSR_<PC_NAME> user for IIS versions 5.1 or 6.0 or IIS_IUSRS group for IIS versions 7.x and later) to the infobase directory (for file mode only).
8.5.3.2.2. Publish dialog box
In the Web server field, specify Internet Information Services.
If necessary, specify the remaining publishing parameters on the Additional tab of the publishing dialog box.
8.5.3.2.3. Webinst utility
Before publishing, you need to create a template file:
-
In the Web server field, specify Internet Information Services.
-
Select the Publish web services checkbox.
-
Select the parameters of web services to publish.
-
If necessary, specify the remaining publishing parameters on the Additional tab of the publishing dialog box.
-
To save the template file, click Save. Enter the template file name iis-template.vrd.
Perform publication using the template file.
Example:
webinst -publish -iis -wsdir demo-ws -dir "c:\inetpub\demo-ws" -connstr "Srvr=server:1741;Ref=demo;" -descriptor iis-template.vrd8.5.3.3. Apache 2.0
8.5.3.3.1. General description
Grant the rights to the user on whose behalf Apache is running to the bin file directory of a specific 1C:Enterprise version (read and execute) and the infobase directory (read and write, for file mode only).
8.5.3.3.2. Publish dialog box
In the Web server field, specify Apache 2.0.
If necessary, specify the remaining publishing parameters on the Additional tab of the publishing dialog box.
8.5.3.3.3. Webinst utility
Before publishing, you need to create a template file:
-
In the Web server field, specify Apache 2.0.
-
Select the Publish web services checkbox.
-
Select the parameters of web services to publish.
-
If necessary, specify the remaining publishing parameters on the Additional tab of the publishing dialog box.
-
To save the template file, click Save. Enter the template file name apache-template.vrd.
Perform publication using the template file.
Example:
webinst -publish -apache2 -wsdir demo-ws -dir "c:\inetpub\demo-ws" -connstr "Srvr=server:1741;Ref=demo;" -descriptor apache-template.vrd8.5.3.4. Apache 2.2
8.5.3.4.1. General description
Grant the rights to the user on whose behalf Apache is running to the bin file directory of a specific 1C:Enterprise version (read and execute) and the infobase directory (read and write, for file mode only).
8.5.3.4.2. Publish dialog box
In the Web server field, specify Apache 2.2.
If necessary, specify the remaining publishing parameters on the Additional tab of the publishing dialog box.
8.5.3.4.3. Webinst utility
Before publishing, you need to create a template file:
-
In the Web server field, specify Apache 2.2.
-
Select the Publish web services checkbox.
-
Select the parameters of web services to publish.
-
If necessary, specify the remaining publishing parameters on the Additional tab of the publishing dialog box.
-
To save the template file, click Save. Enter the template file name apache-template.vrd.
Perform publication using the template file.
Example:
webinst -publish -apache22 -wsdir demo-ws -dir "c:\inetpub\demo-ws" -connstr "Srvr=server:1741;Ref=demo;" -descriptor apache-template.vrd8.5.3.5. Apache 2.4
8.5.3.5.1. General description
Grant the rights to the user on whose behalf Apache is running to the bin file directory of a specific 1C:Enterprise version (read and execute) and the infobase directory (read and write, for file mode only).
8.5.3.5.2. Publish dialog box
In the Web server field, specify Apache 2.4.
If necessary, specify the remaining publishing parameters on the Additional tab of the publishing dialog box.
8.5.3.5.3. Webinst utility
Before publishing, you need to create a template file:
-
In the Web server field, specify Apache 2.4.
-
Select the Publish web services checkbox.
-
Select the parameters of web services to publish.
-
If necessary, specify the remaining publishing parameters on the Additional tab of the publishing dialog box.
-
To save the template file, click Save. Enter the template file name apache-template.vrd.
Perform publication using the template file.
Example:
webinst -publish -apache24 -wsdir demo-ws -dir "c:\inetpub\demo-ws" -connstr "Srvr=server:1741;Ref=demo;" -descriptor apache-template.vrd8.6. Standard OData interface support
8.6.1. General information
To set up the standard OData interface support, configure the used web server and set the rights to access the directories of executable files and the database (for file mode).
To publish the standard OData interface, on the Main tab, select the Publish standard OData interface checkbox.
8.6.2. On Linux
8.6.2.1. General information
This section describes the publication of Standard OData Interface for Linux-based web servers. It is assumed that the web server is already installed.
Once the publication is performed, provide a user running Apache the rights to the executable file directory of a specific 1C:Enterprise version (read and execute). For infobase file mode, grant the rights to edit the infobase directory to the user on whose behalf the web server is running.
8.6.2.2. Apache 2.0
8.6.2.2.1. Publish dialog box
In the Web server field, specify Apache 2.0.
If necessary, specify the remaining publishing parameters on the Additional tab of the publishing dialog box.
8.6.2.2.2. Webinst utility
Before publishing, you need to create a template file:
-
In the Web server field, specify Apache 2.0.
-
Select the Publish standard OData interface checkbox.
-
If necessary, specify the remaining publishing parameters on the Additional tab of the publishing dialog box.
-
To save the template file, click Save. Enter the template file name apache-template.vrd.
Perform publication using the template file.
Example:
webinst -publish -apache2 -wsdir demo-ws -dir /var/www/demo-ws -connstr "Srvr=server:1741;Ref=demo;" -confpath /etc/apache2/httd.conf -descriptor apache-template.vrd8.6.2.3. Apache 2.2
8.6.2.3.1. Publish dialog box
In the Web server field, specify Apache 2.2.
If necessary, specify the remaining publishing parameters on the Additional tab of the publishing dialog box.
8.6.2.3.2. Webinst utility
Before publishing, you need to create a template file:
-
In the Web server field, specify Apache 2.2.
-
Select the Publish standard OData interface checkbox.
-
If necessary, specify the remaining publishing parameters on the Additional tab of the publishing dialog box.
-
To save the template file, click Save. Enter the template file name apache-template.vrd.
Perform publication using the template file.
Example:
webinst -publish -apache22 -wsdir demo-ws -dir /var/www/demo-ws -connstr "Srvr=server:1741;Ref=demo;" -confpath /etc/apache2/httd.conf -descriptor apache-template.vrd8.6.2.4. Apache 2.4
8.6.2.4.1. Publish dialog box
In the Web server field, specify Apache 2.4.
If necessary, specify the remaining publishing parameters on the Additional tab of the publishing dialog box.
8.6.2.4.2. Webinst utility
Before publishing, you need to create a template file:
-
In the Web server field, specify Apache 2.4.
-
Select the Publish standard OData interface checkbox.
-
If necessary, specify the remaining publishing parameters on the Additional tab of the publishing dialog box.
-
To save the template file, click Save. Enter the template file name apache-template.vrd.
Perform publication using the template file.
Example:
webinst -publish -apache24 -wsdir demo-ws -dir /var/www/demo-ws -connstr "Srvr=server:1741;Ref=demo;" -descriptor apache-template.vrd8.6.3. On Windows
8.6.3.1. General information
This section describes the publication of standard OData Interface for Windows-based web servers. It is assumed that the web server is already installed.
8.6.3.2. Internet Information Services
8.6.3.2.1. General description
Besides specifying the parameters of the publication (described below), you must additionally make the following settings:
-
Grant read rights to the user on whose behalf the requests are executed (IUSR_<PC_NAME> user for IIS versions 5.1 or 6.0 or IIS_IUSRS group for IIS versions 7.x and later) to the bin file directory of a specific 1C:Enterprise version.
-
Grant edit rights to the user on whose behalf the queries are executed (IUSR_<PC_NAME> user for IIS versions 5.1 or 6.0 or IIS_IUSRS group for IIS versions 7.x and later) to the infobase directory (for file mode only).
8.6.3.2.2. Publish dialog box
In the Web server field, specify Internet Information Services. If you need the operating system authentication on a web server, select the Use operating system authentication on a web server checkbox.
If necessary, specify the remaining publishing parameters on the Additional tab of the publishing dialog box.
8.6.3.2.3. Webinst utility
Before publishing, you need to create a template file:
-
In the Web server field, specify Internet Information Services.
-
Select the Publish standard OData interface checkbox.
-
If necessary, select the Use operating system authentication on a web server checkbox.
-
If necessary, specify the remaining publishing parameters on the Additional tab of the publishing dialog box.
-
To save the template file, click Save. Enter the template file name iis-template.vrd.
Perform publication using the template file.
Example:
webinst -publish -iis -wsdir demo-ws -dir "c:\inetpub\demo-ws" -connstr "Srvr=server:1741;Ref=demo;" -descriptor iis-template.vrd8.6.3.3. Apache 2.0
8.6.3.3.1. General description
Besides specifying the parameters of the publication (described below), you must additionally make the following settings:
-
Grant read rights to the user on whose behalf the web server is running to the bin file directory of a specific 1C:Enterprise version.
-
Grant edit rights to the user on whose behalf the web server is running to the infobase directory (for file mode only).
8.6.3.3.2. Publish dialog box
In the Web server field, specify Apache 2.0.
If necessary, specify the remaining publishing parameters on the Additional tab of the publishing dialog box.
8.6.3.3.3. Webinst utility
Before publishing, you need to create a template file:
-
In the Web server field, specify Apache 2.0.
-
Select the Publish standard OData interface checkbox.
-
If necessary, specify the remaining publishing parameters on the Additional tab of the publishing dialog box.
-
To save the template file, click Save. Enter the template file name apache-template.vrd.
Perform publication using the template file.
Example:
webinst -publish -apache2 -wsdir demo-ws -dir "c:\inetpub\demo-ws" -connstr "Srvr=server:1741;Ref=demo;" -descriptor apache-template.vrd8.6.3.4. Apache 2.2
8.6.3.4.1. General description
Besides specifying the parameters of the publication (described below), you must additionally make the following settings:
-
Grant read rights to the user on whose behalf the web server is running to the bin file directory of a specific 1C:Enterprise version.
-
Grant edit rights to the user on whose behalf the web server is running to the infobase directory (for file mode only).
8.6.3.4.2. Publish dialog box
In the Web server field, specify Apache 2.2.
If necessary, specify the remaining publishing parameters on the Additional tab of the publishing dialog box.
8.6.3.4.3. Webinst utility
Before publishing, you need to create a template file:
-
In the Web server field, specify Apache 2.2.
-
Select the Publish standard OData interface checkbox.
-
If necessary, specify the remaining publishing parameters on the Additional tab of the publishing dialog box.
-
To save the template file, click Save. Enter the template file name apache-template.vrd.
Perform publication using the template file.
Example:
webinst -publish -apache22 -wsdir demo-ws -dir "c:\inetpub\demo-ws" -connstr "Srvr=server:1741;Ref=demo;" -descriptor apache-template.vrd8.6.3.5. Apache 2.4
8.6.3.5.1. General description
Besides specifying the parameters of the publication (described below), you must additionally make the following settings:
-
Grant read rights to the user on whose behalf the web server is running to the bin file directory of a specific 1C:Enterprise version.
-
Grant edit rights to the user on whose behalf the web server is running to the infobase directory (for file mode only).
8.6.3.5.2. Publish dialog box
In the Web server field, specify Apache 2.4.
If necessary, specify the remaining publishing parameters on the Additional tab of the publishing dialog box.
8.6.3.5.3. Webinst utility
Before publishing, you need to create a template file:
-
In the Web server field, specify Apache 2.4.
-
Select the Publish standard OData interface checkbox.
-
If necessary, specify the remaining publishing parameters on the Additional tab of the publishing dialog box.
-
To save the template file, click Save. Enter the template file name apache-template.vrd.
Perform publication using the template file.
Example:
webinst -publish -apache24 -wsdir demo-ws -dir "c:\inetpub\demo-ws" -connstr "Srvr=server:1741;Ref=demo;" -descriptor apache-template.vrd8.7. HTTP service support settings
8.7.1. General information
Setting support for HTTP services is to configure your web server for operation with HTTP services and to set the access rights to the directories of executable files and the database (for file mode).
To publish HTTP services, select the Publish HTTP services by default check box on the HTTP services tab, and select the services to be published in the table below the check box.
8.7.2. On Linux
8.7.2.1. General information
This section describes the publication of Web services for Linux-based web servers. It is assumed that the web server is already installed.
To publish HTTP services, select the Publish HTTP services by default check box on the HTTP services tab, and select the services to be published in the table below the check box.
Once the publication is performed, provide a user running Apache the rights to the executable file directory of a specific 1C:Enterprise version (read and execute). For infobase file mode, grant the rights to edit the infobase directory to the user on whose behalf the web server is running.
8.7.2.2. Apache 2.0
8.7.2.2.1. Publish dialog box
In the Web server field, specify Apache 2.0.
If necessary, specify the remaining publishing parameters on the Additional tab of the publishing dialog box.
8.7.2.2.2. Webinst utility
Before publishing, you need to create a template file (in Designer):
-
In the Web server field, specify Apache 2.0.
-
Select the Publish HTTP services checkbox.
-
Select parameters of HTTP services to be published.
-
If necessary, specify the remaining publishing parameters on the Additional tab of the publishing dialog box.
-
To save the template file, click Save. Enter the template file name apache-template.vrd.
Perform publication using the template file.
Example:
webinst -publish -apache2 -wsdir demo-ws -dir /var/www/demo-ws -connstr "Srvr=server:1741;Ref=demo;" -confpath /etc/apache2/httd.conf -descriptor apache-template.vrd8.7.2.3. Apache 2.2
8.7.2.3.1. Publish dialog box
In the Web server field, specify Apache 2.2.
If necessary, specify the remaining publishing parameters on the Additional tab of the publishing dialog box.
8.7.2.3.2. Webinst utility
Before publishing, you need to create a template file (in Designer):
-
In the Web server field, specify Apache 2.2.
-
Select the Publish HTTP services checkbox.
-
Select parameters of HTTP services to be published.
-
If necessary, specify the remaining publishing parameters on the Additional tab of the publishing dialog box.
-
To save the template file, click Save. Enter the template file name apache-template.vrd.
Perform publication using the template file.
Example:
webinst -publish -apache22 -wsdir demo-ws -dir /var/www/demo-ws -connstr "Srvr=server:1741;Ref=demo;" -confpath /etc/apache2/httd.conf -descriptor apache-template.vrd8.7.2.4. Apache 2.4
8.7.2.4.1. Publish dialog box
In the Web server field, specify Apache 2.4.
If necessary, specify the remaining publishing parameters on the Additional tab of the publishing dialog box.
8.7.2.4.2. Webinst utility
Before publishing, you need to create a template file (in Designer):
-
In the Web server field, specify Apache 2.4.
-
Select the Publish HTTP services checkbox.
-
Select parameters of HTTP services to be published.
-
If necessary, specify the remaining publishing parameters on the Additional tab of the publishing dialog box.
-
To save the template file, click Save. Enter the template file name apache-template.vrd.
Perform publication using the template file.
Example:
webinst -publish -apache24 -wsdir demo-ws -dir /var/www/demo-ws -connstr "Srvr=server:1741;Ref=demo;" -descriptor apache-template.vrd8.7.3. On Windows
8.7.3.1. General information
This section illustrates how to publish HTTP services for web servers running Windows. It is assumed that the web server is already installed.
8.7.3.2. Internet Information Services
8.7.3.2.1. General description
Besides specifying the parameters of the publication (described below), you must additionally make the following settings:
-
Grant read rights to the user on whose behalf the requests are executed (IUSR_<PC_NAME> user for IIS versions 5.1 or 6.0 or IIS_IUSRS group for IIS versions 7.x and later) to the bin file directory of a specific 1C:Enterprise version.
-
Grant edit rights to the user on whose behalf the queries are executed (IUSR_<PC_NAME> user for IIS versions 5.1 or 6.0 or IIS_IUSRS group for IIS versions 7.x and later) to the infobase directory (for file mode only).
8.7.3.2.2. Publish dialog box
In the Web server field, specify Internet Information Services.
If necessary, specify the remaining publishing parameters on the Additional tab of the publishing dialog box.
8.7.3.2.3. Webinst utility
Before publishing, you need to create a template file:
-
In the Web server field, specify Internet Information Services.
-
Select the Publish HTTP services checkbox.
-
Select parameters of HTTP services to be published.
-
If necessary, specify the remaining publishing parameters on the Additional tab of the publishing dialog box.
-
To save the template file, click Save. Enter the template file name iis-template.vrd.
Perform publication using the template file.
Example:
webinst -publish -iis -wsdir demo-hs -dir "c:\inetpub\demo-ws" -connstr "Srvr=server:1741;Ref=demo;" -descriptor iis-template.vrd8.7.3.3. Apache 2.0
8.7.3.3.1. General description
Grant the rights to the user on whose behalf Apache is running to the bin file directory of a specific 1C:Enterprise version (read and execute) and the infobase directory (read and write, for file mode only).
8.7.3.3.2. Publish dialog box
In the Web server field, specify Apache 2.0.
If necessary, specify the remaining publishing parameters on the Additional tab of the publishing dialog box.
8.7.3.3.3. Webinst utility
Before publishing, you need to create a template file:
-
In the Web server field, specify Apache 2.0.
-
Select the Publish HTTP services checkbox.
-
Select parameters of HTTP services to be published.
-
If necessary, specify the remaining publishing parameters on the Additional tab of the publishing dialog box.
-
To save the template file, click Save. Enter the template file name apache-template.vrd.
Perform publication using the template file.
Example:
webinst -publish -apache2 -wsdir demo-ws -dir "c:\inetpub\demo-ws" -connstr "Srvr=server:1741;Ref=demo;" -descriptor apache-template.vrd8.7.3.4. Apache 2.2
8.7.3.4.1. General description
Grant the rights to the user on whose behalf Apache is running to the bin file directory of a specific 1C:Enterprise version (read and execute) and the infobase directory (read and write, for file mode only).
8.7.3.4.2. Publish dialog box
In the Web server field, specify Apache 2.2.
If necessary, specify the remaining publishing parameters on the Additional tab of the publishing dialog box.
8.7.3.4.3. Webinst utility
Before publishing, you need to create a template file:
-
In the Web server field, specify Apache 2.2.
-
Select the Publish HTTP services checkbox.
-
Select parameters of HTTP services to be published.
-
If necessary, specify the remaining publishing parameters on the Additional tab of the publishing dialog box.
-
To save the template file, click Save. Enter the template file name apache-template.vrd.
Perform publication using the template file.
Example:
webinst -publish -apache22 -wsdir demo-ws -dir "c:\inetpub\demo-ws" -connstr "Srvr=server:1741;Ref=demo;" -descriptor apache-template.vrd8.7.3.5. Apache 2.4
8.7.3.5.1. General description
Grant the rights to the user on whose behalf Apache is running to the bin file directory of a specific 1C:Enterprise version (read and execute) and the infobase directory (read and write, for file mode only).
8.7.3.5.2. Publish dialog box
In the Web server field, specify Apache 2.4.
If necessary, specify the remaining publishing parameters on the Additional tab of the publishing dialog box (see 277).
8.7.3.5.3. Webinst utility
Before publishing, you need to create a template file:
-
In the Web server field, specify Apache 2.4.
-
Select the Publish HTTP services checkbox.
-
Select parameters of HTTP services to be published.
-
If necessary, specify the remaining publishing parameters on the Additional tab of the publishing dialog box.
-
To save the template file, click Save. Enter the template file name apache-template.vrd.
Perform publication using the template file.
Example:
webinst -publish -apache24 -wsdir demo-ws -dir "c:\inetpub\demo-ws" -connstr "Srvr=server:1741;Ref=demo;" -descriptor apache-template.vrd8.8. OpenID authentication support settings
8.8.1. OpenID settings
If the infobase uses OpenID authentication, specify the address of the OpenID provider used for authentication in the default.vrd file (with which the infobase was published on the web server). The <openid> and <rely> elements are intended for this.
Example:
<?xml version="1.0" encoding="UTF-8"?><point xmlns=http://v8.1c.ru/8.2/virtual-resource-system xmlns:xs=http://www.w3.org/2001/XMLSchema xmlns:xsi="http://www.w3.org/2001/XMLSchema-instance"base="/demo"ib="Srvr="tcp://Server";Ref="demo";"enable="false"><openid><rely url="https://myserver.org/users-ib/e1cib/oid2op"/></openid></point>These elements describe the URL to the OpenID provider that authenticates the user to the infobase with OpenID authentication. In this example, the 1C:Enterprise infobase published at https://myserver.org/users-ib acts as an OpenID provider.
You can set up this parameter on the OpenID tab of the publication dialog box.
8.8.2. Configuring an infobase acting as an OpenID provider
If the infobase acts as an OpenID provider, specify this in the default.vrd file (with which the infobase was published on the web server). The <openid> and <provider> elements are intended for this.
Example:
<?xml version="1.0" encoding="UTF-8"?><point xmlns=http://v8.1c.ru/8.2/virtual-resource-system xmlns:xs=http://www.w3.org/2001/XMLSchema xmlns:xsi="http://www.w3.org/2001/XMLSchema-instance"base="/users-ib"ib="Srvr="tcp://Server";Ref="oidusers";"enable="false"><openid><provider><lifetime>432000</lifetime></provider></openid></point>These elements indicate that:
-
Infobase acts as an OpenID provider.
-
Lifetime of the authentication data is 432,000 seconds (or 5 days).
-
A URL to be specified in the <rely> element of the default.vrd file (OpenID provider address) can be: https://myserver.org/users-ib/e1cib/oid2op. URL will have this format if the name of the host where the infobase is published is myserver.org.
You can set up this parameter on the OpenID tab of the publication dialog box.
8.8.3. Additional interface for use by external resources
The OpenID provider implemented by 1C:Enterprise can be accessed using the standard OpenID 2.0 protocol considering some features:
-
In requests for interactive and non-interactive authentication (the openid.mode parameter is equal to checkid_immediate or checkid_setup), the openid.claimed_id and openid.identity parameters must be set to https://specs.openid.net/auth/2.0/identifier_select. Setting this value means that the user ID is determined by the provider.
-
Requests for non-interactive authentication with other values of the openid.claimed_id and openid.identity parameters result in a request for interactive authentication. During this authentication, the provider determines the openid.claimed_id and openid.identity values.
The OpenID provider implements a form for entering a username and password for interactive authentication.
The application also provides a number of commands that simplify the use of an OpenID provider by third-party systems, which are described below. When describing commands, the following abbreviations are used:
-
ProviderIB. Infobase of an OpenID provider.
-
RPID. Infobase of an OpenID relying party.
Request parameters are transmitted in UTF-8 encoding.
Request for OpenID Provider XRDS Document
Description:
Gets an XRDS document describing the properties of an OpenID provider.
Syntax:
https://example.com/ProviderIB/e1cib/oid2op
Return value:
XRDS document describing the properties of an OpenID provider.
Request for XRDS Document of OpenID Relying Party
Description:
Gets an XRDS document describing the properties of an OpenID relying party.
Syntax:
https://example.com/RPIB/e1cib/oid2rp
Return value:
XRDS document describing the properties of an OpenID relying party.
Authentication request
Description:
Performs authentication request.
Syntax:
https://example.com/ProviderIB/e1cib/oid2op?cmd=auth
Parameters:
- openid.auth.userrequired
- Username as specified in the OpenID provider database.
- openid.auth.pwdrequired
- User password.
- openid.auth.Data2FAoptional
- Data for the second authentication factor. Depends on the additional authentication provider type. Includes the colon-separated second factor check type, a session ID, and an optional secret code. For details, see the Status2FA header description in the response 402 to the authentication request.
- opeind.auth.shortoptional
- If the parameter is set to true, the authentication is performed within the session of the web browser, but not more than the lifetime parameter value of the default.vrd file, which describes the publication of the OpenID provider infobase.
- openid.auth.checkoptional
- Response to this request must be checked (the parameter is set to true). It makes sense only if the openid.return_to parameter is specified.
- openid.return_tooptional
- Contains the target URL that is opened after processing the request.
Return value:
If the openid.return_to parameter is not specified, an empty document with the HTTP status code is returned:
-
200. Authentication is successful.
-
400. Authentication is not completed.
-
402. Authentication by username and password is completed successfully. The second factor code is required. The response must have the Status2FA header, which can contain one of the numeric values:
-
1. The simple provider of the additional check checks the second factor using a secret code (the second factor check type).
-
2. The entered code is invalid.
-
3. The external provider of the additional check checks the second factor (the second factor check type).
-
4. Not used.
-
5. An additional access check session is not found.
-
6. An additional access check session for a simple provider of the additional check is not found.
-
7. An additional access check session for an external provider of the additional check is not found.
-
8. An additional access check timed out.
-
9. An additional access check code timed out.
-
10. The external provider access check timed out.
-
11. An error occurred when sending a request to the additional access check provider.
-
12. An error occurred when sending a request to check the second factor pass to the additional access check provider.
-
13. The external provider of the additional access check returned an error.
-
14. An additional access check setup template is not found in the infobase.
-
15. Unsupported type of the additional access check setup template.
-
16. All templates of the additional access check failed the check.
-
17. Not used.
-
18. The OpenID protocol for the second authentication factor is not followed.
-
19. The simple provider of the additional access check returned an error.
-
20. The additional access check request URL is invalid.
-
21. Invalid URL of the request to the external provider of the additional access check to check the second factor pass.
-
For all the error codes (except for 1 and 3), you can see error details in the Descr2FA header in text format. For codes 1 and 3 (the second factor check type), the opsid header returns a session ID as GUID.
If you get response 402 with Status2FA equal to 1 or 3, it indicates that the name and password in the additional check provider are checked. Next, pass the second factor with a code (value 1) or an additional check by an external provider (value 3). To do so, add the openid.auth.Data2FA parameter to the previous request. The parameter consists of the colon-separated second factor type (received in the Status2FA header), a session ID, and an optional secret code:
-
1:<opsid>:Secret_code if authentication with a code.
-
In case of authentication on the external provider side, add nothing. The server sends the request for authentication check and checks the second factor: 3:<opsid>:.
At the time of receipt of such a response code, a request to execute the second authentication factor has already been sent by the OpenID provider to the provider of the second authentication factor.
It is understood that the OpenID provider will check the username and the password, but will not create a user session when it detects the need to execute the second authentication factor. The session will be created at the next access, checking the username, the password, and the second factor again.
If the provider responded with the headers:
-
Status2FA: 1
-
opsid: 5d75e5a2-9cbc-48d5-9b40-c922e3404a1f
Respond with a request with the header: openid.auth.Data2FA=1:5d75e5a2-9cbc-48d5-9b40-c922e3404a1f:123456&openid.auth.user=myuser&openid.auth.pwd=mypassword.
If the openid.return_to parameter is specified, the user is redirected to the address specified in the parameter. If authentication is successful, the following parameters are added to the URL:
-
openid.auth.user with a username as a value.
-
openid.auth.uid with a one-time ID as a value to validate this response. This parameter is specified if the openid.auth.check parameter is specified in the authentication request.
In case of unsuccessful authentication, go to the specified URL without adding any parameters.
OpenID provider request for authentication check
Description:
Executes authentication request.
Syntax:
https://example.com/ProviderIB/e1cib/oid2op/2FACheck?user=xxx
Parameters:
- userrequired
- The username (xxx) whose authentication should be checked.
Return value:
An empty document with an HTTP status code is returned:
-
200. Authentication is successful, the user is authenticated using the second factor.
-
400. Authentication is not completed for one of the following reasons:
-
The user parameter is not specified.
-
There was no regular authentication request before this request.
-
Authentication failure.
-
Authentication timed out.
-
OpenID provider request to verify the active authentication
Description:
Authentication check is performed.
Syntax:
https://example.com/ProviderIB/e1cib/oid2op?cmd=lookup
Parameters:
- openid.return_torequired
- Contains the target URL that is opened after processing the request.
- openid.auth.checkoptional
- Response to this request must be checked (the parameter is set to true). It makes sense only if the openid.return_to parameter is specified.
Return value:
Redirecting to the URL specified in the openid.return_to parameter. If authentication is successful, the following parameters are added to the URL:
-
openid.auth.user with a username as a value.
-
openid.auth.uid with a one-time ID as a value to validate this response. This parameter is specified if the openid.auth.check parameter is specified in the authentication request.
In case of unsuccessful authentication, go to the specified URL without adding any parameters.
Check an OpenID provider response
Description:
Checks an OpenID Provider response for cmd=auth and cmd=lookup requests if the openid.auth.check parameter is set to true in the request.
Syntax:
ahttps://example.com/ProviderIB/e1cib/oid2op?cmd=check
Parameters:
- openid.auth.userrequired
- The username that is got from the request parameter of the same name.
- openid.auth.uidrequired
- The value of the one-time OpenID provider response ID obtained from the request parameter of the same name.
Return value:
A document of text/plain type with the following contents is returned:
-
is_valid:true. Response is indeed generated by the OpenID provider used. In this case, the HTTP status code is 200.
-
is_valid:false. Used OpenID provider did not generate the response being checked. In this case, the HTTP status code is 400.
Request to cancel authentication for a relying party
Description:
Cancels authentication if the OpenID provider URL is unknown. Finishes the current session, cancels authentication on the OpenID provider, and restarts the web client. The web client completes the authentication cancellation request for the OpenID provider.
Syntax:
https://example.com/RPIB/e1cib/oid2op?cmd=logout
Request to cancel authentication for an OpenID provider
Description:
Cancels authentication on the specified OpenID provider.
Syntax:
https://example.com/ProviderIB/e1cib/oid2op?cmd=logout
Parameters:
- openid.return_tooptional
- Contains the target URL that is opened after processing the request.
Return value:
If the openid.return_to parameter is specified, the user is redirected to the specified URL, otherwise an empty response is returned with the HTTP status code equal to 200.
8.8.4. Requirements for external OpenID providers
If it is necessary to use external (in relation to the 1C:Enterprise application) OpenID providers that are supposed to be used to authenticate users of the 1C:Enterprise infobases, the following should be considered:
-
The OpenID provider must support the OpenID Authentication 2.0 protocol specifications and the extension of this protocol implemented in the 1C:Enterprise platform.
-
To be able to use the 1C:Enterprise with thin client, the OpenID provider must use a cookie named vrs_oid2op_auth.
-
When receiving a request with an Accept HTTP header that prohibits the use of HTML content in the response, the OpenID provider should not use redirection with HTML forms (section 5.2.2 of the OpenID Authentication 2.0 protocol specification).
-
When returning the openid.claimed_id and openid.identity parameters to 1C:Enterprise infobases, the OpenID provider must set the values of these parameters in the <OpendID provider address>?lid<user login> format. For example, https://myserver.org/users-ib/e1cib/oid2op?lid=user1.
It may also be helpful to consider the following:
-
When 1C:Enterprise infobase accesses OpenID provider, it always passes the https://specs.openid.net/auth/2.0/identifier_select value in the openid.claimed_id and openid.identity request parameters.
-
1C:Enterprise infobase does not use a shared secret key (Diffie-Hellman's algorithm) to authenticate the provider's messages. Authentication is performed using a direct request to the OpenID provider, in accordance with the requirements of section 11.4.2 of the OpenID Authentication 2.0 protocol specification.
See also:
-
OpenID Authentication 2.0 (see https://openid.net/specs/openid-authentication-2_0.html).
-
OpenID Authentication 2.0, section 5.2.2 (see https://openid.net/specs/openid-authentication-2_0.html#indirect_comm).
-
OpenID Authentication 2.0, section 11.4.2 (see https://openid.net/specs/openid-authentication-2_0.html#indirect_comm).
-
Additional requirements for an OpenID provider (see Requirements for external OpenID providers).
8.9. Safety while using Internet services
8.9.1. Authentication
In general, the procedure of client access to an Internet service is as follows:
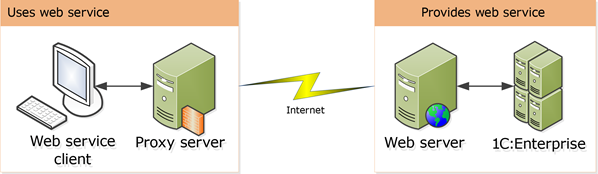
Fig. 69. Internet service connections
There are three different types of authentication:
-
On a proxy server. This authentication is not directly related to a web server, but you should remember about it if you need to use an Internet service from a network behind a proxy server.
-
On a web server. In this case, the following authentication types can be used:
- Anonymous authentication. In this case, all requests coming from the web server are performed under a special user who impersonates the "anonymous" connection.
In this case, 1C:Enterprise authentication is run using the username and the password transferred in the HTTP request.
- Basic authentication. In this case, the client of the Internet service passes the username and password for authentication to the web server in an HTTP request generated when accessing the web server.
In order to successfully perform this type of authentication, the username and password used to access 1C:Enterprise must also be used to access the web server. If a user, whose parameters are passed in an HTTP request, cannot access the web server, it means that they will not be able to use the Internet service.
- OS authentication. In this case, the web server determines the OS user on whose behalf the Internet service accesses 1C:Enterprise, and further this particular data is used.
In this case, the web server determines the OS user who is trying to access the web server, and then transfers to 1C:Enterprise both the parameters of the OS user and the data passed in the HTTP request to the Internet service. If the HTTP request contains the username and password, they are used for authentication, and the OS user data is not used. If the username and password are not specified in the HTTP request, the data of a specific OS user is used.
For a thin client connecting to the infobase via HTTP protocol (via a web server), and for a web client, the OS authentication operation is based on the possibility of impersonalizing a web browser user or a thin client user in a web server thread that executes HTTP requests. The impersonation of users by a web server depends on the type and setting of the web browser used, the type and setting of the web server, the settings of individual user rights, domain security policies, and so on. Impersonation is not always possible.
The corresponding settings are the subject of the administration of the network environment and are beyond the scope of the 1C:Enterprise documentation.
- 1C:Enterprise authentication. To perform this authentication, the web server extension uses the username and password that are transmitted by the web server (when using Basic authentication or OS authentication on the web server). In case of anonymous authentication on a web server, 1C:Enterprise will request Basic authentication. 1C:Enterprise expects the username and password to be passed in UTF-8 encryption.
If the Internet service is accessed from the Microsoft Internet Explorer web browser, it is not recommended to use non-Latin characters in the username and password.
When interacting with a web server, you can organize operations via a secure channel (see Operations over a secure channel).
When using the file mode of the infobase, the users on whose behalf access is performed must have access to the execution of the files of the required version of 1C:Enterprise and the rights to read and modify data in the infobase directory.
8.9.2. Operations over a secure channel
When a client interacts with an Internet services server, data can be exchanged over a secure channel. Secure communication channels prevent unauthorized viewing and alteration of data. The secure channel is TLS-based. Supported protocol versions: 1.0 – 1.3. TLS connections support cryptographic algorithms that comply with GOST R 34.10-94, R 34.10-2001, R 34.10-2012, R 34.11-94, R 34.11-2012, and 28147-89. When using TLS 1.3, only client certificates that use the above-listed GOST algorithms are supported. Server certificates can use any cryptographic algorithms. The outdated SSL 3.0 protocol is not supported.
TLS (Transport Layer Security) is a protocol used to provide secure interaction between a client and a server. TLS is based on:
-
Mutual authentication of the client and the server, so that both the client and the server are sure they are who they say.
-
Digital signatures to ensure data integrity (protecting data from unauthorized alteration).
-
Encryption to ensure the confidentiality of data (protecting data from unauthorized viewing).
TLS protocol supports various encryption options, digital signatures, certificates, and so on, to provide a secure channel with the required robustness.
TLS protocol uses a TLS session to establish a secure connection between a client and a server. Session is established by exchanging a sequence of messages between a client and a server. When establishing a session, the following actions can be performed:
-
Defining cryptography algorithms that will be used to encrypt and digitally sign the transmitted data.
-
Setting the session key.
-
Performing server authentication on the client side.
-
Performing client authentication on the server side.
To authenticate client on the server side and server on the client side, TLS uses certificates. A certificate is a document that describes a set of parameters of the party being authenticated. For example, the certificate can contain the username or the name of the server website. The certificate also contains a digital signature, which is used to verify its validity. Chains of certificates are used to prevent the possibility of uncontrolled issuance of certificates. The beginning of the chain of certificates is the Certificate Authority. It is an organization that issues certificates. If a particular user needs a certificate, they sends a request to the Certificate Authority to issue a certificate. Certificate Authority issues a certificate that is signed with its own private key. The user to whom the certificate is issued may, in turn, act as a Certificate Authority for other users. Thus, a chain of certificates is formed, the root of which is the Root Certificate Authority, which is, as a rule, a well-known organization. For a client to accept this certificate, it must be on the list of the certificates that this client trusts. The list can include both this certificate and any other certificates from the certificate chain of this certificate. As a rule, this is a certificate from the Root Certificate Authority. Please remember that 1C:Enterprise operates correctly with certificates only if the certificate fields contain data in US ASCII or characters encoded with Punycode. Certificate fields must not contain data in Unicode.
One of the most common uses of the TLS protocol is sending HTTP requests (the HTTPS). In this case, HTTPS is a URL scheme for addressing such resources, and the default port is 443.
The client part of the Web services engine automatically, using the URL scheme (HTTPS) of the location of the Web service, determines that the interaction with the Web service should be performed over a secure communication channel. The client also requires that a valid certificate be linked to the server issued by a Certificate Authority known to the client.
A server certificate is valid if its digital signature matches the content of the certificate, its validity date is not expired, and the website, for which the certificate was issued, corresponds to the server website. If the certificate is not valid, for example, the certificate website does not match the server website, then the client will not be able to communicate via TLS with the Web services of this website.
In order to enable the operation via TLS protocol, you need to:
-
Obtain a server certificate for the website, for which you plan to use TLS. The certificate is issued by a Certificate Authority and is linked to this website.
-
TLS support must be enabled for the web server.
-
In order for an application using a Web service to use a secure connection, you must explicitly specify this when connecting to the Web service. To do this, when creating the WSDefinitions and WSProxy objects, specify the SecureConnection parameter. When using a secure connection, you must specify the SecureConnectionOpenSSL object as the value of this parameter.
8.10. Configuring a web server
8.10.1. Apache
8.10.1.1. General specifics
In the case of publishing a file mode of the infobase to the Apache 2.2 web server (running under Windows), it is recommended to add the following fragment to the Apache web server configuration file (httpd.conf):
<IfModule mpm_winnt_module>ThreadStackSize 8388608</IfModule>If problems occur during the operation of the infobase associated with the exhaustion of the stack on the web server side, it is recommended to increase the value of the ThreadStackSize parameter. For more information about the ThreadStackSize parameter: https://httpd.apache.org/docs/2.2/mod/mpm_common.html#ThreadStackSize.
When using the Apache web server version 2.2 and later, running the Linux operating system, please use the multi-process worker module. For more information about the module: https://httpd.apache.org/docs/2.2/mod/worker.html or https://httpd.apache.org/docs/2.4/mod/worker.html. If the publication serves a file version of the infobase, it is not recommended that you allow the web server to create several working processes that serve one publication. If in the infobase file mode background jobs are used, for correct operation purposes the number of working processes in the pool you use must be equal to 1. To manage the number of working processes, set the ServerLimit 1 parameter in the worker module setup section (<IfModule worker.c> </IfModule> section) of the web server configuration file. If a multiprocess processing module is different from the recommended one, for settings of the number of working processes see documentation for the module you use.
8.10.1.2. Search algorithm for an installed web server
8.10.1.2.1. Apache 2.0
- On Windows
-
Service detection:
-
An attempt is made to read the HKEY_LOCAL_MACHINE\SYSTEM\CurrentControlSet\Services\Apache2\ImagePath registry parameter value.
-
In the resulting value, Apache2.exe is replaced with conf\httpd.conf.
-
If there is a file in the path received, then the Apache web server version 2.0 is considered to be detected.
-
-
Detecting the installation directory in the registry:
-
An attempt is made to access the HKEY_LOCAL_MACHINE\Software\Apache Software Foundation\Apache\2.0 registry key.
-
If the attempt fails, an attempt is made to gain access to the HKEY_CURRENT_USER\Software\Apache Software Foundation\Apache\2.0 registry key.
-
The open section reads the value of the ServerRoot parameter.
-
The parameter conf\httpd.conf is added to the parameter value.
-
If there is a file in the path received, then the Apache web server version 2.0 is considered to be detected.
-
-
Detection by default installation directory:
-
The httpd.conf configuration file is searched for in the default installation directory: C:\Program Files\Apache Software Foundation\Apache2\conf.
-
If the file is found, then the Apache web server version 2.0 is considered to be detected.
-
- On Linux
- The httpd.conf configuration file is searched for in the following directory: /etc/httpd/conf/.
8.10.1.2.2. Apache 2.2
- On Windows
-
Service detection:
-
An attempt is made to read the HKEY_LOCAL_MACHINE\SYSTEM\CurrentControlSet\Services\Apache2.2\ImagePath registry parameter value.
-
In the resulting value, Apache2.exe is replaced with conf\httpd.conf.
-
If there is a file in the path received, then the Apache web server version 2.2 is considered to be detected.
-
-
Detecting the installation directory in the registry:
-
An attempt is made to access the HKEY_LOCAL_MACHINE\Software\Apache Software Foundation\Apache\2.2 registry key.
-
If the attempt fails, an attempt is made to access the HKEY_CURRENT_USER\Software\Apache Software Foundation\Apache\2.2 registry key.
-
The open section reads the value of the ServerRoot parameter.
-
The parameter conf\httpd.conf is added to the parameter value.
-
If there is a file in the path received, then the Apache web server version 2.2 is considered to be detected.
-
-
Detection by default installation directory:
-
The httpd.conf configuration file is searched for in the default installation directory: C:\Program Files\Apache Software Foundation\Apache2.2\conf.
-
If the file is found, the Apache web server version 2.2 is considered to be detected.
-
- On Linux
- The apache2.conf configuration file is searched for in the following directory: /etc/apache2/.
8.10.1.2.3. Apache 2.4
- On Windows
-
Service detection:
-
An attempt is made to read the HKEY_LOCAL_MACHINE\SYSTEM\CurrentControlSet\Services\Apache2.4\ImagePath registry parameter value.
-
In the resulting value, Apache2.exe is replaced with conf\httpd.conf.
-
If there is a file in the path received, then the Apache web server version 2.4 is considered to be detected.
-
-
Detecting the installation directory in the registry:
-
An attempt is made to access the HKEY_LOCAL_MACHINE\Software\Apache Software Foundation\Apache\2.4 registry key.
-
If the attempt fails, an attempt is made to access the HKEY_CURRENT_USER\Software\Apache Software Foundation\Apache\2.4 registry key.
-
The open section reads the value of the ServerRoot parameter.
-
The parameter conf\httpd.conf is added to the parameter value.
-
If there is a file in the path received, then the Apache web server version 2.4 is considered to be detected.
-
-
Detection by default installation directory:
-
The httpd.conf configuration file is searched for in the default installation directory: C:\Program Files\Apache Software Foundation\Apache2.4\conf.
-
If the file is found, the Apache web server version 2.4 is considered to be detected.
-
- On Linux
- The apache2.conf configuration file is searched for in the following directory: /etc/apache2/.
8.10.1.3. Embedding Web Client
If you need to embed a web client into a website, it is recommended that you configure the X-Frame-Options response header in the required publication section of the httpd.conf web server configuration file as follows:
- If an external web site and web client are published on a single web server, make sure that a configuration file has the following strings:
LoadModule headers_module modules/mod_headers.soHeader set X-Frame-Options "sameorigin"- If an external web site and web client are published on different web servers, make sure that a configuration file has the following strings:
LoadModule headers_module modules/mod_headers.soHeader set X-Frame-Options "allow-from %WebSite%"In this expression, %WebSite% refers to a URL (protocol, domain, and port) of an external website where you plan to use the embedded web client.
- If a web client cannot be integrated with an external web site, make sure that a configuration file has the following strings:
LoadModule headers_module modules/mod_headers.soHeader set X-Frame-Options "deny"If there is not need to fine-tune the response header, make sure that none of the following exist in the configuration file:
LoadModule headers_module modules/mod_headers.soHeader set X-Frame-Options "deny"See also:
- Embedding a web client in an external web site.
8.10.2. Internet Information Services
8.10.2.1. 32-bit web server extension version on a IIS 64-bit version
If you are using the 32-bit version of a web server extension on a 64-bit version of the operating system, you must indicate to the web server that it can run 32-bit applications. To do this, you must perform the following operations:
- For IIS 5.1 and IIS 6.0, start the command interpreter and run the following command in it:
cscript %SYSTEMDRIVE%\inetpub\adminscripts\adsutil.vbs SET W3SVC/AppPools/Enable32bitAppOnWin64 1- For IIS 7.0 or later, open the dialog box to configure the main application pool settings: IIS configuration manager – <Specific server> – Application pools – <Desired application pool> – Advanced parameters. Set the Allow 32-bit applications parameter to True.
8.10.2.2. Application pool settings
When configuring IIS, remember that within one application pool, more than one web server extension module cannot be executed which differ only in the third and fourth digits of the version. To organize such operation, number if the application pools equal to the number of different versions of extension modules, and manually bind each virtual application of the web client to the required application pool.
If the publication serves a file version of the infobase, it is not recommended that you allow the web server to create several working processes in the same application pool. If in the infobase file mode background jobs are used, for correct operation purposes the number of working processes in the pool you use must be equal to 1. Working process numbers is managed by the following parameter: IIS configuration manager – <Specific server> – Application pools – <Desired application pool> – Advanced parameters – Working processes maximum number (in the Process model parameter group).
8.10.2.3. Error presentation setup
If 1C:Enterprise errors (when using IIS web server version 7.x and later) are displayed with a text of the following type: 500, an internal server error. A requested resource issue. Cannot display the resource. Change the parameter that controls error presentation. To do this, open the dialog box to configure error page parameters: IIS configuration manager – <Specific server> – websites – <Default Web Site> – <Virtual application name> – Error pages – Change parameters… In the opened dialog box, set the If the server detects an error, return parameter to Detailed error messages. Then, click OK.
8.10.2.4. Setup of the URL permissible length
When accessing the standard OData interface, the URL can be of significant length. By default, IIS restricts URL length to 260 characters. To change this restriction, it is necessary (with administrator rights) in the system registry, in the HKEY_LOCAL_MACHINE\SYSTEM\CurrentControlSet\Services\HTTP\Parameters section, create a UrlSegmentMaxLength parameter of DWORD type. Set this parameter to a required value or to 0 for unlimited URL length. Then, restart the computer on which the IIS is installed.
8.10.2.5. HTTPS-connection setup
In some cases, when downloading large amounts of data over an HTTPS connection (when using the IIS web server) errors may occur. In these cases, try to use TLS 1.2 or TLS 1.1 protocol. For IIS 7.5 and later (Windows 7 and later), you can enable TLS 1.1 and later. To do this, follow these steps:
-
In the system registry, in the HKEY_LOCAL_MACHINE\SYSTEM\CurrentControlSet\Control\SecurityProviders\SCHANNEL\Protocols\TLS 1.1\Server section, create the DisableByDefault parameter of the DWORD type and set it to 0.
-
In the system registry, in the HKEY_LOCAL_MACHINE\SYSTEM\CurrentControlSet\Control\SecurityProviders\SCHANNEL\Protocols\TLS 1.2\Server section, create the DisableByDefault parameter of the DWORD type and set it to 0.
-
These actions should be performed on behalf of a user with the administrative rights.
Then, restart the computer on which the IIS is installed.
8.10.2.6. Updating client application
To update the client application, set one of the following MIME types for .zip extension: application/x-zip-compressed (IIS web server is configured by default) or application/zip (IANA recommendation).
To set (or check) a MIME type, do the following:
-
Entire web server settings: IIS configuration manager – IIS group – MIME types.
-
Website settings: IIS configuration manager – websites – <selected website> – IIS group – MIME types.
-
Website page settings: IIS configuration manager – websites – <selected website> – <selected web page> – IIS group – MIME types.
-
In the MIME types list, find the record for the .zip extension and check that the specified MIME type corresponds to the types supported by 1C:Enterprise. If the list does not contain a record for .zip extension, create this record.
8.10.2.7. Embedding Web Client
If you need to embed a web client into a website, it is recommended that you configure the X-Frame-Options response header for the web client application as follows:
-
If an external website and a web client are published on a single web server, the header accepts sameorigin.
-
If an external website and a web client are published on different web servers, the header is set to allow-from %WebSite%. In this expression, %WebSite% refers to a URL (protocol, domain, and port) of an external website where you plan to use the embedded web client.
-
If a web client cannot be integrated with an external web site, the header accepts deny.
If there is no need to configure the response header, make sure that the web client application settings do not contain X-Frame-Options response header with the deny value.
See also:
- Embedding a web client in an external web site.
8.10.3. Reverse Proxy
Reverse proxy (reverse proxy server) is a proxy server that relays client requests from an external network to one or more servers located on the internal network. It can be used for load balancing and increased safety.
If the access to the web servers on which the 1C:Enterprise infobases are published is carried out via reverse proxy, then if the reverse proxy is not properly configured, this may lead to the inoperability of some components. It might happen because a request received by 1C:Enterprise web server is not sent from an external client application but from a computer where reverse proxy is installed. External client application is a client application that connects to reverse proxy. To this proxy server, the client application redirects a request to a web server where 1C:Enterprise infobase is published.
To ensure that 1C:Enterprise correctly determines a client application HTTP request and some client application parameters, configure reverse proxy according to the purpose:
-
To "restore" an HTTP request: when you redirect an HTTP request, the X-Forwarded-Port, X-Forwarded-Host, and X-Forwarded-Proto request headers are appropriately configured.
-
To determine an IP address of an external client application: when you redirect an HTTP request, the X-Forwarded-For request headers are appropriately configured.
A detailed description of the reverse proxy settings should be found in the documentation for the web server used for this purpose.
Chapter 9. Configuring web browsers to operate in the web client
This chapter describes the settings for web browsers that you need to do to operate in a web client.
9.1. General settings
If the software that blocks the opening of windows of web browsers or sending HTTP requests is installed on the computer, on which the web client is used, then the necessary websites (addresses of the infobases) should be included in the list of exceptions.
To ensure stable operation of OS authentication when a thin client connects via a web server, you need to enter the address of the infobase used in the trusted zone of the Microsoft Internet Explorer web browser.
9.2. Mozilla Firefox
9.2.1. Connection settings
To get started, apply the following settings:
-
Start a web browser.
-
In the menu, click Settings.
-
Go to the Privacy and Security section and apply the following settings:
- In the Cookies and site data section, select Accept cookies and site data or add infobase addresses to the exceptions list (to open the dialog box, click Exceptions…).
You should include the request of the location of the file being saved. To do this:
-
Start a web browser.
-
In the menu, click Settings.
-
Go to the Main section and apply the following settings:
- In the Downloads group, select Always ask to save files.
9.2.2. Automatic authentication
You can customize Mozilla Firefox for automatic OS authentication with some exceptions described in Authentication.
You can also apply these settings manually:
-
Start a web browser.
-
In the address bar of the browser, type about:config.
-
On the settings page, enter the name of the parameter in the search bar.
This setting can be performed for three parameters:
-
network.automatic-ntlm-auth.trusted-uris.
-
In a specific network and web server configuration, you may need to set values for the network.negotiate-auth.trusted-uris and network.negotiate-auth.delegation-uris parameters.
-
Next, specify a list of web servers used to work with 1C:Enterprise infobase.
For more information about this feature, follow: https://developer.mozilla.org/En/Integrated_Authentication.
The following is a description of what the above parameters are responsible for with different authentication methods:
- The web server supports NTLM authentication.
If the name of the web server that is being accessed is listed in the list of names contained in the network.automatic-ntlm-auth.trusted-uris parameter, an automatic authentication will be attempted. If the name of the web server is not found, the browser will show a dialog, in which you must specify the username and password of the user to access the web server.
- The web server supports Kerberos authentication.
In order to access the web server with this type of authentication, add the name of this web server to the network.negotiate-auth.trusted-uris parameter. For a file infobase, this is enough. If it is necessary to provide automatic authentication of web client users when using the 1C:Enterprise client/server mode, add the DNS name of this web server to the network.negotiate-auth.delegation-uris parameter.
If the name of the web server being accessed is not found in the network.negotiate-auth.trusted-uris parameter, no authentication will be performed and the user will see the Unauthorized 401 error message. To inform the user about the actions required from them, the administrator can modify the 401 error message page (see the documentation for the web server used).
9.3. Microsoft Internet Explorer
9.3.1. Connection settings
To get started, apply the following settings:
-
Start a web browser.
-
In the Tools menu, select Browser properties.
-
In the window that opens, go to the Security tab.
-
Click Other.
-
In the window that opens:
-
In the Scripts section, set Active Scripts parameter to Allow or Enable.
-
Click OK.
-
-
Go to the Privacy tab. In the Settings section, click Advanced. In the First-party cookies parameter, select Accept. In the Third-party cookies parameter, select Accept. You can also click Sites button (in the Parameters section) and specify the required parameters for infobase addresses.
-
Click on Advanced. In the Multimedia section, select the Show pictures check box.
9.3.2. Using add-ins, file system extensions, cryptography extensions, and client application agent extensions
If you intend to use add-ins (barcode scanner, electronic scales, and other), file system extensions, cryptography extensions and more, select the appropriate zone on the Security tab: Trusted sites or Local intranet, and then do the following:
-
On the Security tab, click Other.
-
In the Parameters window, go to the group of the ActiveX controls and plug-ins parameters. Under the group, Allow the following parameters by selecting Enable:
-
Automatic queries of ActiveX controls
-
Script ActiveX controls marked safe for scripting
-
Run ActiveX controls and plug-ins
-
Download signed ActiveX controls
-
-
In the same window (Security Settings), set Download signed ActiveX objects with user permission or Download signed ActiveX controls to Prompt.
You can also configure ActiveX using the ActiveX Installation Service (on Windows Vista and Windows 7). A detailed description of settings can be obtained:
-
On Windows Vista: https://technet.microsoft.com/ru-ru/library/cc721964(WS.10).aspx.
-
On Windows 7: https://technet.microsoft.com/ru-ru/library/dd631688(WS.10).aspx.
9.4. Google Chrome
To get started, apply the following settings:
-
Start a web browser.
-
In the menu, click Settings.
-
Click Additional hyperlink.
-
Click Content settings.
-
In the Cookies section, select the Allow sites to save and read cookies (recommended) check box or add infobase addresses to the exception list.
-
In the JavaScript section, check the Allowed (recommended) box or add the addresses of infobases to the exception list.
You should include the request of the location of the file being saved. To do this:
-
Start a web browser.
-
In the menu, click Settings.
-
Click Additional hyperlink.
-
In the Downloaded files section, select the Always specify a location to download checkbox.
9.5. Safari
To get started, apply the following settings:
-
Start a web browser.
-
In the menu, click Safari – Settings....
-
On the Security tab, select the Enable JavaScript check box.
-
On the Privacy tab, go to the Cookies and website data group and clear the Block all cookies checkbox.
You should include the request of the location of the file being saved. To do this:
-
Start a web browser.
-
In the menu, click Safari – Settings....
-
On the Main tab, set the Import folder setting to Ask before importing.
Chapter 10. Protection against unauthorized use: features and settings
10.1. General information
Protection against unauthorized use of 1C:Enterprise can be based on the HASP4 Net network security system or the software licensing system (SLS). Any of these systems provides simultaneous operation of a certain number of users (sessions) with 1C:Enterprise. The users can be located both within the local network and outside it (when using web clients or thin clients connected via a web server). The choice of a security system depends on the software distribution package. For more information about 1C:Enterprise application license kinds, see Platform and licensing options. For comparison of features and application areas of 1C:Enterprise licenses, see the table below.
| Feature | Software | Hardware |
|---|---|---|
| Can be stored on user computer | Yes | Yes |
| Can be stored on 1C:Enterprise server | Yes | Yes |
| Can be stored on another computer in a local network | No | Yes |
| Licenses stored on the same computer can be combined | Yes | No, only keys of different series |
| Can be shared over networks for any infobase types (license manager) | No | Yes |
| Can use licensing service | Yes, both client and server licenses | No |
License consumption options:
| License consumption option | Software | Hardware |
|---|---|---|
| License is acquired by client application on a local computer | Per computer | Per computer |
| License is acquired by client application from license manager over network | Not supported | Per computer |
| License is acquired by client application from 1C:Enterprise server | Per session | Per session |
| Web client | Per session | Per session |
| Mobile client | Per session | Per session |
"Per computer" license allows you to run any number of client applications using any number of infobases on the computer that has the license. "Per session" license is acquired for one session only. Each infobase connection requires a separate "per session" license.
You can also check the licensed use of a particular application (see Protection against misuse of applications). This check uses information about the application and the user for whom this application is registered.
10.2. HASP security system
10.2.1. General information
To protect against unauthorized use of 1C:Enterprise, you can use the network security system HASP4 Net. This security system helps to ensure the simultaneous operation of a certain number of users (sessions) with 1C:Enterprise. At the same time, users can be located both within the local network and outside it (web clients and thin clients connected to the infobase via a web server). In this case, users are counted either by HASP License Manager, or by the server of 1C:Enterprise.
With any method of counting users, one or several computers must be on the network, to the USB ports of which the client HASP4 Net USB keys are connected. The total number of users who can use the system is defined as the sum of licenses available in each of the connected client keys, considering some features.
You can start HASP License Manager as an ordinary Windows application, as a service (only on Microsoft Windows 2000 or later), or as a Linux application. When using a multi-user protection system, there is no need to install the HASP Device Driver on user computers, on which 1C:Enterprise is running and to the USB port of which the 1C:Enterprise client dongle is not connected.
You can download the latest versions of the HASP Device Driver and the HASP License Manager from:
-
HASP Device Driver: https://releases.1c.ru/project/AddCompDriverHASP.
-
HASP License Manager: https://releases.1c.ru/project/AddCompNetHASP.
10.2.2. USB key marking
| USB key function | Marking |
|---|---|
| Local client USB key | ORGL8 |
| Multi-user client key (the number of users is specified after "NET": 5, 10, 20, 50, 100) | NET5 ORGL8
NET10 ORGL8
NET20 ORGL8
NET50 ORGL8
NET100 ORGL8 |
| Multi-user client key for 300 users | NET250+ ORG8A |
| Multi-user client key for 500 users | NET250+ ORG8B |
| Local key for 32-bit server | ENSR8 |
| Local key for 64-bit server | EN8SA |
A multi-user license for 1 000 users is supplied as a set of two multi-user licenses for 500 users (two NET250 + ORG8B keys are included in the package).
10.2.3. Specifications
One key of series ORGL8, ORGL8A and ORGL8B can simultaneously work on the same computer. The licenses are searched in the following order:
-
In the ORGL8 key
-
In the ORG8A key
-
In the ORG8B key
The 32-bit server USB security key enables to run an arbitrary number of 32-bit working processes on a single physical computer. The 64-bit server USB security key enables to run an arbitrary number of 32-bit and 64-bit working processes on a single physical computer.
When using security keys, USB over IP is not supported. This tool allows getting access to a USB device connected to a physical computer (for example, a host machine) from a virtual machine. If you need to run 1C software on a virtual machine, it is recommended that you use either a software licensing system or a server cluster licensing service that runs on a physical computer.
There is a function of storing the protection key, which license was obtained by the user during the last connection. During the next access attempt, a license will be obtained from this key. If a license cannot be obtained from the stored key, the search for an available license will be performed as described above.
10.2.4. Protection against unauthorized use
To prevent the unauthorized use, 1C:Enterprise is provided to users in a protected form.
The possibility to use the software at one or several workplaces, as well as the ability to use the 1C:Enterprise server are determined by the existing license agreements.
One of the components of the security system used is the USB key that protects against unauthorized use.
For the operation of the product, the use of which is governed by the License Agreement for one workplace or for one additional workplace, connect a USB to the USB port of the computer. If the use of the product is regulated by an additional multi-user license, connect the USB key to the USB port of the computer running HASP License Manager.
Information about the latest changes in the security system is placed in the readme.htm file.
10.2.5. Monitoring client licenses
10.2.5.1. General information
Depending on the type of client and the location of the key (local or network) with client licenses, several options for license monitoring are available. Let's have a closer look at them.
10.2.5.2. File mode
In this case, there are the following options for obtaining licenses.
10.2.5.2.1. Local USB key
Allows running any number of instances of the application in 1C:Enterprise or Designer mode on a computer with the USB key.
10.2.5.2.2. Multi-user client USB key accessible over the network through the HASP License Manager
Provides simultaneous operation of the computers depending on the number of users in the key. Allows running any number of instances of the application in 1C:Enterprise or Designer mode.
The number of licenses is limited by the total number of available licenses from all computers on the network, on which the HASP License Manager is installed and configured.
10.2.5.3. Client/server mode
In this case, there are the following options for obtaining licenses.
10.2.5.3.1. Local USB key
Allows running any number of instances of the application in 1C:Enterprise or Designer mode on a computer with the USB key.
10.2.5.3.2. Multi-user client USB key accessible over the network through the HASP License Manager
Provides simultaneous operation of the computers depending on the number of users in the key. Allows running any number of instances of the application in 1C:Enterprise or Designer mode.
The number of licenses is limited by the total number of available licenses from all computers on the network, on which the HASP License Manager is installed and configured.
10.2.5.3.3. Local multi-user client key without an installed HASP License Manager and multi-user client key accessible via the network through the HASP License Manager
In this case, the key can be located both on the computer where the 1C:Enterprise server is installed (local multi-user client key) and on the network. The licenses number is counted by the cluster manager to which the session data service is assigned. In this case, one license is used for one session. Thus, if two instances of 1C:Enterprise are running on the same computer (in any startup mode and with any client kind), then two licenses will be spent on it.
See also:
- Shared use of security keys (see Shared use of security keys).
10.2.5.4. Web client
Depending on the infobase mode (file or client/server), licenses are counted by either the web server extension module (in file mode) or 1C:Enterprise server (in client/server mode).
In this case, the key can be located both on the computer where the web server extension module is installed (or 1C:Enterprise server), and on the network. The web server extension module (or 1C:Enterprise server) directly counts the licenses. In this case, one license is used for one session. Thus, if two windows of a web browser are open on the same computer with access to the same infobase, then two licenses will be spent on it.
See also:
- Shared use of security keys (see Shared use of security keys).
10.2.5.5. Thin client running via web server
To obtain licenses, the thin client can use:
-
Local USB key
-
Multi-user USB key accessible for the thin client over the network through the HASP License Manager
-
Web server extension module or 1C:Enterprise server
If a license is obtained directly by a thin client, then on one computer, you can start an arbitrary number of instances of the application in 1C:Enterprise mode.
A license can also be issued by a web server extension module (in the case of the file mode) or by 1C:Enterprise server (in the case of the client/server mode). In this case, the web server extension module or 1C:Enterprise server directly counts the licenses number. In this case, one license is used for one session. Thus, if two instances of 1C:Enterprise are running on one computer, then two licenses will be spent for this. In this case, the key can be located both on the computer where the web server extension module is installed (or 1C:Enterprise server), and on the network.
See also:
- Shared use of security keys (see Shared use of security keys).
10.2.5.6. Local key and web client
If a local key is installed on a computer with 1C:Enterprise server or a web server (in the case of a file infobase), then you can run:
-
Any number of Designer instances on a computer with the key.
-
Any number of client applications (except for the web client) on other computers if client licenses are available to them.
-
In case of the infobase file mode:
-
One client application (including the web client) on any computer if the client key is not available to it.
-
Any number of client applications (except the web client) on a computer with the USB key.
-
-
In case of the infobase client/server mode:
-
One client application (including the web client) on any computer if the client key is not available to it.
-
Any number of client applications (except the web client) on a computer with the USB key.
-
In other words, you can perform developing and debugging with a web client using just the local key.
10.2.5.7. COM connection
When using a 32-bit COM connection, the available licenses are searched for in the following order:
-
Local client licenses
-
Local server licenses (both 32-bit and 64-bit)
-
Network client licenses
-
Client licenses on the 1C:Enterprise server (when in client/server mode) or on the web server (when in file mode, connected via the web server)
When using a 64-bit COM connection, the available licenses are searched for in the following order:
-
Local client licenses
-
Local server license (64-bit only)
-
Network client licenses
-
Client licenses on the 1C:Enterprise server (when in client/server mode) or on the web server (when in file mode, connected via the web server)
10.2.5.8. Internet services, background jobs
Internet services (web services, HTTP services, and requests to OData) and background jobs do not require client licenses. However, if the infobase that provides Internet services operates in client/server mode, you must have a server license to operate 1C:Enterprise server.
10.2.5.9. Terminal server
In this case, there are the following options for obtaining licenses.
10.2.5.9.1. Local USB key
Using a local key in the terminal session is not possible on the following operating systems:
-
Client operating systems: Microsoft Windows 7 and later.
-
Server operating systems: Microsoft Windows Server 2012 and later.
If the operating system used is later than the above, then using a local key allows only one user to operate, who has connected to the terminal session with the identifier 0. Allows running any number of instances of the application in 1C:Enterprise or Designer mode. For terminal sessions with a non-zero session identifier, local keys are not available.
10.2.5.9.2. Multi-user client key
You can use licenses from a multi-user client key installed on the terminal server only if the HASP License Manager is installed and configured on the terminal server. Client licenses are counted for in a manner similar to a multi-user client key available on the network through the HASP License Manager. In this case, one terminal session is considered as one workstation.
10.2.5.10. Mobile client
Depending on the version of the infobase, the license is counted by:
-
File mode: web server extension module.
-
Client/server mode: 1C:Enterprise server.
The key can be located both on the computer where the web server extension module (or 1C:Enterprise server) is installed, and on the network. One license is used for one session. Thus, if two instances of an application that are connected to the same infobase are running on the same mobile device, then two licenses will be spent on it.
Also note that the mobile client always requires a separate client license (from a multi-user package) for its operation. It means that the full development of an application running on a mobile client using only a local protection key is impossible.
See also:
- Shared use of security keys (see Shared use of security keys).
10.2.5.11. Shared use of security keys
When 1C:Enterprise server (or web server extension) counts client licenses, client licenses that have the Timeout column value equal to 0 in Aladdin Monitor will be considered used. In this regard, it is not recommended to use the same multi-user HASP keys to simultaneously obtain client licenses using the HASP License Manager and the 1C:Enterprise server (or web server extensions).
Also note that if several multi-user ORGL8 client keys are detected on the network, the server will select one random key. After all licenses are used up for this key, you may use one multi-user ORG8A key, and then you may use one multi-user ORG8B key. When a client application selects the same network client key, which is selected by the server, the client application can also stop searching for a license in other keys of the same series available on the network.
10.2.5.12. Standalone server
If a standalone server is used, a license can be obtained using:
-
Local key (thin client only).
-
Multi-user key available to thin client in the network via HASP License Manager.
-
Standalone 1C:Enterprise server.
If a license is obtained directly by a thin client, then on one computer, you can start an arbitrary number of instances of the application in 1C:Enterprise mode.
If a license is issued by a standalone server, then licenses are spent "per session". In this case, the key must be available to the instance of the standalone server that serves the used infobase. For the standalone server, enable the option to issue licenses (the infobase.distribute-licenses parameter of the standalone server configuration file).
10.2.6. Obtaining server licenses
10.2.6.1. Server clusters
The USB security key must be installed on the computer running (one or more) working process (rphost) of the server cluster. Working processes may belong to different server clusters. A server license is checked for when the client application connects to the working process.
The server USB security key is local and unavailable over the network.
10.2.6.2. Standalone server
The hardware dongle must be installed on the computer on which the standalone server instance is running. The standalone server dongle is local and unavailable over the network. The standalone server checks the server license in the following cases:
-
The infobase served by the standalone server is not a file infobase and one of the following standalone server connections is established:
-
1C:Enterprise client application connection.
-
The ibcmd utility is connected to a running standalone server instance on a local computer (IPC protocol, the --pid startup command-line parameter is used).
-
The ibcmd utility is connected to a running standalone server instance on a remote computer (SSH protocol, the --remote startup command-line parameter is used).
-
Standalone server connection over SSH protocol.
-
-
The infobase served by the standalone server is a file infobase and there are 3 active concurrent client sessions with this infobase.
Standalone server does not require (or check) the server license when using the file infobase for no more than 3 (three) client sessions (including three sessions). At the same time, sessions of background jobs and Internet services are not technically considered when calculating the number of concurrent sessions.
The ibcmd utility requires the server license in offline mode (the --data startup command-line option is used) when connecting to the client/server infobase. It implies that you can start the ibcmd utility in offline mode only on the computer with the server license.
10.2.7. Installing HASP Device Driver
10.2.7.1. On Windows
The HASP Device Driver installer (haspdinst.exe) is included in the distribution package and installed on the computer along with the 1C:Enterprise server cluster.
To install HASP Device Driver, click Start – Programs – 1C:Enterprise 8 – Additionally – Protection driver installation.
You can also install the HASP Device Driver "manually". To do this, from the command line, run the haspdinst.exe program located in the \Program Files\1cv8\common\ directory with the -i command. Thus, the command line for installing the HASP Device Driver is as follows:
haspdinst -iIf not needed, you can remove HASP Device Driver from the system. To remove HASP Device Driver, click Start – Programs – 1C:Enterprise 8 Additionally – Protection driver removal.
To remove the HASP Device Driver, you can also use the following command line:
haspdinst -r10.2.7.2. On Linux
Download HASP Device Driver for Linux before the installation. For download links, see General information.
To install the HASP Device Driver, perform the following steps (actions must be performed as administrator):
- Unpack the archive by executing the command:
tar xzf HASP_SRM_LINUX_3.50_Run-time_Installer_script.tar.gz- Go to the directory with the unpacked driver by executing the command:
cd HASP_SRM_LINUX_3.50_Run-time_Installer_script- Install the driver by executing the command (make sure that you enter the dot at the end of the command line):
./dinst .To remove the driver key, go to the directory with the unpacked driver and execute the command:
./dunst10.2.7.3. On macOS
Download HASP Device Driver for macOS before the installation. For download links, see General information.
To install the driver, open this archive using the Finder, run the Install Sentinel Runtime Environment file, and then follow the instructions of the installer.
To delete the driver, open this archive using the Finder, run the Uninstall Sentinel Runtime Environment file, and then follow the instructions of the uninstaller.
10.2.8. Installing HASP License Manager
10.2.8.1. On Windows
The 1C:Enterprise application includes the lmsetup.exe utility used to install the HASP License Manager. The utility is located on the 1C:Enterprise installation disk. You can start it either directly from the command line or through the 1C:Enterprise installer menu.
You can install HASP License Manager on any computer on a local network running Microsoft Windows operating systems. At the same time, you can install HASP License Manager in any of these systems as an ordinary application. In Microsoft Windows 2000 or later, you can also install it as a Windows service.
To install HASP License Manager, open the lmsetup.exe installer. The following is an example of installing HASP License Manager version 8.32.
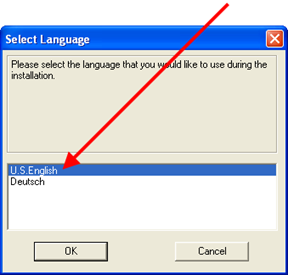
Fig. 70. Language selection
Then select English for the installation (see fig. 70).
Next, confirm that you accept the proposed license.
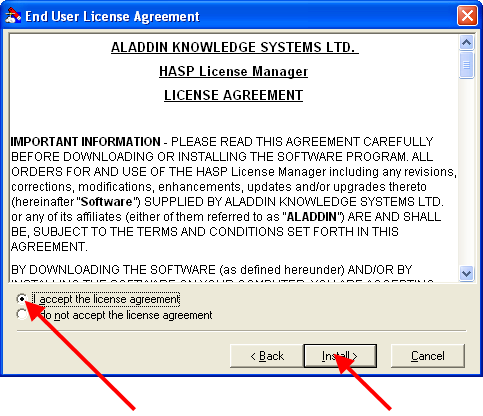
Fig. 71. License acceptance
If you install the HASP License Manager on a computer running Windows 2000 or later, you will be offered two options for installing the HASP License Manager: as an application (Application) or as a service (Service). The dialog box is skipped for HASP License Manager installed on a computer under Windows 98/Me as these operating systems support only the application installation.
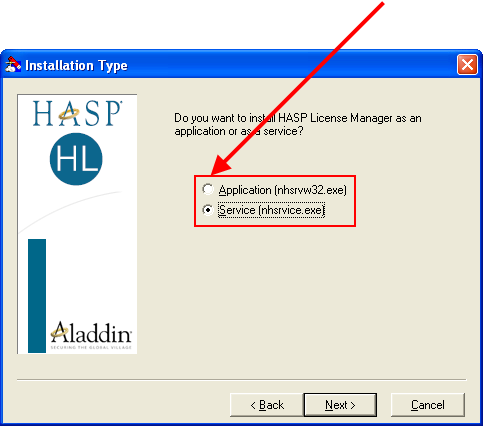
Fig. 72. Selecting installation mode
Next, you will be prompted to select a directory where the HASP License Manager executable files and the help file will be placed. If you install the HASP License Manager as a Windows service, the executable files will be placed in the Windows system directory, and only the help file will be installed in the selected directory.
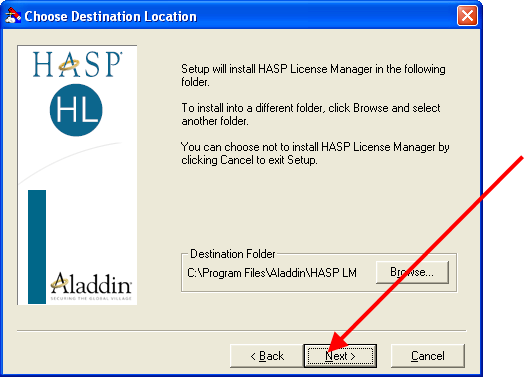
Fig. 73. Choosing the HASP License Manager installation path
At the next step of the installation, you will be prompted to select a group in which the shortcuts for starting the HASP License Manager and the help file will be placed. By default, a new group is created with the name HASP License Manager, but you can select an existing group or change the name of the group being created.
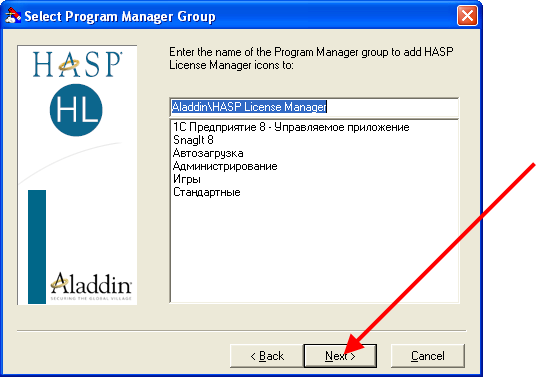
Fig. 74. Specifying a group name
If you install the HASP License Manager as a Microsoft Windows application, you will be prompted to place the HASP License Manager shortcut in the Startup directory. In this case, the HASP License Manager will start automatically when the operating system boots. If you choose the other option, you will have to start the HASP License Manager manually.
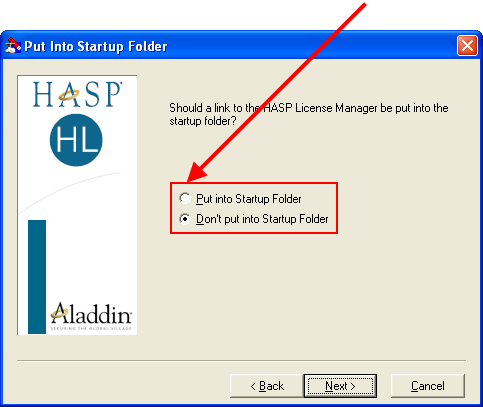
Fig. 75. Selecting run mode
At the next step, it is proposed to install the HASP Device Driver, which is necessary for the normal operation of the HASP License Manager. Using this driver, the HASP License Manager interacts with the HASP4 Net USB dongle. If the HASP Device Driver has already been installed on the computer, then reinstalling the HASP License Manager is not required.
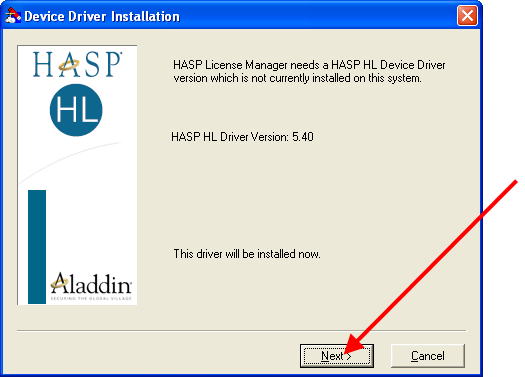
Fig. 76. Installing the protection driver
After the installation process is complete, you will be prompted to start the HASP License Manager. If you refuse, you can start it later manually. Procedures for starting the HASP License Manager for various installation options are described below.
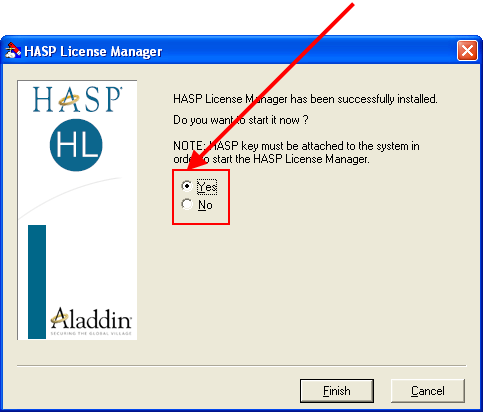
Fig. 77. HASP License Manager starting dialog
10.2.8.1.1. Starting HASP License Manager as Microsoft Windows application
If the HASP License Manager was installed as a Microsoft Windows application, it is started by running the nhsrvw32.exe program file, which is placed on the hard drive of the computer by the HASP License Manager setup program.
When you run nhsrvw32.exe from a command line, you can set the parameters, by which HASP License Manager can be more "instructed" about using a particular network protocol for interaction with the protected programs.
Note that configuring network protocols makes sense only when the default mode of using the network protocols causes unstable operation or there are serious delays in running protected programs.
Each parameter is preceded with "-" or "/". Example:
nsrvw32 -tcpipOr:
nsrvw32 /tcpipWhen you start the nhsrvw32.exe program, the following parameters can be used.
- -addrpath=<path>
- Specifies where to save the haspaddr.dat file. By default, the file is saved in the directory where the HASP License Manager was downloaded.
- -ipx
- Instructs the HASP4 Net application to use the IPX protocol with SAP.
- -ipxnosap
- Instructs the HASP4 Net application to use the IPX protocol without SAP. When using the HASP License Manager for Win32, other protocols can be loaded using the-tcpip or -netbios commands. In this case, the HASP License Manager creates a newaddr.dat file that contains the address of the station where the HASP License Manager is running. When you download the HASP License Manager with one of these keys, only those protected applications that have access to the newaddr.dat file will be able to exchange data with it.
- -ipxsocket num=<number>
- Use the parameter when you need to change the socket for HASP License Manager data exchange. The default socket is 7483 (hex value).
- -localnet
- Use this parameter if you want the HASP License Manager to serve the stations exclusively on the local network. If the HASP License Manager receives requests from workstations that are not on the local network, they get error code 140.
- -nbname=<name>
- Assigns a NetBIOS name to the HASP License Manager. The parameter action is identical to -nethaspnb name.
- -netbios
- This parameter allows you to use the HASP4 Net application only with NetBIOS protocol. When using the HASP License Manager for Win32, other protocols can be loaded using the -tcpip or -ipxnosap commands.
- -portnum=<number>
- If TCP/IP is used, you can use the parameter to specify a network port for HASP License Manager. Default port: 475.
- -srvname=<name> \[,name\]
- Assigns one or more IPX, TCP/IP, or NetBIOS names to the HASP License Manager. A maximum of 6 names can be assigned.
- -tcpip
- This parameter allows you to use the HASP4 Net application only with TCP/IP protocol. When using the HASP License Manager for Win32, other protocols can be loaded using the -ipx or -netbios parameters.
- -use lananum=<x> \[,x\]
- Instructs HASP License Manager to operate with specific communication channel numbers.
- -userlist
- Limits the number of users serviced by the HASP License Manager. Default value: 250.
10.2.8.1.2. Running HASP License Manager as a Microsoft Windows service
You can start HASP License Manager as a Microsoft Windows service only if it was installed to operate as a service. As noted above, this is possible only in the environment of Microsoft Windows 2000 or later.
When you install HASP License Manager as a Microsoft Windows service, it is installed as a startup, that is, HASP License Manager will start every time you start Microsoft Windows.
If necessary, you can change the startup settings of the service and start and stop it manually.
To start, stop, and configure HAPS License Manager manually, click Start – Setup – Control Panel – Administrative Tools – Service. In the list of services that appears, find the HASP Loader service and right-click it. Through the context menu that appears, you can perform all the necessary actions with the service.
10.2.8.2. On Linux
Download HASP License Manager for Linux before proceeding with the installation. For download links, see General information. To use HASP License Manager, install the protection key driver. For download links, see General information.
To install the HASP License Manager, perform the following steps (actions must be performed as administrator):
-
Copy the downloaded file to the directory where the HASP License Manager will be located (for example,/opt/hasplm).
-
Unpack the archive by executing the command:
tar xzf hasplm_linux_8.30.tgz- Add the HASP License Manager starting command (before exit 0 command) to the /etc/rc.local file from the directory where it was unpacked:
/opt/hasplm/hasplmAdding a command to the rc.local file will cause the HASP License Manager to start automatically when the system restarts.
- Start HASP License Manager by executing the command:
hasplmIf you want to configure HASP License Manager using the nhsrv.ini configuration file (see nhsrv.ini), specify the path to the configuration file in the HASP License Manager command line:
/opt/hasplm/hasplm -c /etc/nhsrv.ini10.2.8.3. Configuring the HASP License Manager with a configuration file
You can specify some HASP License Manager settings using the nhsrv.ini configuration file.
If you are using keys with a lot of user licenses (for 300, 500, and 1,000 users), please pay attention to the NHS_USERLIST parameter when configuring HASP License Manager.
10.2.9. Setting up the 1C:Enterprise application for operation with the HASP License Manager
The 1C:Enterprise application is capable of using IPX, TCP/IP, or NetBIOS network protocols to communicate with the HASP License Manager. By default, the network protocol is defined automatically. This mode is always recommended, except when the automatic network protocol detection and communication setup mode is unstable or causes significant delays.
To configure the parameters of the interaction of the "1C:Enterprise" system with the HASP License Manager, the configuration file nethasp.ini is used.
Example of nethasp.ini file:
[NH_COMMON]NH_TCPIP=Enabled[NH_TCPIP]NH_SERVER_ADDR=192.168.0.12NH_PORT_NUMBER=475NH_TCPIP_METHOD=UDPNH_USE_BROADCAST=DisabledIn this example, the protection server is located on the network at 192.168.0.12, the network port 475 is used, UDP packets are used, and the TCP/IP broadcast mechanism is denied.
When installing the 1C:Enterprise application, the sample file nethasp.ini is copied to the directory of the configuration files of the 1C:Enterprise application. This file is almost entirely composed of commented lines and does not override the default settings in any way but it contains at the same time the most complete list of parameters that can be used to configure the interaction of the 1C:Enterprise system with the HASP License Manager.
10.3. Software Licensing System
10.3.1. General information
10.3.1.1. Overview and terms
The Software Licensing System ensures that users interact without using any additional physical devices. For operation, you need to use a special platform software license file. This file, in encrypted form, contains the information required for the operation of the application, the parameters of the license, and the characteristics of the object for which the license is activated. Activation (binding) is a procedure of acquiring a software license file in accordance with the license characteristics: package serial number and PIN code. When activated, a software license becomes associated either with the computer's hardware, or with a HASP dongle available locally or in the network. Several PIN codes are supplied in the package. The number of PIN codes in the package and the number of simultaneously active PIN codes are determined by the license type.
If it is required to obtain a license, the 1C:Enterprise application (client or server) searches for license files by all available paths. Then it gets the license parameters and characteristics of the object linked with the software license from the files. If the parameters of the current object received from the license file match the actual object parameters, checks are performed related to the number of users and the license type (client or server). Otherwise, the license is rejected. Access to the file is determined by the access rights of the operating system. If the user on whose behalf the application is running, does not have access to the license file (or the directory where the file is located), then the license will not be obtained.
10.3.1.2. Types of software licenses:
Software licenses can be:
-
Single-user client. Allow you to run any number of client applications on the same computer.
-
Multi-user client. Allow you to run a certain number of client applications from arbitrary computers. The number of client applications running simultaneously is determined by the license value.
-
Combined client. They are a combination of a single-user group and a one multi-user license. If any single-user license is activated first, the multi-user license cannot be activated and only single-user licenses can be used. If a multi-user license is activated first, single-user licenses cannot be activated.
-
Server license for a 32-bit server. Allows the use of an arbitrary number of 32-bit working processes (rphost) on one computer.
-
Server license for a 64-bit server. Allows the use of an arbitrary number of 32-bit or 64-bit working processes (rphost) on one computer.
-
Server license with a limited number of concurrent sessions. Allows the use of one working server of any bit capacity (32 or 64) on one computer.
10.3.1.3. License location and combined use
Multi-user licenses can be located on a 1C:Enterprise server computer, a web server extension module, or a terminal server. Only single-user licenses can reside on the client computer. Software licenses located on the server (1C:Enterprise or terminal), are added without restrictions. Software licenses can be used together with HASP dongles (in this event, the available licenses are combined). In the case of shared use, the software licenses will be used first, and then the licenses from the HASP keys will be used.
10.3.1.4. Key parameters
A software license is associated either with the computer's hardware, or with a HASP dongle available locally or in the network (using license manager). If a software license is associated with a computer, key parameters of the computer's hardware are collected and analyzed. A software license can be associated with any HASP dongle in use by 1C:Enterprise.
Depending on the association type, the following key parameters are analyzed:
-
Association with computer:
-
Key parameters:
-
Operating system name
-
Operating system version (for Windows, only the first two digits of the version number are analyzed)
-
OS serial number (Windows only, excluding Windows 10)
-
OS installation date (Windows only, excluding Windows 10)
-
Network name of the computer
-
Motherboard model
-
RAM memory
-
BIOS type and version
-
List of processors and their parameters
-
List of network adapters and their MAC addresses, however, the following adapters are excluded from the key parameter comparison procedure:
-
Bluetooth network adapters
-
Network adapters connected to IEEE 1394 or USB
-
WAN and RAS software adapters
-
Adapters that do not have MAC addresses or VEN and DEV data from the PNP ID
-
-
List of hard drives and their parameters
-
-
Specifications:
-
If at least one of the key parameters is changed during the operation, it will be necessary to reactivate the software license (using a new PIN code). Computer parameters are polled not more than once a day.
-
USB and IEEE 1394 storage devices are ignored.
-
When verifying that the software license is compliant with the settings of the current computer, the operating system name and version are not parsed if the scan is running on Linux.
-
-
-
Association with HASP dongle:
-
Key parameters:
-
Dongle series
-
Dongle type
-
Dongle ID
-
-
Specifications:
-
Each PIN code can be used to associate a software license with one HASP dongle only. However, the PIN code can be used any number of times to reactivate the software license for the same owner and the same HASP dongle.
-
You cannot use the software license with any HASP dongles except the one associated with this license.
-
When HASP dongle is used with license manager, activation check occupies 1 free license for 1 second. Activation check is performed once every 20 seconds or more. To ensure stable operation of a software license bound to a network dongle, you always need to have at least one free license in this dongle.
-
If multiple keys of the same series are used across the network, it is recommended that you specify the correct license manager in the nethasp.ini file located on the computer where the activated software license is stored.
-
-
10.3.1.5. Available software license
The software license file is considered available for use if:
-
It is not in the blacklist.
-
It has a correct format.
-
It is associated with the current computer, or the associated HASP dongle is in use on this computer.
-
It contains an available license.
-
The network does not use other license files obtained for the same PIN code and serial number of the application. If such a situation is detected, the license file is rendered unusable and blacklisted. If several license files obtained for one serial number are detected on one computer, then such files are not blacklisted, and only one file that was created or used most recently is used.
Hereinafter in this section, terms "software license file" and "software license" will refer to an available software license as defined above.
10.3.1.6. Software licenses and virtual machines
If you use 1C:Enterprise on virtual computers, activate the software license on each virtual machine. When using virtual machines, the software license is attached to the virtual machine settings (the virtual machine parameters are equivalent to the real computer parameters and are listed above). If any of these parameters are changed (this might happen during virtual machine migration or load redistribution, among others), you will need to reactivate the license using a new PIN code.
To avoid reactivating software licenses on virtual machines:
-
Use a licensing service installed on a physical computer or a virtual machine with fixed parameters (supported in client/server mode only).
-
Associate the software license with a HASP dongle. In this event, the dongle must be available on the virtual machine both before and after migration.
-
Use both methods described above, whenever possible.
10.3.1.7. Activation and usage
When you plan to use software licenses, keep in mind the following peculiarities:
-
No more than 256 processes from one operating system session can simultaneously access one software license file.
-
On one computer, you can access one software license file from up to 256 operating system sessions.
If the software license is activated on per-computer basis, please keep in mind the following:
-
When checking computer information, only the removal of devices is analyzed, not the addition of devices. For example, when you activate the software license, one network adapter was installed on your computer. You can add another network adapter without having to reactivate the software license, but you cannot replace one network adapter with another.
-
You can increase the RAM on your computer, but you should not reduce it. For example, license activation was performed with 2 GB RAM. Without the need to reactivate the software license, you can increase the memory to 6GB and then reduce it to 4GB. However, reducing the amount of RAM below 2GB will require reactivation of the software license.
-
Changes are analyzed by the current state of the computer relative to the state when the license was activated.
To receive a software license on electronic media, visit:
-
https://portal.1c.ru/support/license/license-from-file?lang=LL for the Russian platform version.
-
https://portal.1c.eu/support/license/license-from-file?lang=LL for the global platform version.
In the above links, the LL value stands for a two-letter localization code to correctly process constructions that depend on the localization language.
The above page allows you to submit a license request file (generated using this window) to the Licensing Center and get the license data file in return from the Licensing Center.
To receive a software license automatically, use the web service: https://users.v8.1c.ru/LicenseCenter/ws/lm.1cws.
See also:
-
nethasp.ini file.
-
Cluster services. Licensing service.
10.3.2. License types
Client software license types:
| Type | License qty | Set of PIN codes | ||
|---|---|---|---|---|
| Users | Active | Supplied | ||
| Single-user, 1 user | 1 | 1 | 1 | 3 |
| Combined, 5 users | 5 | 1 | 5 | 8 |
| 5 | 1 | 3 | ||
| Combined, 10 users | 10 | 1 | 10 | 14 |
| 10 | 1 | 3 | ||
| Combined, 20 users | 20 | 1 | 20 | 25 |
| 20 | 1 | 3 | ||
| Multi-user, 50 users | 50 | 50 | 1 | 3 |
| Multi-user, 100 users | 100 | 100 | 1 | 3 |
| Multi-user, 300 users | 300 | 300 | 1 | 3 |
| Multi-user, 500 users | 500 | 500 | 1 | 3 |
| Multi-user, 1,000 users | 1000 | 2*500 | 2*1 | 2*3 |
Multi-user license for 1,000 users is delivered as a set of two multi-user licenses for 500 users.
For combined licenses, you can determine which type of license is most suitable for your needs. If a single-user license is activated first when operating with a combined license, it is considered that a set of single-user licenses has been selected and further activation with a multi-user license becomes impossible. If a multi-user license is activated first, it is considered that a multi-user license has been selected and further activation of single-user licenses becomes impossible.
Server software license types:
| Type | Description | Set of PIN codes | |
|---|---|---|---|
| Active | Supplied | ||
| Server, 32-bit | Allows the use of an arbitrary number of 32-bit working processes on one physical computer | 1 | 3 |
| Server, 64-bit | Allows the use of an arbitrary number of 32-bit or 64-bit working processes on one physical computer | 1 | 3 |
| Server license with a limited number of concurrent sessions | Allows the use of one working server of any bitness on one physical computer | 1 | 3 |
Server license with a limited number of concurrent sessions allows you to run one production server of arbitrary bitness (32- or 64-bit) on one computer, while maintaining a maximum of 5 client sessions and 1 Designer session. The following sessions are considered client sessions: thick client, thin client, web client, and external connection. Client applications use client licenses that are obtained in the usual way.
10.3.3. Protection against unauthorized use
To prevent the unauthorized use, 1C:Enterprise is provided to users in a protected form.
The possibility to use the software at one or several workplaces, as well as the ability to use the 1C:Enterprise server are determined by the existing license agreements.
10.3.4. Monitoring client licenses
10.3.4.1. General information
Depending on the client type and the location of the software license files, there are several options for accounting for licenses. Subsections below contain detailed information on client software license accounting methods.
10.3.4.2. File mode
In this case, you can use only single-user licenses, which ensures that the computer that contains the software license file will run an arbitrary number of application instances in 1C:Enterprise mode or in Designer mode.
The exception is the terminal mode of 1C:Enterprise. In this case, it is possible to use multi-user license infobase with file mode. For more information, see Terminal server.
10.3.4.3. Client/server mode
In this case, there are the following options for obtaining licenses.
10.3.4.3.1. Single-user software license
Allows running any number of instances of the application in 1C:Enterprise mode or Designer on a computer with a software license file.
10.3.4.3.2. Multi-user software license
1C:Enterprise server counts the licenses.
In this case, the software license files are located on the computer where the 1C:Enterprise server is installed. The server directly counts the licenses. In this case, one license is used for one session. Thus, if two instances of 1C:Enterprise are running on the same computer (in any startup mode and with any client kind), then two licenses will be spent on it.
10.3.4.4. Web client
Depending on the infobase mode (file or client/server), licenses are counted by either the web server extension module (in file mode) or 1C:Enterprise server (in client/server mode).
In this case, the software license file can be located on the computer where the web server extension module is installed, or on the computer where the 1C:Enterprise server is installed. The web server extension module (or the server) directly counts the licenses. In this case, one license is used for one session. Thus, if two instances of 1C:Enterprise are running on the same computer (in any startup mode and with any client kind), then two licenses will be spent on it.
10.3.4.5. Thin client running via web server
To obtain licenses, the thin client can use:
-
Single-user software license
-
Web server extension module or 1C:Enterprise server
A single-user license ensures that the computer with a software license file will run an arbitrary number of application instances in 1C:Enterprise mode.
If you use a web server extension module or the 1C:Enterprise server to obtain a license, then the web server extension module counts licenses for file mode and the 1C:Enterprise server counts licenses for client/server mode. In this case, one license is used for one session. Thus, if two instances of 1C:Enterprise are running on the same computer (in any startup mode and with any client kind), then two licenses will be spent on it.
The software license file can be located on the computer where the web server extension module is installed, or on the computer where the 1C:Enterprise server is installed.
10.3.4.6. Single-user software license and web client
If a single-user software license is installed on a computer with 1C:Enterprise server or a web server (in the case of a file infobase), then you can run:
-
Any number of Designer instances on a computer with a single-user software license file.
-
Any number of client applications (except for the web client) on other computers if client licenses are available to them.
-
One of the following startup options is also available:
-
One client application (including the web client) on any computer if the client license is not available to it.
-
Any number of client applications (except the web client) on a computer with the software license file.
-
In other words, you may perform developing and debugging with a web client using just the single-user software license. However, when you use the web client on the local computer, you can still run only Designer. You cannot start other types of clients.
10.3.4.7. COM connection
When using a 32-bit COM connection, the available licenses are searched for in the following order:
-
Single-user software licenses
-
Multi-user software licenses
-
Client licenses on the 1C:Enterprise server (when in client/server mode) or on the web server (when in file mode, connected via the web server)
When using a 64-bit COM connection, the available licenses are searched for in the following order:
-
Single-user software licenses
-
Multi-user software licenses
-
Client licenses on the 1C:Enterprise server (when in client/server mode) or on the web server (when in file mode, connected via the web server)
If a COM connection is started from the code executed on the 1C:Enterprise server as an in-process COM server, and the server uses the server software license, then the COM connection uses the server software license. Otherwise, the COM connection searches for the client software license as described above in this section.
10.3.4.8. Internet services, background jobs
Internet services (web services, HTTP services, and requests to OData) and background jobs do not require client licenses. However, if the infobase that provides Internet services operates in client/server mode, you must have a server license to operate 1C:Enterprise server.
10.3.4.9. Terminal server
10.3.4.9.1. General information
When using Windows applications, consider the following feature: in the software licensing system, the workplace is determined by the session ID number. All license requests made from the same computer and with the same session ID are considered to have been received from one workplace. For example, if there is a computer that has a single-user software license installed, the license can be used by an arbitrary number of client applications running interactively. However, if a client application (in any mode) is started on this computer from any Windows service, it will be considered analogous to a terminal server, and an additional license will be required. This feature concerns any software licenses (not necessarily single-user).
You can also consider the following features of accounting for client licenses.
10.3.4.9.2. Single-user software license
Allows running any number of application instances in 1C:Enterprise mode or Designer mode on behalf of one terminal session.
Software licenses (both single-user and multi-user) stored on the terminal server are added if the license files are available to all users of the terminal server.
10.3.4.9.3. Multi-user software license
Multi-user software license can be stored on a terminal server and used for both file and client/server modes of the application. In this case, you can run any number of application instances in 1C:Enterprise mode or Designer mode for the number of concurrent connections to the terminal server (terminal sessions) equal to the number of users a multi-user software license covers.
Software licenses (both single-user and multi-user) stored on the terminal server are added if the license files are available to all users of the terminal server.
10.3.4.10. Mobile client
Depending on the infobase mode (file or client/server), licenses are counted by either the web server extension module (in file mode) or 1C:Enterprise server (in client/server mode).
In this case, the software license file can be located on the computer where the web server extension module is installed, or on the computer where the 1C:Enterprise server is installed. The web server extension module (or the server) directly counts the licenses. In this case, one license is used for one session. Thus, if two instances of mobile client are running on one mobile device, then two licenses will be spent for this. If Designer is running on the computer where the web server is located, and a mobile client is running on the mobile device that uses the web server to access the infobase, two licenses will also be required for such access.
10.3.4.11. Standalone server
If a standalone server is used, a license can be obtained using:
-
Local software license (thin client only).
-
Standalone 1C:Enterprise server.
If a license is obtained directly by a thin client, then on one computer, you can start an arbitrary number of instances of the application in 1C:Enterprise mode.
If a license is issued by a standalone server, then licenses are spent "per session". The file with the activated software license must be accessible to the instance of the standalone server, which serves the infobase used. When defining availability, consider the user on behalf of whom the standalone server instance is running. For the standalone server, enable the option to issue licenses (the infobase.distribute-licenses parameter of the standalone server configuration file).
10.3.5. Activating and obtaining a server license
10.3.5.1. Server clusters
The software license must be activated for a computer that is running (one or more) a server cluster working process (rphost) or the cluster manager (rmngr) to which the licensing service is assigned.
A server license is checked for when the client application connects to the working process (rphost).
If the server license is issued by the cluster licensing service, keep this in mind: if the licensing service has software licenses for both 32- and 64-bit 1C:Enterprise servers, you might get the license for a 64-bit server when you requested the license for a 32-bit server. It can happen if the license for the 64-bit server was the first free license in the activated license directory (by the file order) upon the request. Thus, we do not recommend that one licensing service distributes software licenses for 32 and 64-bit 1C:Enterprise servers.
See also:
- Cluster services.
10.3.5.2. Standalone server
The software license must be activated for the computer running the standalone server. The standalone server checks the server license in the following cases:
-
The infobase served by the standalone server is not a file infobase and one of the following standalone server connections is established:
-
1C:Enterprise client application connection.
-
The ibcmd utility is connected to a running standalone server instance on a local computer (IPC protocol, the --pid startup command-line parameter is used).
-
The ibcmd utility is connected to a running standalone server instance on a remote computer (SSH protocol, the --remote startup command-line parameter is used).
-
Standalone server connection over SSH protocol.
-
-
The infobase served by the standalone server is a file infobase and there are 3 active concurrent client sessions with this infobase.
Standalone server does not require (or check) the server license when using the file infobase for no more than 3 (three) client sessions (including three sessions). At the same time, sessions of background jobs and Internet services are not technically considered when calculating the number of concurrent sessions.
The ibcmd utility requires the server license in offline mode (the --data startup command-line option is used) when connecting to the client/server infobase. It implies that you can start the ibcmd utility in offline mode only on the computer with the server license.
10.3.6. Activating and obtaining a developer license
You can activate the developer license on one of the following portals (hereinafter referred to as the developer portal): https://developer.1c.ru or https://1c-dn.com. If your computer uses one of the following localization languages: Armenian, Azerbaijani, Georgian, Latvian, Kazakh, Russian, or Turkmen, the https://developer.1c.ru portal will be used. If another localization language is used, you can select the portal in the license activation dialog box (in your language). Such behavior is observed during the initial license acquisition. If the developer license is already received, no automatic license rebinding will be performed. The developer portal selection does not depend on the value of the ExternalResourcesMode parameter of the conf.cfg file and is always done by the above rule.
The text of the license agreement displayed when activating the license depends on the used developer portal:
-
https://developer.1c.ru. Russian text.
-
https://1c-dn.com/. English text.
The license cannot be activated for one of the following reasons:
-
Licenses are already activated on 3 computers for the developer account.
-
The developer portal account is not valid or confirmed.
-
Update Control Center found reasons to prohibit the renewal.
The license can be terminated if:
-
There is no access to 1C resources on the Internet. The developer license has an expiration date. Upon expiration, the platform must get a new license. If there is no access to 1C Licensing Center, you cannot get a license. The existing license becomes unavailable.
-
The account was blocked by 1C for some reason. In this case, you cannot renew the license. The current license becomes unavailable.
-
License issue is suspended for this computer on the developer portal. There are several reasons for this:
-
The number of concurrently used developer licenses is exceeded.
-
The developer suspended the activated license or all licenses on the developer portal to use the license on another computer.
-
10.3.7. Software license activation
10.3.7.1. General rules
One of the protection system components is a software license for 1C:Enterprise. Software licenses can be activated by the following tools:
-
License activation wizard. To start the wizard, open Designer and click Tools – License acquisition….
-
License activation wizard. To start the wizard, open 1C:Enterprise and click Service and settings – Functions for technician – Standard – License acquisition. Before you start the wizard, make sure the functions for technician are enabled.
-
ring utility. The ring utility does not allow you to activate the 1C:Analytics license and a developer license.
When activating a license:
-
Select an action:
-
Acquire a license (choose the Acquire license option).
-
Upload license details file to acquire the license using an external storage device (choose the Specify license file received from the Licensing Center option).
-
Activate a developer license (choose the Activate community license option).
-
-
If you want to acquire the license, specify the distribution package number and PIN code.
-
Click Advanced settings to specify additional parameters related to license activation:
-
To associate the license with 1C:Enterprise server, select the Install the license on the server check box and enter the 1C:Enterprise server access parameters into Server and Port fields. Choose this option when you associate the software license with 1C:Enterprise server using Designer on another computer. In this case, the file with the activated software license will always be placed in the profile directory of the user on whose behalf the 1C:Enterprise server (usr1cv83 by default) is running on the computer where this 1C:Enterprise server is running.
-
To determine how the software license will be activated, select or clear the Automatic acquisition check box. If the check box is selected, the license will be activated automatically. If the check box is cleared, you will be prompted to select one of the following license activation methods: automatically, using an external storage device, or via telephone.
-
-
Select an operation with license:
-
First-time registration. Initial license acquisition.
-
Recovery. License reacquisition or update.
-
-
For first-time registration, enter the license owner's parameters. Then, select whether you want to bind the software license to a computer (description of this computer will be specified) or to an available HASP dongle (a list of available HASP dongles will be displayed).
-
For license recovery:
-
If key parameters of the computer associated with the license did not change, select the I am sure the key computer parameters have not been changed check box.
-
If key parameters of the computer associated with the license did change, clear the I am sure the key computer parameters have not been changed check box. Then, enter the extra (unused) kit PIN code in the Extra PIN field.
-
Check registration data of the license owner and select association with a computer or a HASP dongle.
-
-
The license is activated for all users on the computer. If the user on whose behalf the license is being activated cannot write to a directory that is available to all users, the application will notify you and prompt you to activate the license only for the current user.
-
To acquire a license on an external storage device:
-
Create a license request file.
-
Obtain a license from the Licensing Center.
-
-
When you obtain a license manually:
-
Read the digits that are displayed in the wizard window (48 digits) to the Licensing Center operator.
-
Enter the software license data read by the Licensing Center operator into the special field (120 digits).
-
-
To activate a developer license, you need a verified https://developer.1c.ru portal profile. Enter your username and password to access the 1C portal for developers. No other data is required.
When activating licenses, remember:
-
If the initial activation of the software license was carried out via the Internet or on an electronic media, the reactivation and renewal of the license is possible only via the Internet or on the electronic media.
-
If the initial activation of the software license was performed manually by phone, then reactivation and renewal of the license is possible only manually by phone.
-
If you want to activate an additional client software license on a computer, on which the software license is already activated, do so exactly as you did with the first software license on the this computer.
-
When you re-obtain or update a license, move the file with the current license (for this PIN code and serial number) to a directory that is not used by 1C:Enterprise to search for software licenses. Otherwise, the new (and already existing) license will be blacklisted and cannot be used.
-
If you are activating a server and a multi-user software license and it is possible to run Designer on a computer with the 1C:Enterprise server installed, then complete the activation of both licenses from the computer, on which the 1C:Enterprise server is located.
-
Network devices and external storage devices that are connected through the USB and IEEE 1394 interfaces are not considered during verifying the license file binding to this computer.
However, while you obtain a media license, when requesting the Licensing Center to obtain a license and creating the license file by using a Licensing Center response, the computer settings must coincide with devices settings connected by USB and IEEE 1394. If this requirement is not fulfilled when downloading the response file from the Licensing Center, the license receipt dialog box will display an error message: The Licensing Center response does not match the entered license or owner data. Check the registration number of the package, PIN, and license owner data. To complete the license activation in this case, return the computer configuration to the state when the license request file was generated, for example, insert the same external drive into the USB port, and then re-download the same Licensing Center response file. After that, the external drive can be removed.
If you cannot restore your computer settings, you will need to re-obtain the license using an additional PIN code.
- Before re-activating a license for a previously used PIN code or for a new PIN code from the same kit, ensure that there are no 1C:Enterprise applications in the local network that use a previously obtained license file with a PIN code from the same kit.
The activated software license file consists of two sections. The starting section stores parameters of the activated license and parameters of the associated object. This information is encrypted. The final section stores the same information in human-readable format. Parameters of the associated object can be displayed in shortened form. The human-readable information does not affect the license validity in any way. It can be edited freely.
Do not store one software license file at the same time in several different directories available to 1C:Enterprise applications. This may cause the license file to become unusable due to violation of the license agreement. In this event, a text description of license invalidation reason might be written to the beginning of the license file.
When you obtain a software license file automatically, this file is located:
-
For a computer with 1C:Enterprise server:
-
On Windows: To the %ALLUSERSPROFILE%\1C\licenses directory of the user on whose behalf the 1C:Enterprise server is running.
-
On Linux: in the /var/1C/licenses directory.
-
-
For the current computer: you will be prompted to specify the user(s) to whom the obtained license will be available:
-
If the current user is selected, the file will be placed in the directory:
-
On Windows: %LOCALAPPDATA%\1C\1cv8\conf of the user on whose behalf a license is received.
-
On Linux: ~/.1cv8/conf (~ is a home directory of the user who runs Designer).
-
-
If all users are selected, the file will be placed in the directory:
-
On Windows: %ALLUSERSPROFILE%\1C\licenses of the data directory for all computer users.
-
On Linux: this option is not supported.
-
-
The %ALLUSERSPROFILE%\1C\licenses and /var/1C/licenses directories are created during the application installation to the computer (in the corresponding operating system). Consider the following features related to these directories:
-
On Windows: a user on whose behalf the 1C:Enterprise server runs is granted rights to read and write to the created directory. The user is selected in the application installation window (see Installing 1C:Enterprise server). If you do not select the Install 1C:Enterprise Server as a Windows service check box, the rights to the created directory are not assigned to anyone and they remain in the default option.
-
On Linux: the grp1cv8 group is created during the installation. The group must include all user accounts on whose behalf:
-
1C:Enterprise server clusters run in daemon mode.
-
Client applications are started on this computer.
-
Make sure that users of the grp1cv8 group have write access to software license files. Access rights to a directory with software licenses are assigned as follows:
-
Directory owner: root. Rights: read and write (rwx).
-
Owner group: grp1cv8. Rights: read and write (rwx).
-
Access rights of other users: read only (r-x).
10.3.7.2. Activation guidelines
It does not make sense to activate a multi-user software license on a client computer (in any infobase mode).
10.3.8. Location of software licenses files
10.3.8.1. General information
A software license is a file with a .lic extension that can locate in different locations of the file system.
The software license is obtained as follows:
-
A list of software license files is generated for all directories where software licenses can be located. The files are ordered the way they are returned by the operating system when searching. You can find this list in the subsections of this section. Each section describes the location of one of the supported operating systems.
-
For each file in the list, the required license (client or server) is obtained before the license is successfully received (see Available software license) or before the list of software license files is prepared.
10.3.8.2. On Windows
In Windows, software license files can be located in the following directories (directories are listed in the search order):
-
Directory of configuration files for a specific platform version. The default directory is C:\Program Files\1cv8\A.B.C.D\bin\conf.
-
The %LOCALAPPDATA%\1C\1cv8\conf directory of the user on whose behalf the system is operating.
-
The directory specified as the value of the ConfLocation parameter of the conf.cfg file from the bin\conf directory of a specific version.
-
The %ALLUSERSPROFILE%\1C\1cv8\conf directory.
-
The %ALLUSERSPROFILE%\1C\licenses directory.
-
The %ProgramData%\1C\licenses directory.
If no license was found in any of these directories, the %APPDATA%\1C\1cv8\ directory is used for search. If there is a location.cfg file in this directory, the directory specified in the location parameter will be used for the search.
10.3.8.3. On Linux
In Linux, software license files can be located in the following directories (directories are listed in the search order):
-
The conf directory of a specific version: /opt/1cv8/arch/A.B.C.D/conf.
-
The conf directory of the root installation directory: /opt/1cv8/conf.
-
The ~/.1cv8/conf directory (~ is a home directory of the user on whose behalf 1C:Enterprise operates).
-
The directory specified as the value of the ConfLocation parameter of the conf.cfg file from the conf directory of a specific version.
-
The /var/1C/licenses directory.
If no license was found in all of these directories, the ~/.1cv8/1C/1cv8/ directory is used for search. If there is a location.cfg file in this directory, the directory specified in the location parameter will be used for the search.
10.3.8.4. On macOS
In macOS, software license files can be located in the following directories (directories are listed in the search order):
-
The conf directory of the installed version. The path to this directory looks as follows: /opt/1cv8/A.B.C.D/conf.
-
The ~/.1cv8/conf directory (~ is a home directory of the user on whose behalf 1C:Enterprise operates).
-
The directory specified as the value of the ConfLocation parameter of the conf.cfg file from the conf directory of a specific version.
-
The /var/1C/licenses directory.
If no license was found in all of these directories, the ~/.1cv8/1C/1cv8/ directory is used for search. If there is a location.cfg file in this directory, the directory specified in the location parameter will be used for the search.
10.4. Determining if 1C:Enterprise can run
10.4.1. When you start the client application
When 1C:Enterprise is started, it checks the possibility of running according to the following algorithm (if the required license is found at any step, further search stops):
-
On computer with the client application:
-
An attempt is made to obtain a license from the same type of a software license file or HASP protection key (series, network or local) from which the license was obtained during the last successful connection.
-
Search for software licenses is performed on the local computer (for the search procedure, see General information).
-
Search for a local HASP key is performed (for the search procedure, see Specifications).
-
Search for a multi-user HASP key available with the HASP License Manager is performed in the following order: ORGL8, ORG8A, and ORG8B. If the local network has several HASP License Manager programs with keys of the same series, the used key is selected randomly or in accordance with the order set in the nethasp.ini file available to the application.
-
If the system uses several hardware and software licenses, it is recommended that you avoid the ambiguous choice of an available license when starting client applications. Otherwise, you can activate excessive licenses.
- If the configuration is basic, the client application searches for the base version license on the local computer.
-
On the cluster manager computer to which the session data service is assigned:
-
An attempt is made to obtain a license from the same type of a software license file or multi-user HASP protection key (series, network or local) from which the license was obtained during the last successful connection.
-
Search for software licenses on the computer of the 1C:Enterprise server cluster manager is performed.
-
Search for multi-user HASP keys installed on the computer of the 1C:Enterprise server cluster manager is performed.
-
Search for multi-user HASP key available with the HASP License Manager is performed.
-
-
On the cluster manager computer to which the Licensing Service is assigned:
-
An attempt is made to obtain a license from the software license file from which the license was obtained during the last successful connection.
-
Search for software licenses on the computer of the 1C:Enterprise server cluster manager is performed.
-
If the search for the HASP protection key is disabled (UseHwLicenses=0) using the 1cestart.cfg configuration file, it does not search for available licenses in the HASP protection keys located on the client computer (both local and network) and does not attempt to obtain a license from the saved key.
10.4.2. When you start the server
When connecting a client application with the 1C:Enterprise server, the server license is checked (if the required license is found at any step, further search stops):
-
Search for a license on the working process computer that supports a connection to the infobase is performed:
-
An attempt is made to obtain a license from a software license file or HASP protection key from which the license was obtained during the last successful connection.
-
Search for a 32-bit server software license (only for a 32-bit 1C:Enterprise server) is performed.
-
Search for a 64-bit server software license is performed.
-
Search for a local key of a 32-bit server (only for a 32-bit 1C:Enterprise server) is performed.
-
Search for a local key of a 64-bit server is performed.
-
-
Search for a license on the cluster manager to which the licensing service is assigned is performed.
-
An attempt is made to obtain a license from the software license file from which the license was obtained during the last successful connection.
-
Search for a 32-bit server software license (only for a 32-bit 1C:Enterprise server) is performed.
-
Search for a 64-bit server software license is performed.
-
10.4.3. Actions when a license is not found
If no licenses are found during the search (described above), the following steps are to be performed:
-
Designer, thin client,and thick client run the software license acquisition wizard.
-
The web client generates an error message:
-
License not found. No software protection key or electronic license found!
-
License on 1C:Enterprise server is not found. No software protection key or electronic license found!
-
-
If you refuse to acquire a software license, Designer, thin and thick clients also generate the above error messages.
-
If you click Details in the error window, the Key search history window opens. This window provides information about where the license search was performed, the status of the search (successful or failed), and the reasons for the failed search. This log can make it easier to diagnose license issues.
10.5. Protection against misuse of applications
10.5.1. General information
When purchasing a license for the main delivery of any application, the user receives the distribution packages of the platform and of the configuration specified in the license of the current (at the time of purchase) versions.
For later versions of this configuration, as well as for other configurations with different names, rights are generally not granted automatically. This means that the user must ensure the proper registration of the acquisition of rights for the updated configurations.
The purpose of this mechanism is to inform the user in a timely manner about the actual use of certain versions or releases of the configuration that he/she does not have rights to, and related with these potential legal risks.
The situations when certain versions of the configuration may be used in violation of the rules established by the copyright holder are:
- The user does not have a license for the main delivery of this configuration type.
- The user purchased a license for the main configuration distribution package but later updated the configuration in violation of the maintenance rules established by the copyright holder. For example, the user is using the versions released after the service period expiration under the ITS contract. For the maintenance terms, see the 1C:ITS Portal (https://portal.1c.ru/app/update).
If you use an application with a basic license, verification is not performed. The verification uses the information about the application and the account data created during the registration of the application and servicing agreement on the 1C:ITS Portal (hereinafter referred to as the license client). If the application is used incorrectly, it periodically forms a dialog containing information on the reasons for the misuse of the application. Information about the results of the check is also displayed in the About application dialog box.
When loading the infobase from the *.dt file, verification of application is not performed.
10.5.2. Mechanism structure
After the database configuration update is complete, the 1C:Enterprise application submits a request to the Licensing Center (hereinafter referred to as the LC), specifying information about the application. License client data is used to personalize the request. To execute the request to the Licensing Center, 1C:Enterprise must have access to https://1cv8update.com by port 443.
In case of successful completion of the request, the LC restores the legal status of use of this application for the specified license client. If the LC does not confirm the legal use of the application, the 1C:Enterprise application starts informing all infobase users that the application is used illegally, and the information obtained from the LC is displayed.
About dialog box contains information on the results of the request to LC:
-
License usage verification was not performed. This means that the 1C:Enterprise application was not yet able to connect to LC to verify whether the configuration is legitimate.
-
License usage verification completed successfully. This means that the 1C:Enterprise application contacted the LC to verify the legitimacy of use and received confirmation that the application is being used legally.
-
Unlicensed use of the configuration. This means illegal use of the application.
-
Licensing Center unavailable. This means that 1C:Enterprise cannot access the LC.
License client data (used to contact the LC) must be included in the infobase of the application used. To set the settings from Designer, go to Main menu – Administration – Set licensing client settings. When accessing the LC, in the 1C:Enterprise mode, a similar dialog box will be displayed in case the license client data is not defined for the infobase by the time of the request. If you use a distributed infobase, enter the license client data in each node of such infobase.
The application developer can implement its native license client data installation mechanism (using the SetLicensingClientParameters() method), for example, by getting them during the initial application setup. At the same time, the developer can implement a response of the platform to the license client data request and provide the user with a more convenient dialog box for entering the license client settings (using the AttachLicensingClientParametersRequestHandler(), which opens the dialog box).
Chapter 11. Application updates
11.1. Manual update on a local computer
1C:Enterprise allows you to install several versions on one computer at the same time. Each version is stored in its own directory called version directory (see Structure of the installation directory and assigning directories and files). A version that is already installed on a local computer is updated by restarting the installation of this version. The system behavior is determined by the used operating system. To find out how to install 1C:Enterprise on a computer, see Installing 1C:Enterprise.
11.2. Automated client application update on a remote computer
11.2.1. General information
You can update a client application on a remote computer using several methods:
- If all client computers are located in the local network or do not get access via a web server, you can use a method described in Recommendations for system deployment.
- If client computers get access to the infobase via a web server, you can use various client application update methods provided by the publication. In general, it does not matter whether a computer to be updated is located in the local network or gets access via the Internet (from outside the Intranet). The computer location determines a URL to be used and the way certificates are checked. The computer location does not affect the update options.
When getting access via a web server, 1C:Enterprise provides the following client application update methods. They are listed in the order a web server extension searches for the distribution package:
-
Place distribution packages on a web server and specify a path to them using a dialog box for publishing on a web server.
-
Place client application distribution packages in the distr directory of 1C:Enterprise version directory.
-
Specify distribution package addresses in the conf.cfg file.
-
Configure Internet services for receiving a client application distribution package.
In addition to the above methods, 1C:Enterprise allows you to configure a preload of a thin client distribution package to reduce the load on the network infrastructure when a version is updated on the computer(s) running the server cluster. For setting details, see Preload of the client application distribution package.
On Windows, you can select the bitness of the client application to import (for any automatic update method) as follows:
-
If in the bitness settings of a specific database or startup window, a 32-bit application is specified (the 32(x86) values or Priority 32(x86)), the distribution package of the 32-bit application will be selected for import.
-
If in the bitness settings of a specific database or startup window, a 64-bit application is specified (the 64(x86-64) values or Priority 64(x86-64)), the distribution package of the 64-bit application will be selected for import.
-
If the client application bitness is not explicitly specified in the settings, the bitness of the client application to import is determined by the bitness of the running client application:
-
32-bit client application is running. Distribution package of a 32-bit client application will be selected for import.
-
64-bit client application is running. Distribution package of a 64-bit client application will be selected for import.
-
This section describes the automatic methods in detail and provides references to the related documentation sections.
See also:
-
Startup window settings (see Startup window settings).
-
Selecting bitness of the client application to start (see Determining application bitness and using applications of different bitness).
11.2.2. Setting up the update using a dialog box for publishing on a web server
Publication of a client application distribution package is determined by the Publish thin client distribution package parameter of a dialog box for publishing on a web server. The parameter determines whether the client application can be obtained and installed if the versions of the client application and the server do not match. A distribution package is published as a ZIP archive whose URL is specified as a value of the Published distribution package location table. The URL must allow you to receive a file from any client computer connected to the infobase. The table is available only after you select the Publish thin client distribution package check box. The table contains client application bitness and operating system, and a path to the ZIP file with the application distribution package.
Similar settings are available when you edit the default.vrd file manually. In this case, pay attention to the pubdst* attributes of the point element of the file.
See also:
-
Description of the point element of the default.vrd file (see \<point> (root element)).
-
Dialog box for publishing on a web server (see Publish dialog box).
11.2.3. Setting up the update using the distr directory
When publishing an infobase on a web server, a web server extension directly interacts with the web server. This extension is located in the bin directory of a specific 1C:Enterprise version. If necessary, the web server extension allows delivering client application distribution packages from the distr directory with a version of the system whose extension operates with the web server. In this case, you do not need to configure the web server and the infrastructure. You only need to specify MIME type settings for IIS web server.
There are two methods to prepare client application distribution packages:
-
Download from https://releases.1c.ru/ and install on the computer.
-
Generate required distribution packages and place them in the distr directory.
The system administrator can generate thin client distribution packages for operating systems that allow client application update over HTTP and then place them in the distr directory. In this case, the directory is not automatically deleted when you delete a specific version. For the archive requirements, see \<point> (root element). To place distribution packages in the distr directory, files must have the following names:
| File name | Description |
|---|---|
| linux32tc.zip | 32-bit thin client for Linux |
| linux64tc.zip | 64-bit thin client for Linux |
| macOS64tc.zip | 64-bit thin client for macOS |
| windows32tc.zip | 32-bit thin client for Windows |
| windows64tc.zip | 64-bit thin client for Windows |
See also:
-
Installation directory structure (see Structure of the installation directory and assigning directories and files).
-
Installing client application distribution packages on Linux (see Installing client application distribution packages).
-
Installing client application distribution packages on Windows (see Installing client application distribution packages).
-
Specifying a MIME type of the .zip extension for the IIS web server.
11.2.4. Setting up the update using the conf.cfg file
The conf.cfg configuration file provides parameters that allow you to configure client application update without configuring the default.vrd file.
11.2.5. Setting up the update using Internet services
You can configure client application update via Internet services using the dialog box of startup window settings or the 1cestart.cfg configuration file. To do it, specify the InternetService or WebDistributiveLocation parameters of the file.
See also:
-
Internet service for obtaining distribution packages of a client application (see Internet service for obtaining a client application distribution package).
-
1cestart.cfg configuration file.
-
Startup window settings (see Startup window settings).
11.2.6. Preload of the client application distribution package
If numerous users connect to 1C:Enterprise server cluster (over HTTP), version update might result in a considerable load on the computing infrastructure. It happens because numerous users are trying to download and install a client application distribution package simultaneously.
1C:Enterprise offers you a tool that can reduce the load and mitigate its effects on the infrastructure. Basically, an administrator specifies the time of 1C:Enterprise version update and location of thin client distribution packages on 1C:Enterprise server. When connecting to the server, the client application is notified of the next scheduled update. After that, the application downloads the distribution package in the background from the online resource specified by the administrator and installs it to the user's computer. By the time of planned update ("hour H" specified by the administrator), the new thin client is supposed to be downloaded to the computers of most users who only need to restart the client application to complete the process.
Let us review the sequence of actions in more detail.
-
Create thin client ZIP archives for required operating systems and bitness.
-
Place the archives so that they are available for:
-
Web server extension. If the distribution package is downloaded from the web server used to connect to the infobase.
-
Client application. If the distribution package is located on another web server or the Internet.
-
-
Create the clientupdate.cfg file and specify the correct values for the properties:
-
Version. Version that will be AFTER the update.
-
UpdateDate. Date and time of the update for the version specified in the Version property.
-
PublishDistributiveLocation*. URL to zip files with thin client distribution packages.
-
-
Place the clientupdate.cfg file in the configuration files directory of the current (running) version of the 1C:Enterprise server cluster or in the directory of common configuration files.
The client application accesses the server cluster every 20 minutes to check for updates of the client application version. The server cluster compares the client application version and the version specified in the clientupdate.cfg file. If the versions match, the server cluster does not send any information to the client application. If the version is different, the behavior depends on the clientupdate.cfg configuration file :
-
If the PublishDistributiveLocation* properties are filled in the file, the client application receives the content of the clientupdate.cfg file from the server cluster.
-
If the PublishDistributiveLocation* properties are not filled in the file, the server cluster reads the InstalledLocation properties from the 1cestart.cfg configuration file and searches for the required version. If the version is found, its distr directory is analyzed. If it contains required ZIP files, the web server extension generates an import URL for each ZIP file and sends this information with the other clientupdate.cfg file properties to the client application as described above.
The client application receives the update information from the server cluster and performs the following actions:
-
Searches for the new version. If it is already installed, nothing else happens.
-
If the update date is not specified and the version is not installed, update is performed within 40 minutes after receiving the information about the new version.
-
If the update date is specified, import of the distribution package is performed according to the user's computer time zone as follows:
-
From 9 p.m. to 7 a.m. of the next day (at night) if the following conditions are met:
-
The first scheduled update notification was received less than 24 hours ago.
-
The application will be updated in more than 24 hours.
-
The update is scheduled on the next day not earlier than 12 p.m.
-
-
From 9 a.m. to 6 p.m. (working hours) on any day after the update date if the update version has not been downloaded within the first 24 hours.
-
Import is performed in the background to minimize the load on the network and avoid interferences in user operations. The distribution package import takes up no more than 25% of the channel throughput. In case of failure, an new import attempt is made every 20 minutes until successful completion.
After being downloaded, the client application distribution package is placed on the local hard drive:
-
Linux: ~/.1cv8/1C/1cv8/distr/A.B.C.D.
-
macOS: ~/.1cv8/1C/1cv8/distr/A.B.C.D.
-
Windows: %LOCALAPPDATA%\1C\1cv8\distr\A.B.C.D.
If you select the Automatically install a new version check box in the startup dialog box settings, an installation attempt will be made as if the installation is started interactively once the update is imported. If the checkbox is not selected, the thin client searches for the client application distribution package in the folder to which distribution packages are downloaded (mentioned above) once the version is updated on the server. If the folder does not contain the required distribution package, a standard search for the required version is performed.
Once the version is installed, its files are deleted from the directory where downloaded client application distribution packages are stored.
Therefore, if the functionality is set up correctly, one of the following scenarios will be implemented when updating the version on the server:
-
If the new version is already downloaded and installed, the application restarts and migrates to this version. After that, users can resume their activities in the application.
-
If the new version is downloaded but not installed, the application installs the version, restarts and migrates to this version. After that, users can resume their activities in the application.
-
If users have not been using the client application for a long time, the application downloads the new version distribution package, installs the version, then restarts and migrates to this version. After that, users can resume their activities in the application.
See also:
-
The 1cestart.cfg file.
-
clientupdate.cfg file.
-
Updating using the distr directory.
-
Startup window settings.
-
Client application startup.
Chapter 12. Deleting applications
12.1. Deleting infobases
1C:Enterprise uninstall tool does not automatically delete directories containing infobases on the hard drive. You should delete these directories manually.
If there are links to directories with infobases to be deleted in the infobase list, delete both infobase list rows (see Deleting infobases from list) and the directories.
12.2. Uninstalling the platform
12.2.1. On Linux:
12.2.1.1. Using the uninstaller
The utility required to delete each version is located in the directory of this version. This utility name format is uninstaller-name, where name defines a version to be deleted. For more details on name, see Rules to name distribution files. Version deletion requires superuser rights (root). If you install the system using the package manager, you cannot delete it with the uninstaller.
For example, to delete a full installation of 1C:Enterprise 8.3.24.100 for an x86-64 processor, run the following command:
sudo /opt/1cv8/x86_64/8.3.24.100/uninstaller-fullWhen you install the application, the uninstallAsRoot utility is installed. You can use the application to simplify the version deletion. If you run this application, the following will happen:
-
The application checks whether you have superuser rights (root).
-
If you do not have them, the acquisition of these rights will be initiated. To get the rights, enter the superuser password in the dialog box opened by the uninstallAsRoot application.
-
If the password is entered, the uninstaller with the superuser rights will be started.
For an experienced user, the uninstallAsRoot application startup is similar to the following command-line option:
sudo ./uninstaller-*.runIn this example, "*" refers to the uninstaller name. For more details on name, see Rules to name distribution files. If you run uninstallAsRoot in a directory that has several run files, the installer whose file name is the first in the search results for files by the "uninstall-*.run" mask will be started.
12.2.1.2. Using the package manager
To uninstall 1C:Enterprise, use the command of the package manager of the used operating system. Version deletion requires superuser rights (root). If you install the system using the installer, you cannot delete it with the package manager.
12.2.2. On macOS
To remove the required platform version, click Programs – 1C Enterprise 8 and click Remove 1C:Enterprise in the menu with the required version number.
The uninstallation must be made on behalf of the user which has administrative privileges.
12.2.3. On Windows
Uninstalling 1C:Enterprise is performed by a special program that deletes system components from the computer's hard drive, makes changes to the Start menu and system information of Microsoft Windows.
Before uninstalling, complete all 1C:Enterprise operations (including shutdown of the 1C:Enterprise server).
To uninstall 1C:Enterprise, follow these steps:
-
Open Windows control panel and click the Programs and features icon.
-
If necessary, click Replace or delete in the opened dialog box.
-
In the list of installed programs, select 1C:Enterprise 8 (8.3.24.100) and click Remove.
You will be asked if you want to uninstall the program. If you confirm, Windows will start uninstalling the selected 1C:Enterprise version from the computer and making the necessary changes to the system information.
12.2.4. Deleting versions automatically
In 1C:Enterprise, you can set up automatic deletion of outdated versions. Outdated version is a 1C:Enterprise version installed (!) more than a certain number of days ago. To delete versions automatically, the following parameters are used:
-
Flag that indicates that automatic version deletion is disabled.
-
Period in days after which the version is considered outdated.
-
List of versions that must not be deleted.
For the version to be deleted automatically, the following conditions must be met:
-
The version became outdated because of its installation date. If you started the version using the command line or an infobase shortcut (v8i file), in other words, you did not use launchers, the expiration date is calculated from the date of using the version in this mode. You can find the date of use (by version) in the profile file.
-
Version is not included in the list of versions that must not be deleted.
-
Version is not used.
-
Current operating system user has a right to delete the version.
The version is considered to be used in the following cases:
-
The version is specified in the Version and DefaultVersion infobase properties, in the ibases.v8i infobase list file, and other.
-
The version is used when you register the automatic server cluster start:
-
On Linux: in the srv1cv8-*@.service files in the /etc/systemd/system directory.
-
On Windows: in a service with a standard name.
-
-
The version is used in publications on web servers:
-
On Linux: the /etc/apache2/conf/httpd.conf file.
-
Windows:
-
IIS web server: the default.vrd files in the c:\inetpub\wwwroot directory (with subdirectories).
-
Apache web server: in the conf\httpd.conf file of the web server installation directory.
-
-
When deleting versions, the system always follows the following principle: if there are several versions with the same 3rd digit, at least one of them must not be deleted (taking into account the 4th digit of the version). In other words, if several versions 8.3.24 are installed on the computer, after the expiration date, at least one version 8.3.24 with the biggest 4th digit will be left on the computer. The remaining version is selected from full distribution packages: if thin client version 8.3.24.150 and full distribution package version 8.3.24.100 are installed, the thin client will be deleted, and the full distribution package will be left.
You can find the automatic deletion settings in the 1cestart.cfg or 1cescmn.cfg file and edit them either directly in the files or using a special dialog box available from the setup dialog box of the interactive launcher.
One version can be deleted on one computer at a time. Versions are deleted:
-
On Linux: when the application runs under the superuser (root). Versions are deleted in the background with a reduced priority. You are asked no questions during deletion.
-
Windows:
-
Before version deletion, you are shown a dialog box that prompts you to clarify the actions to perform.
-
If you disable autodeletion in this dialog box (click Do not ask me again), it is recorded in the 1cestart.cfg file and autodeletion will not be performed in the future. If you cancel deletion (click Ask later), versions will not be deleted in the current user session. If you select to delete outdated versions (click Start background deletion), outdated version deletion is started.
-
If the computer has versions installed in both "for user" and "for computer" modes, the "for user" versions will be deleted first. When deleting the versions installed "for user", the versions installed "for computer" will not be deleted. They will be deleted in the next deletion session after all versions installed "for user" are deleted.
-
If you have sufficient rights to delete the versions installed "for computer", a warning that the operating system may request confirmation of administrator rights will be displayed.
-
The check for outdated versions and their deletion starts 2 minutes after you start the system and runs every 20 minutes. One version is deleted per launch.
See also:
-
Configure automatic version deletion (see Startup window settings).
-
1cestart.cfg configuration file (see 1cestart.cfg).
-
Description file of registered infobases.
Chapter 13. Mobile platform administration
13.1. Starting and using the application list on iOS
13.1.1. Starting mobile applications
To start a mobile application, find the application in the list and tap its image. In most cases, the main window of the mobile application opens. However, if more than one application is associated with this program, a list of these applications will open. In this case, to start the application, tap the application in the list.
13.1.2. Using the list of applications
Most of the steps listed below are performed from the application list. To get there, select Application list from the application menu. The application list is also available immediately when the mobile application is started, if more than one application is registered.
13.1.2.1. Creating an application
To create an application for the mobile platform:
-
Select the Add Application command.
-
Specify the application name and tap Finish.
-
After the window closes, the application will be created.
13.1.2.2. Starting the application
When starting the mobile application, in most cases, the application main window opens. However, if more than one application is associated with this program, a list of these applications will open. In this case, to start the application, tap the application in the list.
13.1.2.3. Modifying application properties
Application properties are modified in a special window. To open the application property window, tap > to the right of the application name.
In the window that opens, you can change the name of the application, start it (Open button), or uninstall it (Delete button).
13.1.2.4. Uninstalling the application
To uninstall an application, tap Edit and then tap the picture to the left of the application name. After that, click Delete on the right.
13.1.2.5. Updating application
The mobile application is updated through the App Store. After you successfully update the mobile application, you need to update your previously created applications. Just start the application.
If the update process detects that the database requires restructuring, you will be asked to confirm this operation. If you decline, the update will be deferred until the next application start.
It also makes sense to discard the update to make a backup copy of the database.
13.2. Starting and using the application list on Android
13.2.1. Starting mobile applications
To start a mobile application, find the application in the list and tap its image. In most cases, the main window of the mobile application opens. However, if more than one application is associated with this program, a list of these applications will open. In this case, to start the application, tap the application in the list.
13.2.2. Using the list of applications
Most of the steps listed below are performed from the application list. To get there, select Application list from the application menu. The application list is also available immediately when the mobile application is started, if more than one application is registered.
13.2.2.1. Creating an application
To create an application for the mobile platform:
-
Select the Add Application command.
-
Specify the application name and tap Finish.
-
After the window closes, the application will be created.
13.2.2.2. Starting the application
When starting the mobile application, in most cases, the application main window opens. However, if more than one application is associated with this program, a list of these applications will open. In this case, to start the application, tap the application in the list.
13.2.2.3. Modifying application properties
Application properties are modified in a special window. To open the application property window, tap and hold an application icon. In the opened context menu, tap Edit.
In the window that opens, you can change the name of the application, start it (Open button), or uninstall it (Delete button).
13.2.2.4. Uninstalling the application
To uninstall an application, follow these steps:
-
Tap and hold the application to be deleted.
-
In the context menu that appears, select Delete.
-
To confirm the uninstallation, select Yes.
13.2.2.5. Updating application
The mobile application is updated through the App Store. After you successfully update the mobile application, you need to update your previously created applications. Just start the application.
If the update process detects that the database requires restructuring, you will be asked to confirm this operation. If you decline, the update will be deferred until the next application start.
It also makes sense to discard the update to make a backup copy of the database.
13.3. Preparing the infrastructure to perform the exchange
If a mobile application is part of a distributed information system, then interaction within this infrastructure is normally done using web services. A specific OS may have its own requirements for the organization of interaction (this is determined at the stage of application development). In any case, refer to the application documentation for information on which mechanisms are used to organize interaction.
Accordingly, the task of the administrator is to organize communication channels and create a software and hardware environment that meets the requirements of the application.
13.4. Backup
Data backup is performed depending on the mobile application.
If you use a mobile application that is not associated with the remote system, you can use the standard tools of your mobile device operating system for backup. Consider that in the system running on iOS, a new infobase created from a template is excluded from the backup process. After the infobase is written using extensions of object and register forms, the infobase is included in the backup process.
If the application synchronizes data with a remote system, perform a data synchronization session. The need to use the built-in backup tools after the synchronization is performed depends on the presence of data in the mobile application that are not synchronized with the remote system. If there is no such data, in case of issues, the application can be recreated, and the initial data initialization can be performed from the remote system.
You can configure backup to a mobile device.
Appendix 1. Structure of the installation directory and assigning directories and files
1.1. Installation directory structure
1.1.1. General information
After the installation, a directory structure with executable application files is created on the hard drive. This section describes the installation directory structure depending on the used operating system.
1.1.2. On Linux
The system will be installed in the /opt/1cv8 directory (hereinafter referred to as the root installation directory). The other directories and configuration files are created in the root installation directory:
-
common. This directory contains the common files of 1C:Enterprise. They include a security key driver installer and the 1cescmn.cfg configuration file.
-
conf. This directory contains the configuration files required for 1C:Enterprise operation.
-
arm64. Directory of 1C:Enterprise installation for ARM64 processors. This directory contains version directories (described below).
-
e2kv4. Directory of 1C:Enterprise installation for E2K processors. This directory contains version directories (described below).
-
i386. Directory of 1C:Enterprise installation for x86 processors. This directory contains version directories (described below).
-
x86_64. Directory of 1C:Enterprise installation for x86-64 processors. This directory contains version directories (described below).
-
A directory of a specific architecture contains a directory in the following format: A.B.C.D. This directory contains files of a specific 1C:Enterprise version. Hereinafter this directory will be referred to as the version directory. Full path to the directory:
-
ARM64: /opt/1cv8/arm64/A.B.C.D.
-
E2K: /opt/1cv8/e2kv4/A.B.C.D.
-
x86: /opt/1cv8/i386/A.B.C.D.
-
x86-64: /opt/1cv8/x86_64/A.B.C.D.
-
Installer allows you to install several versions of the 1C:Enterprise applications simultaneously. In this case, a directory of the respective architecture contains several version directories. For example, when installing versions 8.3.18.100 and 8.3.18.150 (version numbers are hypothetical), there will be two directories with the following names: 8.3.18.100 and 8.3.18.150. Every version directory contains all version files (except for the 1cestart file): executable files, accompanying files, software product licenses, and so on. A version directory has the following structure:
-
conf. Contains version-specific configuration files or the conf.cfg file.
-
distr. Directory for storing client application distribution packages.
-
jre. A directory to place Java Runtime Environment (JRE).
-
docs. This directory contains the accompanying files in Russian and English. The file list can vary depending on the version.
-
licenses. Contains the license agreement for 1C:Enterprise in Russian (the 1CEnterpise_ru.htm file) and English (the 1CEnterpise_en.htm file), as well as license agreements for third-party software components used (this list may vary from version to version).
-
readme. This directory contains readme files in the platform localization languages.
-
ExtDst. Contains additional utilities designed for use with 1C:Enterprise.
Note that you can manually place 1C:Enterprise of earlier versions (up to version 8.3.18) in the directory structure described above. To do it, specify directories of specific versions correctly. After you place 1C:Enterprise this way, the launchers start using earlier versions to automatically select client applications to be started.
1.1.3. On macOS
The system will be installed in the /opt/1cv8 directory (hereinafter referred to as the root installation directory). The other directories and configuration files are created in the root installation directory:
-
common. This directory contains the common files of 1C:Enterprise. They include a security key driver installer and the 1cescmn.cfg configuration file.
-
conf. This directory contains the configuration files required for 1C:Enterprise operation.
A.B.C.D. This directory contains files of a specific 1C:Enterprise version. Hereinafter this directory will be referred to as the version directory. Installer allows you to install several versions of the 1C:Enterprise applications simultaneously. In this case, multiple version directories will be located in the root installation directory. So, if you install versions 8.3.24.100 and 8.3.24.150 (version numbers are conditional), there will be two directories named 8.3.24.100 and 8.3.24.150. Every version directory contains all version files (except for the 1cestart file): executable files, accompanying files, software product licenses, and so on. A version directory has the following structure:
-
conf. Contains version-specific configuration files or the conf.cfg file.
-
distr. Directory for storing client application distribution packages.
-
docs. This directory contains the accompanying files in Russian and English. The file list can vary depending on the version.
-
licenses. Contains the license agreement for 1C:Enterprise in Russian (the 1CEnterpise_ru.htm file) and English (the 1CEnterpise_en.htm file), as well as license agreements for third-party software components used (this list may vary from version to version).
-
readme. This directory contains readme files in the platform localization languages.
1.1.4. On Windows
The default 1C:Enterprise installation directory depends on the selected system installation mode. This directory will be referred to as the root installation directory:
-
Installation "for computer":
-
32-bit application in the 64-bit OS: %PROGRAMFILES(x86)%\1cv8.
-
Otherwise: %PROGRAMFILES%\1cv8.
-
-
Installation "for user":
-
32-bit application in the 32-bit OS: %LOCALAPPDATA%\Programs\1cv8.
-
32-bit application in the 64-bit OS: %LOCALAPPDATA%\Programs\1cv8_x86.
-
64-bit application in the 64-bit OS: %LOCALAPPDATA%\Programs\1cv8_x64.
-
The other directories and configuration files are created in the root installation directory:
-
common. This directory contains the common files of 1C:Enterprise. They include the 1cestart launcher, the security key driver installer, the management console snap-in for 1C:Enterprise server cluster administration (1CV8 Servers.msc), and the 1C:Enterprise file icon library for the operating system.
-
conf. This directory contains the configuration files required for 1C:Enterprise operation.
-
srvinfo. The working directory of the main server. Contains the server cluster data if 1C:Enterprise server is installed as a Windows service.
-
A.B.C.D. This directory contains files of a specific 1C:Enterprise version. Hereinafter this directory will be referred to as the version directory. Installer allows you to install several versions of the 1C:Enterprise applications simultaneously. In this case, multiple version directories will be located in the root installation directory. So, if you install versions 8.3.24.100 and 8.3.24.150 (version numbers are conditional), there will be two directories named 8.3.24.100 and 8.3.24.150. Every version directory contains all version files (except for the 1cestart file): executable files, accompanying files, software product licenses, and so on. A version directory has the following structure:
-
bin. Contains the executable files of the version (directory of executable files).
-
bin\conf. Contains the configuration files of a specific version or the conf.cfg file, which contains the path to the shared directory of configuration files (by default, the conf directory of the root installation directory).
-
bin\distr. Directory for storing client application distribution packages.
-
bin\jre. A directory to place Java Runtime Environment (JRE).
-
bin\dmf. Contains the files necessary for optimized database configuration update.
-
docs. This directory contains the accompanying files in Russian and English. The file list can vary depending on the version.
-
licenses. Contains the license agreement for 1C:Enterprise in Russian (the 1CEnterpise_ru.htm file) and English (the 1CEnterpise_en.htm file), as well as license agreements for third-party software components used (this list may vary from version to version).
-
readme. This directory contains readme files in the platform localization languages.
-
Some directories in the installation are always in a fixed place of the file system, regardless of which directory is selected during the application installation:
-
The common and conf directories are always located in the following directories:
-
Installation "for computer":
-
32-bit application in the 64-bit OS: %PROGRAMFILES(x86)%\1cv8.
-
Otherwise: %PROGRAMFILES%\1cv8.
-
-
Installation "for user":
-
32-bit application in the 32-bit OS: %LOCALAPPDATA%\Programs\1cv8.
-
32-bit application in the 64-bit OS: %LOCALAPPDATA%\Programs\1cv8_x86.
-
64-bit application in the 64-bit OS: %LOCALAPPDATA%\Programs\1cv8_x64.
-
-
-
The installer creates the srvinfo directory only if you install 1C:Enterprise server cluster as a Windows service. This installation is possible if 1C:Enterprise is installed in the "for computer" mode. In this case, the srvinfo directory will be created in the following directories:
-
%PROGRAMFILES%\1cv8 if the bitness of 1C:Enterprise and the operating system match.
-
%PROGRAMFILES(x86)%\1cv8 if you use the 32-bit version of 1C:Enterprise on a 64-bit operating system.
-
1.2. Files functions
1.2.1. General information
This section describes certain files that are part of 1C:Enterprise.
1.2.2. 1cestart
1C:Enterprise application launcher. Using the launcher, you can start all types of clients (thick client, thin client, Web client), Designer.
File location:
-
On Windows:
-
Installation "for computer":
-
32-bit application in the 64-bit OS: %PROGRAMFILES(x86)%\1cv8\common.
-
Otherwise: %PROGRAMFILES%\1cv8\common.
-
-
Installation "for user":
-
32-bit application in the 32-bit OS: %LOCALAPPDATA%\Programs\1cv8\common.
-
32-bit application in the 64-bit OS: %LOCALAPPDATA%\Programs\1cv8_x86\common.
-
64-bit application in the 64-bit OS: %LOCALAPPDATA%\Programs\1cv8_x64\common.
-
-
-
On Linux:
-
If the bitness of the OS and the application to be installed match: /opt/1cv8/common.
-
If the bitness of the OS and the application to be installed do not match: not installed.
-
-
On macOS: in the directory with executable files of a specific version.
1.2.3. 1cv8s
Interactive launcher of the specific version of 1C:Enterprise application. The launcher allows you to start all client types (thick client, thin client, web client, and Designer).
File location:
-
On Windows:
-
Installation "for computer":
-
32-bit application in the 64-bit OS: %PROGRAMFILES(x86)%\1cv8\A.B.C.D\bin.
-
Otherwise: %PROGRAMFILES%\1cv8\A.B.C.D\bin.
-
-
Installation "for user":
-
32-bit application in the 32-bit OS: %LOCALAPPDATA%\Programs\1cv8\A.B.C.D\bin.
-
32-bit application in the 64-bit OS: %LOCALAPPDATA%\Programs\1cv8_x86\A.B.C.D\bin.
-
64-bit application in the 64-bit OS: %LOCALAPPDATA%\Programs\1cv8_x64\A.B.C.D\bin.
-
-
-
On Linux: in the directory with executable files of a specific version.
-
On macOS: in the directory with executable files of a specific version.
1.2.4. 1cv8
Executable file of thick client or Designer.
Cannot start thin client or web client.
File location:
-
On Windows:
-
Installation "for computer":
-
32-bit application in the 64-bit OS: %PROGRAMFILES(x86)%\1cv8\A.B.C.D\bin.
-
Otherwise: %PROGRAMFILES%\1cv8\A.B.C.D\bin.
-
-
Installation "for user":
-
32-bit application in the 32-bit OS: %LOCALAPPDATA%\Programs\1cv8\A.B.C.D\bin.
-
32-bit application in the 64-bit OS: %LOCALAPPDATA%\Programs\1cv8_x86\A.B.C.D\bin.
-
64-bit application in the 64-bit OS: %LOCALAPPDATA%\Programs\1cv8_x64\A.B.C.D\bin.
-
-
-
On Linux: in the directory with executable files of a specific version.
-
On macOS: in the directory with executable files of a specific version.
1.2.5. 1cv8c
Executable file of thin client.
File location:
-
On Windows:
-
Installation "for computer":
-
32-bit application in the 64-bit OS: %PROGRAMFILES(x86)%\1cv8\A.B.C.D\bin.
-
Otherwise: %PROGRAMFILES%\1cv8\A.B.C.D\bin.
-
-
Installation "for user":
-
32-bit application in the 32-bit OS: %LOCALAPPDATA%\Programs\1cv8\A.B.C.D\bin.
-
32-bit application in the 64-bit OS: %LOCALAPPDATA%\Programs\1cv8_x86\A.B.C.D\bin.
-
64-bit application in the 64-bit OS: %LOCALAPPDATA%\Programs\1cv8_x64\A.B.C.D\bin.
-
-
-
On Linux: in the directory with executable files of a specific version.
-
On macOS: in the directory with executable files of a specific version.
1.2.6. 1cv8a
Administrative console utility.
File location:
-
On Windows: in the directory with executable files of a specific version.
-
On Linux: in the directory with executable files of a specific version.
-
On macOS: in the directory with executable files of a specific version.
1.2.7. ragent, rmngr, rphost
Executable files of 1C:Enterprise server.
File location:
-
On Windows: in the directory with executable files of a specific version.
-
On Linux: in the directory with executable files of a specific version.
-
On macOS: none.
1.2.8. crserver
Configuration repository server.
File location:
-
On Windows: in the directory with executable files of a specific version.
-
On Linux: in the directory with executable files of a specific version.
-
On macOS: none.
1.2.9. dbgs
1C:Enterprise debug server.
File location:
-
On Windows: in the directory with executable files of a specific version.
-
On Linux: in the directory with executable files of a specific version.
-
On macOS: in the directory with executable files of a specific version.
1.2.10. dbda
Data Accelerator. Works only as part of a 64-bit 1C:Enterprise server cluster. Designed to speed up the execution of complex analytical reports.
File location:
-
On Windows: in the directory with executable files of a specific version.
-
On Linux: in the directory with executable files of a specific version.
-
On macOS: none.
1.2.11. webinst
Utility for configuring web client publishing on a web server.
File location:
-
On Windows: in the directory with executable files of a specific version.
-
On Linux: in the directory with executable files of a specific version.
-
On macOS: none.
1.2.12. chdbfl
Utility for file mode database testing.
File location:
-
On Windows: in the directory with executable files of a specific version.
-
On Linux: in the directory with executable files of a specific version.
-
On macOS: in the directory with executable files of a specific version.
1.2.13. cnvdbfl
Utility for file mode database conversion.
File location:
-
On Windows: in the directory with executable files of a specific version.
-
On Linux: in the directory with executable files of a specific version.
-
On macOS: in the directory with executable files of a specific version.
1.2.14. ci
Integrity monitoring utility.
File location:
-
On Windows: in the directory with executable files of a specific version.
-
On Linux: in the directory with executable files of a specific version.
-
On macOS: none.
1.2.15. dumper
Utility to generate crash dumps. This utility is used when you specify the externaldump="true" attribute in the logcfg.xml file.
File location:
-
On Windows: in the directory with executable files of a specific version.
-
On Linux: none.
-
On macOS: none.
1.2.16. v7cnv.exe
Converter of infobases from 1C:Enterprise 7.7 to the current version.
File location:
-
On Windows: in the directory with executable files of a specific version.
-
On Linux: none.
-
On macOS: none.
1.2.17. RegMSC.cmd
Command file for registration of the administration utility for 1C:Enterprise server cluster of a specific version (located in the directory of executable files of a specific version).
File location:
-
On Windows: in the directory with executable files of a specific version.
-
On Linux: none.
-
On macOS: none.
1.2.18. 1ceunt.dll
Library of icons used by the operating system to display 1C:Enterprise file types. This library is common to all versions of the application. Registration of this library (and associating icons with file types) is performed on the first installation of 1C:Enterprise on the computer. Canceling the library registration (and removing icons association with file types) is performed when the latest version of 1C:Enterprise is removed from the computer.
File location:
-
On Windows: in the common directory of the root installation directory.
-
On Linux: none.
-
On macOS: none.
1.3. Configuration files: location and search
1.3.1. General information
Configuration files used for 1C:Enterprise (logcfg.xml, nethasp.ini, and so on) can be stored at different locations in the file system. Configuration files in various directories are searched in a specific order. This search order of configuration files allows to:
-
Generate unified configuration files for all versions and components installed on the computer. For this, the configuration files must be located only in the conf directory of the root installation directory.
-
Generate configuration files separately for each version installed on the computer. For this, the configuration files must be located only in the bin\conf directory.
-
Generate different configuration files for different components (for the 1C:Enterprise client application and server, operating under another user of the system) of any version running on the computer. For this, the configuration files must be located in the directories of configuration files available for all computer users (the list of such directories depends on the operating system used and 1C:Enterprise installation mode).
-
Use combinations of these methods for different configuration files.
1.3.2. On Linux:
On Linux, files can be located in the following places (in the search order):
-
The conf directory of a specific version: /opt/1cv8/arch/A.B.C.D/conf.
-
The conf directory of the root installation directory: /opt/1cv8/conf.
-
The ~/.1cv8/1C/1cv8/conf directory (~ is a home directory of the user on whose behalf the 1C:Enterprise client application runs).
-
The directory specified as the value of the ConfLocation parameter of a specific version configuration file.
1.3.3. On macOS
On macOS, files can be located in the following places (in the search order):
-
The conf directory of a specific version: /opt/1cv8/A.B.C.D/conf.
-
The conf directory of the root installation directory: /opt/1cv8/conf.
-
The ~/.1cv8/1C/1cv8/conf directory (~ is a home directory of the user on whose behalf the 1C:Enterprise client application runs).
-
The directory specified as the value of the ConfLocation parameter of the conf.cfg file from the conf directory of a specific version.
1.3.4. On Windows
In Windows, files can be stored in the following locations (in the search order):
-
The bin\conf directory of a specific version:
-
Installation "for computer":
-
32-bit application in the 64-bit OS: %PROGRAMFILES(x86)%\1cv8\A.B.C.D\bin\conf.
-
Otherwise: %PROGRAMFILES%\1cv8\A.B.C.D\bin\conf.
-
-
Installation "for user":
-
32-bit application in the 32-bit OS: %LOCALAPPDATA%\Programs\1cv8\A.B.C.D\bin\conf.
-
32-bit application in the 64-bit OS: %LOCALAPPDATA%\Programs\1cv8_x86\A.B.C.D\bin\conf.
-
64-bit application in the 64-bit OS: %LOCALAPPDATA%\Programs\1cv8_x64\A.B.C.D\bin\conf.
-
-
-
The %LOCALAPPDATA%\1C\1cv8\conf directory of the user on whose behalf the system is operating.
-
The directory specified as the value of the ConfLocation parameter of the conf.cfg file from the bin\conf directory of a specific version.
-
The %ALLUSERSPROFILE%\1C\1cv8\conf directory.
Appendix 2. Description of the event log elements
This appendix describes the structure of the event log when it is exported in XML format.
XML document format after event log export:
-
Namespace: http://v8.1c.ru/eventLog.
-
Namespace prefix (default): v8e
EventLog
The root element of the document. Contains the events of the log (Event elements).
- Event
- Contains elements that describe the log event.
- Level
- Event level enumeration. Event level value.
- Date
- DateTime. Event date and time value.
- Application
- String. Name of the application in which the event occurred.
- ApplicationPresentation
- String. Presentation of the application in which the event occurred.
- EventName
- String. Name of the event.
- EventPresentation
- String. Presentation of the event.
- UserID
- UUID. ID of the user who initiated the event.
- UserName
- String. Name of the user who initiated the event.
- MetadataName
- String. Compound name in the English version of the term and with the metadata names. For events that include a list of metadata (data access events), it contains a list of Item elements, each of which contains the name of the metadata object.
- MetadataPresentation
- String. Presentation of the metadata object in the language of user (synonyms). For events that include a list of metadata (data access events), it contains a list of Item elements, each of which contains the presentation of the metadata object.
- Comment
- String. Comment to the event.
- Data
- Arbitrary Event data. If the data type cannot be represented as XML, the Undefined value is written (a blank element with the xsi:nil = "true" attribute).
It may contain structures, arrays, and tables (for data access events, authentication and operation with infobase users).
- DataPresentation
- String. Presentation of the event data.
- TransactionStatus
- Transaction status for the event. The transaction status can take the following values:
-
InProgress. The transaction is in progress.
-
Committed. The transaction is committed.
-
RolledBack. The transaction is canceled.
-
NotApplicable. Record is performed outside the transaction.
- TransactionID
- String. Transaction ID.
- Connection
- Number. Connection number.
The field always equals 0 for the session termination event in the client/server infobase.
- Session
- Number. Session number.
- ServerName
- String. Working server name.
- Port
- Number. Main network port.
- SyncPort
- Number. Auxiliary network port.
- SessionDataSeparation
- Contains a collection of elements that describe the separators used in the session during the event logging. The element name corresponds to the separator name, the element value contains the separator value.
- SessionDataSeparationPresentation
- Contains a collection of Item elements with values of the String type, which contain the separator presentations in the same order as in the SessionDataSeparation element.
Appendix 3. Description and location of internal files
3.1. General information
This appendix contains a description and location of internal files that can be used when operating 1C:Enterprise.
3.2. *.1ccr
The web service configuration file for remote repository can have an arbitrary name (the 1ccr extension is required), an XML format, and contains a single node with an arbitrary name and the connectString attribute. This attribute specifies the repository server address in the TCP scheme.
For example, such configuration file can be called repository.1ccr and contain:
<?xml version="1.0" encoding="UTF-8"?><repository connectString="tcp://RepServ"/>In this case, the repository name is selected as an arbitrary node name and the address of the repository server configuration is tcp://RepServ.
3.3. *.mft
The file with the mft extension is a manifest file, which is a special file that describes the configuration template. The file may have an arbitrary name.
The file is located in the directory of the installed configuration template.
The manifest file has an arbitrary name and mft extension. The internal format of the manifest file is close to the .ini file format. The manifest file uses UTF-8 encoding to support multiple languages. The following parameters are specified at the beginning of the manifest file.
- Vendor
- Solution provider. Matches the one specified in the configuration.
Name
Name of the solution. Matches the one specified in the configuration.
- Version
- Version of the solution. Matches the one specified in the configuration.
- AppVersion
- 1C:Enterprise version used to build the distribution package.
The following parameters refer to parts of the solution and are separated by sections names. Sections names are arbitrary and enclosed in square brackets.
- Source
- The relative path to the configuration file (cf), the update file (cfu), or the database dump file (dt).
- Catalog\_<language suffix>
- Application name in the application directory. There may be several Catalog_<language suffix> parameters in the manifest file. The suffix defines the user interface language in 1C:Enterprise 8 (for example, ru to specify the Russian language). If the language suffix is not specified (the parameter name is set to Catalog), the value of this parameter is used for all user interfaces except those, for which the Catalog parameter with the desired language suffix is specified in this section.
- Destination
- Recommended directory for infobase creation. This parameter is used when creating an infobase from a template. The directory represents a partial path. As one of its parts the directory must include a vendor directory (to avoid a coincidence of directories names for different solutions).
Multiple cfu files are allowed in the configuration template directory.
Vendor=1C CompanyName=Trade ManagementVersion=8.10.0.2[Main]Source=Main\1cv8.cfCatalog_en=Trade management/Trade managementDestination=1C\Trade[Demo]Source=Demo\1cv8.dtCatalog_en=Trade management/Trade management (Demo)Destination=1C\DemoTrd3.4. *.v8i
This appendix describes the registered infobases description file format. This list is used by all clients. By default, the file name is ibases.v8i.
File location:
-
On Linux: ~.1C\1cestart.
-
On macOS: ~.1C\1cestart.
-
On Windows: %APPDATA%\1C\1CEStart\ of a local computer.
The file is a text document encoded in UTF-8 and consists of sections. Each section describes one infobase.
Each section describes one infobase.
Infobase description section:
[Section name]Connect=ID=OrderInList=Folder=OrderInTree=External=ClientConnectionSpeed=App=AppArch=DefaultApp=WA=WSA=Version=DefaultVersion=AdditionalParameters=WebCommonInfoBaseURL=HttpsCA=HttpsCert=HttpsCAFile=HttpsCertFile=HttpsCertSelect=ShowInList=MobilePublicKey=WebCommonInfoBases=A section consists of a section name and parameters.
The name and each section parameter are written to a separate line in the description file.
- Section namerequired
- The name of the section matches the name of the infobase and is a required parameter. The name is enclosed in square brackets.
The parameter can be edited in the infobase properties window.
Example:
[Demo version 8.2]ID
Infobase internal ID. Generated automatically. Must be unique within a single v8i file.
Manually generating the ID is not recommended.
Example:
ID=cf9f0d4b-b4a3-11d8-861e-0050baaa2f3f- Connectrequired
- Infobase connection string. There may be several descriptions of infobases that have the same start string (but different name). This may be necessary when you need to start a single infobase in multiple startup modes (such as thin and thick clients) without changing the properties of the infobase.
Example:
File mode is specified as:
Connect=File=<Path>;Client/server version is specified as:
Connect=Srvr=<1CEnterpriseServerName>;Ref=<InfobaseNameOnServer>;Web server connection is specified as:
Connect=ws="http://web-server/resource/";- Folder
- Folder name in the infobases tree.
Example:
Folder=/CommercialInfobases- OrderInList
- The order in the list when presented in the list view. Specified as a number, which is the sequence count of the infobase in the infobase list (sorting by name is not set).
Example:
OrderInList=5- OrderInTree
- The order in the branch when presented in the tree view.
Example:
OrderInTree=16358- UseProxy
- Specifies how to use a proxy server for the ws connection option.
-
0. The proxy server is not used.
-
1. Proxy server settings are detected automatically.
-
2. Proxy server settings are specified explicitly.
If the UseProxy parameter is not specified, the proxy server settings are automatically defined. For file and client/server modes, it is meaningless.
Example:
UseProxy=1- PSrv
- String containing the proxy address (required only if the UseProxy parameter is set to 2).
Example:
PSrv=192.168.0.1- PPort
- Port number of the proxy server (required only if the UseProxy parameter is set to 2).
Example:
PPort=123- PUser
- Proxy server username.
Example:
PUser=userName- PPasswd
- Encrypted password for the proxy server.
Example:
PPasswd=XNKxbVEqnXUCwwk1Urovbo7bZFpG/Zpf6cQ10qVtzpk=- ClientConnectionSpeed
- Client connection speed (only makes sense for thin and web clients). The following values are possible:
-
Normal. Standard connection speed.
-
Low. Low connection speed.
If the parameter is not specified, the client connection speed will be determined by the Low connection speed checkbox value of the startup window. It is equivalent to the Select when starting value of the Connection speed parameter of the window with the infobase startup parameters.
Example:
ClientConnectionSpeed=Low- WA
- Specifies user authentication mode. The following values are possible:
-
1. Use OS authentication. If unsuccessful, request the username and password.
-
0. Always use username/password authentication.
Example:
WA=1- WSA
- Determines a user authentication mode on a web server if the web server is used as an intermediate link (a thin client that is connected through a web server and a web client). The following values are possible:
-
1. Use OS authentication on the web server. If unsuccessful, request the username and password.
-
0. Always request a username/password.
Example:
WSA=1- App
- Specifies the type of client application:
-
Auto. Client application type is selected automatically.
-
ThinClient. Thin client.
-
ThickClient. Thick client.
-
WebClient. Web client.
The parameter can be edited in the infobase properties window.
Example:
App=Auto- DefaultApp
- The type of client that is defined and placed in this file by the launcher when the client application type is automatically determined (/AppAutoCheckMode key):
-
ThinClient. Thin client.
-
ThickClient. Thick client.
If the App parameter value equals Auto and the DefaultApp parameter is not specified, the thin client is started with the /AppAutoCheckMode command-line option.
If the DefaultApp parameter is set, the client specified in it starts with the /AppAutoCheckMode parameter.
Example:
DefaultApp=ThinClient- Version
- 1C:Enterprise version that must be used to start the infobase.
The parameter can be edited in the infobase properties window.
Example:
Version=8.3.24- DefaultVersion
- 1C:Enterprise version, which was actually used to for the previous start of the infobase. Automatically detected and placed in this file by the launcher if the start is performed with /AppAutoCheckVersion parameter.
During the next startups, this version will be used, not the one specified in the Version parameter.
Example:
DefaultVersion=8.3.24.100- AdditionalParameters
- Contains additional startup options that can be entered in the infobase properties window in the Advanced startup options item.
Example:
AdditionalParameters=/TechnicalSpecialistMode- WebCommonInfoBaseURL
- If the infobase is added to the current list using the Internet service for obtaining a list of shared infobases, this parameter will contain the address of the service that provided the information about the infobase.
If, during the interactive start of the launcher (1cv8s), it is detected that the list of the shared infobases received using the Internet service does not require an update, the descriptions of all infobases (the WebCommonInfoBases.CheckInfoBases() web service call returned the InfoBaseChanged parameter equal to False) that are retrieved from this source remain in the list until the next start.
If the InternetService or WebCommonInfoBases parameters are removed from the 1cestart.cfg file, information about infobases received from remote sources will be removed from the infobases list.
Example:
WebCommonInfoBaseURL=http://info-server/listservice- HttpsCA
- Type of the certificate source from the certification authorities used to validate the server certificate. Possible values:
-
None. Certification authority certificates are used, the server certificate is not verified.
-
File. Certification authority certificates are located in the file.
-
Windows. Certification authority certificates are located in the Windows Certificate Store.
-
Linux. Certification authority certificates are located in the Linux certificate directory.
-
macOS. Certification authority certificates are located in the macOS Certificate Store.
- HttpsCert
- Type of the client certificate source and its private key. Possible values:
-
None. The client certificate is not used.
-
File. The client certificate is in the file.
-
Windows. The client certificate is in the Windows Certificate Store.
-
Linux. The client certificate is in the Linux certificate directory.
-
macOS. The client certificate is in the macOS Certificate Store.
- HttpsCAFile
- Path to the file that contains certification authority certificates. If the HttpsCA parameter is set to File, and this parameter is missing or equal to an empty string, then the HttpsCA parameter is considered to be set to None.
- HttpsCertFile
- The path to the file that contains the client certificate and its private key. If the HttpsCert parameter is set to File, and this parameter is missing or equal to an empty string, then the HttpsCert parameter is considered to be set to None.
- HttpsCertSelect
- How to select a Windows client certificate if more than one certificate is installed and these certificates are suitable for this connection. Possible values:
-
Recent. Use the selected one. If there is a remembered one, it is used. Otherwise, a selection dialog box opens and the selected certificate is remembered for later use.
-
Choose. Always select a certificate. The selected certificate is saved and can be further used if this parameter is set to Recent.
-
Auto. Automatically select the appropriate certificate for this connection. The selection dialog box does not open.
- AppArch
- Defines the bitness of a client application to be used for this infobase. The bitness value is the same as the /AppArch command parameters of the command line for client application startup.
- StartupErrorHelpURL
- If an error occurs upon connection to the infobase, the administrator can enable the Need help? hyperlink display in the dialog box with the error. To do it, specify a URL in this property. It is recommended that you specify a list of frequent connection issues (and their solutions), a list of technical support contacts, or any other similar information as an address.
- StartupErrorHelpText
- If an error occurs upon connection to the infobase, the administrator can enable display of any support information (for example, a technical support phone number) in the dialog box with the error. To do it, set this property. The property can be:
-
Simple string.
-
Formatted string. In this case, a parameter value must be a serialized value of the formatted string. Perform serialization using the XDTOSerializer.XMLString(TextForDialogBox) method. TextForDialogBox is a variable that contains a value of the FormattedString type.
The following set of parameters is applied only in v8i files that are used in the assembled mobile client application.
- ShowInListoptional
- Use this parameter to specify that the infobase will be in the main list of infobases on the mobile device. The parameter can take values:
-
1. The infobase is located in the main list of mobile device bases.
-
0. The infobase is not located in the main list of mobile device bases. To access this database, use a special menu.
Default value: 0.
Example:
ShowInList=1- MobilePublicKey required for iOS
- The MD5 hash (Base64 format) of the public key that is used to verify the signature of the configuration that the mobile client tries to use. The hash value (in the required format) is available in the Mobile Client Signature Designer dialog box.
Example:
MobilePublicKey=322B116E58FA1B7EC6961A8FE53389EE- InternetService
- This parameter contains the Internet service address of the shared infobases list. The infobase from the list will be added to the list of the mobile client (on a mobile device) if the value of the MobilePublicKey parameter for the configuration from the list of shared infobases matches the value of this parameter for any configuration specified during the mobile application build stage.
This parameter for a mobile client is similar to the InternetService parameter of the 1cestart.cfg file.
In the case of a mobile client, this parameter can be nested, that is, the list of shared infobases, which returns the Internet service, may contain a reference to another Internet service.
Example:
InternetService=http:\\server\addr- DisplayAuthDialog
- This parameter defines whether the user authentication dialog box has to be displayed.
- DisableUseBiometrics
- This parameter disables the Use biometrics check box in the mobile client user authentication dialog box.
- UseBiometrics
- This parameter controls the Use biometrics check box set by default in the mobile client user authentication dialog box. If DisableUseBiometrics is available in the infobase details, this parameter has no sense. The parameter can take values:
-
1. The Use biometrics checkbox is selected.
-
0. The Use biometrics checkbox is cleared.
The default value is 1.
- DisableRememberMe
- This parameter disables Remember me check box in the mobile client user authentication dialog box.
- RememberMe
- This parameter controls the Remember me check box set by default in the mobile client user authentication dialog box. If DisableRememberMe is available in the infobase details, this parameter has no sense. The parameter can take values:
-
1. The Remember me check box is selected.
-
0. The Remember me check box is cleared.
The default value is 1.
See also:
-
1cestart.cfg configuration file.
-
Internet service for getting the list of shared infobases.
3.5. 1cescmn.cfg
The 1cescmn.cfg file contains the general settings of the launchers (1cestart and 1cv8s). The file is located in the directory from where the application is being installed if the distribution packages are located in the network directory.
The file is a text document encoded in UTF-8 or UTF-16LE and contains the strings of <Parameter>=<Value> format.
The file description is equivalent to the description of the 1cestart.cfg file. The only difference is that the shared configuration file cannot contain a string with the CommonCfgLocation parameter.
Example:
CommonInfoBases=ibcommon.v8iDistributiveLocation=\\server\v8dstThis example sets the name of a file with the list of shared infobases (Ibcommon.v8i), which must be in the same directory as the file with the interactive launcher (1cestart). The directory of distribution packages of application versions is also specified: \server\v8dst.
3.6. 1cestart.cfg
3.6.1. General information
The 1cestart.cfg file contains settings that launchers (1cestart and 1cv8s), client applications (1cv8 and 1cv8c), and external connections use.
File location:
-
On Linux: ~.1C\1cestart.
-
On macOS: ~.1C\1cestart.
-
On Windows:
-
Installation "for computer":
-
%APPDATA%\1C\1CEStart. For a specific user. The file changes when configuring the startup window (see Startup window settings).
-
%ALLUSERSPROFILE%\1C\1CEStart. For all computer users. The file changes only during the installation of the 1C:Enterprise application.
-
-
Installation "for user":
- %APPDATA%\1C\1CEStart. For a specific user. The file changes when configuring the startup window (see Startup window settings).
-
The file is a text document encoded in UTF-16LE and contains the strings of <Parameter>=<Value> format. The descriptions of the parameters that can be contained in this file are described below.
Example:
DefaultVersion=8.2-8.2.16DefaultVersion=8.3-8.3.24CommonCfgLocation=\\Server\v8\1cescmn.cfgCommonInfoBases=\\Server\common\common_dblist.v8iInstalledLocation=C:\Program Files\1cv8DistributiveLocation=\\server\dst1C\v8ConfigurationTemplatesLocation=\\server\tmpltsConfigurationTemplatesLocation=C:\Documents and Settings\User\Application Data\1C\1cv8\tmpltsInstallComponents=DESIGNERALLCLIENTS=1 THINCLIENT=1 WEBSERVEREXT=1 SERVER=1 CONFREPOSSERVER=0 CONVERTER77=1 SERVERCLIENT=1 LANGUAGES=RUUseHwLicenses=0AppAutoInstallLastVersion=03.6.2. AppAutoInstallLastVersion
The AppAutoInstallLastVersion parameter specifies the need to automatically install the new version of 1C:Enterprise:
-
0. Disable automatic installation of the new version.
-
1. Enable automatic installation of the new version (default value).
The parameter value from one configuration file is used according to the following priority:
-
Local configuration file.
-
Local configuration file for all users.
-
Common configuration file.
If no version is installed on the local computer that is required by the server in the client/server mode or is explicitly specified for the infobase, the value of the parameter (from the configuration files or command line) AppAutoInstallLastVersion is ignored and an attempt is made to install the new version.
3.6.3. AutoUninstall
The AutoUninstall parameter specifies the need to automatically delete outdated versions:
-
0. Versions are not deleted automatically.
-
1. Versions are deleted automatically (default value).
The parameter value from one configuration file is used according to the descending priority:
-
Common configuration file.
-
Local configuration file.
-
Local configuration file for all users.
3.6.4. AutoUninstallVersionsAfter
The AutoUninstallVersionAfter parameter allows you to specify the number of days after which (once the version is installed) the version will be considered outdated.
Default value: 90.
The parameter value from one configuration file is used according to the descending priority:
-
Common configuration file.
-
Local configuration file.
-
Local configuration file for all users.
3.6.5. CommonCfgLocation
The CommonCfgLocation parameter specifies the path and name of the common configuration file. Multiple lines with this parameter are allowed.
Values from all configuration files are used.
3.6.6. CommonInfoBases
The CommonInfoBases parameter specifies the path and name of the file with the shared infobases list.
Values from all configuration files are used.
3.6.7. ConfigurationTemplatesLocation
The ConfigurationTemplatesLocation parameter specifies the path to the configuration templates directory. It may contain more than one record.
Values from all configuration files are used.
3.6.8. DefaultVersion
The DefaultVersion parameter specifies the default version. Multiple lines with this parameter are allowed.
The bitness of the client application to be started can specified in this parameter. The ";" character is used to separate the version and the bitness of the client application. The bitness value is the same as the /AppArch command parameters of the command line for client application startup (see Specifying run mode).
Values from all configuration files are used.
Example 1:
DefaultVersion=8.3-8.3.24.100This line means that version 8.3.3.100 will be used when attempting to start the infobase with version 8.3.
Example 2:
DefaultVersion=8.2.15-8.2.15.315This line means that version 8.2.15.315 will be used when attempting to start the infobase with version 8.2.15.
Example 3:
DefaultVersion=8.3;x86_64_prtThis line means that if you try to start any infobase, you will use the client application version 8.3 with a priority of 64-bit version. For details on how to select the client application bitness, see Determining application bitness.
3.6.9. DisableInstallerVerification
The parameter disables verification of a digital signature of the client application installer obtained over HTTP or from a self-extracting application archive generated using the 1CEClientSetupMake utility:
-
1. Digital signature verification is disabled.
-
0. Digital signature verification is enabled (default value).
3.6.10. DistributiveLocation
The DistributiveLocation parameter contains a reference to the directory where a new version will be searched for automatic installation.
Values from all configuration files are used.
The directory with distribution packages of new versions will also be searched in the directory where the common configuration file (1cescmn.cfg) is located.
3.6.11. DontUninstallVersion
The DontUninstallVersion parameter allows you to specify a version that must not be deleted automatically. A configuration file can contain many of such parameters. Deletion will be unavailable for all specified versions.
Values from all configuration files are used.
3.6.12. InstallComponents
The local configuration file and the local configuration file for all users (1cestart.cfg) contains a list of installed components.
The common configuration file (1cescmn.cfg) contains a list of components to be installed (generated by the system administrator).
The InstallComponents parameter value from one configuration file is used according to the following priority:
-
Local configuration file for all users.
-
Local configuration file.
-
Common configuration file.
The parameter contains a string of components to be installed, separated by a space:
-
0. Do not install.
-
1. Install.
The following components are available:
| Component | Description |
|---|---|
| CONFREPOSSERVER | 1C:Enterprise configuration repository server. |
| CONVERTER77 | Converter of infobases from 1C:Enterprise version 7.7. |
| DESIGNERALLCLIENTS | All clients and Designer. |
| LANGUAGES | List of installation interface languages. If several languages are specified, they are separated by comma (,). For the list of localization languages, see Selecting default interface language. |
| SERVER | 1C:Enterprise server. If the installer starts from the launcher, the server will be installed as an application. |
| SERVERCLIENT | Additional components for administering the 1C:Enterprise server cluster. |
| THINCLIENT | Thin client for client/server mode operation. |
| THINCLIENTFILE | Thin client with support for file infobases. |
| WEBSERVEREXT | Extension components for web server. |
Example:
LANGUAGES=RU,UK,BGExample parameter:
InstallComponents=DESIGNERALLCLIENTS=0 THINCLIENT=1 WEBSERVEREXT=0 SERVER=0 CONFREPOSSERVER=0 CONVERTER77=0 SERVERCLIENT=1 LANGUAGES=RU,EN3.6.13. InstalledLocation
The InstalledLocation parameter contains a reference to the directory where 1C:Enterprise was installed. By default, this is a path to the root installation directory of the respective operating system (see Structure of the installation directory and assigning directories and files).
The values from all configuration files are used in the following order:
-
From the common configuration file.
-
From the local configuration file for all users.
-
From the local configuration file.
3.6.14. InstallForUsers
The InstallForUsers parameter contains a value that describes 1C:Enterprise installation mode depending on the current user rights:
-
0. Installation mode is determined by the current user rights. Default value.
-
1. Install "for computer".
-
2. Install "for the current user" allowing them to specify an installation mode.
-
3. Install "for the current user" not allowing them to specify an installation mode.
See also:
- Specifying system installation mode (see Specifying installation mode).
3.6.15. InternetService
The InternetService parameter allows you to specify the URL of the Internet service which provides a list of shared infobases and distribution package of the client application.
First, an attempt is made to retrieve the required file (with a list of shared infobases or a distribution package of the client application) using an HTTP request. If this attempt fails, an attempt is made to retrieve the file using a web service.
For the HTTP request, the full service URL is generated as follows: <Address from the InternetService parameter>/<Service name>/<Method name>/?<Method parameters>.
For a web service request, the description address (in the WSDL format) is generated as follows: <Address from the InternetService parameter>/<Service name>/?wsdl.
3.6.16. UseHwLicenses
The UseHwLicenses parameter controls the search for the dongle (both local and network ones) when starting 1C:Enterprise:
-
1. The dongle is searched for (default value).
-
0. The dongle is not searched for.
The parameter value from one configuration file is used according to the following priority:
-
Local configuration file.
-
Local configuration file for all users.
-
Common configuration file.
This parameter allows you to disable the search for a security key when obtaining client licenses is implemented using the Web server extension, the 1C:Enterprise server, or in the case of the base version.
The value of the parameter can be changed by the application in the following cases:
-
If the search for the security key is enabled, the client application starts analyzing the security key search time. If the security key was not found, the start was successful and the search time exceeded 3 seconds, the user is prompted to disable the search for the security key to speed up subsequent starts. If the user agrees, the UseHwLicenses=0 parameter is written to the 1cestart.cfg file of that user.
-
If the search for the security key is disabled and at startup it is detected that the license is not obtained from the 1C:Enterprise server or from the Web server extension, the user is prompted to enable the search for the security key. If the user agrees, the UseHwLicenses=1 parameter is written to the 1cestart.cfg file of that user, and the client application restarts.
If an external connection is started, an attempt is made to parse the parameter from the 1cestart.cfg file located in the user profile, on behalf of which the external connection is started. If the user does not have a profile (for example, a LocalSystem user in Windows), the search for the key is always performed.
3.6.17. WebCommonInfoBases
The WebCommonInfoBases parameter allows you to specify the URL of the Internet service which provides a list of shared infobases.
First, an attempt is made to retrieve the list of shared infobases using an HTTP request. If this attempt fails, an attempt is made to retrieve the file using a web service.
For the HTTP request, the full service URL is generated as follows: <Address from the WebCommonInfoBases parameter>/<Service name>/<Method name>/?<Method parameters>.
For a web service request, the description address (in the WSDL format) is generated as follows: <Address from the WebCommonInfoBases parameter>/<Service name>/?wsdl.
If both the InternetService parameter and the WebCommonInfoBases parameter are specified, the address specified in the WebCommonInfoBases parameter is used first. If failed, the address specified in the InternetService parameter is used.
3.6.18. WebDistributiveLocation
The WebDistributiveLocation parameter allows you to specify the URL of the Internet service that provides the distribution package of the client application.
First, an attempt is made to retrieve the client application distribution package using an HTTP request. If this attempt fails, an attempt is made to retrieve the file using a web service.
For the HTTP request, the full service URL is generated as follows: <Address from the WebDistributiveLocation parameter>/<Service name>/<Method name>/?<Method parameters>.
For a web service request, the description address (in the WSDL format) is generated as follows: <Address from the WebDistributiveLocation parameter>/<Service name>/?wsdl.
If both the InternetService parameter and the WebDistributiveLocation parameter are specified, the address specified in the WebDistributiveLocation parameter is used first. If failed, the address specified in the InternetService parameter is used.
3.7. 1CV8Clst.lst
The file is located in the data directory of each working server marked as central server.
The file contains the cluster registry and stores the following information:
-
List of infobases registered in the cluster
-
List of working servers in the cluster
-
List of working processes in the cluster
-
List of cluster managers
-
List of cluster services
-
List of cluster administrators
Example:
C:\Program Files\1cv8\srvinfo\reg_1541\1CV8Clst.lst3.8. 1cv8conn.pfl
The file contains a list of cluster main servers in the context of infobases, as well as other information used by client and server applications of the 1C:Enterprise.
It is required for reliable operation that users, on behalf of which 1C:Enterprise applications are started, have rights to create, read, and modify data in the directory where the file is located. If 1C:Enterprise is used on a computer running Windows by different users, it is recommended that all users, who use the 1C:Enterprise application or the USERS group, have full access to directory of the file location (listed below), and the CREATOR-OWNER user (CREATOR OWNER) is removed from the security list of this directory.
File location:
-
On Linux: ~/.1cv8/1C/1cv8.
-
On macOS: ~/.1cv8/1C/1cv8.
-
On Windows: %ALLUSERSPROFILE%\1C\1cv8.
3.9. 1cv8wsrv.lst
The file is stored on the computer of the working server marked as main in the cluster service files directory and contains a list of clusters registered on this computer of 1C:Enterprise server. The data it contains is necessary for the normal operation of applications that use this 1C:Enterprise server.
Example:
C:\Program Files\1cv8\srvinfo\1cv8wsrv.lst3.10. adminstall.cfg
The adminstall.cfg file indicates that the 1C:Enterprise application was installed using Windows administration tools. The file is located in the directory of 1C:Enterprise configuration files. It is a text document encoded in UTF-8.
The file can contain a single line defining the installation mode:
AdmInstall=<Mode>- <Mode>
- Describes the installation mode:
-
Logon. Installation is performed using a logon script during user logon to the domain.
-
Restart. Installation is performed using group policies.
The following is an example of an installation script that can be used to install 1C:Enterprise using Windows administrative tools (see Installation with ).
Option Explicit' Change user interfaceConst msiUILevelNoChange = 0' Use the default user interfaceConst msiUILevelDefault = 1' Do not display user interface (silent installation)Const msiUILevelNone = 2' Only a progress indicator and error displayConst msiUILevelBasic = 3' User interface without dialog messagesConst msiUILevelReduced = 4' Full user interfaceConst msiUILevelFull = 5' For msiUILevelBasic, progress indicator' is displayed without the Cancel button.Const msiUILevelHideCancel = 32' For msiUILevelBasic, progress indicator' is displayed without any dialog boxes, including error messages.Const msiUILevelProgressOnly = 64' If used with any of the listed values, the installer' displays a message about the final result at the end of the installation.Const msiUILevelEndDialog = 128'***** Must be changed to the actual installation directoryConst DistrFolder="\\Server\1CDistr\"Const shortcutName = "1C:Enterprise startup"Dim shortcutTarget : shortcutTarget = DistrFolder & "1cestart.exe"' Constants to determine an action' installation requiredConst requiredInstall = 1' uninstallation requiredConst requiredUninstall = 0' Value of the ProductCode parameter from the setup.ini file ...'... of the version to uninstallConst unInstallUID="{9173B91C-FF56-4F25-82D1-7F68244044CD}"'... of the version to installConst InstallUID="{0BC98727-04AD-470F-9EEE-0162C543833F}"' procedure for installing or uninstalling the specified version of the productSub installOrUninstall (ByVal productCode, ByVal msiPackage, ByVal mstTransform, ByVal requiredAction)' productCode. Product code information. Is in the' setup.ini file, ProductCode key' msiPackage. 1CEnterprise distribution package' mstTransform. Language conversion file for installer' requiredAction. Required action, either requiredInstall or' requiredUninstall' Variable to generate additional' parameters for installerDim cmdLineOn Error Resume NextDim installer, sessionSet installer = NothingSet session = NothingSet installer = Wscript.CreateObject("WindowsInstaller.Installer") : processErrorinstaller.UILevel = msiUILevelBasic 'msiUILevelNone 'or specify another user interface option' product installation checkingSet session = installer.OpenProduct(productCode)If session Is Nothing AND requiredAction = requiredInstall Then' the product is not installed and must be installedcmdLine = "TRANSFORMS=adminstallrelogon.mst;"If Not mstTransform Is Empty Then' add an instruction to the installer to use the specified languagecmdLine = cmdLine & mstTransform' can additionally specify which components need to be installed'cmdLine = cmdLine & " DESIGNERALLCLIENTS=1 THINCLIENT=1 WEBSERVEREXT=0 SERVER=0 CONFREPOSSERVER=0 CONVERTER77=0 SERVERCLIENT=1 LANGUAGES=RU"End If' installing the platformSet session = installer.InstallProduct(msiPackage, cmdLine) : processError' create a shortcut on the desktopcreateShurtcut()ElsIf Not session Is Nothing AND requiredAction = requiredUninstall Then' the platform is already installed and must be uninstalled' only one session object is allowedSet session = Nothing' specifying that this version should be removed from the user's computercmdLine = "REMOVE=ALL"' uninstallingSet session = installer.InstallProduct(msiPackage, cmdLine) : processErrorEnd IfSet session = NothingSet installer = NothingEnd Sub'error handlingSub processErrorDim msgIf Err = 0 Then Exit Submsg = Err.Source & " " & Hex(Err) & ": " & Err.DescriptionWscript.Echo msgWscript.Quit 2End Sub'creating a shortcutSub createShurtcutDim WshShell, oShellLinkSet WshShell = WScript.CreateObject("WScript.Shell")Dim strDesktop : strDesktop = WshShell.SpecialFolders("Desktop")Set oShellLink = WshShell.CreateShortcut(strDesktop & "\" & shortcutName & ".lnk")oShellLink.TargetPath = shortcutTargetoShellLink.WindowStyle = 1oShellLink.Description = shortcutNameoShellLink.SaveSet oShellLink = NothingSet WshShell = NothingEnd Sub' uninstalling version 260installOrUninstall unInstallUID, DistrFolder + "8.2.9.260\setup\1CEnterprise 8.2.msi", "1049.mst", requiredUninstall' installing version 356installOrUninstall InstallUID, DistrFolder + "8.2.9.356\setup\1CEnterprise 8.2.msi", "1049.mst", requiredInstall3.11. agentbasedir.json
Contains the correspondence between the user name and the user working directory when the configuration agent is running.
The file is located in the working directory of Designer running in agent mode. The working directory is set using the /AgentBaseDir command of the command line to start Designer in agent mode.
The file has the following structure:
{"usersInfo": [{"name": "user_name""dir": "directory_name"},...]}In this file, user_name is the name of the user working with the agent, and directory_name is the name of the service directory of this user. If several users work with the agent, the agentbasedir.json file will contain several sections for matching the user name and directory.
See also:
-
Running Designer in agent mode (see Running Designer in agent mode).
-
Command-line parameters to start the agent mode (see Agent mode commands).
3.12. appsrvrs.lst
Contains a list of 1C:Enterprise servers registered in the client/server infobase administration utility.
Located in the %LOCALAPPDATA%\1C\1cv8 directory.
Example:
C:/Documents and Settings/User/Local Settings/Application Data/1C/1cv8/appsrvrs.lstC:/Users/User/AppData/Local/1C/1cv8/appsrvrs.lst3.13. cacertnx.pem and cacert.pem
These files contain certificates of trusted certificate authorities. 1C:Enterprise uses these certificates to check the validity of the certificates that are shown when establishing a secure connection. The use of a particular file depends on the version of 1C:Enterprise platform:
-
In versions earlier than 8.3.8 and in Version 8.3.7 or earlier compatibility mode, use only the cacert.pem file.
-
Starting from version 8.3.8 and Version 8.3.8 compatibility mode up to version 8.3.19, use only the feature for obtaining certificates from certificate authorities provided by the used operating system.
-
Starting from version 8.3.20:
-
In Version 8.3.8 or later compatibility mode, use the cacertnx.pem file. After that, use the feature for obtaining certificates from certificate authorities provided by the used operating system.
-
In Version 8.3.7 or earlier compatibility mode, use the cacert.pem file only.
-
If you need to update the cacertnx.pem file upon 1C:Enterprise platform update, you can put the updated cacertnx.pem file into one of the following distribution packages:
-
Thin client (32- and 64-bit version).
-
Full distribution package for client and server (32- and 64-bit version).
The new file must be located at the same level as the distribution package MSI file. During the installation process, the new file (from the distribution package being installed) will replace the file in the distribution package.
3.14. cfgrepo.conf
The cfgrepo.conf file is used to adjust the location and size of the versions cache when operating with the configuration repository.
Local cache configuration file location:
-
On Linux: ~/.1cv8/1C/1cv8/<Infobase UUID>/cfgrepo<run1>.
-
On macOS: ~/.1cv8/1C/1cv8/<Infobase UUID>/cfgrepo.
-
On Windows: %LOCALAPPDATA%\1C\1cv8\<Infobase UUID>\cfgrepo.
Global cache configuration file location: in the configuration repository directory.
Parameters for the file of the global storage settings:
- cfgrepo.cache.path
- Specifies the path to the directory where the version cache is located, in terms of the file system of the computer where the repository directory is located or the repository server is installed. In other words, this is the local path to the versions global cache.
- cfgrepo.cache.network.path
- Specifies the UNC path to the directory that describes the location of the global version cache. The path specified in this parameter must be in the same directory as the path specified in the cfgrepo.cache.path parameter.
- cfgrepo.cache.limit
- This parameter describes the maximum size of configuration versions cache.
- cfgrepo.users.minPasswordLength
- Specifies the minimum password length of the storage user.
- cfgrepo.users.checkPasswordComplexity
- Indicates that it is necessary to check the password complexity of the storage user:
-
0. Password is not checked for complexity.
-
1. Password is checked for complexity.
Parameters for the file of the local storage settings:
- cfgrepo.cache.path
- Local cache: specifies the path to the directory where the versions cache is located.
- cfgrepo.cache.limit
- This parameter describes the maximum size of configuration versions cache.
3.15. ClientUpdate.cfg
Use the ClientUpdate.cfg file to set up preloading of the client application distribution package when operating over HTTP.
The file is located in the directory with the 1C:Enterprise configuration files. It is optional.
Note that the file name is case-sensitive on Linux and macOS in contrast to Windows: ClientUpdate.cfg. The file consists of the "key=value" pairs in UTF-8 encoding. BOM is optional.
The file can have the following key values:
- Versionrequired
- Number of the version whose update parameters (update date and distribution package paths) are specified in the file. The version has the standard format: A.B.C.D.
- UpdateDate
- Date and time of planned update on the server cluster. The client application uses this value to schedule the distribution package download.
The value has the standard YYYYMMDDHHMMSS format where:
-
YYYY is year.
-
MM is month.
-
DD is day.
-
HH is hours.
-
MM is minutes.
-
SS is seconds.
- PublishDistributiveLocationWindows32
- PublishDistributiveLocationWindows64
- PublishDistributiveLocationMacOS64
- PublishDistributiveLocationLinux32
- PublishDistributiveLocationLinux64
- The key values determine where the client application distribution package for selected operating system and bitness is located. The behavior and content of the parameters are similar to the pubdst32, pubdst64, pubdstmac64, pubdstlin32, and pubdstlin64 attributes of the point element of the default.vrd file (see \
See also:
- Using the clientupdate.cfg file (see Application updates).
3.16. comcntrcfg.xml
The comcntrcfg.xml file opens the external connection in debug mode.
The file is located in the directory with the 1C:Enterprise configuration files. It is optional.
If the file not found, the external connection opens in normal mode.
Example:
<config xmlns="http://v8.1c.ru/v8/comcntrcfg"><debugconfig debug="true" protocol="tcp" debuggerURL="tcp://localhost:1560"/></config>The attributes of the debugconfig element are described below.
- debug
- Boolean. Indicates the need to start in debug mode:
-
debug="true". Debug mode is enabled.
-
debug="false". Debug mode is disabled.
debug="true"- protocol
- Specifies which debug protocol will be used when operating with this publication if debugging is enabled:
-
protocol="tcp". TCP/IP is used (default).
-
protocol="http". HTTP is used.
- debuggerURL attribute
- Specifies the address of the debugger to automatically connect to for debugging, where localhost specifies search on the local computer and "1560" is a network port number. If no port is specified, all ports in the 1560–1591 port range will be scanned. Specifying tcp:// is equivalent to tcp://localhost. If debugger address is not specified, the debugging is not performed during 1C:Enterprise language code execution.
If HTTP is used, the debugger address must include a port number to be used: http://pc-name:1561.
If the debugging protocol specified using the protocol attribute does not match the scheme specified in the url attribute, the connection to the debugger will not be established, and the operation will continue without debugging.
Example:
debuggerURL="http://pc-name:1561"3.17. conf.cfg
3.17.1. General information
The conf.cfg file specifies the location of the common configuration file directory, the default application interface language, and a number of other parameters that define the system behavior.
File location:
-
On Linux:
-
In the conf directory of a specific 1C:Enterprise version directory with the appropriate bitness.
-
The ~/.1cv8/1C/1cv8/conf directory (~ is a home directory of the user on whose behalf the 1C:Enterprise server runs).
-
-
On macOS:
-
The conf directory of the installed version, for example: /opt/1cv8/A.B.C.D/conf.
-
The ~/.1cv8/1C/1cv8/conf directory (~ is a home directory of the user on whose behalf the 1C:Enterprise server runs).
-
-
On Windows:
-
In the bin\conf directory of a specific version directory of 1C:Enterprise of the appropriate bitness.
-
In the %LOCALAPPDATA%\1C\1cv8\conf directory. Used by the platform of any version, bitness, and installation option.
-
Installation "for computer":
-
32-bit application in the 64-bit OS: %PROGRAMFILES(x86)%\1cv8\conf.
-
Otherwise: %PROGRAMFILES%\1cv8\conf.
-
-
Installation "for user":
-
32-bit application in the 32-bit OS: %LOCALAPPDATA%\Programs\1cv8\conf.
-
32-bit application in the 64-bit OS: %LOCALAPPDATA%\Programs\1cv8_x86\conf.
-
64-bit application in the 64-bit OS: %LOCALAPPDATA%\Programs\1cv8_x64\conf.
-
-
For some parameters, the conf.cfg file can also be located in the infobase directory. It will be additionally and explicitly specified in the description of such parameters. The file is a text document encoded in UTF-8.
This section covers the parameters that can be set using the conf.cfg file.
3.17.2. ConfLocation
The parameter specifies the directory the application will search for configuration files (logcfg.xml, nethasp.ini, and so on) if they are not found in the standard search paths. This parameter makes sense if the file is located in the conf directory of a particular version.
By default, the parameter value is equal to:
-
On Linux: /opt/1cv8/conf.
-
On macOS: /opt/1cv8/A.B.C.D.
-
On Windows:
-
Installation "for computer":
-
32-bit application in the 64-bit OS: %PROGRAMFILES(x86)%\1cv8\conf.
-
Otherwise: %PROGRAMFILES%\1cv8\conf.
-
-
Installation "for user":
-
32-bit application in the 32-bit OS: %LOCALAPPDATA%\Programs\1cv8\conf.
-
32-bit application in the 64-bit OS: %LOCALAPPDATA%\Programs\1cv8_x86\conf.
-
64-bit application in the 64-bit OS: %LOCALAPPDATA%\Programs\1cv8_x64\conf.
-
-
Example:
ConfLocation=C:\MySettings\v8\conf3.17.3. CryptoAPILibraryLocation
Allows you to specify a path (paths) for 1C:Enterprise to search for CryptoPro CSP library on Linux or macOS. If you specify several paths (similar to the PATH environment variable), they must be semicolon-separated.
3.17.4. DBFormatVersion
This parameter specifies the format used to create new databases while in the infobase file mode.
Values: 8.2.14 and 8.3.8.
Default value: 8.2.14.
3.17.5. DisableLocalSpeechToText
The parameter manages local speech recognition in the client application when using the file infobase:
-
1. Local speech recognition in the file infobase is denied. It applies to operations via publication on the web server as well.
-
0. Local speech recognition in the file infobase is available in any mode.
Default value: 0.
The current parameter value is received from the conf.cfg file, which can only be located in the following directories:
-
Infobase directory.
-
The directory specified as the value of the ConfLocation parameter of the conf.cfg file from the directory of a specific version. Applicable if the specified path contains a configuration file with a specified parameter.
The parameter is not used in other conf.cfg files.
3.17.6. DisableUnsafeActionProtection
This option allows you to disable protection against unsafe actions for specific infobases. Infobases are defined by a set of templates (regular expressions) separated by the semicolon character ";". If the infobase connection string satisfies any of the regular expressions listed in this parameter, protection against unsafe actions will be disabled for this infobase.
When you edit regular expressions, use POSIX Basic Regular Expressions (https://pubs.opengroup.org/onlinepubs/9699919799/basedefs/V1_chap09.html#tag_09_03).
This parameter is used by the process that actually performs a potentially dangerous action:
-
Importing external data processors/reports or configuration extensions. Server only (the rphost process).
-
Importing add-ins. Client application or server (the rphost process).
-
Starting an external application. Client application or server (the rphost process).
Example:
DisableUnsafeActionProtection=test_.*;stage_.*;3.17.7. EnableAccessRightAuditEventsWrite
This parameter controls logging of access right audit events only for file infobases:
-
If the parameter is set to true, access right audit events are logged.
-
If the parameter is set to false, access right audit events are not logged.
Default value: false.
The current parameter value is received from the conf.cfg file, which can only be located in the following directories:
-
Infobase directory.
-
The directory specified as the value of the ConfLocation parameter of the conf.cfg file from the directory of a specific version. Applicable if the specified path contains a configuration file with a specified parameter.
The parameter is not used in other conf.cfg files.
See also:
-
Access right audit events.
-
Managing the registration of access right audit events in the server cluster.
3.17.8. EnableCheckScriptCircularRefs
Controls detection of circular references during script execution:
-
The parameter is set to true. Search for circular references during script execution.
-
The parameter is set to false. Do not search for circular references during script execution.
Default value: false.
3.17.9. ExternalResourcesMode
This parameter specifies the components of Internet service resources used and some details of application behavior.
The parameter can take values:
-
D. Default value. The application functions as follows:
-
The platform and configuration software licensing system uses servers located in Russia.
-
When you use the Help – Information on the Internet menu commands, Russian resources are accessed.
-
Registration in the collaboration system is supported.
-
Dedicated 1C service for sending PUSH notifications is supported.
-
-
A. Alternative list of service resources. In this case, the application functions as follows:
-
The platform and configuration software licensing system uses servers located in Europe.
-
When you use the Help – Information on the Internet menu commands, European resources are accessed.
-
Registration in the collaboration system is not supported.
-
Dedicated 1C service for sending PUSH notifications is not supported.
-
3.17.10. ExternalSessionManagementConnectionString
Parameter description string of the external session management service when operating with the file infobase.
If this parameter contains parameters for calling the external session management service, explicitly specify the ExternalSessionManagementRequired parameter in the configuration file. The parameter enables (if the value is set to 1) or disables (if the value is set to 0) the external session management service. In other words, the external session management service in the file infobase is managed by two parameters: ExternalSessionManagementRequired and ExternalSessionManagementConnectionString.
The web service parameter string has the following format: Parameter=Value;. The parameter string contains required parameters (wsdl, ns, srvc, and port) and optional parameters (tout and wsver):
-
wsdl. URL to get a web service description in WSDL format.
-
ns. Web service namespace.
-
srvc. Name of the external session management web service.
-
port. Name of the port used by the web service.
-
tout. Maximum time-out for a call to the web service of external session management, in seconds. Default value: 5 seconds.
-
wsver. Version number of the used web service of external session management. Possible values are 1, 2, 3, and 4. The default value is 4.
If the configuration file located in the infobase directory does not have the ExternalSessionManagementRequired and ExternalSessionManagementConnectionString parameters specified (one or both), an attempt to define these parameters' values from other configuration files is made. The effective value of each parameter will be the first found value in the following order:
-
Directory of configuration files of a specific version:
-
Linux: /opt/1cv8/arch/A.B.C.D/conf
-
macOS: /opt/1cv8/A.B.C.D./conf
-
Windows: %PROGRAMFILES%\1cv8\A.B.C.D\bin\conf
-
-
Configuration file directory of the root installation directory:
-
Linux: /opt/1cv8/conf.
-
macOS: /opt/1cv8/conf.
-
Windows: %LOCALAPPDATA%\1C\1cv8\conf.
-
-
The directory specified as the value of the ConfLocation parameter of a specific version configuration file:
-
Linux: /opt/1cv8/arch/A.B.C.D/conf.
-
macOS: /opt/1cv8/A.B.C.D./conf
-
Windows: %PROGRAMFILES%\1cv8\A.B.C.D\bin\conf.
-
Applicable if the specified path contains a configuration file with a specified parameter.
-
Infobase directory.
-
The directory specified as the value of the ConfLocation parameter of the conf.cfg file from the directory of a specific version. Applicable if the specified path contains a configuration file with a specified parameter.
An example of a string with web service description:
wsdl=http://server/sm/ws/manager?wsdl;ns=http://www.sessioncontrol.org;srvc=ExternalSessionControl;port=ExternalSessionControlSoap;tout=10;wsver=4;3.17.11. ExternalSessionManagementRequired
Manages the requirement to use the external session management service in a file infobase. The parameter can take values:
-
1. External session management is required. If a service call error occurs, you cannot create a news session.
-
0. External session management is not required. If a service call error occurs, you can create a new session. Default value.
If the parameter is set to 1 (external session management is enabled), specify the parameters for calling the external session management service in the ExternalSessionManagementConnectionString parameter. In other words, the external session management service in the file infobase is managed by two parameters: ExternalSessionManagementRequired and ExternalSessionManagementConnectionString.
For more information on how to define the ExternalSessionManagementConnectionString and ExternalSessionManagementRequired parameter values, see ExternalSessionManagementConnectionString.
3.17.12. FileNamesEncodingInZipFile
The parameter controls the encoding used for the names of files in zip archives generated by 1C:Enterprise.
If the parameter value is set to UTF8, the names of the files containing the national characters will be displayed incorrectly by the integrated archiving utility in Windows XP/2003/2008/7 and by the ReadingofZipFile object in 1C:Enterprise 8.3.6 and earlier. These file names will be displayed correctly in macOS.
If the parameter value is set to OSEncodingWithUTF8, the file names containing national characters will be displayed incorrectly by the integrated macOS archiving utility, but in other cases there will be no issues.
Values: UTF8, OSEncodingWithUTF8.
Default value: UTF8.
3.17.13. ForceTLS\<Version>
Specifies the latest TLS version that the 1C:Enterprise client application will use.
| Parameter | TLS protocol version |
|---|---|
| ForceTLS1_0 | 1.0 |
| ForceTLS1_1 | 1.1 |
| ForceTLS1_2 | 1.2 |
Depending on the parameter value, the following protocols are used:
-
If the parameter is set to true, the TLS version used cannot be later than the one set by the parameter. Any earlier protocol version can be used if required by the web server.
-
The parameter is set to false (or any value other than true). The protocol used depends on the settings of the web server which 1C:Enterprise interacts with. Any TLS protocol version can be used up to version 1.3.
Default value: false.
You cannot specify several ForceTLS* parameters. When they are specified simultaneously, the behavior is undefined.
3.17.14. FtsJavaOpts
Defines additional parameters to start Java Virtual Machine for full-text search version 2. The value of this property must not contain quotation marks. It is used in the configuration file on the computer where the 1C:Enterprise server cluster is located.
If Java version 17 or later is used on the computer, for the correct operation of the second version of full-text data search, set up this parameter additionally (for details, see Configuring Java).
This property can be used, for example, to set the maximum amount of RAM available for the Java machine.
Example:
#The minimum heap size. It is specified for the full-text search#to trigger the garbage collection less often and unload internal cachesFtsJavaOpts=-Xms2GExample:
#The maximum heap size. It is specified to set#a new memory consumption boundaryFtsJavaOpts=-Xmx8GExample:
#Console output mode. It is specified to investigate the error causes#when starting version 2 of the full-text search serverFtsJavaOpts=-Dconsole=none #Do not output anything to the console (by default)FtsJavaOpts=-Dconsole=all #Output everything to the consoleFtsJavaOpts=-Dconsole=start|stop #Output only the server startup and shutdown string3.17.15. IgnoreInternetMailServerCertificateVerificationList
When calling the InternetMail.Connect() function, the system checks the mail server certificate (by default, the connection is established by the secure connection). If a mail server certificate does not need to be checked, specify the server host in the parameter.
Specify the host names for which the server certificate must not be checked in a row with ";" as a separator. You can use placeholders: "*" – any arbitrary number of characters, "?" – one arbitrary character.
3.17.16. IgnoreServerCertificatesChainRevocationSoftFail
Controls the behavior of the application when the platform cannot explicitly check the revocation of the certificate:
-
The parameter is set to true. Ignore errors related to the check of server certificate revocation.
-
The parameter is set to false. Do not ignore errors related to the check of server certificate revocation.
Default value: true.
This parameter is relevant if the server has provided the certificate, the certificate chain is correct, but revocation of the provided certificate cannot be checked. In this case, the application behaves as follows, depending on the parameter value:
-
The parameter is set to true. Connection will be established.
-
The parameter is set to false. Connection will not be established and an exception will be thrown.
3.17.17. JavaHome
Specifies the path to the JAVA installation directory. If this parameter is not specified, the path to the JAVA installation directory is defined in the JAVA_HOME environment variable. It is used in the configuration file on the computer where the 1C:Enterprise server cluster is located.
If the application runs on Windows, the JavaHome parameter is not specified in the conf.cfg file, and the JAVA_HOME environment variable is not specified, then Java uses the system registry to determine Java installation path. Information is written to the system registry when installing JRE.
3.17.18. LicConfigDebugTimeouts
This parameter enables shortened verification periods for interactions with the Licensing Center (see Protection against misuse of applications). Depending on the parameter value, the following verification periods can be used:
-
This parameter is set to true value (shortened verification periods):
-
License verification by the server. Every 60 seconds.
-
License verification by clients. Every 30 seconds.
-
License re-verification by clients (if the Licensing Center is unavailable or after entering the license client data). 15 seconds.
-
-
This parameter is set to false (standard verification periods):
-
License verification by the server. Every 1 hour.
-
License verification by clients. Every 1 hour.
-
License re-verification by clients (if the Licensing Center is unavailable or after entering the license client data). 10 minutes.
-
Default value: false.
3.17.19. PublishDistributiveLocation\<OS>
The PublishDistributiveLocationLinux32, PublishDistributiveLocationLinux64, PublishDistributiveLocationLinuxDeb32, PublishDistributiveLocationLinuxDeb64, PublishDistributiveLocationLinuxRpm32, PublishDistributiveLocationLinuxRpm64, PublishDistributiveLocationMacOS64, PublishDistributiveLocationWindows32, and PublishDistributiveLocationWindows64 parameters define the location of the distribution package of the client application of the selected operating system and bitness. The behavior and content of the parameters are similar to the pubdstlin32, pubdstlin64, pubdstlindeb32, pubdstlindeb64, pubdstlinrpm32, pubdstlinrpm64, pubdstmac64, pubdstwin32, and pubdstwin64 attributes of the point element of the default.vrd file.
When connecting the first client application to the system, the content of the parameters above is cached. If the parameters are changed in the conf.cfg file, 1C:Enterprise updates the cache value 10 seconds after the change. In this case, 1C:Enterprise refers to a working process in the client/server mode (with any option for connecting client applications) or a web server extension module (with file mode with access via a web server).
3.17.20. RestructJavaOpts
Defines additional parameters to start a Java Virtual Machine for the optimized restructuring feature operation. The value of this property must not contain quotation marks. It is used in the configuration file on the computer where the 1C:Enterprise server cluster is located.
This property can be used, for example, to set the maximum amount of RAM available for the Java machine.
Example:
#Setting the maximum amount of available memory for a Java processRestructJavaOpts=-Xmx2048mExample:
#Starting JAVA processes with debugger supportRestructJavaOpts=-agentlib:jdwp=transport=dt_socket,server=y,suspend=n,address=50053.17.21. SpeechToTextModelLocation
The parameter specifies a directory for storing model files for all infobase modes on the computer where the configuration file is located. With the setting, you can specify a directory for all infobases and clusters in a single location on the server. The directory will store speech recognition models.
If the parameter is not specified, the model file location will depend on the infobase mode and the operating system:
-
Infobase file mode:
-
On Windows:
-
The %LOCALAPPDATA%\1C\1cv8\STT directory of the user the system is operating under.
-
The %ALLUSERSPROFILE%\1C\1cv8\STT directory of data for all computer users.
-
-
On Linux: ~/.1cv8/1C/1cv8/STT.
-
On macOS: ~/.1cv8/1C/1cv8/STT.
-
-
Infobase client/server mode: the STT subdirectory of the cluster registry directory on each production server. Setting management of the model storage location for the production server of the cluster.
Models are not deleted automatically. Manually monitor the directory size and clear it if the size of directory files exceeds the limit specified by the administrator.
See also:
- Speech recognition.
3.17.22. SystemLanguage
This parameter specifies the application interface language. You can specify the interface language codes (see Selecting default interface language) or the System value as a parameter value. If a language value is specified, this language will be used. If System is specified, the interface language will be determined by the localization of the operating system.
If you specify a language that does not exist, an attempt will be made to use the localization language according to the operating system regional settings. If the user interface is not installed in the specified language, the English interface will be used.
When using a client application running on Windows, consider the following feature: if the conf.cfg file with a specified interface language is located in the conf directory of a certain version, the specified interface language will be used only for this version. If this file is located in the conf directory of the root installation directory, the specified interface language will be used for all versions installed on this computer.
If the SystemLanguage parameter is not specified in the configuration file, the mechanism of defining the interface language using the .res file will be used. If there is no file with .res extension, the interface corresponding to the regional operating system settings will be selected at operating system startup. Specifying an unknown or nonexistent interface language code is equivalent to no file specified.
Use the interface language according to the regional operating system settings:
SystemLanguage=SystemUse the Russian (RU) interface language:
SystemLanguage=RU3.17.23. UpdateDBCfg
Specifies which version of the infobase restructuring component will be used if this is not explicitly specified. Used in the configuration file on the computer where Designer runs.
The parameter can take values:
-
v1. Usual restructuring tool. The only restructuring option for 1C:Enterprise version 8.3.10 or earlier.
-
v2. Optimized restructuring tool. Applicable only to the client/server infobase if Microsoft SQL Server or PostgreSQL is used as a DBMS. If you plan to use the optimized restructuring mechanism in conjunction with the Microsoft SQL Server database management system, the 1C:Enterprise server must use the TCP/IP network protocol (in terms of the database management system) to connect to the database management system. The optimized restructuring tool is not supported if 1C:Enterprise server connects to Microsoft SQL Server using Shared memory or Named pipes network protocols.
Default value: v1.
3.18. ConfigDumpInfo.xml
The ConfigDumpInfo.xml version file stores versions of objects that were contained in the configuration at the moment of dumping. The file is located in the directory that stores the dumped configuration files.
The version file is an XML encoded UTF-8 file.
The ConfigDumpInfo root element has a single ConfigVersions subordinate element. Metadata elements are subordinate to the ConfigVersions element. The version file contains a Metadata element for each object in the dumped configuration. One or more nested Metadata elements are allowed for each Metadata element. The nested elements describe subordinate configuration objects that cannot exist separately from the parent object. A typical example is object attributes.
This ConfigDumpInfo element contains the following attributes:
- format
- This attribute specifies the format used for dumping the configuration whose object versions are specified in this file.
This attribute can take the following values:
-
Plain. Linear format.
-
Hierarchical. Hierarchical format.
- version
- This attribute contains version number of the configuration dumping format.
The ConfigVersions element does not contain any attributes.
The Metadata element contains the following attributes:
- name
- The attribute contains the full name of the exported configuration object.
- id
- The attribute contains the internal ID of the configuration object.
- configVersion
- The attribute contains the version of the configuration object. This attribute is used to check whether the configuration object has been modified and needs to be dumped again.
The values specified in the id and configVersion attributes should be considered as "magic numbers". These numbers are used exclusively by the internal components of the platform and are not intended for human users.
See also:
- Dumping configurations to files/Loading configurations from files.
3.19. debugcfg.xml
The debugcfg.xml file is designed to configure the additional port range used when debugging the configurations.
The file is located in the directory with the 1C:Enterprise configuration files. It is optional.
The file is used only if debugging is performed over TCP/IP.
If the file is not found, ports from the standard range (1560-1591) are used for communication. Debug items on the server use the same ports as the server processes: rmngr and rphost. Additional port ranges for debug items on the server are not required.
Example:
<config xmlns="http://v8.1c.ru/v8/debugcfg"><debugports range="1540:1550"/></config>The attributes of debugports are described below.
- range
- String. Contains an additional range of ports used for debugging.
3.20. def.usr
The file is not used since version 8.3.26.
3.21. default.vrd
3.21.1. General information
This file is used to configure the parameters for publishing an application on the web server. It is located in the virtual application directory.
3.21.2. \<point> (root element)
The root element of the configuration file is <point> that defines the virtual resource settings. It can contain one of each of the following elements: <zones>, <ws>, <pool>, <debug>, <openid>, <openidconnect>, <exitURL>, <standardOData>, <analytics>, <progressiveWebApplication>, <authentication>, and <mobileApps>. The <ws> element supports several nested <point> elements, and the <zones> element supports several nested <zone> elements:
<point...><ws...><point>...</point><zones><zone>...</zone><zone>...</zone></zones><point>...</point></ws><httpServices><service>...<service/></httpServices><pool.../><debug.../><openid><rely... /><provider><lifetime>...</lifetime></provider></openid><openidconnect.../><exitURL>...</exitURL><standardOData.../><analytics.../><progressiveWebApplication.../><authentication><logonView><method>...</method><method>...</method><logonView></authentication><mobileApps><application>...</application><application>...</application></mobileApps></point>Example:
<?xml version="1.0" encoding="UTF-8"?><point xmlns=http://v8.1c.ru/8.2/virtual-resource-system xmlns:xs=http://www.w3.org/2001/XMLSchema xmlns:xsi="http://www.w3.org/2001/XMLSchema-instance"base="/demo"ib="Srvr="tcp://Server";Ref="demo";"enable="false"allowexecutescheduledjobs="force"<ws><point name="OperationalData" alias="OperData"/><point name="AnalyticalData" alias="AnalytData"/></ws><httpServices><service name="ПримерРаботы" enable="true"/></httpServices><pool size="50" maxAge="10" attempts="2"/><debug enable="true" protocol="tcp" url="tcp://localhost"/><zones><zone value="8214" safe="true"/><zone value="last" specify="true" /></zones></point>The root element of the default.vrd file may contain the following attributes:
- base
- The base element points to a relative path (relative to the website root directory) to the virtual application directory.
Example:
base="/demoMA"- ib
- Contains the connection string to 1C:Enterprise infobase. Remember that different connection strings are used for the file and client/server modes.
File infobase example:
ib="File=c:/bases/demo;"Client/server infobase example:
ib="Srvr="tcp://myServer";Ref="mybase";"In the connection string you can specify user login and password. In this case, the connection to the infobase will be performed on behalf of the specified user. In the following example, the connection will be established on behalf of the Seller user:
ib="Srvr="tcp://myServer";Ref="mybase";Usr=Seller;Pwd=123;"However, if you specify a login and password at the command line for the client application, the connection will be performed with the parameters specified in the command line.
- enable
- Responsible for operations with the published infobase using a thin and a web client. If the attribute is true, operations with the published infobase using thin clients and web clients are allowed. The connection string will look like this (for example, at the beginning of the section):
http://host/demoOtherwise (the attribute is set to false), operations using the thin client and the web client are not allowed.
Default value: true (thin client and web client operations are allowed).
temp
Specifies a temporary files directory for the web server extension (wsisapi.dll, wsap22.dll, or wsapch2.dll) or the infobase file mode. If the attribute is not specified:
-
The file infobase uses the 1Cv8Tmp subdirectory of the directory that contains the infobase file.
-
In other cases, the temporary file directory of the user on whose behalf the request is performed is used.
If the attribute contains a reference to a directory used as a temporary file directory for the web server extension operation, the user on whose behalf the web server extension is started must have full access to that directory and its contents.
- pubdstlin32, pubdstlin64, pubdstlindeb32, pubdstlindeb64, pubdstlinrpm32, pubdstlinrpm64, pubdstmac64, pubdstwin32, pubdstwin64 attributes
- The attribute value specifies the full URL of the client application distribution package file to be downloaded and installed in the event of a mismatch between the client application and server versions. This URL must be accessible from outside the computer on which the distribution package is located. Attributes contain paths to distribution packages of the corresponding client applications:
| Dialog box | The default.vrd file | Description |
|---|---|---|
| Linux (DEB) x32 | pubdstlindeb32 | 32-bit thin client for Linux (DEB package option) |
| Linux (DEB) x64 | pubdstlindeb64 | 64-bit thin client for Linux (DEB package option) |
| Linux (RPM) x32 | pubdstlinrpm32 | 32-bit thin client for Linux (RPM package option) |
| Linux (RPM) x64 | pubdstlinrpm64 | 64-bit thin client for Linux (RPM package option) |
| Linux x32 | pubdstlin32 | 32-bit thin client for Linux (installer) |
| Linux x64 | pubdstlin64 | 64-bit thin client for Linux (installer) |
| macOS x64 | pubdstmac64 | 64-bit thin client for macOS |
| Windows x32 | pubdstwin32 | 32-bit thin client for Windows |
| Windows x64 | pubdstwin64 | 64-bit thin client for Windows |
If the client application distribution package is obtained over an HTTPS connection, the computer receiving the distribution package will verify the certificate of the server from which the distribution package is being received using the root certification authority certificates obtained from the root certificate store of the operating system used. The installation will use the parameters specified in the 1cestart.cfg file (similar to the regular installation of the client application).
Place the distribution package of the client application to the archive except for some distribution packages for Linux that cannot be archived:
-
Installer RUN file.
-
RPM or DEB file of the distribution package if national resources do not need to be distributed (except for the Russian and English languages).
Archive type: zip. Archive requirements:
-
Archive file structure:
-
On Linux:
-
Installer: thin client installer file (RUN file), setup-thin-A.B.C.D-arch.run, where A.B.C.D is the full number of 1C:Enterprise version and arch is the used architecture of the client application.
-
Package manager: a package file with the thin client of the corresponding option (DEB or RPM). 1c-enteprise-A.B.C.D-thin-client_A.B.C-D.arch.ext, where A.B.C.D is the full number of 1C:Enterprise version, arch is the used processor architecture, and ext is an extension that corresponds to the package manager. You can place the package file manually or archive it to ZIP with a custom name. In this case, the NLS file for the client application can also be located to the archive. The files in the archive must have the required names.
-
-
On macOS: .dmg.
-
On Windows: no hierarchy or directories, only the distribution package files of the client application.
-
-
Features of the distribution package files:
- Distribution package on macOS: all archive files with the .pkg extension must be digitally signed.
-
Digital signatures of the files included in the distribution package should be checked on the computer where the installation will be executed.
-
When using the IIS web server, you might need to specify the MIME type for the .zip extension (see Updating client application).
Example:
pubdstwin32="http://www.myhost.ru/files/client-win-32.zip"pubdstmac64="http://www.myhost.ru/files/client-mac-64.zip"pubdstlin64="http://www.myhost.ru/files/setup-fhin-8.3.22.100-x86_64.run"pubdstlindeb32="http://www.myhost.ru/files/1c-enteprise-8.3.22.100-thin-client_8.3.22-100.i386.deb"If the server version is changed, you only need to replace the client application archive file.
- allowexecutescheduledjobs
- The attribute controls the ability to execute scheduled jobs by the web server extension for the infobase file mode.
The attribute can take the following values:
-
off. In this case, the web server extension will not perform scheduled jobs. A client application (if available), which connects to the infobase directly without a web server, will perform scheduled jobs.
-
force. In this case, the web server extension will perform scheduled jobs.
Default value: not specified. In this case, the scheduled jobs will be run by the application that established the first connection to the infobase.
3.21.3. \<ws>
3.21.3.1. General element description and attributes
The element contains the Web services publishing settings, and is subordinate to the <point> element. No more than one <ws> element is allowed. This element can contain an arbitrary number of <point> elements.
If you need to use JWT authentication to access the HTTP service, create the <accessTokenAuthentication> element (for details, see {TopicId=}\<accessTokenAuthentication>) subordinate to the <ws> element. The <accessTokenAuthentication> element allows JWT authentication.
The element may contain the following attributes.
- enable
- Allows or prohibits web services in the infobase. If the attribute is set to true (or the attribute is missing), web services are allowed. Otherwise (the attribute is set to false), web services are not allowed.
Default value: true (web service operation is allowed).
- pointEnableCommon
- Allows or prohibits web services published without explicit usage permission (enable attribute of the point element). If the attribute is set to true, all web services that have no explicitly specified value of the enable attribute of the point element are allowed. Otherwise, such web services are prohibited.
Default value: true (web service operation is allowed).
- publishExtensionsByDefault
- Allows or prohibits web services from extensions.
If the attribute is set to true, all web services that are located in attached extensions are allowed. If the attribute is set to false, web services in extensions are not allowed.
Default value: false (web service extension operation is prohibited).
3.21.3.2. \<point>
The element contains the description of the published web service. The element is subordinate to <ws> element. There may more than one <point> element. In this list, you can also manually specify parameters for web services in extensions.
If a web service is not explicitly specified in the default.vrd file and the use of the application web services is allowed, the web service can only be accessed by name (the name web service property). Access by synonym (alias) will not be available even if the synonym is specified in the Publication file name web service property. To access the web service both by name and by synonym (alias), explicitly specify the required web services in the default.vrd file (including the synonym).
The element may contain the following attributes.
- name
- Name of the published web service. The service can be accessed both by a link that includes the name of the web service, and by a link that includes a synonym of the web service.
For the web service described by the string:
…base="/demo"…<point name="OperationalData" alias="OperData"/>The following access methods are available:
http://host/demo/ws/OperationalDatahttp://host/demo/ws/OperData- alias
- Synonym of the published web service. The service can be accessed both by a link that includes the name of the web service, and by a link that includes a synonym of the web service (if the synonym is specified in the default.vrd file).
For a web service that is published as follows:
…base="/demo"…<point name="OperationalData" alias="OperData"/>The following access methods are available:
http://host/demo/ws/OperationalDatahttp://host/demo/ws/OperData- enable
- Allows or prohibits the use of a web service.
Default value: true (publication is allowed).
- reuseSessions
- Session reuse mode:
-
dontuse. Sessions are not reused.
-
use. Session reuse is defined by the client and depends on parameters of an HTTP request to the web service.
-
autouse. Sessions are reused automatically.
Default value: autouse.
- sessionMaxAge
- The session idle time after which the session is terminated (in seconds).
Default value: 20 (the session lifetime is 20 seconds).
3.21.4. \<httpServices>
3.21.4.1. General element description and attributes
The element contains the HTTP services publishing settings, and is subordinate to the <point> element. No more than one <httpServices> element is allowed. This element can contain an arbitrary number of <service> elements.
If you need to use JWT authentication to access the HTTP service, create the <accessTokenAuthentication> element (for details, see {TopicId=}\<accessTokenAuthentication>) subordinate to the <httpServices> element. The <accessTokenAuthentication> element allows JWT authentication.
The element may contain the following attributes.
- publishByDefault
- If this attribute is not set or set to true, all HTTP services that are added to the configuration will be automatically available for use, unless explicitly prohibited by the <service> element.
Default value: true (HTTP service operation is allowed).
- publishExtensionsByDefault
- Responsible for the ability to use HTTP services from extensions.
If the attribute is set to true, all HTTP services that are located in connected extensions will be available for use. If the attribute is set to false, the HTTP services from the extensions will not be available for use.
Default value: false (HTTP service extension operation is prohibited).
3.21.4.2. \<service>
The element contains the description of the published HTTP service. The element is subordinate to <httpServices> element. There may more than one <service> element. In this list, you can also manually specify HTTP services parameters from extensions.
The element may contain the following attributes.
- name
- Contains the HTTP service name as it is specified in Designer. This name is not used to access the service.
- rootUrl
- Contains the value of the Root URL property of the HTTP service property. The property is used to determine the HTTP service that should process the received request.
- enable
- Allow or prohibits the use of a HTTP service.
Default value: false (use is prohibited).
- reuseSessions
- Session reuse mode:
-
dontuse. Sessions are not reused.
-
use. Session reuse is defined by the client and depends on parameters of an HTTP request to the HTTP service.
-
autouse. Sessions are reused automatically.
Default value: autouse.
- sessionMaxAge
- The session idle time after which the session is terminated (in seconds).
Default value: 20 (the session lifetime is 20 seconds).
3.21.5. \<pool>
The element contains the settings of the connection pool with the infobase. No more than one <pool> element is allowed.
The element may contain the following attributes:
- size
- Pool size is the maximum number of connections in the pool.
The default value is 10 000.
- maxAge
- The connection lifetime in the pool is the maximum connection lifetime in the pool, in seconds. If the connection is not requested within the specified time, it will be removed from the pool.
The default value is 20 minutes.
- attempts
- Maximum number of attempts to establish a connection with the 1C:Enterprise server.
The default value is 5.
- attemptTimeout
- Waiting time (in milliseconds) to establish a connection with the 1C:Enterprise server.
The default value is 500 ms.
- waitTimeout attribute
- Waiting time (in milliseconds) between attempts to establish a connection with the 1C:Enterprise server.
The default value is 500 ms.
- serverPingPeriod
- Connection interruption check frequency (in milliseconds).
The default value is 1,000 ms.
The maximum value is 65,535 ms.
- serverPingTimeout
- Time (in milliseconds) during which the connection interruption monitoring system waits for at least one message from the monitored process.
The default value is 5,000 ms.
The maximum value is 2,147,483,647 ms.
Example:
<pool size="50" maxAge="10" attempts="2" attemptTimeout="1" waitTimeout="1"/>3.21.6. \<debug>
- enable
- Indicates the need to start in debug mode:
-
enable="true". Debug is enabled.
-
enable="false". Debug is disabled.
- protocol
- Specifies which debug protocol will be used when operating with this publication if debugging is enabled:
-
protocol="tcp". TCP/IP is used (default).
-
protocol="http". HTTP is used.
- url
- Specifies the address of the debugger to automatically connect to for debugging, where localhost specifies search on the local computer and "1560" is a network port number. If no port is specified, all ports in the 1560–1591 port range will be scanned. Specifying tcp:// is equivalent to tcp://localhost. If debugger address is not specified, the debugging is not performed during 1C:Enterprise language code execution.
If HTTP is used, the debugger address must include a port number to be used: http://pc-name:1561.
If the debugging protocol specified using the protocol attribute does not match the scheme specified in the url attribute, the connection to the debugger will not be established, and the operation will continue without debugging.
Example:
<debug enable="true" protocol="http" url="http://pc-name:1561"/>3.21.7. \<zones>
3.21.7.1. Element description
The <zones> element is subordinate to the <point> element. No more than one is allowed. The <zones> element may have one or several subordinate <zone> elements.
This element does not have any attributes.
3.21.7.2. \<zone>
Every <zone> element describes one separator. The sequence of <zone> elements in the <zones> element matches the sequence of separators in Designer. When you change the separator order, change the default.vrd file as well. The number of the <zone> elements must not exceed the number of separators. If the number of elements exceeds the number of separators, an exception will be generated when connecting to the infobase. If the number of elements is less than the number of separators, the default value for separator type will be used as a value of non-specified separators and the separator use will be disabled.
The <zone> element may contain the following attributes:
- safe
- Allows or prohibits changing the values of objects related to data separation functionality, if the infobase is accessed by a web client or by a thin client via web server (data separation safe mode). This attribute must be used when the user needs to ensure that no other data regions can be accessed when accessing the infobase over the Internet.
Default value: false (changes are allowed).
If the attribute value is true, the following actions are prohibited in the session using this infobase publication:
-
Disable a separator if the separation is not conditionally disabled.
-
Change the used separator value if the separation is not conditionally disabled.
-
Modify objects managing the conditional separation:
-
Specified for the separator itself
-
Specified for objects included in the separator
-
- specify
- Determines whether the published infobase address must contain this separator value.
Default value: false (a separator is not used in the address).
- value
- Explicitly specifies the value of separator placed in this position.
If the value of the value attribute is not specified and the specify attribute is set to false, this is equivalent to the absence of the separator value (corresponds to the "-" value in the connection string Zn parameter value).
If the specify attribute is true and the value of the value attribute is specified, this value (case-insensitive) must be explicitly specified in the infobase address string in the respective position. Otherwise, error code 404 (web page not found) will be returned when attempting to access the infobase.
Characters which cannot be used in URL (RFC 1738 and https://datatracker.ietf.org/doc/html/rfc1738.html) are transformed into UTF-8 and encrypted in accordance with section 2.2. URL Character Encoding Issues of the RFC 1738 standard using the "%" character and two hexadecimal characters.
Default.vrd file example:
<?xml version="1.0" encoding="UTF-8"?><point xmlns=http://v8.1c.ru/8.2/virtual-resource-system xmlns:xs=http://www.w3.org/2001/XMLSchema xmlns:xsi="http://www.w3.org/2001/XMLSchema-instance"base="/test"ib="File=c:\base;"><ws enable="false"/><zones><zone value="8214" safe="true"/><zone specify="true" /><zone /><zone specify="true" /><zone value="last" specify="true" /></zones></point>5 separators are defined in the application in this example. The infobase address will be as follows:
http://example.com/test/01/20101231235959/lastIt will be interpreted as follows:
-
http://example.com/test. Infobase address.
-
The first separator must not be specified in the address (default specify attribute value is false), its value is 8214, and it is not possible to control this separator programmatically (safe attribute value is true). The other separators can be controlled programmatically, as the safe attribute value for zone elements is not specified and the default value (false) permits program control.
-
The second separator must be specified in the address (specify attribute value is true), and its value is 01.
-
The third separator is disabled.
-
The fourth separator must be specified in the address (specify attribute value is true), and its value is 31-12-2010 23:59:59.
-
The last separator must be specified in the address and its value must be last.
Such separator specification may be used for the thin client running via web server, for the web client, and for web services.
If different method of specifying the separator values to be applied during the session are used at the same time, these are determined as follows:
-
If the default.vrd file contains the specified <zones> element, the separator values specified in the infobase address have the highest priority. Where:
-
Values specified in the startup parameter (Z parameters) are ignored.
-
Values specified in the infobase connection string are ignored (the Zn parameter in the ib attribute of the <point> element).
-
-
If the <zones> element is not specified in default.vrd file:
-
An attempt to define the separator values from the Z parameter of the address string is made.
-
If parameter is not specified, the attempt is made to use the values, specified in infobase connection string (the Zn parameter in the ib attribute of the <point> element).
-
-
The overall priority of the places where separator values are specified is as follows (the priority decreases from top to bottom):
-
Infobase address (if the default.vrd file contains the <zones> element).
-
Startup command line (the Z parameter).
-
Infobase connection string (the Zn parameter in the ib attribute of the <point> element).
-
3.21.8. \<openid>
3.21.8.1. Element description
This element describes the settings related to OpenID authentication. The <openid> element is subordinate to the <point> element. No more than one is allowed. The <rely> and <provider> elements are subordinate to the <openid> element. No more than one subordinate element is allowed.
This element does not have any attributes.
3.21.8.2. \<rely>
The element contains the address of infobase used as OpenID provider.
- url
- Specifies the URL of 1C:Enterprise infobase used as OpenID provider. The infobase must be published in a special way.
Example:
<rely url="https://myserver.org/users-ib/e1cib/oid2op"/>3.21.8.3. \<provider>
3.21.8.3.1. Element description
The element specifies that this infobase is used as an OpenID provider. The <lifetime> element (no more than one is allowed) is subordinate to this element.
Example:
<?xml version="1.0" encoding="UTF-8"?><point xmlns=http://v8.1c.ru/8.2/virtual-resource-system xmlns:xs=http://www.w3.org/2001/XMLSchema xmlns:xsi="http://www.w3.org/2001/XMLSchema-instance"base="/demo"ib="Srvr="tcp://Server";Ref="demo";"enable="false"><openid><provider/></openid></point>3.21.8.3.2. \<lifetime>
The element specifies the lifetime of the authentication data flag. If the element is not specified, the default value is 86 400 seconds (24 hours). Maximum authentication data lifetime is 604 800 seconds (7 days). If greater value is specified for lifetime element, the maximum value is used.
Example:
<?xml version="1.0" encoding="UTF-8"?><point xmlns=http://v8.1c.ru/8.2/virtual-resource-system xmlns:xs=http://www.w3.org/2001/XMLSchema xmlns:xsi="http://www.w3.org/2001/XMLSchema-instance"base="/demo"ib="Srvr="tcp://Server";Ref="demo";"enable="false"><openid><provider><lifetime>432000</lifetime></provider></openid></point>3.21.8.3.3. \<returnto>
The <returnto> element is subordinate to the <provider> element and can be used an unlimited number of times or not used at all.
<returnto>mysite\.org</returnto><returnto>.*\.1c\.ru</returnto>The element is a regular expression that defines the mask for permitted names of websites that can be used to redirect the user's web browser (see openid.return_to request parameter) after the OpenID provider command is executed. This element is not used if the thin client attempts to access the OpenID provider.
If no <returnto> element is specified during OpenID provider publishing, any user's web browser request to OpenID provider containing openid.return_to parameter will result in HTTP 400 error.
3.21.9. \<openidconnect>
3.21.9.1. Element description
This element describes the settings related to authentication over OpenID Connect protocol. It can be applied in thin client, mobile client, and web client. The <openidconnect> element is subordinate to the <point> element. No more than one is allowed. The <providers> and <allowStandardAuthentication> elements are subordinate to the <openidconnect> element. No more than one subordinate element is allowed.
This element does not have any attributes.
<openidconnect><providers><![CDATA[[<json-data>]]]></providers><allowStandardAuthentication>true</allowStandardAuthentication></openidconnect>3.21.9.2. \<providers>
This element contains description of external OpenID providers that support OpenID Connect v1.0 authentication protocol (https://openid.net/connect/). The description is an array of objects, where each object describes one OpenID provider. The array is represented by JSON serialization.
Each provider is described with the object with the following properties:
-
name. Provider ID. Must be unique within the array. If the array contains several providers with the same ID, the last one will be used.
-
title. Text provider presentation. It will be displayed on the provider button on the authentication page if the image is not set.
-
image. Graphical provider presentation. Will be displayed on the provider button in the authentication page. The image is specified as data:image in Base64 format.
-
discovery. Contains the provider URL to retrieve all its settings (discovery endpoint URL). We recommend that you use discovery endpoint supporting providers.
-
authenticationClaimName. Determines which JSON structure field (JSON Web Token, JWT) with authentication results must be used as an ID to map the infobase user and the OpenID Connect provider user. If it is not specified, the email field is used instead.
-
authenticationUserPropertyName. Determines the field in the infobase user settings to be used to compare with the user ID sent by the OpenID Connect provider. Possible values:
-
name. Username (the Name property of the InfoBaseUser object).
-
OSUser. Name of the operating system user (the OSUser property of the InfoBaseUser object).
-
email. Infobase user email address (the Email property of the InfoBaseUser object).
-
matchingKey. In this case, the value of the UserMatchingKeys property is used as a field. The search key uses the value of the name provider details property.
-
-
endSessionEndpoint. Determines a URL to follow when executing a command to complete the authentication session. This URL is automatically supplemented with the id_token_hint parameter where a token received during user authentication is placed. When you close a web browser tab with the running web client application or complete the client application operation, the authentication session is not completed. After completing the authentication session in web client, you will be directed to a standard page of session completion.
-
provideconfig. Provider settings description as a JSON structure unless the provider supports the request to retrieve settings. The data must be in OpenID Provider Metadata format (https://openid.net/specs/openid-connect-discovery-1_0.html#ProviderMetadata).
-
clientconfig. Client configuration as a JSON structure. This data format matches OAuth 2.0 Authorization Request format (https://openid.net/specs/openid-connect-core-1_0.html#AuthRequest). The data is supplemented with the authority property that must contain the authentication provider URL. Contents of this property depend on the provider used.
Depending on the required authentication type, the response_type property value can be:
-
code. Authorization Code Flow is used. In this case, the client_secret property of the clientconfig structure contains information provided to a user by OpenID provider upon registration. This property is deleted from the clientconfig structure when sending to the client application.
-
id_token or id_token token. Implicit Flow is used. In this case, the client_secret property of the clientconfig structure is not used. It is not recommended that you use Implicit Code Flow for security reasons. It is used for compatibility.
-
The other combinations are not supported.
redirect_uri property in clientconfig structure has URL which is used to enter an authentication data processor in an application which requests such authentication. As a rule, the URL format is https://<IBhost>/<IBname>/authform.html, where:
-
<IBhost>. Name of a host where an infobase is published.
-
<IBname>. Name of the published infobase. "Name" means information entered in the Name field in the dialog box for publishing the infobase or the point.base attribute of the publication file. Remember that the text in the <IBName> field must be identical to the infobase name (including the character case).
-
{zones}. Specify this template only if separators are passed as a part of the infobase URL (in the URL body). In this case, separators are described in the <zones> section of the default.vrd file. If separator values are passed using the Z command-line option for the client application startup, do not specify the {zones} template in the URL for redirection. Separator values from the command line will be automatically used for their intended purpose. If the redirect_uri property value contains the template, and separators are not passed via URL (or the <zones> section is missing), the template will be replaced with an empty string.
In other words, if the following kind of URL is used to access the infobase: https://example.com/test-db/val1/val2 (2 separators are used), specify the redirection address as follows: https://example.com/test-db/{zones}/authform.html. If the following kind of URL is used to access the infobase: https://example.com/test-db?Z=val1,val2, specify the redirection address as follows: https://example.com/test-db/authform.html.
-
dialect. Defines the protocol that will be used to interact with the provider. If ru-esia is specified, the protocol of the Unified System for Identification and Authentication is used to interact with the provider (USIA, https://minsvyaz.ru/ru/activity/directions/13/). If this attribute is not specified or its value differs from ru-esia, OpenID Connect v1.0 protocol will be used to interact with the provider.
-
crypto. Contains a structure that describes the cryptography module that is used to sign requests. Signing requests is necessary if the USIA protocol is used to interact with the provider (dialect property is equal to the ru-esia value). The structure contains the following properties:
-
module_name. Cryptography module name.
-
module_path. Cryptography module path.
-
module_type. Cryptography module type.
-
cert_thumbprint. Certificate thumbprint to be used to sign requests. Certificate search will be executed by thumbprint. The certificate must be previously stored in the personal certificate store.
-
The fields of the structure located in the crypto property are similar to the parameters of the constructor of the CryptographyManager object.
Provider description example:
<openidconnect><providers><![CDATA[[{"name": "google","title": "Google","discovery": "https://accounts.google.com/.well-known/openid-configuration","authenticationClaimName": "email","clientconfig": {"authority": "https://accounts.google.com/","client_id": "<client ID>","redirect_uri": "https://<hostname>/openidc/authform.html","response_type": "id_token token","scope": "openid email","filterProtocolClaims": true,"loadUserInfo": false}},{"name": "googleII","title": "Google 2","providerconfig": {"issuer": "https://accounts.google.com","authorization_endpoint": "https://accounts.google.com/o/oauth2/v2/auth","token_endpoint": "https://www.googleapis.com/oauth2/v4/token","response_types_supported": ["code","token"],"scopes_supported": ["openid","email","profile"]},"clientconfig": {"authority": "https://accounts.google.com/","client_id": "<client ID>","redirect_uri": "https://<hostname>/openidc/authform.html","response_type": "id_token token","scope": "openid email"}},{"name": "googleIII","title": "Google 3","providerconfig": {"issuer": "https://accounts.google.com","authorization_endpoint": "https://accounts.google.com/o/oauth2/v2/auth","token_endpoint": "https://www.googleapis.com/oauth2/v4/token","response_types_supported": ["code","token"],"scopes_supported": ["openid","email","profile"]},"clientconfig": {"authority": "https://accounts.google.com/","client_id": "<client ID>","client_secret": "<client secret>","redirect_uri": "https://<hostname>/openidc/authform.html","response_type": "code","scope": "openid email"}},{"name": "microsoft","title": "Microsoft","authenticationUserPropertyName" : "OSUser","image": "data:image/png;base64,………","discovery": "https://login.microsoftonline.com/<client ID>/.well-known/openid-configuration","clientconfig": {"authority": "https://login.microsoftonline.com/<client ID>/","client_id": "<client ID>","redirect_uri": "https://<hostname>/openidc/authform.html","response_type": "id_token token","scope": "openid email"}},{"name": "googleIV","title": "GOOGLE.COM","discovery": "https://accounts.google.com/.well-known/openid-configuration","authenticationClaimName": "email","authenticationUserPropertyName": "matchingKey","clientconfig": {"authority": "https://accounts.google.com","client_id": "<client ID>","client_secret": "<client secret>","redirect_uri": "https://<hostname>/openidc/authform.html","response_type": "token id_token","scope": "openid email","filterProtocolClaims": true,"loadUserInfo": false}},{"name": "esia","title": "USIA","authenticationClaimName": "value","authenticationUserPropertyName": "name","dialect": "ru-esia","crypto": {"module_path": "","module_name": "Crypto-Pro GOST R 34.10-2012 Cryptographic Service Provider","module_type": "80","cert_thumbprint": "<certificate thumbprint>"},"providerconfig": {"authorization_endpoint": "https://<hostname>/aas/oauth2/v2/ac","token_endpoint": "https://<hostname>/aas/oauth2/v3/te","userinfo_endpoint": "https://<hostname>/rs/prns/"},"clientconfig": {"authority": "https://<hostname>/aas/oauth2/v2/ac","client_id": "<client ID>","redirect_uri": "https://<hostname>/openidc/authform.html","scope": "openid email","response_type": "code","access_type": "offline","client_certificate_hash": "E11E4A7D6391E5FE58395D5EF935784215FB932174DC58FB873131D7B9F6C62F"}}]]]></providers><allowStandardAuthentication>true</allowStandardAuthentication></openidconnect>The googleIV provider example shows how to specify the field from the UserMatchingKeys collection. In this example:
-
The email field acts as the token field that contains the user ID for mapping. It is specified in the authenticationClaimName": "email" expression.
-
The "authenticationUserPropertyName": "matchingKey" expression indicates that the system must go through all the infobase users, get the UserMatchingKeys structure from each of them, and get the field in this structure with the ID specified in the name provider details field. In our example, it is the googleIV value. The value retrieved by this key from the user will be compared with the email token field value.
The 1C:Enterprise server cluster or the web server extension (for a file infobase) runs requests to the OpenID Connect provider to perform the following operations:
-
Getting cryptographic keys to verify the authentication token signature.
-
To exchange the code property value for an authentication token (in case of Authorization code flow).
The computer running the production server of the 1C:Enterprise server cluster needs to have a permission to access URLs located in the discovery, jwks_uri, token_endpoint and, if required, end_session_endpoint properties.
You can find the addresses to access in the description of the corresponding OpenID Connect provider (see the example and description of the parameter structure above). If the providerconfig section is not filled, follow the URL specified in the discovery setting, and get the jwks_uri, token_endpoint, and end_session_endpoint values from the server response.
3.21.9.3. Different USIA versions
The 1C:Enterprise platform supports different USIA (Unified System for Identification and Authentication) versions. Versions depend on the values specified in the providerconfig.authorization_endpoint, clientconfig.authority, and providerconfig.token_endpoint properties of the USIA provider description:
-
USIA version 2.90 and later:
-
Endpoint of receiving the authorization code: https://<hostname>/aas/oauth2/v2/ac.
-
Endpoint of receiving the access token: https://<hostname>/aas/oauth2/v3/te.
-
-
Previous USIA versions:
-
Endpoint of receiving the authorization code: https://<hostname>/aas/oauth2/ac.
-
Endpoint of receiving the access token: https://<hostname>/aas/oauth2/te.
-
The version of the used protocol is determined by the URL specified at the endpoint for receiving the authorization code. However, if version 2.90 or later is specified at this endpoint, and a previous version is specified at the endpoint for receiving the access token, it will be impossible to authenticate using USIA.
When using the USIA 2.90 protocol and subsequent versions, the client_certificate_hash property is added to the client configuration description. However, this property is optional. If it is not set, the platform will automatically identify it and add to the request to USIA (if necessary). If the property is specified in the default.vrd file, it is not identified automatically. Instead, the value from this file is used. To calculate the hash value manually, use the http://esia.gosuslugi.ru/public/calc_cert_hash_unix.zip utility. The archive includes a brief usage description. It makes sense to use the utility if the USIA developers have changed the hash calculation algorithm and the used platform does not include this change.
We recommend that you use USIA version 2.90 and later. Previous versions can be disabled any time without warning on the USIA provider side.
3.21.9.4. \<allowStandardAuthentication>
The element displays a hyperlink for navigating to the 1C:Enterprise authentication form. If the element is set to false, you will not be able to open the 1C:Enterprise authentication form on the authentication form upon web client startup. You can manage 1C:Enterprise authentication in the user properties (see Adding new users).
Possible values:
-
true. You can open the 1C:Enterprise authentication form. Default value.
-
false. You cannot open the 1C:Enterprise authentication form.
3.21.9.5. Usage scenario
Authentication using the OpenID Connect provider is available only if the parameters of one or more providers are specified in the default.vrd file. When trying to use a client application (thin, mobile, or web client) to access the infobase, the following actions are performed:
-
If the provider is explicitly specified in the client application command line, the navigation is executed as specified in the default.vrd file parameters for this provider.
-
Otherwise, the platform forms a start form (depending on the client application), on which all configured OpenID Connect providers are located (in the default.vrd file). Depending on the settings, this web page may contain the access button using the standard 1C:Enterprise authentication.
-
After selecting the provider, the user is redirected to the provider's authentication page. On this page, the user authenticates with selected provider in any possible method (for this provider).
-
After that, the provider redirects the user to a special page of 1C:Enterprise, passing a JSON structure as a "parameter" (JSON Web Token, JWT) with the authentication results. URL of this page is specified in redirect_uri property in clientconfig structure of provider element.
-
Using the authentication results passed by the provider, 1C:Enterprise platform receives the key parameter for user authentication from the provider. By default, this parameter is the user email address but it can be overridden using the default.vrd file (the authenticationClaimName field).
-
The retrieved key parameter is used to search for the user in a 1C:Enterprise infobase. The Name property is used by default. The search field can be overridden using the default.vrd file (the authenticationUserPropertyName field).
-
After that the authentication is deemed to be successful and the application startup continues.
If authentication on the provider side fails, the provider's actions are not defined.
3.21.10. \<exitURL>
Specifies the URL to open after exiting the web client.
Example:
<?xml version="1.0" encoding="UTF-8"?><point xmlns=http://v8.1c.ru/8.2/virtual-resource-system xmlns:xs=http://www.w3.org/2001/XMLSchema xmlns:xsi="http://www.w3.org/2001/XMLSchema-instance"base="/demo"ib="Srvr="tcp://Server";Ref="demo";"enable="false"><exitURL>http://www.1c.ru</exitURL></point>3.21.11. \<standardOData>
Manages the availability of the standard OData interface for the published infobase. The element is subordinate to the <point> element. No more than one <standardOData> element is allowed. If the default.vrd file contains no such element, the standard OData interface is not available for the published application.
The element may contain the following attributes.
- enable
- The attribute controls availability of the OData standard interface via the specified publication. The attribute can take the following values:
-
true. You can use the current publication for data operations using the standard OData interface.
-
false. You cannot use the current publication for data operations using the standard OData interface.
- reuseSessions
- Session reuse mode when using the OData standard interface:
-
dontuse. Sessions are not reused.
-
use. Session reuse is defined by the client and depends on parameters of an HTTP request to the web service.
-
autouse. Sessions are reused automatically.
Default value: dontuse (session reuse is prohibited).
- sessionMaxAge
- The session idle time after which the session is terminated (in seconds).
Default value: 20 (the session lifetime is 20 seconds).
3.21.12. \<analytics>
Manages 1C:Enterprise and 1C:Analytics server integration. The parameters contain a set of parameters that control the session pool parameters used by the analytics system to interact with the 1C:Enterprise server cluster. The element may contain the following attributes.
- enable
- Enables or disables the integration. The attribute can take the following values:
-
true. You can use the current publication for integration with the 1C:Analytics server. The default value.
-
false. You cannot use the current publication for integration with the 1C:Analytics server.
- sessionMaxAge
- The session idle time after which the session is terminated (in seconds).
Default value: 20 (the session lifetime is 20 seconds).
- poolSize attribute
- The maximum number of sessions that can be generated in the session pool.
Default value: 500.
- poolTimeout attribute
- Time to wait for an available session after the session pool is filled (in seconds). If the system cannot generate a new session during the given time, the client will be notified about the error.
Default value: 5 (time to wait for an available session is 5 seconds).
3.21.13. \<progressiveWebApplication>
It allows you to specify a name of a progressive 1C:Enterprise web application for this web client publication. The element may contain the following attributes.
- name
- Specifies a name of the progressive web application.
3.21.14. \<accessTokenAuthentication>
3.21.14.1. Element description
This element describes JWT authentication settings. The <accessTokenAuthentication> element is subordinate to the <point>, <ws>, and <httpServices> elements. There can be one \<accessTokenAuthentication> element or none. The <issuers> element is subordinate to the <accessTokenAuthentication> element. Each subordinate element can be used once.
If the element is subordinate to <point>, you can authenticate over JWT to access the infobase. If the element is subordinate to <ws> or <httpServices>, you can authenticate over JWT for web services and HTTP services respectively.
This element does not have any attributes.
For JWT authentication to the infobase, you can use the default.vrd file part of the following format:
<point xmlns="http://v8.1c.ru/8.2/virtual-resource-system" xmlns:xs="http://www.w3.org/2001/XMLSchema" xmlns:xsi="http://www.w3.org/2001/XMLSchema-instance"base="/InfoBase"ib="File="C:\InfoBase";"><accessTokenAuthentication><accessTokenRecipientName>InfoBaseJWT</accessTokenRecipientName><issuers><issuername="limitedAccess"authenticationClaimName="subauthenticationUserPropertyName="name"keyInformation="EgH23sF8nL3xEGT2kEmAgxWyaKWvcf3p"/></issuers></accessTokenAuthentication></point>In this example, the token for authenticating to the infobase must have the aud payload set to InfoBaseJWT. You can access the infobase only if the iss payload of the token is equal to limitedAccess as well.
3.21.14.2. \<accessTokenRecipientName>
This element does not have any attributes. It contains a recipient ID to check whether the provided token is used to issue to this service. For this purpose, the element value is compared with the value of the aud payload claim of the provided token. If the value is not specified, the receiver ID will be the Internet service or publication name.
<point...><accessTokenAuthentication><accessTokenRecipientName>infoBase<accessTokenRecipientName>...</accessTokenAuthentication>...</point><ws...><accessTokenAuthentication><accessTokenRecipientName>soapSrv1<accessTokenRecipientName>...</accessTokenAuthentication>...</ws>3.21.14.3. \<issuers>
This element is subordinate to the <accessTokenAuthentication> element and describes the list of applications that can access this publication using JWT authentication. The <issuer> element is subordinate to the <issuers> element. There can be one or multiple subordinate elements.
3.21.14.4. \<issuer>
This element is subordinate to the <issuers> element. It describes an application that can get access to this publication. The element may contain the following attributes:
- name
- It contains a name of an application that can get access to this publication. The attribute value is compared with the iss claim value of the provided access token.
- authenticationClaimName
- It defines a claim name of the provided access token that has a name for 1C:Enterprise to authenticate a JWT issuer. If this attribute is not specified, the sub claim is used.
- authenticationUserPropertyName
- It defines 1C:Enterprise user property to search by when JWT is provided. In other words, the claim value with the name specified in the authenticationClaimName attribute is extracted from JWT. After that, this value is used to search for 1C:Enterprise user by a property specified in this attribute. The following values can be used for this attribute:
-
name. Use the Name property for the search.
-
OSUser. Use the OSUser property for the search.
-
email. Use the Email property for the search.
-
matchingKey. In this case, the field is a value from the UserMatchingKeys property, and the search key is a value of the name property of the application description.
If the attribute is not specified, user search is performed by name (the attribute value is name, the search field name is Name).
- keyInformation
- It contains a certificate (in PEM format) to check a JWT signature. In the case of HS256, HS384, or HS512 algorithms, it is a symmetric encryption key. Otherwise, it is a public key.
Let us consider the example given at the beginning of the section (see Element description):
<accessTokenAuthentication><accessTokenRecipientName>InfoBaseJWT</accessTokenRecipientName><issuers><issuername="limitedAccess"authenticationClaimName="subauthenticationUserPropertyName="name"keyInformation="EgH23sF8nL3xEGT2kEmAgxWyaKWvcf3p"/></issuers></accessTokenAuthentication>In this case, to get access to the infobase, which is restricted by the parameters specified in the example, use a JWT token of the following type:
{"alg": "HS256","typ": "JWT"}{"exp": 1709936634,"aud": "InfoBaseJWT","sub": "JSmith","nbf": 1709733034,"iat": 1709733034,"iss": "limitedAccess"}Pay attention to the following specifics of the token:
-
HS256 symmetric hashing algorithm is used (claim of the alg header). It means that a symmetric hashing key will be located in the default.vrd file in the point/accessTokenAuthentication/issuers/issue/keyInformation field. The HS256 hashing algorithm is used as an example. For a real-life application, assess the risks of the task to be solved. In the systems accessed from outside the company security perimeter, it is recommended that you use asymmetric algorithms, for example, RS256. If access is established from inside the secured perimeter, consider using symmetric algorithms.
-
Let's access the infobase called InfoBaseJWT (the aud payload claim). In the default.vrd file, this name is defined by the point/accessTokenAuthentication/accessTokenRecipientName element.
-
To get access to the infobase, the token must have one of the issuers (the iss payload claim) specified. The issuers are specified in the point/accessTokenAuthentication/issuers section. Every issuer is determined by the name attribute value of the issuer element. In this example, the access will be provided only if the iss claim has the limitedAccess value.
3.21.15. \<authentication>
3.21.15.1. Element description and attributes
The element contains settings for displaying additional authentication types in the authentication dialog box (when trying to access the infobase), subordinated to the <point> element. No more than one <authentication> element is allowed. This element must contain one <logonView> element.
You can use this element to configure the user authentication dialog box:
-
Allow or prohibit saving user authentication parameters on any local computer.
-
Determine how long the stored authentication will be used. After the stored authentication becomes obsolete, you will need to authenticate again.
-
Specify the default authentication method.
-
Configure the order of authentication types at the bottom of the dialog box.
The element may contain the following attributes.
| Attribute | Description |
|---|---|
| allowSaveForReauthentication | You can save authentication parameters to sign in again to any infobase available through this publication.
Authentication is remembered for standard authentication (for any connection methods and infobase types) and for OpenID authentication.
To delete the stored parameters of the last signing (and a list of up to 4 recent usernames), use the
Boolean.
Default value: false. |
| reauthenticationTokenLifeTime | The lifetime (in seconds) of the token (JWT) that is used for re-entry. In other words, the value of this parameter determines the lifetime of this token or the time period after which the system will request the username and password again.
Number. Range of values: from 1 to 999,999,999. If the attribute value is less than 1, then 1 will be used. If it is greater than 999,999,999, then 999,999,999 will be used.
Default value: 432,000. |
Element example:
<authentication allowSaveForReauthentication="true" savedAuthenticationParametersLifeTime="60"><logonView saveForReauthenticationByDefault="false"><method type="standard" visible="true"/> <method type="qr" visible="false"/><method type="openid" visible="true"/><method type="openidconnect" visible="true"/><method type="email" visible="true"/></logonView></authentication>If the order of authentication types is not configured, the following order of authentication types is used in the authentication dialog box (if they are configured for the publication):
-
Standard authentication
-
Email authentication.
-
OpenID authentication.
-
OpenID Connect authentication.
3.21.15.2. \<logonView>
The element contains a description of the order of authentication types at the bottom of the authentication dialog box. The order of authentication types depends on the order of the <method> elements which describe a particular authentication type.
The first authentication type specified in this element will be the default authentication type for this infobase publication. If the order is not configured, the default authentication type will be selected as follows:
-
OpenID Connect authentication, if it is configured for the infobase.
-
OpenID authentication, if it is configured for the infobase.
-
1C:Enterprise authentication.
The element may contain the following attributes.
| Attribute | Description |
|---|---|
| saveForReauthenticationByDefault | Specifies the default value for the Remember checkbox in the authentication form for a new infobase user.
Boolean.
Default value: false. |
3.21.15.3. \<method>
The element describes the authentication method that will be displayed in the infobase authentication dialog box.
The element may contain the following attributes:
| Attribute | Description |
|---|---|
| type | The authentication type displayed on the form. The attribute can take one of the following values:
|
| visible | Controls the authentication type display on the authentication form. The attribute value takes precedence over the authentication type setting for the infobase available through this publication.
Boolean.
Default value: true. |
3.21.16. \<mobileApps>
The element specifies the location of mobile applications. It is subordinated to the <point> element. No more than one <mobileApps> element is allowed. This element can contain one or several <application> elements.
This element describes the location of mobile applications that can be used for QR code authentication.
3.21.16.1. \<application>
A mobile application that can be used for QR code authentication.
The element may contain the following attributes:
| Attribute | Description |
|---|---|
| type | Application source (app store. The attribute can take one of the following values:
|
Application name that will be displayed as a tooltip for the
store picture.
String. |
|
| url | URL for downloading the mobile application.
String. |
| appid | A UUID of applications in the Apple and Google stores, which is designed for smart banners, which will offer to install a mobile application when operating with a necessary infobase in a web client.
String. |
3.22. inetcfg.xml
The inetcfg.xml file allows you to specify the default proxy settings and has a greater priority over the default proxy settings in Windows OS or parameters specified in the environment variables in Linux and macOS.
The file is located in the directory with the 1C:Enterprise configuration files. It is optional.
-
On Linux:
-
If there is the file, the settings are taken from the file.
-
If the file is absent, an attempt is made to retrieve the settings from the following environment variables: http_proxy, https_proxy, ftp_proxy, and ftps_proxy (in accordance with the protocol used). If these environment variables are not specified, an attempt to get the proxy settings from the all_proxy environment variable is made. If the environment variables contain invalid parameters, they are ignored.
-
-
On macOS:
-
If there is the file, the settings are taken from the file.
-
If the file is absent, an attempt is made to retrieve the settings from the following environment variables: http_proxy, https_proxy, ftp_proxy, and ftps_proxy (in accordance with the protocol used). If these environment variables are not specified, an attempt to get the proxy settings from the all_proxy environment variable is made. If the environment variables contain invalid parameters, they are ignored.
-
-
On Windows:
-
If there is the file, the settings are taken from the file.
-
If the file is absent, the settings are taken from the Microsoft Internet Explorer settings. Automatic setup is not supported.
-
When setting up a proxy, you can use the User-Agent information from an HTTP request:
-
Thin client. 1CV8C.
-
Web service. 1C + Enterprise/8.3.
-
Web client. This parameter is generated by the web browser.
Example:
<InternetProxyprotocols="http=10.1.0.8:8080 10.1.0.9:8080"user="proxyUser"password="proxyPassword"bypassOnLocal="true"bypassOnAddresses="127.0.0.1 *.master"/>The InternetProxy root element, containing the default proxy settings, has the structure (attributes) as specified below.
- ntlmoptional
- Type: Boolean. NTLM authentication use flag:
-
true. NTLM authentication is enabled.
-
false. NTLM authentication is disabled.
NTLM authentication is enabled by default.
- protocolsoptional
- String. Specifies the host name and port for the protocols. The format is as follows:
ParametersOfProxyProtocol1 ParametersOfProxyProtocol2 ... ParametersOfProxyProtocolNProtocolProxyParameters:=[Protocol"="]host":"portThe proxy-protocols parameter list is separated by spaces. Each parameter contains the optional protocol name, "=" sign, and proxy server host name and port separated by colon. If the protocol name is not specified, the proxy parameters are used for all the protocols, for which these are not explicitly specified. The protocols can have the following names:
-
HTTP
-
HTTPS
-
FTP
It is case-sensitive, other protocol names are not supported, e.g.:
protocols="http=10.1.0.8:8080 10.1.0.9:8080"Where:
-
For HTTP, the following proxy parameters are defined: host - 10.1.0.8, port - 8080.
-
For other protocols (HTTPS, FTP): host - 10.1.0.9, port - 8080.
- useroptional
- String. Username for authentication on the proxy server. Example:
user="proxyUser"- passwordoptional
- String. User password for authentication on the proxy server. Example:
password="proxyPassword"- bypassOnLocaloptional
- Boolean. Indicates whether to use a proxy server for local addresses:
-
true. Do not use.
-
false. Use.
Addresses that have no dots in their DNS names are considered as local addresses (i. e. all IP addresses are not local). In some situations, a local address is not recognized correctly.
In order to restrict using proxy for the addresses recognized as local, the following parameter is used:
bypassOnLocal="true"For all other addresses, bypassOnAddresses parameter must be used.
- bypassOnAddressesoptional
- String. List of addresses the proxy is not used for. The format is as follows:
host1 host2 … hostNHost names are separated with spaces. The host name can contain the following special mask characters: - any number of characters, ? - any character. For example, to block proxy for all domain hosts, use .<domain name>, such as:
bypassOnAddresses="127.0.0.1 *.master"In this example, the proxy is not used for 127.0.0.1 (localhost) address and all the master domain addresses.
3.23. location.cfg
location.cfg file is used to specify the directory containing the user settings files and software license file location. location parameter is used to specify the directory location.
- location
- Directory path.
Example:
location=C:\Users\UserName\AppData\Roaming\1C\1cv823.24. logcfg.xml
3.24.1. General description
logcfg.xml file is used to configure the parameters of technological log and memory dumps generation function in case of unexpected 1C:Enterprise shutdown. The file is located in the directory with the 1C:Enterprise configuration files. It is optional. If the file is not found, the default technological log settings are applied:
-
Technological log (the <log> element). Disabled.
-
Default technological log (the <defaultlog> element):
-
Generation. Enabled.
-
Lifetime. 24 hours.
-
The <system> event generation level for all system components is defined as Error.
-
Saved to the directories:
-
Linux: ~/.1cv8/logs.
-
Windows: %LOCALAPPDATA%\1C\1cv8\logs.
-
-
-
Forced abortion dumps (relevant only for Windows OS):
-
Minimum crash dumps are saved (type="1").
-
Dumps are saved to the %LOCALAPPDATA%\1C\1cv8\dumps directory.
-
Example:
<config xmlns="http://v8.1c.ru/v8/tech-log"><log location="c:\v8\logs" history="1"><event><eq property="name" value="conn"/></event></log><dump location="c:\v8\dumps" create="1" type="2"/></config>This configuration file specifies that:
-
All events of establishing or losing connection to the server are written to the technological log.
-
Technological log files are located in C:\v8\logs directory.
-
Technological log files are stored for 1 hour.
-
Dump files are saved to C:\v8\dumps directory.
-
Dump files contain all available information (the entire process memory).
Attributes are described as element.attribute, meaning attribute of the element. The element1/element2/element3 expression means that element3 is subordinate to element2, which is subordinate to element1. Another possible combination is config/log.location.
3.24.2. Configuration file structure
3.24.2.1. General description
The root element of the configuration file is <config> that defines the technological log settings. The element can contain nested elements responsible for various technological log features:
<config…><log…>…</log><log…>…</log><log…>…</log><dump … /><leaks>...</leaks><mem/><ftextupd …/><query …/><plansql/><dbmslocks/><inputbystring …/><scriptcircrefs/><sessiondatacontext><system … /><system … /><system … /><defaultlog … /></config>These elements are responsible for:
-
The <log> element defines the technological log directory and its composition. There can be one or multiple elements.
-
<dump> defines the directory for saving unexpected shutdown dumps. No more than one element is allowed.
-
The <leaks> element sets tracking for memory leaks that may be caused by configuration code errors. Tracking memory leaks decreases the performance a bit. No more than one element is allowed.
-
<mem> controls memory usage. No more than one element is allowed.
-
The <plansql> element is intended to manage collection of the query plans generated during DMBS operations. The query plans are located in the <planSQLText> property of the events related to DBMS. No more than one element is allowed.
-
<dbmslocks> manages collection of the DBMS lock data. No more than one element is allowed.
-
<ftextupd> manages collection of data on the update processes of the full-text search index. No more than one element is allowed.
-
<query> controls placing information about fields that contain NULL when executing a request to an external data source, but for which such value is not allowed, to the technological log. No more than one element is allowed.
-
<inputbystring> manages collection of information about the input by string functionality. No more than one element is allowed.
-
<scriptcircrefs> manages the functionality of tracking circular reference data during 1C:Enterprise language execution. No more than one element is allowed.
-
<sessiondatacontext> manages displaying the list of session data changes and their contexts. No more than one element is allowed.
-
<defaultlog> defines the default technological log directory and lifetime. No more than one element is allowed.
-
<system> defines system event generation settings. Any number of elements is allowed.
Elements are divided into several groups:
-
Elements that control generation of a specific event. Such elements include <dump>, <leaks>, <mem>, <plansql>, <ftextupd>, <system>, <query>, <scriptcircrefs>, <inputbystring>. If the required element is not specified in the technological log configuration file, the corresponding event is not generated. In other words, if, for example, recording of the memory used is not enabled by the <mem> element, filtering by MEM event will not affect the technological log contents, as this event is simply not generated.
-
Elements that filter already generated technological log data. Such elements include <event> and <property>. You can use these elements to filter the events generated by the system. These elements can only reduce the amount of data recorded to technological log files.
-
Elements that control placement of data files for technological log and dumps. Such elements include <log>, <defaultlog>, <dump>.
3.24.2.2. \<log>
<log> defines the technological log directory and the filtering criteria used to store the previously generated events in the technological log.
The element attributes:
| Attribute | Description |
|---|---|
| compress | Manages compressing obsolete files of the technological log:
|
| format | Use this attribute to specify the format in which technological log files will be created:
|
| history | A number of hours at which information stored the technology log will be removed. The 0 value means that deletion of outdated files is disabled. In this case, third-party administration tools must be responsible for deleting outdated files to avoid an overflow of the disk drive that stores technological log files. |
| location | Name of the directory to save the technological log to. Different directories must be specified in the location attributes of the <log>, <dump> and <defaultlog> elements. |
| placement | Determines the structure of storing technological log files:
|
| rotation | Determines the technological log file rotation:
|
| rotationperiod | The attribute determines the time period (in hours) after which the rotation is activated.
Default value: 1 hour. |
| rotationsize | The attribute determines the file size (in megabytes) after which the rotation is activated.
Default value: 100 Mb. |
The <log> element may contain<event> and <property> elements that determine the conditions for recording each event and event property to the log. If the <log> element does not contain any <event> element, no events will be logged.
For more information on technological log files (their storage, format, structure, and so on), see Technological log files.
3.24.2.3. \<event>
Sequence of the <event> elements defines the condition for saving the event to the log. Only events that satisfy the condition are logged. In other words, if the condition defined by the <event> element sequence is True, the event is written to the log. An event is only logged if it satisfies all the conditions inside at least one of the <event> elements. The conditions within the <event> element are combined using logical AND, and the <event> elements are combined using logical OR.
The conditions are set by the elements:
-
eq. Equal.
-
ne. Not equal.
-
gt. Greater than.
-
ge. Greater than or equal.
-
lt. Less than.
-
le. Less than or equal.
-
like. Matches the mask.
Each of these elements, except like, defines a simple comparison of the event parameter value (property attribute defines the parameter name) to the value attribute value.
Example:
<event><eq property="name" value="proc"/></event>In this case, events referred to the group named PROC will be recorded to the technological log.
The following event names are available:
| Event name | Description |
|---|---|
| ADDIN | Operations with add-ins. |
| ADMIN | Control actions of 1C:Enterprise server cluster administrator. |
| ATTN | Records of 1C:Enterprise cluster status monitoring subsystem. |
| CALL | Incoming remote calls (call target side remote calls). |
| CLSTR | Execution of actions changing the server cluster operation. |
| CONFLOADFROMFILES | Execution of configuration restoring from the files. |
| CONN | Establishment or termination of client connection to a server. |
| DB2 | Execution of DB2 SQL operators. |
| DBCOPIES | Operations with database copies. |
| DBMSSQL | Execution of Microsoft SQL Server SQL operators. |
| DBMSSQLCONN | The event is generated when the 1C:Enterprise server connects Microsoft SQL Server DBMS for the first time when the provider for database is selected. |
| DBORACLE | Execution of Oracle Database SQL operators. |
| DBPOSTGRS | Execution of PostgreSQL SQL operators. |
| DBV8DBENG | Execution of file-based DBMS SQL operators. |
| DHIST | Execution of data history update. |
| EDS | Operations with external data sources. |
| EVENTLOG | Registration of events related to generation of the event log index. |
| EXCP | 1C:Enterprise applications exceptions, which are not handled in standard way and may cause the unexpected shutdown of the server process or client process connected to it. |
| EXCPCNTX | Events that have started but have not finished, when the abnormal situation occurred. |
| FTEXTCHECK | Occurs when verifying the full-text search index files. |
| FTEXTUPD | Occurs during the full-text search index files update. |
| FTS | Registers v2 full-text search events that can be useful for administrators to assess the situation and develop responses. |
| HASP | The event logs a single dongle access. |
| INPUTBYSTRING | Occurs when the platform processes the input by string. |
| LEAKS | Events related to the memory leak, which may be caused by the configuration code errors. |
| LIC | Events related to retrieval and release of the licenses (both software and HASP), retrieval of licenses for the base versions, regular monitoring of matching the actual hardware and list of hardware, recorded in the license. |
| MAILPARSEERR | Event generated if an error occurred when parsing the mail message. |
| MEM | Events related to the increase of memory, used by the server processes (ragent, rmngr, rphost). |
| PROC | Events related to the entire process and affecting the process performance. For example: startup, termination, abnormal termination, and so on. |
| QERR | Events related to detection of query compilation errors or database records or fields level restrictions. |
| SCALL | Outgoing remote calls (call source side outgoing calls). |
| SCOM | Events of creation or deletion of server contents, usually related to the infobase. |
| SDBL | Events related to querying the 1C:Enterprise database model. |
| SDGC | The event occurs when the session data clearing mechanism is triggered. |
| SESN | Actions related to the session. For example: session start, session end, and so on. |
| SINTEG | Operations with an external integration service. The event occurs when sending and starting to receive messages. |
| SRVC | Events related to startup, stopping, and notifications of the server cluster services. |
| STORE | Events related to the storage of binary data of the server cluster. |
| STT | User actions related to speech recognition. |
| STTADM | Administrative actions related to the speech recognition subsystem. |
| SYSTEM | Platform component-related system events intended for analysis by 1C technical experts. Such events are only configured based on the explicit instructions from the technical support and only for a time required to reproduce a specific problem. Otherwise, such configuration may cause the significant increase of log file size and decrease the application performance. |
| TDEADLOCK | Deadlock in the managed mode is detected. |
| TLOCK | Transaction lock control in managed mode. |
| TTIMEOUT | Transaction lock timeout. |
| VIDEOCALL | Messages of the control logic of the video module. You can use the events to record the beginning and end of the call, screen sharings, and switching the camera/microphone on/off. |
| VIDEOCONN | You can set, close, and change connection statuses used during video calls. With these events, you can monitor errors that occur during calls due to unstable network connection. |
| VIDEOSTATS | Output of the technical statistics and the processor load. Events are output with a frequency of about 1 second. Technical statistics include characteristics of incoming and outgoing video and audio streams. |
| VRSCACHE | Server call cache operations. |
| VRSREQUEST | Request to server for a resource. |
| VRSRESPONSE | Server response. |
| WINCERT | Errors related to certificate verification using Windows functionality. Such events may help the specialists to investigate the causes of incorrect certificate verification. |
It is also worth noting that events from PROC, SCOM, EXCP, CONN and ADMIN groups are relatively rare and contain small amount of data, while logging of events from SDBL, DB2, DBMSSQL, DBPOSTGRS, DBORACLE groups may cause the significant increase of technological log.
The like element determines whether the technological log property matches a mask. The mask is a sequence of characters, some of which represent themselves, and some are templates intended to describe a group of characters.
For example, the <like property="SDBL" value="%reference%"/> element means checking if the SDBL property value of the technological log event matches the %reference% mask.
The templates include:
-
%. 0 or more arbitrary characters.
-
_. 1 arbitrary character.
-
[...]. One of the listed characters, where [...] may contain any characters and ranges similar to c-C, where c is the range starting character, C is the range ending character.
-
[^...]. Any single character, except for the characters specified in square brackets [].
-
\. Prefix character. It is ignored, meaning that the next character is a regular character that does not represent a template.
-
Any other characters. Regular characters representing themselves. Simple characters comparison is case-insensitive.
Sample templates:
-
template. String with specific text. In this case comparison using like does not differ from comparison using eq. Case-insensitive.
-
%reference%. String that contains the reference context in an arbitrary position. Case-insensitive.
-
reference%. String that contains the reference context at the beginning. Case-insensitive.
-
%reference. String that contains the reference context at the end. Case-insensitive.
-
%[a-z]. String that ends with a lowercase Latin letter.
-
%[^a-z]%. String that contains at least one character different from a lowercase Latin letter.
Example:
<log location="c:\logs" history="1"><event><eq property="name" value="proc"/></event><event><eq property="name" value="scom"/></event><event><eq property="name" value="conn"/></event><event><eq property="name" value="excp"/></event><event><eq property="name" value="dbmssql"/></event></log>In this example, the technological log will log events related to the PROC, SCOM, CONN, EXCP, and DBMSSQL groups.
3.24.2.4. \<property>
3.24.2.4.1. General information
The <property> element defines the conditions for an event whose name is the name attribute value to be logged, provided that the event is also logged. The conditions are set by the nested <event> elements according to the same rules that apply to events.
If the <property> element with a specific name is missing, the corresponding property is not logged. If the <property> element does not contain nested <event> elements, the property it defines is logged for all logged events which have this property. If the <property> element contains nested <event> elements, the property is logged only for events that satisfy the condition (if the event is logged and has this property).
The <property name="all"> </property> element logs all event properties.
The <log> element below defines the following events to be recorded in the log: process, server context, connection, exceptions, and execution of SQL operators. However, the SQL operator text will only be saved to the log if its execution took longer than a second. The log is located in C:\logs directory and is stored for 1 hour.
Example:
<log location="c:\logs" history="1"><event><eq property="name" value="proc"/></event><event><eq property="name" value="scom"/></event><event><eq property="name" value="conn"/></event><event><eq property="name" value="excp"/></event><event><eq property="name" value="dbmssql"/></event><property name="sql"><event><eq property="name" value="mssql"/><gt property="duration" value="10000"/></event></property></log>Each event has a set of properties. Each property has a name. Several properties with the same names are allowed per event. Property names may be used for events and properties filtering. Comparison of names is case-insensitive. Empty condition in the <property> element means that the property is always displayed.
3.24.2.4.2. List of properties
The basic event properties, which may be required for configuration file setup and technological log browsing, are given below:
| Property name | Description | |
|---|---|---|
| Action | Text description of the operation performed while restoring the configuration from files (for CONFLOADFROMFILES event). | |
| Admin | Cluster or central server administrator name. | |
| agentURL | URL of the current process of 1C:Enterprise server agent (production server URL). | |
| All | Enables recording of all the log events. | |
| ApplicationExt | Specification of the functionality assignment rule (for CLSTR event). | |
| AudioEncoding | Audio frame format (for the STT and STTAdm events). | |
| AvMem | Value of Available memory indicator when writing to technological log (for FTEXTUPD event). | |
| BackgroundJobCreated | Determines whether full-text search index generation was performed as a background process (true) or not (false) (for FTEXTUpd event). | |
| BackupBaseFileName | Name of the file with a full backup when performing differential backup (for the STORE event). | |
| BackupFileName | Name of the file with a binary data storage backup (for the STORE event). | |
| BackupType | Backup mode of the binary data storage (for the STORE event):
|
|
| Body | Size of request/response body in bytes (for VRSREQUEST, VRSRESPONSE events). | |
| Calls | Number of client application calls to server application made over TCP. | |
| Certificate | Verified certificate description (for WINCERT event). Includes the following certificate fields: subject, issuer, and serial number. | |
| Class | Name of class that generated the event (for SYSTEM event). | |
| Classes | Add-in object names separated by "|" (for the ADDIN event). | |
| Cluster | Server cluster main port. | |
| cn | Number of dynamic memory fragments occupied by the process when writing MEM event. | |
| cnd | Change in the number of dynamic memory fragments occupied by the process since the last MEM event. | |
| Component | Name of the platform component that generated the event (for SYSTEM event). | |
| Connection | Infobase connection number.
The selected ICE candidate pair in the "local -> remote" format (for the VIDEOCONN event). |
|
| Connections | Number of connections for which working processes are missing (for the CLSTR event). | |
| ConnLimit | Maximum number of connections per working process (for CLSTR event). | |
| Context | Execution context. | |
| Contexts | Number of additional grammar items (for the STT and STTAdm events). | |
| ContextsOnly | Indicates whether only additional grammar is used (for the STT and STTAdm events). | |
| CopyBytes | The overall size of copied values applicable to garbage collection (for SDGC event). | |
| cpu | Processor load level (for the VIDEOCONN event). | |
| CpuTime | CPU usage time, in microseconds, required to index a portion of the event log file (for the EVENTLOG event). | |
| Crashed | Equals 1 if the operation is completed with an error (for the ADDIN event). | |
| Database | Used database path (for DB2, DBMSSQL, DBORACLE, DBPOSTGRS, DBDA, EXCP, SDBL events). For the client-server version, the database name is generated as a NameServer\BaseName, for the file version, the full path to the 1Cv8.1CD file is displayed. | |
| DBConnID | External data source DBMS connection ID (for EDS event). | |
| DBConnStr | External data source connection string (for EDS event). | |
| DBCopy | Name of the database copy used (for DB2, DBMSSQL, DBORACLE, DBPOSTGRS, DBDA, EXCP, SDBL events). If access to the copy does not occur, this property is not written. | |
| Dbms | Dbms: the name of the DBMS used to execute the operation that led to the generation of this technological log (for EDS, DB2, DBMSSQL, DBORACLE, DBPOSTGRS, DBDA, EXCP, SDBL events). Possible values:
|
|
| Dbpid | String representing the ID of 1C:Enterprise server connection to the database server in database terms (for DBMSSQL, DBPOSTGRS, DB2, DBORACLE events). | |
| DBUsr | External data source DBMS username (for EDS event). | |
| DeadlockConnectionIntersections | List of transaction pairs forming the deadlock (for TDEADLOCK event). | |
| Descr | Software exception description. | |
| description | Text explaining the action being performed (for DHIST event). | |
| Direction | Stream direction (incoming/outgoing). For the VIDEOSTATS event. | |
| DstAddr | Assigned working process address (for the CLSTR event). | |
| DstId | UUID of the assigned working process (for the CLSTR event). | |
| DstPid | System ID of the assigned working process (for the CLSTR event). | |
| DstSrv | Assigned working process name (for the CLSTR event). | |
| dumpError | Description of an error occurred during the process of dumping. | |
| DumpFile | Name of the dump file. | |
| Duration | Duration of an event in hundreds of microseconds. | |
| Durationus | Event duration in microseconds. | |
| Err | Console message type: 0 – information, 1 – error. | |
| errorCode | Error code returned by the handling method of working with the Windows API certificates (for the WINCERT event). | |
| ErrorDescr | Contains an exception text upon error (for the ADDIN event). | |
| Event | Contains a name of the action performed by a cluster of servers (for CLSTR event) and determines the presence of other properties in current event. | |
| Exception | Name of the software exception. | |
| ExcessDurationSec | Memory excess duration in seconds (for the ATTN event). | |
| ExcessStartTime | Timestamp when the memory excess was registered (for the ATTN event). | |
| ExtSrvcUrl | External integration service address (for the SINTEG event). | |
| ExtSrvcUsr | Name of the external integration service user (for the SINTEG event). | |
| FailedJobsCount | Number of the background indexing processes that finished with errors (for FTEXTUpd event). | |
| File | Name of a file in which an event was generated (for SYSTEM event) or in which a problem was detected in the course of checking the index of a full-text search (for FTEXTCHECK event). | |
| FileName | Name of a file with the event log index to be generated (for the EVENTLOG event). | |
| Files | List of files formatted as "file name ... file size" in the directory in which an action is occurring (for FTEXTUPD event). A property is generated only if the
|
|
| FilesCount | Number of files in the directory in which an action is occurring (for FTEXTUPD event). A property is generated only if the logfiles attribute of the ftextupd element is set to True (see <ftextupd>). | |
| FilesSize | The overall size of the storage in bytes (for the SDGC event). | |
| FilesTotalSize | Number of files in the directory in which an action is occurring (for FTEXTUPD event). A property is generated only if the logfiles attribute of the ftextupd element is set to True (see <ftextupd>). | |
| FillRefsPresent | If a property does exist, it means that the cache of links from the user list of values is used instead of a full-text data search (for the INPUTBYSTRING event). | |
| FindByString | Name of a configuration object for which input by string is performed. | |
| findTicks | Time spent while searching the database, in ms (for INPUTBYSTRING event). | |
| Finish | Reason for ending the process. | |
| fixedState | New timestamp in the state file till which indexing was performed, in ISO 8601 format. For the FTS event. | |
| Folder | Directory in which the action is occurring (for FTEXTUPD event). Could be a temporary directory or a directory for files with an index of a full-text search. A property is generated only if the logfiles attribute of the ftextupd element is set to True (see <ftextupd>). | |
| Frames | Number of audio frames in the speech recognition stream (for the STT and STTAdm events). | |
| FreeMemory | Available RAM of a computer with a server cluster (for the ATTN event). | |
| ftextResultCount | Number of links found in the course of a full-text search (for INPUTBYSTRING event). | |
| ftextSearchCount | Number of calls to the full-text search (for INPUTBYSTRING event). | |
| ftextTicks | Time spent on full-text search, in ms (for INPUTBYSTRING event). | |
| fullKey | Full key to search for a record in the search engine. For the FTS event. | |
| Func | Name of the action. For the list of possible values, see The property values of . | |
| Headers | HTTP request / response headers (for VRSREQUEST, VRSRESPONSE events). | |
| Host | Computer name. | |
| hResultOLEDB, hResultNC2005, hResultNC2008, hResult2012 | Contains a hexadecimal return code when trying to connect via a provider (OLE DB, SQL Server Native Client versions 2005, 2008, and 2012). If the attempt to connect through the provider was not performed, a property will be unavailable. Connection attempts begin with a provider most suitable for the latest Microsoft SQL Server version. After that, other providers are picked starting from the latest ones. After a successful connection is completed, all further attempts to establish a connection through other providers are stopped. | |
| IB | Name of an infobase in the client/server mode. | |
| IBLimit | A determined maximum number of infobases per each working process (for CLSTR event). | |
| Id | ID of an object to save to the binary data storage (for the STORE event).
ID of the streaming speech recognition session (for the STT and STTAdm events). |
|
| IName | Name of the interface to pass whose method is called remotely (for the SCALL and CALL events). | |
| InBytes | Amount of data read from hard drive during a call (in bytes). | |
| Info | Crash info (for FTEXTCheck event).
Number of attempts to establish a connection with the process completed with an error (for the ATTN event). |
|
| Infobases | Number of infobases for which working processes are missing (for the CLSTR event). | |
| InMessage | The messages received from the thin client (for the VIDEOCALL event). | |
| InstanceID | Storage UUID (for the SDGC event). Integer. | |
| JobCanceledByLoadLimit | Flag indicating that the background indexing process has been canceled because a load limit for the working process has been reached (for FTEXTUpd event). | |
| jobId | Indexing background job ID. For the FTS event. | |
| Key | Key of the local streaming recognition session (for the STT and STTAdm events). | |
| Level | Event severity level (for all events). Possible values:
Possible event values are provided in the description of the <system> element in the logcfg.xml file of technological log setup (see <system>). |
|
| Line | String number in the file where SYSTEM event was generated. | |
| Location | Contains add-in location or object ID for the ADDIN event. | |
| LockDuration | Duration of storage lock in the period when garbage collector is in operation, in milliseconds (for SDGC event). | |
| Locks | A list of managed transaction locks (for TLOCK event). | |
| logFrom | Initial timestamp of the data chunk in the event log, in ISO 8601 format. For the FTS event. | |
| logTo | Final timestamp of the data chunk in the event log, in ISO 8601 format. For the FTS event. | |
| MDX | Text of MDX request to OLAP system. | |
| MDX | Text of the executed request to OLAP system (only for EDS event). | |
| Memory | Amount of memory in bytes used but not released, per server call. | |
| MemoryLimits | Set memory limits (for the ATTN event). | |
| MemoryPeak | A peak value of memory in bytes used but not released, per server call. | |
| MemoryUsed | The maximum size of dynamic memory used during the call (for FTEXTUpd event). | |
| Message | Message that is specified when calling an add-in event (for the ADDIN event). | |
| MessageUid | A unique ID of mail message, a parsing of which resulted in an error. Value is equal to the property ID of the object InternetMailMessage. | |
| metaDataId | Table metadata object UUID. Can be used to search for the object in the configuration dumped to XML. For the FTS event. | |
| Method | HTTP method of accessing the resource (for VRSREQUEST, VRSRESPONSE events) or a method of InternetMail object during which an error in parsing the mail message (for MAILPARSEERR event) occurred, or a name of the method being called which is different from call method (for CALL event) or current action of garbage collector (for SDGC event).
For the event MAILPARSEERR can take the values:
For the CALL event, this property contains a number of the called method of the interface; wherein the ID of the called interface is specified in the Interface property.
For SDGC event can accept the following values:
|
|
| MethodName | Name of an add-in method whose call is displayed in this technological log record (for the ADDIN event). | |
| MinDataId | Minimum ID of the indexed data in the chunk passed from the cluster manager into working process and back (for FTEXTUpd event). | |
| MinimalWriteSize | Data threshold. When it is exceeded, a value is recorded to the binary data storage (for the STORE event). | |
| MName | Name of the remotely called method (for SCALL and CALL events). | |
| modelID | Speech recognition model ID (for the STT and STTAdm events). | |
| MyVer | Current server state version (for CLSTR event). | |
| Name | Event name. | |
| NeedResync | The server data synchronization is required (for CLSTR event whose Event property is equal to current version older). | |
| NewServiceDataDirectory | Path to the service data directory that will be used after the service setting is applied, and the cluster process is restarted. | |
| Nmb | Session number (for SESN event). | |
| NParams | Number of parameters of SQL operator for the file version of infobase (for DBV8DBENG event). Parameters whose amount has been specified in a given property, are being used to transfer long binary data. | |
| Obsolete | Number and UUIDs of obsolete working processes (for the CLSTR event). | |
| OldServiceDataDirectory | Path to the service data directory that was used before the service setting was applied. | |
| OSException | Description of the operating system exception. | |
| OSThread | Number of a thread indexing the event log file (for the EVENTLOG event). | |
| OutBytes | Amount of data (in bytes) recorded on hard drive during a call. | |
| OutMessage | The messages sent to the thin client (for the VIDEOCALL event). | |
| p:processName | Name of server context which usually matches the name of infobase. | |
| PacketCount | Actual number of packets written to the index file during current file processing (for the EVENTLOG event). | |
| parallelism | Number of background jobs that can be started at the same time. Affects indexing speed and resource consumption (CPU and RAM). For the FTS event. | |
| Path | Path to a speech recognition model component (for the STT and STTAdm events). | |
| Phrase | Text phrase corresponding to the status code (for VRSRESPONSE events).
Number of additional grammar items (for the STT and STTAdm events). |
|
| PID | Process ID of the operating system.
Operating system process ID of the main cluster manager (for the ATTN event). |
|
| planSQLText | Query plan contained in Sql property (for DBV8DBENG, DBMSSQL, DBPOSTGRS, DB2, DBORACLE, EDS events). | |
| Port | Number of the main network port of a process. | |
| Process | Name of an application module, as interpreted by the operating system (the file name of the booting application's module). | |
| ProcessId | Main cluster manager UUID (for the ATTN event). | |
| ProcessName | Name of a process. | |
| procURL | Server process address of 1C:Enterprise system to which the event relates. | |
| Query | Text of query in the 1C:Enterprise language during the execution of which NULL value was detected in the field for which such a value is invalid (for QERR event). | |
| QueryFileds | List of query fields in which NULL values have been detected (for QERR event). | |
| QueueLength | The number of queries in the processor queue (for the VIDEOCONN event). | |
| ReadOnlyMode | Indicates that the binary data storage is in read-only mode (for the STORE event). | |
| Reason | Reason for non-availability of working process (for CLSTR event). | |
| recordCount | Number of records before or after indexing in a specific data chunk. For the FTS event. | |
| Recording | Indicates audio stream recording (for the STT and STTAdm events). | |
| recordRef | Internal reference to the table record. For the FTS event. | |
| Ref | Infobase name. | |
| Regions | Names of spaces of the controlled transactional locks (for TLOCK event). | |
| Registered | Number and UUIDs of new working processes (for the CLSTR event). | |
| reindexCount | Number of tables sent for reindexing. For the FTS event. | |
| Released | Number and UUIDs of backup working processes that became the main processes (for the CLSTR event). | |
| Report | Name of the metadata object of the report being executed (being performed in the background job). | |
| Request | Connection request ID (for the CLSTR event). | |
| res | Describes the action performed by the licensing system (for LIC event). | |
| Result | Result of checking full-text search index files (for the FTEXTCheck event):
1. No errors.
0. There are errors.
Add-in operation result (for the ADDIN event):
|
|
| RetExcp | An exception occurred during execution of the server call and transmitted to client as a result of call (for CALL events). | |
| Rows | A number of database records retrieved. | |
| RowsAffected | A number of the modified database records. | |
| RunAs | A process start mode (application or service). | |
| rx:Acoustic | Acoustics selected by the system (for the STT and STTAdm events). | |
| rx:Grammar | Grammar selected by the system (for the STT and STTAdm events). | |
| rx:Language | Model language selected by the system (for the STT and STTAdm events). | |
| rx:Location | Speech operation location option selected by the system (for the STT and STTAdm events). | |
| rx:SampleRate | Recognition sample rate (for the STT and STTAdm events). | |
| rx:Version | Model version selected by the system (for the STT and STTAdm events). | |
| SafeLimit | Safe memory usage per call (for the ATTN event). | |
| Sdbl | A query text in the 1C:Enterprise language of the database model. | |
| seanceID | 1C:Enterprise session ID. | |
| SearchByMask | If set to TRUE or "1", a database search without the full-text search results is performed (for INPUTBYSTRING event). | |
| Separation | A division (for FTEXTCHECKevent) is enabled or not. | |
| SepId | An index of the split area if split is enabled (for FTEXTCHECK event). | |
| ServerComputerName | Working server name. | |
| ServerId | Server UUID (for the ATTN event). | |
| ServiceName | The name of a server cluster (for CLSTR event). | |
| SessionID | A session number assigned to the current thread. If no session has been assigned to the current thread, a property is not added. | |
| Size | Size of the object to write to the binary data storage (for the STORE event). | |
| skippedRecords | Number of records skipped due to indexing errors. For the FTS event. | |
| Source | Source specified when calling an event from an add-in (for the ADDIN event). | |
| Sql | SQL statement text. | |
| SrcAddr | Preferred working process address (for the CLSTR event). | |
| SrcId | UUID of the preferred working process (for the CLSTR event). | |
| SrcPid | System ID of the preferred working process (for the CLSTR event). | |
| srcProcessName | It is recorded when the overall data from infobase is retrieved by working process. A value of the property ProcessName is the name of the overall data at the time of its retrieval. A value of the property srcProcessName is the name of the overall data from infobase at the time of its formation. | |
| SrcURL | A preferred address of production server (for CLSTR event). | |
| SrcVer | A version of server cluster status (for CLSTR event) received. | |
| SrvcName | Name of the integration service metadata object for which connection to the external integration service is executed (for the SINTEG event). | |
| State | A start or end of the update operation on the full-text search index (for FTEXTUPD event) has been committed. | |
| Status | HTTP status code (for VRSRESPONSE events).
Status of the recognition model component processing (for the STT and STTAdm events).
Connection state (for the VIDEOCONN event). |
|
| StorageGUID | Binary data storage UUID (for the STORE event). | |
| StreamType | Stream type: video, audio, or device screen (for the VIDEOCONN event). | |
| SyncPort | An auxiliary network port number of a process. | |
| Sz | An amount of dynamic memory (in bytes) taken up by process at the time MEM event is executed. | |
| Szd | Change in the amount of dynamic memory (in bytes) taken up by process since the previous MEM event execution. | |
| t:applicationName | ID of a client application. | |
| t:clientID | ID of TCP connection with a customer. | |
| t:computerName | Name of a client computer. | |
| t:connectID | ID of connection with infobase. | |
| tableCode | Table code. It is displayed when the table name is unavailable. For the FTS event. | |
| tableCount | Number of tables before or after indexing in a specific data chunk. For the FTS event. | |
| tableName | Table name. For the FTS event. | |
| tableRef | Human-readable reference to the configuration object. For the FTS event. | |
| Text | Text entered when entering by string (for INPUTBYSTRING event). | |
| Time | Time of writing to the technology log (for FTEXTUPD event).
Operation execution time. It is displayed either in milliseconds or as a time interval in the ddd.hh:mm:ss.fff format. For the FTS event. |
|
| tooManyResults | If set to TRUE or "1", there are too many links in the index matching the request; a full-text search is not used (for INPUTBYSTRING event). | |
| TotalJobsCount | A number of background processes generated during indexing (for FTEXTUpd event). | |
| TotalMemory | RAM of a computer with a server cluster (for the ATTN event). | |
| totalRecords | Total (accumulated) number of records in a data chunk. For the FTS event. | |
| Trans | ID of the transaction activity at the start of an event:
|
|
| tx:Acoustic | Requested acoustics (for the STT and STTAdm events). | |
| tx:Grammar | Requested grammar (for the STT and STTAdm events). | |
| tx:Language | Requested model language (for the STT and STTAdm events). | |
| tx:Location | Requested speech operation location option (for the STT and STTAdm events). | |
| tx:SampleRate | Sample rate of the outgoing audio stream (for the STT and STTAdm events). | |
| tx:Version | Requested model version (for the STT and STTAdm events). | |
| Txt | Text of informational message. | |
| Type | Name of a type for which an object is created or deleted (for the ADDIN event).
Type of the recognition model component (acoustics / grammar) (for the STT and STTAdm events).
Stream type (video/audio). For the VIDEOSTATS event. |
|
| URI | A resource being accessed (for VRSREQUEST, VRSRESPONSE events). | |
| Url | Main cluster manager URL (for the ATTN event). | |
| UsedSize | Size of used storage space in bytes (for SDGC events). | |
| UseMode | Indicates whether the binary data storage is used (for the STORE event). | |
| Usr | The infobase user name (if no users have been defined in the infobase, this property will be set to DefUser). A property value is taken from the assigned session. | |
| Val | A value, the meaning of which depends on a value of Func. | |
| Value | Data stream statistics (for the VIDEOCONN event). | |
| WaitConnections | A list of the connections being collided with on the managed transactional locks (for TLOCK and TTIMEOUT events). | |
| Word | A word, if defined (for FTEXTCheck event). | |
By using the properties of the <property> element, the execution context can be recorded in the technology log. The execution context can be: 1C:Enterprise language context or interface context. The embedded 1C:Enterprise language context is a list of the embedded language statements. It contains:
-
Module name.
-
Module line number.
-
Text presentation of an item from the 1C:Enterprise language call list of the corresponding module line.
The interface context includes:
-
Full form name.
-
Type of the active form item.
-
Name of the active form item.
-
Name of the command bar button (if clicked).
-
Action performed by the form item.
For example, a context of the embedded 1C:Enterprise language in the technological log might look like this:
Document.GoodsReceipt:23: Records.ProductAccounting.Write();ApplicationModule:18:CheckIdleHandlerConnection(True);ApplicationModule:230:IfnpGetDefaultValue(mainCurrentUser,"UseReminders");GeneralModule.npUserSettings:481:Selection=Query.Execute().Select();The interface context in the technological log file might look like this:
{Document.Document1.ListForm}/{TabularField:DocumentList}/{RefreshDisplay}{Document.Document1.Form.DocumentForm}/{CommandBar:MainFormActions}/{MainFormActionsOK}{Document.Document1.Form.DocumentForm}/{Button:Button1}/{Click}To enable a context record, it is needed to record the <property name = "Context"> element or the <property name = "all"> element among the property filters.
To write the SDBL (SDBL requests) and DBMSSQL (SQL operators to MS SQL Server DBMS) events with the execution context, the technological log configuration file must include:
<config xmlns="http://v8.1c.ru/v8/tech-log"><log location="c:\v8\logs" history="1"><event><eq property="name" value="sdbl"/></event><event><eq property="name" value="dbmssql"/></event><property name="context"></property></log></config>To write the SDBL (SDBL requests) and DBMSSQL (SQL operators to MS SQL Server DBMS) events without the execution context, fill the following in the technological log configuration file:
<config xmlns="http://v8.1c.ru/v8/tech-log"><log location="c:\v8\logs" history="1"><event><eq property="name" value="sdbl"/></event><event><eq property="name" value="dbmssql"/></event></log></config>To write the SDBL (SDBL requests) and DBMSSQL (SQL operators to MS SQL Server DBMS) events with all properties but the execution context, the technological log configuration file must include:
<config xmlns="http://v8.1c.ru/v8/tech-log"><log location="c:\v8\logs" history="1"><event><eq property="name" value="sdbl"/></event><event><eq property="name" value="dbmssql"/></event><property name="context"><event><eq property="name" value=""/><event></property><property name="all"></property></log></config>To write the SDBL event (SDBL requests) with the execution context and the DBMSSQL event (SQL operators to MS SQL Server DBMS) without the execution context, the configuration file must include:
<config xmlns="http://v8.1c.ru/v8/tech-log"><log location="c:\v8\logs" history="1"><event><eq property="name" value="sdbl "/></event><event><eq property="name" value="dbmssql"/></event><property name="context"><event><eq property="name" value="sdbl"/></event></property></log></config>If the <property name = "Context"> element is present, it means that context information will be recorded for the technological log events if the conditions specified in this element are met. After that, information about execution context in current process will be added to each technological log event, and after the event, an instant event carrying information about the execution context of client process will be added.
Technological log may contain messages related to the exceptions linked to the lock manager. For that, a configuration file should look like this:
<config xmlns="http://v8.1c.ru/v8/tech-log"><log location="c:\v8\logs" history="7"><event><eq property="name" value="excp"/></event><event><eq property="name" value="tlock"/><gt property="duration" value="100000"/></event><property name="all"/><property name="context"><event><eq property="name" value=""/></event></property></log><dump location="c:\v8\dumps" create="1" type="2"/></config>In the above example, all exceptions associated with locks will be recorded (in particular, DEADLOCK are connections interlocks and TIMEOUT is expiration of a predetermined time, wherein in both cases, a number of the connection that caused this exception is included). The waiting periods that exceeded 10 seconds will also be included in the message text about the exception. The information about all properties except for Context will be recorded.
3.24.2.4.3. Level property
Each technological log event belongs to one of the levels:
| Level | Level events |
|---|---|
| DEBUG | DBMSSQL, DBV8DBENG, DB2, DBCOPIES, DBORACLE, DBPOSTGRS, SDBL, SCRIPTCIRCREFS, MEM, LEAK |
| ERROR |
|
| INFO | all events that do not belong to the ERROR, WARNING, DEBUG, and TRACE levels |
| WARNING |
|
3.24.2.4.4. The property values of Func
Func property can take the following values:
| Value | Description |
|---|---|
| AcceptPartialIndex | Accept partial indexes. |
| addCopy | Adding the database copy (for DBCOPIES event). |
| agentAuthenticate | Main server administrator authentication. |
| applyServiceAssociationRules | Application of the requirements related to functionality assignment. |
| Attach | An assignment of the session to a connection (an event of SESN kind is being output at the moment of unassignment to a connection of the session). A duration indicates how long the session was assigned to a connection.
Add-in attachment (for the ADDIN event) and the action result. |
| authenticateInfoBaseAdmin | Authentication of the infobase administrator. |
| authenticateSrvrUser | Authentication of a cluster user in working server. |
| authenticateStarter | Authentication of a remote central server. |
| beginTransaction | A transaction starts (an event of SDBL kind is displayed in the log at the moment when the said transaction starts and has no duration). |
| Busy | A session has already been assigned to a connection (SESN event is being output when an attempt is made to assign a session that has already been assigned to the connection). Has no duration |
| Call | Add-in object method call (for the ADDIN event) and the action result. |
| changeInfoBaseParams | Change in infobase parameters: server licensing, external session management, mandatory external session management, security profile, security profile of the secure mode. |
| changeLocale | Change in the national database settings. |
| CheckIndexes | Verification of the full-text search indexes is being executed. |
| commitTransaction | Transaction commitment. |
| Connect | Connection with an external data source or external integration service. |
| continueFillTable | Resumption of initial filling in database copy table (for DBCOPIES event). |
| copyMoveFile | Copying / moving a fragment of an application between database table entries. |
| Crash | Add-in host process crash (for the ADDIN event). |
| Create LM component | Create an additional grammar component (server, for the STTAdm event). |
| createFile | Create a file. |
| createInfoBase | Create an infobase. |
| CreateObject | Add-in object creation (for the ADDIN event) and the action result. |
| deleteFile | Delete a file. |
| deserializeTable | Recovery of data pertained to the database table from a file. |
| disconnect | Disconnection from the external data source. |
| dropInfoBase | Deleting infobases. |
| erase<X> | Delete a record from the security profile where <X> is:
|
| eraseAgentUser | Deleting a main server administrator. |
| eraseIBRegistry | Delete a central server cluster. |
| eraseRegServer | Delete a working server. |
| eraseRegUser | Delete a cluster user. |
| eraseSeance | Delete a session. |
| eraseSecurityProfile | Delete a security profile. |
| eraseServerProcess | Delete a working process. |
| eraseServiceAssociationRule | Delete a functionality assignment requirement. |
| ExternalEvent | External event generated by an add-in (for the ADDIN event). |
| fillTable | Execution of initial filling in database copy table (for DBCOPIES event). |
| fillTableBlocksKeyFields | Fill in the database copy table by key values (for DBCOPIES event). |
| fillTableBlocksKeyFieldsTableParts | Fill in the database copy table containing reference data (for DBCOPIES event). |
| fillTableOne | Fill in the database copy table with one query (for DBCOPIES event). |
| finish | The end of session (an event of SESN kind is logged at the time of a session being ended and the event duration is equal to a duration of the entire session). |
| Finish indexing file | Finish writing an index file for the completed event log file (for the EVENTLOG event). |
| FtextMngrIndexChanges | A full-text search index is being updated in the file mode of infobase. |
| FtextMngrRHostIndexChanges | A full-text search index is being updated in the client-server mode of infobase. |
| get<X> | Read the entire list of security profiles or their records where <X> is:
|
| getAgentUsers | Read data on the agent administrators. |
| getClusterManagers | Read the list and parameters of cluster managers. |
| getConnections | Read the list of connections. |
| GetDataForIndexing | Get the list of modified objects to be included in the full-text search index |
| getIBRegistry | Read the list and parameters of clusters. |
| getInfoBaseParams | Read the infobase parameters. |
| getInfoBases | Read a list of infobases. |
| getObjectLocks | Read a list of cluster object locks. |
| GetProperty | Add-in object property receipt (for the ADDIN event) and the action result. |
| getRegUsers | Read data on the cluster administrators. |
| getSeances | Read a list of sessions. |
| getServerProcesses | Read a list and parameters of working processes. |
| getServiceAssociationRules | Read a list of functionality assignment rules. |
| getServicesDistribution | Read data on the distribution of services between cluster managers. |
| getServicesInfo | Read information about available cluster services |
| getTransactionSplitter | Get a totals separator. |
| holdConnection | Hold connection. |
| IndexObjects | Perform indexing of a portion of objects. |
| initialize | Initialize a licensing subsystem (for LIC events only). |
| insertAgentUser | Add a central server user. |
| insertIBRegistry | Add a cluster to the central server. |
| insertRecords | Add a record to the database table. |
| insertRegServer | Add a working server. |
| insertRegUser | Add a cluster user. |
| insertServerProcess | Add a working process. |
| isProperLocale | Validate database local settings. |
| killClient | Disconnect a client from 1C:Enterprise cluster server. |
| Load | Add-in import to a host-process (for the ADDIN event) and the action result. |
| Load model component end | Complete the import of the recognition model component (server event, for the STTAdm event). |
| Load model component start | Start the import of the recognition model component (server event, for the STTAdm event). |
| lockRecord | Locked record. |
| Long recognize end | Complete the local audio file recognition (server event, for the STT event). |
| Long recognize start | Start the local audio file recognition (server event, for the STT event). |
| lookupTmpTable | Get/create a temporary database table. |
| MergeSynchro | Merge files with full-text search indexes. |
| modifyFile | Update a file. |
| moveFile | Move a file. |
| quickInsert | Quick insert of data into a database table. |
| readFile | Read a file. |
| reFillTable | Refill and resume filling in of the database copy table (for DBCOPIES event). |
| regAuthenticate | Cluster administrator authentication. |
| regAuthenticate | Perform cluster authentication. |
| Regular indexing, 1000 packets written | Finish writing each thousand packets to the event log index (for the EVENTLOG event). |
| ReleaseObject | Add-in object deletion (for the ADDIN event) and the action result. |
| removeCopy | Delete a database copy (for DBCOPIES event). |
| restoreObject | Restore an object. |
| resumeIndexing | Resume database table indexing. |
| returnTmpTable | Release a temporary database table. |
| rollbackTransaction | Cancel a transaction. |
| saveObject | Save an object. |
| searchFile | Search a file. |
| securedInsert | Insert records with restrictions on data access. |
| selectFileName | Select a file name. |
| serializeTable | Save table data to a file. |
| setClusterRecycling | Change settings for restarting the cluster working processes (except for fault tolerance level). |
| setFaultToleranceLevel | Set the cluster fault tolerance level. |
| setInfoBaseConnectingDeny | Set the parameters to block the infobase session start. |
| setInfoBaseDescr | Set description of an infobase. |
| setInfoBaseScheduledJobsDeny | Set locks on infobase scheduled jobs. |
| SetProperty | Add-in object property setting (for the ADDIN event) and the action result. |
| setRegDescr | Set description of a cluster. |
| setRegMultiProcEnable | Enable support of multiple working processes for a cluster. |
| setRegSecLevel | Set cluster security level. |
| setRollbackOnly | Set a flag indicating errors in transaction (such transaction can only be rolled back). |
| setSecurityProfile | Create/modify a security profile. |
| setSecurityProfileAddIn | Create/modify an entry in the security profile (add-in). |
| setSecurityProfileApplication | Create/modify an entry in the security profile (application). |
| setSecurityProfileComClass | Create/modify an entry in the security profile (COM class). |
| setSecurityProfileExternalModule | Create/modify an entry in the security profile (external module). |
| setSecurityProfileInternetResource | Create/modify an entry in the security profile (Internet resource). |
| setSecurityProfileVirtualDirectory | Create/modify an entry in the security profile (virtual directory). |
| setServerProcessCapacity | Set throughput capacity of a working process. |
| setServerProcessCapacity | Set performance capacity of a working process. |
| setServerProcessEnable | Set flag indicating that a working process is allowed to start. |
| setServerProcessEnable | Set status of a working process. |
| setServiceAssociationRule | Create/modify a functionality assignment rule. |
| setSingleUser | Set exclusive mode. |
| setSrcProcessName | Create common infobase data in a working process and assign a common name to this data. An event is recorded when the first user connects to infobase through this working process or when performing a dynamic update of the infobase configuration. |
| setTableState | Change the state of the database copy table (for DBCOPIES event). |
| Start | Start a session (an event of SESN type is logged at the time when a session starts and has no duration). |
| Start indexing file | Start writing a new event log index file (for the EVENTLOG event). |
| Streaming end | Complete the streaming recognition (client event, for the STT event). |
| Streaming session end | Complete the local streaming recognition session (server event, for the STT event). |
| Streaming session start | Start the local streaming recognition session(server event, for the STT event). |
| Streaming start | Streaming recognition start (client event, for the STT event). |
| suspendIndexing | Cancel indexing of database tables. |
| takeKeyVal | Get a value of a table record key. |
| transaction | Start a transaction (an event of SDBL type starts at the beginning of a transaction, ends when it is finished). |
| transferChangesTable | Transfer changed objects to the database copy (for DBCOPIES event). |
| transferTrLogs | Transfer transaction logs to the database copy (for DBCOPIES event). |
| Unload model component | Export the recognition model component (server event, for the STTAdm event). |
| updateCopyContent | Change content of the database copy tables (for DBCOPIES event). |
| updateCopyProperties | Change parameters of a database copy (for DBCOPIES event). |
| updateRegServer | Modify parameters of a working server. |
| updateTimeIsOver | Completion of the database copy update (for DBCOPIES event). |
| Wait | Wait for an assignment (an event of SESN type is output when waiting period of assigning a session to a connection is finished). Duration of an event is equal to the time spent while waiting for a connection. If a connection is assigned with a session which has already been assigned, then the current thread of the current connection is waiting for cancellation of the session assignment to another connection. |
| xlockTables | Set an exclusive lock on a table. |
| xlockTablesShared | Set a shared lock on a table. |
3.24.2.4.5. res property of the LIC event
Possible values:
-
seize. New license is used.
-
reuse. License is reused. If the res property is set to seize or reuse, then the txt property contains the following information:
-
An array with the numbers of received licenses.
-
License recipient:
-
local Designer.
-
local application.
-
-
A unique ID for a session or server receiving license.
-
An ID of license if it has been received.
-
A kind of a license requested:
-
local Designer. Designer.
-
local application. Client application.
-
local COM connector 32. 32-bit COM connection.
-
local COM connector 64. 64-bit COM connection.
-
local server 32. 32-bit 1C:Enterprise server.
-
local server 64. 64-bit 1C:Enterprise server.
-
remote application. Any 1C:Enterprise application on a remote computer.
-
-
Information on the viewed license keys or license files:
-
For the hardware licenses:
-
hard.
-
A local or network key used.
-
Key series: client, client 300, client 500, server 32, server 64.
-
Why a license has not been received:
-
not available. Does not exist (an error detected in the HASP dongle API).
-
no licenses left. All licenses have run out.
-
no slots left. All licenses have run out.
-
absent. Attempt to use a key that is no longer available. For example, already removed from a computer.
-
local and single key is already used. Attempt to obtain an already occupied license from a local single-user key.
-
-
Number of licenses (if this information is available).
-
How many licenses have already been obtained (if this information is available).
-
For the software licenses:
-
soft.
-
Name of the activated license file.
-
Reason for a denial of a license:
-
stop list. License file is blacklisted.
-
bad format. Incorrect file format.
-
bad signature. Licensing Center signature is invalid.
-
second server lite. Re-license for the MINI server.
-
binding error. Binding error.
-
incorrect license type. License of an incorrect type.
-
no licenses left. All licenses have run out.
-
exception (exception text). Another exception.
-
-
Licensing Center signature option
-
Short. For a license obtained by phone.
-
Long. For licenses obtained on media or via Internet.
-
-
License registration number.
-
License activation PIN code.
-
License type.
-
Maximum number of users.
-
Supporting information.
-
Differences in the list of equipment:
-
For the software licenses activated for version 8.2.14 and earlier:
-
Added in current computer configuration. List of equipment that is currently available but was not available at the moment of obtaining the license.
-
Available at license acquisition time. List of equipment that was available at the moment of obtaining the license.
-
-
For software licenses activated for version 8.2.15 and later:
-
Removed after license acquisition. List of equipment that is currently not available but was available at the moment of obtaining the license.
-
Available in current computer configuration. List of equipment that is currently available but was not available at the moment of obtaining the license. Only if such equipment does exist.
-
-
-
-
If a license is acquired, the following data about a key or the software license is provided:
-
For the hardware licenses:
-
Dongle series.
-
Key type.
-
Number of licenses.
-
Number of licenses taken after acquiring the current license.
-
-
-
For the software licenses:
-
Name of the activated license file.
-
License type.
-
Number of licenses.
-
Number of licenses taken after acquiring the current license.
-
-
-
release. License release. In this case, the txt property contains the following information:
-
For the software licenses:
-
Internal UUID of the object of the license being released.
-
Creation time of the object of the license being released.
-
Recipient of the license.
-
License being released: client, server32, server64, server lite.
-
Supporting information.
-
-
For the hardware licenses:
-
Internal UUID of the object of the license being released.
-
Creation time of the object of the license being released.
-
Recipient of the license.
-
Supporting information about a key.
-
-
-
binding. Verification of compliance of the current list of equipment to the list that was used when activating a software license. When a mismatch found is critical for a license binding, the txt property contains the following information:
-
Computer binding parameter changed.
-
For each license file that stops working because of the current computer parameters, the following information is displayed:
-
Name of the activated license file.
-
License registration number.
-
License activation PIN code.
-
License type.
-
Maximum number of users.
-
Differences in the list of equipment:
-
For the software licenses activated for version 8.2.14 and earlier:
-
Added in current computer configuration. List of equipment that is currently available but was not available at the moment of obtaining the license.
-
Available at license acquisition time. List of equipment that was available at the moment of obtaining the license.
-
-
For software licenses activated for version 8.2.15 and later:
-
Removed after license acquisition. List of equipment that is currently not available but was available at the moment of obtaining the license.
-
Available in current computer configuration. List of equipment that is currently available but was not available at the moment of obtaining the license.
-
-
-
-
-
error. Error occurred while accessing the licensing tool.
-
must be removed. File with license is not used and must be deleted.
3.24.2.4.6. Descr property
Descr property content depends on the event accommodating the said property:
-
Contains the event description for ATTN event. Depending on the event the technological log records contains different set of properties:
- Server online. Production server is available.
Available properties:
- AgentUrl. Production server URL.
- Server unavailable. Production server is unavailable.
Available properties:
- AgentUrl. Production server URL.
- Server check error. An unexpected error occurred during the production server survey.
Available properties:
- AgentUrl. Production server URL.
- Main manager inaccessible. Local main manager is unavailable.
Available properties:
-
Url. Main cluster manager URL.
-
AgentUrl. Production server URL.
-
ProcessId. Cluster process UUID of a cluster manager or a working process.
-
Pid. Operating system ID of a cluster process of a cluster manager or a working process.
-
Main manager not responding. Local main manager is not responding. It might be forcibly terminated according to the Terminate corrupted processes setting.
Available properties:
-
Url. Main cluster manager URL.
-
AgentUrl. Production server URL.
-
ProcessId. Cluster process UUID of a cluster manager or a working process.
-
Pid. Operating system ID of a cluster process of a cluster manager or a working process.
-
Process online. Cluster process is available.
Available properties:
-
Url. Process URL.
-
AgentUrl. Production server URL.
-
ProcessId. Cluster process UUID.
-
Pid. Operating system ID of a cluster process of a cluster manager or a working process.
-
Process inaccessible. Cluster process is unavailable.
Available properties:
-
Url. Process URL.
-
AgentUrl. Production server URL.
-
ProcessId. Cluster process UUID of a cluster manager or a working process.
-
Pid. Operating system ID of a cluster process of a cluster manager or a working process.
-
Info. Number of attempts to establish connection with the process completed with an error.
-
Process not responding. Cluster process is not responding. It might be forcibly terminated according to the Terminate corrupted processes setting.
Available properties:
-
Url. Process URL.
-
AgentUrl. Production server URL.
-
ProcessId. Cluster process UUID of a cluster manager or a working process.
-
Pid. Operating system ID of a cluster process of a cluster manager or a working process.
-
Info. Number of attempts to establish connection with the process completed with an error.
-
Process obsolete. Process is excluded from the cluster.
Available properties:
-
Url. Process URL.
-
AgentUrl. Production server URL.
-
ProcessId. Cluster process UUID of a cluster manager or a working process.
-
Pid. Operating system ID of a cluster process of a cluster manager or a working process.
-
Process server unavailable. The process is excluded from the cluster. You cannot determine its status as it is located on an unavailable server.
Available properties:
-
Url. Process URL.
-
AgentUrl. Production server URL.
-
ProcessId. Cluster process UUID of a cluster manager or a working process.
-
Pid. Operating system ID of a cluster process of a cluster manager or a working process.
-
Process expired. The process is excluded from the cluster but it cannot terminate on its own. It might be forcibly terminated according to the Terminate corrupted processes setting.
Available properties:
-
Url. Process URL.
-
AgentUrl. Production server URL.
-
ProcessId. Cluster process UUID of a cluster manager or a working process.
-
Pid. Operating system ID of a cluster process of a cluster manager or a working process.
-
Process finished. Cluster process is completed.
Available properties:
-
Url. Process URL.
-
AgentUrl. Production server URL.
-
ProcessId. Cluster process UUID of a cluster manager or a working process.
-
Pid. Operating system ID of a cluster process of a cluster manager or a working process.
-
Process exceeded critical memory limit. The specified process will be forcibly terminated to free up space as the process memory on the server has exceeded a critical limit.
Available properties:
-
Url. Process URL.
-
AgentUrl. Production server URL.
-
ProcessId. Cluster process UUID of a cluster manager or a working process.
-
Pid. Operating system ID of a cluster process of a cluster manager or a working process.
-
Memory exceeded temporary allowed limit. The server process memory has exceeded the temporarily allowed limit.
Available properties:
-
ServerId. Server cluster UUID.
-
Host. Name of the computer running the server cluster.
-
MemoryLimits. Set memory limits.
-
TotalMemory. Total server RAM.
-
ExcessStartTime. Timestamp when the memory excess was registered.
-
ExcessDurationSec. Memory excess duration in seconds.
-
Memory exceeded critical limit. Process memory on the server has exceeded a critical limit.
Available properties:
-
ServerId. Server cluster UUID.
-
Host. Name of the computer running the server cluster.
-
MemoryLimits. Set memory limits.
-
TotalMemory. Total server RAM.
-
ExcessStartTime. Timestamp when the memory excess was registered.
-
ExcessDurationSec. Memory excess duration in seconds.
-
Memory shortage detected. There is less free RAM left than the safe consumption per call.
Available properties:
-
ServerId. Server cluster UUID.
-
Host. Name of the computer running the server cluster.
-
FreeMemory. Available server RAM.
-
SafeLimit. Safe memory usage per call.
-
Contains the description of the operation in progress for the SRVC event. For this event, the property text has the following format: <ServiceName>[, <InfobaseName>[, <SessionID>]]:<Action>, where:
-
<ServiceName>. Name of the service on which the operation is performed.
-
<IBName>. Infobase name.
-
<SessionID>. Session UUID.
-
<Action>. Description of the action performed on the cluster service:
-
service notified <notification name> <parameters>. Service receives a notification of a cluster event.
-
service started. Service instance creation.
-
service finished. Service instance release.
-
-
-
Contains the operation description (in English) for WINCERT event. This description allows for identifying a call to the Windows API function and restoring the state of environment at the time of a call. The following message options are possible:
-
CertGetCertificateChain failed. Error in building the certificate chain. If such an error occurs, you need to analyze the error code (the errorCode property ). It is possible that the default crypto-provider does not support the algorithm of certificate encryption. To search for information about errors, the Microsoft Internet resources are recommended.
-
CertVerifyCertificateChainPolicy failed. Error in the certification chain verification involving policies. If such an error occurs, you need to analyze the error code (the errorCode property ). A certificate might have been revoked, certain certificates in the chain might be missing, and so on. To search for information about errors, the Microsoft Internet resources are recommended.
-
3.24.2.4.7. Event property
Event property values and an array of properties to be additionally set in this event are listed in this section:
-
connection assigned. Working process is assigned to the connection. The following properties are defined for the event:
-
ApplicationExt. Clarification of the functionality assignment rule.
-
DstAddr. Assigned working process address.
-
DstId. UUID of the assigned working process.
-
DstPid. System ID of the assigned working process.
-
Ref. Infobase name.
-
Request. Connection request ID.
-
SrcAddr. Preferred working process address.
-
SrcId. UUID of the preferred working process.
-
SrcPid. System ID of the preferred working process.
-
-
current version newer. Active instance of the service received a replication with the obsolete version of the service state and rejected it. The following properties are defined for the event:
-
MyVer. Current service state version.
-
NeedResync. Synchronization of service data for the current version older event is required.
-
Ref. Infobase name.
-
ServiceName. Cluster service name.
-
SessionID. Session number.
-
SrcVer. Received service state version.
-
-
current version older. Active service instance that received a replication with the new service state version must become a backup instance.
-
data replication start. Start replicating data from the current active instance of service to a backup instance. The following properties are defined for the event:
-
Ref. Infobase name.
-
ServiceName. Name of the server cluster service.
-
SessionID. Session number.
-
-
destination version newer. Replication was moved to the active instance of the service with the new service state version. The replication was rejected, and the current service must become a backup service. The following properties are defined for the event:
-
Ref. Infobase name.
-
ServiceName. Name of the server cluster service.
-
SessionID. Session number.
-
-
destination version older. Replication was moved to an active service instance with the obsolete service state version.
-
finish replication. Replication is finished. The following properties are defined for the event:
-
Ref. Infobase name.
-
ServiceName. Name of the server cluster service.
-
SessionID. Session number.
-
-
main rmngr is down. Error in calling the cluster service on the main manager. The working process is to be finished. The following properties are defined for the event:
- ServiceName. Name of the service upon calling which it was discovered that the main cluster manager is unavailable.
-
no process for connection. No acceptable working process to establish connection is found. The following properties are defined for the event:
-
ApplicationExt. Clarification of the functionality assignment rule.
-
DstSrv. Assigned working server name.
-
Ref. Infobase name.
-
Request. Connection request ID.
-
SrcAddr. Preferred working process address.
-
SrcId. UUID of the preferred working process.
-
SrcPid. System ID of the preferred working process.
-
-
performance update. Process performance metrics are updated. The following properties are defined for the event:
-
Data. Values of the parameters used to calculate available process performance listed as comma-separated "parameter"="value". Administrators of 1C:Enterprise servers can use these parameters to estimate changes in working process performance, DBMS, and hardware load. Available performance parameters:
-
average_response_time. Average time (in 5 minutes) required for performing reference operations to calculate the possible performance, in milliseconds.
-
cpu. CPU load percentage.
-
disk_performance. Time for performing reference operations with files in milliseconds.
-
memory_performance. Time for performing reference operations with memory in milliseconds.
-
pid. System ID of the process.
-
process. Cluster process address.
-
queue_length. Processor query queue length.
-
queue_length/cpu_num. Ratio of the query queue length to the number of CPU cores.
-
response_time. Time for performing reference operations to calculate the possible performance in milliseconds.
-
sql. Time for performing reference queries to DBMS in milliseconds.
-
-
-
process deficit detected. Deficit of working processes is detected. The following properties are defined for the event:
-
Host. Computer name.
-
Connections. Number of connections for which working processes are missing.
-
Infobases. Number of infobases for which working processes are missing.
-
Deficit. Number of missing working processes.
-
-
process restart required. It is required to restart working processes. The following properties are defined for the event:
-
ByMemory. IDs of working processes restarted by occupied memory.
-
ByTime. IDs of working processes restarted by lifetime.
-
-
process requirements changed. Changes in working processes are required. The following properties are defined for the event:
-
Obsolete. Number and UUIDs of obsolete working processes.
-
Registered. Number and UUIDs of new working processes.
-
Released. Number and UUIDs of backup working processes that became the main processes.
-
-
rebalance denied. Rebalance is not required although the request was received. The following properties are defined for the event:
-
ApplicationExt. Clarification of the functionality assignment rule.
-
Ref. Infobase name.
-
SrcAddr. Working process address.
-
SrcId. Working process UUID.
-
SrcPid. System ID of the working process.
-
-
rebalance required. Rebalance request is fulfilled. The following properties are defined for the event:
-
ApplicationExt. Clarification of the functionality assignment rule.
-
DstAddr. Assigned working process address.
-
DstId. UUID of the assigned working process.
-
DstPid. System ID of the assigned working process.
-
Ref. Infobase name.
-
SrcAddr. Preferred working process address.
-
SrcId. UUID of the preferred working process.
-
SrcPid. System ID of the preferred working process.
-
-
register rmngr. Registration of cluster managers.
-
register rphost. Registration of working processes of the cluster.
-
unregister rmng. Cancel registration of cluster managers.
-
unregister rphost. Unregistering of working processes of the cluster.
-
setting data directory of service. Directory for storing cluster service data is configured. The following properties are defined for the event:
-
ServiceName. Name of the service for which the setting is applied.
-
Ref. Infobase name if the service is divided into infobases and if the setting is applied to a specific infobase, not the entire service. Optional.
-
OldServiceDataDirectory. Path to the service data directory that was used before the setting was applied.
-
NewServiceDataDirectory. Path to the service data directory that will be used after the setting is applied and the cluster process is restarted.
-
-
StorageUpdateSettings. Binary data storage settings are updated.
-
StorageBackupStarted. Binary data storage backup is started.
-
StorageBackupFinished. Binary data storage backup is completed.
-
StorageRestoreStarted. Restoration of the binary data storage from the backup is started.
-
StorageRestoreFinished. Binary data storage is restored from the backup.
-
StorageRead. Read data from the storage.
-
StorageWrite. Write data to the storage.
3.24.2.4.8. Txt property
Textproperty content depends on the event accommodating the said property:
-
For the HASP event, this property contains source data and the result of accessing the key in the following format: <Operation>(<List of input parameters>)-><List of output parameters>. Where:
-
<Operation>. Operation performed in this key reference.
-
<List of input parameters>. List of the input operation parameters and their comma-separated values.
-
<List of output parameters> . List of the output parameters and their comma-separated values.
-
You can find the full list of operations, their parameters, and results in the HASP developer guide (https://sentineldiscussion.safenet-inc.com/viewFile.do?fileId=43161000000036014&forumGroupId=43161000000003001).
-
For the CONN event, the property contains an event description within the connection break monitoring. A property value looks like 'EventName: Parameter1=Value1,Parameter2=Value2,…'. The following system events have been defined:
- Ping direction opened. New verification direction in the client process emerged.
Parameters:
-
address: String. Direction address.
-
pingTimeout: Number. Verification timeout.
-
pingPeriod: Number. Verification period.
-
directionID: the UUID type. Direction ID.
-
Ping direction closed. Completion of the verification direction on the client process.
Parameters:
-
address: String. Direction address.
-
pingTimeout: Number. Verification timeout.
-
pingPeriod: Number. Verification period.
-
Connection established for ping direction. TCP connection is established to verify the client process.
Parameters:
-
address: String. Direction address.
-
pingTimeout: Number. Verification timeout.
-
pingPeriod: Number. Verification period.
-
Ping direction switched to TCP mode. Verifying stream on the client process is switched to the TCP-based verification mode.
Parameters:
-
address: String. Direction address.
-
pingTimeout: Number. Verification timeout.
-
pingPeriod: Number. Verification period.
-
Ping direction not available. Timeout occurred in the verification direction on the client process.
Parameters:
-
address: String. Direction address.
-
pingTimeout: Number. Verification timeout.
-
pingPeriod: Number. Verification period.
-
Ping direction available. Verification direction on the client process became available again.
Parameters:
-
address: String. Direction address.
-
pingTimeout: Number. Verification timeout.
-
pingPeriod: Number. Verification period.
-
Connection added to ping direction. Another connection became connected with this verification direction.
Parameters:
-
address: String. Direction address.
-
pingTimeout: Number. Verification timeout.
-
pingPeriod: Number. Verification period.
-
clientID: Number. A connection number associated with a verification direction.
-
Connection removed from ping direction. Connection ceased to be connected with this verification direction.
Parameters:
-
address: String. Direction address.
-
pingTimeout: Number. Verification timeout.
-
pingPeriod: Number. Verification period.
-
clientID: Number. A connection number associated with a verification direction.
-
Ping direction statistics. Statistics on the verification direction. It is displayed in each direction every 10 seconds and before completing a directional verification.
Parameters:
-
address: String. Direction address.
-
pingTimeout: Number. Verification timeout.
-
pingPeriod: Number. Verification period.
-
period: Number. Time spent on collecting statistical data in milliseconds.
-
packetsSent: Number. A number of packets sent.
-
avgResponseTime: Number. An average response time.
-
maxResponseTime: Number. A maximum response time.
-
packetsTimedOut: Number. Packets not responded to before timeout.
-
packetsLost: Number. Number of packets not responded to but not yet timed out.
-
packetsLostAndFound: Number. A number of responses received on packets sent but not taken into account.
-
Connection added to ping direction on server. One more connection began to correspond to a verification direction on the server process.
Parameters:
-
directionID: the UUID type. Direction ID.
-
clientID: Number. A connection number associated with a verification direction.
-
address: String. Direction address.
-
Connection removed from ping direction on server. One connection ceased to correspond to a verification direction on the server process.
Parameters:
-
directionID: the UUID type. Direction ID.
-
clientID: Number. A connection number associated with a verification direction.
-
Ping direction opened on server. New verification direction appeared on the server process.
Parameters:
- directionID: the UUID type. Direction ID.
- Ping direction closed on server. Verification direction ceased to exist on the server process.
Parameters:
- directionID: the UUID type. Direction ID.
- Ping direction not available on server. Timeout is detected in a verification direction on the server process.
Parameters:
- directionID: the UUID type. Direction ID.
- Ping direction settings changed on server. Verification period and verification timeout are transferred to a verification direction on the server process.
Parameters:
-
directionID: the UUID type. Direction ID.
-
pingTimeout: Number. Verification timeout.
-
pingPeriod: Number. Verification period.
3.24.2.5. \<dump>
3.24.2.5.1. General information
You can use this element only on Windows. On Linux and macOS, dumps generation settings are governed by the operating system. Therefore, the <dump> element is ignored.
3.24.2.5.2. On Linux
This section describes the steps to configure Linux to enable generation of crash memory dumps.
By default, crash dumps are disabled. Suppliers of Linux distributions recommend that you enable creation of dumps only on computers intended for development rather than on computers for operating the application.
3.24.2.5.2.1. Enabling automatic generation of dumps
Generation of crash dumps is configured for all processes executed on behalf of a specific user. To enable automatic dump generation, add the following lines to the /etc/security/limits.conf file:
<username> soft core unlimited<username> hard core unlimitedWhere <username> is the name of the user on whose behalf 1C:Enterprise is running.
3.24.2.5.2.2. Identifying dump names and location
To ensure clear understanding which crash dump is related to which process and to keep the dumps in a specific directory, it is recommended that you set a dump name generation template. The template can be specified for a single session or permanently.
To set a name template and location for crash dumps, use the command:
sysctl -w kernel.core_pattern=/tmp/core.%e.%pThis setting will be valid until the computer is restarted. In the above example, the dumps will be placed in the /tmp directory and the names of the dumps will be generated from:
-
core prefix
-
Name of the executable file
-
ID of the process that initiated crash dump generation
To apply the name template and the path on the permanent basis, you must add the following line to the /etc/sysctl.conf file:
kernel.core_pattern=/tmp/core.%e.%pFor the changes to take effect, run the command:
sysctl -pThe path specified in the settings must be allowed for writing for the users on whose behalf the applications that generate crash dumps are running.
3.24.2.5.3. On macOS
3.24.2.5.3.1. General information
This section describes how to configure macOS to enable generation of crash memory dumps.
By default, crash dumps are disabled.
3.24.2.5.3.2. Enabling automatic generation of dumps
Generation of crash dumps is configured for all processes. To enable automatic generation of dumps, run the following command on behalf of a user with administrative rights:
sudo launchctl limit core unlimitedThe command is valid until the computer is restarted.
3.24.2.5.3.3. Identifying dump names and location
The crash dumps are placed in the /cores/ directory. Files will have names of the core.<process pid> type. <process pid> is an ID of the crashed OS process.
3.24.2.5.4. On Windows
<dump> defines the parameters of a dump generated on application crash. To disable dump writing, set the dump.create attribute to 0 or false. If <dump> is missing, dump files are saved to the %LOCALAPPDATA%\1C\1cv8\dumps directory.
The user on whose behalf the client application is running or the server must have full rights to the directories:
-
Temporary files directory
-
Technological log directory
-
Dumps directory
The user on whose behalf the client application is running or the server must have the right to read the directories:
-
Configuration files
-
Directory that owns the dumps directory
<dump> attributes:
| Attribute | Description |
|---|---|
| create | Create or not create a dump file.
|
| externaldump | Manages crash dump generation. The attribute can take the following values:
If an external program is not detected or some problems are detected during its launch, standard mode for creating dumps (using a crashing process) will be used.
When you use a 32-bit version of 1C:Enterprise in a 64-bit operating system, external dump generation applications for a video module are not supported and the dump.externaldump attribute is ignored. In this case, dumps will be generated by the process (default behavior).
We recommend that you use an external dump generation application for 1C:Enterprise servers that operate without 24/7 support and service. |
| location | The name of a directory in which the dump files will be placed. Different directories must be specified in the location attributes of the <log>, <dump> and <defaultlog> elements. |
| prntscrn | Indicates whether to save a screenshot when 1C:Enterprise client crashes. The file name is the same as the dump name, but it has the png extension. The screen copy files are created in the same directory as dumps (see the location attribute).
If 1C:Enterprise crashes, the system displays a dialog box with information about the dump recording process, which is automatically closed after the dump recording is completed. |
| type | Dump type – an arbitrary combination of the following check boxes, represented in decimal or hexadecimal system (addition of check box values). A hexadecimal representation must begin with a 'x' character; for example, x0002.
The following values are available:
TIP. For most cases, it is sufficient to use as the value of the attribute. For example, |
3.24.2.6. \<leaks>
The <leaks> element establishes tracking of memory leaks caused by issues in configuration code. Tracking leaks is disabled by default. It does not impact the system performance.
To enable leak data collection, in the logcfg.xml file, add the <leaks> element: <leaks collect="1"> or <leaks collect="true">.
To disable memory leak tracking, change the <leaks> element: <leaks collect="0"> or <leaks collect="false">.
If a leak tracking is enabled, then creation and deletion of the following objects is controlled by user:
-
Form
-
ManagedForm
-
FixedStructure
-
FixedMap
-
FormDataStructure
-
FormDataCollection
-
FormDataStructureAndCollection
-
FormDataCollectionItem
-
FormDataTree
-
FormDataTreeItemCollection
-
FormDataTreeItem
-
AccountingRegisterManager
-
AccountingRegisterRecordSet
-
ChartOfAccountsManager
-
ChartOfAccountsObject
-
ExchangePlanManager
-
ExchangePlanObject
-
SettingsStoragesManager
-
AccumulationRegisterManager
-
AccumulationRegisterRecordSet
-
ChartOfCharacteristicTypesManager
-
ChartOfCharacteristicTypesObject
-
ConstantManager
-
DocumentManager
-
DocumentObject
-
EnumManager
-
ExternalDataProcessor
-
ExternalReport
-
InformationRegisterManager
-
InformationRegisterRecordSet
-
DataProcessorManager
-
DataProcessor
-
CatalogManager
-
CatalogObject
-
ReportManager
-
Report
-
SequenceRecordSet
-
BusinessProcessManager
-
BusinessProcessObject
-
TaskManager
-
TaskObject
-
ChartOfCalculationTypesManager
-
ChartOfCalculationTypesObject
-
CalculationRegisterManager
-
CalculationRegisterRecordSet
-
RecalculationRecordSet
-
COMSafeArray
-
KeyAndValue
-
Array
-
FixedArray
-
Map
-
Structure
-
ValueListItem
-
ValueList
-
ValueTable
-
ValueTableRow
-
ValueTree
-
ValueTreeRow
Leaks are tracked between the start and end checkpoints in the code. The start checkpoint clears leak data for a current user. At the end checkpoint, the LEAKS event is generated and written to the technological log in which for each unreleased object instance the stack of the embedded 1C:Enterprise language will be indicated at the time of its creation.
The following can be used as checkpoints:
-
Starting and ending execution of 1C:Enterprise language commands on the client or server.
-
Calling a procedure or function of 1C:Enterprise language and returning from the procedure or function.
-
Starting execution of one line of 1C:Enterprise language and finishing execution of another line of 1C:Enterprise language.
The starting and ending checkpoint is defined by the <point> element. In this case, embedding checkpoints into each other is allowed but ignored. Leaks are counted only for external checkpoints. For example, if the Starting1, Starting2, Ending1, and Ending2 checkpoints are passed when executing the configuration code, leaks are tracked between the Starting1 and Ending2 checkpoints.
The <point> element can have one of the following formats:
- <point call=«client»/>, <point call=«server»/>
- Defines checkpoints at the beginning/end of 1C:Enterprise language execution on the client or on the server. The starting point will be set at the beginning of 1C:Enterprise language execution on the server/client. The endpoint will be set at the end of 1C:Enterprise language execution on the server/client.
- <proc="\
- Defines checkpoints when calling and returning a specific 1C:Enterprise language method. <ModuleName>. Contains a full name of the metadata object the module belongs to (without a configuration name). Debugger displays module names in the same format. <MethodName> contains a method name. If the <MethodName> argument is not set, then the checkpoints will be defined at the beginning/ending of the module body execution. Module name examples:
-
SessionModule.Module. Session module.
-
ApplicationModule.Module. Application module.
-
ManagedApplicationModule.Module. Managed application module.
-
ExternalConnectionModule.Module. External connection module.
-
CommonModule.Global.Module. Common Global module.
-
Catalog.Counterparties.ObjectModule. Module of the Counterparties catalog item.
-
DataProcessor.DataProcessor1.Form.Form1.Form. Module of the Form1 form of the DataProcessor1 data processor.
-
DataProcessor.DataProcessor2.Form.MainForm.Form. Module of the MainForm form of the DataProcessor2 data processor.
- <point on="\
- Defines the starting and ending checkpoints by explicitly specifying the lines of code. The starting checkpoint corresponds to the beginning of execution of code for the string specified in the attribute On. The ending checkpoint corresponds to the end of the execution of code for the string specified in the attribute Off. Line numbering starts with 1. If the starting checkpoint is reached on server, then the ending checkpoint must be reached on server, as well. The ending checkpoint cannot be the last string of the procedure code, function or module body.
An example of the <leaks> element:
<leaks collect="1"><point call="client"/><point call="server"/><point proc="МодульПриложения/"/><point proc="ОбщийМодуль.ОбработкаПодключений.Модуль/НаСервереБезУтечки"/><point on="ОбщийМодуль.Сервисы.Модуль/9" off="ОбщийМодуль.Сервисы.Модуль/11"/></leaks>In this case, leak data collection is enabled. The checkpoints are set:
-
At the beginning and at the end of execution of 1C:Enterprise language on client
-
At the beginning and at the end of execution of 1C:Enterprise language on server
-
At the beginning and at the end of execution of the application module body
-
When calling and returning method AtServerNoLeaks() from the common module ConnectionProcessing
-
On lines 9 and 11 of the common module Services
Suppose a procedure with the following text causes a memory leak:
Procedure AtServerWithLeak() ExportM=NewArray;M.Add(NewArray);M[0].Add (NewArray);M[0][0].Add(M);EndProcedureTo detect it, leak tracing in the technological log can be enabled using the following settings:
<config xmlns="http://v8.1c.ru/v8/tech-log"><log location="C:\ProgramFiles\1cv8\logs" history="24"><event><eq property="name" value="call"/></event><event><eq property="name" value="leaks"/></event><property name="all"></property></log><leaks collect="1"><point call="server"/></leaks></config>When the server is called or a scheduled job is performed, if there is no leak, a technological log fragment will look like as follows:
59:44.4562-2840,CALL,5,process=rphost,p:processName=t76346,t:clientID=428,t:applicationName=JobScheduler,Func=Execute,Module=CommonModule2,Meth=ScheduledTaskNoLeak59:49.4581-2700,CALL,5,process=rphost,p:processName=t76346,t:clientID=430,t:applicationName=JobScheduler,Func=Execute,Module=CommonModule2,Meth=ScheduledTaskNoLeakAnd if a leak occurs, the log will look like this:
59:48.4768-2885,CALL,5,process=rphost,p:processName=t76346,t:clientID=429,t:applicationName=JobScheduler,Func=Execute,Module=CommonModule2,Meth=ScheduledTaskWithLeak59:48.4769-0,LEAKS,5,process=rphost,Descr='Array:CommonModule.CommonModule2:2:AtServerWithLeaks();CommonModule.CommonModule1:4:M[0].Add(NewArray);Array:CommonModule.CommonModule2:2:AtServerWithLeaks();CommonModule.CommonModule1:2:M=NewArray;Array:CommonModule.CommonModule2:2:AtServerWithLeaks();CommonModule.CommonModule1:3:M.Add(NewArray);Here, three Array objects were created and not released when executing the ScheduledTaskWithLeak() method of the CommonModule2 module as a scheduled job (t:applicationName=JobScheduler, Func=Execute). In this case, 1C:Enterprise language call stacks at the time of creation of each object are indicated.
3.24.2.7. \<mem>
If the <mem> element is present, 1C:Enterprise server processes monitor:
-
Number of allocated and not released fragments of memory
-
Total size of allocated and not released memory fragments
If between the moments when the server process was not performing either any calls and any routine task, the number of allocated but not released memory fragments increased, then a MEM event is generated with the following properties:
-
sz. Total number of memory fragments allocated but not released by the process.
-
szd. Its modification since the previous output of the MEM event.
-
cn. Total number of memory fragments allocated but not released by the process.
-
cnd. Its modification since the previous output of the MEM event.
A duration of the MEM event is equal to the period between the last and penultimate moments when the server process was not performing any calls and any routine tasks. It was during this time that the number of memory fragments used by process increased.
For example, the amount of allocated memory is not collected and the MEM events are not output for the following configuration:
<config xmlns="http://v8.1c.ru/v8/tech-log"><log location="C:\ProgramFiles\1cv8\logs" history="24"><event><eq property="name" value="mem"/></event><property name="all"/></log></config>The following configuration of the technological log collects the amount of allocated memory and outputs the MEM events when the amount increases:
<config xmlns="http://v8.1c.ru/v8/tech-log"><log location="C:\ProgramFiles\1cv8\logs" history="24"><event><eq property="name" value="mem"/></event><property name="all"/></log><mem/></config>3.24.2.8. \<ftextupd>
The <ftextupd> element includes generation of the extended information about the process of updating the full-text search indexes (the FTETXUpd event). If the element is not in file, then the extended information is not included in the technological log.
The element attributes:
logfiles
A presence of extended information in the FTEXTUpd event:
-
0 (false). Do not include.
-
1 (true). Include.
3.24.2.9. \<query>
The <query> element controls placing information to the technological log about fields that contain NULL when executing a request to an external data source but for which such a value is not allowed (the QERR event). If you enable this tracking, it can significantly slow down query execution.
The element attributes:
- checkActualNullable:
- Manages a collection of information:
-
1 (true). Field information will be collected.
-
0 (false) or the query element is missing in the file. No field information is collected.
3.24.2.10. \<plansql>
3.24.2.10.1. General description
If <plansql> is present, a collection of the query plans will be included that generate the DBMS when performing 1C:Enterprise queries. The query plans are located in the planSQLText property of the events related to execution of the queries of a specific DBMS (see \<property>).
<?xml version="1.0"?><config xmlns="http://v8.1c.ru/v8/tech-log"><log location="c:\log" history="24"><event><eq property="name" value="dbmssql"/></event><property name="sql"/><property name="plansqltext"/></log><plansql /></config>In the example above, collecting query plans (the <plansql /> element) and logging them (the <property name="plansqltext"/> expression) with the query texts (the <property name="sql"/> expression) in 1C:Enterprise query language are enabled for Microsoft SQL Server DBMS (the <eq property="name" value="dbmssql"/> expression).
3.24.2.10.2. Information on the DBMS query plans
For the information on operations with specific DBMS query plans, see the documentation for these DBMS: For PostgreSQL and Oracle Database, the format of a query plan exactly matches the format described in the documentation for a respective DBMS. The format of query plans for Microsoft SQL Server and IBM DB2 is simplified relative to original format. The original field names are saved. Information in these fields is interpreted in accordance with the information on a specific DBMS. These changes are reflected in the following sections.
3.24.2.10.3. The MS SQL Server query plan format
The planSQLText field for DBMS of Microsoft SQL Server consists of several records (lines). Each record consists of the following fields (in DBMS terms) in the order of description:
-
Rows
-
Executes
-
EstimateRows
-
EstimateIO
-
EstimateCPU
-
AvgRowSize
-
TotalSubtreeCost
-
EstimateExecutions
-
StmtText
The fields are separated by commas. The last field describing a query plan (StmtText) should be read to the end of the line ignoring the possible characters ",". The lines are separated by line breaks.
3.24.2.10.4. IBM DB2 query plan format
The field planSQLText for IBM DB2 consists of several records (lines), each of which consists of the following fields exposed in descending order. The field names correspond exactly to the fields from the explain tables, i.e. the text IO_COST (EXPLAIN_OPERATOR) means that the IO_COST field from the explain table EXPLAIN_OPERATOR will be placed in the query plan:
-
OPERATOR_TYPE (EXPLAIN_OPERATOR)
-
TOTAL_COST (EXPLAIN_OPERATOR)
-
STREAM_COUNT (EXPLAIN_STREAM)
-
IO_COST (EXPLAIN_OPERATOR)
-
CPU_COST (EXPLAIN_OPERATOR)
-
COMM_COST (EXPLAIN_OPERATOR)
-
BUFFERS (EXPLAIN_OPERATOR)
-
PREDICATE_TEXT (EXPLAIN_PREDICATE).
The fields are separated by commas. The last field describing a query plan (PREDICATE_TEXT) should be read to the end of line ignoring any commas. The lines are separated by line breaks.
At the end of a query plan description, a line is added that starts with the text Optimized query:; it contains a query text generated by the DBMS optimizer. The original query text is given in the SQL event of the technological log. A query ends with the end-of-line character. IDs from the optimized query variant are used in data located in the PREDICATE_TEXT column.
3.24.2.10.5. Query plan format for the file mode
A query plan for the file mode has the following format:
\<Query plan>
[CONST <Conditions>]<Selection list fields>[ [<Relation description> […]]][WITHOUT DUPLICATES][GROUPING][SORTING [CUTTING TOP]][UNION [ALL] <Query plan>]In this description:
-
WITHOUT DUPLICATES. Indicates that data without duplicates needs to be retrieved.
-
GROUPING. Indicates that the result needs to be grouped.
-
SORTING. Indicates that the result needs to be sorted.
-
CUTTING TOP. Indicates that only a part of records will be retrieved after sorting.
\<Conditions>
WHERE [(POST) | (END)] <Condition> [AND <Condition> […]]In this description:
-
(POST). Indicates that conditions are checked after the connection is established.
-
(END). Indicates that conditions are checked after the joins between all the tables are made.
\<Selection list fields>
Fields:(<Selection list expression> [, <Selection list expression>])\<Scanning description>
{{NOT SCAN} | {FULL SCAN} | {DISTINCT SCAN} | {RANGE SCAN}} [UNTIL FIRST NOT NULL] [USING [REVERSE] INDEX (<Index name>) [(<Number of index fields used> fields)]]In this description:
-
NOT SCAN. Indicates that the table will not be scanned.
-
FULL SCAN. Indicates that the whole table will be scanned.
-
DISTINCT SCAN. Indicates that different index values will be scanned.
-
RANGE SCAN. Indicates that a table section will be scanned by index.
-
UNTIL FIRST NOT NULL. Indicates that records will be scanned until the first record with a value other than NULL is received.
-
USING INDEX. Indicates that an index will be used for scanning.
-
REVERSE. Indicates that an index will be used in reverse order.
\<Source description>
{<Table name> [(TWICE)] <Scanning description>} |{NESTED SELECT <Scanning description> (<Query plan>)}<Conditions>\<Relation description>
{{ NESTED [OUTER] LOOP <Table name> [(TWICE)] <Scanning description>} |{ NESTED [OUTER] LOOP BY SELECT <Scanning description> (<Query plan>)}}<Conditions> [<Conditions>]In this description:
-
(TWICE). Indicates that the table is used in the query several times.
-
NESTED LOOP. Indicates that for each table entry on the left, a loop will be performed to bypass the table entries on the right.
-
OUTER. Indicates that if a record in the right table suitable by the linking condition is not found, the entire record will not be lost.
3.24.2.11. \<defaultlog>
The <defaultlog> element defines the default technological log settings. This log has a fixed event filter defined by 1C:Enterprise. This filter cannot be changed and can be represented by the following configuration file:
<log location="C:\Users\<UserName>\AppData\Local\1C\1cv8\logs" history="24" ><event><eq property="name" value="system"/><eq property="level" value="error"/></event><property name="all"/></log>This log records events that are critical for system operability. Composition of the events is not documented. Event generation is configured using the <system> element.
The element attributes:
| Attribute | Description |
|---|---|
| history | A number of hours at which information stored the technology log will be removed. If a value of this attribute is set to 0, the technological log will be disabled by default.
Default value: 24. |
| location | The name of the directory in which the default technological log will be placed. If the attribute is not specified, then the default technological log is saved to the following directories:
Different directories must be specified in the location attributes of the <log>, <dump> and <defaultlog> elements. |
Unlike the technological log files, the default technological log files are generated only when the corresponding event occurs.
3.24.2.12. \<system>
The <system> element manages generation of the SYSTEM events in the technological log. The technological log configuration file (logcfg.xml) can contain one, multiple, or none of these elements.
If the <system> element is not in the logcfg.xml file, the default technological log is configured as follows: a level of generation of the system events for all system components is defined as ERROR.
The events SYSTEM will be simultaneously placed in all configured technology logs (including the default technology log).
The element attributes:
| Attribute | Description |
|---|---|
| class | Specifies the name of the class for which generation of system events is configured. The class name is case-sensitive. |
| component | Specifies the name of the component for which generation of system events is configured. The component name is case-sensitive. |
| level | Sets the minimum level value for system-generated events. Possible values (in order of increasing importance):
If you specify the attribute, 1C:Enterprise will only generate the events of the specified level.
For example, if the logcfg.xml file contains <system level="info" />, 1C:Enterprise will register events with the INFO, WARNING, and ERROR levels. |
As an example, let's consider the situation where the logcfg.xml file contains the following fragment:
<system level="info"/><system level="debug" class="core::FileSystem" /><system level="warning" component="core82" />This means:
-
SYSTEM events with the INFO level (and higher) are generated for all system objects.
-
However, for the core::FileSystem class, events with the DEBUG level are generated.
-
For all classes of the core82 component, events with the WARNING level and higher are generated.
3.24.2.13. \<dbmslocks>
The <dbmslocks> element enabled collection of information about database locks in the technological log. If the element is not in the file, DBMS lock data is not included in the technological log.
Information about the DBMS locks is displayed in the technological log by special properties (see Writing information about mutual locks).
3.24.2.14. \<scriptcircrefs>
The <scriptcircrefs> element enables collection of information about circular references in the technological log. If the element is not in the file, circular reference data is not included in the technological log.
<?xml version="1.0"?><config xmlns="http://v8.1c.ru/v8/tech-log"><log location="D:\V82\logs" history="96"><event><eq property="name" value="SCRIPTCIRCREFS"/></event><event><eq property="name" value="Excp"/></event><property name="all"/></log><scriptcircrefs/></config>The given example implements the following settings:
-
Circular reference data collection is enabled (<scriptcircrefs/>).
-
Events placed into the technological log contain all properties (<property name="all"/>).
-
Only the SCRIPTCIRCREFS and EXCP events are recorded in the technological log (the <event> elements).
See also:
- Writing information about circular references (see Writing information about circular references).
3.24.2.15. \<sessiondatacontext>
<sessiondatacontext> manages displaying the list of session data changes and their contexts. The system slows down when specifying the <sessiondatacontext> element. So, we recommend that you enable the mode only when you analyze occurring errors.
The list is displayed to the Context property of the CALL event of the technological cluster manager log (rmngr) for the seanceParametersCommit and finishSeance methods (value of the MName property of the CALL event). The following operations are displayed:
-
Setting a session parameter value (SET).
-
Copying the parameter value to another session (COPY).
-
Deleting a session parameter (DELETE).
The context includes:
-
Name of a called infobase resource.
-
1C:Enterprise language stack from bottom to top similar to the Context property of other technological log events.
-
Code lines from the platform where session data is changed (for the SET operation).
The context list has the following format:
<context_list>: <one_context> [line_end # line _end <context_list>]<one_context>: <operation_list> line _end <context><operation_list>: <operation> [line_end <operation_list>]<operation>: {SET, <ID>, <size>} | {DELETE, <ID>} | {COPY, <ID>, <target_session_number>}<ID>. Number. crc32 of session parameter ID<size>. Number. Amount of serialized parameter value in bytes.<target_session_number>. Number. Number of the session to which a parameter is copies. Similar to the SessionID property value.<context>: an operation upon which the session data is changed.3.24.3. Technological log files
3.24.3.1. General information
The technological log is a directory containing files with data. Files with data are stored in a specific structure, which is determined by the settings for storing the technological log. The data placed in the files is determined by the settings for filtering properties and events of the setup file of technological log parameters.
3.24.3.2. Storing and naming technological log files
The log.location attribute defines a directory for storing technological log files. The log.placement attribute defines the directory structure:
| Value | Description |
|---|---|
| folders | Technological log files are located in directories with names of the <appName_pid> kind, where:
|
| plain | To store technological log files, directories are not created. Technological log files are stored directly in the directory specified in the log.location attribute. |
Full name of the file with technological log data depends on:
-
Specified storing structure.
-
Specified structure of the log file rotation.
-
Whether technological log file compression is required after rotating technological log files.
Standard name looks as follows: appName_pid_timestamp.log.counter.zip. In this name:
-
appName. Name of the operating system processor that creates a technological log file: 1cv8, 1cv8c, rphost, and so on.
-
pid. Number that is a process UUID in the used OS terms.
-
timestamp. File creation timestamp. The value is a multiple of the rotation period. The timestamp format is yymmddhh. It consists of:
-
yy. Last two digits of the year.
-
mm. Month number (with a leading zero).
-
dd. Day number (with a leading zero).
-
hh. Hour when the technological log file was created.
-
-
log. Extension of a file with technological log data.
-
counter. Monotonically increasing integral counter.
-
zip. Extension of a file archived to save space on the disk drive.
All file name elements cannot exist simultaneously:
| File name fragment | Condition for appearing |
|---|---|
| appName_pid | Exists in the file name when the attribute is log.location="plain" or log.rotation="size". |
| timestamp | Exists in the file name when the attribute is log.location="folders" or log.rotation="period". |
| counter | Exists in the file name when the attribute is log.rotation="size". |
| zip | Exists in the file name when the attribute is log.comperssion="zip". |
3.24.3.3. Deleting, rotating, and archiving technological log files
Technological log files can take up much space on the hard drive. Each file can take up much space. Usually, it is not required to store a technological log older than a certain date. The configuration file of the technological log setup provides a number of settings required to control the size of technological log files.
The log.history attribute allows you to specify how many hours later the technological log files will be deleted. For example, if you set this attribute to 24, there will be no files that were used more than 24 hours ago in the technological log directory. If the directory in which these files were located becomes empty after deleting the outdated files, the directory is also deleted. This ensures that the entire technological log directory tree does not contain outdated files and directories. The files will be deleted only for those applications that are running during deletion. This is how the "depth" of the technological log storage is regulated.
Deletion is supported for all file placement modes (hierarchical and plain) and for all file rotation options (by size or by time).
To limit the size of one technological log file to a certain size or time, use rotation settings of technological log files. Rotation is a process of creating a new technological log file when certain criteria are met (by size and creation time) that will be called rotation settings.
Technological log rotation can be performed by time or by size. The rotation rule is customized using the log.rotation attribute:
| Value | Description |
|---|---|
| period | Rotation is set by a specific period of time (in hours). The minimal rotation period is one hour.
The log.rotationperiod attribute is responsible for customizing the rotation. In case of rotation by period, the last two characters of the technological log file name represent the hour when the creation of this file started. This number is a multiple of the log.rotationperiod attribute.
File examples: 23080116.log
23080117.log
23080118.log |
| size | Rotation is set by a specific technological log file size (in megabytes). The minimal file size step is one megabyte.
The log.rotationsize attribute is responsible for customizing the rotation. A new file will be created if the current file size exceeds the one specified in the log.rotationsize attribute. The .counter suffix will be added to the outdated file, where counter is a monotonously increasing counter. The less the counter value, the older the technological log in this file.
File examples: ragent_18972.log
ragent_18972.log.1
ragent_18972.log.2 |
Technological log files represent a regular text data structure with a relatively large amount of duplicate data. This means that technological log files are easy to compress into archive storage formats. To enable compression in the technological log settings, use log.compress. If this attribute is set to zip, the corresponding technological log file will be compressed during rotation. The .zip extension will be added for compressed files.
File examples: 23080116.log.zip 23080117.log.zip 23080118.log ragent_18972.log ragent_18972.log.1.zip ragent_18972.log.2.zip
3.24.3.4. Technological log file format
Technological log files can be generated in two formats:
-
"Plain" text format.
-
JSON object list.
The log.format attribute set to text enables a "plain" text format. In this case, the technological log string is as follows (for log.placement="folders"):
45:31.831006-1,SCALL,2,level=INFO,process=1cv8,OSThread=13476,ClientID=1,Interface=7f58f27d-5ad8-43a1-aa1e-c982f41bed5c,IName=IRemoteCreatorService,Method=0,CallID=13126,MName=createRemoteInstance,DstClientID=0The event string format is mm:ss.tttttt-d, <event>, <nesting>, <level>, <properties>, where
| Mnemonics | Description |
|---|---|
| mm | Minute in the current hour. |
| ss | Second in the current minute. |
| tttttt | Microsecond in the current second. |
| d | Event duration in microseconds. |
| <event> | Event name (for details, see <event>). |
| <nesting> | Event level in the current thread stack. |
| <level> | Technological log event level. |
| <properties> | All the selected event properties (and the values of these properties) separated by comma. The event property has the <name> = <value> format, where <name> and <value> are an arbitrary text. If it contains "end of line" or "comma" characters, the text is enclosed in quotation marks or apostrophes, depending on which characters are less common in the string, and quotation marks or apostrophes in the text are doubled. |
If the storage structure of the technological log is set to "plain" (log.placement="plain"), the beginning of the string slightly changes:
2023-08-01T15:01:45.259000-14998,SCALL,0,level=INFO,process=1cv8c,OSThread=2732,ClientID=8,Interface=bc15bd01-10bf-413c-a856-ddc907fcd123,IName=IVResourceRemoteConnection,Method=0,CallID=26018,MName=send,DstClientID=122The main change is that the event date and time are fully included in the string in XML format. As a result, the 2023-08-01T15:01:45.259000-14998 string consists of:
-
2023-08-01T15:01:45. Date and time accurate to the second.
-
259000. Microsecond of the current second (similar to the tttttt value in hierarchical format).
-
14998. Event duration in microseconds (similar to the d value in hierarchical format).
The rest of the field in the event description are the same.
The log.format attribute set to json enables generating the technological log as a list of JSON objects. Unnamed log properties will become named:
| Property description | JSON ID |
|---|---|
| Even date and time (accurate to microseconds) | ts |
| Event duration (in microseconds) | duration |
| Event level in the current thread stack | depth |
| Event name in the current string |
Event string will look as follows:
{"ts":"2023-08-02T08:48:05.982000","duration":"46998","name":"SCALL","depth":"0","level":"INFO","process":"1cv8c","OSThread":"15968","ClientID":"8","Interface":"bc15bd01-10bf-413c-a856-ddc907fcd123","IName":"IVResourceRemoteConnection","Method":"0","CallID":"28284","MName":"send","DstClientID":"122"}Each property is represented as "key=value" in standard JSON format. Date and time are represented in XML format.
See also:
-
Date and time presentation in XML format (https://www.w3.org/TR/xmlschema-2/#dateTime).
-
Technological log events (see \<event>).
-
Properties of technological log events (see \<property>).
3.24.4. Writing exception contexts
An exception context is a sequence of the technological log events of EXCPCNTX type. Each EXCPCNTX event is a long event that had started but did not yet finish at the moment of a 1C:Enterprise emergency. In this case, the events are displayed in descending order of the nesting level. Type of the event that originated the EXCPCNTX event becomes a value of the SrcName property of the EXCPCNTX event.
An exception context is written to the technological log if it is enabled (at least one log element is in the logcfg.xml file) and one of the following abnormal situations has occurred:
-
An OS exception was thrown during 1C:Enterprise operation, the process (client or server) was terminated abnormally, a crash dump was generated.
-
A database exception occurred, an error message was displayed, 1C:Enterprise closed.
If a database error occurs, an event of EXCP type is written to the technological log if it meets the conditions defined in the technological log configuration file (logcfg.xml).
3.24.5. Writing information about mutual locks
Whenever a database query is performed (but not more often than once per second), an additional database query is sent in order to find out which thread was locked by which thread. A result of such a query is a table of pairs ("blocking victim", "blocking source") where:
-
Blocking victim. ID of a connection to DBMS waiting for a lock.
-
Blocking source. ID of a connection to DBMS that established the lock.
If there are several working processes in a cluster, then the query is executed by one of them. Mutual lock queries are numbered. Lock information is collected only if the <dbmslocks> element is present in the technological log configuration file.
The data from a resulting table is added to the context of each thread to which the received connections IDs from the DBMS correspond and will be displayed as the locking property values of the next technology log event. After the next event of the technological log is completed in the thread to the context of which information about locks is completed, the locking properties will be added to this event. Herewith, if a thread has been a lock target, the locking events will be cleared after the output. If a thread was a lock source, a cleanup is performed when a transaction is closed or rolled back.
Information about locks is added to threads in the following order:
-
If a target thread has no information about lock, it is passed a query number and source thread ID.
-
A query number is added to a lock source thread only if it has targets that have no information about their locks.
Information on locks:
-
If the thread is a source, time of detection.
-
If the thread is a target, time of detection.
-
Query number (if the thread is a target).
-
List of query numbers (if the thread is a source).
-
Source connection number (if the thread is a target).
Event blocking properties:
-
lka='1'. Thread is a source of blocking.
-
lkp='1'. Thread is a victim of blocking.
-
lkpid. Number of the request to DBMS of the "who blocked whom" kind (only for a victim thread of blocking). For example, '423'.
-
lkaid. List of request numbers to DBMS of the "who blocked whom" kind (only for a source thread of blocking). For example, '271,273,274'
-
lksrc. Blocking source connection number if the thread is a victim, for example, '23'.
-
lkpto. Time (in seconds) elapsed since detection of the thread being a victim. For example, '15'.
-
lkato. Time (in seconds) elapsed since detection of the thread being a source of blocking. For example, '21'.
Thus, to analyze locks, it is necessary to find the first event with lka and lkp properties in the technological logs of rphost processes, read the values of lkaid and lkpid properties, and find all the events with these property values in the logs of all the working processes of a cluster. The group of found events can be analyzed to find out "who locked whom", for how long, and what occurred during that time.
Also, in the Txt property of the TLOCK event in the technological log, a namespace where lock occurred can be displayed.
3.24.6. Writing information about circular references
When developing complex application solutions, it is possible to commit various errors that would lead to circular references. Circular references are the construction of data in an application when any data directly or indirectly refers to itself. A simplest example of such a circular reference is:
Structure1 = New Structure("Structure2Ref");Structure2 = New Structure("Structure1Ref");Structure1.Structure2Ref = Structure2;Structure2.Structure1Ref = Structure1;The memory used by such data cannot be released by the system upon work completion, for example, a form that contains such a program code in the built-in language. As a result, each opening of a form containing such code leads to the application session process taking up more RAM and not releasing it after use. Finally, the application is either terminated abnormally or starts using excessive RAM. The increased RAM usage by an application could, among others, lead to the general computer slowdown, up to the inability to open external data processors after the changes have been made, and so on.
Obviously, the circular references need to be eliminated. In order to locate errors in configurations that lead to circular references, several tools are available:
-
Modifying a configuration file of the technological log.
-
Using the command line to start a client or server application.
-
Using a parameter of the conf.cfg file.
-
Using a 1C:Enterprise language method.
Depending on the selected mode, a behavior of the system upon detecting circular references will be different:
-
When using the technological log, the SCRIPTCIRCREFS events will be placed in there. The application will not be interrupted.
-
Using the other tools would result in interruption of the application operation, which would trigger a corresponding message. It would be impossible to continue work after such message is issued.
The circular references are checked in the following cases:
-
When completing 1C:Enterprise language method: all local variables and parameters of the method are analyzed.
-
When setting a session parameter: a value that is set as a session parameter value is analyzed.
-
When calling a special method of 1C:Enterprise language.
In order to include information about circular references in the technological log, it is necessary to specify the <scriptcircrefs> element in the technological log configuration file logcfg.xml. In this case, 1C:Enterprise will start analyzing circular references. Whether the SCRIPTCIRCREFS events are written to the technological log depends on other settings of the technological log.
If the parameter EnableCheckScriptCircularRefs of the startup command has been used at starting a thin or thick client application, that means that the system will search for circular references in the client code of an application solution. This parameter also gets into the command line at launching the client application if the Detect 1C:Enterprise script circular references check box is selected in Designer settings (Main menu – Service – Parameters – 1C:Enterprise startup – Additional).
In order to enable search for circular references on the server side of the 1C:Enterprise system, it is necessary to start server with the / enableCheckScriptCircularRefs parameter. In this case, a search for circular references will be performed in all sessions serviced by server that has been launched with the referenced parameter.
If the EnableCheckScriptCircularRefs parameter of the conf.cfg is set to true, this means that a search for circular references while executing code in 1C:Enterprise language will be performed by all instances of 1C:Enterprise that use the conf.cfg file with the referenced parameter.
It is possible to initiate a search for circular references using the global context method CheckCircularReferencesOf1CLanguage(). When this method is called either the variable specified as a parameter of a method or all local variables available at the time the method is executed are checked.
See also:
-
<scriptcircrefs> (see \<scriptcircrefs>).
-
conf.cfg file.
-
General startup commands (see General startup commands).
3.25. nethasp.ini
3.25.1. General description
To configure the parameters of the interaction of the "1C:Enterprise" system with the HASP License Manager, the configuration file nethasp.ini is used.
The file is located in the directory with the 1C:Enterprise configuration files. It is optional. If this file is not in the directories of configuration files, then it is searched in the following directories:
-
On Linux:
-
Current directory
-
User home directory
-
Directory/etc
-
-
On macOS:
-
Current directory
-
User home directory
-
Directory/etc
-
-
On Windows:
-
Directory with the executable files representing the running version of 1C:Enterprise
-
Current directory
-
Directory %SYSTEMROOT%\System32 (for the 32-bit Windows) or %SYSTEMROOT%\SysWOW64 (for the 64-bit Windows)
-
%SYSTEMROOT%\System directory
-
%SYSTEMROOT% directory
-
Directories listed in the environment variable PATH
-
The nethasp.ini file contains four sections:
-
[NH_COMMON]. For general settings (see [NH_COMMON] section).
-
[NH_IPX]. For IPX (see [NH_IPX] section).
-
[NH_NETBIOS]. For NetBIOS (see [NH_NETBIOS] section).
-
[NH_TCPIP]. For TCP/IP (see [NH_TCPIP] section).
The [NH_COMMON] section contains global settings for all sections of the configuration file. All other sections contain settings affecting the performance of operations with a specific protocol.
In each section, the parameters specific to this section or overall to all sections can be used. Specifying a parameter overall to all sections in a section for one of the three protocols has a higher priority than setting in the [NH_COMMON] section (relative to this protocol).
To define additional settings for a specific protocol, the parameters specific to a particular section should be used.
Configuration files may contain comments. A comment begins with a ";" (semicolon) and continues to the end of the line.
A case of letters in parameter names does not matter.
Below is a list of parameters and their valid values which may be given in various sections of the nethasp.ini file.
When you install 1C:Enterprise, a sample of the nethasp.ini file is copied to the conf subdirectory of the 1C:Enterprise installation directory. This file is almost entirely composed of commented lines and does not override the default settings in any way but it contains at the same time the most complete list of parameters that can be used to configure the interaction of the 1C:Enterprise system with the HASP License Manager.
The parameters of each section of the configuration file are described in detail below.
3.25.2. [NH_COMMON] section
- NH_IPX
- Values: Enabled, Disabled. Specifies whether to use the IPX protocol to communicate with the HASP License Manager.
Default value: Enabled.
- NH_NETBIOS
- Values: Enabled, Disabled. Specifies whether to use the NetBIOS protocol to communicate with the HASP License Manager.
Default value: Enabled.
- NH_TCPIP
- Values: Enabled, Disabled. Specifies whether to use the TCP/IP protocol to communicate with the HASP License Manager.
Default value: Enabled.
- NH_SESSION
- Values: <Number>. Sets the interval (in seconds) during which the program tries to establish a connection with the HASP License Manager.
Default value: 2 seconds.
- NH_SEND_RCV
- Values: <Number>. Sets the maximum time of receiving or sending a package for the HASP License Manager.
Default value: 1 second.
3.25.3. [NH_IPX] section
- NH_USE_BROADCAST
- Values: Enabled, Disabled. Use the Broadcast mechanism only to search for the HASP License Manager in network. It makes sense to use this feature when working with the IPX protocol in networks other than Novell NetWare. Default value: Enabled.
- NH_BC_SOCKET_NUM
- Values: <Number>. Specifies the socket number for the broadcast mechanism. The number is specified in hexadecimal format.
Default value: 7483H.
- NH_SERVER_NAME
- Values: server1, server2, .... Defines names of servers where HASP License Manager is searched for. The parameter cannot contain more than 6 names. Each name cannot contain more than 7 characters.
- NH_DATFILE_PATH
- Values: <Path>. A path that will be used to search for the haspaddr.dat and newhaddr.dat files containing the HASP License Manager network address. Basically, it makes sense to use this parameter only with the NH_USE_BROADCAST=Disabled settings. Otherwise, the HASP License Manager address can be determined automatically.
- NH_SESSION
- Values: <Number>. Sets the interval (in seconds) during which the program tries to establish a connection with the HASP License Manager.
Default value: 2 seconds.
- NH_SEND_RCV
- Values: <Number>. Sets the maximum time of receiving or sending a package for the HASP License Manager.
Default value: 1 second.
3.25.4. [NH_NETBIOS] section
- NH_NBNAME
- Values: <Name>. Specifies the name of the HASP License Manager (name length is up to 8 characters).
- NH_USELANANUM
- Values: <Number>. Sets a number of the communication channel to be used as a communication channel.
- NH_SESSION
- Values: <Number>. Sets the interval (in seconds) during which the program tries to establish a connection with the HASP License Manager.
Default value: 2 seconds.
- NH_SEND_RCV
- Values: <Number>. Sets the maximum time of receiving or sending a package for the HASP License Manager.
Default value: 1 second.
3.25.5. [NH_TCPIP] section
- NH_SERVER_ADDR
- Values: <Address1>, <Address2>. Sets IP addresses for all HASP License Managers. You can use an unlimited number of IP addresses and host text names.
IP address: 192.168.0.65.
Local host name: hasp.local.
- NH_SERVER_NAME
- Values: server1, server2, .... Defines names of servers where HASP License Manager is searched for. The parameter cannot contain more than 6 names. Each name cannot contain more than 7 characters.
- NH_PORT_NUMBER
- Values: <Number>. Sets the network port number.
Default value: 475.
- NH_TCPIP_METHOD
- Values: TCP, UDP. Sends a TCP or UDP packet.
Default value: UDP.
- NH_USE_BROADCAST
- Values: Enabled, Disabled. Use the UDP broadcast mechanism.
Default value: Enabled.
- NH_SESSION
- Values: <Number>. Sets the interval (in seconds) during which the program tries to establish a connection with the HASP License Manager.
Default value: 2 seconds.
- NH_SEND_RCV
- Values: <Number>. Sets the maximum time of receiving or sending a package for the HASP License Manager.
Default value: 1 second.
3.26. nhsrv.ini
You can specify some HASP License Manager settings using the nhsrv.ini configuration file.
File location:
-
On Linux: specify the location of the nhsrv.ini configuration file using the -c parameter. The default configuration file location is undefined.
-
On Windows: this file is searched in various directories in the following order:
-
Directory where the executable file of HASP License Manager is located.
-
Current Windows directory.
-
Microsoft Windows system directory: %SYSTEMROOT%\system32 for the 32-bit version and %SYSTEMROOT%\SysWOW64 for the 64-bit version.
-
%SYSTEMROOT% Microsoft Windows directory.
-
The directories listed in the PATH environment variable (only when installing the HASP License Manager as a Microsoft Windows application).
-
For Windows, it is recommended that you place the nhsrv.ini file, if necessary, in the directory where the HASP License Manager executable file is located. Verifying that the HASP License Manager found and read the configuration file is possible using the log Activity Log/Server Activity Log.
The HASP License Manager is configured using the settings of various parameters in the [NHS_SERVER] section of the nhsrv.ini file:
- NHS_IP_LIMIT
- Values: <ipAddr>, <ipAddr>,...
Defines the range of network stations served by the HASP License Manager. For example: 10.1.1.1, 10.1.1.*,10.1.1.1/32, 10.1.1.1/24.
- NHS_ADAPTER
- Values: <ipAddrSubMask>,<ipAddrSubMask>,...
Specifies the IP address of one or more network cards to be served by the HASP License Manager. It is used when using the HASP License Manager with Win32. For example: 10.1.1.111, 255.255.0.0.
- NHS_USERLIST
- Maximum number of users simultaneously connected to the HASP License Manager. The default value is 250.
3.27. rescntsrv.lst
The file is located in the data directory of each working server marked as central server.
The file contains the values of the resource consumption counters defined by the counter settings. Values in this file are updated every 20 seconds. It is used to restore counter values after the server cluster restart.
3.28. ring-commands.cfg
This file contains the registry of module instances registered for use with the ring utility. This is a text file encoded in UTF-8 (without BOM). The file format is YAML.
The central registry file location (contains modules available to all users):
-
On Linux: /etc/1C/1CE/ring-commands.cfg.
-
On macOS: /Library/Application Support/1C/1CE/ring-commands.cfg.
-
On Windows: %ALLUSERSPROFILE%\1C\1C\ring-commands.cfg.
The central registry file location (contains modules available to the current user in addition to modules from the central registry):
-
On Linux: ~/.1C/1CE/ring-commands.cfg.
-
On macOS: ~/Library/Application Support/1C/1CE/ring-commands.cfg.
-
On Windows: %LOCALAPPDATA%\1C\1CE\ring-commands.cfg.
The file looks like this:
license:-file: C:\Program Files\1C\1CE\license-tools\lib\com._1c.license.activator.ring-0.1.0-12.jararch: x86_64version: 0.1.0In this file:
-
license. Module name. In the ring utility, this name is used as the <module> parameter.
-
–. Indicates the beginning of the module description.
-
file. Parameter contains the full name of the file with a module.
-
arch. Parameter describes the architecture of the used module.
-
version. Parameter describes a version of the used module.
3.29. swpuser.ini
The swpuser.ini file is designed to override the users on whose behalf working processes and the cluster manager will be executed. By default, working process and cluster manager run on behalf of the same user as the server agent.
If you need to change users on whose behalf server components (working processes and cluster managers) operate, change a user on whose behalf the server agent (ragent) is running. To change the users:
-
Provide users on whose behalf cluster components will operate with the required access rights.
-
Create the swpuser.ini file.
-
Change the startup (or autorun) settings of the server agent so that the agent server runs on behalf of the required user.
-
Run the server agent and the server cluster with new settings.
When you change users on whose behalf the server cluster components will run, consider the following system behaviour specifics and access rights that depend on the operating system:
-
Linux:
-
The server agent must run on behalf of the superuser (root).
-
When you start working processes and cluster managers, the system ignores the password and rmngr_pass parameters of the swpuser.ini configuration file.
-
Users on whose behalf working processes and cluster managers will run, must have:
-
Access rights.
-
Full access to the /var/1C directory.
-
-
-
Windows:
-
The server agent must run on behalf of the user who:
-
Belongs to the administrator group.
-
Has the following rights:
-
Adjust memory quotas for a process right.
-
Replace a process level token right.
-
Belonging to a group of administrators does not guarantee availability of the above rights.
-
-
-
Users on whose behalf working processes and cluster managers will run, must have:
-
Access rights.
-
Full access to the %ALLUSERSPROFILE%\1C\1cv8 directory.
-
-
Create operating system profiles for all users on whose behalf working processes and cluster managers will be started. You can do it when you create a user or interactively authorize on their behalf once. Once you create the profile, you can disable interactive authorization for applied users if there is such feature in the operating system.
In any operating system, if you change the user on whose behalf the server agent runs, specify users on whose behalf working processes and cluster managers operate using the swpuser.ini file. Otherwise, all server cluster processes will be performed on behalf of the system administrator. It is unsafe and must be avoided in industrial systems.
Let us take a closer look at the swpuser.ini file. You can find the file in the cluster data directory next to the cluster list file that server agent uses. The file has the following format:
user=<user name for rphost>password=<user password for rphost>[rmngr_user=<username for rmngr>[rmngr_pass=<user password for rmngr>]][registry=<cluster registry directory>][<port>:[user=<username for rphost>[password=<user password for rphost>]][rmngr_user=<username for rmngr>[rmngr_pass=<user password for rmngr>]][registry=<cluster registry directory>]]In this file, you can specify:
-
A user (and their password) on whose behalf the working processes will be executed in all clusters on this computer (user and password parameters). If not specified, then the production server is running on behalf of the same user as the server agent.
-
A user (and their password) on whose behalf the cluster managers will be executed in all clusters of this computer (rmngr_user and rmngr_pass parameters). If not specified, then the cluster manager is running on behalf of the same user as the server agent.
-
A root directory to place cluster data directories for all clusters of this main server (the registry parameter). If not specified, a directory of the reg_<PORT> kind in the data directory of the main cluster manager will be used (specified in the /d parameter when starting the cluster agent).
If you need to change the cluster registry directory, please keep in mind that the user on whose behalf a cluster manager is working must have full rights to this directory.
- If it is necessary to specify its own set of parameters for each cluster, create a section with the port number of the cluster manager in the swpuser.ini file and specify all the above parameters in this section.
If an individual cluster registry is specified for a cluster, then the user on behalf of which the manager of that cluster is running must have full rights in the specified directory.
If you need to specify a username with a domain, the username must be as follows: \domain-name\username.
Consider an example of using the swpuser.ini file. In this example, two clusters are running on a computer (with ports 1541 and 1641); the -d"d:\cluster\main" parameter is specified in the server agent launch line. The directory d:\cluster\main contains the file swpuser.ini containing the following:
user=srv_1c_rphostpassword=123rmngr_user=srv_1c_rmngrrmngr_pass=123registry=d:\cluster\common1541:user=srv_1c_rphost_1541password=123rmngr_user=srv_1c_rmngr_1541rmngr_pass=123registry=d:\cluster\oneAs a result:
-
For a cluster with cluster manager port 1541, the d:\cluster\one cluster registry directory and the srv_1c_rphost_1541 and srv_1c_rmngr_1541 users will be used for the working process and the cluster manager respectively. The srv_1c_rmngr_1541 user must have full access to the d:\cluster\one directory. The actual directory with cluster data will be d:\cluster\one\reg_1541.
-
A cluster with cluster manager port 1641 (and all clusters that can be added in the future if the swpuser.ini file is not changed) will use the subdirectories of the d:\cluster\common directory to store their cluster registries and srv_1c_rphost and srv_1c_rmngr users for working processes and the cluster manager respectively. The actual directory with cluster data will be d:\cluster\common\reg_1641.
3.30. testcfg.xml
The testcfg.xml file is designed to configure the range of ports used in automated testing of the application solutions running in the web client.
The file is located in the configuration files directory of the 1C:Enterprise instance used as a testing client. The file is optional.
If the file is not found, ports from the standard range (1538–1539) are used for communication.
Example:
<config xmlns="http://v8.1c.ru/v8/testcfg"><testports range="1538:1539"/></config>The attributes of the testports element are described below.
- range
- String. Contains a range of ports that the web server uses to organize communication between the test manager and test client.
3.31. Object list file
3.31.1. General description
This file is used to specify a list of objects that are used during configuration comparison operations or working with configuration storage.
The file with the list of objects is an XML file with the following structure:
<Objects…><Configuration…/><Object…><Subsystem…/></Object></Objects>Namespace: http://v8.1c.ru/8.3/config/objects.
3.31.2. \<Objects>
The root element of the file. This element can contain no more than one <Configuration> element and one or several <Object> elements.
The element may contain the following attributes:
- versionrequired
- Version of the file list.
String.
Only version 1.0 is supported. For any other version, error Version x.x of the object file list is not supported by this version of the platform will be generated.
3.31.3. \<Configuration>
Describes the root configuration object. No more than one element is allowed.
The element may contain the following attributes:
- includeChildObjectsrequired
- Use subordinate (to any degree) objects of the root configuration element in the operation.
Boolean.
3.31.4. \<Object>
Describes one configuration object (possibly together with the subordinate objects) involved in the operation. Any number of elements is allowed. No more than one <Subsystem> element can be subordinated to the element.
The element may contain the following attributes:
- fullName
- Full name of the object in the first configuration.
It is used only when configuring the configuration comparisons and when working with the configuration repository. When configuring the configuration comparisons, a fullName or a fullNameInSecondConfiguration attributes must be specified. An attribute is required when working with the configuration repository.
String.
- fullNameInSecondConfiguration
- Full name of the object in the second configuration.
Used only when configuring the configuration comparison. When configuring the configuration comparisons, a fullName or a fullNameInSecondConfiguration attributes must be specified.
String.
- includeChildObjectsrequired
- Use subordinate (to any degree) objects of the configuration object specified in the fullName attribute in the operation.
The subordinate objects of a subsystem include the subordinate subsystems and not the objects in the subsystem. To include the objects in the subsystem, use the nested<Subsystem> tag.
Boolean.
3.31.4.1. \<Subsystem>
Indicates that it is required to include objects, which are a part of the subsystem selected by the <Object> parent element, in the operation. This element is applicable only for the <Object> elements that describe the object of the subsystem. No more than one element is allowed.
The element may contain the following attributes:
- includeObjectsFromSubordinateSubsystemsrequired
- If this attribute is specified, all objects (along with the subordinate objects) included in the subsystem described by the parent element will be added to the list of the objects being processed.
Boolean.
- configurationoptional
- Indicates a configuration used as a source of the subsystem content when configuring a configuration comparison.
String.
Values:
-
Main. To be taken from the main configuration. Used by default.
-
Second. To be taken from the second configuration.
3.31.5. Examples
Use all the configuration objects.
<Objects xmlns="http://v8.1c.ru/8.3/config/objects" version="1.0"><Configuration includeChildObjects = "true"/></Objects>Use the Goods catalog with subordinate objects.
<Objects xmlns="http://v8.1c.ru/8.3/config/objects" version="1.0"><Object fullName = "Справочник.Товары" includeChildObjects= "true" /></Objects>Use only the Administration subsystem (without subordinate subsystems) and objects (together with subordinate objects) included in the Administration subsystem.
<Objects xmlns="http://v8.1c.ru/8.3/config/objects" version="1.0"><Object fullName = "Subsystem.Administration" includeChildObjects= "false"><Subsystem includeObjectsFromSubordinateSubsystems = "true"/></Object></Objects>Use the root configuration object without subordinate objects and the InventoryAccounting subsystem with subordinate subsystems and objects included in the InventoryAccounting subsystem and the subordinate subsystems.
<Objects xmlns="http://v8.1c.ru/8.3/config/objects" version="1.0"><Configuration includeChildObjects = "false"/><Object fullName = "Subsystem.InventoryAccounting" includeChildObjects= "true"><Subsystem includeObjectsFromSubordinateSubsystems = "true"/></Object></Objects>3.32. A file of merge settings
3.32.1. General information
When saving merge configuration settings, the following are saved to the file:
-
A file version of the settings, the minimum version of the platform that supports this version of the settings.
-
A description of configurations:
-
Name
-
Version
-
Vendor
-
-
Merge options:
-
Relation between the main and second configuration
-
Comparison languages
-
Permission to delete the main configuration objects
-
Object copying mode
-
-
Flags for using object/property in a merge
-
Established orders of subordinate objects
-
Settings for properties merging, including:
-
Modules
-
Forms
-
Spreadsheet document templates
-
Only the non-default settings are saved.
A settings file is an XML file with the following structure:
<Settings…><MainConfiguration><Name/><Version/><Vendor/></MainConfiguration><SecondConfiguration><Name/><Version/><Vendor/></SecondConfiguration><OldVendorConfiguration><Name/><Version/><Vendor/></OldVendorConfiguration><SupportRules>// Support rule setup</SupportRules><Parameters>// Merge options</Parameters><Conformities>// Manual object mapping settings</Conformities><Objects>// Object merge settings</Objects></Settings>The above sequence order of the elements subordinated to the <Settings> element is important and must be observed when the file is being generated on its own. Each element specified above consists of the nested elements (one or several) and may contain attributes. A more detailed description of the structure of each element is given below.
Namespace: http://v8.1c.ru/8.3/config/merge/settings.
3.32.2. \<Settings>
3.32.2.1. General description
The root element of the file.
The element may contain the following attributes:
- versionrequired
- Settings file version.
String.
- platformVersionoptional
- The minimum version of the 1C:Enterprise platform compatible with this configuration file.
The attribute is written while saving settings.
String.
3.32.2.2. \<MainConfiguration>
The element describes the main configuration options.
This element is optional.
- <Name>required
- Name of the main configuration.
String.
- <Version>optional
- Version of the main configuration.
String.
- <Vendor>optional
- Name of supplier.
String.
3.32.2.3. \<SecondConfiguration>
Description of the second configuration involved in merge.
This element is optional.
The content of this element is similar to the content of the <MainConfiguration> element (see \<MainConfiguration>).
3.32.2.4. \<OldVendorConfiguration>
Description of the configuration of a supplier participating in merge.
This element is optional.
The content of this element is similar to the content of the <MainConfiguration> element (see \<MainConfiguration>).
3.32.2.5. \<SupportRules>
3.32.2.5.1. General description
This element contains the support rule settings.
This element is optional.
The element's content is as follows:
<SupportRules><NewObjects><ChangesAllowedRule/><ChangesNotRecommendedRule/></NewObjects><DuplicateObjectsAndModifiedObjectsWithGetFromSecondConfigurationRule><ChangesAllowedRule/><ChangesNotRecommendedRule/></DuplicateObjectsAndModifiedObjectsWithGetFromSecondConfigurationRule><ModifiedObjectsWithoutGetFromSecondConfigurationRule><ChangesAllowedRule/><ChangesNotRecommendedRule/></ModifiedObjectsWithoutGetFromSecondConfigurationRule></SupportRules>3.32.2.5.2. \<NewObjects>
This element specifies the support rules for new vendor objects.
- <ChangesAllowedRule>optional
- Specifies support rules for the supplier objects with delivery rule Changes are allowed. Possible values:
-
ObjectNotEditable. Vendor object is not editable support rule.
-
ObjectIsEditableSupportEnabled. Vendor object is editable, support enabled support rule.
-
ObjectNotSupported. Vendor object is not supported support rule.
Default value: ObjectNotEditable.
- <ChangesNotRecommendedRule>optional
- Specifies support rules for supplier objects with delivery rule Changes are not recommended. Possible values:
-
ObjectNotEditable. Vendor object is not editable support rule.
-
ObjectIsEditableSupportEnabled. Vendor object is editable, support enabled support rule.
-
ObjectNotSupported. Vendor object is not supported support rule.
Default value: ObjectNotEditable.
3.32.2.5.3. \<DuplicateObjectsAndModifiedObjectsWithGetFromSecondConfigurationRule>
This element specifies the support rules for identical objects or objects with the Take from second configuration merge mode.
- <ChangesAllowedRule>optional
- Specifies support rules for the supplier objects with delivery rule Changes are allowed. Possible values:
-
KeepCurrentRule. Keep the current support rule (only for updating a supported configuration).
-
ObjectNotEditable. Vendor object is not editable support rule.
-
ObjectIsEditableSupportEnabled. Vendor object is editable, support enabled support rule.
-
ObjectNotSupported. Vendor object is not supported support rule.
Default value:
-
When enabling support: ObjectNotEditable.
-
When updating on support: KeepCurrentRule.
- <ChangesNotRecommendedRule>optional
- Specifies support rules for supplier objects with delivery rule Changes are not recommended. Possible values:
-
KeepCurrentRule. Keep the current support rule (only for updating a supported configuration).
-
ObjectNotEditable. Vendor object is not editable support rule.
-
ObjectIsEditableSupportEnabled. Vendor object is editable, support enabled support rule.
-
ObjectNotSupported. Vendor object is not supported support rule.
Default value:
-
When enabling support: ObjectNotEditable.
-
When updating on support: KeepCurrentRule.
3.32.2.5.4. \<ModifiedObjectsWithoutGetFromSecondConfigurationRule>
This element specifies the support rules for modified objects with a merge mode different from Take from second configuration.
- <ChangesAllowedRule>optional
- Specifies support rules for the supplier objects with delivery rule Changes are allowed. Possible values:
-
KeepCurrentRule. Keep the current support rule (only for updating a supported configuration).
-
ObjectNotEditable. Vendor object is not editable support rule.
-
ObjectIsEditableSupportEnabled. Vendor object is editable, support enabled support rule.
-
ObjectNotSupported. Vendor object is not supported support rule.
Default value:
-
When enabling support: ObjectIsEditableSupportEnabled.
-
When updating on support: KeepCurrentRule.
- <ChangesNotRecommendedRule>optional
- Specifies support rules for supplier objects with delivery rule Changes are not recommended. Possible values:
-
KeepCurrentRule. Keep the current support rule (only for updating a supported configuration).
-
ObjectNotEditable. Vendor object is not editable support rule.
-
ObjectIsEditableSupportEnabled. Vendor object is editable, support enabled support rule.
-
ObjectNotSupported. Vendor object is not supported support rule.
Default value:
-
When enabling support: ObjectIsEditableSupportEnabled.
-
When updating on support: KeepCurrentRule.
3.32.2.6. \<Parameters>
3.32.2.6.1. General description
This element contains the merge options.
This element is optional.
The element's content is as follows:
<Parameters><ConfigurationsRelation/><ComparisonLanguages><Language/></ComparisonLanguages><AllowMainConfigurationObjectDeletion/><CopyObjectsMode/></Parameters>- <ConfigurationsRelation>optional
- The element indicates the relationship between the main and the second configurations. Possible values:
-
ConfigurationsNotRelated. Main configuration is not related to the second one.
-
SecondConfigurationIsDescendantOfMainConfiguration. Second configuration is a descendant of the main one.
-
MainConfigurationIsDescendantOfSecondConfiguration. Main configuration is a descendant of the second configuration.
Default value: ConfigurationsNotRelated.
- <AllowMainConfigurationObjectDeletion>optional
- The element indicates whether objects of the main configuration can be deleted.
Boolean.
Default value: False.
- <CopyObjectsMode>optional
- The element indicates a copy mode for the objects of a configuration being loaded. In this case, the internal object IDs are not saved.
Boolean.
Default value: False.
3.32.2.6.2. \<ComparisonLanguages>
Indicates that the selective language comparison is used. The language codes used for comparison are described by the Language element.
3.32.2.7. \<Conformities>
This element contains a list of objects whose conformity is established manually.
This element is optional.
The element's content is as follows:
<Conformities><Conformity/></Conformities>- <Conformity>
- This element describes a pair of the matched objects.
This element contains the following attributes:
- fullNamerequired
- A full name of the main configuration object.
String.
- fullNameInSecondConfigurationrequired
- A full name of the second configuration object.
String.
3.32.2.8. \<Objects>
3.32.2.8.1. General description
This element contains the configuration settings for merging objects.
This element is optional.
The element's content is as follows:
<Objects><Configuration><MergeRule/><MergeRuleForPropertiesChangedTwice/><MergeRuleForPropertiesChangedOnce/><ObjectOrder/><Properties/></Configuration><Object><MergeRule/><MergeRuleForPropertiesChangedTwice/><MergeRuleForPropertiesChangedOnce/><ObjectOrder/><Subsystem><MergeRule/><MergeRuleForPropertiesChangedTwice/><MergeRuleForPropertiesChangedOnce/><ObjectOrder/></Subsystem><Properties/></Object></Objects>3.32.2.8.2. \<Configuration>
Describes the merge settings for the root configuration object. The element must include at least one of the elements: <MergeRule>, <MergeRuleForPropertiesChangedTwice>, <MergeRuleForPropertiesChangedOnce>, <ObjectOrder>, <Properties>.
- <MergeRule>optional
- Describes the merge mode for a root element.
- <MergeRuleForPropertiesChangedTwice>optional
- Describes the merge mode for twice-changed root element properties.
- <MergeRuleForPropertiesChangedOnce>optional
- Describes the merge mode for a property of the root configuration element changed in one configuration only.
- <ObjectOrder>optional
- Describes the order of subordinate objects.
- <Properties>optional
- Merge settings for properties of the root configuration object.
3.32.2.8.3. \<Object>
Describes the merge settings for a specific configuration object.
This element contains the following attributes:
- fullNameoptional
- Full name of the object in the first configuration.
When configuring a configuration merge, either the attribute fullName or the attributefullNameInSecondConfiguration must be specified.
String.
- fullNameInSecondConfiguration
- Full name of the object in the second configuration.
When configuring a configuration merge, either the attribute fullName or the attributefullNameInSecondConfiguration must be specified.
String.
The element must include at least one of the <MergeRule>, <ObjectOrder>, <Properties>, <Subsystem> elements.
If the merge mode is not DoNotMerge and:
-
If the object is in the main configuration only, the object will be deleted.
-
If the object is in the second configuration only, the object will be added.
- <MergeRule>optional
- Describes the object merge mode.
- <MergeRuleForPropertiesChangedTwice>optional
- Describes the merge mode for object properties that were changed twice.
- <MergeRuleForPropertiesChangedOnce>optional
- Describes the merge mode for properties of an object that has been changed in one configuration only.
- <ObjectOrder>optional
- Describes the order of subordinate objects in an object.
3.32.2.8.3.1. \<Subsystem>
Describes the merge settings for the objects that make up the subsystem. Applies only to objects describing the subsystem.
- includeObjectsFromSubordinateSubsystemsrequired
- If this attribute is specified, all objects (along with the subordinate objects) included in the subsystem described by the parent element will be added to the list of the objects being processed.
Boolean.
- configurationrequired
- From which configuration to take a composition of the subsystem.
String.
Values:
-
Main. To be taken from the main configuration. Used by default.
-
Second. To be taken from the second configuration.
- <MergeRule>optional
- Describes the object merge mode.
- <MergeRuleForPropertiesChangedTwice>optional
- Describes the merge mode for object properties that were changed twice.
- <MergeRuleForPropertiesChangedOnce>optional
- Describes the merge mode for properties of an object that has been changed in one configuration only.
- <ObjectOrder>optional
- Describes the order of subordinate objects in an object.
3.32.3. Auxiliary elements
3.32.3.1. \<Properties>
3.32.3.1.1. General description
The element describes merge settings for properties of the configuration object.
The element's content is as follows:
<Properties><Property name="…"><MergeRule/><MergeRuleForPropertiesChangedTwice/><MergeRuleForPropertiesChangedOnce/>- <Module>
<Methods/><Patch/></Module><FormModule><MergeRule/><MergeRuleForPropertiesChangedTwice/><MergeRuleForPropertiesChangedOnce/><Module/></FormModule><SpreadsheetDocument><MergeRule/><MergeRuleForPropertiesChangedTwice/><MergeRuleForPropertiesChangedOnce/></SpreadsheetDocument><Types>- <Type>
<MergeRule/></Type>...</Types><Content>- <Item>
<MergeRule/></Item>...</Content><Property/></Properties>3.32.3.1.2. \<property>
The element describes merge settings for a specific property of the configuration object.
This element contains the following attributes:
- name
- The name of a property of the configuration object. Depending on the value of this attribute, the <Property> element may include one of the following elements: <Module>, <FormModule>, <SpreadsheetDocument>, <Types>, or <Content>.
String.
The element includes the following elements:
- <MergeRule>
- Describes the property merge mode.
- <MergeRuleForPropertiesChangedTwice>
- Describes the merge mode for object properties that were changed twice.
- <MergeRuleForPropertiesChangedOnce>optional
- Describes the merge mode for properties of an object that has been changed in one configuration only.
3.32.3.1.3. \<Module>
The element describes advanced merge settings for a module.
The element contains the following elements:
- <Methods>
- Describes the module merge settings by procedures.
- <Patch>
- Information intended for automated modification of the module text in 1C:Enterprise language in the universal unidiff format.
3.32.3.1.4. \<FormModule>
The element describes advanced merge settings for a form module.
The element contains the following elements:
- <MergeRule>
- Describes the module merge mode.
- <MergeRuleForPropertiesChangedTwice>
- Describes the module merge mode if the form is changed twice.
- <MergeRuleForPropertiesChangedOnce>
- Describes the merge mode of a module changed in only one configuration.
\<Module>
Contains additional merge settings of the form module.
3.32.3.1.5. \<SpreadsheetDocument>
The element describes advanced merge settings for a spreadsheet document.
The element contains the following elements:
- <MergeRule>
- Describes a merge mode for a spreadsheet document. It can take one of the following values:
-
Merge. Merge documents.
-
Unite. Include the contents of both spreadsheet documents.
- <MergeRuleForPropertiesChangedTwice>
- Describes the merge mode if the spreadsheet document is changed twice.
- <MergeRuleForPropertiesChangedOnce>
- Describes the merge mode of a spreadsheet document changed in only one configuration.
3.32.3.1.6. \<Types>
3.32.3.1.6.1. Element description
The element describes advanced merge settings for types.
The element contains one or more elements:
\<Type>
Describes merge settings for a specific type.
3.32.3.1.6.2. \<Type>
This element contains the following attributes:
- namerequired
- Full name of the type to which the merge rule applies.
String.
The element must contain one <MergeRule> element.
- <MergeRule>required
- Describes the object merge mode.
3.32.3.1.7. \<Content>
3.32.3.1.7.1. Element description
The element describes additional settings for merging the contents of exchange plan, subsystems, and functional options.
The element contains one or more elements:
\<Item>
Describes merge settings for a specific element of the above objects.
3.32.3.1.7.2. \<Item>
This element contains the following attributes:
- namerequired
- Full name of the type to which the merge rule applies.
String.
The element must contain one <MergeRule> element.
- <MergeRule>required
- Describes the object merge mode.
3.32.3.2. \<Methods>
3.32.3.2.1. General description
This element describes merge settings for configuration modules. The element contains one or more elements describing settings:
-
Merging procedures/functions (the <Method> element). There can be one or multiple elements.
-
Merging section of declaration of variables (the <VariableDeclarationArea> element). No more than one instance of this element is allowed.
-
Merging the main section of application (the <MainArea> element). No more than one instance of this element is allowed.
The element's content is as follows:
<Methods><Method><MergeRule/><Patch/><Method/><VariableDeclarationArea><Methods/><Patch/></VariableDeclarationArea><MainArea><Methods/><Patch/></MainArea></Methods>3.32.3.2.2. \<Method>
The element describes settings for merging a specific procedure/function of a module in 1C:Enterprise language.
This element contains the following attributes:
- name
- Name of the method used in the main and the second configuration (if the NameInSecondConfiguration attribute is not specified).
String.
- nameInSecondConfiguration
- Name of the method used in the second configuration if the mapping was specified manually. Optional.
String.
Behavior specifics:
-
If a procedure is in both files, the merge will be performed according to the mode or contents of the <Patch> element will be used.
-
If a method is only in the first file, it will be deleted if a merge mode is not equal to DoNotMerge.
-
If a method is only in the second file, it will be added if a merge mode is not equal to DoNotMerge.
The element includes the following elements:
- <MergeRule>
- Describes the method merge mode.
- <Patch>
- Information intended for automated modification of the module text in 1C:Enterprise language in the universal unidiff format.
3.32.3.2.3. \<VariableDeclarationArea>
Describes merge settings for the variable declaration section.
The element includes the following elements:
- <MergeRule>
- Describes the merge mode for the variable declaration section.
- <Patch>
- Information intended for automated modification of the module text in 1C:Enterprise language in the universal unidiff format.
3.32.3.2.4. \<MainArea>
Describes merge settings for the main program section.
The element includes the following elements:
- <MergeRule>
- Describes the merge mode for the main program section.
- <Patch>
- Information intended for automated modification of the module text in 1C:Enterprise language in the universal unidiff format.
3.32.3.3. \<MergeRule>
The element describes a merge mode of an element. It can take one of the following values:
-
DoNotMerge. Do not merge.
-
GetFromSecondConfiguration. Take from the second configuration.
-
MergePrioritizingMainConfiguration. Merge prioritizing the main configuration.
-
MergePrioritizingSecondConfiguration. Merge prioritizing the second configuration.
-
MergeWithExternalTool. Merge using an external program (supported by modules).
3.32.3.4. \<MergeRuleForPropertiesChangedTwice>
Describes the merge mode for object properties that were changed twice. It can take one of the following values:
-
DoNotMerge. Do not merge.
-
GetFromSecondConfiguration. Take from the second configuration.
-
MergePrioritizingMainConfiguration. Merge prioritizing the main configuration.
-
MergePrioritizingSecondConfiguration. Merge prioritizing the second configuration.
-
MergeWithExternalTool. Merge using an external program (supported by modules).
3.32.3.5. \<MergeRuleForPropertiesChangedOnce>
Describes a merge mode for properties of the objects modified in only one of the configurations. It can take one of the following values:
-
DoNotMerge. Do not merge.
-
GetFromSecondConfiguration. Take from the second configuration.
3.32.3.6. \<ObjectOrder>
Describes the order of subordinate objects. It can take one of the following values:
-
GetFromMainConfiguration. Take the order from the main configuration.
-
GetFromSecondConfiguration. Take the order from the second configuration.
3.33. File of differences in configuration dumps
When executing the batch launch command of designer/ DumpConfigToFiles with the –getChanges parameter, a file is generated that contains a list of differences between the two compared configurations.
A file is generated in UTF-8 encoding with the following format:
-
Each object in this file is described in a separate line.
-
If no changes are found, an empty file is generated.
-
If configuration changes require full dump, then, instead of a list of objects, the file will contain a single line: FullDump.
-
Each line is preceded by a prefix describing the nature of a change:
-
New:. Contains a full name of the added object.
-
Modified:. Contains a full name of the modified object. Renaming an object is fixed in a separate line.
-
3.34. Standalone server configuration file
3.34.1. General information
The standalone server configuration file is a file in YAML 1.2 format (https://www.yaml.org/spec/1.2/spec.html) encoded in UTF-8. The configuration file contains parameters that define the server settings and parameters of the infobase that is served by the server.
In the case of using the time range value, the units of measurement should be indicated:
-
nano, ns. Nanoseconds.
-
micro, us. Microseconds.
-
milli, ms. Milliseconds.
-
seconds, sec, s. Seconds.
-
minutes, min, m. Minutes.
-
hours, h. Hours.
-
days, d. Days.
The configuration file consists of the following sections, whose format is given below:
-
server. Contains server parameters.
-
database. Contains database parameters.
-
infobase. Contains infobase parameters.
-
http. Contains parameters for web access to the infobase.
-
gates. Contains a description of infobase access methods.
-
features. Describes standalone server features.
3.34.2. server
Section describes server parameters.
Section parameters:
| Parameter | Description |
|---|---|
| access-right-audit-events-recording | Manages logging of access right audit events:
Default value: deny. |
| host | Name of the computer that is running standalone server. |
| address | The network address that will be used to access the standalone server copy. You can specify the IP-address of the server, as well as aliases. The parameter can take values:
Default value: localhost. |
| port | Network port to be used to access the application. The value of this parameter can be a number from 1 to 65535.
Default value: 8314. |
3.34.3. database
The section describes the database parameters. Depending on the version in use of the standalone server, the following parameters are required:
-
The infobase is located in the DBMS. Required parameters: dbms, server, and name.
-
The infobase is located in the 1Cv8.1CD file. Required path parameter.
The dbms and path parameters cannot be used at the same time.
Section parameters:
| Parameter | Description | |
|---|---|---|
| + | dbms | Type of the DBMS in use. The parameter can take values:
The remaining parameters of the indicated DBMSs correspond to the requirements of 1C:Enterprise in client/server mode. |
| + | name | Database name. |
| password | The DBMS user password. | |
| + | path | Path to the 1Cv8.1CDdatabase file. |
| + | server | DBMS server name. |
| user | The name of the user on behalf of whom the standalone server will connect to the DBMS. |
The first column contains a flag indicating whether the parameter is required.
3.34.4. infobase
The section describes the infobase parameters, which is located in the database described in the database section.
Section parameters:
| Parameter | Description |
|---|---|
| id | Infobase identifier in UUID format.
You can specify a unique symbolic ID. In this case, each time the server starts, the UUID will be generated (can be used for testing purposes).
Default value: unique. |
| name | Infobase name If not specified, it will be generated as a string presentation of the actual infobase ID value. |
| distribute-licenses | Manages the issuance of client licenses by the standalone server.
The parameter can take values:
|
| schedule-jobs | Manages the scheduled job execution.
The parameter can take values:
|
| disable-local-speech-to-text | Manages local speech recognition.
The parameter can take values:
|
3.34.5. http
3.34.5.1. General information
The settings described in the http section of the standalone server configuration file are similar to the publication settings that are stored in the default.vrd file.
3.34.5.2. General section
The section describes the parameters for accessing the infobase through a web server (which is the standalone server). It is permissible to create several access options to one infobase using a web server.
Section parameters:
| Parameter | Description |
|---|---|
| application | The section that describes accessibility using client applications. |
| auth | The section that describes authentication parameters. |
| base | The base path to access the infobase using a web server. You can organize several publications to one infobase that differ in the basic path and other publication parameters.
Default value: /. |
| distro | The section that describes the parameters for publishing client application distribution package. |
| http-services | The section that describes the Http-service publication parameters. |
| odata | The section that describes the Odata publication parameters. |
| web services | The section that describes the Web services publication parameters. |
| zones | The section that describes separator parameters. |
3.34.5.3. Authentication parameter (auth)
3.34.5.3.1. OpenId authentication parameters (openid)
Section parameters:
| Parameter | Description |
|---|---|
| provider | The section that describes the parameters of the infobase that acts as an OpenID provider. |
| rely | The section that describes the parameters for accessing the OpenId authentication provider. |
3.34.5.3.2. Parameters for accessing the OpenId authentication provider (rely)
Section parameters:
| Parameter | Description |
|---|---|
| url | Specifies the URL of 1C:Enterprise infobase used as OpenID provider. |
3.34.5.3.3. Parameters of the infobase acting as an OpenID provider (provider)
Section parameters:
| Parameter | Description |
|---|---|
| lifetime | Indicates the lifetime of the identifier authentication flag in seconds.
Default value: 86,400 seconds. |
| return-to | It is a regular expression that defines the mask for permitted names of websites that can be used to redirect the user's web browser (see openid.return_to request parameter) after OpenID provider command is executed.
One or more elements may be specified. |
3.34.5.3.4. OpenIDConnect (openid-connect) authentication parameters
Section parameters:
| Parameter | Description |
|---|---|
| allow-standard | Allows or prohibits 1C:Enterprise authentication. If this element is false, authentication using the providers described in default.vrd file will be available in the authentication form on web client startup.
Possible values:
|
| providers | This element contains description of external OpenID providers that support OpenID Connect v1.0 authentication protocol (https://openid.net/connect/). The description is an array of objects, where each object describes one OpenID provider. The array is represented by JSON serialization. |
3.34.5.4. Separator parameters (zones)
The section contains a separator description for the base access directory. If the application contains several separators, this section may contain several records. Each record describes the parameters of one separator in the order of their (separators) sequence in metadata.
Each separator is described by the following parameter set:
| Parameter | Description |
|---|---|
| safe | The parameter manages the option to change the separator value from the application code:
Default value: false. |
| specify | Determines whether the published infobase address must contain this separator value.
Default value: false. |
| Explicitly specifies the value of separator placed in this position. |
3.34.5.5. Managed application publishing parameters
Section parameters:
| Parameter | Description |
|---|---|
| exit-url | Specifies the URL to open after exiting the web client. |
| publish | Determines the option to use the client application to access the infobase:
Default value: true. |
3.34.5.6. OData (OData) publication parameters
Section parameters:
| Parameter | Description |
|---|---|
| publish | Manages the availability of the standard OData interface through the specified publication.
Default value: false. |
| reuse-sessions | The section that describes the reuse-sessions. |
3.34.5.6.1. Reuse-sessions mode parameters
Section parameters:
| Parameter | Description |
|---|---|
| max-age | The session idle time after which the session is terminated (in seconds).
Default value: 20 seconds. |
Session reuse mode. The parameter can take values:
Default value: autouse. |
|
| pool-size | The maximum number of sessions that can be generated during automatic session management.
Default value: 10 seconds. |
| pool-timeout | Time to wait for an available session after the session pool is filled (in seconds).
Default value: 5 seconds. |
3.34.5.7. Web service publication parameters
3.34.5.7.1. General parameters
The section describes the access parameters to the Web services that are implemented in the application.
Section parameters:
| Parameter | Description |
|---|---|
| publish-by-default | If this parameter is not set or set to true, all Web services that are added to the configuration will be automatically available for use, unless explicitly prohibited by the service parameter.
Default value: true. |
| publish-extensions-by-default | If the parameter is set to true, all web services that are located in attached extensions are allowed. If the attribute is set to false, web services in extensions are not allowed.
Default value: false. |
| service | The section that describes the web service parameters. You can specify one or more services (if several Web services are developed in the configuration). |
3.34.5.7.2. Web services parameters
Section parameters:
| Parameter | Description |
|---|---|
| alias | Web service synonym. |
| name | Web service name. |
| publish | You can publish (use) the web service.
Default value: true. |
| reuse-sessions | This section describes how to use sessions again when operating with the web service (for more information about the section parameters, see Reuse-sessions mode parameters). |
3.34.5.8. Parameters for publishing http-services
3.34.5.8.1. General parameters
The section describes the access parameters to the HTTP-services that are implemented in the application.
Section parameters:
| Parameter | Description |
|---|---|
| publish-by-default | If this parameter is not specified or set to true, all HTTP services that are added to the configuration will be automatically available for use unless it is explicitly prohibited by the service parameter.
Default value: true. |
| publish-extensions-by-default | If the attribute is set to true, all HTTP services that are located in connected extensions will be available for use. If the parameter is set to false, the HTTP services from the extensions will not be available for use.
Default value: false. |
| service | The section that describes the Http-service parameters. You can specify one or more services (if several HTTP services are developed in the configuration). |
3.34.5.8.2. HTTP service parameters
Section parameters:
| Parameter | Description |
|---|---|
| name | HTTP service name. |
| publish | You can publish (use) the HTTP service.
Default value: true. |
| reuse-sessions | This section describes how to use sessions again when operating with the HTTP service (for more information about the section parameters, see Reuse-sessions mode parameters). |
| root | Root URL of the HTTP service property. The property is used to determine the HTTP service that should process the received request. |
3.34.5.9. Distribution package publication parameters (pubdst)
Section parameters:
| Parameter | Description |
|---|---|
| lin32 | The full file name of the distribution package file with archive for the 32-bit client application for Linux. |
| lin64 | The full file name of the distribution package file with archive for the 64-bit client application for Linux. |
| lindeb32 | The full file name of the distribution package with an archive for the 32-bit client application for Linux (DEB package). |
| lindeb64 | The full file name of the distribution package with an archive for the 64-bit client application for Linux (DEB package). |
| linrpm32 | The full file name of the distribution package with an archive for the 32-bit client application for Linux (RPM package). |
| linrpm64 | The full file name of the distribution package with an archive for the 64-bit client application for Linux (RPM package). |
| mac64 | The full file name of the distribution package file with archive for the 64-bit client application for macOS. |
| win32 | The full file name of the distribution package file with archive for the 32-bit client application for Windows. |
| win64 | The full name of the distribution package file with an archive for the 64-bit client application for Windows. |
3.34.6. gates
3.34.6.1. General information
This section describes methods to access an infobase. Each access method is referred to as "gateway". The following gateway types are supported:
-
For direct access to the server over TCP/IP. The gateway name is "direct". For details, see direct.
-
Access over SSH. The gateway name is "ssh".
-
Access over HTTP. The gateway name is "http".
-
Description of parameters for getting performance metrics over HTTP. The gateway name is "monitor".
3.34.6.2. direct
3.34.6.2.1. General information
This section describes parameters for accessing the infobase over TCP/IP (using a direct connection). The section parameters are similar to the launch parameters of a server cluster in terms of the used network ports and security level. If this gateway is set up, the standalone server will support direct connection of Designer and the thin client. The section contains a description of gateway parameters.
3.34.6.2.2. Section description
The section describes the only direct connection gateway.
Section parameters:
| Parameter | Description |
|---|---|
| regport | Parameter similar to the value of the /regport command parameter of the command line of a server cluster startup.
Default value: 1541. |
| range | Parameter similar to the value of the /range command parameter of the command line of a server cluster startup.
Default value: 1560:1591. |
| seclevel | Parameter similar to the value of the /seclevel command parameter of the command line of a server cluster startup.
Default value: 0. |
3.34.6.3. ssh
3.34.6.3.1. General information
This section describes parameters of infobase access over SSH. If this access type is set, the standalone server executes SSH- and SFTP server functions and accepts commands using these protocols. The section contains description of gateway parameters.
See also:
- Running Designer in agent mode (see Running Designer in agent mode).
3.34.6.3.2. Section description
The section name is a name of a specific gateway.
Section parameters:
| Parameter | Description |
|---|---|
| address | Network interface used by the gateway. |
| host-key | Path to a private host key.
The auto value indicates that a private host key is a file located at:
|
| port | Port served by the gateway.
Default value: 8282. |
3.34.6.4. http
3.34.6.4.1. General information
This section describes parameters of infobase access over HTTP. The section contains description of gateway parameters.
3.34.6.4.2. Section description
The section name is a name of a specific gateway.
Section parameters:
| Parameter | Description |
|---|---|
| address | Network interface used by the gateway. |
| endpoint | Description of publishing point parameters. Publishing point fully matches the http section in terms of its parameters and their structure.
In other words, all parameters of the main http section (and below by structure) must be located in the following section: gates – http – section_name – endpoint. |
| port | Port served by the gateway. |
3.34.6.5. monitor
3.34.6.5.1. General information
This section describes the parameters of getting performance metrics over HTTP. If the connection to a standalone server over HTTP is disabled (using the configuration file or command-line options of the standalone server startup), getting performance metrics also becomes unavailable. The section contains description of gateway parameters.
You can access metrics without authentication.
3.34.6.5.2. Section description
The section name is a name of a specific gateway.
Section parameters:
| Parameter | Description |
|---|---|
| address | Network interface used by the gateway. The parameter can take values:
Default value: localhost. |
| base | Base access path to the cluster performance monitor over HTTP.
Default value: /. |
| port | Port served by the gateway.
Default value: 1555. |
3.34.7. features
The section describes standalone server features. In particular, what features will be available or unavailable for the standalone server which uses a configuration file with the following parameters:
Section parameters:
| Parameter | Description |
|---|---|
| direct-gate | Manages access to the standalone server over TCP/IP (direct connection). If the option is disabled, you cannot access the standalone server over TCP/IP including debugging over TCP/IP.
The parameter can take values:
Default value: enable. |
| extended-designer-features | Manages availability of extended Designer functionality. If the option is disabled, you cannot use the following standalone server features:
The parameter can take values:
Default value: disable. |
| http-gate | Manages access to the standalone server over HTTP. If the option is disabled, you cannot access the standalone server over HTTP including debugging over HTTP.
The parameter can take values:
Default value: enable. |
| ssh-gate | Manages access to the standalone server over SSH.
The parameter can take values:
Default value: enable. |
3.34.8. debug
3.34.8.1. General information
The section describes the debugging parameters that will be used in the standalone server instance that uses a configuration file with these parameters. For details on debugger on a standalone server, see Debugging using the standalone server.
3.34.8.2. General section
The section describes the debugger mode.
Section parameters:
| Parameter | Description |
|---|---|
| address | IP address served by the debug server over TCP/IP.
Possible values:
Default value: localhost. |
| password | Password to access the debug server. |
| port | Network port served by the debug server over HTTP.
Default value: 1550. |
| type | Debugger mode. Possible values:
|
3.34.8.3. Parameters of an external debug server (server)
Section parameters:
| Parameters | Description |
|---|---|
| url | Address of an external debug server. |
3.35. Configuration file of debug server user setup
3.35.1. General information
The file specifies users that have access to debugging and infobases where such debugging is available. In this configuration file, you can also set up debug features for the users.
The configuration file is an XML file in UTF-8 encoding. BOM is optional.
The XML file has the following structure:
-
config. Root element of the file.
-
infobase. Describes one or multiple infobases for which debugger users are specified. There can be one or multiple elements.
-
user. Describes an infobase user whose debug features must be set up. Usernames must be unique within an infobase. There can be one or multiple elements.
-
allowConfigurationExtensionsDebugging. Describes the list of extensions which the user can debug. No more than one element is allowed. If the element is not set, the user can debug all extensions connected to the infobase.
- configurationExtension. Describes an extension which the user can debug in the infobase. There can be one or multiple elements.
-
zones. Specifies the zone to which the user connects. Separator values determine the zone. There can be one element or no elements. If the element is not set, the user can view all debug items from all zones of a separated infobase.
- zone. Describes a separator value. There can be one or multiple elements.
-
-
-
Configuration file example:
<?xml version="1.0" encoding="UTF-8"?><config><infobase name="test_at_20"><user name="John Smith"storedPasswordValue="QL0AFWMIX8NRZTKeof9cXsvbvu8="comment="Custom user description"allowPrivilegedModeDebugging="false"allowConfigurationDebugging="true"allowExpressionEvaluation="false"><allowConfigurationExtensionsDebugging><configurationExtension name="Расширение1"/></allowConfigurationExtensionsDebugging><zones><zone name="Разделитель1" value="1"/><zone name="Разделитель2" value="a"/></zones></user></infobase></config>We described XML file elements whose application differs from a simple specification in more detail below.
3.35.2. infobase
The element describes an infobase for which user permissions are specified. Use the name attribute to specify an infobase name. An infobase name or a regular expression can serve as the attribute name. The regular expression describes multiple infobases for which users' debug rights are specified.
When you edit regular expressions, use POSIX Basic Regular Expressions (https://pubs.opengroup.org/onlinepubs/9699919799/basedefs/V1_chap09.html#tag_09_03).
Example:
<infobase name = "test_base"><infobase name = "Infobase*">3.35.3. user
This element describes a user and their application debugging capabilities. The user capabilities are described with the following element attributes:
name
String.
This attribute contains a debug server username. The attribute value is an ID of the user who attempts to connect to the debug server. The property value must be unique within the infobase.
- storedPasswordValue
- String.
The attribute contains a value (a Base64 string) received from the SHA1 hash of the user password specified as an UTF-8 encoded string.
To receive this value, you can use the Designer dialog box (Main menu – Administration – Get the stored password value for the debug server user...) or the following code in 1C:Enterprise language:
Hashing = New DataHashing(HashFunction.SHA1);Hashing.Add("UserSecretPassword");Hash = Hashing.HashSum;Hash64 = Base64String(Hash);- comment
- String.
An arbitrary string used to describe this debug user.
- allowPrivilegedModeDebugging
- Boolean.
The attribute manages whether the user can debug the main configuration code:
-
true. User can debug the main configuration code.
-
false. User cannot debug the main configuration code.
- allowConfigurationDebugging
- Boolean.
The attribute manages whether the user can debug modules in privileged mode:
-
true. User can debug when privileged mode is enabled.
-
false. User cannot debug when privileged mode is enabled. Debugging will resume after privileged mode is disabled.
- allowExpressionEvaluation
- Boolean.
The attribute manages whether the user can calculate expression values while debugging:
-
true. User can calculate and view expressions while debugging. All expressions calculated by the user are recorded in the event log.
-
false. User cannot calculate and view expressions while debugging.
3.35.4. configurationExtension
This element describes an extension that the user can debug in the infobase. An extension name is specified using the name attribute of this element. The extension name can also be specified using a regular expression.
When you edit regular expressions, use POSIX Basic Regular Expressions (https://pubs.opengroup.org/onlinepubs/9699919799/basedefs/V1_chap09.html#tag_09_03).
3.35.5. zone
This element describes separator values (if they are available in the infobase) to be used to connect to the infobase.
This element contains the following attributes:
name
String.
The attribute must contain the separator name as specified in the configuration.
value
String.
The attribute contains a value to be set for the separator. The value generation rules match the rules that are used to specify the separator values in the default.vrd file (see \<zone>).
Appendix 4. Startup command lines of system components and description of additional utilities
4.1. Verification utility (chdbfl)
This utility is designed for offline verification and correction of database files.
This utility is designed to work only with the file database. The utility is available only in the 32-bit version. A file database is used:
-
To store a file infobase
-
To store a configuration storage
To start the utility from 1C:Enterprise installation directory, you need to run chdbfl application. This will display a window (see fig. 78).
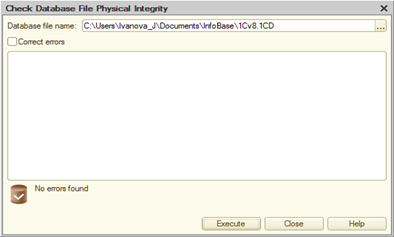
Fig. 78. Infobase verification and correction utility
In the field Name of infobase file, specify or select the infobase file name.
Select the check box Fix detected errors to fix the errors found during verification. Select this checkbox to optimize the storage of internal information that accelerates infobase opening (see Verifying and repairing an infobase).
To start the utility, click Execute. Make sure the infobase is not yet opened in Designer or in 1C:Enterprise mode.
Messages about the errors found are displayed in a text box.
Messages about the results of the utility's performance are displayed below the text box.
This utility can also be used for verification of configuration storage.
It is recommended to follow these steps when using the utility:
-
Create a backup of the database file.
-
Perform verification without selecting the Fix the detected errors check box.
-
If during verification no issues are detected, a verification with the selected Fix errors detected check box can be performed. At the same time, re-indexing of the infobase or infobase storage will be executed. It is recommended to perform such an operation regularly.
-
If any issues have been detected during verification, you should correct the infobase errors. If the utility reports lost data, it is not recommended to continue working with this infobase. You can:
-
Retrieve the remaining data and configuration that can be used to create a new infobase.
-
Get the latest version of configuration that can be used to create a new storage.
-
4.2. Integrity monitoring utility (ci)
4.2.1. General information
The integrity monitoring utility (ci) is designed to monitor the state of the file system objects and the database used in 1C:Enterprise, and to detect the situation of changes in these objects. To determine whether an object has remained unchanged, a comparison of the hash sums of the monitored objects ((control objects)), which are calculated using the SHA-1 algorithm (the cryptographic hashing algorithm), is used. Verification process consists of generating the template hash sum values and the subsequent regular verification.
The utility works with the following control objects:
-
Files located in the file system
-
Some tables of 1C:Enterprise database
Lists of control objects are specified using the data source template. The data source template is described by a universal data source descriptor (see A universal descriptor of the source of information). Such templates can be specified in the startup command line of the utility directly or as content of the file specified in the in parameter (see Using the utility). Such file is known as a template list (see List of information source templates).
A list of control objects and the corresponding hash sums (this pair is called reference) is stored in a special reference database that is generated by the utility when started in the template database generation mode. When the utility is started in verification mode, the hash sums are calculated and reconciled with the template database generated earlier. As a result, a report file is generated.
The utility does not automatically control self-integrity. To restrict access to the utility, template database, and verification results, use the operating system functionality.
4.2.2. List of information source templates
If it is necessary to specify several control objects or a set of objects for a simultaneous verification, a special file which is a list of information source templates can be used. Each line in this file contains a template of the source of information. The number of lines in the file is unlimited. A comment starts with the character "#". A comment line as well as the empty lines and the lines consisting of spaces, are ignored while generating a list of control objects.
A template list file should be in the UTF-8 encoding only.
Examples of universal descriptors of data sources:
# control object. The /tmp/vokas/spru.cvs file.file:///tmp/vokas/spru.cvs# control object. All files in the c:\Program Files\1cv8\8.3.4.408\bin directory.rdir://c:\Program Files\1cv8\8.3.4.408\bin# control object. All .rc and .cfg files in the /home/user/.kde directory and subdirectories.rdir:///home/user/.kde?*.rc,*.cfg# control object. All files that begin with "V8", files in the /tmp directory, no subdirectories.ndir:///tmp?V8*.txt# control object. All tables supported in the database that is located on the MS SQL Server.mssql://user:password@server/instance/dbname# control object. The "users" and "config" tables on the PostrgeSQL server.postgre://user:password@server:123/dbname?users,config# control object. The "users" tables in a file database.dbe://c:\DB\checked_db?users4.2.3. A universal descriptor of the source of information
To describe the control object, a special format is used: the universal descriptor of the source of information. In general, the universal descriptor of the information source looks like:
proto://[user:[password]@][server[:port]][/path/resource][?mask]
Let's consider in detail each component part of the descriptor:
-
proto. Description of the control object kind. The following modes are available:
-
file. Separate file in the file system.
-
ndir. Files located in the directory (without traversing subdirectories).
-
rdir. Files located in the directory and all the nested directories.
-
mssql. Database located in the Microsoft SQL Server DBMS.
-
ora. Database located in the Oracle Database DBMS.
-
postgre. Database located in the PostgreSQL DBMS.
-
db2. Database located in the DB2 DBMS.
-
dbe. File version of a 1C:Enterprise database.
-
-
user:password@. Describes a username (user) and a password (password) required to access the control object. If the database tables are monitored, then the DBMS user is specified as a user instead of the 1C:Enterprise database user. It is recommended to use the parameters of the user on whose behalf the 1C:Enterprise database was created. The "@" symbol is required if the username and password are specified.
-
server: port. Computer name and access port on which the DBMS that serves the 1C:Enterprise database is running.
-
/path/resource. Full path to the file or the directory in the notation of the operating system used. On Windows, it must start with the disk name. On Linux, it must start with the root file system designation (/). If a connection to the client-server version of the database is used, then as a path can be taken the name of database in terms of the used DBMS if the DBMS does not support the organization of server instances and a combination consisting of the name of instance and the database name for the DBMS supporting this organization. If a database name with an indication of a DBMS instance is specified as a path to a resource, then an access to DBMS is performed using the default access port, and a specification of the port number in description of the name of server on which the DBMS operates, is not supported.
-
?mask. Comma-separated list of parameters of the information source descriptor. Depends on protocol If the files described by the ndir or rdir protocols are used as a control object, the file masks can be used as parameters. If as an object of control the "1C:Enterprise" database table is acting, then the table names can be used as parameters:
-
config. Database configuration.
-
users. Table of configuration users.
-
Both of these tables are virtual and contain information from several tables of the 1C:Enterprise database. If the universal data descriptor contains a link to one of the above tables, the hash sum is calculated for all data in the table (physical tables, completely or not). Capability to control a table fragment is not supported.
4.2.4. File of the template base
Hash sums of control objects are stored in a special file, the database of templates. A file contains information in the UTF-8 format. File location and name are specified when the utility is started. The file format is as follows:
[Normalized view of universal data source descriptor]<control object> = <hash>In this format, Normalized view of universal data source descriptor contains a string in the same way as it is specified in the data source template. However, a universal data source descriptor is converted to a normalized view. During normalization, the following actions are performed:
-
For all protocols, a forward slash ("/") is added to the end of the description of objects of control (before the "?").
-
For protocols describing directories, mask "*" is added if no mask was found.
-
For protocols describing databases, an explicit specification of the parameters config,users is added if no mask was found.
-
For protocols describing databases, the "*" mask is replaced with the explicit indication of config,users.
-
Masks are lexicographically sorted.
-
Back slashes ("\") are replaced with the forward slashes ("/").
-
Several consecutive slashes (any) are replaced by one straight slash (for example, the construction "//\//" is replaced by "/").
The <object> = <hash> string contains a name of the control object and a hash sum of that object. There can be more than one such string. If a universal data source descriptor contains a reference to a specific file, then the <object>expression is absent and the line begins with the "=" character.
An example of a fragment from the template database:
[dbe://C:/1C DB/DB folder/?config]config = FEC3FC5E46AE98299217D6885B3BE28C4F4D6FB9[dbe://C:/1C DB/Another DB folder/?config,users]config = FEC3FC5E46AE98299217D6885B3BE28C4F4D6FB9users = A244BE3830C2B7075C0BB684896B97A0324984A0[file://C:/Program Files (x86)/1cv82/8.2.9.356/docs/ru/V8UpdateFrom82Beta.htm]= 392BC75149AE02565C7E31592EDCD60F00BFA03C[ndir://C:/Program Files (x86)/1cv8/8.3.5.625/bin/?*]1cv8.exe = 232F2BCCE6ABB95FD56E3CB3FADE528D851A5D691cv8_root.hbk = 025B4C8465D3CD851363B2102478B1CAF2EC444E1cv8_root.res = 8F48869F82BB222EE25E18502605AC117BB5736A1cv8_ru.hbk = 81CBB0D5573D8517913053EA88AAADE9785AB443...4.2.5. Report file
Results of the utility's performance are recorded in a report file. A file contains information in the UTF-8 format. File location and name are specified when the utility is started. However, the specified name will be converted as follows: report generation date and time will be added to the file name. For example, if a report is to be saved to C:\temp\report.rpt, the actual file name will look like C:\temp\report-14.02.26-14.07.58.019446.rpt.
The file has the following format:
[.params]Key=value[Normalized view of universal data source descriptor]<Control object> = <Detected change>The .params section is always included and contains a description of the utility startup parameters. The following values can be used as the Key value:
-
datetime. Utility start date and time.
-
workdir. Working directory at utility startup.
-
exepath. Path to the executable utility file.
-
mode. Utility start mode:
-
create. Mode of generating a base of templates.
-
check. Template verification mode.
-
-
etalon. Path to the base of templates.
-
report. Path to the report file (as specified in the command line at launching a utility).
-
debug. Path to the file that contains debug information or an empty string if debug information output is not specified.
-
in. Path to the file that contains parameters. If the startup command line contains more than one in parameter, there can be several in keys in the .params section.
-
param. All the recognized command-line options to start the utility separated by commas.
If discrepancies between a template database and the actual state of files on a hard drive are found in any source from a template database, the section with a description of the changed source is added to the report file and the found changes for control objects are displayed below. If an object of control has not changed, information on such object is not displayed.
The following possible changes are processed:
-
A. New control object has been detected in the source of information.
-
D. Object of control that existed at the time of generating a base of templates was deleted from the source of information.
-
M. Object of control has been modified.
Let's review a fragment of the report file:
[dbe://C:/1C DB/DB folder/?config,users]users = M[ndir://C:/Program Files (x86)/1cv81/bin/?*]1CMailV8.dll = D1CMailV8.dll.32 = AThis report file indicates that:
-
Content of the user table has been changed for the file infobase located in the C:/1C DB/DB directory.
-
In the C:/Program Files (x86)/1cv81/bin directory, the 1CmailV8.dll file was deleted and a new 1CmailV8.dll.32 file is detected.
4.2.6. Using the utility
The utility is started using the command line with the following parameters:
ci <mode> --in <SourceTemplate> --etalon <ReferenceDatabaseFile> --report <ReportFile> --debug <DebugInformationFile> [description of source]Parameters have the following values:
mode
A utility's working mode:
-
--version, -v. Show a version number of the integrity monitoring utility.
-
--help, -h. Show reference information on make and check modes. In this case, specify a mode after the command for receiving reference information (separated by a space).
-
make. Create a template database file or update data on any information sources (if the template database exists and it contains data on the source that was specified when the utility started).
-
check. Check integrity of the transmitted list of sources on the template database.
The following parameters must be specified only when using a utility in the make and check modes.
- --in, -i
- This parameter is used to specify a path to the data sources template (see List of information source templates). There may be more than one such parameter.
For the make and check modes, at least one description of a source must be specified. This can be the --in (-i) parameter or a simple indication of the source description (see source description parameter below).
- --etalon, -e
- This parameter is used to specify a full path to the file with the template database (see File of the template base).
It is required for the make and check modes.
- --report, -r
- This parameter is used to specify a full path to the report file (see Report file).
It is required for the make and check modes.
- --debug, -d
- This parameter is used to specify a full path to the file with debug information. The file is needed for the 1C technical personnel in case of an investigation into the utility's incorrect behavior.
- --method=<value>, -m=<value> only for make
- This parameter allows you to select a hash function calculation algorithm to calculate checksums. The parameter can have one of the following values:
-
sha1. SHA-1 algorithm is used.
-
sha256. SHA-256 algorithm is used. This value is used by default.
-
gost2012. Algorithm described in GOST R 34.11-2012 (512 bit) is used.
- source descriptionoptional
- Specifies a data source without specifying a template file (including multiple descriptions). For that, specify a source in the same format as each row of the list of data source templates. The utility uses all source descriptions specified during startup (both using parameter in and explicitly).
4.2.7. Recommendations for installation and use
The integrity monitoring utility does not have self-monitoring functions. Therefore, integrity monitoring of the utility files is entrusted to the system administrator. It can be protected by using the file system permissions for the utility directory, reference database files, and report files.
A viable use case is as follows:
-
The utility is installed in the directory different from the 1C:Enterprise installation directory.
-
A privileged user with restricted rights (sufficient to view all control objects) is created.
-
Access rights to the executable and configuration files of the utility are only granted to this user (any access by any other users is denied).
-
The utility is always started on behalf of this user.
The above rules will ensure high level of protection against unauthorized access and misuse.
The general usage procedure is as follows:
-
To run the utility, log in as a privileged user. If the utility is started from the system scheduler, make sure that the scheduler runs it on behalf of the privileged user.
-
The utility is started in one of these modes: creating a reference database or checking integrity of data sources.
-
Analysis of the utility performance report is performed.
Thus, the utility (and its performance results) is only accessible to the trusted persons who know the name and password of a privileged user created to run the integrity monitoring utility.
4.3. Conversion utility (cnvdbfl)
A database file has several versions of the internal format:
- A size of the internal page of database file in version 8.2.14 is equal to 4,096 bytes. A size of the internal file cannot exceed 4 GB.
- In version 8.3.8, the size of the internal database file page can have several values: 4,096, 8,192, 16,384, 32,768, and 65,536 bytes. In addition, version 8.3.8 provides an optimal format for internal data storage. Size of the internal file cannot exceed 4 GB (with page size of 4 096 bytes) or 6 GB (with page size of 8 192, 16 384, 32 768, or 65 536 bytes).
1C:Enterprise 8.3.8 and later is compatible with 1Cv8.1CD files of any format. 1C:Enterprise 8.3.7 and earlier is compatible with 1Cv8.1CD files of version 8.2.14 only. Conversion between the two formats is possible either through dumping/restoring the infobase to the .dt file or by using the cnvdbfl utility.
The cnvdbfl command-line utility allows to:
- Convert the 1Cv8.1CD files between different formats.
- Resize the file page for 8.3.8 format.
To run the utility, use this command line:
cnvdbfl <command> <path to 1CV8.1CD>You can use the following commands:
| Commands | Description |
|---|---|
--help
–h |
Displays brief information about the utility. |
--version
–v |
Gets version of the utility. |
--info
–i |
Displays information about the format of 1Cv8.1CD. For the database files that have not been used with 1C:Enterprise 8.2.14 or later, file information cannot be displayed; a diagnostic message is displayed instead. |
--convert
–c |
Converts 1Cv8.1CD file. If the command is used without parameters, the file is converted to 8.3.8 format with a page size of 8192 bytes.
One of the following parameters should be specified:
Specifies the format to which the 1Cv8.1CD file must be converted. Possible <format> values:
Specifies the page size for 8.3.8 format. Default value: 8192. If the –f 8.2.14 parameter is specified, this parameter is ignored. Possible <page size> values:
|
For examples of using the utility, see below.
Convert to 8.2.14 format:
cnvdbfl -c -f 8.2.14 c:\temp\1cv8.1cdConvert to 8.3.8 format with default page size:
cnvdbfl -c -f 8.3.8 c:\temp\1cv8.1cdConvert to 8.3.8 format with page size of 16K:
cnvdbfl -c -f 8.3.8 -p 16k c:\temp\1cv8.1cdGet information about 1Cv8.1CD:
cnvdbfl -i c:\temp\1cv8.1cd4.4. ring utility
4.4.1. General information
The ring utility is a cross-platform console (without a graphical interface) utility for managing the local configuration of 1C:Enterprise processes and for performing various operations necessary to support the system operation.
The ring utility has a modular architecture. A module is a set of general features accessed through commands. A number of commands per module is unlimited. A command is an action that has a certain set of parameters or without them. One call to the ring utility leads to an execution of a single command of one module. The utility can use several modules at the same time.
You can find the list of set and used modules in the ring-commands.cfg module instance registry.
Parameters passed to commands cannot contain spaces. If the parameter value contains a space, this value must be enclosed in quotation marks.
To call the command, use:
ring <module> <command> [--parameter "parameter value"]Where:
-
ring. Utility name.
-
<module>. Module name.
-
<command>. Used command name.
-
--parameter. Parameter and its value for a command. A number of parameters, required and optional parameters, default values, and so on are determined for each command individually.
When using modules and commands with the ring utility on Windows, keep in mind that the command-line characters must not exceed 8 bits. If you use a language with characters exceeding this limit, it is recommended to select the appropriate replacement for these characters. For example, instead of the character "ə", use "a" or "e".
4.4.2. System requirements
The ring utility is supported on the same operating systems as 1C:Enterprise (see System and hardware requirements). The ring utility is accessible in both 32- and 64-bit versions.
Additionally, the ring utility requires for functioning:
-
Java 8 or later (https://www.java.com/ru/download/).
-
On Linux, GNU Awk must be installed and used by default.
4.4.3. Installing the utility
Utility installation is executed when installing other products that require this utility. Other products may be modules of the ring utility or include modules for this utility.
The ring utility without modules installed does not have any practical value, so installing the ring utility separately is not supported.
4.4.4. Use recommendations
4.4.4.1. Setting a utility display language
ring utility displays information in a language selected by the operating system. For information concerning the way interface language can be changed in, see documentation related to the operating system you use.
If ring utility has to display information in a language which is different from that specified in the operating system settings, in RING_OPTS environment variable specify -Duser.country=ru -Duser.language=RU parameter. If RING_OPTS variable has already been assigned a value, add a space and further the said string.
For an example of environment variable specified using a command line, see below:
- On Windows:
set RING_OPTS=-Duser.country=ru -Duser.language=RU- On Linux (bash command processor):
export RING_OPTS=-Duser.country=ru -Duser.language=RUThe utility supports the following output languages: English and Russian.
4.4.4.2. Incorrect utility output
Make sure that Consolas or any other True Type font is specified for the terminal which supports Unicode. Make sure that you have selected a proper language in the operating system for programs failing to support Unicode. Whenever this setting is modified, you need to reload your computer for it to become valid.
If operating system settings cannot be modified, when you use Consolas font before starting ring, run a command intended to change a code page and specify a code page which is relevant to your language, for example:
chcp 12514.4.4.3. Selecting coding upon redirection of utility output in a file
When you use Windows OS and redirect ring utility display in a file, unreadable symbols can be present in a file. This is due to the fact that language settings for programs failing to support Unicode are incompatible with those in the system interface. You can obtain data in a file in readable format by any of the following methods.
-
Set a language for applications that do not support Unicode being compatible with the interface language (see Incorrect utility output).
-
Use UTF-8 coding and the RING_OPTS environment variable (see Setting a utility display language).
4.5. Licensing utility (ring license)
4.5.1. General information
The licensing utility is designed to execute the following tasks:
-
Initial license acquisition
-
License reacquisition and renewal
-
Checking license validity for the current computer
-
Displaying the license list
-
Getting information about a license
-
Deleting a license
-
Updating the license
When describing the licensing utility, the term "license storage" is used. License storage is a directory where the files with the activated software licenses are located. Depending on the operating system in use, the licensing utility uses the following directories as a license storage by default:
-
Windows: %ProgramData%\1C\licenses.
-
On Linux: /var/1C/licenses.
For the full list of directories where software licenses can be located, see Location of software licenses files.
When displaying licenses, a unified presentation is used: a PIN. So, if PIN 123-456-789-012 can be applied to a software license and this license is used for a product with registration number 8000314159, this license will be displayed as: 123456789012-8000314159. This name must be used whenever a command of the licensing utility requires the license name as a parameter.
Two software license activation methods are available:
- Usage of the activate command. In this case, activation occurs immediately through the web service of the licensing center, without generating intermediate files.
- Usage of the prepare-request, acquire and generate commands in sequence. In this case, a request file for the licensing center (the prepare-request command) is prepared, then a request to the licensing center is made (via e-mail), and a response of the licensing center (as a file) is received. Also, a response file from the licensing center can be generated via a web service, without using e-mail (the acquire command). Then, based on the request and response, a license file (the generate command) is acquired.
4.5.2. System requirements
In fact, the licensing utility is a separate module that requires the ring utility to its execution. The module is called license. From the point of view of the actions executed, the "license module" and "licensing utility" are interchangeable terms. From a technical point of view, the "licensing utility" is the ring utility and the license module, and the "license module" is a separate module that requires the ring utility for its operation.
The license module requires the installed ring utility. The license module is available in 32- and 64-bit versions.
For work of the license module, you need:
-
ring utility 0.8.2 or later.
-
JCE for Java 8 (https://www.oracle.com/technetwork/java/javase/downloads/jce8-download-2133166.html) or correct Java configuration file (depending on Java version).
-
On Windows: Windows Script Host system running on the computer where the license module is started.
4.5.3. Installing the module
4.5.3.1. Installing the module
The distribution package of the licensing utility is located at https://releases.1c.ru/project/EnterpriseLicenseTools. To install the utility, do the following:
-
Define bitness and operating system where the licensing utility will be used.
-
Select and download a version of the licensing utility that corresponds to certain bitness and operating system.
-
Create a temporary directory.
-
Unpack the archive with the utility to this directory.
-
Go to the created directory.
-
Install the licensing utility. You must have administrator rights to install the licensing utility.
The directory with the unpacked utility installation kit will contain the following files required to install the utility:
-
1ce-installer. Installer with a graphical interface.
-
1ce-installer-cli. Installer with a command-line interface.
You can define versions of the licensing utility, ring utility, and installer in file names. For example, the downloaded archive is unpacked to the following structure:
<lib>1c-enterprise-installer-1.9.1+3-linux-anyarch.e1c.car1c-enterprise-license-tools-0.15.0+2-linux-x86_64.e1c.car1c-enterprise-license-tools-0.15.0+2-linux-x86_64.e1c.dar1c-enterprise-license-tools-0.15.0+2-linux-x86_64.e1c.par1c-enterprise-ring-0.19.5+12-linux-x86_64.e1c.car1ce-installer1ce-installer-cliIt indicates that:
-
The licensing utility is downloaded for the 64-bit Linux version: linux-x86_64.
-
The installer version is 1.9.1.3.
-
The ring utility version is 0.19.5.12.
-
The licensing utility (license tools) version is 0.15.0.2.
For how to use the installer (in graphic and console versions), see the 1C:ITS Portal (https://its.1c.ru/db/inst10doc).
After a module is installed, you can check if it is registered in the module instance registry.
4.5.3.2. Configuring Java
For how to set up Java for the licensing utility, see Configuring Java.
4.5.4. Module commands
4.5.4.1. acquire
The command generates a response file based on a previously generated request file using the Licensing Center's web service.
- Command line:
ring license acquire [--request <RequestFile>] [--response <ResponseFile>] [--conf-location] [--send-statistics <mode>]- Parameter description:
-
request. Full name of the file with the request to the Licensing Center. If a parameter is not specified, the request file content is expected from the standard input stream.
-
response. Full name of the file to which a response from the Licensing Center will be placed. If a parameter is not specified, the response file content will be output to the standard output stream.
-
conf-location. Specifies a directory with the conf.cfg configuration file. This file analyzes ExternalResourcesMode parameter, which selects the applied licensing centre address.
If this parameter is blank or the specified directory does not contain conf.cfg file, the search for this file is performed in the following directories:
-
On Windows:
-
32-bit application in the 64-bit OS: %PROGRAMFILES(x86)%\1cv8\conf.
-
Otherwise: %PROGRAMFILES%\1cv8\conf.
-
-
On Linux:
- The ~/.1cv8/1C/1cv8/conf directory (~ is a home directory of the user on whose behalf the 1C:Enterprise server runs).
-
send-statistics. Sends statistical information to the 1C:Remote service (pult.1c.com, port 443). Possible <mode> values:
-
true. Information is sent. Default value.
-
false. Information is not sent.
-
For the list of outgoing information, see Information for 1C:Remote Service.
- Result:
- A Licensing Center's response
If successful, the utility returns 0. Otherwise, the return code is not 0 and an error message is generated in the standard output stream.
4.5.4.2. activate
License activation using a licensing center web service.
- Command line:
ring license activate --first-name <name> --middle-name <middle name> --last-name <last name> [--email <email>] --company <company> --country <country> --zip-code <zip code> [--region <region> --district <district>] --town <town> --street <street> --house <house> --building <building> --apartment <apartment> --serial <serial number> --pin <PIN> [--previous-pin <previous PIN>] [--path <path>] [--validate] [--conf-location <path>] [--send-statistics <mode>]- Parameter description:
-
first-name. First name of a licensee. When specifying the company parameter, this parameter is optional.
-
middle-name. Middle name of a licensee. When specifying the company parameter, this parameter is optional.
-
last-name. Last name of a licensee. When specifying the company parameter, this parameter is optional.
-
email. Email address of a licensee.
-
company. Company of a licensee. When specifying the parameters first-name, middle-name, last-name this parameter is optional. At least 5 characters are required, but there should not be more than 3 identical characters in a row.
-
country. Country of registration. Cannot be empty.
-
zip-code. Zip code. Cannot be empty.
-
region. Province/region/area.
-
district. District.
-
town. City. Cannot be empty.
-
street. Street. Cannot be empty.
-
house. House number. When specifying the building or apartment parameters, this parameter is optional. Cannot be empty.
-
building. Building. When specifying the house or apartment parameters, this parameter is optional. Cannot be empty.
-
apartment. Apartment. When specifying the house or building parameters, this parameter is optional. Cannot be empty.
-
serial. Serial number of a software product.
-
pin. PIN used to activate the license.
-
previous-pin. When re-activating a license, this parameter must contain the PIN that was used during the initial activation of the license. Must not match the pin parameter value.
-
path. Specifies a path to the license repository if it differs from the default path.
-
validate. If specified, the command will be executed with an error if an attempt to get any of the key parameters resulted in a runtime error. If a parameter is not specified, the occurrence of an error when receiving any key parameter will not prevent a license from its successful activation. However, the license fields corresponding to the parameters not received will be filled with empty values which will make it impossible to continue using the activated license.
-
conf-location. Specifies a directory with the conf.cfg configuration file. This file analyzes ExternalResourcesMode parameter, which selects the applied licensing centre address.
If this parameter is blank or the specified directory does not contain conf.cfg file, the search for this file is performed in the following directories:
-
On Windows:
-
32-bit application in the 64-bit OS: %PROGRAMFILES(x86)%\1cv8\conf.
-
Otherwise: %PROGRAMFILES%\1cv8\conf.
-
-
On Linux:
- The ~/.1cv8/1C/1cv8/conf directory (~ is a home directory of the user on whose behalf the 1C:Enterprise server runs).
-
send-statistics. Sends statistical information to the 1C:Remote service (pult.1c.com, port 443). Possible <mode> values:
-
true. Information is sent. Default value.
-
false. Information is not sent.
-
For the list of outgoing information, see Information for 1C:Remote Service.
- Result:
- Upon successful registration, server returns a license file, which is placed in the specified storage. When the identical data (including kit data) is re-entered on the same machine, a similar license file is generated.
If successful, the utility returns 0. Otherwise, the return code is not 0 and an error message is generated in the standard output stream.
See also:
- conf.cfg file.
4.5.4.3. generate
A command is intended to generate a license file based on data from a request to the Licensing Center and its (center) response.
- Command line:
ring license generate --license <LicenseFile> --request <RequestFile> --response <ResponseFile> [--send-statistics <mode>]- Parameter description:
-
license. Full name of the file with a resulting license. If a parameter is not specified, the activated license file content will be output to the standard output stream.
-
request. Full name of the file with the request to the Licensing Center.
-
response. Full name of the file to which a response from the Licensing Center will be placed.
-
send-statistics. Sends statistical information to the 1C:Remote service (pult.1c.com, port 443). Possible <mode> values:
-
true. Information is sent. Default value.
-
false. Information is not sent.
-
For the list of outgoing information, see Information for 1C:Remote Service.
- Result:
- A file with an activated license.
If successful, the utility returns 0. Otherwise, the return code is not 0 and an error message is generated in the standard output stream.
4.5.4.4. get
Obtains an activated license from a license repository and writes it to a file.
- Command line:
ring license get -name <name> [--license <FullName>] [--path <storage>] [--send-statistics <mode>]- Parameter description:
-
name. Name of a license for which information is expected.
-
license. Full path to the file to which the received license will be written. If not specified, the content of the license file is output to the standard output stream.
-
path. Specifies a path to the license repository if it differs from the default path.
-
send-statistics. Sends statistical information to the 1C:Remote service (pult.1c.com, port 443). Possible <mode> values:
-
true. Information is sent. Default value.
-
false. Information is not sent.
-
For the list of outgoing information, see Information for 1C:Remote Service.
- Result:
- Obtains an activated license from a repository and writes it to a file with the specified name.
If successful, the utility returns 0. Otherwise, the return code is different from 0.
4.5.4.5. info
Displays information about the specified license.
- Command line:
ring license info [--name <name>] [--path <path>] [--send-statistics <mode>]- Parameter description:
-
name. Name of a license for which information is expected. If this parameter is missing, the system expects the content (not the name) of the file with an activated license from the standard input stream.
-
path. Specifies a path to the license repository if it differs from the default path.
-
send-statistics. Sends statistical information to the 1C:Remote service (pult.1c.com, port 443). Possible <mode> values:
-
true. Information is sent. Default value.
-
false. Information is not sent.
-
For the list of outgoing information, see Information for 1C:Remote Service.
- Result:
- License information in the following format:
License file name:Information about the user:Name:Middle name:Last name:Email:Company:Country:ZIP code:City:Street:Building:Product information:Description:Date of equipment:Registration number:Product code:License type:License binding type:TechnicalInfo:LicenseType:LicenseAssociationType:HardwareKeyAssociation:LicenseGenerationDate:ProductCode:DistributionKitRegistrationNumber:The current computer hardware is not validated to match the hardware used to activate a license.
The command result can be divided into two parts: human-readable information and computer-readable information. Human-readable information is located in the following sections: License file name, User details, and Product information. These sections display localized information so that it is comprehensible to people.
Machine-readable section is the TechnicalInfo section. This section is intended for automated processing. Data in this section is presented as key-value pairs. Each pair is displayed in a separate line. A separator between a key and a value is a colon ":". All the information in the section is presented in English and contains the following parameters:
-
LicenseType. Types of licenses and bindings return as their IDs specified below:
-
ProfLicenseUpdate. License is an update of the previously issued PROF-level licenses.
-
ClientLicense. Client license.
-
ServerLicenseFor32BitServer. License for the 32-bit application server.
-
ServerLicenseFor64BitServer. License for the 64-bit application server.
-
ServerLicenseWithLimitedNumberOfConcurrentSessions. Application server license with a limited number of concurrent sessions.
-
LicenseForDedicatedFunctionalityTesting. License for feature testing.
-
CorporateLicense. CORP-level license.
-
EntirePlatformFunctionality. License allows you to use the entire platform functionality.
-
MoreThan500UsersInInfobase. License allows an infobase to contain more than 500 active users.
-
MoreThan12CpuCores. License allows the application server to use more than 12 processor cores.
-
-
LicenseAssociationType. What the software license is bound to:
-
HardwareProtectionKey. License is bound to a HASP dongle.
-
Computer. License is bound to the computer.
-
If a license is bound to a HASP dongle, the displayed information contains the HardwareKeyAssociation parameter. The parameter contains description of a HASP dongle to which a license is bound.
-
LicenseGenerationDate. License binding date in the ISO 8601 format: yyyy-MM-ddTHH:mm:ss.
-
ProductCode. Code of a product to be licensed.
-
DistributionKitRegistrationNumber. Registration number of a product to be licensed.
4.5.4.6. list
The command is intended to display a list of licenses in the license repository.
- Command line:
ring license list [--path <path>] [--send-statistics <mode>]- Parameter description:
-
path. Specifies a path to the license repository if it differs from the default path.
-
send-statistics. Sends statistical information to the 1C:Remote service (pult.1c.com, port 443). Possible <mode> values:
-
true. Information is sent. Default value.
-
false. Information is not sent.
-
For the list of outgoing information, see Information for 1C:Remote Service.
- Result:
- A list of the license names found.
4.5.4.7. prepare-request
If a software license cannot be activated using the web service of the licensing center, you can activate the license by sending an email to the licensing center. To do this, the prepare-request, acquire and generate commands are used in the specified order.
The prepare-request command prepares the file for transfer to the Licensing Center.
- Command line:
ring license prepare-request --first-name <first name> --middle-name <middle name> --last-name <last name> [--email <email>] --company <company> --country <country> --zip-code <zip code> [--region <region> --district <district>] --town <town> --street <street> --house <house> --building <building> --apartment <apartment> --serial <serial number> --pin <PIN> [--previous-pin <previous PIN> --request <file>] --validate [--send-statistics <mode>]- Parameter description:
-
first-name. First name of a licensee. When specifying the company parameter, this parameter is optional.
-
middle-name. Middle name of a licensee. When specifying the company parameter, this parameter is optional.
-
last-name. Last name of a licensee. When specifying the company parameter, this parameter is optional.
-
email. Email address of a licensee.
-
company. Company of a licensee. When specifying the parameters first-name, middle-name, last-name this parameter is optional. At least 5 characters are required, but there should not be more than 3 identical characters in a row.
-
country. Country of registration. Cannot be empty.
-
zip-code. Zip code. Cannot be empty.
-
region. Province/region/area.
-
district. District.
-
town. City. Cannot be empty.
-
street. Street. Cannot be empty.
-
house. House number. When specifying the building or apartment parameters, this parameter is optional. Cannot be empty.
-
building. Building. When specifying the house or apartment parameters, this parameter is optional. Cannot be empty.
-
apartment. Apartment. When specifying the house or building parameters, this parameter is optional. Cannot be empty.
-
serial. Serial number of a software product.
-
pin. PIN used to activate the license.
-
previous-pin. When re-activating a license, this parameter must contain the PIN that was used during the initial activation of the license. Must not match the pin parameter value.
-
request. Specifies a full path to the file in which information for transmission to the Licensing Center will be placed. If not specified, the text of the request to the licensing center will be output to the standard output stream.
-
validate. If specified, the command will be executed with an error if an attempt to get any of the key parameters resulted in a runtime error. If a parameter is not specified, the occurrence of an error when receiving any key parameter will not prevent a license from its successful activation. However, the license fields corresponding to the parameters not received will be filled with empty values which will make it impossible to continue using the activated license.
-
send-statistics. Sends statistical information to the 1C:Remote service (pult.1c.com, port 443). Possible <mode> values:
-
true. Information is sent. Default value.
-
false. Information is not sent.
-
For the list of outgoing information, see Information for 1C:Remote Service.
- Result:
- Content of the Licensing Center request file is generated and written to a file or standard output stream.
If successful, the utility returns 0. Otherwise, the return code is not 0 and an error message is generated in the standard output stream.
4.5.4.8. put
Places a selected file with the activated license into the specified license repository.
- Command line:
ring license put --license <FullName> [--path <storage>] [--send-statistics <mode>]- Parameter description:
-
license. Full path to a file of the activated license that will be placed in the license repository.
-
path. Specifies a path to the license repository if it differs from the default path.
-
send-statistics. Sends statistical information to the 1C:Remote service (pult.1c.com, port 443). Possible <mode> values:
-
true. Information is sent. Default value.
-
false. Information is not sent.
-
For the list of outgoing information, see Information for 1C:Remote Service.
- Result:
- Places the specified file with the activated license in the specified (explicitly or implicitly) license repository.
If successful, the utility returns 0. Otherwise, the return code is different from 0.
4.5.4.9. remove
Removes a license from a license repository.
- Command line:
ring license remove -name <name> [--path <storage>] [--all] [--send-statistics <mode>]- Parameter description:
-
name. Name of a license to be removed from a repository.
-
path. Specifies a path to the license repository if it differs from the default path.
-
all. Delete all licenses with the given name in the repository.
-
send-statistics. Sends statistical information to the 1C:Remote service (pult.1c.com, port 443). Possible <mode> values:
-
true. Information is sent. Default value.
-
false. Information is not sent.
-
For the list of outgoing information, see Information for 1C:Remote Service.
- Result:
- A license is removed from the license repository.
If successful, the utility returns 0. Otherwise, the return code is different from 0.
4.5.4.10. update
Updates (re-obtains) all licenses from the license storage. License update means re-obtaining a license in the licensing center with the same registration number, PIN, and key parameters. Files with activated software licenses that exist before the update are saved with the .oldlic extension for backup purposes.
- Command line:
ring license update --conf-location <ConfigurationFile> [--force <value>] [--path <storage>] [--validate] [--send-statistics <mode>]- Parameter description:
-
conf-location. Location directory of a platform configuration file. Used to search for the conf.cfg configuration file, which analyzes the ExternalResourcesMode parameter. If the parameter is not specified or the conf.cfg file is missing in the specified directory, an attempt will be made to find the conf.cfg file in the following directories:
-
On Windows:
-
32-bit application in the 64-bit OS: %PROGRAMFILES(x86)%\1cv8\conf.
-
Otherwise: %PROGRAMFILES%\1cv8\conf.
-
-
On Linux:
- The ~/.1cv8/1C/1cv8/conf directory (~ is a home directory of the user on whose behalf the licensing utility is started).
-
-
force. Defines the behavior of the licensing utility if errors occurred during the license update. Possible parameter values:
-
true. Error is ignored and the file during processing of which the error occurred is skipped. Processing continues.
-
false. File processing is interrupted, all licenses are restored from backups (default value).
-
-
path. Specifies a path to the license repository if it differs from the default path.
-
validate. Indicates whether to check the hardware data received from the system. The parameter can take values:
-
true. Check.
-
false. Do not check (default value).
-
-
send-statistics. Sends statistical information to the 1C:Remote service (pult.1c.com, port 443). Possible <mode> values:
-
true. Information is sent. Default value.
-
false. Information is not sent.
-
For the list of outgoing information, see Information for 1C:Remote Service.
- Result:
- All licenses in the license storage is updated.
If successful, the utility returns 0. Otherwise, the return code is different from 0.
4.5.4.11. validate
Checks whether the current computer hardware matches the hardware registered at the moment of license activation.
- Command line:
ring license validate [--name <name>] [--path <path>] [--send-statistics <mode>]- Parameter description:
-
name. Name of a license for which information is expected. If this parameter is missing, the system expects the content (not the name) of the file with an activated license from the standard input stream.
-
path. Specifies a path to the license repository if it differs from the default path.
-
send-statistics. Sends statistical information to the 1C:Remote service (pult.1c.com, port 443). Possible <mode> values:
-
true. Information is sent. Default value.
-
false. Information is not sent.
-
For the list of outgoing information, see Information for 1C:Remote Service.
- Result:
- Confirmation that the computer hardware matches the hardware registered at the moment of license activation, or a list of differences (if the hardware lists are different).
If successful, the utility returns 0. Otherwise, the return code is not 0 and an error message is generated in the standard output stream. Some situations are highlighted by special error codes:
-
1. The computer parameters are changed.
-
2. An error occurred when verifying the digital signature of a license.
4.5.4.12. Information for 1C:Remote Service
The following data is sent to 1C:Remote service:
-
Operating system: Windows or Linux.
-
OS full name.
-
Architecture of a computer running a utility.
-
Version of a licensing utility so started.
-
Architecture of a licensing utility so started.
-
Version of Java managing the said utility.
-
Name of a licensing utility command being executed.
-
UUID generated on the basis of the following data (hash in UUID format):
-
Computer MAC address
-
Utility version
-
Utility architecture
-
-
Data batch ID.
-
Computer UUID generated on the basis of server MAC address (hash in UUID format).
-
Command execution date and time.
4.6. Administrative console utility (1cv8a)
The administrative console utility (1cv8a) is intended to speed up verification and correction of certain issues:
-
Verifying and fixing the exchange plan node tables.
-
Verifying and fixing the hash fields of the infobase tables.
The administrative console utility allows you to fix some infobase issues without starting Designer and in a shorter time. This is thanks to the fact that the administrative console utility processes only the problematic objects and at the same time performs a limited set of fixes.
To run the utility, use this command line:
1cv8a <modes> <keys>The modes are as follows:
- help [mode] or h [mode]
Displays brief information about the utility or a mode of operation.
- ib-check-and-repair or ibcr
Verifies and repairs data.
The following parameters can be specified:
- --repair or -r
Indicates that the errors will be repaired.
- --exchange-plan-integrity or -epi
Verifies and repairs the exchange plan node tables.
- --exchange-plan-integrity-outFile=<XML file name> or -epiof <XML file name>
Specifies a name of the XML file used for saving status of ThisNode records of the exchange plans. This parameter is required when executing the command with the --exchange-plan-integrity parameter.
- --data-history-integrity or -dhis
Verify and repair data history tables.
- --dimhash-integrity or -dhi
Recalculates totals to eliminate incorrect totals calculations for the accumulation registers and accounting registers if at least one dimension has String type and the dimension index contains more than 16 database fields. A recalculation of the total is performed only if the --repair parameter is used simultaneously with the --dimhash-integrity parameter. If the --repair parameter is not specified, the system only checks whether there are the incorrect totals of the accumulation and accounting registers in the infobase.
- --connection-string=<string>
Specifies the infobase connection string.
- --file=<path> or -f <path>
Specifies a path to the file infobase directory.
- --server=<server:port/infobase> or -s <server:port/infobase>
Specifies parameters for connecting to the client/server infobase.
- --user=<name> or -u <name> or -n <name>
Specifies the username on whose behalf the connection to the infobase will be established.
- --password=<password> or –p <password>
Specifies the password of the infobase user on whose behalf the connection to the infobase will be established.
- --unlock-code=<code>
Specifies the permission code for connecting to the infobase (if specified).
- --security-level=<level>
Indicates security level of a server connection.
- --verbose
Indicates whether detailed progress messages will be displayed.
4.7. Running Designer in agent mode
4.7.1. General information
Agent mode. A special version of Designer batch mode, in which Designer performs the functions of the SSH and SFTP servers and accepts commands using these protocols.
When operating in agent mode, Designer can only work with one infobase. If you need to operate simultaneously with several infobases, launch several Designers in agent mode.
An overall scheme of work in the agent mode is, as follows:
-
Designer is started in the agent mode.
-
A remote computer connects to the agent.
-
Files are exchanged with the agent over the SFTP client.
-
Commands to the agent are sent and results obtained over the SSH client.
When in the agent mode, Designer provides a specific set of commands to be discussed further in this section. All commands are executed interactively and concurrently. While executing a command, you cannot know its precise execution status. All messages generated after commands are executed are completely identical to the messages generated when the similar commands are executed in Designer batch mode.
login as: adminadminadmin@localhost's password:1C:Enterprise 8.3 1C Designer Shell © 1C LLC 1996-2018designer>A result of the command performance in the agent mode can be presented in two formats: text format (default) and JSON message format. When in the JSON message format, server always returns an array of information about work results. A special command is used to select format for work results. At the end of processing all commands, the Designer agent sends a message of the success, error, cancel or question kinds. The help command sends a message of the success kind at the end. When an unknown command is entered, it sends a message of the error kind.
To run agent mode, perform a command of the following type:
1cv8 DESIGNER <infobase> /AgentMode [agent mode parameters] [/Visible].When entering a startup command line, consider the following:
-
To specify an infobase, you can use any of the following parameters: /IBName, /F, or /S. Do not specify the parameters defining username and password for accessing the infobase; these parameters will be ignored. Login and password will be required in response to the corresponding requests in the remote access console. It is not recommended to connect to an infobase in the agent mode on behalf of a user whose name includes national characters.
-
If the /AgentMode parameter is found in the command line, Designer will ignore all parameters except for the agent mode parameters, parameters specifying an infobase, and the /Visible parameter.
-
Specifying the /Visible parameter causes a special window to appear on the screen. This window is used to quit the agent mode. If Designer is started without this parameter, you have to use the remote access command line to quit the agent mode.
While Designer runs in agent mode, one client can be connected via SSH and several clients via SFTP.
See also:
-
JSON operation description.
-
Agent mode commands (see Agent mode commands).
4.7.2. List of commands
The following commands are available in the agent mode:
-
help command.
-
The common command group. Common commands.
-
The options command group. Setting commands.
-
The config command group. Commands to edit the configuration.
-
The infobase-tools command group. Service infobase commands.
For a more detailed description of JSON message format, see Format of JSON messages.
Within this section, it is assumed that all commands return results in text format. As an example of returning the JSON messages, the output of the help command will be considered. It should also be clear that agent commands – including commands for receiving reference information – will be returned in the JSON message format.
It should be remembered that all examples given in this section are not complete structures and are intended only to demonstrate performance of the reviewed mechanisms or methods.
4.7.3. help command
This command displays help information. The help command with no parameters displays general information on using the agent mode.
designer> helpUsage:help [options] [arguments]General parameters:--version | -vGets version of the utilityMode:help (h)Displays help information for the specified mode.Arguments:MODEThe mode for which information needs to be obtained about keys of the command lineSupported modes:help Displays help information for the specified mode.common Common commandsoptions Settings managementconfig Configuration modeinfobase-tools Infobase utility commandsdesigner>If more specific information about a group of commands or a particular command is required, then all this information should be entered after the keyword help. For example, to get information about the group of commands options, execute the help options command.
designer> help optionsUsage:options [command] [options]General parameters:--version | -vGets version of the utilityMode:optionsSettings managementCommands:listDisplays values of all settingsgetGets a value of a setting--output-formatOutput format--show-promptShows the command-line promptsetSets a value of a setting--output-format=<text|json>Output format--show-prompt=<yes|no>Shows the command-line promptdesigner>To get the 1C:Enterprise version which runs in agent mode, perform the help –version command.
designer> help --version8.3.10.2000designer>If you set the JSON message output format, the information about the 1C:Enterprise version will be output as follows:
designer> options set --output-format=json[{"type": "success","message": ""}]designer> help --version[{"type": "success","body": "8.3.10.1772"}]designer>In this example, the first command (options set ...) sets the output format, and the second command gets the 1C:Enterprise version.
4.7.4. common group commands
Commands of the common group are responsible for general operations. A group includes the following commands:
-
connect-ib. Connect to the infobase whose parameters are specified upon the agent mode startup.
-
disconnect-ib. Disconnect from the infobase that was previously connected using the connect-ib command.
-
shutdown. Close Designer in agent mode.
The commands of this group have no parameters.
4.7.5. options group commands
4.7.5.1. Command group purpose
The commands of the options group are responsible for managing settings of the current session.
4.7.5.2. get
This command allows you to get parameter values. The following parameters are available for the command:
-
--output-format=<value>. Allows you to specify an output format of the command performance:
-
text. Commands return a result in text format.
-
json. Commands return a result as JSON messages.
-
-
--show-prompt=<value>. Allows you to show or hide the designer> command line prompt:
-
yes. There is a prompt in a command line.
-
no. There is no prompt in a command line.
-
-
--notify-progress. Allows you to get information about the display of the command execution progress.
-
--notify-progress-interval. Allows you to get the time interval after which the information about the progress is updated.
4.7.5.3. list
Using this command, you can view a list of parameters and their (parameters) current status.
4.7.5.4. set
This command allows you to set parameter values. The following parameters are available for the command:
-
--output-format=<value>. Allows you to specify an output format of the command performance:
-
text. Commands return a result in text format.
-
json. Commands return a result as JSON messages.
-
-
--show-prompt=<value>. Allows you to show or hide the designer> command line prompt:
-
yes. There is a prompt in a command line.
-
no. There is no prompt in a command line.
-
-
--notify-progress=<value>. Allows you to manage the output of information about the command execution progress:
-
yes. Progress is displayed.
-
no. Progress is not displayed (default value).
-
For a list of commands that support progress display, see Notification about the progress of time-consuming operation execution.
- --notify-progress-interval=<value>. Allows you to specify the time interval after which the information about the progress is updated. The value is set with an accuracy of 0.1 seconds. The default value is 1 second. Violation of accuracy leads to generation of the CommandLineFormaError error. For a list of commands that support progress display, see Notification about the progress of time-consuming operation execution.
4.7.6. config group commands
4.7.6.1. Command group purpose
The commands of aconfig group are responsible for configuration editing.
4.7.6.2. dump-cfg
The command allows you to export the configuration or extension to the file. The following parameters are available for the command:
-
--file=<path>. Path to a configuration file (CF file) or an extension (CFE file).
-
--extension=<extension name>. Contains a name of the extension that will be exported to the file.
4.7.6.3. dump-config-to-files
The command allows you to export the configuration to xml files. The following parameters are available for the command:
-
--dir=<path>. Contains a path to a directory to which a configuration will be dumped. The parameter is required.
-
--extension=<extension name>. Contains a name of the extension that will be exported to files.
-
--all-extensions. If a parameter is specified, all the configuration extensions will be dumped to files.
-
--format=<value>. Defines an export format.
-
hierarchical. Hierarchical export format. Default value.
-
plain. Linear export format.
-
-
--update. Update an existing dump. In this case, only objects with versions different from the versions specified in the ConfigDumpInfo.xml file will be exported.
-
--force. Perform full dump if, when trying to update the dump (the update parameter), it turned out that the current version of the dump format does not match a version of the dump format specified in the ConfigDumpInfo.xml file.
-
--get-changes=<path>. Generate a file that contains changes between the current and specified configuration dumps.
-
--config-dump-info-for-changes=<path>. Path to the ConfigDumpInfo.xml file used to generate the list of differences between two configuration dumps.
-
--list-file=<file>. Dump only metadata objects and/or external properties specified in a file, regardless of whether they were changed or not.
-
--server. Indicates that the configuration must be dumped to files on the 1C:Enterprise server side. In this case, the configuration will be dumped in multi-threaded mode (faster). To specify the number of used threads, use the --threads parameter.
The command is ignored when you use:
-
Standalone server
-
Designer agent running in file mode
-
--threads=<count>. Allows you to specify the number of concurrent background jobs to dump the configuration to files on the server side. Use it only together with the --server command.
Default value: auto. In this case, the number of background jobs is determined by the platform automatically based on the number of processor cores on a computer with a 1C:Enterprise server cluster.
-
--archive=<file name>. Allows you to dump the configuration to a ZIP archive file. This parameter can be used for a full dump, partial dump, or exporting all configuration extensions (the --all-extensions parameter is specified).
-
--ignore-unresolved-refs. When dumping a configuration, references to unobtainable objects, which were deleted in one of the earlier configuration versions, are not dumped.
4.7.6.4. dump-external-data-processor-or-report-to-files
The command allows you to export external processings or reports to xml files. The following parameters are available for the command:
-
--file=<file>. Contains the name of a file that will act as a root dump file of the external data processor/report in XML. The parameter is required.
-
--ext-file=<file>. Contains the full name of external data processor (.epf) or report (.erf) file to be dumped.
-
--format=<value>. Defines an export format.
-
hierarchical. Hierarchical export format. Default value.
-
plain. Linear export format.
-
4.7.6.5. generation-id
The command allows you to receive an ID of the current configuration metadata generation. For more information, see Configurations and extensions.
The following parameters are available for the command:
- –-extension. Gets a metadata ID of the specified extension. If the parameter is not specified, the ID is received for the main configuration.
4.7.6.6. load-cfg
The command allows you to import the configuration or extension from the file. The following parameters are available for the command:
-
--file=<path>. Path to a configuration file (CF file) or an extension (CFE file).
-
--extension=<extension name>. Contains the extension name that will be loaded from the file.
4.7.6.7. load-config-from-files
The command allows you to import the configuration to xml files. The following parameters are available for the command:
-
--dir=<path>. Contains a path to the directory from which a configuration will be loaded. The parameter is required.
-
--extension=<extension name>. Contains a name of the extension that will be loaded from files.
-
--all-extensions. If the parameter is specified, all configuration extensions will be loaded from the files.
-
--format=<value>. Defines an export format.
-
hierarchical. Hierarchical export format. Default value.
-
plain. Linear export format.
-
-
--files=<file[, file]>. List of files to be loaded. Filenames are separated by commas. File paths are relative to the download directory. Absolute paths are not supported. When using the --list-file parameter, it is not used.
-
--list-file=<file>. Path to the file that lists the files to load. One line corresponds to one file. File paths are relative to the download directory. Absolute paths are not supported. When using the --files parameter, it is not used.
-
--update-config-dump-info. After restoring is finished, create the ConfigDumpInfo.xml file corresponding to the restored configuration in the directory.
-
--no-check. Specifies that integrity of the configuration to be restored is not checked upon restoration. This reduces the restoration time if the command initiator is sure that an integral configuration is being restored.
-
--archive=<file>. Contains a name of a ZIP archive from which files will be loaded. To execute the command, specify either the --dir parameter or this parameter. You cannot specify the --dir parameter and this parameter at the same time.
-
--partial. When you restore the configuration from files, restores only the items of the configuration object description that are specified as a file. Such files can be:
-
Description file of a metadata object (without its external properties).
-
External property file (form and so no).
-
Form module file (without the form description file).
-
4.7.6.8. load-external-data-processor-or-report-from-files
The command allows you to import external processings or reports from xml files. The following parameters are available for the command:
-
--file=<file>. Contains a name of the file that is a root file of exporting the external data processor/report in XML. The parameter is required.
-
--ext-file=<file>. Full name of the external data processor (.epf) or report (.erf) file to be dumped.
4.7.6.9. manage-cfg-support
The command allows you to disable the configuration support. The following parameters are available:
-
--disable-support. Indicates that it is required to disable configuration support. If the parameter is missing, an error occurs.
-
-force. Disable the configuration support even if the changes are restricted in the configuration. The error is generated if the parameter is absent and if the attempt to disable the configuration support is made for the configuration, for which the changes are restricted in the support control interactive mode.
4.7.6.10. mobile-app-write-file
The command allows you to save the configuration for creating a mobile application in an xml file. The following parameters are available for the command:
- --file=<file name>. Name of a file to save the configuration to.
4.7.6.11. mobile-client-digi-sign
The command allows you to generate a digital signature of the mobile client configuration. The following parameters are available for the command:
- --file=<file name>. Defines the name of the file that contains a private key. This key is used to generate a signature.
4.7.6.12. mobile-client-write-file
The command allows you to save the configuration for creating a mobile client in an xml file. The following parameters are available for the command:
- --file=<file name>. Defines the name of the file that contains a private key. This key is used to generate a signature.
4.7.6.13. sign-cfg
The command allows you to sign the configuration extension with a digital signature. When the extension is signed, you can use it in base configuration versions that are signed with the same key. The following parameters are available:
-
--configuration-type=<configuration type>. Location of the configuration extension to be signed. The parameter can take values:
-
extension-configuration. Configuration extension.
-
extension-db-configuration. Configuration extension located in the database.
-
extension-configuration-repository. Configuration extension located in the configuration extension repository.
-
File. Configuration extension file.
-
-
--name=<extension name>. Extension name. Used if the configuration type has one of the following values: extension-configuration, extension-db-configuration, or extension-configuration-repository.
-
--version=<version>. Version of the configuration extension in the repository. Used when the extension-configuration-repository configuration type is specified.
-
--digisign=<name of license parameter file>. Allows you to specify the licensing parameters of the user workplace.
-
--file=<cfe file path>. Path to a file with an extension to be signed. Used when the file configuration type is specified.
-
--signed-file=<cfe file path>. Path to the resulting file.
4.7.6.14. update-db-cfg
The command allows you to update the database configuration. The following parameters are available for the command:
-
--prompt-confirmation. Determines a need for requesting a user to confirm acceptance of changes when restructuring the infobase.
-
--dynamic-enable. First, it tries a dynamic update. If the attempt fails, a background update will be started.
-
--dynamic-disable. Disables dynamic update.
-
--warnings-as-errors. If this parameter is specified, all warnings that may occur when updating the database configuration will be considered errors.
-
--background-start. If this parameter is specified, a background configuration update will be launched and the current session will be terminated.
-
--background-cancel. If this parameter is specified, the launched background database configuration update will be canceled.
-
--background-finish. If this parameter is specified, the launched background database configuration update will be completed. In this case, an exclusive lock will be imposed on the database, and the final update phase will be performed. You can use the session-terminate and session-terminate-message parameters at the same time.
-
--background-resume. If this parameter is specified, the system continues the previously suspended background database configuration update.
-
--server. This parameter indicates that the database configuration update must be performed on the 1C:Enterprise server side.
-
--extension=<extension name>. Extension name.
-
--session-terminate=<purpose>. Terminates active sessions if you need to set an exclusive infobase lock. You can use the parameter when you update the main configuration or the extension. You can use it for both interactive and background configuration updates.
Possible values:
-
disable. Disable (default value).
-
prompt. User request.
-
force. Forced session termination.
-
--session-terminate-message=<message>. Sets the text message explaining the reason for session termination to be displayed on the client to disconnect. You can use it for both interactive and background configuration updates.
When performing the update-db-cfg commands, the following algorithm is used:
-
If you cannot lock the database exclusively and dynamic update is enabled (the --dynamic-disable parameter is not specified), you will be prompted to choose between cancelling the operation, dynamic updating, or trying to set the exclusive mode again.
-
If you try to set the exclusive mode again and the --session-terminate=prompt parameter is specified, you will be prompted to cancel the operation, try to set the exclusive mode, or close the sessions that prevent the infobase update.
-
If you close the sessions, you will be prompted to confirm your actions or cancel the operation. If you confirm, the sessions are closed and the infobase configuration is updated.
-
If you can exclusively lock the database but database restructuring is not required, the usual database configuration update will be performed.
-
In the event that it is possible to exclusively lock the database but restructuring of database is required, then some actions will be performed in the following sequence:
-
A list of changed objects is created.
-
A resulting list is displayed in the console.
-
If a user confirmation is required to accept the changes (the --prompt-confirmation parameter), the user is asked a corresponding question.
-
If an answer is negative, update is canceled and the corresponding notification is displayed.
-
If the answer is positive, the request was not required, or the --prompt-confirmation parameter is not specified, the update continues as planned.
-
4.7.6.15. Group of extension commands
4.7.6.15.1. Command group purpose
config extensions command group is designed to manage extensions using agent mode.
4.7.6.15.2. create
The command is designed to create extensions in the infobase. The extension is created as empty. To import the extension you should use theconfig load-cfg or config load-config-from-files command. The following parameters are available:
-
--extension=<name>. Sets the extension name. The parameter is required.
-
--name-prefix=<prefix>. Sets the name prefix for the extension. The parameter is required.
-
--synonym=<synonym>. Extension name synonym. Multilanguage string in the Nstr() function format.
-
--purpose=<purpose>. Extension purpose:
-
customization. The Adjustment purpose (default value).
-
add-on. The Add-on purpose.
-
patch. The Patch purpose.
-
4.7.6.15.3. delete
The command is designed to remove the extension from the infobase. The following parameters are available:
-
--extension=<name>. Sets the name of the extension to be deleted.
-
--all-extensions. Indicates that all extensions must be deleted.
4.7.6.15.4. Group of property commands
4.7.6.15.4.1. Command group purpose
config extensions properties command group allows you to define and get extension properties.
4.7.6.15.4.2. get
The command is designed to get extension properties located in the infobase. The following parameters are available:
-
--extension=<name>. Sets the name of the extension for which you want to get properties.
-
--all-extensions. Indicates that it is necessary to get the properties of all extensions imported into the infobase.
4.7.6.15.4.3. set
The command is designed to set extension properties located in the infobase. The following parameters are available:
-
--extension=<name>. Specifies the name of the extension for which you want to set properties.
-
--active=<mode>. Specifies the extension activity. Possible <Mode> values:
-
yes. Extension is active.
-
no. Extension is inactive.
-
-
--safe-mode=<mode>. Specifies operation in safe mode.
-
yes. Extension operates in a safe mode.
-
no. Extension operates in unsafe mode. In this case, the security profile name is automatically cleared (the profile name is set to an empty string).
-
-
--security-profile-name=<profile>. Defines the name of the security profile that the extension runs under. If the security profile name is specified, the safe mode flag is automatically set.
-
--unsafe-action-protection=<mode>. Specifies a mode of protection against unsafe actions:
-
yes. Protection against unsafe actions in the extension is enabled.
-
no. Protection against unsafe actions in the extension is disabled.
-
-
--used-in-distributed-infobase=<mode>. Specifies whether the extension can be used in the distributed infobase:
-
yes. Extension is used in the distributed infobase.
-
no. Extension is not used in the distributed infobase.
-
-
--scope=<scope>. Extension scope:
-
infobase. Extension is valid for the whole infobase.
-
data-separation. Extension is valid for a specific data area.
-
4.7.7. Infobase-tools group commands
4.7.7.1. Command group purpose
The commands of the infobase-tools group are responsible for obtaining service information about infobase.
4.7.7.2. data-separation-common-attributes-list
This command allows you to get a list of separator names of the infobase.
4.7.7.3. debug-info
Using this command, get information about the debugger settings for the infobase. The following debugger configuration parameters are available:
-
enabled. Indicates the debugging start.
-
protocol. Debugging protocol: tcp or http.
-
server-address. Debug server address for this infobase.
4.7.7.4. dump-ib
The command is designed to infobase export into the dt-file. The following parameters are available:
- --file=<file name>. Defines the DT file name.
4.7.7.5. erase-data
The command deletes the infobase data.
4.7.7.6. restore-ib
You can use the command to restore the infobase from the DT file. After the operation is completed, the Designer agent performs the following actions:
-
In text format: an interactive warning about the need to reconnect to the Designer agent is displayed.
-
In JSON message format: a message about the need to reconnect to the Designer agent is generated.
-
The infobase session is terminated.
-
SSH-connection is broken.
-
The Designer agent is not restarted and awaits reconnection.
The following parameters are available:
- --file=<file name>. Defines the DT file name.
4.7.8. Format of JSON messages
In the event that the output format is set as JSON messages, a server will always return an array of various combinations of the following values:
-
Name: type, required.
-
Values: log | success | error | canceled | question | dbstru | loading-issue | progress | extension-info.
-
Describes a kind of messages:
-
log. Information message.
-
success. Operation is successfully completed.
-
error. Operation is completed with an error.
-
canceled. Operation is canceled.
-
question. Question for a user.
-
dbstru. Information on restructuring.
-
loading-issue. Errors and warnings accumulated during configuration restoration from files.
-
progress. Information on the command execution.
-
extension-info. Information on the extension in the infobase.
-
-
-
Name: error-type
-
Values: none.
-
Contains a kind of error that occurred when executing the command:
-
UnknownError. Unknown error.
-
DesignerNotConnectedToInfoBase. Connection to the infobase is not established.
-
DesignerAlreadyConnectedToInfoBase. Connection to the infobase is already established.
-
CommandFormatError. Incorrect command format.
-
DBRestructInfo. Error occurred when restructuring the database.
-
InfoBaseNotFound. Infobase is not found.
-
AdministrationAccessRightRequired. Administrative rights are required to complete the operation.
-
ConfigFilesError. Errors occurred when restoring/dumping the configuration from/to the file.
-
DesignerAlreadyStarted. Running Designer is detected.
-
InfoBaseExclusiveLockRequired. Exclusive infobase lock is required.
-
LanguageNotFound. Language is not found.
-
ExtensionWithDataIsActive. Configuration extension is active and contains data.
-
ExtensionNotFound. Extension is not found.
-
-
-
Name: message
-
Values: none.
-
Contains a localized error message.
-
-
Name: body
-
Values: JSON message.
-
A content of this value depends on a specific operation.
-
4.7.9. Notification about the progress of time-consuming operation execution
Some commands may require significant time for their execution. There is an option to configure the agent mode so that the progress of the command will be displayed either in the type of messages or directly on the console screen. To configure the progress display, use the options set command.
The commands inform about progress only if the corresponding mode is enabled in the settings. The frequency of updating information is also set by the settings parameter. Progress is measured as a percentage. If the progress has not changed over the time interval, then the message is not sent.
The following commands support the display of progress:
-
dump-config-to-files
-
load-config-from-files
-
dump-external-data-processor-or-report-to-files
-
load-external-data-processor-or-report-from-files
-
dump-cfg
-
load-cfg
-
update-db-cfg.
4.7.10. Recommendations for configuring the SSH clients
When configuring the PuTTY SSH client, the following settings are recommended:
-
The parameters of a group Terminal:
-
The Local echo– Force on parameter.
-
The Local line ending – Force on parameter.
-
-
The Window – Translation parameter group:
- The Remote character set – UTF-8 parameter.
-
The Connection – SSH – TTY parameter group:
- Enable the Don't allocate a pseudo-terminal parameter.
4.8. Client application agent (1cecla)
4.8.1. General information
The 1C:Enterprise Alert and Launch application (hereinafter referred to as the "client application agent") is intended to receive messages from the server of the collaboration system as well as to centrally display alerts. In this case, messages are received and displayed also if the application itself (for which a message is intended) is not currently launched. The client application agent, in addition to accumulation and display of notifications, allows you to quickly navigate to the client application for which a message has been received, as well as to control a display of notifications. If an application is not running, an agent starts this application. Also, the client application agent being launched replaces all the infobase icons that (in Windows OS) are located in the system tray of the taskbar with a single agent icon.
The client application agent is being released in the following versions:
-
The executable file for Windows in the 32-bit version.
-
The executable file for Linux in 32- and 64-bit versions.
-
Web browser extension for Google Chrome, Mozilla Firefox in 32- and 64-bit versions (depending on the bitness of the web browser used), as well as the Microsoft Internet Explorer extension in a 32-bit version.
4.8.2. Agent installation
When installing the 1C:Enterprise (except for a separate thin client distribution), a distribution kit of the client application agent is located in:
-
On Windows: in the ExtDst directory of a specific version.
-
On Linux: in the ExtDst directory of a specific version.
The agent packet file's name is of the 1c-enterprise-client-application-agent-a.b.c.d.arch kind, where:
-
a.b.c.d. Full version number of the agent located in the package, which corresponds to a number of the a.b.c.d kind.
-
arch. Utility architecture. Possible values:
-
Windows:
- x86. 32-bit version of the agent.
-
Linux:
-
i386. 32-bit version of the agent.
-
x86_64. 64-bit version of the agent.
-
-
On Windows, the package has the .exe extension. On Linux, the package has the .sh extension.
Installation of the agent is initiated by launching the corresponding installation packet manually using the 1C:Enterprise language or from the settings dialog of the interaction system from the client application. The client application agent is installed in the following directories:
-
Windows:
-
32-bit system in the 64-bit OS: %PROGRAMFILES(x86)%\1C\1CE\1cecla\ecsver<api-version>.
-
Otherwise: %PROGRAMFILES%\1C\1CE\1cecla\ecsver<api-version>.
-
-
Linux:
- ~/bin/1cecla/ecsver<api-version> (for any OS bitness).
-
<api-version> expression is a number equal to the version of collaboration protocol with a collaboration system server.
The executable file name of the client application agent is 1cecla.
Only one version of the client application agent can be installed on a computer at a time.
If an installed client agent is detected during installation of 1C:Enterprise, version of the installed agent is determined. If version of the installed agent application is lower than the agent version in the platform being installed, the following actions are performed:
-
The client application agent is updated to the latest version.
-
The web browser extension is updated if necessary.
-
The client application agent is restarted if it was launched before installing the new version of 1C:Enterprise.
When the client application starts, the installed and running version of the agent is checked. If it is earlier than the available version of the agent, a dialog box opens displaying the information about availability of a later version of the agent and the update hyperlink. Clicking the hyperlink starts the update process.
After the client application agent is installed in OS Windows, the client will automatically start at Windows startup. In Linux you need to manually specify that the client application agent must start at system startup. You should remember the agent needs a running GUI to start.
4.8.3. Agent interface
To access the client agent interface, the client agent manager is used. It is accessible through the global context property ClientApplicationAgent.
The application interface allows to:
-
Install the agent.
-
Check for availability of new agent versions.
-
Get/install presentation of the client application from the agent context menu.
-
Connect the current client application to (or disconnect from) the agent.
-
Enable or disable the agent status change handler.
The agent connects to the running client application automatically, upon the start of the client application. However, if you need the client application agent to display notifications even when the client application is not currently running, use the ClientApplicationAgent.StartConnection() method. You can read the actual connection status using the handler attached with the ClientApplicationAgent.DisableConnectionStatusHandler() method. To change the presentation of the application in the agent list, use theClientApplicationAgent.GetApplicationName()/ClientApplicationAgent.SetApplicationName() methods.
4.9. Standalone server (ibsrv)
You can manage the standalone server using the configuration file and command-line parameters. Command-line parameters have priority over configuration file parameters. It means that if a parameter is specified both in the command line and in the configuration file, the standalone server uses the parameter value from the command line.
To start the standalone server, use the following command line:
ibsrv [--parameter[=value]] [--parameter[=value]]Where:
-
parameter. Standalone server parameter to set. The list of available parameters is provided in the following table.
-
value. Parameter value if it is required for the used parameter.
You can specify more than one parameter in the command line. In this case, the parameters are specified one by one as space-separated values.
To get help information on the standalone server startup parameters, you can use the following command line:
ibsrv --helpThe command will return a list similar to the table below. The difference is that the table is ordered by parameter name.
| Parameter | Description |
|---|---|
| --access-right-audit-events-recording | Manages logging of access right audit events:
Default value: deny. |
| --binary-storage-data=<path> | Directory of the binary data storage.
Default value: the binary-storage-data directory of the server data directory. |
| --clnt-notif-data=<path> | The path to the data directory of the client application notification service from the server side.
Default value: the clnt-notif-data directory of the server data directory. |
--config=<path>
-c <path> |
Path to the configuration file. |
| --daemon | Standalone server in Linux daemon mode. Available only on Linux. |
--data=<path>
-d <path> |
Path to the server data directory.
Default value: %LOCALAPPDATA%/1C/1cv8/ss-data/. |
--database-name=<name>
--db-name=<name> |
Database name. |
--database-password=<password>
--db-pwd=<password> |
DBMS user password. |
--database-path=<path>
--db-path=<path> |
Path to 1C:Enterprise file database directory. If you use a relative path, the full path is received relative to the server data directory.
Default value: the db-data directory of the server data directory. |
--database-server=<address>
--db-server=<address> |
DBMS server name. |
--database-user=<name>
--db-user=<name> |
DBMS server username.
If a Microsoft SQL Server DBMS is used, you don't have to specify the DBMS username and password when running the standalone server. In this case, the standalone server will connect to the DBMS using OS authentication. A user on whose behalf a specific instance of the standalone server (ibsrv) is running will be authenticated. |
| --dbms=<kind> | Specifies a type of the DBMS where the infobase is located.
Possible values:
If the parameter is not specified, the file database is used. |
--debug=[none|tcp|http|server]
-D [none|tcp|http|server] |
Enable infobase debugging.
Possible values:
If the --debug parameter value is not specified, debugging will be enabled in the following order (depending on the enabled standalone server capabilities):
|
| --debug-address=<address> | IP address served by the server for debugging over HTTP.
Possible values:
Default value: localhost. |
| --debug-password=<password> | Password to access the debug server. |
| --debug-port=<port> | Network port served by the debug server over HTTP.
Default value: 1550. |
| --debug-server-url=<url> | Address of an external debug server. |
| --direct-range=<lower:upper> | The range of network ports used to establish a direct connection to the server (an equivalent of the /range command of the command line for starting the server agent).
Default value: 1560:1591. |
| --direct-regport=<number> | The main network port for establishing a direct connection to the server (an equivalent of the /regport command of the command line for starting the server agent).
Default value: 1541. |
| --direct-seclevel=<0|1|2> | The security level of a direct connection to the server (an equivalent of the /seclevel command of the command line for starting the server agent).
Possible values:
Default value: 0. |
--disable-direct-gate
--disable-direct |
Disable direct access to the standalone server. |
| --disable-extended-designer-features | Disable advanced configuration options. |
--disable-http-gate
--disable-http |
Disable access to the standalone server over HTTP. |
| --disable-local-speech-to-text=<flag> | Manages local speech recognition on the standalone server:
Default value: deny. |
--disable-ssh-gate
--disable-ssh |
Disable access to the standalone server over SSH. |
| --distribute-licenses=<flag> | Manages client license issuance by a standalone server.
Possible values:
Default value: allow. |
| --enable-direct-gate | Enable direct access to the standalone server. |
| --enable-extended-designer-features | Enable advanced configuration options. Designer add-ins must be attached within the platform installation. |
| --enable-http-gate | Enable access to the standalone server over HTTP. |
| --enable-ssh-gate | Enable access to the standalone server over SSH. |
| --ftext2-data=<path> | Path to the full-text search data directory (version 2).
If you use a relative path, the full path is received relative to the server data directory.
Default value: the ftext2-data directory of the server data directory. |
| --ftext-data=<path> | Path to the full-text search data directory.
If you use a relative path, the full path is received relative to the server data directory.
Default value: the ftext-data directory of the server data directory. |
--help
-?
-h |
Receive the utility help information. |
--http-address=<address>
--address=<address>
-a <address> |
Main IP address served by the server.
Possible values:
Default value: localhost. |
--http-base=<location>
--base=<location>
-b <location> |
Base path to publish infobases.
Default value: /. |
--http-port=<number>
--port=<number>
-p <number> |
Main network port served by the server.
Default value: 8314. |
| --id=<uuid> | Infobase ID.
Possible values:
Default value: auto. |
| --lock=<path> | Path to the lock file of the standalone server data directory.
By default, the lock.pid file of the server data directory is used. |
| --log-data=<path> | Path to the event log data directory.
If you use a relative path, the full path is received relative to the server data directory.
Default value: the log-data directory of the server data directory. |
| --monitor-address | IP address served by the performance monitor gateway over HTTP.
Possible values:
The default value is localhost. |
| --monitor-base | Base path to publish performance indicators.
The default value is /. |
| --monitor-port | Network port served by the performance monitor gateway over HTTP.
The default value is 1555. |
--name=<name>
-n <name> |
Infobase name.
The default name is a string presentation of the infobase ID. |
| --openid-data=<path> | Path to the OpenID authentication data directory.
If you use a relative path, the full path is received relative to the server data directory.
Default value: the openid-data directory of the server data directory. |
--request-database-password
--request-db-pwd
-W |
Password request of the DBMS server user over the standard input stream (stdin). |
| --schedule-jobs=<flag> | Enables/disables scheduled job planning.
Possible values:
Default value: allow. |
| --service | Standalone server in Windows service mode. Available only on Windows. |
| --session-data=<path> | Path to the session data directory.
If you use a relative path, the full path is received relative to the server data directory.
Default value: the session-data directory of the server data directory. |
| --ssh-address=<address> | IP address served by the server for connection over SSH.
Possible values:
Default value: localhost. |
| --ssh-host-key=<path> | Path to the file used as a private key of the host when connecting over SSH.
Default value: %USERPROFILE%/.ssh/id_rsa. |
| --ssh-port=<number> | Network port served by the server for connection over SSH.
Default value: 1543. |
| --stt-data=<path> | Path to the directory of the speech recognition model storage.
If you use a relative path, the full path is received relative to the server data directory.
Default value: the stt-data directory of the server data directory. |
| --system=<path> | Path to the system configuration file. |
--temp=<path>
-t <path> |
Path to the directory of temporary infobase files.
If you use a relative path, the full path is received relative to the server data directory.
Default value: the temp directory of the server data directory. |
| --users-data=<path> | Path to the directory of user configuration data.
Default value: the users-data directory of the server data directory. |
--version
-v |
Get a utility version. |
See also:
-
Standalone server (see Standalone server).
-
Configuration file of the standalone server (see Standalone server configuration file).
4.10. Standalone server administration utility (ibcmd)
4.10.1. General information
The standalone server administration utility is a tool that allows you to manage the standalone server and perform various administrative actions.
Command-line parameters have priority over configuration file parameters. It means that if a parameter is specified both in the command line and in the configuration file, the administration utility uses a parameter value from the command line.
To start the administration utility, use the following command line:
ibcmd mode command [command] [--parameter[=value]] [--parameter[=value]]Where:
-
mode. Administration utility mode.
-
command. Mode command. Some modes might use commands that consist of several IDs. For example, the following command: ibcmd infobase config load.
-
parameter. Parameter to be set for the administration utility command. The list of available parameters is listed further in the section, in the table that corresponds to a specific command of the selected mode.
-
value. Parameter value if it is required for the used parameter.
You can specify more than one parameter in the command line. In this case, the parameters are specified one by one as space-separated values.
To get the current administration utility version, use the following command line:
ibcmd --versionTo get help information on the startup parameters of the administration utility, you can use the following command line:
ibcmd --helpThe administration utility displays help information as a single fragment for each mode. In this section, the parameters are split by commands. All parameters are ordered alphabetically. If a parameter is required, it is underlined, for example:
| Parameter | Description |
|---|---|
| --param | Standard utility parameter. |
| --req-param | Required utility parameter. |
4.10.2. General parameters
The administration utility can manage both a running standalone server instance and a standalone server in offline mode (for more information on the management methods, see Standalone server management). To connect to a standalone server, specify the connection parameters for the administration utility. These parameters can be divided into two groups.
The first group is used to specify data of the running standalone server instance. You can use these parameters for all administration utility commands, except for certain commands that will be described below.
| Parameter | Description |
|---|---|
--pid=<pid>
-p <pid> |
Process ID of a standalone server that you need to connect to. It is used only when the administration utility manages the standalone server that is running on the same computer as the utility. |
--remote=<url>
-r <url> |
Network address of the standalone server administration gateway. In this case, the standalone server and the administration utility can be located on different computers. |
All the above parameters do not contain parameters of the database, the used DBMS, and so on. These parameters are unavailable since a running standalone server uses a certain DBMS and a database. It means that the administration utility might use this information for its operations.
The second group of parameters describes connection to a standalone server in offline mode. This group includes much more parameters as most administration utility commands operate directly with the infobase. It means that you need to specify all the parameters required to connect to the database that is managed by a DBMS.
| Parameter | Description |
|---|---|
--config=<path>
-c <path> |
Path to the configuration file. |
--data=<path>
-d <path> |
Path to the server data directory.
Default value: %LOCALAPPDATA%/1C/1cv8/ss-data/. |
--database-name=<name>
--db-name=<name> |
Database name. |
--database-password=<password>
--db-pwd=<password> |
DBMS user password. |
--database-path=<path>
--db-path=<path> |
Path to 1C:Enterprise file database directory. If you use a relative path, the full path is received relative to the server data directory.
Default value: the db-data directory of the server data directory. |
--database-server=<address>
--db-server=<address> |
DBMS server name. |
--database-user=<name>
--db-user=<name> |
DBMS server username. |
| --dbms=<kind> | Specifies a type of the DBMS where the infobase is located.
Possible values:
If the parameter is not specified, the file database is used. |
| --ftext2-data=<path> | Path to the full-text search data directory (version 2).
If you use a relative path, the full path is received relative to the server data directory.
Default value: the ftext2-data directory of the server data directory. |
| --ftext-data=<path> | Path to the full-text search data directory.
If you use a relative path, the full path is received relative to the server data directory.
Default value: the ftext-data directory of the server data directory. |
| --lock=<path> | Path to the lock file of the standalone server data directory.
Default value: the lock.pid file of the server data directory. |
| --log-data=<path> | Path to the event log data directory.
If you use a relative path, the full path is received relative to the server data directory.
Default value: the log-data directory of the server data directory. |
| --openid-data=<path> | Path to the OpenID authentication data directory.
If you use a relative path, the full path is received relative to the server data directory.
Default value: the openid-data directory of the server data directory. |
--password=<password>
-P <password> |
Password of the infobase user on whose behalf the operation will be performed. |
--request-database-password
--request-db-pwd
-W |
Password request of the DBMS server user over the standard input stream (stdin). |
| --session-data=<path> | Path to the session data directory.
If you use a relative path, the full path is received relative to the server data directory.
Default value: the session-data directory of the server data directory. |
| --stt-data=<path> | Path to the directory of the speech recognition model storage.
If you use a relative path, the full path is received relative to the server data directory.
Default value: the stt-data directory of the server data directory. |
| --system=<path> | Path to the system configuration file. |
--temp=<path>
-t <path> |
Path to the directory of temporary infobase files.
If you use a relative path, the full path is received relative to the server data directory.
Default value: the temp directory of the server data directory. |
--user=<name>
-u <name> |
Name of the infobase user on whose behalf the operation will be performed. |
| --users-data=<path> | Path to the directory of user configuration data.
Default value: the users-data directory of the server data directory. |
This parameter list is similar to the parameter list of the standalone server (ibsrv) but shortened. This is caused by administration utility specifics. To use the utility, you only need infobase access parameters. Other settings, such as parameters for access over HTTP, are not required.
The session and lock modes of the administration utility are unavailable in offline mode since a non-running standalone server has no sessions or locks.
4.10.3. server mode
4.10.3.1. General information
To configure a standalone server, use commands of this mode.
4.10.3.2. config group commands
Manage a standalone server configuration.
4.10.3.2.1. init
Use this command to initialize the standalone server configuration.
| Parameter | Description |
|---|---|
--database-name=<name>
--db-name=<name> |
Database name. |
--database-password=<password>
--db-pwd=<password> |
DBMS user password. |
--database-path=<path>
--db-path=<path> |
Path to 1C:Enterprise file database directory. If you use a relative path, the full path is received relative to the server data directory.
Default value: the db-data directory of the server data directory. |
--database-server=<address>
--db-server=<address> |
DBMS server name. |
--database-user=<name>
--db-user=<name> |
DBMS server username. |
| --dbms=<kind> | Specifies a type of the DBMS where the infobase is located.
Possible values:
If the parameter is not specified, the file database is used. |
| --distribute-licenses=<flag> | Manages client license issuance by a standalone server.
Possible values:
Default value: allow. |
--http-address=<address>
--address=<address>
-a <address> |
Main IP address served by the server.
Possible values:
Default value: localhost. |
--http-base=<location>
--base=<location>
-b <location> |
Base path to publish infobases.
Default value: /. |
--http-port=<number>
--port=<number>
-p <number> |
Main network port served by the server.
Default value: 8314. |
| --id=<uuid> | Infobase ID.
Possible values:
Default value: auto. |
--name=<name>
-n <name> |
Infobase name.
The default name is a string presentation of the infobase ID. |
--out=<path>
-o <path> |
Path to the configuration file of the standalone server that will contain the specified configuration. |
--request-database-password
--request-db-pwd
-W |
Password request of the DBMS server user over the standard input stream (stdin). |
| --schedule-jobs=<flag> | Enables/disables scheduled job planning.
Possible values:
Default value: allow. |
4.10.3.2.2. import
Use this command to import a standalone server configuration from the registry of an existing 1C:Enterprise server cluster.
| Parameter | Description |
|---|---|
--address=<address>
-a <address> |
Main IP address served by the server.
Possible values:
Default value: localhost. |
--base=<location>
-b <location> |
Base path to publish infobases.
Default value: /. |
| --cluster-data=<path> | Path to the main server data directory of 1C:Enterprise server cluster.
Default value: %LOCALAPPDATA%/1C/1cv8. |
| --manager-port=<port> | Network port of 1C:Enterprise server cluster manager.
Default value: 1541. |
--name=<name>
-n <name> |
Infobase name. |
--out=<path>
-o <path> |
Path to the configuration file of the standalone server that will contain the specified configuration. |
| --port=<number> | Main network port served by the server.
Default value: 8314. |
--publication=<path>
-p <path> |
Path to the file describing the infobase publication on the web server (the default.vrd file). |
See also:
- default.vrd file.
4.10.4. infobase mode
4.10.4.1. General information
Infobase management mode.
4.10.4.2. General parameters
For the common command parameter details, see General parameters.
4.10.4.3. create
Use this command to create an infobase.
| Parameter | Description |
|---|---|
| --apply | Indicates that the database configuration needs to be updated after the configuration is loaded. |
| --create-database | Create database if none present. |
| --date-offset=<years> | Date offset (used only for Microsoft SQL Server DBMS).
Default value: 2000. |
--force
-F |
Confirm the operation if it has warnings. |
| --import=<directory> | Path to the directory with XML files of hierarchical configuration dump. In this case, the configuration based on which the infobase will be created will be built from XML files in this directory. |
| --load=<file> | Path to the infobase configuration file (cf file) to load. An infobase will be created from this configuration. |
--locale=<name>
-l <name> |
Localization code of the infobase to create.
Default value: locale code of the current operating system session. |
| --restore=<file> | If specified, after the infobase is created, data will be loaded from this dt file. |
4.10.4.4. dump
Use this command to dump the infobase to a dt file. This operation is not a database backup operation.
| Parameter | Description |
|---|---|
| <path> | Path to an infobase dump file in dt format. |
--password=<password>
-P <password> |
Password of the infobase user on whose behalf the operation will be performed. |
--user=<name>
-u <name> |
Name of the infobase user on whose behalf the operation will be performed. |
See also:
- Database backup (see Infobase backup).
4.10.4.5. restore
Use this command to load an infobase from a dt file.
| Parameter | Description |
|---|---|
| <path> | Path to an infobase dump file in dt format. |
| --create-database | Create database if none present. |
--force
-F |
Forced termination of infobase sessions before loading. |
--password=<password>
-P <password> |
Password of the infobase user on whose behalf the operation will be performed. |
| --session-terminate-message | This parameter allows you to specify the text that will be displayed to users before a session is forcibly terminated. Use this parameter only together with the --force parameter. |
--user=<name>
-u <name> |
Name of the infobase user on whose behalf the operation will be performed. |
4.10.4.6. clear
Use this command to clear the current infobase.
| Parameter | Description |
|---|---|
--password=<password>
-P <password> |
Password of the infobase user on whose behalf the operation will be performed. |
--user=<name>
-u <name> |
Name of the infobase user on whose behalf the operation will be performed. |
4.10.4.7. replicate
Use this command to configure and run the conversion of a client/server infobase from one DBMS to another without exporting it to an intermediate format (DT file). The command does not allow replication from a file database to a client/server database for security reasons.
| Parameter | Description |
|---|---|
| --batch-data-size=<n> | Data package size (in bytes) of the table used for replication.
Default value: 10 485 760. |
--batch-size=<n>
-B <n> |
Number of lines in the data batch of the table used for replication.
Default value: 10 000 |
| --force | Forced termination of source infobase sessions before replication. |
--jobs-count=<n>
-j <n> |
Number of working threads and DBMS connections concurrently used while dumping.
Default value: the number of logical processor cores of the computer running the standalone server. |
| --target-create-database | Create a target database if there is none. |
--target-database-name=<name>
--target-db-name=<name> |
Target database name. |
--target-database-password=<password>
--target-db-pwd=<password> |
User password of the target DBMS server. |
--target-database-path=<path>
--target-db-path=<path> |
Path to the directory of the target file 1C:Enterprise database. |
--target-database-server=<address>
--target-db-server=<address> |
Target DBMS server name. |
--target-database-user=<name>
--target-db-user=<name> |
Target DBMS server username. |
| --target-date-offset=<years> | Date offset (used only for Microsoft SQL Server DBMS).
Default value: 2000. |
| --target-dbms=<kind> | Specifies the type of the target DBMS used for the operation.
Possible values:
Default value: file database is used. |
--target-jobs-count=<n>
-J <n> |
Number of threads and DBMS connections used while dumping.
Default value: the number of logical processor cores of the computer running the standalone server. |
--target-request-database-password
--target-request-db-pwd |
Password request of the target DBMS server user over the standard input stream (stdin). |
4.10.4.8. config group commands
4.10.4.8.1. General information
This group of commands manages the infobase configuration.
4.10.4.8.2. load
Allows you to load the infobase configuration.
| Parameter | Description |
|---|---|
| <path> | Path to the infobase configuration file (cf file) to load. |
--extension=<extension>
-e <extension> |
Extension name. It must comply with the name generation rules:
|
--force
-F |
Automatically confirms the operation if it has warnings. |
4.10.4.8.3. save
Allows you to dump the infobase configuration.
| Parameter | Description |
|---|---|
| <path> | Path to the configuration file (cf file) of the infobase to dump. |
| --db | Performs the operation on the database configuration. |
--extension=<extension>
-e <extension> |
Extension name. It must comply with the name generation rules:
|
4.10.4.8.4. check
Allows you to check the infobase configuration.
| Parameter | Description |
|---|---|
--extension=<extension>
-e <extension> |
Extension name. It must comply with the name generation rules:
|
--force
-F |
Automatically confirms the operation if it has warnings. |
4.10.4.8.5. apply
Allows you to update the database configuration.
| Parameter | Description |
|---|---|
| --dynamic=<auto|disable|prompt|force> | Use dynamic updates.
Possible values:
Default value: auto. |
--extension=<extension>
-e <extension> |
Extension name. It must comply with the name generation rules:
|
--force
-F |
Automatically confirms the operation if it has warnings. |
| --session-terminate=<disable|prompt|force> | Terminates active sessions if you need to set an exclusive infobase lock.
You can use the parameter when you update the main configuration or the extension.
Possible values:
Default value: disable.
If this parameter is set to auto or prompt and the --session-terminate-message parameter is not specified, to complete user sessions, the console will request you to type a message that will be shown to the users. |
| --session-terminate-message | This parameter allows you to specify the text that will be displayed to users before a session is forcibly terminated. Use this parameter only together with the --force parameter. |
4.10.4.8.6. reset
Restores a working configuration from a database configuration.
| Parameter | Description |
|---|---|
--extension=<extension>
-e <extension> |
Extension name. It must comply with the name generation rules:
|
4.10.4.8.7. repair
Attempts to restore the configuration after an incomplete operation.
| Parameter | Description |
|---|---|
| --commit | Complete an incomplete operation. |
| --rollback | Cancel an incomplete operation. |
| --fix-metadata | Restore the configuration metadata structure. |
4.10.4.8.8. export group commands
4.10.4.8.8.1. General information
Use the commands of this group to dump an infobase configuration to XML files. Only the hierarchical format is supported.
See also:
- Dumping configurations to XML files.
4.10.4.8.8.2. export parameters
These parameters apply to all commands of the export group.
| Parameter | Description |
|---|---|
| <path> | Path to the directory where XML configuration files will be dumped to. |
--archive
-A |
Archives files to export. |
--base=<file>
-b <file> |
Path to the configuration information file (ConfigDumpInfo.xml) relative to which changes of the current configuration are calculated. |
--extension=<extension>
-e <extension> |
Extension name. It must comply with the name generation rules:
|
--file=<file>
-f <file> |
Path to:
|
| --force | Creates a full dump if the dump cannot be updated because the current dump format does not match the one in ConfigDumpInfo.xml. |
| --ignore-unresolved-refs | Do not export unresolved references. |
| --sync | Synchronizes existing XML files with the infobase configuration. |
--threads=<n>
-T <n> |
Number of threads used during export.
Default value: the number of logical processor cores of the computer running the standalone server. |
See also:
- ConfigDumpInfo.xml.
4.10.4.8.8.3. info
Generates a ConfigDumpInfo.xml file that contains information about the configuration state.
| Parameter | Description |
|---|---|
--extension=<extension>
-e <extension> |
Extension name. It must comply with the name generation rules:
|
--out=<file>
-o <file> |
Path to the file where configuration information will be recorded. |
See also:
- ConfigDumpInfo.xml.
4.10.4.8.8.4. status
Use this command to display information about changes between the infobase configuration and the configuration located in the dump directory. Configuration information in the dump directory is located in the ConfigDumpInfo.xml file.
| Parameter | Description |
|---|---|
--base=<file>
-b <file> |
Path to the configuration information file (ConfigDumpInfo.xml) relative to which changes of the current configuration are calculated. |
--extension=<extension>
-e <extension> |
Extension name. It must comply with the name generation rules:
|
--out=<file>
-o <file> |
Path to the file where information about changes in the configuration will be recorded. |
--short
-s |
Displays brief information on changes. |
See also:
- ConfigDumpInfo.xml.
4.10.4.8.8.5. objects
This command allows you to export the selected configuration objects to XML files.
| Parameter | Description |
|---|---|
| <Object1 ... ObjectN> | List of configuration objects to export. |
--archive
-A |
Archives files to export. |
--extension=<extension>
-e <extension> |
Extension name. It must comply with the name generation rules:
|
| --ignore-unresolved-refs | Do not export unresolved references. |
--out=<file>
-o <file> |
Path to the directory or archive where files with objects to dump will be recorded. |
--recursive
-r |
Export subordinate objects. |
--threads=<n>
-T <n> |
Number of threads used during export.
Default value: the number of logical processor cores of the computer running the standalone server. |
4.10.4.8.8.6. all-extensions
Export all configuration extensions to XML files.
| Parameter | Description |
|---|---|
| <path> | Path to the export directory of XML files of the current infobase extensions. |
--archive
-A |
Archives files to export. |
| --ignore-unresolved-refs | Do not export unresolved references. |
--threads=<n>
-T <n> |
Number of threads used during export.
Default value: the number of logical processor cores of the computer running the standalone server. |
4.10.4.8.9. import group commands
4.10.4.8.9.1. General information
The commands of this group allow you to load configuration objects from hierarchical XML files.
4.10.4.8.9.2. import parameters
These parameters apply to all commands of the import group.
| Parameter | Description |
|---|---|
| <path> | Path to the directory with XML configuration files. |
--extension=<extension>
-e <extension> |
Extension name. It must comply with the name generation rules:
|
--out=<file>
-o <file> |
Path to the file to write the configuration, external data processor, or report to be imported. If you import an external data processor or report, the parameter is required. |
| --partial | When you restore the configuration from files, restores only the items of the configuration object description that are specified as a file. Such files can be:
|
4.10.4.8.9.3. files
Import configuration objects from XML files.
| Parameter | Description |
|---|---|
| <File1 ... FileN> | List of configuration files to import. |
| --archive=<path> | Path to the ZIP archive containing XML files of the configuration dump. |
| --base-dir=<directory> | Base directory that contains XML configuration files |
--extension=<extension>
-e <extension> |
Extension name. It must comply with the name generation rules:
|
| --no-check | Disable metadata check after import. |
4.10.4.8.9.4. all-extensions
Import all configuration extensions from XML files.
| Parameter | Description |
|---|---|
| <path> | Path to the directory with XML configuration files. |
| --no-check | Disable metadata check after import. |
4.10.4.8.10. support group commands
4.10.4.8.10.1. General information
This group of commands configures infobase configuration support.
4.10.4.8.10.2. disable
The command disables the infobase configuration support.
| Parameter | Description |
|---|---|
--force
-F |
Disable support regardless of whether you can edit the configuration. |
4.10.4.8.11. data-separation group commands
4.10.4.8.11.1. General information
This group of commands gets information about infobase separators.
4.10.4.8.11.2. list
Displays the list of infobase separators. The command has no parameters.
4.10.4.8.12. extension group commands
4.10.4.8.12.1. General information
This group of commands operates with configuration extensions of this infobase.
4.10.4.8.12.2. create
Create an extension in the infobase.
| Parameter | Description |
|---|---|
| --name=<name> | Extension name. It must comply with the name generation rules:
|
| --name-prefix=<prefix> | Name prefix. It must comply with the name generation rules:
Contain no special characters other than "_". |
| --purpose=<customization|add-on|patch> | Extension purpose. Possible values:
|
| --synonym=<synonym> | Extension name synonym. Specified as an NStr() function parameter. |
4.10.4.8.12.3. info
Get information about the extension.
| Parameter | Description |
|---|---|
| --name=<name> | Extension name. It must comply with the name generation rules:
|
4.10.4.8.12.4. list
Get a list of the infobase extensions. The command has no parameters.
4.10.4.8.12.5. update
Set property values for the selected extension.
| Parameter | Description |
|---|---|
| --active=<flag> | Extension activity.
Possible values:
|
| --name=<name> | Extension name. It must comply with the name generation rules:
|
| --safe-mode=<flag> | Safe mode.
Possible values:
|
| --scope=<infobase|data-separation> | Extension scope.
Possible values:
|
| --security-profile-name=<name> | Specify the name of the security profile that will be applied to the extension. |
| --unsafe-action-protection=<flag> | Unsafe operation protection.
Possible values:
|
| --used-in-distributed-infobase=<flag> | Use an extension in a distributed infobase.
Possible values:
|
4.10.4.8.12.6. delete
Delete extensions from the infobase.
| Parameter | Description |
|---|---|
| --all | Delete all extensions. |
| --name=<name> | Extension name. It must comply with the name generation rules:
|
4.10.4.8.13. generation-id
Get the configuration generation ID.
| Parameter | Description |
|---|---|
| --name=<name> | Extension name. It must comply with the name generation rules:
|
4.10.4.8.14. sign
Digitally sign the configuration or extension.
| Parameter | Description |
|---|---|
| <path> | Path to the file of the configuration or extension to be signed. |
| --db | Performs the operation on the database configuration. |
--extension=<extension>
-e <extension> |
Extension name. It must comply with the name generation rules:
|
--key=<path>
-k <path> |
Path to the private key the configuration will be signed with. The key must be specified in PEM format and in a .pem file. |
--out=<path>
-o <path> |
Path to create a signed copy of the configuration or extension. |
4.10.5. config mode
The commands of this mode are completely equivalent by list and parameters to the ibcmd infobase config commands. For more information, see config .
The following commands will be completely equivalent:
ibcmd config load …ibcmd infobase config load …4.10.6. extension mode
The commands of this mode are completely equivalent by list and parameters to the ibcmd infobase config extension commands. For more information, see extension .
The following commands will be completely equivalent:
ibcmd extension update …ibcmd infobase extension update …4.10.7. mobile-app mode
4.10.7.1. General information
Mobile application mode.
4.10.7.2. export
Exports a mobile application configuration.
The command is available only when the extended configuration functionality mode is enabled (the extended-designer-features parameter of a configuration file of a standalone server).
| Parameter | Description |
|---|---|
| path | Path to export the mobile application configuration. |
4.10.8. mobile-client mode
4.10.8.1. General information
Mobile client mode.
4.10.8.2. export
Exports a mobile client configuration.
The command is available only when the extended configuration functionality mode is enabled (the extended-designer-features parameter of a configuration file of a standalone server).
| Parameter | Description |
|---|---|
| path | Path to export the mobile client configuration. |
4.10.8.3. sign
Digitally signs the mobile client configuration.
| Parameter | Description |
|---|---|
--key=<path>
-k <path> |
Path to the private key the configuration will be signed with. The key must be specified in PEM format and in a .pem file. |
4.10.9. session mode
4.10.9.1. General information
Allows you to operate with infobase sessions. You can use the commands of this mode only when the administration utility is connected to a running instance of the standalone server. Offline mode is not supported.
4.10.9.2. info
Allows you to get information about the selected infobase session.
| Parameter | Description |
|---|---|
| --licenses | Allows you to get information about the licenses received by the session. |
| --session=<uuid> | ID of the session to get information for. |
4.10.9.3. list
Allows you to get a list of infobase sessions.
| Parameter | Description |
|---|---|
| --licenses | Allows you to get information about the licenses received by each session. |
4.10.9.4. terminate
Allows you to forcibly terminate the infobase session.
| Parameter | Description |
|---|---|
| --error-message=<string> | The message about the session termination reasons that will be shown to the user. |
| --session=<uuid> | ID of the session to be forcibly terminated. |
4.10.9.5. interrupt-current-server-call
Allows you to forcibly terminate the current server call.
| Parameter | Description |
|---|---|
| --error-message=<string> | The message about the session termination reasons that will be shown to the user. |
| --session=<uuid> | ID of the session whose server call is to be forcibly terminated. |
4.10.10. lock mode
4.10.10.1. General information
Allows you to get information about infobase locks. You can use the commands of this mode only when the administration utility is connected to a running instance of the standalone server. Offline mode is not supported.
4.10.10.2. list
Allows you to get a list of infobase locks.
| Parameter | Description |
|---|---|
| --session=<uuid> | Allows you to get information about the locks set by the specified session. |
4.10.11. eventlog mode
4.10.11.1. General information
Allows you to operate directly with the event log without connecting to the infobase.
4.10.11.2. export
Exports event log events to the console or the specified file in one of the supported formats. The command does not establish the connection to the infobase. So, it does not require the corresponding parameters.
| Parameter | Description |
|---|---|
--format=<format>
-f <format> |
Determines the export format.
Possible values:
Default value: xml. |
| --skip-root | Allows you not to write the root XML element or the enclosing JSON object to the resulting file, in other words, to record each event as a separate entity of the selected format. |
| --from=<date> | Date of the export start in YYYY-MM-DDThh:mm:ss[.mmmmmm] format. In other words, the date to start the export from. If not specified, the export starts with the first available log event. |
| --to=<date> | The date of the export end in YYYY-MM-DDThh:mm:ss[.mmmmmm] format. In other words, the date till which the events must be exported. In not specified, the export ends with the last available log event. |
--follow=<timeout> <ms>
-F <timeout> <ms> |
The frequency of expecting new events for export in milliseconds. If the parameter name is specified without a value, the default value is used. If the parameter is not specified, new records are not expected.
Default value: 1,000 ms (milliseconds) |
--out=<file>
-o <file> |
Path to the export file.
If the parameter is not specified, the output is performed to the standard output stream (stdout). |
| <path to the log directory> | The unnamed parameter that specifies the path to the directory where the event log is stored. |
4.10.11.3. model export
The command exports the event log event model as an XSD scheme with the target http://v8.1c.ru/eventLog namespace URI. The scheme version (the version attribute) corresponds to the 1C:Enterprise platform version. The command does not establish the connection to the infobase. So, it does not require the corresponding parameters.
| Parameter | Description |
|---|---|
| <Path to the XSD scheme file> | The unnamed parameter that contains a full name of the file where the XSD scheme of the event log of the current version will be located. |
4.10.12. binary-data-storage mode
4.10.12.1. General information
Allows you to manage binary data storages related to a specific infobase.
4.10.12.2. clear-unused-space
Allows you to clear unused data in a built-in binary data storage.
| Parameter | Description |
|---|---|
| --by-universal-date=<value> | Delete unused data until the specified (<value>) date. Has priority over the --keep-days parameter. |
| --keep-days=<value> | Save unused data for the preceding <value> of days from the current date. Ignored if the --by-universal-date parameter is specified. |
4.10.12.3. create-diff-backup
Creates a differential backup of a built-in binary data storage.
| Parameter | Description |
|---|---|
| --full-backup-server-path=<value> | Path to a full backup file. The user on whose behalf a backup is created on the binary data storage server has to have access to this file. |
| --server-path=<value> | Path to a differential backup file. The user on whose behalf a backup is created on the binary data storage server has to have access to this file. |
4.10.12.4. create-full-backup
Creates a full backup of a built-in binary data storage.
| Parameter | Description |
|---|---|
| --server-path=<value> | Path to the file of the full backup to create. The user on whose behalf a backup is created on the binary data storage server has to have access to this file. |
4.10.12.5. info
Get information on the binary data storage. One of the parameters must be specified.
| Parameter | Description |
|---|---|
| --name=<value> | Binary data storage name. |
| --storage=<value> | Binary data storage ID. |
4.10.12.6. list
Get a list of all connected binary data storages.
4.10.12.7. load-diff-backup
Restores a built-in binary data storage from a differential backup.
| Parameter | Description |
|---|---|
| --full-backup-server-path=<value> | Path to a full backup file. The user on whose behalf a backup is restored on the binary data storage server has to have access to this file. |
| --server-path=<value> | Path to the differential backup file that will be used for restore. The user on whose behalf a backup is restored on the binary data storage server has to have access to this file. |
4.10.12.8. load-full-backup
Restores a built-in binary data storage from a full backup.
| Parameter | Description |
|---|---|
| --server-path=<value> | Path to the full backup file from which the restore will take place. The user on whose behalf a backup is restored on the binary data storage server has to have access to this file. |
4.11. Debug server (dbgs)
4.11.1. Startup command line
You can run the debug server (dbgs) as an application, a daemon, or an operating system service. As an application, the debug server can run on any supported operating system. As a "daemon", the debug server can only run on Linux. As an operating system service, the debug server can only run on Windows.
To start the debug server manually, specify the following commands in the command line:
dbgs --version|--help --service|--daemon --addr=<host> --port=<port>|--range=<range> --ownerPID=<PID> --password=<pwd> --notify=<file> --debugServerUsers=<file>Command description:
| Command | Description |
|---|---|
--version
-v |
Displays the debug server version. |
--help
-h
-? |
Displays brief help information about debug server startup command line settings. |
| --service | Informs the debug server that it is running as a Windows service. Available only on Windows.
You can find out how to register and unregister the debug server as a Windows service in the following subsections.
The service key is incompatible with the daemon key. |
| --daemon | This key allows you to start the debug server in the "demon" mode of Linux OS, i.e in the background application mode that does not interact with the terminal from where this application is running. Starting a debug server with this key does not mean that the server agent will be automatically started for execution after the system is rebooted.
The daemon key is incompatible with the service key. |
--addr=<host>
-a <host> |
Allows to specify the IP address that will be used as the debug server address. It makes sense if there are several network cards with different IP addresses installed on the computer. If the IP address is not specified, then the address of an arbitrary network card will be used. |
--port=<port>
-p <port> |
The port that will be used to connect to the debug server. If the specified port will be unavailable, the debug server will not start and debugging will be impossible. The port must be specified explicitly, there is no default value. When you start the debug server using the server cluster, the port 1550 will be used, which cluster selects by default and can be redefined using the server cluster start-up keys.
If the port and range parameters are specified at the same time, the port parameter is ignored. |
--range=<range>
-r <range> |
Specifies a range of ports to select the port from, which will connect to the debug server. If all the ports specified in this parameter are unavailable, the debug server cannot start and debugging is impossible.
A range of ports is indicated by the symbol ":", several ranges (or specific ports) are separated by the symbol ",". For example: 2560:2590, 4567, 9000:12000. In this example, the ports from 2560 to 2590, port 4567 and ports from 9000 to 12000 are used to select the port. As a result, one port is selected, which will be used in the work. Information about the selected port (along with the address of the debug server) will be written to the file specified with the notify parameter.
If the port and range parameters are specified at the same time, the port parameter is ignored. |
--ownerPID=<PID>
-opid <PID> |
This parameter specifies the ID of the operating system process, the lifetime of which determines the lifetime of the debug server process. The debug server monitors the process with the specified id. After completion of this process it also completes work. In this case, all debugging processes that are performed through this debug server will also be terminated.
When debugging the file infobase, Designer automatically sets its own process ID for this parameter. When running from a server cluster, this parameter is not used. |
--password=<pwd>
-pwd <pwd> |
Password to access the debug server. The password is to be specified for all debuggers that want to be debugged using this debug server.
If the debugServerUsers and password parameters are specified at the same time, the password parameter is ignored. |
| --notify=<file> | The full name of the file where debug server stores its address. Designer or cluster manager reads the information on the debug server address and deletes the file. |
--debugServerUsers=<file>
-dbgsUsers <file> |
Allows the debug server to specify a file with a list of debug users. If the debugServerUsers and password parameters are specified at the same time, the password parameter is ignored.
If the debugServerUsers parameter is not specified, the debug server does not limit debugging capabilities. |
When starting the debug server as a service or "demon", you should keep in mind that through such debug server, you can debug infobase debug items in file mode and client/server infobase client debug items. Debugging of server debug items of client/server infobases via a debug server running in service or "daemon" mode is not supported.
See also:
- Debug server.
4.11.2. Registering the debug server service (Windows)
To register a debug server as a Windows service, you can use the following command file (or take it as a basis for further upgrades):
register-dbgs.bat:
@echo offrem %1. Full 1C:Enterprise version number.rem %2. Network port to connect to the debug server.set DbgsUserName=<debug server user>set DbgsUserPwd=<debug server user password>set SrvcName="Debug Server %2"set BinPath="\"C:\Program Files\1cv8\%1\bin\dbgs.exe\" --service --port=%2%"set Desctiption="1C:Enterprise 8.3 Debug Server. Parameters: %1, port: %2"sc stop %SrvcName%sc delete %SrvcName%sc create %SrvcName% binPath= %BinPath% start= auto obj= %DbgsUserName% password= %DbgsUserPwd% displayname= %Desctiption%Before you use this batch file, specify the data of a real user (name and password) on whose behalf the debug server service will run (set DbgsUserName= and set DbgsUserPwd= lines).
When starting this command file, the following parameters are used:
- The full number of 1C:Enterprise version from which a debug server will be used.
- The number of the network port that will be used to connect to the debug server. In the above example, the existence of a service with the given number is not checked.
Example of starting the command file (administrator rights are required):
register-dbgs.bat 8.3.25.100 1550After starting the command file with these parameters, the following actions will be executed:
-
Service name: Debug Server 1550.
-
1C:Enterprise version: 8.3.24.100.
-
Command line for service startup: "C:\Program Files\1cv8\8.3.25.100\bin\dbgs.exe" --service --port=1550.
-
Displayed name: 1C:Enterprise 8.3 Debug server. Parameters: 8.3.24.100, port: 1550.
-
Service start mode: Automatic.
4.11.3. Unregistering the debug server service (Windows)
To unregister the Windows debug server service, you can use the following command file (or take it as a basis for further upgrades):
unregister-dbgs.bat:
@echo offrem %1. Network port to connect to the debug server.set SrvcName="Debug Server %1"sc stop %SrvcName%sc delete %SrvcName%When starting this command file, the following parameters are used:
- The number of the network port that will be used to connect to the debug server. In the above example, the existence of a service with the given number is not checked.
Example of starting the command file (administrator rights are required):
unregister-dbgs 1550This batch file stops and unregisters the service. The service name is generated according to the same rules as when registering a new (non-standard) 1C:Enterprise debug server service.
4.12. Cluster agent (ragent)
4.12.1. Startup command line
You can run the server agent (ragent) as an application, a daemon, or an operating system service. As an application or, the server agent service can run on any supported operating system. As a "daemon", the server agent can only run on Linux.
To specify the server agent startup parameters, use the startup command line, which looks as follows for all supported operating systems:
./ragent /daemon /instsrvc /rmsrvc /start /stop /usr <value> /pwd <value> /port <value> /regport <value> /range <value> /seclev <value> /d <value> /pingPeriod <value> /pingTimeout <value> /debug -<value> /debugServerAddr <value> /debugServerPort <value> /debugServerPwd <value> /debugServerUsers <value>In the command description, pay attention to the "OS" column. This column indicates whether the command is applicable on Linux (letter "L" in the column) or Windows (letter "W" in the column). If nothing is specified in the column, the command can be used on any supported operating system.
You can use the following commands in the startup line:
| Command | OS | Description |
|---|---|---|
| /d <value> | The directory that will contain (or contains) the server cluster service files (including the cluster list and the cluster infobase list). If the parameter is not specified, the default directory is used:
NOTE. On Windows, the directory name must not end with a character if it is enclosed in quotes. Correct: , incorrect: . |
|
| /daemon | L | On Linux. This switch allows you to start the server agent in daemon mode on Linux, that is, as a background application that does not interact with the terminal used to start it. Running the server agent with this switch does not auto start the server agent after a system reboot. |
| /debug -<value> | Starts the server cluster in debug mode. The <value> parameter specifies the protocol the debugger will use on this server cluster:
Default value: -tcp.
TIP. Since server performance drops in debug mode, it is recommended that you apply the mode only for those servers where debugging is required. |
|
| /debugServerAddr <value> | Specifies the address of the computer where the debug server is running. It is recommended that you use this switch when several network cards are installed on the computer.
If the command is not specified, an arbitrary network address that belongs to the computer running the debug server will be used. |
|
| /debugServerPort <value> | Specifies the port to be used by the debug server.
Default value: 1550. |
|
| /debugServerPwd <value> | Specifies the password to be used by the client application when establishing a connection with the debug server of this server cluster.
If the /debugServerPwd and /debugServerUsers parameters are specified at the same time, the list of users from the /debugServerUsers command is used, and the /debugServerPwd command is ignored.
Default value: password is not set. |
|
| /debugServerUsers <value> | Allows the debug server to specify a file with a list of debug users.
If the /debugServerPwd and /debugServerUsers commands are specified at the same time, the list of users from the /debugServerUsers command is used, and the /debugServerPwd command is ignored. If the /debugServerUsers command is not specified, the debug server does not limit debugging capabilities.
Default value: user list is not specified. |
|
| /instsrvc | W | On Windows. Register the cluster agent as a Windows service. If ragent is started with this command, it registers ragent in the list of Windows services and exits.
The /instsrvc command is incompatible with the /rmsrvc, /start and /stop commands. |
| /pingPeriod <value> | Connection interruption check frequency (in milliseconds). You can change the value using the cluster administration tools. If at least one of the Verification period or Verification timeout parameters in the cluster settings is different from 0, these values will be used. Otherwise, the server cluster startup command-line options will be used.
Default value: 1,000. |
|
| /pingTimeout <value> | Check timeout of the connection break monitoring system (in milliseconds). You can change the value using the cluster administration tools. If at least one of the Verification period or Verification timeout parameters in the cluster settings is different from 0, these values will be used. Otherwise, the server cluster startup command-line options will be used.
Default value: 5,000. |
|
| /port <value> | Network port number of the server agent (ragent). This port is used by the cluster console to access the main server. The cluster agent port is also specified as the network port of the working server.
Default value: 1540. |
|
| /pwd <value> | W | On Windows. Password of the Windows user that must run ragent as a Windows service.
You can use it only with the /usr and /instsrvc when registering ragent as a Windows service. |
| /range <value> | Network port ranges for dynamic selection. Used as the initial value of the IP port ranges property of the working cluster server created by default at first ragent startup.
Default value: 1560:1591.
Examples of range values: 4549:4567, 7072:7790. |
|
| /regport <value> | Network port number of the main cluster manager (rmngr) created by default at first ragent startup. Default value: 1541. | |
| /rmsrvc | W | On Windows. Unregister the cluster agent as a Windows service. If ragent is started with this switch, it unregisters ragent from the list of Windows services and exits.
The /rmsrvc command is incompatible with the /instsrvc, /start, and /stop command. |
| /seclev <value> | Security level of the cluster agent process. Specifies the security level of connections established with the ragent process. Level can take values:
|
|
| /start | W | On Windows. Run ragent registered as a Windows service. Starts ragent previously registered as a Windows service and exits.
The /start command is incompatible with the /instsrvc, /rmsrvc, and /stop command. |
| /stop | W | On Windows. Stop ragent registered and running as a Windows service. Stops ragent previously registered and started as a Windows service and exits.
The /stop command is incompatible with the /instsrvc, /rmsrvc, and /start command. |
| /usr <value> | W | On Windows. Name of the Windows user that must run ragent as a Windows service.
You can use it only with the /instsrvc command when registering ragent as a Windows service. |
The values specified for the /pingPeriod and /pingTimeout commands are used for all outgoing connections of cluster processes on this server that have been started via this server agent process.
If the cluster contains several working servers and changing the default period and timeout values is advisable, we recommend that you:
-
Set the check timeout value to be 3-10 times longer than the check period.
-
Do not set the check period value to be less than 1,000 milliseconds.
-
Specify the same check period and timeout values on all servers in one cluster.
To stop the server agent running as an application, press Ctrl + C.
See also:
- Starting the server cluster.
4.12.2. Registering the cluster agent startup service (Windows)
To register a service agent as a Windows service, you can use the following command file (or take it as a basis for further upgrades):
register-agent.bat file:
@echo offrem %1. Full 1C:Enterprise version number.rem %2. First two digits of the port numbers. For ports 1540,1541,1560:1591, use 15rem %3. Directory with cluster registry data.set SrvUserName=<user name>set SrvUserPwd=<user password>set RangePort=%260:%291set BasePort=%241set CtrlPort=%240set SrvcName="Server Agent %CtrlPort% %1"set BinPath="\"C:\Program Files\1cv8\%1\bin\ragent.exe\" /srvc /agent /regport %BasePort% /port %CtrlPort% /range %RangePort% /d \"%~3\" /debug"set Desctiption="1C:Enterprise 8.3 Server Agent. Parameters: %1, ragent port: %CtrlPort%, rmngr port: %BasePort%, range: %RangePort%"if not exist "%~3" mkdir "%~3"sc stop %SrvcName%sc delete %SrvcName%sc create %SrvcName% binPath= %BinPath% start= auto obj= %SrvUserName% password= %SrvUserPwd% displayname= %Desctiption% depend= Dnscache/Tcpip/Tcpip6/lanmanworkstation/lanmanserverBefore you use this batch file, specify the data of a real user (name and password) on whose behalf the server cluster service will run (set SrvUserName= and set SrvUserPwd= strings).
When starting this command file, the following parameters are used:
-
The full number of 1C:Enterprise version from which a debug server will be used.
-
The first two digits of the numbers of the network ports used by the server cluster launched by this service agent. For ports 1540,1541,1560:1591, use 15.
-
Cluster registry data directory.
Before registering an operating system service, the service name is generated. The service name is a string that consists of the following elements:
-
Server Agent line
-
Network port number of the main cluster manager
-
Full version number of 1C:Enterprise
If you register a server whose version is 8.3.27.100 and the main cluster manager port is 2540, the service name will look as follows: Server Agent 2540 8.3.27.100.
Example of starting the command file (administrator rights are required):
register-agent 8.3.27.100 25 "c:\cluster_data\cluster 1"register-agent 8.3.27.100 35 "c:\cluster_data\cluster 2"In this example, the first string registers the server service with the following parameters:
-
Service name: Server Agent 2540 8.3.27.100.
-
Server ports: 2540, 2541, 2560:2591.
-
Directory with cluster registry data: C:\cluster_data\cluster 1.
-
Service description: 1C:Enterprise 8.3 Server Agent. Parameters: 8.3.27.100, ragent port: 2540, rmngr port: 2541, range: 2560:2591.
The second string registers a server service with the following parameters:
-
Service name: Server Agent 3540 8.3.27.100.
-
Server ports: 3540, 3541, 3560:3591.
-
Directory with cluster registry data: C:\cluster_data\cluster 2.
-
Service description: 1C:Enterprise 8.3 Server Agent. Parameters: 8.3.27.100, ragent port:3540, rmngr port: 3541, range: 3560:3591.
4.12.3. Unregistering the cluster agent startup service (Windows)
To unregister the Windows debug server service, you can use the following command file (or take it as a basis for further upgrades):
unregister-agent.bat file:
@echo offrem %1. Full 1C:Enterprise version number.rem %2. First two digits of the port numbers. For ports 1540,1541,1560:1591, use 15set SrvcName="Server Agent %240 %1"sc stop %SrvcName%sc delete %SrvcName%When starting this command file, the following parameters are used:
- The full number of 1C:Enterprise version from which a debug server will be used.
- The first two digits of the numbers of the network ports used by the server cluster launched by this service agent. For ports 1540,1541,1560:1591, use 15.
Example of starting the command file (administrator rights are required):
unregister-agent 8.3.27.100 25This batch file stops and unregisters the service. The service name is generated according to the same rules as when registering a new (non-standard) 1C:Enterprise server service.
4.13. Administration server (ras)
4.13.1. Startup command line
You can run the administration server (ras) as an application, a daemon, or an operating system service. As an application, the administration server can run on any supported operating system. As a "daemon", the administration server can only run on Linux. As an operating system service, the administration server can only run on Windows.
To specify the administration server startup parameters, use the startup command line, which looks as follows for all supported operating systems:
ras cluster --port=<port> --monitor-address=<address> --monitor-base=<location> --monitor-port=<port> <host[:port]>The command-line options for starting the administration server (ras) on Windows and Linux are identical and have the following value:
| Command | Description |
|---|---|
| <host[:port]> | Specifies the address of the service agent of the server cluster administrated by the administration server.
If the address of the cluster agent is not explicitly specified, the default value is localhost:1540. |
| cluster | Starts the administration server in server cluster administration mode. |
| --monitor-address=<address> | IP address served by the performance monitor gateway over HTTP.
Possible values:
Default value: localhost. |
| --monitor-base=<location> | Base path to publish performance indicators.
Default value: /. |
| --monitor-port=<port> | Network port served by the performance monitor gateway over HTTP.
Default value: 1555. |
--port=<port>
-p <port> |
Number of the network port served by the administration server.
Default value: 1545. |
The required parameter is cluster. It is highlighted the same way in the table above.
To authenticate in the cluster, use 1C:Enterprise authentication.
4.13.2. Registering the administration server startup service (Windows)
To register an administration server as a Windows service, you can use the following command file (or take it as a basis for further upgrades):
Register-ras.bat:
@echo offrem %1. Full 1C:Enterprise version numberrem %2. Network port number of the administration server.rem %3. Server cluster instance name.rem %4. Network port number of the server agent.set RasUserName=<username>set RasUserPwd=<user password>set SrvcName="Remote Server %2"set BinPath="\"C:\Program Files\1cv8\%1\bin\ras.exe\" cluster --service --port=%2 %3:%4"set Desctiption="1C:Enterprise 8.3 Remote Server. Parameters: %1, port: %2, cluster: %3:%4"sc stop %SrvcName%sc delete %SrvcName%sc create %SrvcName% binPath= %BinPath% start= auto obj= %RasUserName% password= %RasUserPwd% displayname= %Desctiption%Before you use this batch file, specify the data of a real user (name and password) on whose behalf the server cluster service will run (set RasUserName= and set RasUserPwd= strings).
When starting this command file, the following parameters are used:
-
The full number of 1C:Enterprise version from which a debug server will be used.
-
Number of the network port serviced by the administration server.
-
The name of the server cluster instance to which the administration server will connect.
-
The network port number of the server agent to which the administration server will connect.
Before registering an operating system service, the service name is generated. The service name is a string that consists of the following elements:
-
Remote Server string
-
Number of the network port serviced by the administration server.
If you register an administration server whose version is 8.3.27.100 and the network port is 1545, the service name will look as follows: Remote Server 1545.
Example of starting the command file (administrator rights are required):
register-ras 8.3.27.100 1545 localhost 1540In this example, the first string registers the server service with the following parameters:
-
Service name: Remote Server 1545.
-
Administration server port: 1545.
-
Server cluster instance name: localhost.
-
Cluster agent port: 1540.
-
Service description: 1C:Enterprise 8.3 Remote Server. Parameters: 8.3.27.100, port: 1545, cluster: localhost:1540.
-
Service start mode: Automatic.
4.13.3. Unregistering the administration server startup service (Windows)
To unregister the Windows debug server service, you can use the following command file (or take it as a basis for further upgrades):
unregister-ras.bat file:
@echo offrem %1. Full 1C:Enterprise version number.rem %1. Network port number of the administration server.set SrvcName="Remote Server %1"sc stop %SrvcName%sc delete %SrvcName%When starting this command file, the following parameters are used:
- The first two digits of the numbers of the network ports used by the server cluster launched by this service agent. For ports 1540,1541,1560:1591, use 15.
Example of starting the command file (administrator rights are required):
unregister-ras 25This batch file stops and unregisters the service. The service name is generated according to the same rules as when registering a new (non-standard) 1C:Enterprise server service.
4.14. Web server publishing utility (webinst)
The webinst utility configures web servers to support the web client operation. The utility can be used in Windows or Linux environment. It is part of the 1C:Enterprise distribution package.
webinst [-publish]|-delete <web server> -wsdir <virtual directory> -dir <physical directory> -connstr <connection string> -confpath <path to httpd.conf> -descriptor <path to default.vrd> [-osauth]To publish, run the utility as an administrator. When running on Windows, a request for elevation of privileges will appear.
The following commands can be used in the startup line, which are the same for starting on any supported operating system:
| Command | Description |
|---|---|
| <web server> | Indicates a web server for which publishing or publication deleting will be performed:
When using the Apache 2.4 web server, you can omit the path to the configuration file using the -confpath parameter.
It should be considered that for the Apache web server version 2.2 and 2.4 there are differences between the changes made in the configuration file of the web server. Therefore, the incorrectly specified version of the web server will result in the unavailability of the publication.
You can specify only one value from the above list when running the utility. |
| -confpath | The full path to the configuration file (httpd.conf) of the Apache web server.
This parameter is applicable only when using Apache web servers. |
| -connstr | Infobase connection string (see Infobase connection string). |
| -delete | The publication is deleted from the specified directory.
NOTE. When deleting a publication, it is sufficient to specify only the parameter. The remaining parameters can be specified to control the operation. |
| -descriptor | Allows you to publish according to the template specified by the existing file, which is specified in this parameter (including the file path). The name of the template file does not have to be default.vrd. When publishing, the existing default.vrd file is completely replaced with the template file. If the -wsdir or -connstr parameters are specified simultaneously with this parameter, then the values of these parameters replace the values of the base and ib (respectively) attributes of the point element.
If the -descriptor parameter is specified simultaneously with the -delete parameter, then the virtual directory name (the base attribute of the point element) and the infobase connection string (the ib attribute of the point element) are used from the template file. The publication will be deleted only if both values in the publication to delete and the template file match. |
| -dir | Name of the physical directory where the virtual directory of the web server will be displayed. The directory must already exist.
For IIS 7.x and later web servers, publishing is not supported if the value of this parameter points to the %SYSTEMDRIVE%\Inetpub\wwwroot directory.
NOTE. A directory name must not end with a "" character if it is enclosed in quotes. Correct: , incorrect: . |
| -osauth | When publishing, it configures the use of OS authentication on a web server.
This parameter is applicable only when using IIS web servers. |
| -publish | The web client is published to the web server. |
| -wsdir | Name of the virtual directory. |
The name and value of the parameter must be space-separated. If the parameter contains spaces, it must be enclosed in quotation marks (""). If there is a quotation mark inside the parameter, the internal quotation marks must be doubled.
See also:
- Using the webinst (278) utility.
Appendix 5. Error handling
The text of an error message is generated as follows:
-
The most deeply nested (meaning the first) exception is extracted from the chain of exceptions.
-
The description text of the first exception is used as short presentation of the error:
-
For module compilation errors, the short presentation also indicates the error location (module line containing the error).
-
For run-time errors, the short presentation does not indicate the error location (module line containing the error).
-
-
The short presentation of the error is displayed to the user in a dialog box. This dialog box may include Details… button if the following conditions are met:
-
Debug mode is active
-
The error is related to 1C:Enterprise language
-
The chain contains multiple exceptions
-
-
The detailed presentation of the error is generated from the descriptions of all exceptions in the chain.
If the error notification dialog box has no Details… button and the error is critical (terminating the application), this dialog box instead contains the Show information for the technical support hyperlink.
If the dialog box displays a 1C language error, clicking the Details… button opens a window with the errors details and Designer… button.
While the thin client or web client is running, the following exceptions are handled in the client/server mode:
-
If any locked infobase connections are detected at system startup, an error message is displayed and the user is prompted to reestablish the connection.
-
If the server version and the client version do not match, an error message is displayed and the user is prompted to restart the client.
-
If the user has no rights to start the thin client, the system behavior depends on whether the –AppAutoCheckMode command was executed:
-
If the command was executed at startup, the system attempts to start the thick client automatically.
-
If the command was not executed at startup, an error message window is displayed (the user is not prompted to restart the client).
-
-
If connection to 1C:Enterprise server (or a web server) fails for a repeatable request or a request executed before the session start, the error message is displayed and the user is prompted to repeat the request. If the user does not choose to repeat the request, the client does not close. If the request is not repeatable, the error message is displayed and the user is prompted to restart the client.
-
If an error occurs during the processing of the request on the server, the error message window appears with the option to restart.
-
If a session error occurs (for example, the session was removed by the administrator), the error message window appears and the user is prompted to restart the client.
When an internal platform error occurs, the web client generates an error of this type: Unknown error: <error description>.
If a web client or a thin client connected via a web server is used to connect to the infobase, the following error codes are used in case of emergencies:
-
400 Bad Request. Describes the application errors without critical consequences for the operation of the client application (including all runtime exceptions). Cannot catch to display to the user.
-
500 Internal Server Error. Describes the application errors with critical consequences for the operation of the client application. For example:
-
Unrecoverable database exceptions
-
Exceptions related to deleted sessions or missing session data
-
-
502 Bad gateway. Describes server cluster errors or maintenance operation errors with critical consequences for the operation of the client application. For example, if it is impossible to connect to the 1C:Enterprise server.
-
503 Service Unavailable. Describes server cluster errors or maintenance operation errors with critical consequences for the operation of the client application. For example, if it is impossible to connect to the DBMS server.
Appendix 6. Secondary administration internet services
6.1. Internet service for getting the list of shared infobases
6.1.1. General information
When working remotely (for example, via a web server) you need to retrieve the shared infobase list. However, you cannot use the CommonInfoBases parameter of configuration file 1cestart.cfg to retrieve the list. You can get the shared infobase list if it was published using the Internet service. To get the list, you can use either HTTP requests or web services.
If the shared infobase list is retrieved using HTTP connection, the certificate of the server used to retrieve the list is checked using the certificates of the root certificate authority obtained from the corresponding OS system storage.
6.1.2. Using web services
To get the shared infobase list through a web service, you need to publish a specific web service that will return the list. This web service is described below in more detail.
6.1.2.1. Overview
The interactive launcher (1cv8s) can get the shared infobase list either from a local network or from the Internet. To retrieve the shared bases list from the Internet, you need to start the interactive launcher and specify the address of the list (the InternetService or WebCommonInfoBases parameter in file 1cestart.cfg).
The shared infobase list retrieval procedure must meet the following requirements:
-
The WebCommonInfoBases.CheckInfoBases() method is called anonymously.
-
The WebCommonInfoBases.GetInfoBases() method is called with authentication.
-
The infobase that returns the shared infobase lists must contain a list of users allowed to request these lists.
First, the WebCommonInfoBases.CheckInfoBases() method is called (anonymously). If the launcher is started manually for the first time for this computer and this user, the ClientID and InfoBasesCheckCode parameters take the value 00000000-0000-0000-0000-000000000000. If the launcher is not started for the first time, the client code and the code of the current shared infobases list are passed as parameters. The web service method determines whether the shared infobase list for the client needs to be updated. If the update is needed, the InfoBasesChanged output parameter must be set to True and the URL parameter must contain the address of the web service that implements the WebCommonInfoBases.GetInfoBases() method (requires authentication). Otherwise, InfoBasesChanged must be set to False and URL must contain an empty string.
The algorithm of checking for the changes in the shared infobase list is not regulated and can be arbitrary. Please note that the launcher does not calculate the code value identifying the shared infobase list but simply stores the value that was passed during the previous call of the web service.
If results of the call of WebCommonInfoBases.CheckInfoBases() method indicate that the list needs to be updated, the launcher calls the WebCommonInfoBases.GetInfoBases() method of the web service. The web service is located at the address returned by the WebCommonInfoBases.CheckInfoBases() function in its URL parameter. The GetInfoBases() method must match the user on whose behalf the web service is authenticated with a client code. The mapping can be "personal". The user identifies themselves with a personal username and password and receives the personal shared infobase list. The mapping can be "role-based": the user identifies their belonging to a certain role, such as Operator, Storekeeper, and so on, and obtains the shared infobase list common to all users with the same role. You should note that in the first case, the infobase implementing the GetInfoBases() method needs to contain the list of all users who can run the 1cv8s launcher connected to this web service. In the second case, the list of users can contain the role names only.
The GetInfoBases() method must return three values:
-
Client code (if not specified).
-
The list of shared infobases in the v8i format.
-
Code value identifying the passed infobase list. This value will be passed to the WebCommonInfoBases.CheckInfoBases() method at the next check for whether the shared infobase list needs to be updated.
If the shared infobase list is retrieved for the first time, the client code (the ClientID parameter) is 00000000-0000-0000-0000-000000000000.
Please also consider the following:
-
The infobase that implements the WebCommonInfoBases web service needs to be published in two different publications. This is because calling the CheckInfoBases() and GetInfoBases() methods requires different levels of authentication.
-
The anonymous access is organized by explicitly specifying the user on whose behalf the access is performed in the default.vrd file.
-
The user on whose behalf the anonymous access is organized should not be able to call the method for retrieving the infobase list. The user should only indicate whether the list has changed for the passed ClientID value.
-
All publications serving the WebCommonInfoBases web service must prohibit the web client.
-
If the shared infobase list is used by the mobile client, this file must contain the correct values of the MobilePublicKey parameter for the infobases to be displayed in the mobile client.
6.1.2.2. Web service description
Web service name: WebCommonInfoBases. The timeout for execution of any web service method is 3 seconds.
The web service methods are listed below.
CheckInfoBases
Description:
This method is used by the 1cv8s launcher to determine whether the shared infobase list needs to be retrieved.
Parameters:
- ClientID input
- String. Contains the client ID used to check whether the shared infobase list needs to be updated.
- InfoBasesCheckCode input
- String. Identifies the shared infobase list. The code must uniquely identify the current shared infobase list. If the list is modified in any way, the code needs to be assigned a new value that was not previously used for this client ID.
- InfoBasesChanged output
- Boolean. Indicates that the shared infobase list must be retrieved again.
- URL output
- String. The URL to be requested if the shared infobase list has changed since the last call.
Return value:
Arbitrary type, the value is ignored.
getInfoBases
Description:
Parameters:
- ClientID input/output
- String. Contains the client ID for which the shared infobase list is retrieved. If the client ID is not specified (or equal to 00000000-0000-0000-0000-000000000000), the method assigns the client ID and returns it in this parameter.
- InfoBasesCheckCode output
- String. Value of the code identifying the shared infobase list returned by this method in the InfoBases parameter.
- InfoBases output
- String. The list of shared infobases in the v8i format.
Return value:
Arbitrary type, the value is ignored.
6.1.2.3. Implementation example
This section reviews an example of web service used to retrieve the shared infobase list.
A simple configuration including one catalog and one web service is used as a web service.
The catalog is organized as follows:
-
Name SaredInfoBasesList.
-
Code type String, length is 36 characters.
-
Attributes:
-
Name ListCode, type UniqueIdentifier.
-
Name IBList, type String, unlimited length.
-
-
The remaining parameters have default values.
This catalog will store the list of customer IDs (standard attribute Code), the shared infobase list (attribute IBList) and the current version of the infobase list (attribute ListCode) determined when the list was last retrieved for this client. The version of the list is a unique identifier, and it is changed each time a catalog item is saved. For this purpose in the object module, the handler BeforeWrite is defined:
Procedure BeforeWrite(Cancel)ListCode = New UniqueIdentifier;EndProcedureIn addition, in the configuration, the WebCommonInfoBases web service must be created with the following operations defined:
-
CheckInfoBases, the Return value type property is set to string, the Possibly empty value check box is selected. The remaining properties are set to default values.
-
GetInfoBases, the Return value type property is set to string, the Possibly empty value check box is selected. The remaining properties are set to default values.
Text of the web service operations:
Function CheckInfoBases(ClientID, InfoBasesCheckCode, InfoBaseChanged, URL)If ClientID = "00000000-0000-0000-0000-000000000000"And InfoBasesCheckCode = "00000000-0000-0000-0000-000000000000" Then// the first request of the clientInfoBaseChanged = True;URL = "/listservice2/ws/WebCommonInfoBases";Return "";EndIf;Client = Catalogs.SharedBaseList.FindByCode(ClientID);If Client.Empty() Then// no such clientInfoBaseChanged = False;Else// check that the list on the client and our list are the sameIf InfoBasesCheckCode = Client.ListCode Then// the list is not changedInfoBaseChanged = False;URL = "";Else// the list is changedInfoBaseChanged = True;URL = "/listservice2/ws/WebCommonInfoBases";EndIf;EndIf;Return "";EndFunctionFunction GetInfoBases(ClientID, InfoBasesCheckCode, InfoBases)If ClientID = "00000000-0000-0000-0000-000000000000" ThenCurUser = InfoBaseUser.CurrentUser();// need to add a new client// as a code of the catalog item, the UUID// of the infobase user will be usedObject = Catalogs.SharedBaseList.NewElement();Object.Code = String(CurUser.UniqueIdentifier);// the client name will be equal to the usernameObject.Name = CurUser.Name;// the IB list is empty at the first callObject.IBList = "";Object.Write();// to form the returned values of the web serviceInfoBasesCheckCode = Object.CodeList;InfoBases = Object.IBList;ClientID = Object.Code;Else// here we get the data for the existing client codeClient = Catalogs.SharedBaseList.FindByCode(ClientID);If Client.Empty() Then// no such clientInfoBasesCheckCode = "";InfoBases = "";ElseInfoBasesCheckCode = Client.CodeList;InfoBases = Client.IBList;EndIf;EndIf;Return "";EndFunctionOnce you create the configuration, publish the web service on the web server twice (see Web service support settings). Then the addresses of published web services should be stored. Suppose that web services are published at the addresses:
-
http://localhost/listservice. Anonymous web service.
-
http://localhost/listservice2. Web service that requires authentication.
The infobase should contain users: Anonymous, and, for example, users Operator, Storekeeper, Accountant.
The default.vrd file, which describes the publication at http://localhost/listservice, is as follows:
<?xml version="1.0" encoding="UTF-8"?><point xmlns="http://v8.1c.ru/8.2/virtual-resource-system"xmlns:xs="http://www.w3.org/2001/XMLSchema"xmlns:xsi="http://www.w3.org/2001/XMLSchema-instance"base="/listservice"ib="File=X:\DB\ListBase;Usr=Anonimous" enable="false"><ws><point name="WebCommonInfoBases"enable="true"/></ws></point>The default.vrd file, which describes the publication at http://localhost/listservice2, is as follows:
<?xml version="1.0" encoding="UTF-8"?><point xmlns="http://v8.1c.ru/8.2/virtual-resource-system"xmlns:xs="http://www.w3.org/2001/XMLSchema"xmlns:xsi="http://www.w3.org/2001/XMLSchema-instance"base="/listservice2"ib="File= X:\DB\ListBase;"enable="false"><ws><point name="WebCommonInfoBases"enable="true"/></ws></point>In the settings of the web server where you published the web service for retrieving the shared infobase list, the HTTP HEAD request should be disabled (at least for virtual catalogs to access the web service). Otherwise, the web service will not be used.
In the setup form of the startup window (see Startup window settings), add the Internet service with the address displayed above and specify the ws suffix: http://localhost/listservice/ws/.
After completing the configuration, run the launcher. When prompted to enter a username and password to access the 1C:Enterprise web service, you should enter the names Operator, Storekeeper, Accountant. The corresponding entries are added to the SharedBaseList catalog. If you place into the IBList attribute of each catalog element your list in the v8i format, this list will be added to the list of infobases of the launcher after authentication.
6.2. Internet service for obtaining a client application distribution package
6.2.1. General information
When operating remotely (using web server), it is necessary to automatically get the distribution package of the client application when the system version is changed on the 1C:Enterprise server (or on the web server). In this case the search for a new version using the DistributiveLocation parameter of the configuration files may not give the result. To get the distribution package, you can use the option to publish the client application distribution package using the web service. To get the list, you can use either HTTP requests or web services.
If you get the client application distribution package using the HTTPS connection, then the server certificate (from which the distribution package is requested) is verified using the certificates of the root certification authorities, obtained from the system storage of the corresponding OS.
For other methods of updating the client application, see Application updates.
6.2.2. Using web services
To get the client application distribution package using web service you need to publish a special web service that return this distribution package. This web service is described below in more detail.
6.2.2.1. Overview
Thin client (1cv8c) can attempt to install the required thin client version if the version matches 1C:Enterprise server cluster version or web server extension version. For this, the following three mechanisms are used (in order of use):
-
Search for the distribution package in the local network using the DistributiveLocation configuration file parameters (1cestart.cfg and 1cescmn.cfg). \$\$\$remove it$$$
-
Get the client application distribution package at the URL specified in the default.vrd (the point element attribute, see \<point> (root element)) or conf.cfg configuration files (the PublishDistributiveLocation* parameters). The priority value is the value specified in the default.vrd file.
-
Get the file using the web service for obtaining the client application distribution package. Specify the web service address in the 1cestart.cfg configuration file (the InternetService or WebDistributiveLocation parameter) or in the dialog box of startup window settings (see Startup window settings).
The thin client analyzes the result of the request to the web service. If the web service returns 0 in the Size parameter, then it is considered that the required client application distribution package does not exist, and the error is generated that the versions of the client application and the server do not match. Otherwise, the user is prompted to download and install the client application, and the size of the distribution package received is shown. If the answer is positive, the new version is downloaded and installed. Then the necessary version of the client application is restarted. When you import the distribution package file, the timeout for the operation is 600 seconds. When executing distribution package import, redirect on the web server side is not supported.
6.2.2.2. Web service description
Web service name: WebDistributiveLocation. The timeout for execution of any web service method is 3 seconds.
The web service methods are listed below.
GetDistributiveInfo
Description:
This method is used by the thin client (1cv8c) to get the required version of the client application distribution package in the following cases:
-
When connecting via a web server in client/server mode, the version of the client application does not match the server version.
-
When connecting via a web server in file mode, the version of the client application does not match the web server extension version.
Parameters:
- DistributiveType input
- String. The type of operating system for which you need to get the client application distribution package.
Values: Linux, LinuxDEB, LinuxRPM, MacOS, Windows.
- Arch input
- String. The architecture of operating system for which you need to get the client application distribution package.
Values: x86, x86_64.
- Version input
- String. The version number of the client application for which you need to get the client application distribution package.
- Size output
- Number. The size of the client application distribution package (in bytes). If the requested distribution package is missing, you must return the value 0.
- URL output
- String. URL for downloading the client application distribution package. When generating the URL, remember that the distribution package file must be accessible to the web server. In addition, the user getting the distribution package must also have rights to download this file.
The client application distribution package is a zip archive of distribution files. For more details on the content of the ZIP archive, see \<point> (root element).
Return value:
Arbitrary type, the value is ignored.
6.2.2.3. Implementation example
Let us consider an example of web service to get the client application distribution package.
A simple configuration is used as the web service. It implements the web service only and does not contain any other configuration objects. The client application distribution packages are located in a special directory to which the web server should have access. In this configuration the WebDistributiveLocation web service must be created, for which: the operation GetDistributiveInfo is defined, the Return value type property is set to string, the Possibly empty value check box is selected. The remaining properties are set to default values. For the method parameters and their types, see Web service description.
Text of the web service operations:
Function GetDistributiveInfo(OS, Arch, Version, Size, URL)DistributiveDirectory = "C:\inetpub\Distribs\";DistributiveURL = "http://host/site/distribs/";// make the zip file nameFileName = "tc-" + Lower(OS) + "-" + Arch + "-" + Version + ".zip";Archive = New File(DistributiveDirectory + FileName);If Archive.Exists() ThenSize = Archive.Size();URL = DistributiveURL + FileName;ElseSize = 0;URL = "";EndIf;Return "";EndFunctionSpecify the correct values in the DistributionPackageDirectory and DistributionPackageURL variables that correspond to the real name of the distribution package directory of the client application (when accessing it from the web service, the DistributionPackageDirectory variable and when accessing it via the web service, the DistributionPackageURL variable).
The name of the file with the distribution package must be tc-windows-x86-8.3.24.100.zip or similar (depending on the OS type and the requested client application architecture). The name of the file with an archive is determined by the program code of the above demonstrative web service.
After creating the configuration, publish the web service on the web server (see Web service support settings). Then the address of published web services should be stored. Suppose that the web service is published at http://localhost/getdistr.
In the setup form of the startup window (see Startup window settings), add the Internet service with the address displayed above and specify the ws suffix: http://localhost/getdistr/ws. Now, to get a distribution package, a web service request will be made. If the DistributionDirectory directory (on the computer with the web service) contains a ZIP archive with the correct distribution package, this file is transferred to the computer that requested the distribution package.
6.3. External session management web service
6.3.1. General information
For external session management, you need to implement a web service that will provide a specific set of methods and control logic. This web service can be implemented using 1C:Enterprise tools or third-party tools. The structure of the Sessions type depends on the used web service version.
This chapter contains a description of the web service and an example of its implementation using 1C:Enterprise tools.
6.3.2. Web service description
The web service name is not specified. The default timeout for method execution is 5 seconds. To change the default timeout value, use the tout parameter when calling the web service.
6.3.2.1. Version 1
onStartSession
Description:
The method is called by the server cluster at the start of the session that requires a client license:
-
Designer
-
Thick client
-
External connection
-
Thin client
-
Web client
-
Mobile client
-
1C:Analytics client
The method determines whether a new session with the specified parameters can be created. The return code is passed to the server cluster.
Parameters:
- CallNo input
- Number. Sequence number of the call. Each time the cluster calls the web service, the sequence number of the call is incremented by 1. Based on the CallNo value, the web service may request synchronization of session data.
The call number is unique per infobase.
- ClusterID input
- String. Server cluster ID. Contains a string presentation of the universal unique identifier (UUID).
- ClusterName input
- String. Name of the server cluster where the infobase is located.
- InfoBaseName input
- String. Name of the infobase used by the session.
- SessionID input
- String. Session ID. Contains a string presentation of the universal unique identifier (UUID).
- UserID input
- String. User ID. Contains a string presentation of the universal unique identifier (UUID).
- UserName input
- String. Username.
- AppID input
- String. Name of the application attempting to access the infobase. For detailed information on the values of this parameter, see description of the ApplicationPresentation() global context function.
- Zone input
- String. Contains the initial separator values for the session being created. The string is passed in the format specified for the /Z startup command-line parameter.
- LanguageCode input
- String. The message language code for the session being created.
- ErrorDescription output
- String. Contains a description of the reason for prohibiting session creation in a human-readable format. Filled in when the web service method returns 1.
Return value:
Number. Return values:
-
0. Session can be created.
-
1. Session cannot be created. The user who starts the session is shown a login error message with the exception text from the ErrorDescription parameter or with the Session start is forbidden by the external session management service text if the ErrorDescription parameter is set to an empty string.
-
2. Synchronization is required. In this case, the server cluster calls the synchronize method with a list of sessions not including this session, and then calls the onStartSession method again. External session management calls are not synchronized. The external session management service determines whether synchronization of the session list is required. Sequence number of the call (CallNo parameter) can be used for this purpose. Skipping some call numbers after timeout may be considered a condition requiring synchronization.
onFinishSession
Description:
The method is called at the end of the session.
Parameters:
- CallNo input
- Number. Sequence number of the call.
The call number is unique per infobase.
- ClusterID input
- String. Server cluster ID. Contains a string presentation of the universal unique identifier (UUID).
- SessionID input
- String. Session ID. Contains a string presentation of the universal unique identifier (UUID).
Return value:
None.
synchronize
Description:
It is used to synchronize data on created sessions between a server cluster and a web service that implements the external session management feature. The server cluster calls this method if onStartSession() returns 2.
Parameters:
- CallNo input
- Number. Sequence number of the call.
The call number is unique per infobase.
- ClusterID input
- String. Server cluster ID. Contains a string presentation of the universal unique identifier (UUID).
- ClusterName input
- String. Name of the server cluster where the infobase is located.
- InfoBaseName input
- String. Name of the infobase for which information on the number of sessions is synchronized.
- CurrentSessions input
- Sessions. The object contains data about all sessions created for a specific infobase using the external session management feature. The object contains the Content property, which is a collection of Session objects that describe a single session each. The collection may be empty.
Return value:
None.
6.3.2.2. Version 2
In addition to the features provided by version 1, version 2 includes two methods that allow you to operate considering when a session enters or leaves the Hibernating state.
onHibernateSession
Description:
The method is called by the server cluster when a session hibernates. When a session enters the hibernating state, its license is revoked and becomes available, which must be reflected in the web service data. At the beginning of the session that enters the Hibernating state, the server cluster called the onStartSession method of this web service.
Parameters:
- CallNo input
- Number. Sequence number of the call.
The call number is unique per infobase.
- ClusterID input
- String. Server cluster ID. Contains a string presentation of the universal unique identifier (UUID).
- SessionID input
- String. Session ID. Contains a string presentation of the universal unique identifier (UUID).
Return value:
None.
onWakeupSession
Description:
Parameters:
- CallNo input
- Number. Sequence number of the call. Each time the cluster calls the web service, the sequence number of the call is incremented by 1. Based on the CallNo value, the web service may request synchronization of session data.
The call number is unique per infobase.
- ClusterID input
- String. Server cluster ID. Contains a string presentation of the universal unique identifier (UUID).
- SessionID input
- String. Session ID. Contains a string presentation of the universal unique identifier (UUID).
- ErrorDescription output
- String. Contains a description of the reason for prohibiting session wakeup in a human-readable format. Filled in when the web service method returns 1.
Return value:
Number. Return values:
-
0. Can wake up session.
-
1. Cannot wake up session. The user whose session is trying to wake up is shown a login error message with the exception text from the ErrorDescription parameter or with the Session wake-up is forbidden by the external session management service text if the ErrorDescription parameter is set to an empty string.
-
2. Synchronization is required. In this case, the server cluster calls the synchronize method with a list of sessions not including this session, and then calls the onWakeupSession method again. External session management calls are not synchronized. The external session management service determines whether synchronization of the session list is required. Sequence number of the call (CallNo parameter) can be used for this purpose. Skipping some call numbers after timeout may be considered a condition requiring synchronization.
6.3.2.3. Version 3
Version 3 has an extended list of parameters of the onStartSession() method and includes two new parameters: SessionNumber and ClientIPAddress.
onStartSession
Description:
The method is called by the server cluster on session start (except for background job sessions and WS connection sessions). The method determines whether a new session with the specified parameters can be created. The return code is passed to the server cluster.
Parameters:
- CallNo input
- Number. Sequence number of the call. Each time the cluster calls the web service, the sequence number of the call is incremented by 1. Based on the CallNo value, the web service may request synchronization of session data.
The call number is unique per infobase.
- ClusterID input
- String. Server cluster ID. Contains a string presentation of the universal unique identifier (UUID).
- ClusterName input
- String. Name of the server cluster where the infobase is located.
- InfoBaseName input
- String. Name of the infobase used by the session.
- SessionID input
- String. Session ID. Contains a string presentation of the universal unique identifier (UUID).
- SessionNumber input
- Number. Session number. Contains the session number in the infobase.
- UserID input
- String. User ID. Contains a string presentation of the universal unique identifier (UUID).
- UserName input
- String. Username.
- ClientIPAddress input
- String. IP address of the client application that attempts to start the session.
- AppID input
- String. Name of the application attempting to access the infobase. For detailed information on the values of this parameter, see description of the ApplicationPresentation() global context function.
- Zone input
- String. Contains the initial separator values for the session being created. The string is passed in the format specified for the /Z startup command-line parameter.
- LanguageCode input
- String. The message language code for the session being created.
- ErrorDescription output
- String. Contains a description of the reason for prohibiting session creation in a human-readable format. Filled in when the web service method returns 1. The return parameter value can be either a string or a value of the FormattedString type converted as follows: XDTOSerializer.XMLString(FormattedString).
Return value:
Number. Return values:
-
0. Session can be created.
-
1. Session cannot be created. The user who starts the session is shown a login error message with the exception text from the ErrorDescription parameter or with the Session start is forbidden by the external session management service text if the ErrorDescription parameter is set to an empty string.
-
2. Synchronization is required. In this case, the server cluster calls the synchronize method with a list of sessions not including this session, and then calls the onStartSession method again. External session management calls are not synchronized. The external session management service determines whether synchronization of the session list is required. Sequence number of the call (CallNo parameter) can be used for this purpose. Skipping some call numbers after timeout may be considered a condition requiring synchronization.
6.3.2.4. Version 4
In version 4, the Session object has more fields whose collection is passed as the CurrentSessions parameter of the synchronize() method:
-
SessionNumber. Session number.
-
ClientIPAddress. IP address of the client application.
6.3.2.5. Sessions type description
6.3.2.5.1. Version 1
Description of the Sessions object (in XSD format), versions 1 to 3 (inclusive):
<xs:schema xmlns:ns1="http://v8.1c.ru/8.1/data/core" xmlns:tns="http://v8.1c.ru/SessionManagement" xmlns:xs="http://www.w3.org/2001/XMLSchema" targetNamespace="http://v8.1c.ru/SessionManagement" attributeFormDefault="unqualified" elementFormDefault="qualified"><xs:import namespace="http://v8.1c.ru/8.1/data/core"/><xs:complexType name="Session"><xs:sequence><xs:element name="SessionID" type="xs:string"/><xs:element name="UserID" type="xs:string"/><xs:element name="UserName" type="xs:string"/><xs:element name="AppID" type="xs:string"/><xs:element name="Zone" type="xs:string"/><xs:element name="LanguageCode" type="xs:string"/><xs:element name="Hibernate" type="xs:boolean"/><xs:sequence></xs:complexType><xs:complexType name="Sessions"><xs:sequence><xs:element name="Content" type="tns:Session" minOccurs="0" maxOccurs="unbounded"/><xs:sequence></xs:complexType></xs:schema>6.3.2.5.2. Version 4
Description of the Sessions object (in XSD format), starting from version 4:
<xs:schema xmlns:ns1="http://v8.1c.ru/8.1/data/core" xmlns:tns="http://v8.1c.ru/SessionManagement" xmlns:xs="http://www.w3.org/2001/XMLSchema" targetNamespace="http://v8.1c.ru/SessionManagement" attributeFormDefault="unqualified" elementFormDefault="qualified"><xs:import namespace="http://v8.1c.ru/8.1/data/core"/><xs:complexType name="Session"><xs:sequence><xs:element name="SessionID" type="xs:string"/><xs:element name="SessionNumber" type="xs:decimal"/> <!-- v4 --><xs:element name="UserID" type="xs:string"/><xs:element name="UserName" type="xs:string"/><xs:element name="AppID" type="xs:string"/><xs:element name="Zone" type="xs:string"/><xs:element name="LanguageCode" type="xs:string"/><xs:element name="Hibernate" type="xs:boolean"/><xs:element name="ClientIPAddress" type="xs:string"/> <!-- v4 --><xs:sequence></xs:complexType><xs:complexType name="Sessions"><xs:sequence><xs:element name="Content" type="tns:Session" minOccurs="0" maxOccurs="unbounded"/><xs:sequence></xs:complexType></xs:schema>6.3.3. Implementation example
Let us review an example of the web service of external session management.
This example will implement the following algorithm:
-
The administrator can restrict the number of concurrent sessions for an infobase. To do this, the infobase name and the maximum number of concurrent sessions are specified.
-
If the infobase is not in the list, the number of sessions with it is unlimited.
-
You can see the list of sessions for each infobase in the list.
A simple configuration including one catalog and one web service is used as a web service. The catalog contains a list of infobases, the maximum number of sessions, and the sequence number of the last call. The web service performs session registration activities.
The catalog is organized as follows:
-
Name: AvailableSessions.
-
Code length: 0.
-
Description length: 50.
-
Attributes:
-
Name: Count, Number(2), non-negative.
-
Name: LastCallNumber, type Number(10), non-negative.
-
-
Table:
-
Name: CurrentSessions.
-
Attributes:
-
Name: SessionID, String (40) of variable length.
-
Name: UserID, String of unlimited length.
-
Name: UserName, String of unlimited length.
-
Name: AppID, String of unlimited length.
-
Name: Zone, String of unlimited length.
-
Name: LanguageCode, String of unlimited length.
-
Name: Hibernate, Boolean.
-
-
This catalog will store the infobase name (standard Name attribute), the maximum number of concurrent sessions for this infobase (Count attribute), and the sequence number of the last web service call (LastCallNumber attribute). LastCallNumber is used to determine whether data synchronization between 1C:Enterprise server cluster and the web service is required. The table will store information on the sessions that the web service allowed to start. The session record is created in the onStartSession() method and deleted in the onFinishSession() method. By comparing the maximum number of sessions allowed for this infobase and the number of recorded sessions, you can determine whether another session can be created. If the second version of the interface is used, session hibernations and wakeups are also recorded. When a session hibernates, the session record is not deleted but is marked accordingly.
Create the web service described above (see Web service description) and add the following code in the web service module. The web service must contain a link to the http://v8.1c.ru/SessionManagement XDTO package that describes the Sessions object.
Text of the web service operations:
Function onStartSession(CallNo, ClusterID, ClusterName, InfoBaseName, SessionID, UserID, UserName, AppID, Zone, LanguageCode, ErrorDescription)ErrorDescription = "";Result = Catalogs.AvailableSessions.FindByDescription(InfoBaseName, True);If Result.Empty() Then// If infobase with this name is not listed in the catalog, the infobase has no restrictionsReturn 0;EndIf;Object = Result.GetObject();Object.LastCallNumber = Object.LastCallNumber + 1;// If the call sequence is broken, synchronization will be requiredIf Object.LastCallNumber <> CallNo ThenReturn 2;EndIf;Sessions = Result.CurrentSessions.FindRows(New Structure("Hibernate", False));If Sessions.Count()+1 > Result.Count Then// Maximum number of sessions reached, cannot create any more sessionsObject.Write();ErrorDescription = "Exceeded the maximum number of sessions allowed by the external session management service";Return 1;Else// Can create sessionsString = Object.CurrentSessions.Add();String.SessionID = SessionID;String.UserID = UserID;String.UserName = UserName;String.AppID = AppID;String.Zone = Zone;String.LanguageCode = LanguageCode;String.Hibernate = False;Object.Write();Return 0;EndIf;EndFunctionFunction onFinishSession(CallNo, ClusterID, SessionID)Query = New Query;Query.Text ="SELECT| AvailableSessions.Ref|FROM| Catalog.AvailableSessions AS AvailableSessions|WHERE| AvailableSessions.CurrentSessions.SessionID = &SessionID";Query.SetParameter("SessionID", SessionID);QueryResult = Query.Execute();SelectionDetailRecords = QueryResult.Select();While SelectionDetailedRecords.Next() Do// delete the session from the service databaseObject = SelectionDetailRecords.Ref.GetObject();Result = Object.CurrentSessions.FindRows(New Structure("SessionID", SessionID));For Each Row In Result DoObject.CurrentSessions.Delete(Object.CurrentSessions.Index(Row));EndDo;Object.LastCallNumber = CallNo;Object.Write();EndDo;Return Undefined;EndFunctionFunction Synchronize(CallNo, ClusterID, ClusterName, InfoBaseName, CurrentSessions)Result = Catalogs.AvailableSessions.FindByDescription(InfoBaseName, True);If Result.Empty() Then// If infobase with this name is not listed in the catalog, the infobase has no restrictionsReturn Undefined;EndIf;// Can create sessionsObject = Result.GetObject();Object.CurrentSessions.Clear();For Each Session In CurrentSessions.Content DoString = Object.CurrentSessions.Add();String.SessionID = Session.SessionID;String.UserID = Session.UserID;String.UserName = Session.UserName;String.AppID = Session.AppID;String.Zone = Session.Zone;String.LanguageCode = Session.LanguageCode;EndDo;Object.LastCallNumber = CallNo;Object.Write();Return Undefined;EndFunctionFunction onHibernateSession(CallNo, ClusterID, SessionID)Query = New Query;Query.Text ="SELECT| AvailableSessions.Ref|FROM| Catalog.AvailableSessions AS AvailableSessions|WHERE| AvailableSessions.CurrentSessions.SessionID = &SessionID";Query.SetParameter("SessionID", SessionID);QueryResult = Query.Execute();SelectionDetailRecords = QueryResult.Select();While SelectionDetailedRecords.Next() Do// Mark the session as hibernating in the service databaseObject = SelectionDetailRecords.Ref.GetObject();Result = Object.CurrentSessions.FindRows(New Structure("SessionID", SessionID));For Each Row In Result DoRow.Hibernate = True;EndDo;Object.LastCallNumber = CallNo;Object.Write();EndDo;Return Undefined;EndFunctionFunction onWakeupSession(CallNo, ClusterID, SessionID, ErrorDescription)Query = New Query;Query.Text ="SELECT| AvailableSessions.Ref|FROM| Catalog.AvailableSessions AS AvailableSessions|WHERE| AvailableSessions.CurrentSessions.SessionID = &SessionID";Query.SetParameter("SessionID", SessionID);QueryResult = Query.Execute();If QueryResult.Empty() ThenErrorDescription = "Cannot wake up the session. Start of the session # "+ SessionID +" was not registered";Return 1;EndIf;SelectionDetailRecords = QueryResult.Select();While SelectionDetailedRecords.Next() Do// If the call sequence is broken, synchronization will be requiredIf SelectionDetailRecords.Ref.LastCallNumber + 1 <> CallNo ThenReturn 2;EndIf;// Mark the session as hibernating in the service databaseObject = SelectionDetailRecords.Ref.GetObject();// Get the number of non-hibernating sessionsNotHibernating = Object.CurrentSessions.FindRows(New Structure("Hibernate", True)).Count();// Start waking upResult = Object.CurrentSessions.FindRows(New Structure("SessionID", SessionID));For Each Row In Result DoIf NotHibernating > Object.Count ThenErrorDescription = "Cannot wake up the session. Exceeded the maximum number of sessions allowed by the external session management service";Return 1;EndIf;NotHibernating = NotHibernating + 1;String.Hibernate = False;EndDo;Object.LastCallNumber = CallNo;Object.Write();EndDo;Return 0;EndFunctionAfter creating the configuration, publish the web service on the web server.
Let us assume that the publication is called sc, the web service is called SessionControl, the namespace of this web service is called http://v8.1c.ru/SessionManagement, and the XDTO package must include the http://v8.1c.ru/SessionManagement package. The publication is performed on the localhost computer.
After publishing and verifying the web service publication, you need to create a string pointing the server cluster to the created web service.
The string will look as follows:
wsdl=http://localhost/sc/ws/SessionControl?wsdl;ns=http://v8.1c.ru/SessionManagement;srvc=SessionControl;port=SessionControlSoap;wsver=4;You also need to create a client/server infobase whose sessions will be managed by the web service. Let us call this infobase TestDB. Any infobase (including an empty one) can be used. After creating the infobase, use the cluster console to specify the string generated above (wsdl = ...) as the value of the External session management property, and select the checkbox for the Mandatory use of external control property.
After that, run the session management infobase in 1C:Enterprise mode, create one item in the AvailableSessions catalog and set the standard Name attribute to TestDB and the Count attribute to 2 for this catalog item. This way, the maximum number of concurrent sessions for the TestDB infobase will be 2.
Now, only two users can access TestDB at the same time.
6.4. HTTP service for getting performance parameters
6.4.1. General information
1C:Enterprise allows you to get performance metrics of a server cluster using HTTP requests. This feature is supported by the server cluster administration server (ras) and when using a standalone server (ibsrv). You cannot get performance metrics of a file infobase. "Performance metrics" can also be called just "metrics".
Performance metrics are provided in the OpenMetrics format.
To get the metrics, go to http://server.host:port/resource, where:
-
http://server.host:port. Address of a server cluster administration server (ras) or the corresponding gateway of a standalone server.
-
resource. Name of the resource that is accessed to get performance metrics. The name is set when configuring access to performance metrics.
To start the HTTP service:
-
For an administration server (ras): start the administration server and specify the value of any service management parameter, for example, --monitor-base=/metrics.
-
For a standalone server: start the standalone server so that access to the standalone server is allowed over HTTP and the performance metric gateway is initialized. You can either use command-line options for starting the standalone server or the configuration file of the standalone server.
If administrators are set in the server cluster, to receive metrics, authentication is required when making a request to the HTTP service. If cluster administrators are not set, you can execute a request without authentication. The service for receiving metrics uses basic authentication.
Basic authentication usage depends on how the request to the HTTP performance metrics service is generated:
-
Using the request headers. In this case, specify the Authorization HTTP request header with a string value of the Basic base64(username:password) kind, where:
-
Basic. Indicates basic authentication.
-
username:password. Name and password of one of the server cluster administrators.
-
base64(). Means that the text with the authentication data should be encoded in Base64 format.
-
Example: Authorization: Basic YWxhZGRpbjpvcGVuc2VzYW1l.
-
-
When accessing using 1C:Enterprise language, use the User and Password properties of the HTTPConnection object. In these properties, specify the name and password of one of the server cluster administrators.
See also:
-
Description of OpenMetrics format (https://github.com/OpenObservability/OpenMetrics/blob/main/specification/OpenMetrics.md).
-
Starting the server cluster administration server.
-
Performance monitor gateway of the standalone server (see monitor).
6.4.2. Ways to filter performance metrics
To get performance metrics, use the "query language", which is a set of parameters when accessing an HTTP service. As a result of such request, a certain set of metrics will be obtained that corresponds to the request parameters. Each metric, in addition to its name, has a so-called label. Each label has its own value. So, by specifying the filter by label value, we limit the list of metrics to those marked with this label only and get only those metrics for which the required label is equal to the filter value. Labels form information register dimensions, and metrics act as resources of such register. You can also filter the necessary metrics by their names. For this, use a subset of regular expressions.
To get metrics, use the following request parameters:
| Parameter | Description |
|---|---|
| <label>=<value> | Allows you to specify the filter by label value. The filter searches by full match only. |
| filter=<value> | Allows you to specify the filter by metric name. The value can be a regular expression, which can include the following operators:
|
| managers=<value> | Allows you to enable and disable getting cluster manager metrics.
Values:
Default value: true. |
| processes=<value> | Allows you to enable and disable getting working process metrics.
Values:
Default value: true. |
| servers=<value> | Allows you to enable and disable getting production server metrics.
Values:
Default value: true. |
| sessions=<value> | Allows you to enable and disable getting infobase session metrics.
Values:
Default value: true. |
If several parameters of the same name are specified in the query, these parameters will be combined "by OR". Parameters of different names will be combined "by AND".
6.4.3. Available performance metrics
6.4.3.1. General information
In this section, you can learn about the available performance metrics grouped by a server cluster object. Each metric contains a description (how the corresponding metric is displayed in the cluster console), an ID (a metric name), and a metric value type. If two adjacent rows of the table with a list of metrics contain lines like "Value description" and "... an addition", this means that the second line implies the following text: "Value description an addition".
After the list of metrics, you can find a list of labels that accompany each metric.
6.4.3.2. Session metrics
List of metrics:
| Description | Metric name | Type |
|---|---|---|
| Number of server calls per session | e1c_session_calls_total | uint64 |
| ... for the last 5 min. | e1c_session_calls_last_5min | uint64 |
| Amount of data received from the client per session, bytes | e1c_session_received_total | uint64 |
| ... for the last 5 min., bytes | e1c_session_received_last_5min | uint64 |
| Amount of data transferred to the client per session, bytes | e1c_session_transmitted_total | uint64 |
| ... for the last 5 min., bytes | e1c_session_transmitted_last_5min | uint64 |
| Execution time on the server per session, milliseconds | e1c_session_server_time_total | uint64 |
| ... for the last 5 min., milliseconds | e1c_session_server_time_last_5min | uint64 |
| Time of the last call to the server, in milliseconds | e1c_session_server_time_current | uint64 |
| Number of DBMS requests per session | e1c_session_dbms_calls_total | uint64 |
| ... for the last 5 min. | e1c_session_dbms_calls_last_5min | uint64 |
| Time of DBMS requests per session, milliseconds | e1c_session_dbms_time_total | uint64 |
| ... for the last 5 min., milliseconds | e1c_session_dbms_time_last_5min | uint64 |
| Time of the last DBMS request, milliseconds | e1c_session_dbms_time_current | uint64 |
| Time in milliseconds since the current DBMS connection was captured, or 0 if not captured | e1c_session_dbms_transaction_time_current | uint64 |
| Number of requests to the lock manager per session | e1c_session_lock_calls_total | uint64 |
| ... for the last 5 min. | e1c_session_lock_calls_last_5min | uint64 |
| Waiting time for locks to be set per session, milliseconds | e1c_session_lock_time_total | uint64 |
| ... for the last 5 min., milliseconds | e1c_session_lock_time_last_5min | uint64 |
| Cluster manager call time, milliseconds | e1c_session_manager_time_total | uint64 |
| ... for the last 5 min., milliseconds | e1c_session_manager_time_last_5min | uint64 |
| Cluster manager call time in the current call, milliseconds | e1c_session_manager_time_current | uint64 |
| Amount of data transferred to the DBMS per session | e1c_session_dmbs_transmitted_total | uint64 |
| ... for the last 5 min. | e1c_session_dmbs_transmitted_last_5min | uint64 |
| Amount of data received from the DBMS per session, bytes | e1c_session_dmbs_received_total | uint64 |
| ... for the last 5 min., bytes | e1c_session_dmbs_received_last_5min | uint64 |
| Amount of memory used per session, bytes | e1c_session_memory_total | int64 |
| ... for the last 5 min., bytes | e1c_session_memory_last_5min | int64 |
| ... current, bytes | e1c_session_memory_current | int64 |
| Amount of data read from files per session, bytes | e1c_session_read_total | uint64 |
| ... for the last 5 min., bytes | e1c_session_read_last_5min | uint64 |
| ... current, bytes | e1c_session_read_current | uint64 |
| Amount of data recorded in files per session, bytes | e1c_session_write_total | uint64 |
| ... for the last 5 min., bytes | e1c_session_write_last_5min | uint64 |
| ... current, bytes | e1c_session_write_current | uint64 |
| CPU usage time per session, milliseconds | e1c_session_cpu_time_total | uint64 |
| CPU usage time for the last 5 min., milliseconds | e1c_session_cpu_time_last_5min | uint64 |
| ... current, milliseconds | e1c_session_cpu_time_current | uint64 |
The metrics are accompanied by the following labels:
| Label | Description |
|---|---|
| client_app * | Client application type |
| client_host * | Client application host name |
| client_ip * | Client IP address |
| cluster | Cluster ID |
| infobase * | Infobase ID |
| infobase_name * | Name of the infobase in the cluster |
| session * | Session ID |
| session_number | Session number |
| user * | Name of the authenticated session user |
If session metrics are obtained from a standalone server, session metrics can have only the labels marked with the "*" character in the tables above.
6.4.3.3. Session metrics by security profile
List of metrics:
| Description | Metric name | Type |
|---|---|---|
| Time of the cluster manager call since the beginning of the session, milliseconds | e1c_session_profile_manager_time_total | uint64 |
| Current cluster manager call time, milliseconds | e1c_session_profile_manager_time_current | uint64 |
| DBMS query execution time, milliseconds | e1c_session_profile_dbms_time_current | uint64 |
| DBMS query execution time per session, milliseconds | e1c_session_profile_dbms_time_total | uint64 |
| Time of the last server call, milliseconds | e1c_session_profile_server_time_current | uint64 |
| Duration of a server call per session, milliseconds | e1c_session_profile_server_time_total | uint64 |
| Number of server calls per session | e1c_session_profile_calls_total | uint64 |
| Amount of data recorded in files per session, bytes | e1c_session_profile_write_bytes_total | uint64 |
| Amount of recorded data, current, bytes | e1c_session_profile_write_bytes_current | uint64 |
| Amount of data read from files per session, bytes | e1c_session_profile_read_bytes_total | uint64 |
| Amount of read data, current, bytes | e1c_session_profile_read_bytes_current | uint64 |
| Amount of information transferred/received by the DBMS per session, bytes | e1c_session_profile_dbms_bytes_total | uint64 |
| Amount of memory used per session, bytes | e1c_session_profile_memory_bytes_total | int64 |
| Memory capacity, current, bytes | e1c_session_profile_memory_bytes_current | int64 |
| CPU usage time per session, milliseconds | e1c_session_profile_cpu_time_total | uint64 |
| CPU usage time, current, milliseconds | e1c_session_profile_cpu_time_current | uint64 |
| Current amount of information transferred/received by the DBMS, bytes | e1c_session_profile_dbms_bytes_current | uint64 |
The metrics are accompanied by the following labels:
| Label | Description |
|---|---|
| client_app | Client application type |
| client_host | Client application host name |
| client_ip | Client IP address |
| cluster | Cluster ID |
| infobase | Infobase ID |
| infobase_name | Name of the infobase in the cluster |
| profile | Security profile name |
| session | Session ID |
| session_number | Session number |
| user | Name of the authenticated session user |
6.4.3.4. Cluster infobase metrics
List of metrics:
| Description | Metric name | Type |
|---|---|---|
| Total number of infobase sessions * | e1c_infobase_session_count | uint32 |
| Number of active (not hibernating) infobase sessions * | e1c_infobase_active_session_count | uint32 |
| Number of hibernating infobase sessions | e1c_infobase_hibernated_session_count | uint32 |
The metrics are accompanied by the following labels:
| Label | Description |
|---|---|
| cluster | Cluster ID |
| infobase * | Infobase ID |
| infobase_name * | Name of the infobase in the cluster |
If the infobase metrics are obtained from a standalone server, the metrics and labels available for use are marked in the tables of this section with the "*" character.
6.4.3.5. Cluster service metrics
List of metrics:
| Description | Metric name | Type |
|---|---|---|
| Number of managers the service is assigned to | e1c_service_manager_count | uint32 |
The metrics are accompanied by the following labels:
| Label | Description |
|---|---|
| cluster | Cluster ID |
| service | Cluster service name |
6.4.3.6. Metrics of the production server of the cluster
List of metrics:
| Description | Metric name | Type |
|---|---|---|
| Number of working processes on the server | e1c_server_process_count | uint32 |
| Number of active working processes on the server | e1c_server_active_process_count | uint32 |
| Number of passive working processes on the server | e1c_server_passive_process_count | uint32 |
| Number of working processes on the server that are in the error state | e1c_server_error_process_count | uint32 |
Total number of active sessions of all cluster working processes on this production server |
e1c_server_active_session_count | uint32 |
| Number of cluster managers | e1c_server_manager_count | uint32 |
The metrics are accompanied by the following labels:
| Label | Description |
|---|---|
| cluster | Cluster ID |
| host | Name of the computer (host) that is running a production server. |
| server | ID of the cluster's production server |
6.4.3.7. Cluster manager metrics
List of metrics:
| Description | Metric name | Type |
|---|---|---|
| Number of services assigned to the manager | e1c_manager_service_count | uint32 |
The metrics are accompanied by the following labels:
| Label | Description |
|---|---|
| cluster | Cluster ID |
| host | Name of the computer (host) that is running a production server. |
| manager | Cluster manager ID |
| server | ID of the cluster's production server |
6.4.3.8. Metrics of the working process of the cluster
List of metrics:
| Description | Metric name | Type |
|---|---|---|
| Average length of a 1C:Enterprise server call, seconds | e1c_process_avg_call_time | double |
| ...per 1C:Enterprise server, seconds | e1c_process_avg_server_call_time | double |
| ...per SQL server, seconds | e1c_process_avg_db_call_time | double |
| ...per callbacks, seconds | e1c_process_avg_back_call_time | double |
| ...per accesses to the lock manager, seconds | e1c_process_avg_other_call_time | double |
| Average number of threads on the server | e1c_process_avg_threads | double |
| Average waiting time for a managed lock, seconds | e1c_process_avg_lock_time | double |
| Amount of used virtual process memory, bytes | e1c_process_memory_size | uint64 |
| Average response time to a reference call, seconds | e1c_process_avg_response_time | uint32 |
| Number of active process connections | e1c_process_connections | uint32 |
| Average available performance in the last 5 minutes | e1c_process_available_perfomance | double |
Number of active working process sessions, meaning those sessions for which the working process is currently making server calls |
e1c_process_active_session_count | Uint32 |
Process state:
|
e1c_process_state | uint32 |
The metrics are accompanied by the following labels:
| Label | Description |
|---|---|
| cluster | Cluster ID |
| host | Name of the computer (host) that is running a production server. |
| pid | OS process ID |
| process | ID of the working process in the cluster |
| server | ID of the cluster's production server |
| status | Working process state:
|
Appendix 7. Startup command-line options of 1C:Enterprise
7.1. General information about the system command line interface
The 1C:Enterprise system allows you to perform certain actions using the command line interface. Some applications provide a command line interface as an additional tool to the graphical interface, for example, the launcher. Some applications can be controlled using the command line interface only. The examples of such applications are command-line launcher and 1C:Enterprise server.
In general case, the 1C:Enterprise command line interface has the following structure:
Application|URL [Mode] [Command1 [Command2 […]]]In this description:
-
Application. Name of the used application. The need to specify the full path to the launched application, the case of the used characters, and other features depend on the operating system and environment in which the application is used. To launch the web client, the URL of the infobase published on the web server is the name of the application.
-
Mode. Optional parameter to launch some applications.
-
CommandN. One or more commands that the application must execute, including additional command parameters. Command. Specific action. Generally, each command has required and optional parameters and an optional value. The possibility to combine several commands in one command line depends on the launched application, the launch mode (if applicable) and the commands themselves. Some commands may be mutually exclusive, that is, you can use only one command from a specific list.
All command line elements are separated by character " " (space). When describing the command line interface, the following characters may be used:
-
The " " (space) character. Separates all the elements of the launch command line interface.
-
Commands and parameters can be specified using several methods:
-
Method 1:
-
The "/" (slash) character. Begins each command. The exception is a web client, where commands do not begin with a slash. Web client commands are separated by character "&".
-
The "-" (dash) character. Precedes a command parameter.
-
The parameters are specified according to this scheme, for example, when you start the 1C:Enterprise server (ragent) or when you run Designer in batch mode (1cv8).
-
-
Method 2:
-
The command is specified without preceding characters. The parameter starts with the character "--" (double dash) in case of specifying the full parameter name or "-" (dash) in case of specifying the abbreviated name of the parameter.
-
The parameters are specified according to this scheme, for example, for the ring utility.
-
-
Method 3:
-
The command starts with the character "--" (double dash) in case of specifying the full command name or "-" (dash) in case of specifying the abbreviated name of the command.
-
The parameters are specified according to this scheme, for example, for the cnvdbfl utility.
-
-
When the documentation describes the command line interface of an application, first a general description of the command line is given. It shows how the application parameters are specified.
-
-
The "[" and "]" characters. These characters enclose an optional text. For example, /command [-parameter] means that it is possible to specify this command either as /command or as /command -parameter. In the first case (without specifying a parameter), the command uses for this parameter some default value.
-
The "|" character. Separates elements that can't present in a given place at the same time. For example, the description /command1|/command2 means that in this place you can use either command1 or command2. But simultaneous usage of these commands is not allowed.
-
The "\<" and ">" characters. Usually enclose a brief description of the command parameter. The command description explains the actual values of the parameter. Obviously, you should not transfer these characters into the actual command line. In addition, in most command interpreters these characters mean redirection of standard input/output streams, so the direct transfer of these characters into the real command line leads to radical change in the meaning of the command entered.
-
Please note that the values may be specified not only for commands, but also for command parameters.
If the value of a command or parameter contains spaces, then we recommend to enclose this value in quotes. A quotation mark in the parameter text is preceded by a backslash (\). Double the backslash before the quotation mark in the parameter value text. For example, the ef \abc \" "\ parameter value must be entered as ef \abc \\\ \ \.
Some examples of the description of the 1C:Enterprise launch command line commands are given below.
/TComp [-None|-Deflate|-SDC|-lz4|-zstd]This example describes the TComp command for which you can specify one of the following parameters: -None, -Deflate, -SDC, -lz4, or -zstd. It is not mandatory to specify the parameters. The command can be issued without any parameters, in the form /TComp.
/VA<mode>This example shows the VA command, which contains a value (<mode>) as a parameter. The value must be specified after the command without space. Specific command values will be given in the command description.
/MergeCfg <cf-file name> -Settings <settings file name> [-EnableSupport | -DisableSupport] [-IncludeObjectsByUnresolvedRefs | -ClearUnresolvedRefs] [-force]This example shows the MergeCfg command, which contains:
-
Required <cf-file name> parameter for the command.
-
Required Settings parameter with its <settings file name> parameter.
-
One of the following optional parameters: EnableSupport or DisableSupport.
-
One of the following optional parameters:IncludeObjectsByUnresolvedRefs or ClearUnresolvedRefs.
-
Optional parameter force.
7.2. Selecting run mode
At launch you can use one of the startup modes listed below. Simultaneous use of multiple modes is not allowed.
7.2.1. Launch in 1C:Enterprise mode
1cv8 ENTERPRISE [<options>]Startup options can include:
- Common startup options (see General startup commands).
7.2.2. Launch in Designer mode
1cv8 DESIGNER [<commands>]Commands can include:
-
Common commands (see General startup commands).
-
One of the following sets of commands:
-
Designer startup commands (see Running Designer in batch mode).
-
Commands for creating distribution package and update files (see Commands for creating distribution and update files).
-
Configuration repository operations (see Configuration repository operations).
-
Registering 1C:Enterprise as OLE Automation server. For details, see Registering 1C:Enterprise as OLE Automation server.
-
7.2.3. Launch in infobase creation mode
1cv8 CREATEINFOBASE <connection string> [/AddToList [<infobase name>]] [/UseTemplate <template file name>] [/Out <file name>] [/L<language code>] [/VL<locale code>] [/O<connection speed>] [/DumpResult <file name>]When starting the application, the following parameters are used:
-
<Connection string>. String that specifies the parameters for access to the database. For details on the connection string, see Infobase connection string.
-
/AddToList. Parameter that indicates that the created infobase should be added to the infobase list. The infobase is added under the name <infobase name>. If <infobase name> is not specified, then the default name is used similar to the name formed when infobase is added to the infobase list manually.
If the parameter is not specified, the database will not be added to the list.
-
/UseTemplate. Create an infobase based on the template specified in the <template file name> parameter. You can use configuration files (.cf) and infobase dump files (.dt) as templates. If the template is not specified, ignore this parameter.
-
/L<language code>. Interface language code of the platform. For supported interface languages (<language code>), see Selecting default interface language.
-
/VL<session locale code>. Session locale code used for formatting data of the Number and Date type and in the NumberInWords() and PeriodPresentation() methods.
-
/DumpResult <file name>. Saves the infobase creation result to a file. The result is a number (0 if the file is saved successfully).
7.3. General startup commands
7.3.1. Connection parameters
- /F <directory>
- Directory where the 1Cv8.1CD database file is located.
- /S <address>
- Address of the infobase stored on the 1C:Enterprise server. Generated as Name of computer running the application server>/<Reference infobase name known within 1C:Enterprise server>. The separator between the computer name and the infobase name must be a slash, or the entire infobase address (the /S command value) must be enclosed in quotation marks:
-
server-pc/ibName. For any OS.
-
server-pc\ibName. For Windows only.
-
"server-pc\ibName". For any OS.
- /IBName <infobase name>
- Allows you to specify the name of the infobase to launch. The launcher or the client executable file searches for the specified infobase in the infobase list. If multiple infobases with this name are found, the launcher closes and an error message is displayed.
If the infobase is found, it is opened with the specified parameters from the launcher or the client executable file.
- /IBConnectionString
- The complete infobase connection string, as provided by IBConnectionString() function. Parts of the connection string can be overridden by already specified parameters. It happens if the /IBConnectionString parameter is placed in the command line before them. Since a connection string always contains double quotation marks, Enclose it in double quotation marks and replace each double quotation mark character inside the connection string with two double quotation mark characters. For details on infobase connection string, see Infobase connection string.
Additional connection string parameters in thin client mode:
-
wsn. Username for authentication on the web server.
-
wsp. Password for authentication on the web server.
-
wspauto. Use automatic proxy server settings.
-
wspsrv. Proxy server address.
-
wspport. Proxy server port.
-
wspuser. Username for proxy server with authorization.
-
wsppwd. Password for proxy server with authorization.
- /WS <url>
- WS connection string.
- /O<connection speed>
- Specifies the connection speed (used in a thin client). The command sets up an infobase list item. Possible <connection speed> values:
-
Normal. Usual connection speed (default value).
-
Low. Low connection speed.
- /TComp \[-None\|-Deflate\|-SDC\|-lz4\|-zstd\]
- Sets the compression mode for traffic between the server and the thin client. For this command you can specify one of the following parameters:
-
-None. Compression is disabled.
-
-Deflate. Use the deflate compression method (one of the most common compression schemes for HTTP data).
-
-SDC. Custom compression algorithm is used.
-
-lz4. LZ4 compression algorithm is used.
-
-zstd. Zstandard compression algorithm is used (by default).
- UsePrivilegedMode
- Launch the client application in privileged mode. Available to authenticated users with administrator privileges. A record stating that the privileged session mode is set or cannot be set is added to the event log.
- /SLev<level>
- Defines the security level of the client connection to the 1C:Enterprise server. For this command you can specify one of the following values:
-
0. Unsecure connection.
-
1. Secure connection only for authentication.
-
2 . Secure connection during the entire session.
If the command is specified without a value, this is equivalent to entering the command with value 0– /SLev0.
- /Z"<common attribute 1>,<common attribute 2>, ..., <common attribute N>"
- Set separators when starting the client application.
7.3.2. Authentication settings
- /N<name>
- User name. As in the user list in Designer.
- /P<password>
- The password for the user provided in /N command. If the password is empty, omit this option.
- /ModifyPassword <password>
- You can only use the command together with the /N and /P commands. The command sets the password specified as a command parameter for the user specified in the /N command. If the correct password is specified in the /P command, the user is authenticated in the infobase, then the password is changed, and the user continues their operations in the session.
- /WA<mode>
- The operating system authentication usage mode at 1C:Enterprise startup. If you omit /WA command, it is treated as /WA+ command line option.
Possible <mode> values:
-
+. Require operating system authentication at 1C:Enterprise startup.
-
-. Deny operating system authentication at 1C:Enterprise startup.
- /WSA<mode>
- The operating system authentication usage mode on the web server. If you omit /WSA option, it is treated as /WSA+ command line option.
Possible <mode> values:
-
+. Forced authentication using the operating system on the web server (default value).
-
–. Prohibits operating system authentication on the web server.
- /WSN <name>
- The web server authentication user name if /WSA+ option is specified. Specify the password in the /WSP option.
- /WSP <password>
- The web server authentication password for the user specified in /WSN option.
- /NoProxy
- Disable proxy usage (only for web service connection).
- /Proxy -PSrv <address> -PPort <port> \[-PUser <user name> \[-PPwd <password>\]\]
- Use the specified proxy settings, ignoring the default ones (only for ws connection).
- /OIDA<mode>
- Apply end-to-end user authentication between different infobases and/or external resources for thin and web clients. If the /OIDA parameter is missing during the client startup or the /OIDA+ parameter is used, the authentication is attempted via the OpenID provider whose address is specified in the default.vrd file of the infobase publication.
If the OpenID provider requires interactive authentication (it is an initial request or the authentication timeout expired), the client prompts to enter the user name and password.
The user list of the OpenID provider infobase is used for authentication.
The name of the infobase user being authenticated using OpenID must match the user name in the OpenID provider infobase.
Possible <mode> values:
-
+. Use OpenID authentication (the default option).
-
-. Do not use OpenID authentication.
- /AccessToken
- Allows you to specify JWT to perform user authentication.
- /Authoff
- Runs the OpenID logout operation (user session termination) for OpenID and OpenID Connect protocols. The user session is completed irrespective of the authentication method to be used subsequently.
- /SAOnRestart
- Indicates that at restart of the client application from this session the username and password are required. By default, users are not prompted to enter passwords.
This option is not applicable to the thin client.
/ResetSavedAuth
Indicates the need to delete the saved authentication token from the storage, as well as the names of all the remembered infobase users who signed in from this computer.
- /EmailAuth <email>
- Allows email authentication. A verification code will be sent to the specified email and a window will open for entering this code.
This command is not supported for the Designer batch mode, and also if Designer is started in any mode that prohibits displaying dialog boxes (the /DisableStartupDialogs command, see Other parameters).
7.3.3. Specifying run mode
- /AppAutoCheckVersion<mode>
- Automatically select the required version for each infobase.
Possible <mode> values:
-
+. Select a version upon startup (default value).
-
–. Do not select a version upon startup.
By default version is selected. The /AppAutoCheckVersion command is equivalent to the /AppAutoCheckVersion+ command.
If the startup line contains /AppAutoCheckVersion parameter, the following procedure is followed:
-
Infobase version is determined. This information is obtained from the Version parameter of *.v8i file (when in file infobase mode), or from response of the 1C:Enterprise server (when in client/server mode).
-
If the version is 8.1 or 8.0, the executable files for the version are found and started. For 1C:Enterprise 8.0, DESIGNER command-line parameter is changed to CONFIG (for compatibility purposes).
-
When using 8.2 and newer versions:
-
If the full version number is specified, the search for the required version is performed using the InstalledLocation parameters of configuration files. If the required version is not installed on the computer, the search for the distribution package of the required version is performed using the DistributiveLocation parameters of configuration files. If the distribution package is found, it is installed. If not, the application closes and an error message is displayed.
-
If a partial version number is specified, it is attempted to determine the full version number from the DefaultVersion parameter of configuration files. If the full version number cannot be determined, a search for the latest installed version (InstalledLocation parameters of configuration files) and the latest version available for installation (DistributiveLocation parameters of configuration files) is performed. If the latest version available for installation is newer than the latest installed version, it is installed.
-
- /AppAutoCheckMode
- Automatically select the appropriate application (the default configuration start mode and the default start mode for end users) based on the infobase data.
When the application startup line contains /AppAutoCheckMode parameter, the procedure is as follows:
-
Run mode for the specific user is defined.
-
Default run mode of the infobase is defined.
-
If a run mode does not match the client and the current user has the right to start client applications, the client application of the same version is restarted. Otherwise, the startup of the client application continues.
- /RunModeOrdinaryApplication
- Start the thick client in ordinary application mode, regardless of the configuration settings and the user that starts the application. This option is not applicable to the thin client.
- /RunModeManagedApplication
- Start the thick client in managed application mode, taking into account the client settings in the infobase list (the Default run mode setting, see Infobase startup parameters):
-
Auto. Run the thin client.
-
Thin client. Run the thin client.
-
Web client. Run the web client.
-
Thick client. Run the thick client in managed application mode.
When the client is started, the automatic client application selection is disabled.
- /AppArch <bitness>
- Allows you to specify the bitness of the client application in use.
<bitness> can take the following values:
-
x86. Use 32-bit versions only.
-
x86_prt. Use mainly 32-bit versions. Default value.
-
x86_64. Use 64-bit versions only.
-
x86_64_prt. Use mainly 64-bit versions.
For details on how to select the client application bitness, see Determining application bitness.
- /MainWindowMode <startup mode>
- Allows you to specify the startup mode of the main window of the client application. <startup mode>can take one of the following values:
-
Normal. Regular startup mode.
-
Workplace. Workplace mode.
-
EmbeddedWorkplace. Embedded workplace mode (for embedding a web client in a third-party website).
-
FullscreenWorkplace. Full-screen workplace mode.
-
Kiosk. Kiosk mode.
7.3.4. Managing certificates
- /HttpsCert \[-windows\] \[-linux\] \[-macos\] \[-recent\] \[-auto\] \[-choose\] \[-file <path>\] \[-pwd <password>\] \[-none\]
- Source of the client certificate.
The command parameters:
-
-windows. Use a client certificate from the Microsoft Windows system certificate store. This parameter is ignored if at least one of the following command parameters is specified: -file or -none.
-
-linux. Use a certificate from the dedicated Linux directory where certificates are stored. For more information, see Certificate sources and formats. This parameter is ignored if at least one of the following command parameters is specified: -file or -none.
-
-macos. Use a client certificate from the macOS system certificate store. This parameter is ignored if at least one of the following command parameters is specified: -file or -none.
-
-recent. Select or use a previously selected client system certificate when running on Windows or macOS.
If the system user certificate store contains multiple suitable certificates, the user is prompted to select a certificate using the system certificate selection dialog box. Further, this certificate will be selected automatically.
This is the default method for client certificate selection for the -windows and -macos parameters if the -auto and -choose parameters are not specified.
-
-auto. Use the automatically selected client certificate from the Windows or macOS system certificate store. This parameter is ignored if the command does not have the –windows or –macos parameter (respectively).
-
-choose. Always select Windows or macOS client certificate manually.
If the system user certificate store contains multiple suitable certificates, the user is prompted to select a certificate using the system certificate selection dialog box regardless of the previous selection of any certificate. The selected certificate can be used automatically in the future with the -recent parameter.
You can use this parameter if you need to avoid the automatic usage of the previously selected client certificate from the Windows or macOS store and instead select a new certificate appropriate for this connection. This parameter is ignored if the command does not have the –windows/-macos parameter or the -auto parameter is set.
-
-file <path>. File that contains the client certificate and the private key. This parameter is ignored if the command has the -none parameter set.
-
-pwd <password>. Password for the file that contains the client certificate and its private key. If the server requires a client certificate and the certificate file is password-protected, the password is required to establish a connection. This parameter is ignored if -file parameter is not specified in the command.
-
-none. Do not use a client certificate. Only connections to servers that do not require client certificate verification are available.
If neither -windows, nor -linux, nor -macos, nor -file, nor -none parameter is specified, the /HttpsCert option is ignored.
- /HttpsCA \[-windows\] \[-linux\] \[-macos\] \[-file <path>\] \[-pwd <password>\] \[-none\]
- The source of digital certificates of certifying centers. They are used to validate the server certificate.
The command parameters:
-
-windows. Specifies that certificates of certification authorities from the Windows certificate store must be used to verify the server certificate upon connection. This parameter is ignored if at least one of the following command parameters is specified: -file or -none.
-
-linux. Indicates that to check the server certificate during the connection, it is necessary to use certificates of certification authorities from the dedicated Linux directory where the certificates are stored. For more information, see Certificate sources and formats. This parameter is ignored if at least one of the following command parameters is specified: -file or -none.
-
-macos. Specifies that certificates of certification authorities from the macOS certificate store must be used to verify the server certificate upon connection. This parameter is ignored if at least one of the following command parameters is specified: -file or -none.
-
-file <path>. Gets certificate authority certificates from the specified file. This parameter is ignored if the -none command parameter is set.
-
-pwd <password>. Root certificate file password. If the certificate file is password-protected, the password is required to establish a connection. This parameter is ignored if -file parameter is not specified in the command.
-
-none. Do not use root certificates and do not check the server certificate.
If neither -windows, nor -linux, nor -macos, nor -file, nor -none parameter is specified, the /HttpsCA command is ignored.
- /HttpsForceTLS1_0
- Force the 1C:Enterprise to use TLS 1.0 protocol when accessing the web server over HTTPS.
- /HttpsForceTLS1_1
- Force the 1C:Enterprise to use TLS 1.1 or later protocol when accessing the web server over HTTPS.
- /HttpsForceTLS1_2
- Force the 1C:Enterprise to use TLS 1.2 or later protocol when accessing the web server over HTTPS.
You cannot use several /HttpsForce parameters simultaneously (for example, /HttpsForceTLS1_0 and /HttpsForceTLS1_2). When they are specified simultaneously, the behavior is undefined. If the /HttpsForceTLS commands are missing in the command line, the client application tries to use the TLS protocol version 1.3 or earlier if the web server in use requires it.
7.3.5. Interface settings
- /iTaxi
- Run in the Taxi interface mode.
- /itdi
- Run in the "Forms in tabs" interface mode .
- /TechnicalSpecialistMode
- Enables the Functions for technician command in the menu.
7.3.6. Locale settings
- /L<language code>
- Specify the language code of the platform interface. For supported interface languages (<language code>), see Selecting default interface language.
- /VL<session locale code>
- The session locale code used for formatting Number and Date data, and also used in NumberInWords() and PeriodPresentation() methods.
7.3.7. Debug settings
- /debug \[<mode>\] \[-attach\]
- Means that this client application will be started in debug mode. The parameter <mode> defines the debugging protocol:
-
-tcp. Debugging over TCP/IP.
-
-http. Debugging over HTTP.
If -attach parameter is present, the debugger automatically attaches the client and server debug items of the application, and then they are registered on the debug server. This option is applicable only to debugging over HTTP.
- /debuggerURL <debugger address>
- This command specifies the debugger address (when debugging over TCP/IP) or the debug server address (when debugging over HTTP) for debug mode. When specifying a debug server, you must specify not only the name of the computer on which the debug server is running, but also the communication port.
- DisplayPerformance
- Display the number of server calls and the volume of data sent to the server and received from it.
- /EmulateServerCallDelay \[-Call<delay>\] \[-Send<delay>\] \[-Recevie<delay>\]
- This command simulates the operation of the client application when the connection is slow.
The following parameters are available:
-
-Call<delay>. Indicates the delay in seconds when the server is called. If the parameter is not specified, the delay value is assumed to be 1.45 seconds.
-
-Send<time>. Indicates the delay in seconds per every 1 KB of data sent to the server. If the parameter is not specified, the delay value is assumed to be 0.45 seconds.
-
-Receive<time>. Indicates the delay in seconds per every 1 KB of data received from the server. If the parameter is not specified, the delay value is assumed to be 0.15 seconds.
The maximum delay is 9.99 seconds.
7.3.8. Testing settings
- /TestManager
- Start the thick or thin client for managing other testing clients using a dedicated object model.
- /TestClient \[-TPort<Network port number>\] \[-TestClientID<ID>\] \[-TURL=<PublicationURL>\]
- Starts a client application (thin client, thick client, web client, mobile client, and mobile application) as a test client.
The command parameters:
-
-TPort<Network port number>. Specifies a network port number for interaction between the client and test manager. The default port is 1538. It is not used when started in the mobile client.
-
-TestClientID<ID>. Specifies a UUID of the client application to be tested. The parameter is used for web client or mobile client. Use this parameter when you need to distinguish several different test clients that are concurrently used via the same test manager application. The parameter does not have a default value.
-
-TURL=<PublicationURL>. Allows you to specify an infobase publication URL when starting the test client in the application on the mobile platform.
- /UILogRecorder \[–TPort<Network port number>\] \[-File<Path>\]
- Allows you to log interactive user actions in a client application (thin client, thick client, web client, or mobile client). You can use the log of user actions to generate a program in 1C:Enterprise language that will allow you to perform logged actions. You can use this option with the /TestClient option.
The command parameters:
-
-TPort<Network port number>. Specifies a network port number for interaction between the client and test manager. The default port is 1538. It is not used when started in the mobile client.
-
-File<path>. Name of the file that will store the user action log after the recording is stopped, provided that a test manager is not connected to the client.
7.3.9. Client application checks
- /EnableCheckModal
- Enable the strict check for modal methods calls.
- /EnableCheckExtensionsAndAddInsSyncCalls
- Enable the strict check for synchronous calls in add-ins, in the file system extension, and in the cryptography extension. Ignored when run the thick client.
- /EnableCheckServerCalls
- Enable the check for context server form calls in event handlers where the server calls are prohibited. If the parameter is specified, then in the context server call in handlers where such calls are prohibited, a message will be displayed in the message window. The same message is shown in the Information for technical support dialog box.
- /EnableCheckScriptCircularRefs
- Enable detection of circular references during the script execution.
7.3.10. Auxiliary parameters
- /C <text string>
- Passes a parameter to the application.
- /ClearCache
- Clears the service data stored in the application data directory:
-
Cache of client/server calls, which stores metadata of forms, modules, and so on. The cache is stored in the vrs-cache subdirectory.
-
Saved search index for all module texts. The index is located in the cfg-cache directory. The index is not deleted, but cleared.
The application data directory is located:
-
On Linux: ~/.1cv8/1C/1cv8/<UUID DB>.
-
On macOS: ~/.1cv8/1C/1cv8/<UUID DB>.
-
On Windows: %LOCALAPPDATA%\1C\1cv8\<UUID DB>.
In the above paths, the <UUID DB> expression means an infobase UUID received from the ID property of the user's infobase list file (file with the v8i extension).
- /AllowExecuteScheduledJobs -Off\|-Force
- Manage the execution of scheduled jobs. Start scheduled jobs on the client that was started first (excluding clients with AllowExecuteScheduledJobs –Off). Once the session of this client is closed, start scheduled job in any other active session. Once a session with AllowExecuteScheduledJobs –Force is started, new scheduled jobs are started in this session, regardless of the availability of other sessions.
- /UC <access code>
- Connect to the infobase with a connection lock enabled. If a non-empty access code is set for the lock, enter this access code in the /UC parameter to bypass the lock.
- /RunShortcut <file name>
- Allows you to run the 1C:Enterprise with infobase list stored in the specified file. You can select a shared infobase list file (*.v8i), or an infobase shortcut file (*.v8l).
- /AppAutoInstallLastVersion<mode>
- Allows you to automatically install new client application versions.
Possible <mode> values:
-
+. Installation of new versions is enabled.
-
–. Installation of new versions is disabled.
- /Execute <external data processor file path>
- Runs external processing with full path specified as the command value in the 1C:Enterprise mode immediately after the system start. If the /Execute parameter is specified, the /URL parameter is ignored.
If the command line has the file name of the external data processor but no parameters for connecting to the infobase, the connection will be established with the special infobase that can be used for universal external data processors. The infobase is located in the <directory ibases.v8i>/EmptyIB directory, where <directory ibases.v8i> is a directory with the file that contains a list of infobases on the computer (for details, see *.v8i). If such directory does not exist or the infobase is not found in this directory, the directory will be created (if necessary) with an empty infobase in it.
- /URL <address>
- Follow the link after opening the application. The links in e1c and http(s) format are supported.
The parameter functions as follows:
-
If the parameter value contains an external URL (infobase address), the search for a running client application using this infobase is performed on the computer. The client application attempts to open the object referenced by the URL. If the infobase is not opened in any client application, a new client application is started with the /url command-line parameter specified.
-
If the parameter value is an internal link, it is ignored and the client application is started as usual.
Let's have a look at how the search for a client application is performed. The search procedure is as follows:
-
Search for a running client application that uses the infobase with the connection string specified in the parameter is performed. The search is not case-sensitive regarding host computer name and infobase name. DNS names are not converted into IP addresses or back. Therefore, if the client application contains a DNS address in the connection string and the external link contains an IP address, the client application will not be found. During the search, separator values are used if you specify them with the Z parameter.
-
If the client application is found and it does not have a modal or blocking window opened, the client application is activated and the URL received from the /url command-line parameter value is passed to it.
-
If the found client application has a modal or blocking window opened, the client application is ignored and the search continues.
-
If no client application is found, a client application is started and the URL received from the /url command-line parameter value is passed to it. If the original external URL contains separator values, these values are passed to the client application you want to start. To pass the values, use the /Z startup command-line parameter.
-
If the URL passed to the launcher or the client application only contains an infobase address (for example, e1c://host/ib-name), the client application is started and no other actions are performed.
When following an internal link, the procedure is as follows:
-
Link is opened after calling the AtSystemStartup handler.
-
If the client application runs in the Forms in separate windows mode and the in-app link target is a navigation point, the link is opened instead of opening the desktop. Otherwise, the desktop is opened and then the target form is opened.
-
In case of error, a diagnostic message is displayed and application continues to run.
If several parameters are specified in startup command line:
-
If the /Execute parameter is specified, the /url parameter is ignored.
-
If the /url parameter with an absolute URL is specified, any infobase connection parameters specified elsewhere are ignored. The following command-line parameters are ignored: /F, /S, /WS, /IBName. For the /IBConnection parameter, parts of the connection string that describe the infobase are ignored.
To follow the links, you can use external URLs in the following formats:
-
e1c:. Thick and thin clients.
-
http: or https:. Only a thin client.
You can use the following methods for the same effect as using /url parameter:
-
FollowTheURL() 1C:Enterprise language method.
-
Dialog box accessible from the infobase list window.
-
Standard full-text search form (only for e1c: format).
7.3.11. Other parameters
- /@ <file with a command>
- Allows you to specify the startup command line in the file specified by the command value (<file with command>). The /@ command is used to bypass the length limit for the command line of the used operating system. In this file, the command must be entered completely (with all of its parameters) in one line. Encoding of the file must match encoding of the command interpreter where the client application is started.
While processing the command line, the file content completely replaces the command line of the application to be started. It means the following:
- The /@ command must be either the first or the only command of the application startup command line.
- If the /@ command is not entered as the first one, the behavior is undefined.
- /Out <file name> \[-NoTruncate\]
- Specify the file for storing utility messages. If the -NoTruncate parameter is specified (separated by a space), the file is not cleared (not used with the thin client).
You can open the file during the batch execution. In batch startup mode, log messages are not buffered, they are written directly to the file.
The file is generated in UFT-8.
- /DisableStartupMessages
- Disable the following startup messages:
-
Database configuration does not match stored configuration. Continue?.
-
Your computer capabilities are inadequate to edit configuration help. To edit HTML documents, install Microsoft Internet Explorer version 7.0 or higher.
-
Your computer capabilities are inadequate to edit HTML documents, including help sections. To edit HTML documents, you must install Microsoft Internet Explorer version 7.0 or higher. HTML document editing will be unavailable during this session.
- /DisableStartupDialogs
- Skip the authentication and startup dialog boxes. Where:
-
An error is generated in the following cases:
-
If the command line is not enough to select the infobase or define the startup mode.
-
If the command line is not enough to authorize the user in the infobase.
-
If the command line has invalid authorization in the configuration store.
-
An attempt is made to create an infobase (CREATEINFOBASE), but an administrator has been set for the server cluster.
-
-
If the command-line options do not contain repository authentication data, start Designer without connecting to a repository.
The command is supported by Designer, thin and thick client applications. When you use this command in the command line for starting the client application, batch mode for starting the client application is enabled (for details, see Batch mode for client application startup).
- /DisableSplash
- Disables the splash on 1C:Enterprise startup if it is completely replaced. Contact the 1C Company to replace the splash.
- /DisableUnrecoverableErrorMessage
- Allows you to define specific behavior when a non-recoverable error occurs (including abnormal termination):
-
The error message will not be displayed.
-
In case of abnormal termination, a dump is generated according to settings in the logcfg.xml file (on Windows) or operating system settings (on Linux and macOS).
-
The error report will be sent if the automatic error report sending option is enabled and the report size does not exceed the limitation to send without prompting (5 MB).
-
The application will be terminated and return the non-zero code.
This command is recommended if the client application is started without an active user to get the error message.
- /DisableHomePageForms
- Disables displaying the forms of the application home page when you open a thin client.
- /DisableBackgroundIndexBuild
- Disables background generation of refactoring index at Designer startup. The index is used in the following operations:
-
Search for references to configuration objects
-
Deleting configuration objects
-
Renaming configuration objects
- /UseHwLicenses<mode>
- Defines the dongle search mode.
Possible <mode> values:
-
+. Dongle search is performed.
-
–. Dongle search is not performed.
- /DisplayUserNotificationList
- Displays the new messages from the collaboration system and the notification center when starting a client application.
7.4. Running Designer in batch mode
7.4.1. General information
The parameters listed in this section (and its subsections) cannot be combined in a single launch command line, unless otherwise is explicitly stated. To enable batch start mode, select the Designer start mode (DESIGNER) in the command line and then specify the common start commands necessary for operation, as well as the required batch start command. The infobase export command may look like this:
1cv8 DESIGNER /IBName "My db" /DumpIB c:\temp\dump.dtIf you specify a file with its full path as a command line parameter of Designer batch mode, ensure that all of the directories that form the path exist. Otherwise, the operation will fail.
Modules locked with password are ignored in Designer batch mode. When processing such a module, a diagnostic message is generated.
If the command line command supports the –Extension and –AllExtensions parameters, the simultaneous use of both parameters is not supported and the system behavior in this case is unpredictable.
When working with extensions (–Extension and –AllExtensions parameters), the return code is set to 0 upon successful completion, otherwise the return code is 1.
7.4.2. Dumping/restoring infobase
- /DumpIB <file name>
- Dump an infobase to a file.
- /RestoreIB <file name> \[-JobsCount <Count>\]
- Load infobase from file. The following parameters are available:
- -JobsCount. The number of system background jobs used to restore an infobase. Default value: 0. It means that the number of background jobs will be equal to the CPU number of the computer that restores an infobase.
You can speed up the restoration process in the following cases:
-
When 1C:Enterprise server cluster and DBMS server are located on the same computer.
-
1C:Enterprise server cluster and DBMS server cluster are connected via a fast communication channel (1 Gbit and faster).
7.4.3. Restoring infobase structure
- /IBRestoreIntegrity
- Attempt to restore the infobase structure If other parameters are found, they are ignored.
In order to get the result of the recovery, you must specify the /Out command line parameter. In the file specified in the /Out parameter, the following information is stored:
-
Restoring the infobase is not required. This means that the structure of the infobase is not corrupted. The return code in this case is 0.
-
The infobase is restored successfully. This means that the structure of the infobase is restored successfully. The return code in this case is 0.
-
If any error occurred during the recovery attempt, the error text is stored in the file and the return code is 1.
It is recommended to run Designer with the /IBRestoreIntegrity parameter if the previous database configuration update (in batch mode or interactively) was not fully completed, for example, due to a crash of Designer or shutting down the computer.
7.4.4. Configurations and extensions
- /DumpCfg <cf/cfe file name> \[-Extension <extension name>\]
- Save the configuration or the extension of the configuration to a file. To save the extension configuration you need correctly specify the -Extension parameter.
- /LoadCfg <cf/cfe file name> \[-Extension <extension name>\]
- Load the configuration or the extension of the configuration from a file. To load the extension configuration you need correctly specify the -Extension parameter. If the extension does not exist in the infobase at the time of import, it is created with the specified name. If the extension specified in the -Extension parameter is connected to the configuration repository, it cannot be imported.
- /MergeCfg <cf or cfe file name> -Settings <settings file name> \[-EnableSupport \| -DisableSupport\] \[-IncludeObjectsByUnresolvedRefs \| -ClearUnresolvedRefs\] \[-Extension <Extension name>\] \[-force\]
- Merge the current configuration/extension with the configuration/extension file (using the settings file).
The following parameters are available:
-
<cf or cfe file name>. Name of the file with the configuration (CF file) or extension (CFE file) to be merged.
-
-Settings <settings file name>. Allows you to specify the name of the file with configuration merging settings. For the format and description of the merge settings file, see A file of merge settings.
-
-EnableSupport. Enable support for the configuration if it is possible. The support rules must be specified in the settings file.
-
-DisableSupport. Do not enable support even if it is possible.
-
-IncludeObjectsByUnresolvedRefs. If merge settings contain the objects that are not included in the list of merged ones and are absent in the main configuration, but referenced from objects included in the list, such objects are also marked for merging, and an attempt to continue merging is made. Merge attempts are made until there are no objects left with references to objects that are not included in the list, or until the entire configuration is selected. Similar to the Mark all for merging button in the window with unresolved references, but attempts are repeated.
-
-ClearUnresolvedRefs. References to objects that are not included in the list of objects to be merged are cleared. Similar to the Continue button in the window with unresolved references.
-
-Extension <Extension name>. Name of the extension to merge with.
-
-force. Perform merging if there are:
-
Warnings of deleted objects referenced in the objects not included in the merging (such objects will be excluded from the merging).
-
Settings applying warnings.
-
The merging will be interrupted in the above cases, unless specified.
If the -EnableSupport or -DisableSupport parameter is specified together with the -Extension parameter, merging will be terminated with an error. If support is available for the configuration and the -EnableSupport or -DisableSupport parameter is not specified, merging will be terminated with an error. If support is unavailable for the configuration but the -EnableSupport or -DisableSupport parameter is specified, merging will also be terminated with an error.
If there is a possibility to put the configuration on support, and the -EnableSupport parameter is specified, but there is no SupportRules element in the settings file, then the following support rules are set:
-
New vendor objects:
-
Objects with the Changes allowed vendor rule. Set the Vendor object is not editable support rule.
-
Objects with the Changes not recommended vendor rule. Set the Vendor object is not editable support rule.
-
-
Identical objects or objects with the Take from new vendor configuration merge rule:
-
Objects with the Changes allowed vendor rule. Set the Vendor object is not editable support rule.
-
Objects with the Changes not recommended vendor rule. Set the Vendor object is not editable support rule.
-
-
Modified objects with a merge rule other than Take from new vendor configuration:
-
Objects with the Changes allowed vendor rule. Set the Object available for editing, support enabled support rule.
-
Objects with the Changes not recommended vendor rule. Set the Object available for editing, support enabled support rule.
-
If unresolved links are detected in objects from the merged (second) configuration, and the -IncludeObjectsByUnresolvedRefs or -ClearUnresolvedRefs parameters are not specified, then the merge is aborted. For each object the list of properties of objects with unresolved links and the list of objects not included on these links are stored in the utility message file.
The warnings are written in the utility message file regardless the value of the -force parameter.
- /CompareCfg –FirstConfigurationType <configuration type> \[-FirstName <configuration name>\] \[-FirstFile <file path>\] \[-FirstVersion <version number>\] –SecondConfigurationType <configuration type> \[-SecondName <configuration name>\] \[-SecondFile <file path>\] \[-SecondVersion <version number>\] \[-MappingRule <rule>\] \[-Objects <file name>\] -ReportType <report type> \[-IncludeChangedObjects\] \[-IncludeDeletedObjects\] \[-IncludeAddedObjects\] -ReportFormat <format type> -ReportFile <file name>
- Compare two configurations and generate a file with a comparison report.
The following parameters are available:
-
-FirstConfigurationType <configuration type>. Type of the first configuration to compare. The parameter can take values:
-
MainConfiguration. Main configuration.
-
DBConfiguration. Database configuration.
-
VendorConfiguration. Vendor configuration.
-
ExtensionConfiguration. Configuration extension.
-
ExtensionDBConfiguration. Configuration extension from database.
-
ConfigurationRepository. Configuration from a repository.
-
ExtensionConfigurationRepository. Configuration extension from an extension repository.
-
File. Path to the configuration file or configuration extension file.
-
-
-FirstName <additional ID>. Name of the first configuration. Possible parameter values (depending on the value of the /FirstConfigurationType parameter):
-
VendorConfiguration. Vendor configuration name.
-
ExtensionConfiguration. Extension configuration name.
-
ExtensionDBConfiguration. Extension configuration name (from the database).
-
This parameter is not applicable for other values of the /FirstConfigurationType parameter.
-
-FirstFile. Path to the configuration file (.cf) or to the extension configuration file (.cfe). Use this parameter only if the /FirstConfigurationType parameter is set to File.
-
-FirstVersion. Version of the configuration repository. Use this parameter only if the /FirstConfigurationType parameter is set to ConfigurationRepository or ExtensionConfigurationRepository.
-
-SecondConfigurationType <configuration type>. Type of the second configuration to compare. The parameter values are completely equivalent to the /FirstConfigurationType parameter values.
-
-SecondName <additional ID>. Name of the second configuration. Completely similar to the /FirstName parameter.
-
-SecondFile. Path to the configuration file (.cf) or to the extension configuration file (.cfe). Completely similar to the /FirstFile parameter.
-
-SecondVersion. Version of the configuration repository. Completely similar to the /FirstVersion parameter.
-
-MappingRule <rule>. Object mapping rule (if the configurations are not related):
-
ByObjectName. By object names. Used by default.
-
ByObjectIDs. By object IDs.
-
-
-Objects <file name>. Path to a file with the list of objects to be involved in the operation. If the file is specified, the operation involves the objects specified in the file only. Otherwise, the operation involves the complete configuration. For details on the file format, see Object list file.
-
-IncludeChangedObjects. Include changed subordinate objects in the report.
-
-IncludeDeletedObjects. Include deleted subordinate objects in the report.
-
-IncludeAddedObjects. Include added subordinate objects in the report.
-
–ReportType <report type>. Type of the comparison report:
-
Brief. Brief report.
-
Full. Full report.
-
-
-ReportFormat <format type>. Describes the format of the report file:
-
txt. Text document.
-
mxl. Spreadsheet document.
-
-
-ReportFile <file name>. Specifies the file name for the comparison report.
- /UpdateDBCfg \[-Dynamic<Mode>\] \[-BackgroundStart\] \[-BackgroundCancel\] \[-BackgroundFinish \[-Visible\]\] \[-BackgroundSuspend\] \[-BackgroundResume\] \[-WarningsAsErrors\] \[-Server\] \[-v1\|-v2\] \[-Extension <Extension name>\] \[-SessionTerminate <mode>\]
- Update a database configuration. Before restructuring, the mobile client signature is verified (see Infobase parameters). Displayed diagnostic messages are considered warnings by default and do not lock database configuration update.
It should be understood that the background update mechanism is not related to selection of the restructuring mechanism. If a background update is indicated, selection of the restructuring mechanism option (-v1|-v2) will be ignored.
The following parameters are available:
-
-Dynamic<Mode>. Show whether dynamic update is performed. Possible values:
-
–. Explicitly restricts dynamic update.
-
+. Allows dynamic update. First the system attempts to perform a normal update. If the attempt fails, the system attempts to perform a dynamic update. Dynamic update will also be allowed if the -Dynamic+ parameter is not specified and when the -Dynamic parameter is specified without the mode.
-
-
-BackgroundStart. Starts the background database configuration update and exits. If the –Dynamic or –Dynamic+ parameter is additionally specified, a dynamic update attempt will be performed first and if this attempt fails, a background update will be launched.
-
-BackgroundCancel. Cancel a running background database configuration update.
-
-BackgroundFinish. Completes a background database configuration update (performs the change acceptance phase). An attempt to lock the database exclusively and perform the final phase is made. When the –Visible checkbox is selected, a dialog box with the Cancel, Retry, and Close sessions and retry buttons is displayed if it is impossible to complete the background update (go to the change acceptance step). If the checkbox is not selected, the execution fails.
-
-BackgroundSuspend. Pauses a background database configuration update.
-
-BackgroundResume. Resumes a paused background database configuration update.
-
-WarningsAsErrors. Treat all warnings as errors.
-
-Server. Update is performed on the server (makes sense only in the client/server configuration). If this parameter is specified for a background update, the following rules apply:
-
The refreshing phase of the update is always performed on the server.
-
The processing phase and the change acceptance phase of the update can be performed both on the client and on the server.
-
The option to start a background update on the client and complete it on the server, or vice versa, is available.
-
The optimized restructuring mechanism is not used (the -v2 command is ignored if one is specified).
-
-
-v1|-v2. Defines the restructuring tool in use. If the restructuring mechanism version (-v1 or -v2) is not specified, then the restructuring mechanism of the version specified in the conf.cfg file (on the client application side) will be used. Otherwise use the version specified in the command line. If the optimized restructuring tool is specified, but this tool conflicts with other parameters, the usual restructuring tool will be used.
-
-Extension <extension name>. Specified extension is updated.
-
-SessionTerminate <mode>. Terminates active sessions if you need to set an exclusive infobase lock. Possible <mode> values:
-
disable. Do not forcibly terminate sessions. Default value.
-
force. Forced session termination.
-
The restructuring tool is selected as follows:
-
If the command line contains an explicit indication of the restructuring tool used, the specified tool will be used.
-
If the command line does not indicate the restructuring tool used, the restructuring tool specified by the UpdateDBCfg parameter of the conf.cfg file on the client application side will be used.
-
In any case, the –Server command indicates that the restructuring will be executed on the server. This command does not affect the selection of the restructuring mechanism used.
You can use /UpdateDBCfg after the following options:
-
/LoadCfg
-
/UpdateCfg
-
/ConfigurationRepositoryUpdateCfg
-
/LoadConfigFiles
-
/LoadConfigFromFiles
-
/MobileAppUpdatePublication
-
/MobileAppWriteFile
-
/MobileClientDigiSign
-
/MobileClientWriteFile
- /DumpDBg <cf/cfe file name> \[-Extension <extension name>\]
- Save to a file the database configuration or the configuration of the extension saved to the database. To save the extension configuration you need correctly specify the -Extension parameter.
- /DumpDBCfgList \[-Extension <extension name>\] \[-AllExtensions\]
- Displays the name of the main configuration (if no one parameter is specified) or the name(s) of the extension(s). The following parameters are available:
-
-Extension. Displays the name of the specified extension.
-
-AllExtensions. Displays the names of all extensions.
- /RollbackCfg \[-Extension <extension name>\]
- Revert to database configuration.
If the -Extension parameter is specified, the configuration saved in the database for the specified extension is restored.
- /DeleteCfg \[-Extension <extension name>\] \[-AllExtensions\]
- Deletes the extension with the specified name. If you specify the –AllExtensions option, all extensions are deleted. This command can't be used without parameters.
- /DumpConfigFiles <dump directory> \[-Module\] \[-Template\] \[-Help\] \[-AllWritable\] \[-Picture\] \[-Right\] \[-Extension <extension name>\]
- Dumps some properties of configuration objects (modules, templates, images, access rights, and reference information) to files. The following directories and parameters are available:
-
<dump directory>. Directory that stores property files.
-
-Module. Export modules.
-
-Template. Export templates.
-
-Help. Export help information.
-
-AllWritable. Export properties of writable objects.
-
-Picture. Export common pictures.
-
-Right. Export rights.
-
–Extension. Export the specified extension.
- /LoadConfigFiles <load directory> \[-Module\] \[-Template\] \[-Help\] \[-AllWritable\] \[-Picture\] \[-Right\] \[-Extension <extension name>\]
- Restores some properties of configuration objects (modules, templates, images, access rights and reference information) from files. The following directories and parameters are available:
-
<load directory>. Directory that stores property files.
-
-Module. Import modules.
-
-Template. Import templates.
-
-Help. Import help information.
-
-AllWritable. Import only properties of writable objects.
-
-Picture. Import common pictures.
-
-Right. Import rights.
-
–Extension. Import to the specified extension. If the extension is bound to a repository, the imported objects must be locked in the repository.
If the batch mode command is executed successfully, it returns code 0. Otherwise, it returns code 1 (101 if the data contains errors).
- /DumpConfigToFiles <export directory> \[-Format <mode>\] \[-Extension <Extension name>\] \[-AllExtensions\] \[–update\] \[–force\] \[–getChanges <file name>\] \[–configDumpInfoForChanges <file name>\] \[-listFile <file name>\] \[-configDumpInfoOnly\] \[-Server \[-JobsCount <count>\]\] \[-Archive <file name>\] \[-ignoreUnresolvedReferences\]
- Uploads configuration to files. The following parameters are available:
-
-Format. Defines the format of dumping the configuration to files:
-
Plain. Linear format.
-
Hierarchical. Hierarchical format. Used by default.
-
-
–Extension. Exports the specified extension.
-
–AllExtensions. Exports all extensions except for the main configuration. Each extension is exported to a directory with its own name.
-
-update. Update the previous export, that is, export only objects with versions different from the versions of the previously uploaded objects.
Version file (ConfigDumpInfo.xml) is taken from current dump directory. If the current version of the upload format does not match the version of the version file format or if the version file is not found, an error is generated. After upload complete the version file is updated.
It is possible to add the following parameters:
-
-force. If the current version of the export format does not match the format version in the version file, a full export is performed.
-
-configDumpInfoForChanges. If before export, the current export directory is not empty, an error is thrown. Matching the current version of the upload format to the version of the upload format in the version file is not checked. Upload generates new version file. The file specified in the -configDumpInfoForChanges parameter is not updated.
-
-force. Perform full export if an attempt to update the export reveals the mismatch between the current export format version and the version of the format stored in the version file (ConfigDumpInfo.xml). Used in combination with the -update parameter only. Otherwise it is ignored.
-
-getChanges <file name>. Specified file contains the list of changes in the current configuration regarding the dump and, accordingly, the file of the version which directory is indicated by the parameter of the /DumpConfigToFiles command. For this parameter the file name is required.
Can be used with the –configDumpInfoForChanges parameter. In this case, the changes are determined relative to the version file (ConfigDumpInfo.xml) specified in this parameter. If the file version is not found when using the -configDumpInfoForChanges parameter an error is generated.
- -configDumpInfoForChanges <file name>. Specifies the version file (ConfigDumpInfo.xml) to compare the changes. This parameter requires the full file name.
This parameter can be used only with the parameters -update and -getChanges.
- -listFile <file name>. Specifies the file with the list of objects exported regardless of their update status. For this parameter the file name is required.
Objects from the list are uploaded completely, except the subordinate objects that are treated as separate objects of development. To upload such subordinate objects, they should be explicitly indicated in the list.
If an object from the list has subordinate objects that are not separate development objects but have external properties, then the external properties of these objects are also dumped.
In the file containing the names of the objects to be exported, you can specify the Configuration identifier, which is the equivalent of the configuration root. If the Configuration identifier is present in the file, which is not followed by the name of the root configuration object, then during exporting this identifier will be equivalent to the full name of the configuration root object, i.e., an entry of the Configuration.Help type is equivalent to the Configuration.ConfigurationName.Help entry.
You can use both names containing the Configuration identifier and the full name of the root configuration object at the same time. If you want to export two external properties of the root configuration object, for example, Help and Splash, then in the file with the object list you can specify the following lines:
Configuration.HelpConfiguration.ConfigurationName.SplashThis parameter can't be used with other parameters.
- -configDumpInfoOnly. If the parameter is specified, only the version file (ConfigDumpInfo.xml) is generated during dumping. If the -format parameter will be specified in the command line, the version file will be generated for the specified export format. By default, a version file is generated for the hierarchical export format.
This parameter can only be combined with the -format parameter. Combination with other parameters is not allowed.
-
-Server. Indicates that the configuration must be dumped to files on the 1C:Enterprise server side. In this case, the configuration will be dumped in multi-threaded mode (faster). The command has an optional parameter:
- -JobsCount <count>. Allows you to specify the number of concurrent background jobs to dump the configuration to files on the server side.
Default value: 0. In this case, the number of background jobs is determined by the platform automatically based on the number of processor cores on a computer with a 1C:Enterprise server cluster.
-
-Archive <file name>. Allows you to dump the configuration to a ZIP archive file. This parameter can be used for a full dump, partial dump, dumping only the current state file (the -configDumpInfoOnly parameter is specified), or exporting all configuration extensions (the –AllExtensions parameter is specified).
-
-ignoreUnresolvedReferences. When dumping a configuration, references to unobtainable objects, which were deleted in one of the earlier configuration versions, are not dumped.
If you dump a configuration and decide to ignore references to unobtainable objects, you will observe the following behavior:
-
Unobtainable references to managed form commands are replaced with a default reference.
-
Unobtainable references to command groups in managed forms are not dumped.
-
Unobtainable paths to data in forms are not dumped.
-
Unobtainable references to predefined items are not dumped.
-
Unobtainable references in choice parameter links of metadata objects are not dumped.
-
Unobtainable references in type links of metadata objects are not dumped.
-
Unobtainable references to the subsystem command interface commands are not dumped.
-
Unobtainable references to command groups in the subsystem command interface are replaced with NavigationPanelOrdinary.
If the subsystem command interface is cleared completely, the next loading of such XML file into the configuration will clear the external property in the corresponding metadata object. As a result, the external property file will be missing during the next dump to XML.
The result of comparing the original configuration and the one loaded from XML files that was previously dumped to them with ignored references to unobtainable objects can contain configuration object changes, including changes without specific details.
See also:
- The ConfigDumpInfo.xml file.
- /LoadConfigFromFiles <load directory> \[-Extension <Extension name>\] \[-AllExtensions\] –files "<files>" –listFile <listFile> -Format <mode> \[-updateConfigDumpInfo\] \[-NoCheck\] \[-Archive <ZIP archive name>\] -partial
- Restores a configuration from files. Loading extensions to the main configuration (or vice versa) is not supported. When the configuration files are fully restored, the restore format (linear or hierarchical) is automatically determined. For partial loading, automatic format detection is not supported. Specify a format explicitly using the –Format parameter.
The following parameters are available:
-
–Extension. Imports the specified extension. If the extension does not exist, it is created. If the extension is bound to a repository it can't be fully loaded. If the loaded objects are locked in the extension configuration repository the load may be partial.
-
–AllExtensions. Extensions are loaded from files. Each subdirectory in the specified directory is considered an extension. This parameter is incompatible with the –files and -listFile parameters.
-
-files. Specifies which files should be loaded when the configuration is partially restored from files. Each file can be specified with the full path or with the relative path for the load directory. The list of files must be enclosed in quotes; the file names must be separated by comma. This parameter is incompatible with the –AllExtensions parameter.
-
-listFile. Specifies a file with the list of the files to load. Files are listed there one file name per line, each name can be full path to the file or relative path from the download directory. Strings must be separated by a line break. Line break is supported in both Windows and Linux formats. - File is expected to be in UTF-8 encoding. Empty strings are not supported. If the string starts from REM it is skipped. This parameter is incompatible with the –AllExtensions parameter.
-
-Format. Defines the format of dumping the configuration to files:
-
Plain. Linear format.
-
Hierarchical. Hierarchical format. Used by default.
-
This parameter can be used only with the -files or -listFile parameters.
-
-updateConfigDumpInfo. Indicates that the ConfigDumpInfo.xml version file that corresponds to the restored configuration will be created in the directory at the end of restoring. If the configuration is partially restored (the -files or -listFile parameters are used), the existing version file will be updated.
-
-NoCheck. Specifies that integrity of the configuration to be restored is not checked upon restoration. This reduces the restoration time if the command initiator is sure that an integral configuration is being restored.
-
-Archive. Contains a name of a ZIP archive from which files will be loaded. To execute the command, specify either the load directory or this parameter. You cannot specify the load directory and this parameter at the same time.
-
-partial. When you restore the configuration from files, restores only the items of the configuration object description that are specified as a file. Such files can be:
-
Description file of a metadata object (without its external properties).
-
External property file (form and so no).
-
Form module file (without the form description file).
-
If you specify the –files and –listFile parameters at the same time, the first specified parameter in the command line is used.
See also:
- The ConfigDumpInfo.xml file.
- /GetConfigGenerationID \[-Extension <Extension name>\]
- The command allows you to receive an ID of the current configuration metadata generation. This ID is updated every time the configuration is changed. It does not make sense to compare IDs received using this command in terms of "greater/less". It makes sense to compare such IDs in terms of "equal/not equal". It allows you to check whether the configuration has been changed since the last ID was received.
To get an ID, specify the /Out command in Designer startup command line. The ID will look as follows: 4d8d1d994cd4534c9accd32a5b44b35300000000. For an empty infobase, the ID will look as follows: 0000000000000000000000000000000000000000.
The following parameters are available:
- –Extension. Gets a metadata ID of the specified extension. If the parameter is not specified, the ID is received for the main configuration.
7.4.5. Configuration and extension checks
- /CheckModules \[-ThinClient\] \[-WebClient\] \[-MobileClient\] \[-MobileAppClient\] \[-Server\] \[-MobileAppServer\] \[-ExternalConnection\] \[-ThickClientOrdinaryApplication\] \[-ExtendedModulesCheck\] \[-Extension <extension name>\] \[-AllExtensions\]
- Checks modules. Specify at least one of the check options, otherwise the check is not performed. The following parameters are available:
-
-ThinClient. Check in thin client mode.
-
-WebClient. Check in web client mode.
-
-MobileClient. Check in mobile client mode.
-
-MobileAppClient. Check in mobile application client mode.
-
-MobileClientStandalone. Check in the mobile client running in standalone mode.
-
-Server. Check in 1C:Enterprise server mode.
-
-MobileAppServer. Check in mobile application server mode.
-
-ExternalConnection. Check in external connection mode.
-
-ThickClientOrdinaryApplication. Check in client application mode.
-
-ExtendedModulesCheck. Check object method and object property calls using "." (dot) for a limited set of types. Check whether string literals that serve as parameters for certain functions, such as GetForm(), are valid.
-
-Extension. Perform the specified checks for the given extension.
-
-AllExtensions. Perform the specified checks for all extensions.
- /CheckConfig \[-ConfigLogIntegrity\] \[-IncorrectReferences\] \[-ThinClient\] \[-WebClient\] \[-MobileClient\] \[-MobileAppClient\] \[-Server\] \[-MobileAppServer\] \[-MobileClientStandalone\] \[-ExternalConnection\] \[-ExternalConnectionServer\] \[-ThickClientManagedApplication\] \[-ThickClientServerManagedApplication\] \[-ThickClientOrdinaryApplication\] \[-ThickClientServerOrdinaryApplication\] \[-DistributiveModules\] \[-UnreferenceProcedures\] \[-HandlersExistence\] \[-EmptyHandlers\] \[-ExtendedModulesCheck\] \[-CheckUseModality\] \[-CheckUseSynchronousCalls\] \[-UnsupportedFunctional\] \[-MobileClientDigiSign\] \[-Extension <Extension name>\] \[-AllExtensions\]
- Centralized configuration test. The following parameters are available:
-
-ConfigLogIntegrity. Check the logical integrity of the configuration. It is a standard check that is usually performed before updating the database.
-
-IncorrectReferences. Search for invalid references. Search references to deleted objects. The search is performed in the entire configuration, including rights, forms, templates, interfaces, and so on. In addition, the system searches for logically incorrect links.
-
-ThinClient. Perform module syntax check for emulation mode of the managed application environment (thin client, file mode).
-
-WebClient. Perform module syntax check in emulation mode of the web client environment.
-
-MobileClient. Perform module syntax check in emulation mode of the mobile client environment.
-
-MobileClientStandalone. Syntactic control of modules in emulation mode of the mobile client environment performed in standalone mode.
-
-Server. Perform module syntax check in emulation mode of the 1C:Enterprise server environment.
-
-ExternalConnection. Perform module syntax check in external connection environment emulation mode (file mode).
-
-ExternalConnectionServer. Perform module syntax check in emulation mode of the external connection environment (client/server mode).
-
-MobileAppClient. Perform module syntax check in emulation mode of the mobile platform environment (client mode).
-
-MobileAppServer. Perform module syntax check in emulation mode of the mobile platform environment (server mode).
-
-ThickClientManagedApplication. Perform module syntax check in emulation mode of the managed application environment (thick client, file mode).
-
-ThickClientServerManagedApplication. Perform module syntax check in emulation mode of the managed application environment (thick client, client/server mode).
-
-ThickClientOrdinaryApplication. Perform module syntax check in emulation mode of the ordinary application environment (thick client, file mode).
-
-ThickClientServerOrdinaryApplication. Perform module syntax check in emulation mode of the ordinary application environment (thick client, client/server mode).
-
-DistributiveModules. Distribute modules without their source texts. If the configuration distribution package settings specify distribution of some modules without source texts, the possibility of generating images of these modules is checked.
-
-UnreferenceProcedures. Search for unused procedures and functions. Search for local (not exported) procedures and functions that are never referenced, including unused event handlers.
-
-HandlersExistence. Check for assigned handlers. Check for event handlers of interfaces, forms, and controls.
-
-EmptyHandlers. Check for empty handlers. Search for event handlers that perform no actions. Such handlers can impact the system performance.
-
-ExtendedModulesCheck. Check object method and object property calls using "." (dot) for a limited set of types. Check whether string literals that serve as parameters for certain functions, such as GetForm(), are valid.
-
-CheckUseModality. Search for the modules for modal method calls. The parameter is only used together with the -ExtendedModulesCheck parameter.
-
-CheckUseSynchronousCalls. Search for the modules for synchronous method calls. The parameter is only used together with the -ExtendedModulesCheck parameter.
-
-UnsupportedFunctional. Search for the functionality that cannot be performed in the mobile application. The check in this mode shows that:
-
Metadata that do not have their classes implemented in the mobile platform.
-
Exchange plans in configuration that have the Distributed infobase property.
-
Types not implemented in the mobile platform:
-
In the Type properties of metadata attributes, constants, and session parameters.
-
In the Command parameter type property of the Command configuration object.
-
In the Type property of attributes and form attribute columns.
-
Forms having Ordinary type.
-
Form controls that are not implemented in the mobile platform. (the check is not performed for forms which Use purposes property does not include mobile devices)
-
Complex desktop (contains multiple forms)
-
-
-
-MobileClientDigiSign. Verifies the digital signature of the configuration for the mobile client.
-
-Extension. Perform the specified checks for the given extension.
-
-AllExtensions. Perform the specified checks for all extensions.
- /CheckCanApplyConfigurationExtensions \[-Extension <extension name>\] \[-AllZones\] \[-Z «separators»\]
- Checks whether the extension can be used with the specific infobase.
The following parameters are available:
-
-Extension. Check for the specified extension considering all previously loaded extensions. If the extension name is not specified, all the extensions are checked in the order they were imported.
-
-AllZones. Check the extension in all data areas of the current infobase.
-
The -Extension and –AllZones parameters, and the –Z and –AllZones parameters can't be used together.
-
The result of checking the applicability of the extensions for each area is preceded by the string of -Z, followed by the separators for the tested area.
-
-
-Z. Set separator values to test. If the -Z option is not specified, the data area with unspecified separators is tested.
If the -Z parameter and the /Z command are specified at the same time, the separators specified in the -Z parameter are used to launch Designer and select users. The separators specified in the /Z command (the /CheckCanApplyConfigurationExtensions command parameter) are used to specify the data area to test the extension applicability.
- /IBCheckAndRepair \[-ReIndex\] \[-LogIntegrity \[MDtype\[,MDtype\]\] \| -LogAndRefsIntegrity \[MDtype\[,MDtype\]\]\] \[-RecalcTotals\] \[-IBCompression\] \[-Rebuild\] \[–RebuildStandaloneCfg\] \[-TestOnly \| \[\[-BadRefCreate \| -BadRefClear \| -BadRefNone\] \[-BadDataCreate \| -BadDataDelete\]\]\] \[-UseStartPoint\] \[-TimeLimit:hhh:mm\] \[-ConfigurationExtensionsLogIntegrity\] \[-RefreshTableLocation\] \[-BinaryDataStorageIntegrity \[MDtype\[,MDtype\]\]\] \[-JobsCount <count>\] \[-Z: "separator values"\] \[-CheckAndEnableCORPFunctionality\]
- Performs the testing and correction for infobase. The following parameters are available:
-
-ReIndex. Index the tables again.
-
-LogIntegrity. Check the logical integrity. If the parameter is specified without any values, the logical integrity of all infobase tables is checked. To select tables to check, specify comma-separated tables as a parameter value. You can find the list of tables to check further in the text.
-
-LogAndRefsIntegrity. Check the logical and reference integrity. If the parameter is specified without any values, the logical and reference integrity of all infobase tables is checked. To select tables to check, specify comma-separated tables as a parameter value. You can find the list of tables to check further in the text.
-
-RecalcTotals. Recalculate totals.
-
-IBCompression. Compress tables. A special optimization is also performed for the file mode. For details, see Verifying and repairing an infobase.
-
Rebuild. Restructure infobase tables.
-
-RebuildStandaloneCfg. Rebuild a configuration designed for a mobile client in standalone mode.
-
-RebuildConfigurationExtension. Rebuild all extension tables. If only this parameter is specified for the verify and repair operation, you will not need exclusive access to use the infobase.
-
-Z:. Verify and repair configuration extensions in the specified data areas. The format to specify extension values is similar to the /Z command of the Designer startup command line. To specify multiple data areas to verify and repair extensions, specify the -Z: option several times.
You cannot use the /IBCheckAndRepair and /Z commands at the same time. If you specify these commands together, a runtime error will occur.
-
-ConfigurationExtensionsLogIntegrity. Allows you to check and correct (if possible) the logical integrity of configuration extensions. If you select the -TestOnly parameter, only the check is performed. If only this parameter is specified for the verify and repair operation, you will not need exclusive access to use the infobase.
-
-TestOnly. Test the infobase only. If testing and correction of the infobase are specified (-TestOnly parameter is missing), you can specify the following parameters:
In case of references to non-existent objects:
-
-BadRefCreate. Create objects.
-
-BadRefClear. Clear objects.
-
-BadRefNone. Do not change if objects are partially lost.
In case of partial loss of information about objects:
-
-BadDataCreate. Create objects.
-
-BadDataDelete. Delete objects.
-
-UseStartPoint. Use the saved return point to resume testing from where it was terminated in the previous session.
-
-TimeLimit:hhh:mm. Limit the maximum testing session time:
-
hhh. Hours (0...999).
-
mm. Minutes (0...59).
-
When specifying a parameter please note that some processes cannot be interrupted at arbitrary time during testing and correction, and some processes can't be interrupted at all. Therefore, the execution is interrupted after the specified time, but only when it is possible. In other words, you should not expect that if you specify time limit of 1 hour, the testing and correction will be interrupted exactly after 1 hour.
-
-RefreshTableLocation. Updates information about the location of tables in user tablespaces.
-
-BinaryDataStorageIntegrity. Allows you to check the binary data storage integrity. If the parameter is specified without any values, the integrity of all infobase tables is checked. To select tables to check, specify comma-separated tables as a parameter value. You can find the list of tables to check further in the text.
-
-JobsCount. Number of system background jobs that are used to verify and repair the infobase. Default value: 0. It means that the number of background jobs will be equal to the CPU core number of the computer that verifies and repairs the infobase. If the value is 1, parallel verification and repair are disabled.
The process is sped up in the following cases:
-
When 1C:Enterprise server cluster and DBMS server are located on the same computer.
-
1C:Enterprise server cluster and DBMS server cluster are connected via a fast communication channel (1 Gbit and faster).
-
-CheckAndEnableCORPFunctionality. Checks and updates the infobase depending on various settings (for details, see On a personal computer).
You cannot use several parameters simultaneously within a subgroup of parameters.
For the -LogIntegrity, -LogAndRefsIntegrity, and -BinaryDataStorageIntegrity parameters, you can specify a list of tables to process (as comma-separated parameter values if there are several tables) from the following list:
| Object | Parameter value |
|---|---|
| Business processes | BusinessProcesses |
| Documents | Documents |
| Other objects | Other |
| Document journal | DocumentJournals |
| Tasks | Tasks |
| Constants | Constants |
| Charts of calculation types | ChartsOfCalculationTypes |
| Charts of characteristic types | ChartsOfCharacteristicTypes |
| Exchange plans | ExchangePlans |
| Charts of accounts | ChartsOfAccounts |
| Accounting registers | AccountingRegisters |
| Accumulation registers | AccumulationRegisters |
| Calculation registers | CalculationRegisters |
| Information registers | InformationRegisters |
| Catalogs | Catalogs |
7.4.6. Configuration support
- /UpdateCfg <CF or CFU file name> -Settings <settings file name> \[-IncludeObjectsByUnresolvedRefs \| -ClearUnresolvedRefs\] \[-DumpListOfTwiceChangedProperties\] \[-force\]
- Update a supported configuration.
Merge current configuration with a file (using settings file).
The following parameters are available:
-
<cf or cfu file name>. Name of the file with configuration to be merged (.cf file) or with the configuration update file (.cfu file).
-
-Settings <settings file name>. Allows you to specify the name of the file with configuration merging settings. For the format and description of the merge settings file, see A file of merge settings.
-
-IncludeObjectsByUnresolvedRefs. If merge settings contain the objects that are not included in the list of merged ones and are absent in the main configuration, but referenced from objects included in the list, such objects are also marked for merging, and an attempt to continue merging is made. Merge attempts are made until there are no objects left with references to objects that are not included in the list, or until the entire configuration is selected. Similar to the Mark all for merging button in the window with unresolved references, but attempts are repeated.
-
-ClearUnresolvedRefs. References to objects that are not included in the list of merged objects are cleared. Similar to the Continue button in the window with unresolved references.
-
-DumpListOfTwiceChangedProperties. Output a list of the properties changed twice to an internal message file.
-
-force. Perform merging if there are:
-
Warnings of deleted objects referenced in the objects not included in the merging (such objects will be excluded from the merging).
-
Warnings of the properties, that have been changed twice and for which the merging mode has not been selected (such properties will be merged with default settings).
-
Objects that are restricted from changing by the support rules (such objects will be excluded from merging).
-
Settings applying warnings.
-
The merging will be interrupted in the above cases, unless specified.
Warning of the properties that have been changed twice will be output to file for outputting the service messages, which are output to service messages file regardless of -force parameter.
- /ManageCfgSupport \[-disableSupport \[-force\]\]
- Allows you to disable the configuration support. The following parameters are available:
-
-disableSupport. Indicates that it is required to disable configuration support. If the parameter is missing, an error occurs.
-
-force. Disable the configuration support even if the changes are restricted in the configuration. The error is generated if the parameter is absent and if the attempt to disable the configuration support is made for the configuration, for which the changes are restricted in the support control interactive mode.
7.4.7. Commands for creating distribution and update files
- /CreateTemplateListFile <file name> \[-TemplatesSourcePath\]
- Create the configuration template file. The following directories and parameters are available:
-
<file name>. File name of the configuration template list. If this is not specified, the file is created in the specified directory with default name; if the name only is specified, the file is created with the specified name in the specified directory. The following path is used, if the full path is specified;
-
-TemplatesSourcePath. Path to search for configuration template files. If not specified, the path set in the system in the startup configuration dialog box is taken.
- /CreateDistributivePackage <directory name> -File <distribution package description file name> -PackageFileName <archive name> \[-Option <distribution option>\] \[-MakeSetup\] \[-MakeFiles\] \[-digisign <license parameters file name>\] \[-WarningAsError\]
- Create a distribution package archive or distribution package files based on a distribution package description. If the configuration contains the mobile client signature, the check, if the specified signature matches the configuration meta-data, is performed before command execution. If the configuration signature does not match the configuration, the diagnostic message is generated and the further system behavior is determined by the -WarningAsError parameter.
It is possible to use either -MakeSetup or -MakeFiles parameter. If none of these parameters are specified, -MakeSetup is used (a distribution package is created). The following directories and parameters are available:
-
<distribution package creation directory>. Specifies the directory for creating a distribution package or distribution package files.
-
-File <distribution package description file>. Specifies the file with distribution package description.
-
-PackageFileName <archive name>. Name of the file with the ZIP archive of the distribution package. The archive is created in <distribution package creation directory>. Used in combination with -MakeSetup parameter only. If the specified file name has ".zip" extension, it will be added automatically. If the parameter is not specified, updsetup.zip will be used as a default name.
-
-Option <distribution option>. Create a distribution option based on the distribution package description. The default distribution package option is Full.
-
-MakeSetup. Create a distribution package.
-
-MakeFiles. Create distribution package files.
-
-digisign <name of license parameter file>. Specifies the licensing parameters of the user workplace.
-
-WarningAsError. If this parameter is specified, mismatch of the digital signature of the mobile client with the current metadata is interpreted as an error and the process is interrupted. If the parameter is not specified, signature and configuration mismatch is not treated as an error and the process is not interrupted.
- /CreateDistributionFiles \[-cffile <cf file name>\] \[-cfufile <cfu file name> \[-f <cf file name>\|-v <distribution package version>\]+\]\[–digisign <license parameters file name>\] \[-WarningAsError\]
- Create the distribution and update files. If the configuration contains the mobile client signature, the check, if the specified signature matches the configuration meta-data, is performed before command execution. If the configuration signature does not match the configuration, the diagnostic message is generated and the further system behavior is determined by the -WarningAsError parameter.
The following directories and parameters are available:
-
-cffile <cf file name>. Create a distribution package file.
-
-cfufile <cfu file name>. Create an update file.
-
-f <cf file name>. Name of the distribution package included in the update.
-
-v <distribution package version>. Version of the distribution package included in the update.
-
-digisign <name of license parameter file>. Specifies the licensing parameters of the user workplace.
-
-WarningAsError. If this parameter is specified, mismatch of the digital signature of the mobile client with the current metadata is interpreted as an error and the process is interrupted. If the parameter is not specified, signature and configuration mismatch is not treated as an error and the process is not interrupted.
The -f <cf file name>|-v <distribution package version> parameter group is repeated as many times as the distribution package files are included in the update.
- /CreateDistributive <distribution package creation directory> -File <distribution package description file name> \[-Option <distibution option>\] \[-MakeSetup\] \[-MakeFiles\] \[-digisign <license parameters file name>\] \[-WarningAsError\]
Create a distribution package or distribution package files based on a distribution package description. If the configuration contains the mobile client signature, the check, if the specified signature matches the configuration meta-data, is performed before command execution. If the configuration signature does not match the configuration, the diagnostic message is generated and the further system behavior is determined by the -WarningAsError parameter.
It is possible to use either -MakeSetup or -MakeFiles parameter. If none of these parameters are specified, -MakeSetup is used (a distribution package is created). The following directories and parameters are available:
-
<distribution package creation directory>. Specifies the directory for creating a distribution package or distribution package files.
-
-File <distribution package description file>. Specifies the file with distribution package description.
-
-Option <distribution option>. Create a distribution option based on the distribution package description. The default distribution package option is Full.
-
-MakeSetup. Create a distribution package.
-
-MakeFiles. Create distribution package files.
-
-digisign <name of license parameter file>. Specifies the licensing parameters of the user workplace.
-
-WarningAsError. If this parameter is specified, mismatch of the digital signature of the mobile client with the current metadata is interpreted as an error and the process is interrupted. If the parameter is not specified, signature and configuration mismatch is not treated as an error and the process is not interrupted.
- /SignCfg -ConfigurationType <configuration type> -SignedFile <cfe file path> \[-File <cfe file path>\] \[-Name <extension name>\] \[-Version <version>\] -digisign <license parameters file name>
- Sign the configuration extension with a digital signature. When the extension is signed, you can use it in base configuration versions that are signed with the same key.
The following directories and parameters are available:
-
-ConfigurationType <configuration type>. Location of the configuration extension to be signed. The parameter can take values:
-
ExtensionConfiguration. Configuration extension.
-
ExtensionDBConfiguration. Configuration extension located in the database.
-
ExtensionConfigurationRepository. Configuration extension located in the configuration extension repository.
-
File. Configuration extension file.
-
-
-SignedFile <cfe file path>. Path to the signed extension file (resulting file).
-
-File <cfe file path>. Path to a file with an extension to be signed. Used when the File configuration type is specified.
-
-Name <extension name>. Extension name. Used if the configuration type has one of the following values: ExtensionConfiguration, ExtensionDBConfiguration, or ExtensionConfigurationRepository.
-
-Version <version>. Version of the configuration extension in the repository. Used when the ExtensionConfigurationRepository configuration type is specified.
-
-digisign \<name of license parameter file>. Allows you to specify the licensing parameters of the user workplace.
7.4.8. External reports and data processors
When dumping/loading the external data processors (reports) you need to understand the process of type information in XML files when applied to batch mode. If the external data processor (reports) reference to the configuration objects, when dumping such data processor (report) to files, types of such references shall be dumped as a unique type IDs. Therefore, when loading from such files the type will be determined only if the data processor is loaded to the same configuration or to the configuration, which is the child object of the configuration, from which the dumping has been performed. The types will be defined incorrectly in other cases.
In order to avoid this dumping and loading must be performed after specifying the infobase connection parameters in the command line of Designer batch mode. In this case the text type representations will be output in the dump files instead of the unique IDs. In order to have the reference to a real configuration type in the data processor generated at loading it is required to specify the infobase parameter at loading. If the loading is performed without specifying these parameters, the type data will be lost.
If the external data processor (report) does not reference to the configuration objects, such objects may be dumped/loaded without specifying the infobase connection parameters.
- /DumpExternalDataProcessorOrReportToFiles <dump root file> <external data processor (report)> \[-Format Plain\|Hierarchical\]
- Exports an external data processor (report) in XML format. 2.0 format dump is used
The following parameters are available:
-
<root dump file>. Contains a full path to the root dump directory. Required parameter.
-
<external data processor (report)>. Full path to an external data processor (report) in .epf (.erf).
-
-Format. Specifies dump format:
-
Plain. Linear format.
-
Hierarchical. Hierarchical format (by default).
-
- /LoadExternalDataProcessorOrReportFromFiles <dump root file> <external data processor (report)>
- Imports an external data processor (report) from XML format. 2.0 format dump is used
The following parameters are available:
-
<root dump file>. Contains the full path to the root directory that contains the external data processor (report) in XML format files. Required parameter.
-
<external data processor (report)>. Full path to an external data processor (report) in .epf (.erf), resulting from dumping. The extension of the resulting file will be determined automatically based on the XML files. If the extension is incorrect in the command line, it will be automatically replaced with the required extension.
7.4.9. Mobile application
- /MobileAppUpdatePublication
- Update mobile application publication if created earlier, otherwise the error is generated. Preliminary update of the database configuration is possible.
- /MobileAppWriteFile <zip-file name>
- Save a configuration to a ZIP file. The specified file is used to build an application for a mobile device. The ZIP file contains a configuration description (as an XML file) and a file with data that is used to create an infobase on a mobile device.
7.4.10. Mobile client
- /MobileClientWriteFile <file name>
- Save configuration to a file. The specified file may be used to build an application for a mobile device. Preliminary update of the database configuration is possible.
- /MobileClientDigiSign
- Sign the mobile client configuration. Preliminary update of the database configuration is possible.
7.4.11. Event log
- /ReduceEventLogSize <Date> \[-saveAs <file name>\] \[-KeepSplitting\]
- Truncate the event log. The following parameters are available:
-
Date. New event log limit in the YYYY-MM-DD format.
-
-saveAs <file name>. Parameter to save a copy of the exported records.
-
-KeepSplitting. Preserve splitting into files in periods.
7.4.12. Deleting data
- /EraseData \[/Z\[<separators>\]\]
- Delete the infobase data. Parameter /Z specifies the region to delete data from. Only users with the Administration right can delete the data.
7.4.13. Predefined data
- /SetPredefinedDataUpdate \[-Auto\] \[-UpdateAutomatically\] \[-DoNotUpdateAutomatically\]
- The parameter is intended for specifying the predefined data update modes. The following parameters are available:
-
-Auto. Actual value is calculated automatically (default value). For the master infobase node, the value will be -UpdateAutomatically. For the subordinate infobase node, this will be -DoNotUpdateAutomatically.
-
-UpdateAutomatically. Predefined items will be created and the existing values will be updated automatically during infobase restructuring.
-
-DoNotUpdateAutomatically. New predefined items will not be created and their values will not be updated automatically during infobase restructuring.
7.4.14. Distributed infobase
- /ResetMasterNode
- Cancel distributed infobase master node assignment. Parameter is similar to call of SetMasterNode() method with Undefined parameter value.
7.4.15. Configuration repository operations
7.4.15.1. Repository access parameters
Commands, specifying the configuration repository parameters, may be combined with the other repository operations commands.
- /ConfigurationRepositoryF <repository directory>
- This parameter is used to specify a path to the configuration repository.
- /ConfigurationRepositoryN <name>
- This parameter is used to specify the configuration repository username.
- /ConfigurationRepositoryP <password>
- The parameter is intended for specifying the configuration repository user password.
7.4.15.2. Creating repositories
- /ConfigurationRepositoryCreate \[-AllowConfigurationChanges -ChangesAllowedRule <Support rule> -ChangesNotRecommendedRule <Support rule>\] \[-NoBind\] \[-MinPasswordLenght <Length>\] \[-CheckPasswordComplexity\] \[-Extension <Extension name>\]
- Create the configuration repository. The following parameters are available:
-
-AllowConfigurationChanges. Allow configuration changes if the configuration is supported and changes are not allowed.
-
-ChangesAllowedRule <Support rule>. Sets a support rule for the objects with changes allowed by the vendor. You can set one of the following rules:
-
ObjectNotEditable. Vendor object is not editable.
-
ObjectIsEditableSupportEnabled. Vendor object is editable, support enabled.
-
ObjectNotSupported. Vendor object is not supported.
-
-
-ChangesNotRecommendedRule. Sets a support rule for the objects with changes not recommended by the vendor. You can set one of the following rules:
-
ObjectNotEditable. Vendor object is not editable.
-
ObjectIsEditableSupportEnabled. Vendor object is editable, support enabled.
-
ObjectNotSupported. Vendor object is not supported.
-
-
-NoBind. No binding to the created repository.
-
-MinPasswordLenght <Length>. Sets the minimum password length for the repository to create.
-
-CheckPasswordComplexity. Check the password complexity for the repository to create.
-
-Extension <Extension name>. Allows you to specify the name of an extension whose repository will be created by the command. If the parameter is not specified, the main configuration repository will be created.
7.4.15.3. Managing users
- /ConfigurationRepositoryAddUser -User <Name> -Pwd <Password> -Rights <Rights> \[-RestoreDeletedUser\] \[-Extension <Extension name>\]
- Create a configuration repository user. The user currently connected to the repository must have administrative rights. If a user with the specified name exists, the user is not created. The following parameters are available:
-
-User. Name of the user to create.
-
-Pwd. Password of the user to create. The specified password is checked for compliance with the repository password policies.
-
-Rights. Rights granted to the user. Values:
-
ReadOnly. Viewing right.
-
LockObjects. Object lock right.
-
ManageConfigurationVersions. Version change right.
-
Administration. Right to use administrative functions.
-
-
-RestoreDeletedUser. If a deleted user with the same name is found, this user is restored.
-
-Extension <Extension name>. Allows you to specify the name of the extension with whose repository the command will be executed. If the parameter is not specified, the operation is performed with the main configuration repository.
- /ConfigurationRepositoryCopyUsers -Path <path> -User <Name> -Pwd <Password> \[-RestoreDeletedUser\] \[-Extension <Extension name>\]
- Copy the users from the other configuration repository. Deleted users cannot be copied. If a user with the specified name exists, the user cannot be added. The following parameters are available:
-
-Path. Path to the source repository.
-
-User. User in the source repository.
-
-Pwd. User password in the source repository.
-
-RestoreDeletedUser. If a deleted user with the same name is found, this user is restored.
-
-Extension <Extension name>. Allows you to specify the name of the extension with whose repository the command will be executed. If the parameter is not specified, the operation is performed with the main configuration repository.
7.4.15.4. Operations with objects
- /ConfigurationRepositoryLock \[–Objects <file name>\] \[-revised\] \[-Extension <Extension name>\]
- Locks objects from configuration repository for editing.
The following parameters are available:
-
-Objects <file name>. Path to a file with the list of objects to be involved in the operation. If the file is specified, the operation involves the objects specified in the file only. Otherwise, the operation involves the complete configuration. For details on the file format, see Object list file.
-
-revised. Get locked objects if required.
-
-Extension <Extension name>. Allows you to specify the name of the extension with whose repository the command will be executed. If the parameter is not specified, the operation is performed with the main configuration repository.
Batch mode return code:
-
0. No errors.
-
1. There are errors. Error text is output to the service message file.
- /ConfigurationRepositoryUnLock \[–Objects <file name>\] \[-force\] \[-Extension <Extension name>\]
- Releases locked objects in configuration repository.
The following parameters are available:
-
-Objects <file name>. Path to a file with the list of objects to be involved in the operation. If the file is specified, the operation involves the objects specified in the file only. Otherwise, the operation involves the complete configuration. For details on the file format, see Object list file.
-
-force. Describes the behaviour with the objects changed locally:
-
If the parameter is specified, locally changed objects will be retrieved from the repository. Changes will be lost.
-
If the parameter is not specified, the error will be generated for the locally changed objects. The operation will be canceled for all the objects involved in the operation.
-
-
-Extension <Extension name>. Allows you to specify the name of the extension with whose repository the command will be executed. If the parameter is not specified, the operation is performed with the main configuration repository.
Batch mode return code:
-
0. No errors.
-
1. There are errors. Error text is output to the service message file.
- /ConfigurationRepositoryCommit \[–Objects <file name>\] \[-comment <comment text>\] \[-keepLocked\] \[-force\] \[-Extension <Extension name>\]
- Stores object changes to configuration repository.
The following parameters are available:
-
-Objects <file name>. Path to a file with the list of objects to be involved in the operation. If the file is specified, the operation involves the objects specified in the file only. Otherwise, the operation involves the complete configuration. For details on the file format, see Object list file.
-
-comment <comment text>. Comment to the stored objects. Must be put in double quotes. To specify the comment in several lines each line mush be specified using its own -comment parameter.
-
-keepLocked. Keep the stored objects locked. If not specified, the objects involved in the operation will be unlocked after the changes are made.
-
-force. Describes the behaviour if the references to deleted objects are detected:
-
If the parameter is specified, reference deletion attempt will be made.
-
If the parameter is not specified, an error will be generated.
-
-
-Extension <Extension name>. Allows you to specify the name of the extension with whose repository the command will be executed. If the parameter is not specified, the operation is performed with the main configuration repository.
Batch mode return code:
-
0. No errors.
-
1. There are errors. Error text is output to the service message file.
7.4.15.5. Managing configurations
- /ConfigurationRepositoryBindCfg \[-forceBindAlreadyBindedUser\] \[-forceReplaceCfg\] \[-Extension <Extension name>\]
- Binds the previously unbound infobase to configuration repository. The following parameters are available:
-
-forceBindAlreadyBindedUser. Binds even if this user already has the configuration bound to this repository.
-
-forceReplaceCfg. If the configuration is not empty, this parameter confirms replacement of the configuration with the configuration from the repository.
-
-Extension <Extension name>. Allows you to specify the name of the extension with whose repository the command will be executed. If the parameter is not specified, the operation is performed with the main configuration repository.
- /ConfigurationRepositoryUnbindCfg \[-force\] \[-Extension <Extension name>\]
- Unbind the configuration from the configuration repository (user must have administrator rights in this infobase). If a user is authenticated in the repository (interactively or via command-line parameters) the configuration unbinding also affects the repository (the binding data is deleted). If a user is not authenticated in the repository, the configuration is only locally unbound from the repository.
If the configuration contains locked objects that have been modified in regard to the repository, the respective message is displayed the unbinding is not performed.
–force. Parameter is intended for skipping the authentication dialog box (if the repository user parameters are not specified) and for ignoring captured and modified objects.
-Extension <Extension name>. Allows you to specify the extension name with whose repository the command will be executed. If the parameter is not specified, the operation is performed with the main configuration repository.
- /ConfigurationRepositoryDumpCfg <cf file name> \[-v <repository version number>\] \[-Extension <Extension name>\]
- Save configuration from repository to a file. The following parameters are available:
-
-v <repository version number>. Version number. If the version number is not specified or equals to -1, the latest version will be saved.
-
-Extension <Extension name>. Allows you to specify the name of the extension with whose repository the command will be executed. If the parameter is not specified, the operation is performed with the main configuration repository.
- /ConfigurationRepositoryUpdateCfg \[-v <repository version number>\] \[-revised\] \[-force\] \[-Objects <file name>\] \[-Extension <Extension name>\]
- Update configuration from repository.
The following parameters are available:
-
-v<repository version number>. Version number in the configuration repository. If the configuration is not bound to a repository, the version number (if specified) is ignored, and the current version of the repository configuration will be received. If the configuration is not bound to a repository, the specified version will be retrieved. If the version is not specified or the value equals to -1, the latest configuration version will be retrieved.
-
-revised. Get locked objects if required. If the configuration is not bound to a repository, the parameter is ignored.
-
-force. If new configuration objects are expected to be retrieved or the existing ones are expected to be deleted from the repository during batch configuration update, the user specifies this parameter to confirm the above operations. If the parameter is not specified, the actions will be skipped.
-
-Objects <file name>. Path to a file with the list of objects to be involved in the operation. If the file is specified, the operation involves the objects specified in the file only. Otherwise, the operation involves the complete configuration. For details on the file format, see Object list file.
-
-Extension <Extension name>. Allows you to specify the name of the extension with whose repository the command will be executed. If the parameter is not specified, the operation is performed with the main configuration repository.
7.4.15.6. Service operations
- /ConfigurationRepositorySetLabel \[-v <repository version number>\] \[-name\] <label name> \[-comment <comment text>\] \[-Extension <Extension name>\]
- Sets the repository version label.
The following parameters are available:
-
-v <repository version number>. Number of the repository version for setting the label. If the version is not specified, the label is set for the latest repository version. If the specified version does not exist, the error is displayed.
-
-name <label name>. Label text in double quotation marks.
-
-comment <comment text>. Text of a comment to a label to set. Must be put in double quotes. To specify the comment in several lines each line mush be specified using its own -comment parameter.
-
-Extension <Extension name>. Allows you to specify the name of the extension with whose repository the command will be executed. If the parameter is not specified, the operation is performed with the main configuration repository.
Batch mode return code:
-
0. No errors.
-
1. There are errors. Error text is output to the service message file.
- /ConfigurationRepositoryReport <file name> \[-NBegin <version number>\] \[-NEnd <version number>\] \[-DateBegin <beginning date>\] \[-DateEnd <end date>\] \[-GroupByObject\] \[-GroupByComment\] \[-DoNotIncludeVersionsWithLabels\] \[-IncludeOnlyVersionsWithLabels\] \[-IncludeCommentLinesWithDoubleSlash\] \[-ConfigurationVersion <configuration version>\] \[-ReportFormat <txt\|mxl>\] \[-Extension <Extension name>\]
- Generate a repository history report. If the grouping options are not specified and the configuration compatibility mode is Do not use, the report shall be generated with version-based grouping. The report will be generated with object-based grouping in Version 8.1 and Version 8.2.13 compatibility modes. If the database configuration compatibility property does not match the compatibility property of the configuration being edited, the value of database configuration compatibility mode is considered when processing the command line. The following file names and parameters are available:
-
<file name>. Report file name.
-
-NBegin . Number of the stored version used as the first version for report generation. If the parameter value is -1, the report is built for the latest version in the repository.
-
-NEnd . Number of the stored version used as the last version for report generation.
-
-DateBegin. Date from which the repository report is generated. To generate the date, the syntax of the string passed to the constructor of the Date type of 1C:Enterprise language is used.
-
-DateEnd. Date until which the repository report is generated. To generate the date, the syntax of the string passed to the constructor of the Date type of 1C:Enterprise language is used.
-
-GroupByObject. Indicates that a report is generated by version with a grouping by object.
-
-GroupByComment. Indicates that a report is generated by version with a grouping by comment.
-
-DoNotIncludeVersionsWithLabels. Allows you not to include repository versions with labels in the report.
-
-IncludeOnlyVersionsWithLabels. Allows you to include only repository versions with labels in the report. This parameter is ignored if the -DoNotIncludeVersionsWithLabels parameter is specified in the command line.
-
-IncludeCommentLinesWithDoubleSlash. Includes comment lines starting with "//" in the report.
-
-ConfigurationVersion <configuration version>. Allows you to specify a configuration version for which the repository report is generated.
-
-ReportFormat <txt|mxl>. Sets the report file format: text file (txt) or 1C:Enterprise spreadsheet document (mxl). The default format is MXL.
-
-Extension <Extension name>. Allows you to specify the name of the extension with whose repository the command will be executed. If the parameter is not specified, the operation is performed with the main configuration repository.
See also:
- Date.
- /ConfigurationRepositoryOptimizeData \[-Extension <Extension name>\]
- Optimizes data storage in the configuration repository.
7.4.15.7. Managing repository caches
- /ConfigurationRepositoryClearCache \[-Extension <Extension name>\]
- Clear the local database of the configuration repository.
-Extension <Extension name> parameter allows you to specify the name of the extension with whose repository the command will be executed. If the parameter is not specified, the operation is performed with the main configuration repository.
- /ConfigurationRepositoryClearLocalCache \[-Extension <Extension name>\]
- Clear the local cache of configuration versions.
-Extension <Extension name> parameter allows you to specify the name of the extension with whose repository the command will be executed. If the parameter is not specified, the operation is performed with the main configuration repository.
- /ConfigurationRepositoryClearGlobalCache \[-Extension <Extension name>\]
- Clear the global cache of configuration versions.
-Extension <Extension name> parameter allows you to specify the name of the extension with whose repository the command will be executed. If the parameter is not specified, the operation is performed with the main configuration repository.
7.4.16. Agent mode commands
- /AgentMode
- Enable Designer Agent mode. If this command is present, /DisableStartupMessages /DisableStartupDialogs commands are ignored, if specified.
- /AgentPort <Port>
- Specifies a network port number to be used by Designer Agent in SSH server mode. If the command is not specified, Designer Agent uses a network port with number 1543 by default.
- /AgentListenAddress <Address>
- Command parameter allows you to specify the IP address which Designer Agent listens to. If the command is not specified, IP address 127.0.0.1 will be used by default.
- /AgentSSHHostKey <private key>
- Command parameter allows you to specify the path to the private host key. If the parameter is not specified, /AgentSSHHostKeyAuto command must be specified. If no command is specified, Designer cannot be started in agent mode.
- /AgentSSHHostKeyAuto
- The command specifies, the host private key is located in the directory below (depending on the operating system):
-
On Windows: %LOCALAPPDATA%\1C\1cv8\host_id.
-
On Linux: ~/.1cv8/1C/1cv8/host_id.
-
On macOS: ~/.1cv8/1C/1cv8/host_id.
If the specified file is not found, a new 2048-bit private RSA key is generated.
- /AgentBaseDir <working directory>
- This command allows you to specify the working directory, which is used for SFTP server and for configuration dump and restore commands.
If the command is not specified, the following directory is used:
-
On Windows: %LOCALAPPDATA%\1C\1cv8\<Infobase UUID>\sftp.
-
On Linux: ~/.1cv8/1C/1cv8/<Infobase UUID>/sftp.
-
On macOS: ~/.1cv8/1C/1cv8/<Infobase UUID>/sftp.
See also:
- Running Designer in agent mode (see Running Designer in agent mode).
7.4.17. Other parameters
- /Visible
- Makes the batch command execution visible to the user. A splash screen is displayed during the Designer mode operation.
When you use the agent mode, the message box is displayed.
- /RunEnterprise
- Start 1C:Enterprise after batch command execution. The additional command line may be specified after the command. The parameters passed in it will be used instead of current session parameters during 1C:Enterprise start. Additional command line must be put into quotation marks. If it has nested quotation marks, these must be doubled.
- /ConvertFiles <file name\|path>
- Convert 1C:Enterprise 8.x. files in batch. <file name|path> is a file or directory name.
If the directory is specified, all the documents available in this directory and all its subdirectories are converted. The files must be writable for successful conversion. If the file specified is parameter is not writable, the error message is generated.
In the directory operation mode the non-writable files are skipped without an error message.
Designer mode must be started and the configuration, where the conversion will be performed, must be opened for this function to operate. Infobase name and authentication parameters may be specified using the standard command line parameters. If these parameters are not specified, the respective requests will be displayed similar to the other command line functions operating in Designer mode.
- /DumpResult <file name>
- Save the Designer result to a file. The result is a number (0 if the file is saved successfully).
7.5. Batch mode for client application startup
Batch start mode of the client application is a dedicated start mode. During operation of this mode, the 1C:Enterprise platform does not generate dialog boxes. This mode is effective from the moment of start to the end of the execution of the BeforeSystemStartWork event handler of the application module. WhenSystemStartWork event handler is called upon completion of the batch mode of the client application. The client application work does not automatically end after the end of the batch mode for start the client application. Batch mode for start the client application is supported by thin and thick client applications and is activated by the /DisableStartupDialogs command of the command line for start the client application. The web client does not support batch mode. Errors that occur during the execution of the batch mode for starting the client application can be written to the service message output file. Service message output files are specified with the /Out command.
When working in batch mode for starting the client application, all the features of the /DisableStartupDialogs command (see Other parameters) are in effect, in addition, a number of other features are applied.
If during the batch mode for starting the client application, a call to some asynchronous method is executed, then:
-
Such methods will be executed after the execution of the BeforeSystemStart event handler, but before the completion of the batch mode. This behavior will be observed if the client application started successfully and the main application window opens.
-
If the batch mode ended with a failure to start the application (the Failure parameter of the BeforeSystemStart event handler is set to True), then asynchronous calls will not be made.
The client application batch mode does not support opening windows. In a scenario where a window is about to be open:
-
The window is blocked.
-
An error is generated.
To define that the client application is currently prohibited from opening windows, the ProhibitFormOpening() global context method is used.
The external processing, passed as the value of the /Execute command, starts after the batch mode of the client application ends.
If during execution of the StartApplications()/BeginStartApplication() global context methods a runtime error is detected, an exception will be generated when working in the batch mode.
7.6. Registering 1C:Enterprise as OLE Automation server
- /RegServer \[-AllUsers \| -CurrentUser \| -Auto\]
- Register V83.Application and V83C.Application objects. One of the following parameters may be used:
-
-AllUsers. The objects are registered for all computer users. If the user does not have enough rights for such registration, an error message is displayed. If the /Out <FileName> parameter is specified, the message is output to file, otherwise the message is displayed at the user screen.
-
-CurrentUser. Objects are registered for the current user.
-
-Auto. Objects are registered for all computer users if the user has sufficient rights. If the user does not have sufficient rights, the objects are registered for the current user. No dialog boxes are displayed.
If optional parameters are not specified, the registration is performed depending on the privileges of the user on whose behalf the registration is performed:
-
If the user has the rights to register objects for all computer users, the object is registered for the computer.
-
If the user has insufficient rights to register objects for all computer users, the user is prompted to register the object for the current user.
- /UnregServer
- Unregister V83.Application and V83C.Application objects.
7.7. Infobase connection string
7.7.1. General information
Connection string is a string that defines infobase parameters, where each parameter is a fragment of the following format: <Parameter name>=<Value>, where:
-
Parameter name. Parameter name.
-
Value. Parameter value.
Fragments are separated by ;. If the value contains spaces, it must be put in double quotation marks ("). The parameter set is determined by the created infobase type: file or client/server. There is also a common parameter set, applicable for any infobase type.
Connection string is specified as a list of infobases under the list, may be set in a mode selection command line parameter CREATEINFOBASE, as a CreateInitialImage() methods parameter.
7.7.2. Common parameter set
| Parameter | Description |
|---|---|
| disstt | The parameter manages local (import of speech recognition models into the address space of server cluster processes or standalone server processes) speech recognition:
If the parameter is not specified, local speech recognition is enabled.
The parameter affects the speech recognition availability when creating a client/server infobase. It disables local speech recognition when connecting to the file infobase, including via the web server extension or via COM connection. |
| LicDstr | Manages client license acquisition via the 1C:Enterprise server. Parameter value:
|
| prmod | Specifies the need to start the system in the privileged mode (parameter value is 1). Authenticated user with administrator rights is permitted to start the system. A record stating that the privileged session mode is set or cannot be set is added to the event log. |
| Pwd | Specifies user password. |
| Usr | Specifies the user name. |
| Z n | Specify the application solution separator values. |
7.7.3. File-based infobase parameters
| Parameter | Description |
|---|---|
| DBFormat | Specifies the format to create the file-based database.
Values: 8.2.14 and 8.3.8.
Default value: 8.2.14. |
| DBPageSize | Specifies the page size of the created database in 8.3.8 format (format is defined in DBFormat parameter).
Values: 4096 or 4k, 8192 or 8k, 16384 or 16k, 32768 or 32k, 65536 or 64k.
Default value: 4096 or 4k. |
| File | Directory name, where the infobase file is located. |
| Locale | Language (country) to be used during infobase opening or creation. This parameter has available values similar to <Format string> parameter in Format() method. Locale parameter is optional. If the parameter is not specified, the regional settings of the current infobase will be used. |
7.7.4. Client-server infobase parameters
| Parameter | Description |
|---|---|
| CrSQLDB | Create database if none is present. Parameter value:
|
| DB | Name of database on the database server. |
| DBMS | Database server type:
|
| DBPwd | The password of the database server user. If the database server user password is not specified, this parameter may be omitted. |
| DBSrvr | Database server name. |
| DBUID | Database server username. |
| Locale | Language (country), similar to file-based type. |
| Ref | Name of the infobase stored on the 1C:Enterprise server. |
| SchJobDn | Restrict scheduled jobs in the infobase created. Parameter value:
|
| SPwd | Password of the cluster administrator. |
| SQLYOffs | Date offset used to store dates in Microsoft SQL Server. Can take value 0 or 2000. This parameter is optional. If it is not specified, value 0 is used. |
| Srvr | Srvr. 1C:Enterprise server name in the following format: [<protocol>://]<address>[:<port>], where:
Example:
In order to ensure the uninterrupted running of the client applications several cluster addresses may be specified. For that:
|
| SUsr | Cluster administrator name, where the initial image will be created. This parameter is required if administrators are specified in the cluster and the operating system authentication is not set or irrelevant for them. |
7.8. Web client command line
The commands listed in this section allow you to manage various parameters when starting the web client. If you include a specifically generated URL in the web client startup URL, the web client opens a form of the specified standard function.
- Opening the standard function form
- A URL in the #e1cib/system/<stdFuncName> format specified in the web client startup URL opens the form of the specified standard function. This feature is available only when starting the web client. In this case, the startup URL looks as follows:
http://localhost/InfoBase/?mainWindowMode=Workplace&DisableHomePageForms#e1cib/system/AnalyticsSystemManagementThe following standard functions are supported:
| <stdFuncName> | Standard function |
|---|---|
| ActiveUsers | Active users |
| AdditionalAuthenticationSettings | Additional authentication settings |
| AnalyticsSystemManagement | Analytics system management |
| AuthenticationLocks | Authentication lock |
| ConfigurationLicense | Configuration license |
| DataBaseCopiesManagement | Database copies management |
| DataChangeHistory | Data change history |
| DeleteMarkedObjects | Delete marked objects |
| DocumentsPosting | Document posting |
| CollaborationSystemManagement | Collaboration system management |
| ErrorProcessingSettings | Management of error processing settings |
| EventLog | Event log |
| EventLogSettings | Event log settings |
| ConfigurationExtensionsManagement | Configuration extensions management |
| ExternalDataSourcesManagement | Managing external data sources |
| FindByReference | Find references to objects |
| FullTextSearchManagement | Full-text search management |
| InfobaseParameters | Infobase parameters |
| IntegrationServicesManagment | Management of integration services |
| LicenseAcquisition | License acquisition |
| MobileAppBuildService | Mobile application build service |
| MobileAppBuilderServiceLoader | Mobile application builder service loader |
| InfobaseRegionalSettings | Regional infobase settings |
| TotalsManagement | Totals management |
| UserList | Users |
| ServersManagement | Server management |
For more information about standard functions, see Standard functions. Information about standard functions is given in the help of each standard function.
| Parameter | Description |
|---|---|
| AccessToken | Allows you to specify JWT to perform user authentication. |
| Authoff | Perform OpenID logout (close a user session). The user session is completed irrespective of the authentication method to be used subsequently. |
| C=<value> | Passes a parameter to the application. |
| Debug=[<mode>[,attach]] | Specifies the debug protocol (<mode>) and a flag (attach) which indicates that the debugger will automatically attach the debug items (both client and server) of the started application to be registered on the debug server. attach parameter is only used for debugging over HTTP.
<mode> can take values:
|
| DebuggerURL=<value> | Specifies the debugger the application must connect to immediately after startup. In case of debugging over TCP/IP the debugger URL (protocol, computer and port) is specified. In case of debugging over HTTP the debugging server URL is specified. |
| DisableHomePageForms | Disables displaying the forms of the application home page when you open a web client. |
| DisableStartupMessages | Suppresses the startup message: Database configuration does not match stored configuration. Continue?. |
| DisableUnrecoverableErrorMessage | Allows you to define specific behavior when a non-recoverable error occurs (including abnormal termination):
This command is recommended if the client application is started without an active user to get the error message. |
| DisplayPerformance | Display the number of server calls and the volume of data sent to the server and received from it. |
| isdi | Ignored. The application will be started in Taxi interface mode. |
| iTaxi | Run in the Taxi interface mode. |
| itdi | Ignored. The application will be started in Taxi interface mode. |
| L=<value> | Specify the language code of the platform interface. For supported interface languages (<language code>), see Selecting default interface language. |
| MainWindowMode=<value> | Allows you to specify the startup mode of the main window of the client application. <startup mode>can take one of the following values:
|
| N=<value> | User name. As in the user list in Designer. |
| O=<value> | Defines the connection speed:
|
| OIDA<value> | Apply end-to-end user authentication between different infobases and/or external resources for thin and web clients. If the /OIDA parameter is missing during the client startup or the /OIDA+ parameter is used, the authentication is attempted via the OpenID provider whose address is specified in the default.vrd file of the infobase publication.
If the OpenID provider requires interactive authentication (initial request is performed or the authentication timeout expired), the client prompts to enter the user name and password.
The user list of the OpenID provider infobase is used for authentication.
The name of the infobase user being authenticated using OpenID must match the user name in the OpenID provider infobase.
Possible <mode> values:
|
| OidcSelectedProvider | Allows you to specify the configured OpenID Connect provider name to be used for user authentication at web client startup.
For details on how to set up OpenID Connect providers, see <openidconnect>. |
| P=<value> | Password for the user specified in N parameter. If the password is empty, omit this option. |
| ProgressiveWebApplicationName=<value> | Allows you to specify the name of a progressive web application that can be installed from the web client.
You can also set a name of the progressive web application in the default.vrd file (see <progressiveWebApplication>). |
| SYSTEMWEBCLIENTSTAT | Enables web client usage statistics collection functionality. This functionality is intended for 1C Company specialists. |
| TechnicalSpecialistMode | Enables the Functions for technician command in the main menu. |
| TestClient | Start web client in test client mode. TestClientID parameter must be used to identify the specific web client instance. |
| TestClientID=<value> | Allows the test manager to access the web client by its ID when web client is started in test client mode. If the ID is not specified or several clients are started with the same value, the random ID is selected. |
| UC=<value> | Connect to the infobase with a connection lock enabled. If a non-empty access code is set for the lock, enter this access code in the UC parameter to bypass the lock. |
| UsePrivilegedMode | Start the web client in privileged mode. Available to authenticated users with administrator privileges. A record stating that the privileged session mode is set or cannot be set is added to the event log. |
| VL=<value> | The session locale code used for formatting Number and Date data, and also used in NumberInWords() and PeriodPresentation() methods. |
| WA<value> | The operating system authentication usage mode at 1C:Enterprise startup. If /WA parameter is not specified, it is treated as /WA+ command line parameter.
Possible <mode> values:
|
| Z=<Common attribute 1>,<Common attribute 2>,...,<Common attribute N> | Set separators when starting the client application. |
7.9. Mobile version command line
1C:Enterprise mobile version supports specifying several commands and parameters, which can be specified in the client applications startup command line for PC.
The supported commands (list) with specification of the sections containing the client application command line parameters for PC are given below.
-
/N, /P, /WSN, /WSP, /WSA, /OIDA, /Authoff, /UsePrivilegedMode, /Z, /O: for details, see Authentication settings.
-
/HttpsForceTLS1_0: for details, see Managing certificates.
-
/L, /VL: for details, see Locale settings.
-
/ClearCache, /C, /URL: for details, see Auxiliary parameters.
-
/DisableStartupMessages: for details, see Other parameters.
-
/TestClient, /UILogRecorder: for details, see Testing settings.
Appendix 8. Components and resources used
The following components have been used in the software product:
-
Dictionaries, used in full-text search, are based on the dictionary bases and Russian, Ukrainian and English thesauri, provided by "Informatic" company.
-
Interface translated by:
-
Bulgarian: "DAVID Holding Inc."
-
Vietnamese: 1C Vietnam LLC (https://1c.com.vn).
-
Georgian: Integrated Business Solutions LLC (IBS).
-
Kazakh: 1C Kazakhstan, "Infosoftprom" LLP, Kazakhstan.
-
Latvian: "ANDI M" LLC.
-
Lithuanian: "AVAKOMPAS" CJSC.
-
Turkmen: Ak sahypa (Ashgabat, Turkmenistan) (https://aksahypa.net.tm/ru).
-
-
zlib general purpose compression library
version 1.2.11, January 15, 2017\ Copyright © 1995–2017 Jean-loup Gailly and Mark Adler
-
Portions of this software are based in part on the work of the Independent JPEG Group
-
PNG reference library.
libpng version 1.6.37
Copyright © 1998–2017 Glenn Randers-Pehrson
Copyright © 1996–1997 Andreas Dilger
Copyright © 1995–1996 Guy Eric Schalnat, Group 42, Inc.
- TIFF Software Distribution.
Copyright © 1988–1997 Sam Leffler
Copyright © 1991–1997 Silicon Graphics, Inc.
- Various 1С products provide read/write capability and/or other LZW capability covered by Unisys-owned U.S. patent 4,558,302. Licensing information can be obtained by contacting Unisys at the following address:
Unisys Corporation
Welch Licensing Dept. – MSC1SW19
Township Line and Union Meeting Roads
P.O. Box 500
Blue Bell, PA 19424-0001
Fax: (215) 986-3090
- PROJ 4 release 4.4
Copyright © 2000, Frank Warmerdam
- The ZipArchive Library 4.6.1
Copyright © 2000 – 2014 Artpol Software – Tadeusz Dracz
- Dr. Gladman's AES library: (A Password Based File Encryption Example with AES and HMAC-SHA1).
Copyright © 2002, Dr Brian Gladman, Worcester, UK. All rights reserved.
-
This product includes software developed by the OpenSSL Project for use in the OpenSSL Toolkit (https://www.openssl.org/).\ This product includes cryptographic software written by Eric Young (eay@cryptsoft.com). This product includes software written by Tim Hudson (tjh@cryptsoft.com).
-
Portions of this software are copyright © 2017 The FreeType Project (www.freetype.org). All rights reserved.
-
ICU 4.6.
Copyright © 1995-2011 International Business Machines Corporation and others.
- ImageMagick version 7.1.11-11.
Copyright © 1999-2023 ImageMagick Studio LLC.
- libgsf version 1.10.1.
Copyright © 1994, 1995, 1996, 1999, 2000, 2001, 2002, 2004, 2005 Free Software Foundation, Inc.
- libxml2 2.9.10
Copyright © 1998-2012 Daniel Veillard. All Rights Reserved
- libxslt 1.1.34
License for libxslt except libexslt Copyright © 2001–2002 Daniel Veillard. All rights reserved.
License for libexslt Copyright © 2001–2002 Thomas Broyer, Charlie Bozeman and Daniel Veillard. All rights reserved.
- curl version 7.67.0 (6th of November 2019)
Copyright © 1996–2019, Daniel Stenberg, \<daniel@haxx.se>.
-
wxWidgets 3.0.1 Copyright © 1998-2014 Julian Smart, Robert Roebling et al
-
Google Closure Library
Copyright 2006 The Closure Library Authors. All rights reserved.
- Closure Stylesheets
Copyright 2008 Google Inc.
- Closure Compiler
Copyright 2017 The Closure Compiler Authors.
- Google Closure Templates
Copyright 2009 Google Inc.
- SQLite database engine
Copyright © 2004–2013 D. Richard Hipp and team.
- Mimetic 0.9.7 Copyright © 2009 Stefano Barbato
The MIT License
Permission is hereby granted, free of charge, to any person obtaining a copy of this software and associated documentation files (the «Software»), to deal in the Software without restriction, including without limitation the rights to use, copy, modify, merge, publish, distribute, sublicense, and/or sell copies of the Software, and to permit persons to whom the Software is furnished to do so, subject to the following conditions: The above copyright notice and this permission notice shall be included in all copies or substantial portions of the Software.
- libEtPan! – a mail library
Copyright © 2001, 2005 – DINH Viet Hoa
All rights reserved.
Copyright © 2007 g10 Code GmbH
All rights reserved.
Copyright © 2006 Andrej Kacian \<andrej@kacian.sk>
All rights reserved.
Copyright © 1983, 1990, 1993
The Regents of the University of California. All rights reserved.
- libxdiff 0.23 – file differential library
Copyright © 2003 Davide Libenzi \<davidel@xmailserver.org>
- libssh 0.9.4
Copyright © 2003-2014 by Aris Adamantiadis, Andreas Schneider et al
- WebSocket++ (https://www.zaphoyd.com/websocketpp)
Copyright © 2014, Peter Thorson
- Google Protocol Buffers
Copyright 2008 Google Inc.
-
AOP Alliance
-
Apache Commons IO 2.4
Copyright 2002-2012 The Apache Software Foundation
- Guava: Google Core Libraries for Java 16.0.1
Copyright © 2014 The Guava Authors
- Google Guice 3.0
Copyright 2006-2011 Google, Inc.
- ICU4J 2.6.1
Copyright © 1995-2012 International Business Machines Corporation and others
- JSR-330: Dependency Injection for Java
Copyright © 2009 The JSR-330 Expert Group
- Simple Logging Facade for Java (SLF4J) 1.7.7
Copyright © 2004-2013 QOS.ch
- PostgreSQL JDBC driver
Copyright © 1997-2011, PostgreSQL Global Development Group
- Microsoft JDBC Driver 6.2 for SQL Server
Copyright © Microsoft Corporation
- mstch 1.1.3
Copyright © 2015 Daniel Sipka
- NSIS 3.02.1
Copyright © 1999-2017 Nullsoft and Contributors
- diff-match-patch
Copyright 2018 The diff-match-patch Authors
- Gperftools-2.7
Copyright © 2005, Google Inc.
- libuuid
Copyright © 1996, 1997, 1998, 1999 Theodore Ts'o.
- jszip 3.2.0
Copyright © 2009-2016 Stuart Knightley, David Duponchel, Franz Buchinger, Antonio Afonso
- html2canvas 1.0.0-rc3
Copyright © 2012 Niklas von Hertzen
- libunwind-1.3.1
Copyright © 2002 Hewlett-Packard Co.
- libintl
Copyright © 1995-2019 Free Software Foundation, Inc.
- nghttp2 version 1.43.0. MIT license
Copyright © 2012, 2014, 2015, 2016 Tatsuhiro Tsujikawa
Copyright © 2012, 2014, 2015, 2016 nghttp2 contributors