2.2 Creating a New Configuration Project
2.3 Running the Application in Debug Mode
2.4 Understanding Project Configuration
After installing and launching 1C:EDT, you will see the Start window. This is where you can create your first project and begin working with it.
2.1 Creating a New Project
- Click New Project.
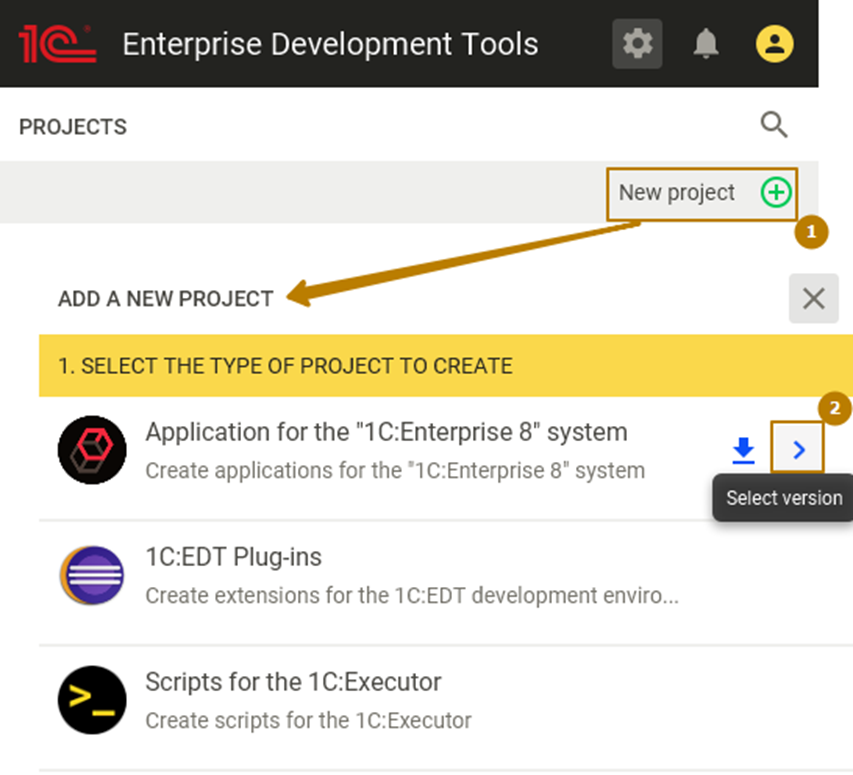
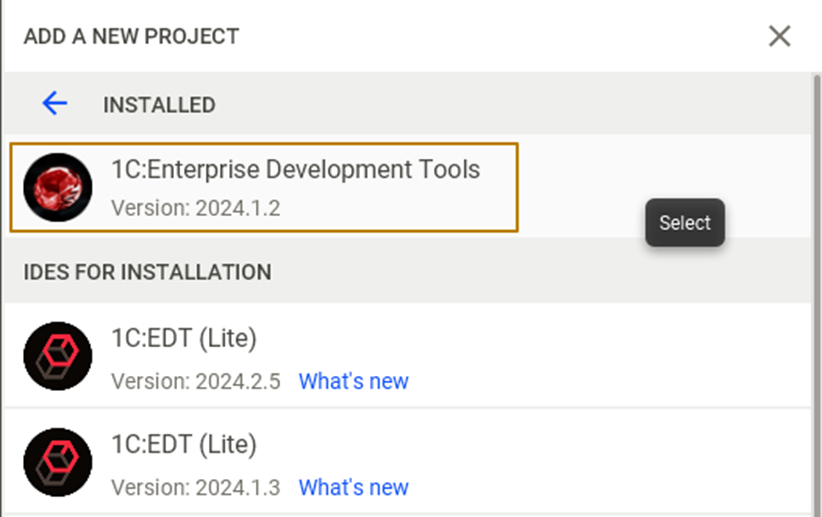
- On the project creation page, select the EDT version. If this is your first installation, only one version will be available. Additional versions can be downloaded later if needed.
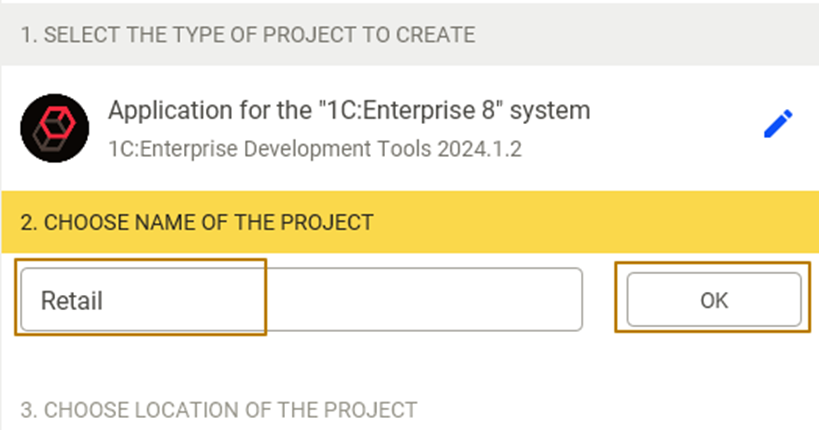
- Enter the project name, then click OK.
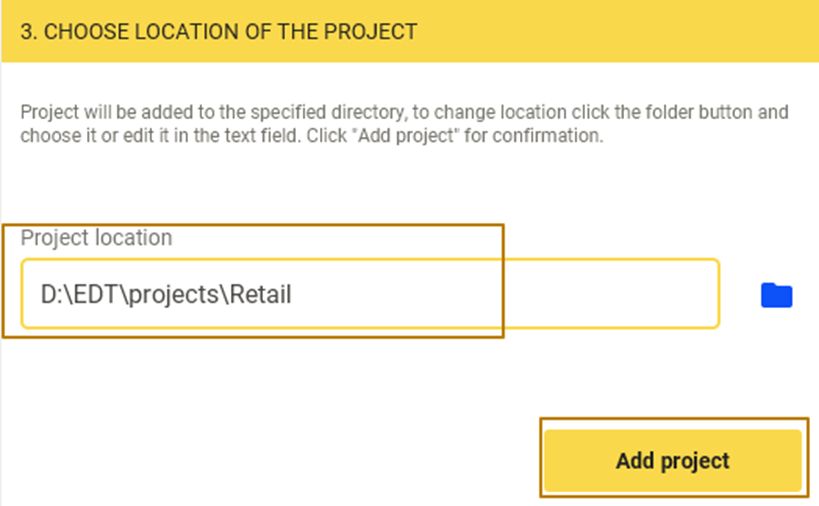
- Specify the path where the project will be stored and click Add Project.
Your new project will now appear in the list of available projects. On the right side of each project line, you will see the time of its last launch. For a new project, this field will display No data until it is opened for the first time.

To start working with a project, click the Play icon next to its name. The project will open and display the Getting Started page.
At this point, you can choose whether to: - Start a project from scratch, - Work with an existing configuration, or - Connect the project to a remote repository.
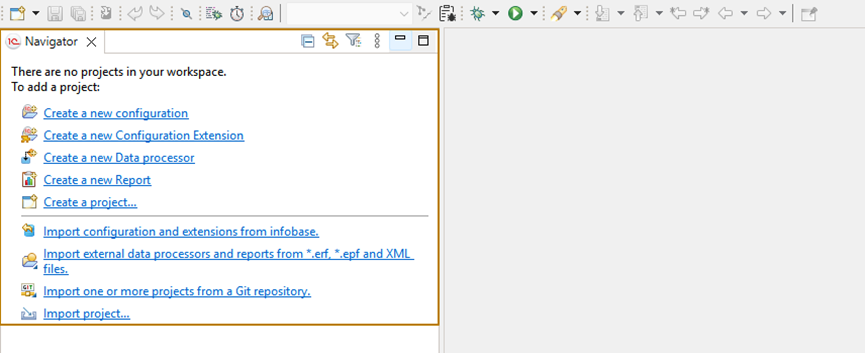
You can close this page or click Get Started to continue. The Navigator panel will appear on the left side of the workspace.
2.2 Creating a New Configuration Project
If you want to develop a configuration from scratch, click Create a New Configuration in the Navigator panel.
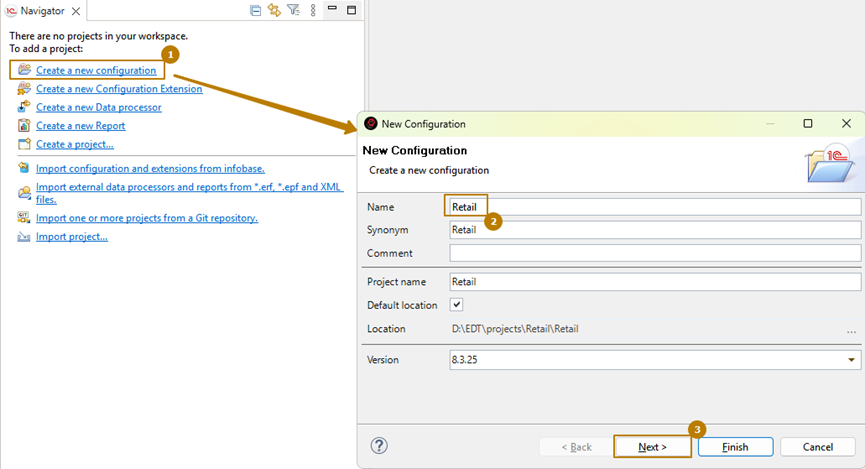
A configuration creation window will open where you can: - Specify the configuration name. - Change the synonym and project name if necessary. - Choose the 1C:Enterprise platform version for your project.
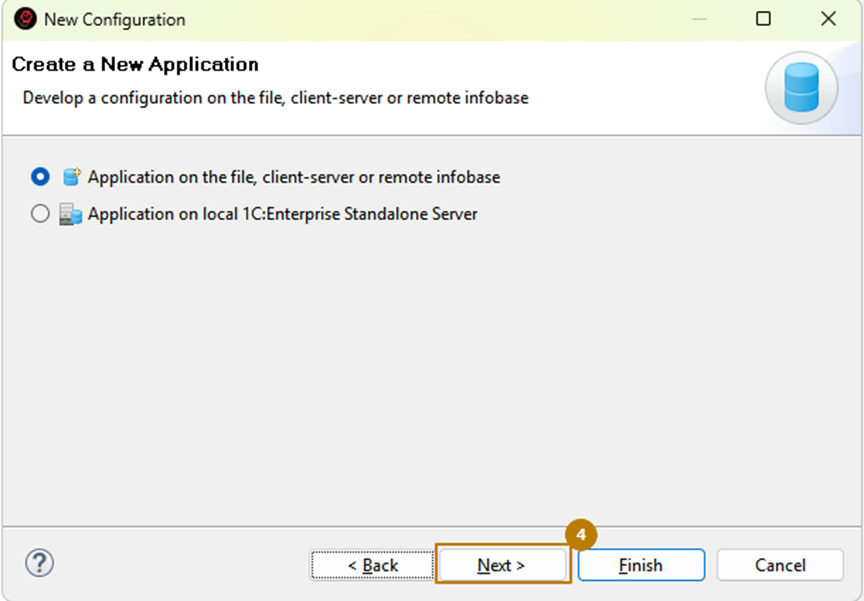
On the next step, specify the infobase type. Since we will not be using the Standalone Server mechanism in this guide, leave the default option selected and continue.

Next, you will be asked to select an infobase to link with the project. You can: - Select one from the existing list, - Add a new one, or - Create a new infobase directly.
Although it is optional, creating an infobase allows you to test and view configuration changes during development.
To create a new infobase:
-
Click Create.
-
In the new window, choose Create Infobase → Creating an Information Base Without a Configuration.
-
Enter the infobase name, for example, Retail_EDT.
-
Specify the path to the directory where it will be stored.
-
Click Finish.

After creation, the new infobase will automatically appear in the Infobase field of your configuration setup form.
On the final step, enable Automatically Create Module Structure so that each new module will contain predefined code regions, such as Public and FormEvents. This saves time and keeps your project organized.
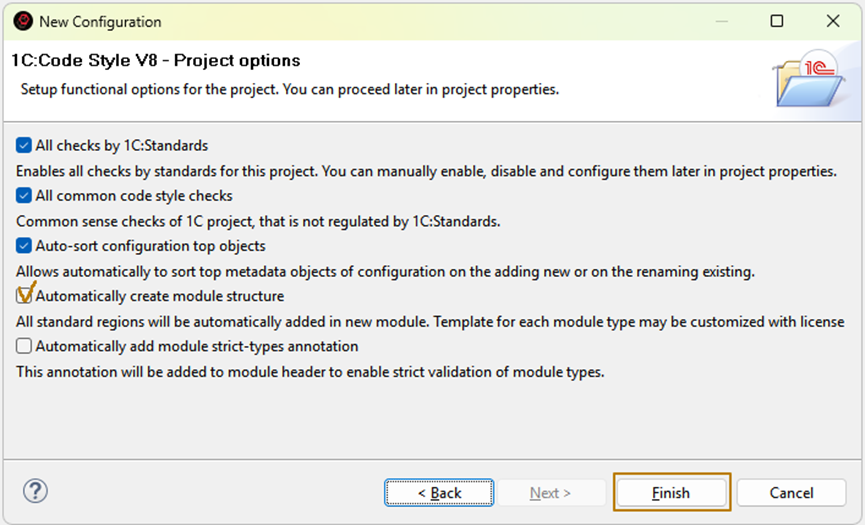
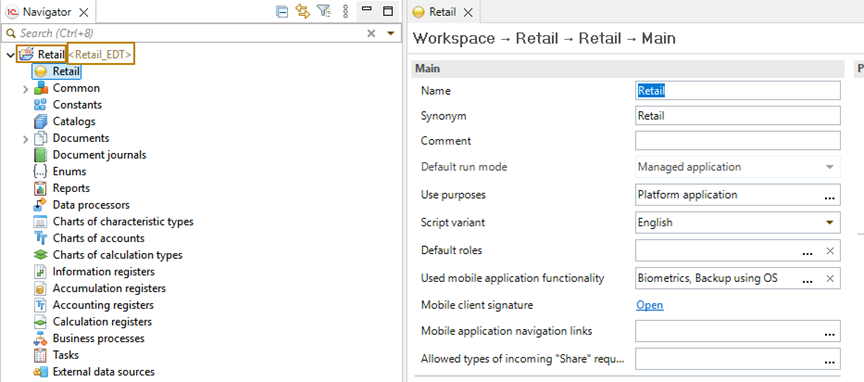
Click Finish to complete the setup. Once creation is finished, the Navigator panel will display your new configuration project, including the configuration tree and the connected infobase name.
2.3 Running the Application in Debug Mode
Let’s see what your configuration looks like when launched. You can start and debug the application from the Run menu or from the toolbar buttons.
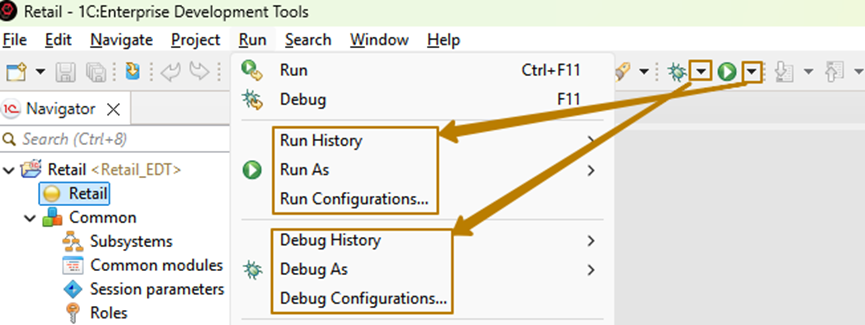
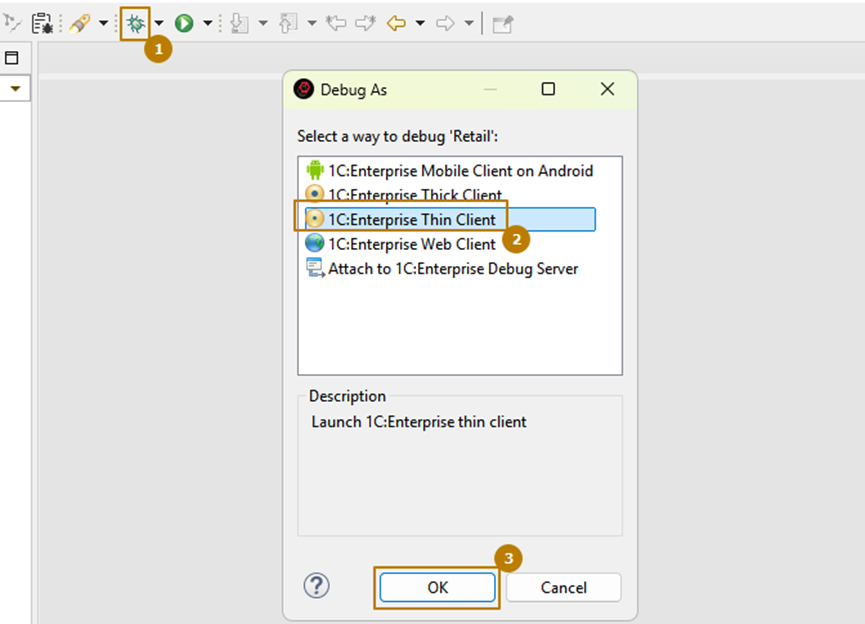
1. Click the Debug As button (you can also click the small bug icon on the toolbar).
2. In the dialog that opens, choose the client type to run. Select Thin Client and click OK.
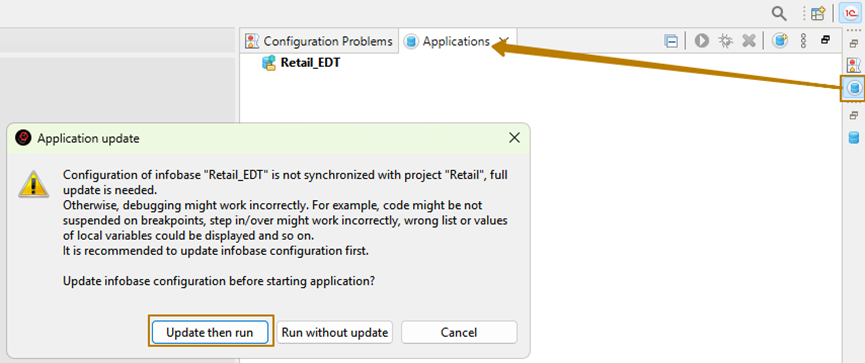
A warning window may appear, and the Applications panel will become active. The message indicates that the application configuration is not yet synchronized with the project configuration.
2.4 Understanding Project Configuration
When you work in EDT, you edit the project configuration (for example, Retail). However, this configuration is not automatically applied to the linked application. To synchronize them, EDT must load your project configuration into the application configuration.
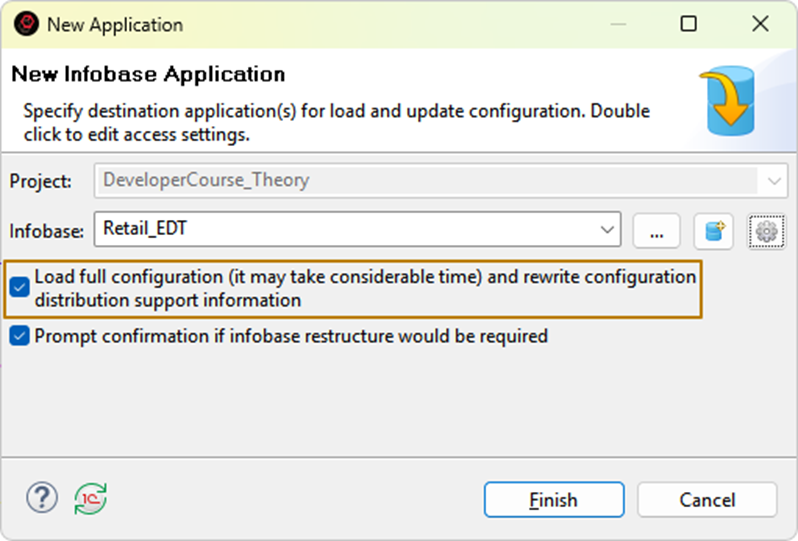
There are two types of updates: - Full update replaces the entire application configuration with the project configuration. - Incremental update loads only the differences between the two configurations, which speeds up synchronization.
Tip: The first time you synchronize, a full update is always required.
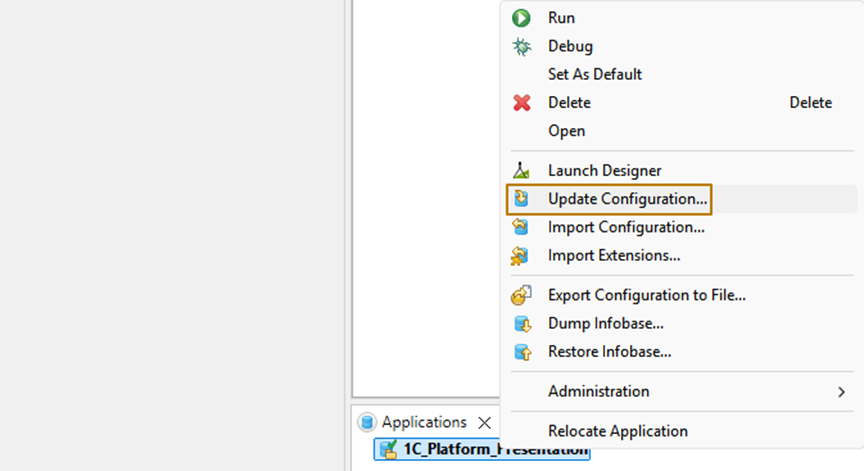
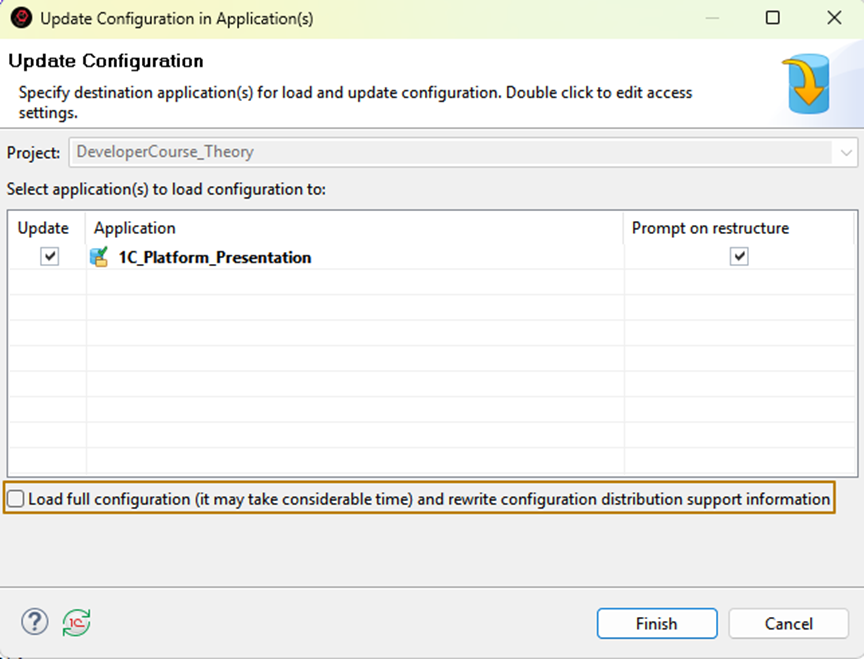
You can also update the application configuration without launching the client. To do this, right-click the application and select Update Configuration.
If this is not the first update, the Full Load option will be unchecked by default, but you can enable it manually if needed.
Once synchronization is complete, launch the thin client again. The application will open in a new window. Since your configuration is empty for now, no metadata objects will appear yet.
✅ Next Steps:
In the next section, you will learn how to import an existing configuration
into a new EDT project and continue development of a configuration created in Designer.