3.1 Importing a Configuration from an Existing Infobase
3.2 Understanding Applications in 1C:EDT
3.3 Creating a Project from a Remote Repository
In many cases, you might already have a configuration that you developed earlier in Designer, and now you want to continue working with it in 1C:EDT. The process of importing an existing configuration into an EDT project is straightforward. ### 3.1 Importing a Configuration from an Existing Infobase
3.1 Importing a Configuration from an Existing Infobase
If you have previously worked with the configuration on the same computer, you likely already have access to the infobase that contains it.
-
Create a new project in EDT and run it.
-
Close the Start page.
-
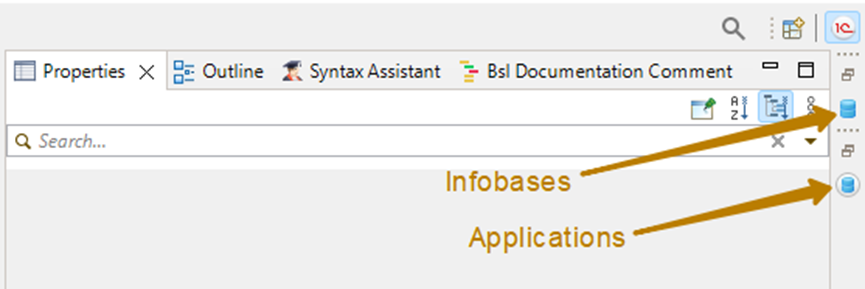
Open the Infobases panel. You can do this by:
-
Clicking the Infobases icon if it is visible on the side panel, or
-
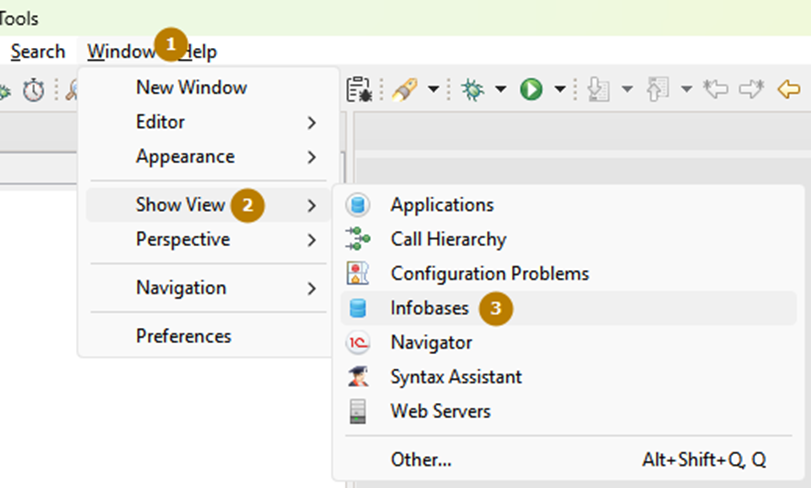
Selecting Window > Show View > Infobases from the main menu.
-
-
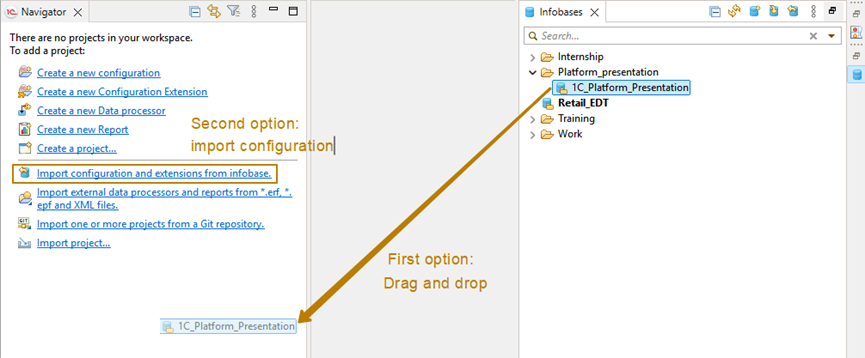
In the Infobases panel, select the infobase that contains the configuration you want to import.
-
Drag the infobase from the list directly into the Navigator window.
Alternatively, you can:
- Right-click inside the Navigator window and select Import Configuration and Extensions from Infobase.
A new window will appear where you can specify:
- The project name,
- The 1C:Enterprise platform version, and
- Which extensions (if any) should also be imported into separate projects.
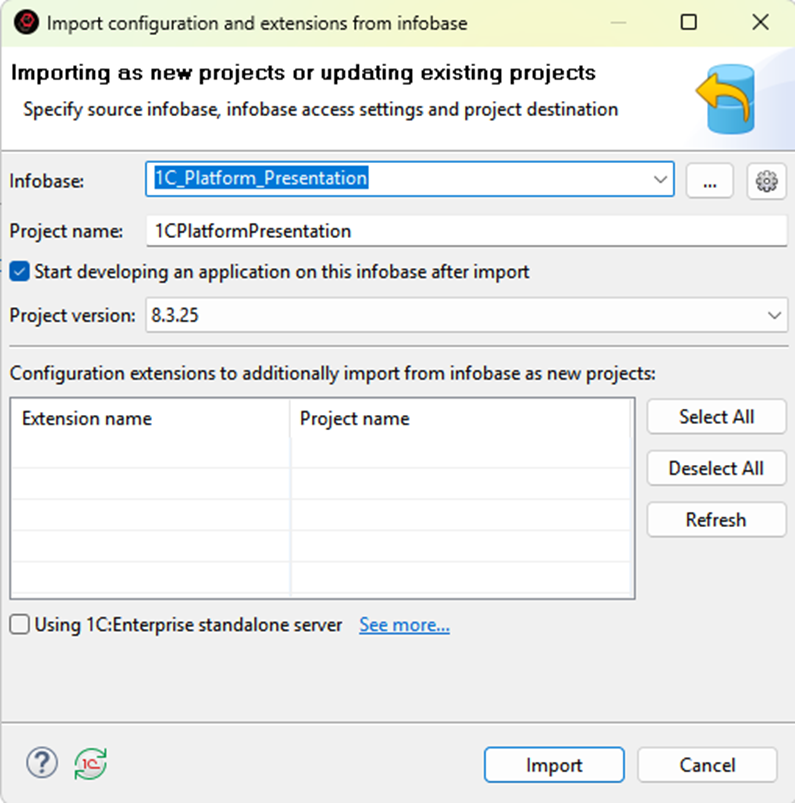
Once everything is set, click Import. EDT will copy the configuration from the infobase and convert it into a project structure.
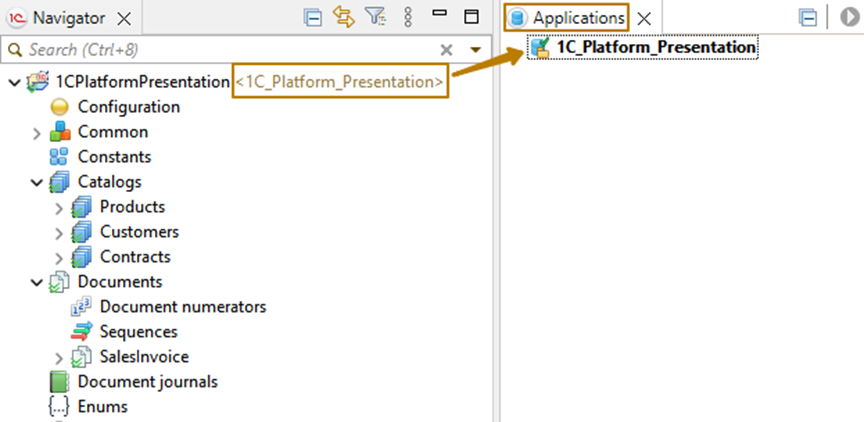
After the import process is complete, you will see the project name in the Navigator window. In angle brackets next to it, EDT will display the name of the linked application.
3.2 Understanding Applications in 1C:EDT
It is important to understand how applications work in EDT. In Designer, each configuration was directly connected to an infobase, creating a one-to-one relationship between the configuration and the database.
In EDT, things work differently. You do not directly edit the configuration stored in the infobase. Instead, you work with a project configuration, which you can later load into the infobase as its application configuration.
Linked applications allow you to: - Launch and debug the project in client mode. - Manage multiple applications within one project (although only one can be set as default).
The default application is highlighted in bold in the Applications list. It will be used when you start or debug the project, unless you explicitly choose another configuration to run.
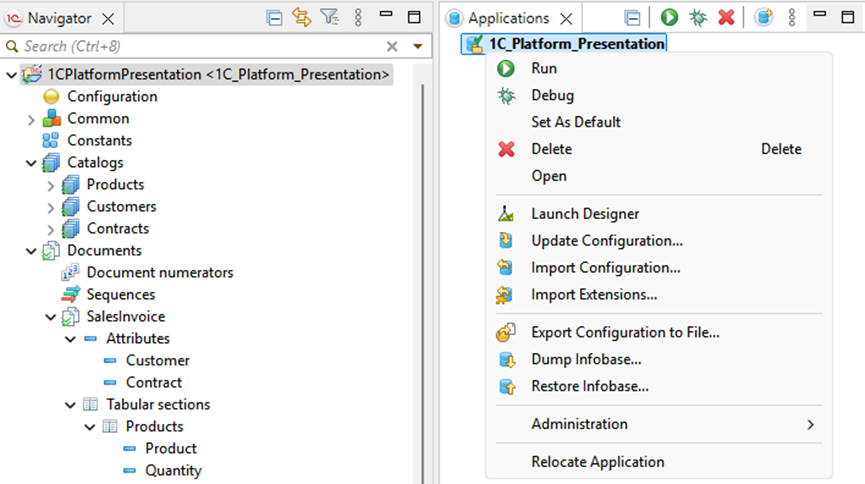
Tip: When an EDT project is launched, its applications cannot be opened in Designer outside of EDT. This prevents configuration conflicts.
If you need to open the application in Designer, right-click the application in the Applications panel and choose Launch Designer.
You will also find several other useful commands in the same menu, such as: - Save Configuration to File, - Create Infobase Dump, and - Restore Infobase from File.
If the Applications panel is hidden or minimized, you can open it from the main menu using Window > Show View > Applications.
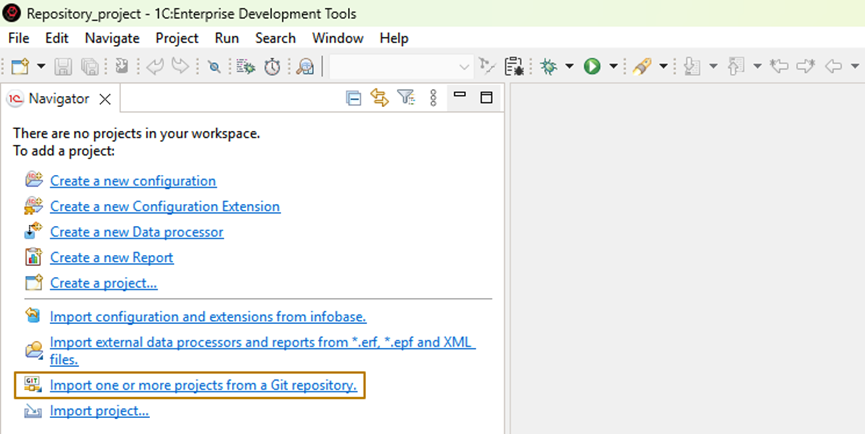
3.3 Creating a Project from a Remote Repository
If you are working as part of a development team, you might need to create a project that is stored in a remote Git repository.
-
Create a new EDT project and run it.
-
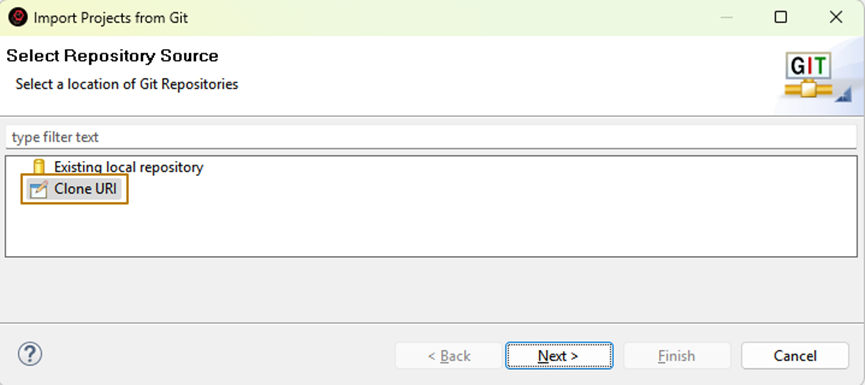
In the Navigator window, click Import One or More Projects from a Git Repository.
-
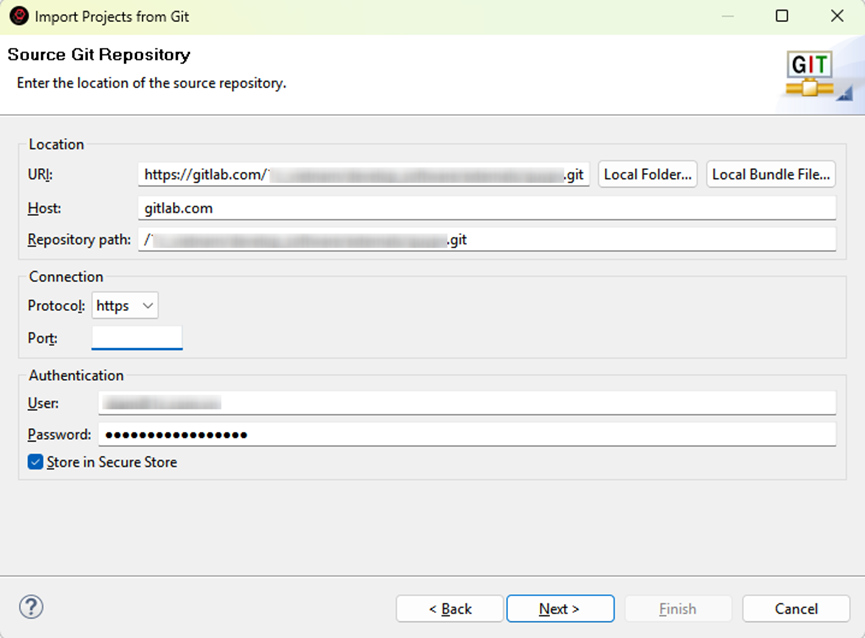
In the dialog window, select Clone URI to clone a remote repository, then click Next.
-
Enter the repository URL and your authentication details. You can choose to save these credentials in the Git Authentication Manager so you do not have to re-enter them later.
-
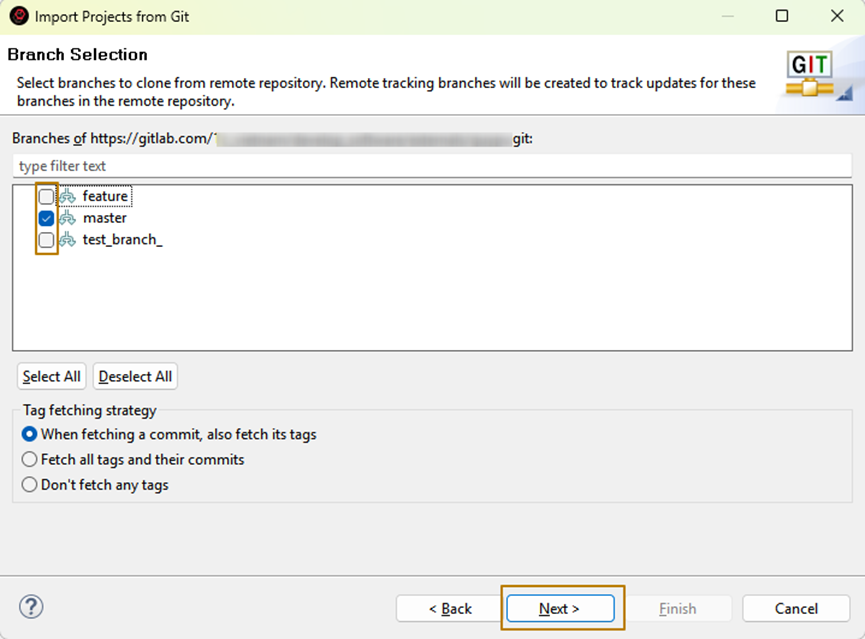
After EDT retrieves the list of available branches, select the branches you want to clone. Typically, you can leave only the main or master branch selected.
-
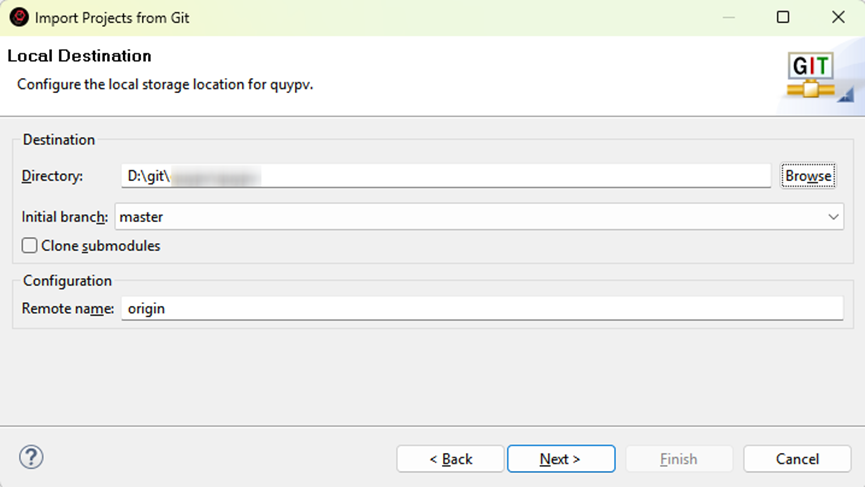
Choose the local directory where the repository will be cloned and click Next.
-
When prompted to select the project type, keep the default setting (Eclipse projects).

-
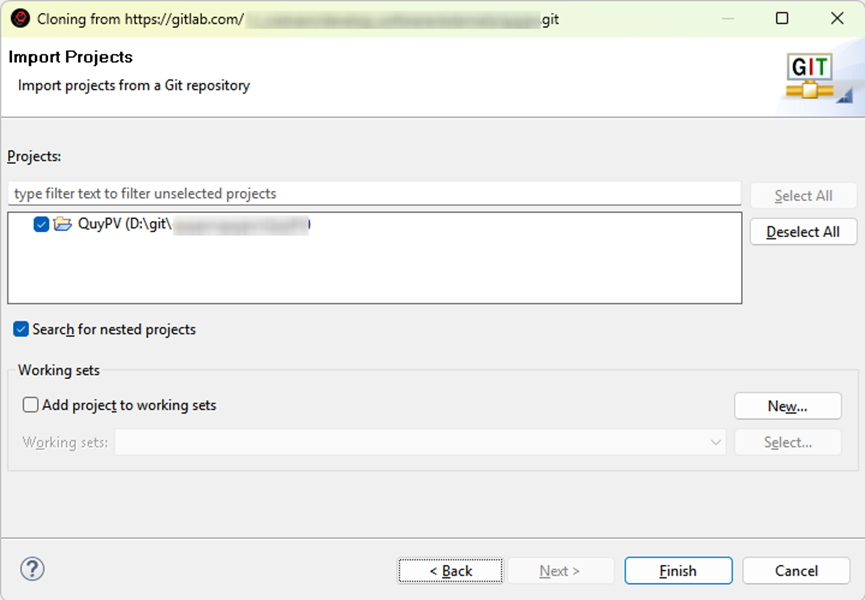
On the final screen, select which projects from the repository to import (usually there will be one) and click Finish.
Your project will now be cloned locally and ready for use in EDT.
✅ Next Steps:
In the next section, we will explore Team Development in EDT and see how to manage branches, commit changes, and synchronize your work with the shared Git repository.