6.1 Importing the Configuration into EDT
6.2 Connecting the Project to Git
6.3 Initial Commit and Push
6.4 Reverting and Merging Changes
Sometimes a project starts in 1C:Enterprise Designer and later needs to be transferred to 1C:EDT for team development. This typically happens when the project grows and multiple developers need to work on it simultaneously. The migration process involves two main steps:
- Importing the configuration into EDT.
- Connecting the project to a Git repository for collaborative development.
6.1 Importing the Configuration into EDT
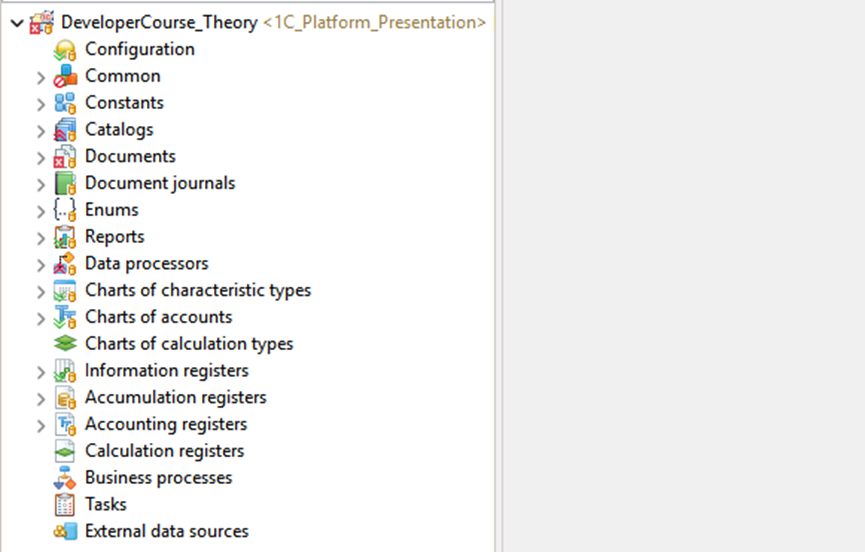
If your configuration was previously developed in Designer, it is likely stored in an existing infobase. You can import this configuration into EDT by following the same process described earlier in the section Importing an Existing Configuration.
Once imported, the configuration becomes part of your EDT project structure, ready for modern development workflows.
6.2 Connecting the Project to Git
After importing, the next step is to connect your EDT project to a Git repository so that you can manage versions and collaborate with others.
Let’s go through this process step by step.
-
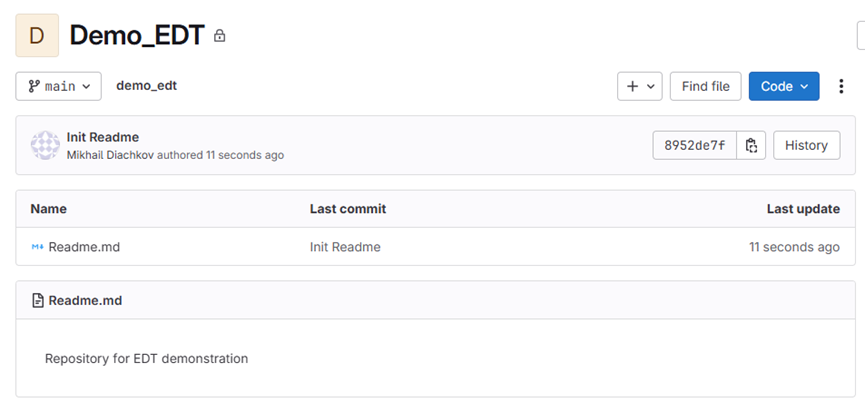
Create a new repository in your Git hosting service, for example GitLab.
-
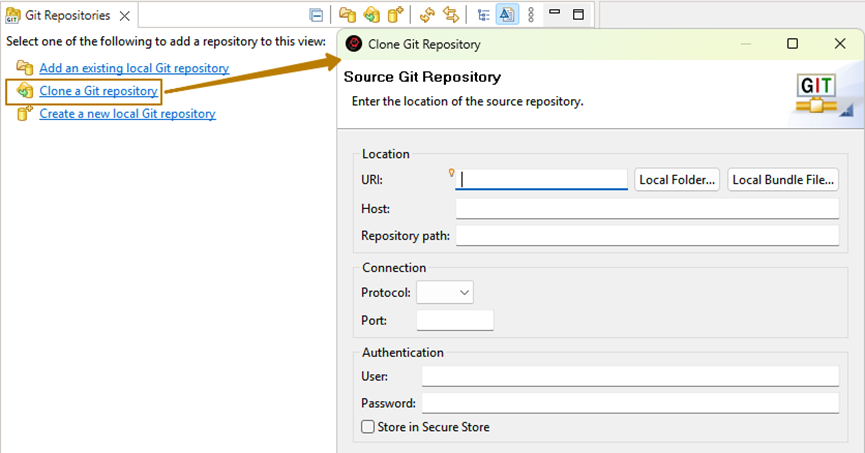
In EDT, switch to the Git Perspective. You can find this option in the top-right corner of the workspace.
-
Click Clone Git Repository.
-
Enter the repository URL, along with your username and password or access token if required.
-
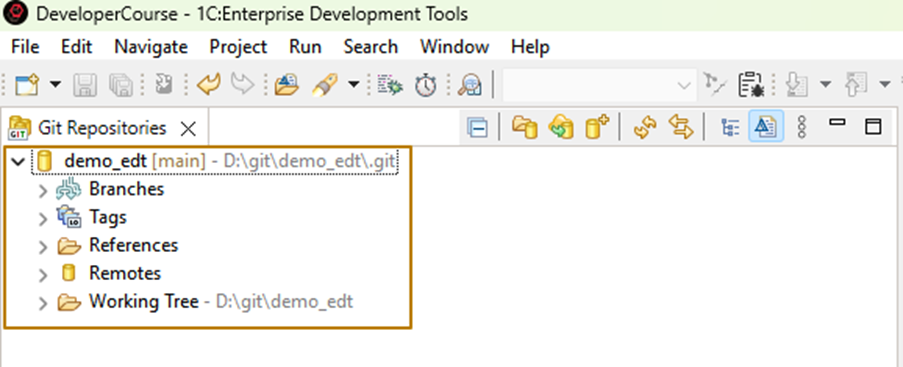
Follow the prompts to clone the repository locally. After cloning, the repository will appear in the Git Repositories window.
Once the repository is cloned, return to the 1C:Enterprise Perspective.
-
In the Navigator panel, right-click your project and select Team > Share Project.
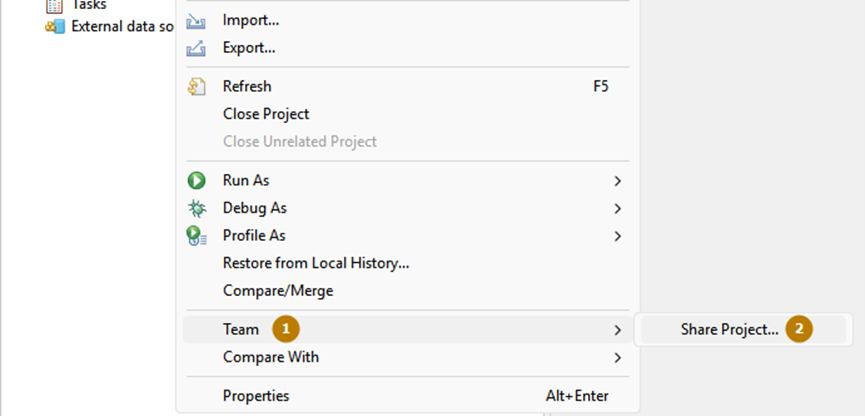
-
In the dialog that opens, select your local Git repository and click Finish.
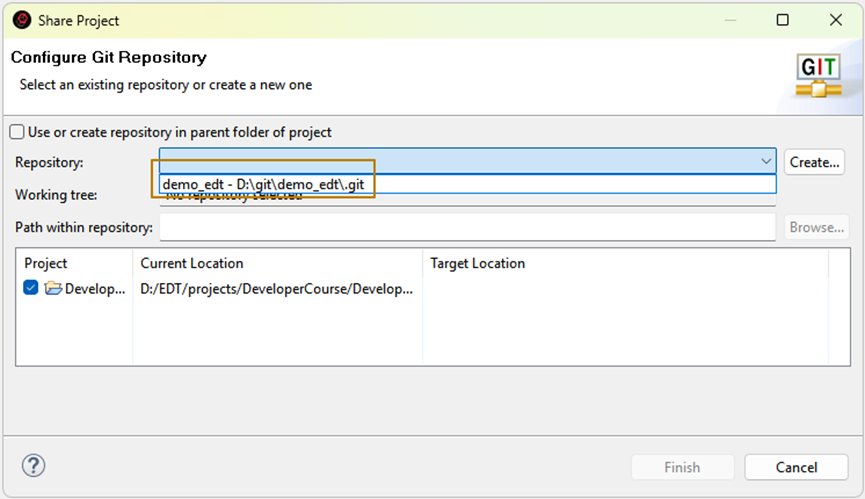
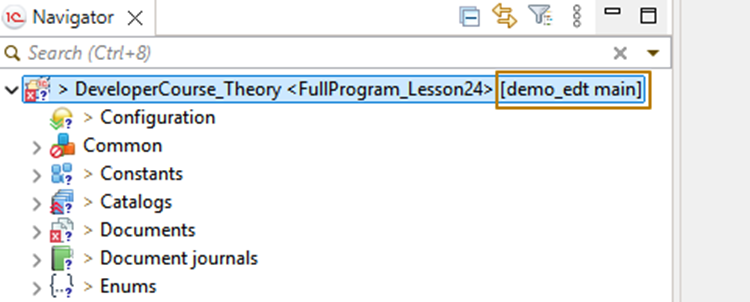
After completing this step, the repository name will appear in the project title. This confirms that the project is successfully connected to Git.
6.3 Initial Commit and Push
The first time you connect a project to a new repository, you need to upload its contents.
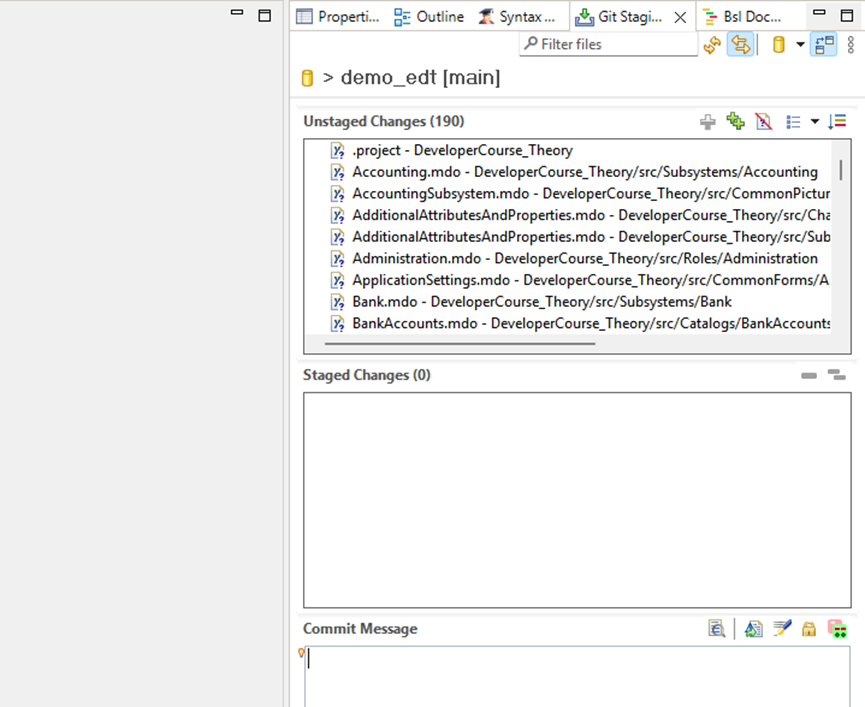
- Right-click the project and select Team > Commit.
- Move all files from Unstaged Changes to Staged Changes.
- Write a commit message, for example Initial project import.
- Click Commit and Push.
EDT will now send all project files to the remote repository. Once the push is complete, your team members can clone the repository and begin collaborative development.
Tip: In real-world projects, direct pushes to the main branch are often restricted. Instead, developers work through merge requests or pull requests, ensuring that all changes are reviewed before merging.
6.4 Reverting and Merging Changes
One of the main advantages of using Git in 1C:EDT is the ability to undo or merge changes at almost any level of the project. Unlike the simple step-by-step undo (for example, pressing Ctrl+Z), Git lets you roll back changes to individual objects such as commands, catalogs, documents, or templates, or even to the entire project. The only limitation is that you cannot revert individual attributes or tabular sections separately from their parent object.
You can also merge objects or entire projects with their versions from other branches, commits, or earlier states of the same branch. Let’s look at some examples of how this works.
6.4.1 Rolling Back Uncommitted Changes
This method allows you to quickly undo modifications made after the last commit or after creating a new branch (if no commits have been made yet).
Suppose you create a new branch and make the following changes:
-
Clear the contents of the DocumentsCommonFilling common module.
-
Change the description length in two catalogs.
-
Add a new attribute and a new command to a document.
You can see that these objects have been modified in the Git Staging panel.
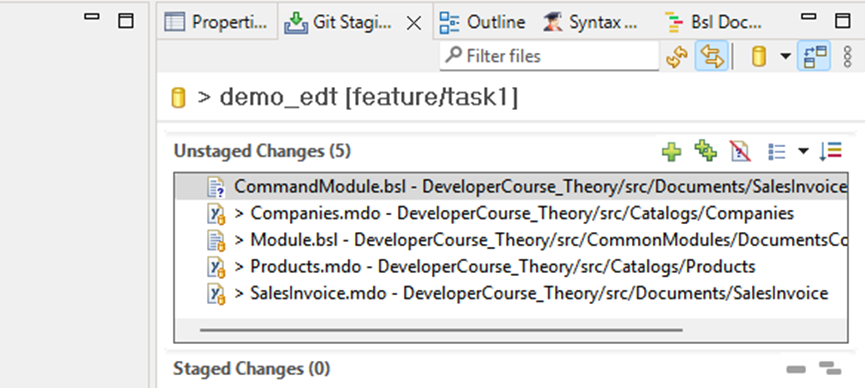
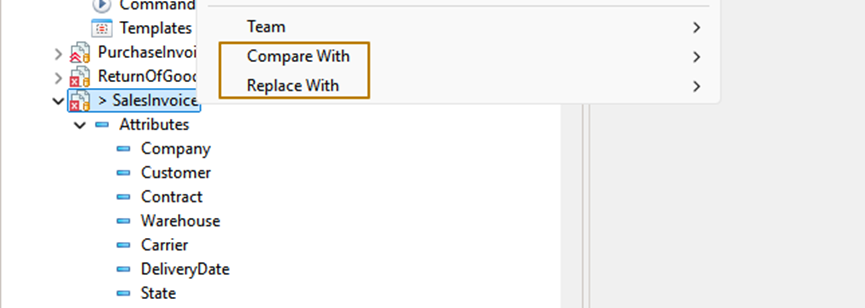
At this point, you have two ways to undo the changes, either for individual objects or for the entire project:
-
Compare and Merge with the previous committed version.
-
Replace changes with the previous committed version.
6.4.1.1 Compare and Merge
This option lets you compare the differences before merging. You can choose what to keep or discard using merge priorities (source, destination, or manual merge).
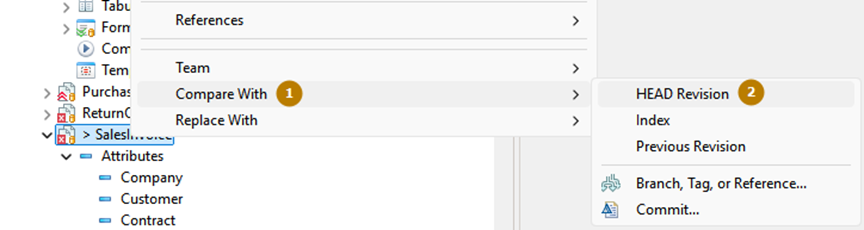
To compare with the previous committed version of the current branch:
-
Select HEAD Revision in the Compare With section.
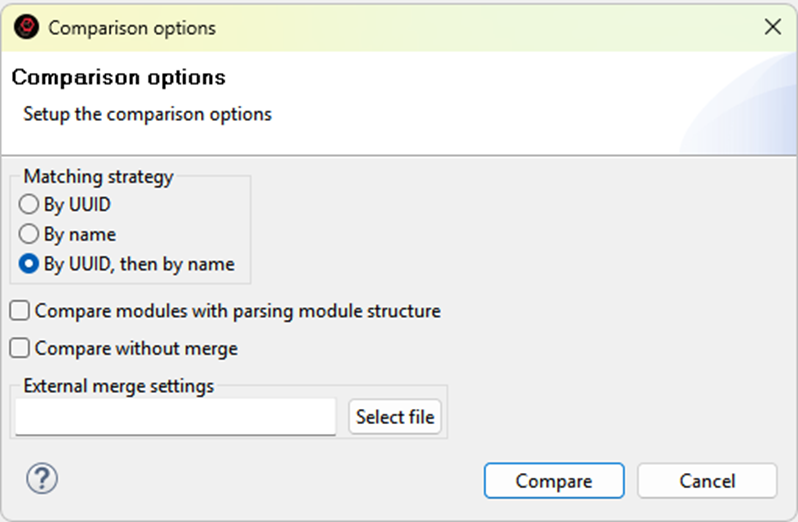
-
In the window that opens, click Compare. If you want to prevent accidental merges, enable the Compare Without Merging flag.
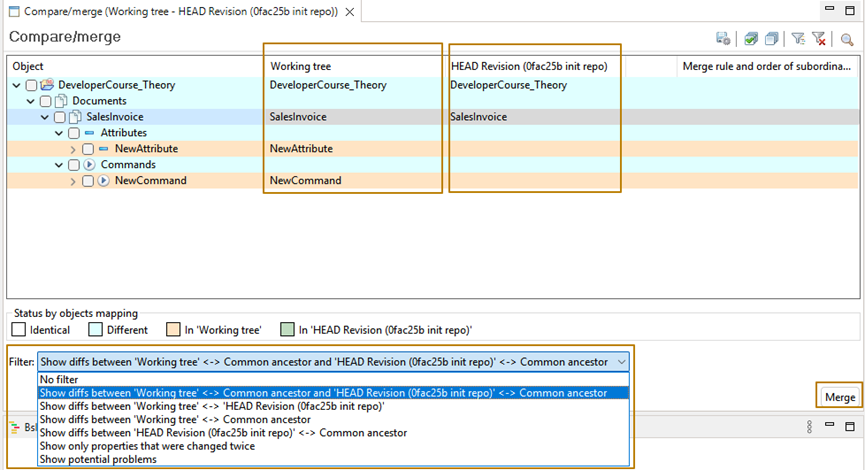
In the Compare/Merge window:
-
The Working Tree column shows the current project state.
-
The HEAD Revision column shows the version from the previous commit.
After reviewing and marking the objects to merge, click Merge to apply your selections.
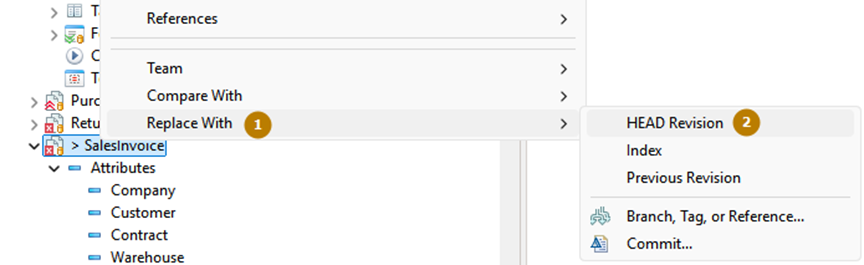
6.4.1.2 Replace with Previous Version
This is a faster, one-step way to cancel changes. The selected object or project returns to the state of the previous commit. However, you have no control over which parts are restored, so use this option carefully. Important changes could be lost permanently.
Both Compare and Merge and Replace With can be applied to any metadata object or the entire project. For example, you can right-click a single document command and revert it without affecting other objects. Keep in mind that this does not work for attributes or tabular sections; you must select the entire parent object to revert them. The commands also work for individual forms, commands, and templates.
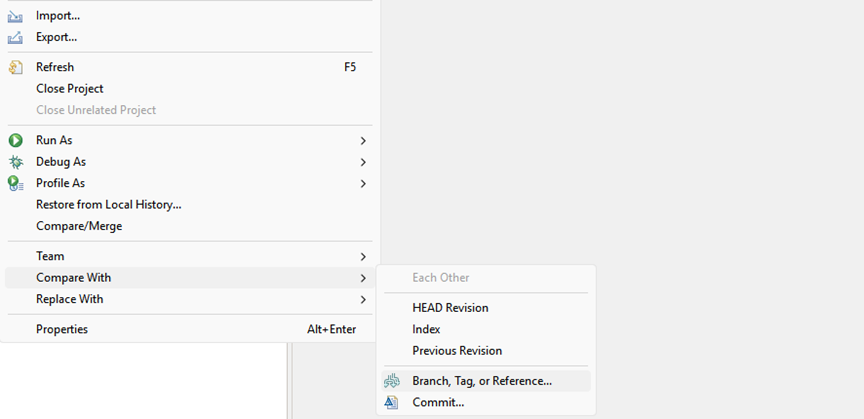
6.4.2 Taking Changes from Another Branch or Commit
Sometimes you might need to take changes from an older commit, a specific commit from another branch, or even from the latest commit of another branch. In the Compare With and Replace With submenus, you can find commands such as Branch, Tag, or Reference… and Commit…. These allow you to select the exact source from which to copy changes, whether for a single object or the entire project.
6.4.3 Merging Another Branch into Yours
This process is slightly different because it uses the Git Merge command. The result is a new commit in your current branch that includes changes from another branch. This operation is often used to resolve conflicts that occur when merging branches in a remote repository.
Let’s go through a practical example.
6.4.4 Resolving Merge Conflicts
-
You have a branch named task1. In the Sales common module, you add a comment inside the
CheckAmountOfProducts()procedure:// comment at task1 branch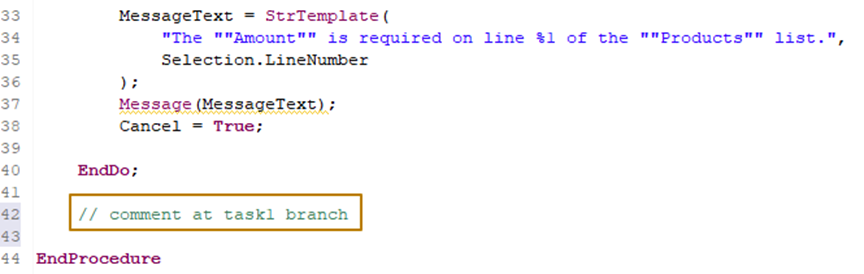
-
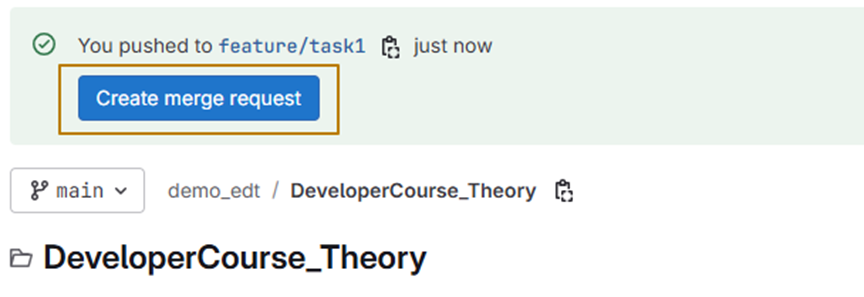
Commit and push your changes to the remote repository.
-
Create a merge request for the task1 branch in GitLab (the same process works in GitHub and similar systems).
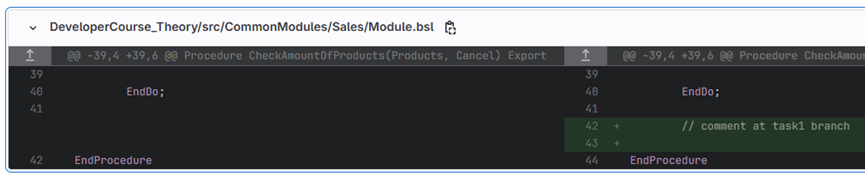
-
On the Changes tab, you can see the new comment added in the module file.
Next, create another branch, task2, based on the main branch.
-
In the same procedure and line, add another comment:
// comment from the task2 branch -
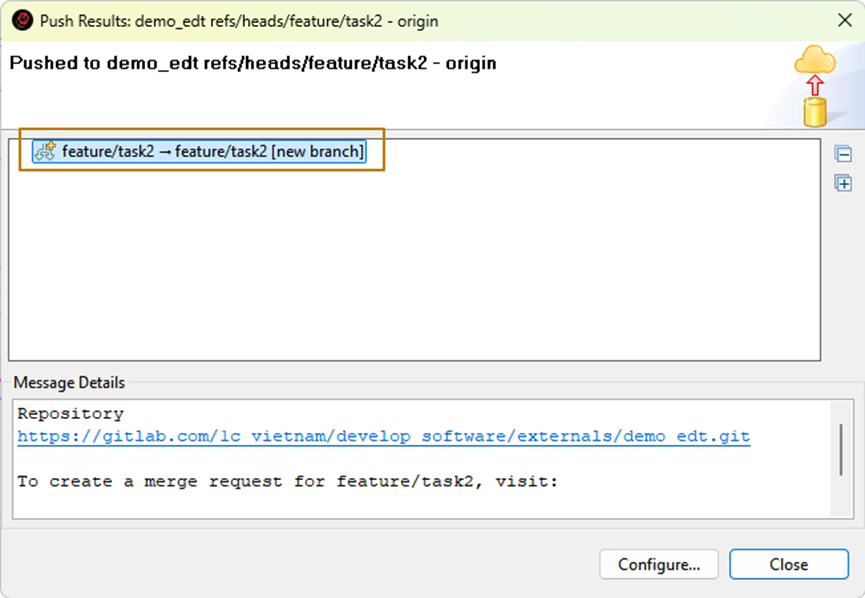
Commit and push the changes, then create a merge request for task2.
-
Merge task2 into the main branch in GiLab.
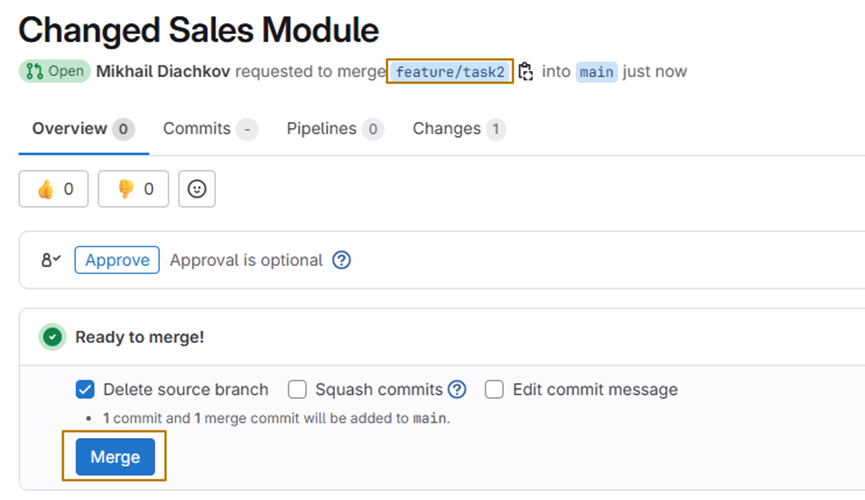
Now, when you open the merge request for task1, GitLab shows a conflict. The conflict occurs because the same part of the file was modified in both branches. Git cannot automatically decide which change to keep.

To resolve this:
-
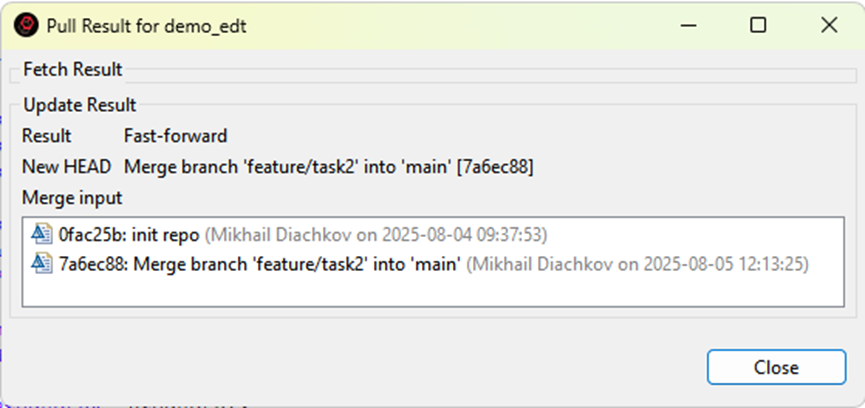
In EDT, switch to the main branch and execute Pull to download the latest changes.
-
Switch back to the task1 branch.
-
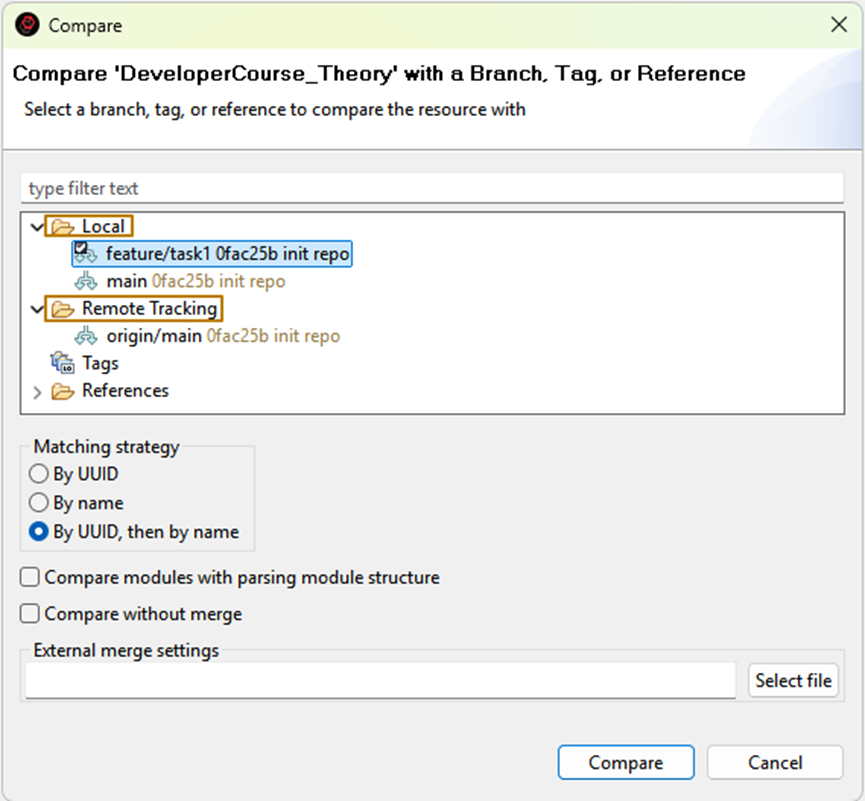
Open the Team Development submenu and select Merge.
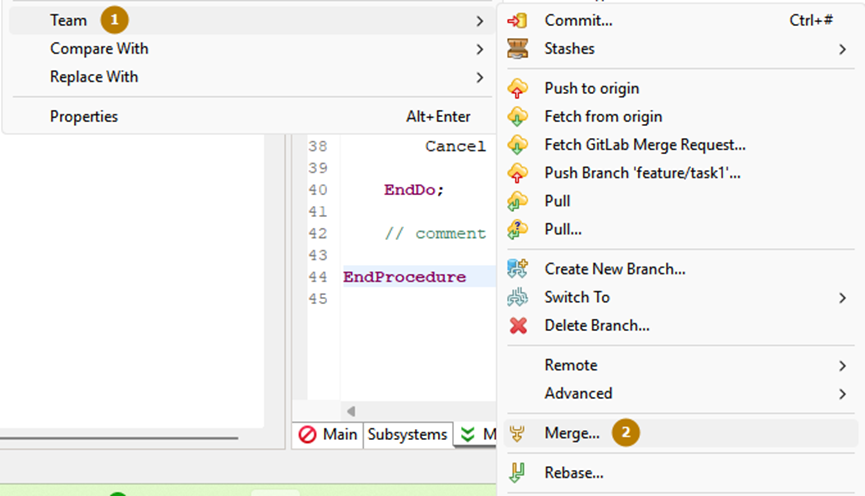
-
Choose the remote branch origin/main (or the local main branch, as they are now the same).
-
Enable the Open Compare/Merge Editor option, even if no potential conflicts are detected.
-
Click Merge.

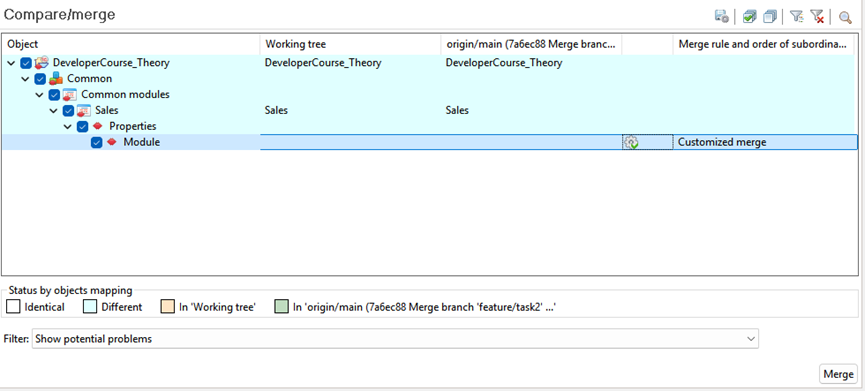
The Compare/Merge editor opens.
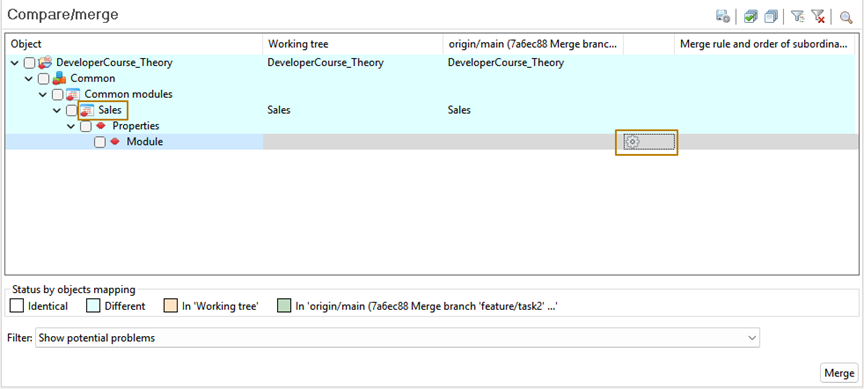
Expand the object hierarchy and locate the Sales module. Click the gear icon to open the detailed merge window.
This window contains three panes:
-
Left shows the text from your current branch.
-
Right shows the text from the merged branch.
-
Center shows the result of the merge.
At the bottom, the Merge Strategy field is set to Don’t Merge by default. You can select a strategy, such as Take from Another, to accept changes from the other branch completely. Alternatively, you can edit the center window manually, which will change the strategy to Custom Merge.
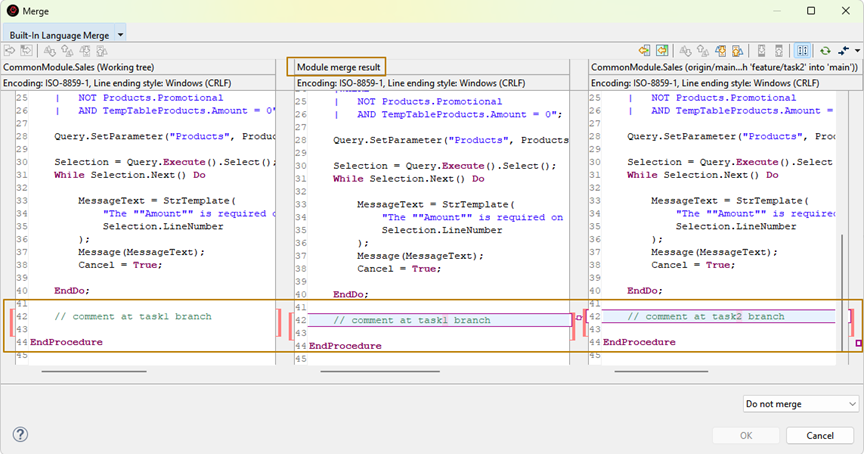
For this example, edit the merged text manually and leave a single comment:
// comment

After confirming your choice, the Sales module will display a green flag on the gear icon, indicating that the merge is complete and showing the chosen strategy.
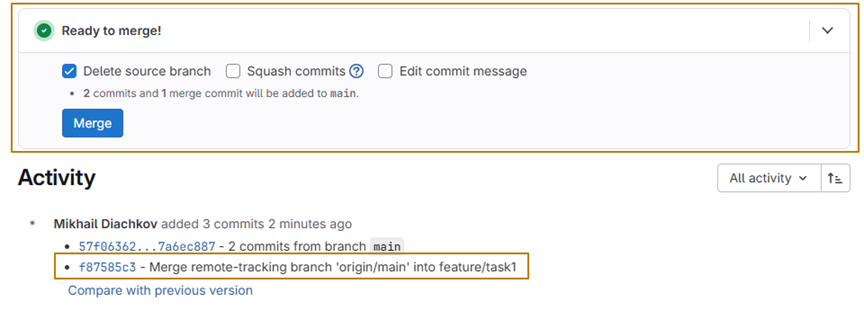
Click Merge to finalize. EDT creates a new commit in your current branch that merges origin/main into it.
-
Open the Git Staging panel.
-
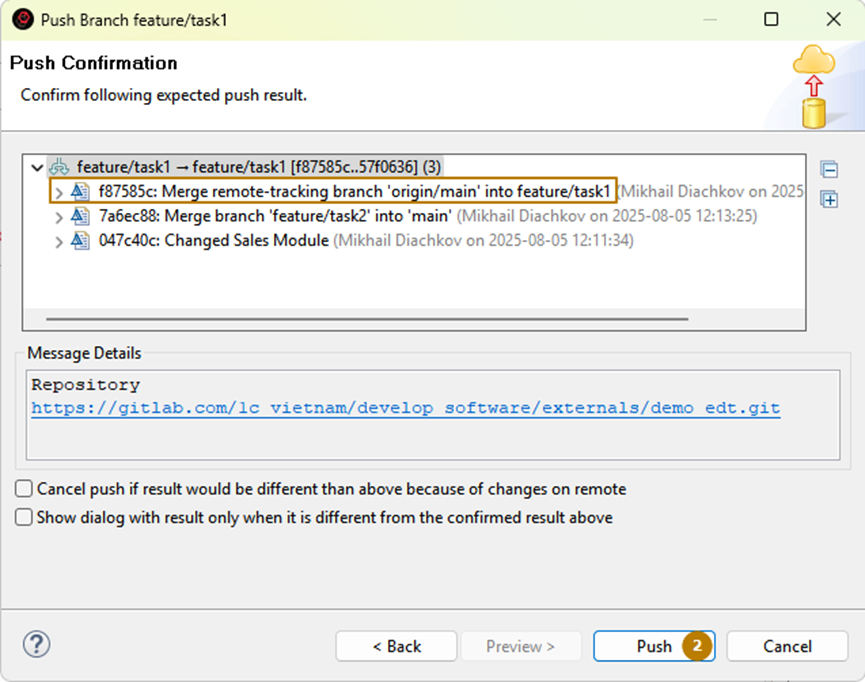
Click Push HEAD….

-
In the dialog that opens, click Preview to review the changes.

-
If everything looks correct, click Push to send the result to the remote repository.
-
A standard confirmation window appears, showing the result of the push operation.
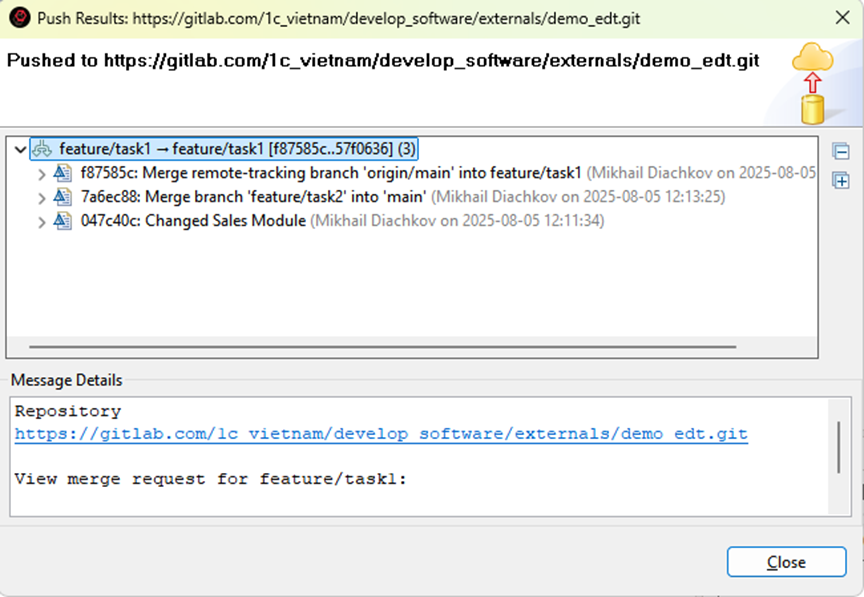
Back in GitLab, refresh the merge request page. The conflict is resolved, and you can now merge the task1 branch into main without issues.
6.4.5 Summary
You have learned how to:
-
Roll back uncommitted changes.
-
Retrieve changes from other branches or commits.
-
Merge branches and resolve conflicts manually.
These capabilities make Git a powerful and reliable tool within 1C:EDT, allowing developers to manage and synchronize changes safely and efficiently.