Another useful part of 1C:Enterprise 8 is the functional options feature. Functional options allow you to group some of the applied solution features and then with a single click manage whether the set of features will be used in the specific application or not.
Functional options are advantageous during the applied solution implementation. For example, the CRM that you create in this tutorial includes three accounting sections: managing people, events, and finances. If you will decide to share your applied solution with your friends or to enhance its functionally and sell, you will see that not everything that the applied solution is capable of is useful for each user. For example, not everyone will need to keep all the events that occur in his or her life. However, maintaining a list of acquaintances and keeping records of money income and outgoings is useful for most users.
Thus, keeping in mind that someone may find events feature not useful, you can segregate it to the functional option and let a user to decide whether to use it or not. If you do so, 1C:Enterprise 8 platform will maintain all references to objects of the functional option in all parts of the applied solution. Moreover, if the user does not need features of the functional option, the platform will automatically disable and hide those objects.
The platform will perform all these changes on its own, so that the developer does not need to write the script for that. The only thing that is required is to set the desired value of the functional option in 1C:Enterprise mode!
Consider a simple example where the value of the functional option is stored in the constant of the Boolean type. If the value is True, then the functional option is enabled. If the value is False, then the functional option is disabled.
Because you are creating the first custom option of the application, it is a good time to create the Settings subsystem, and specify the SettingsSubsystem.png icon for it.
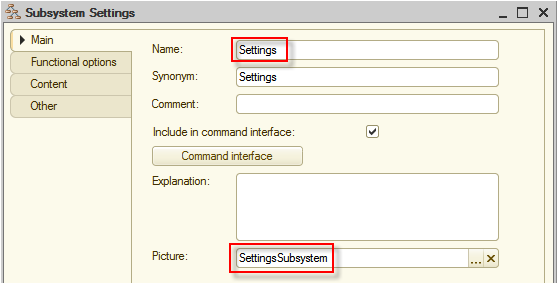
Figure 9-1. Adding the Settings subsystem
At once, place the new subsystem after the operational subsystems. To do this, click the root configuration node, and then in Properties click the Open link of the Command interface property.
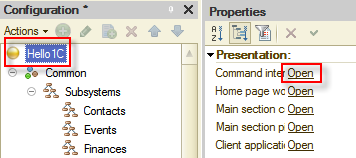
Figure 9-2. Opening the Command interface editor
Move the Settings subsystem to the bottom.
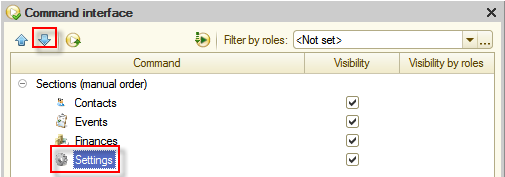
Figure 9-3. Moving the Settings subsystem down
Create a constant.
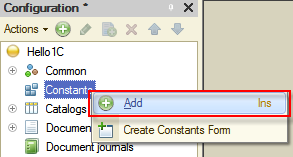
Figure 9-4. Creating a constant
Name it UseEvents, and set its Type to Boolean.
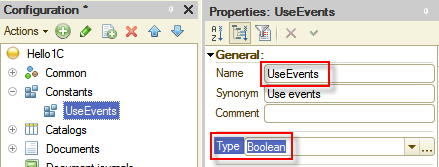
Figure 9-5. Adjusting the Use events constant
After that, right-click the UseEvents node in the Configuration tree and then click More in the context menu.
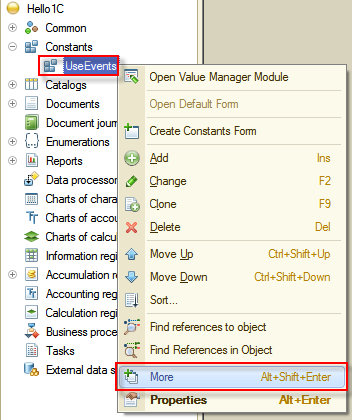
Figure 9-6. Opening the More properties of the UseEvents constant
Then, include the new constant to the Settings subsystem.
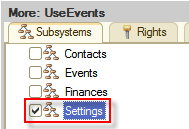
Figure 9-7. Including Use events to the Settings subsystem
Then create the Use events functional option and adjust it to keep its value in the Use events constant. For that click Functional options node in the Configuration tree, then click Add  (Ins) in the command bar of the Configuration tree. Then input UseEvents as the name of the functional option, and then select UseEvents constant in the Data path property.
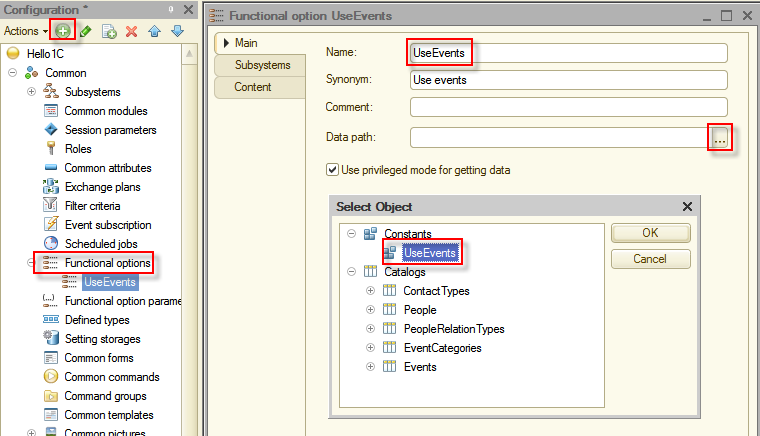
Figure 9-8. Creating the UseEvents functional option
Because of these actions, a command that allows us to open the form and change the value of Use events functional option in the 1C:Enterprise mode will appear in the Settings section.
Now you need to include configuration objects and object properties to the functional option. Ask yourself: "What in your applied solution is related to events?" The answer is:
- the Events subsystem;
- the Events catalog;
- the used only for events Event categories catalog;
- the Event attributes of tabular sections of the Cash receipt and the Cash payment documents;
- the Event dimension of the Financial transactions accumulation register.
It is very easy to include the mentioned above objects and properties to the Use events functional option. To do this, double-click the Use events functional option to open it in the editor and then click Content tab. After that, in the tree on top set checkboxes on the left of configuration objects and object properties. For verification see the panel on the bottom that the platform fills with selected objects.
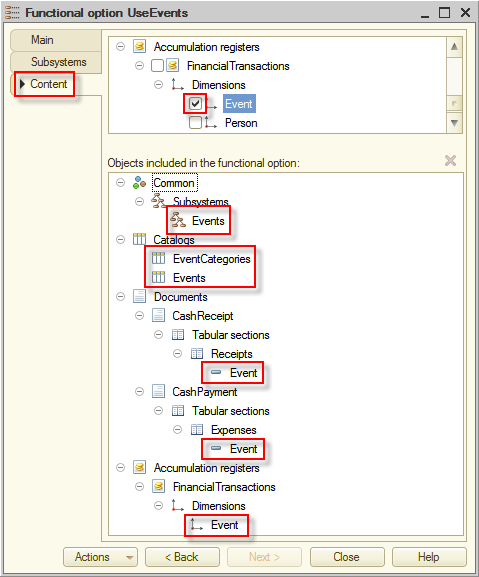
Figure 9-9. Including objects to the functional option
Now, start the application in the 1C:Enterprise mode, click the Settings section, click the Tools menu, and then click Use events.
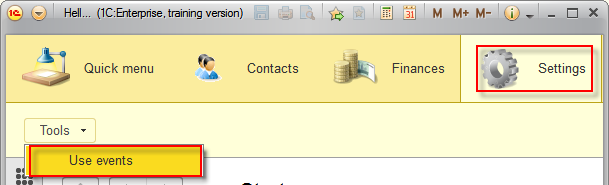
Figure 9-10. Opening the Use events constant form
Enable Use events to make sure that the created functional option did not affect anything in the application. For this, select the Use events check box, and then click Save and close.
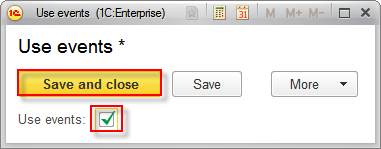
Figure 9-11. Enabling the Use events functional option
Close the main application window and start the application in the 1C:Enterprise mode once again to see that the application works the same as it was before you created the functional option.
Now, in the Settings section disable Use events functional option.
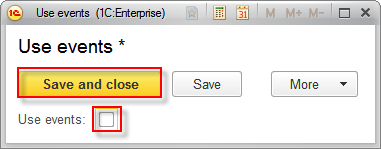
Figure 9-12. Disabling the Use events functional option
After saving changes, restart the application in 1C:Enterprise mode.
Look at the application carefully.
First, that you might mention is that the Events section and various object references related to events are no longer displayed on Home page.
Figure 9-13. The Events section and Events catalog are disappeared
Second is that references to events have disappeared from all forms, including the information displayed in reports.
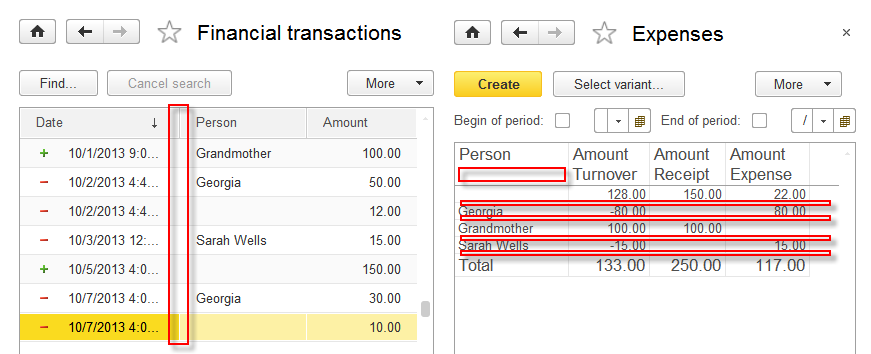
Figure 9-14. The Events column in the list form and Event details of the report are disappeared
You made what was required, the use of events in the applied solution is now optional and depends on settings of a specific application.
Next page: Cross-platform design