Let us specify the default report view settings.
- Click the Settings tab.
A hierarchical report structure can include various combinations of three key items:- Grouping, used for displaying data as a regular linear report
- Table, used for displaying data as a table
- Chart, used for displaying data as a chart
- Right-click Report and then click New grouping.
-OR-
In the window command bar, click the Add button and then click New grouping.
-OR-
Click Report and then press Insert (fig. 13.13).
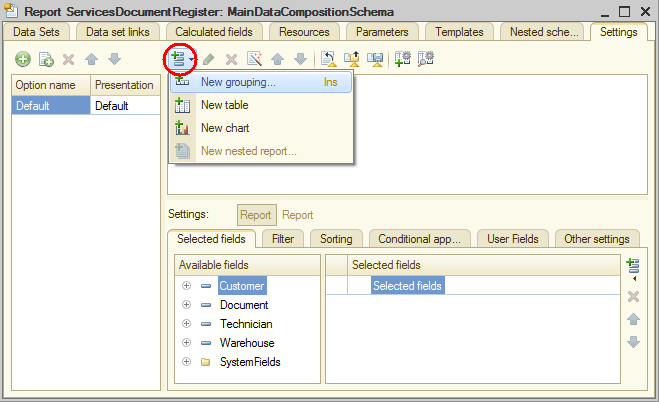
Fig. 13.13. Adding a grouping to a report - Do not enter the grouping field, simply click OK.
This specifies that the report includes detailed infobase records.
The Detailed records grouping is added to the report. - In the bottom pane, on the Selected fields tab, drag the following fields from the Available fields list to the Selected fields list:
- Document
- Warehouse
- Technician
- Customer
to the right of the list of selected fields. You can change the order of selected fields by dragging them or by using the Move up  and Move down
  buttons.
Now the report settings window should look as follows (fig. 13.14).

Fig. 13.14. Report settings window
This completes the report creation.
Finally, let us specify the subsystems where the report is available. - Close the data composition schema wizard and then, in the editor of the ServicesDocumentRegister report configuration object, click the Subsystems tab.
- Select the Services check box (fig. 13.15).
This adds the link that opens the report to the Reports menu in the command panel of this subsystem.
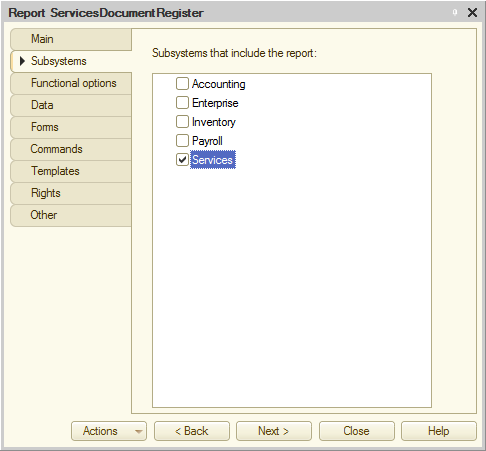
Fig. 13.15. Specifying the list of subsystems where the report is available