Now proceed to adding documents that record money incomes and expenses. The first document you will add is Income.
Documents are located in the Documents branch of the configuration object tree. Add a new document.
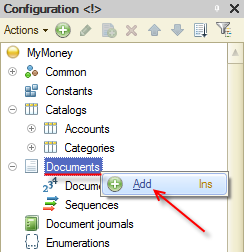
Figure 5-1. Adding a new document
Name it Income and then proceed to the Data tab.
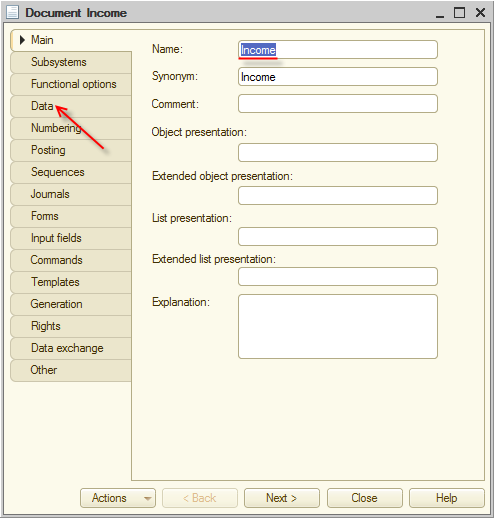
Figure 5-2. Creating Income document
Each document has two default attributes, Number and Date, they indicate the sequential number of the document and the date when it was created. However, in addition to these attributes, it is usually required to have other information regarding specific business activity in the document. For example, in this master class users would like to see what was the reason for the money receipt, as well as its account and category.
In order to be able to track events by accounts, you need to create two attributes: Account and Category. To track the number of transactions, create the Amount attribute. You may also need to comment on each income. Add the Memo attribute:
- Account of the CatalogRef.Accounts type.
- Category of the CatalogRef.Categories type.
- Amount of the Number type. Length is 10, Precision is 2, and selected the Non-negative checkbox.
- Memo of the String type. Length is 1024.
After these actions, the Data tab of the document will look as follows:
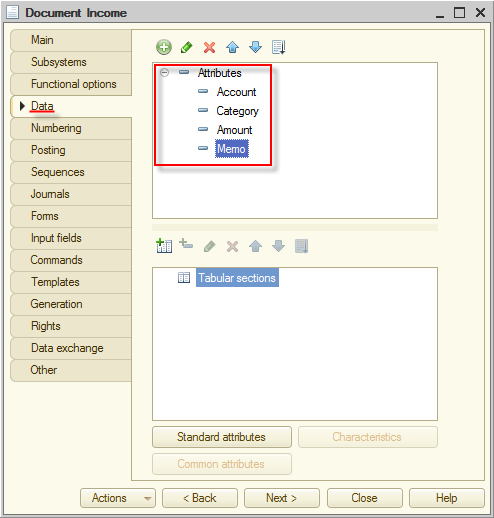
Figure 5-3. Filling the document with fields
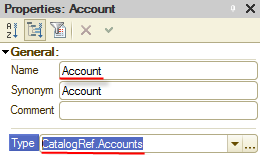
Figure 5-4. Account attribute
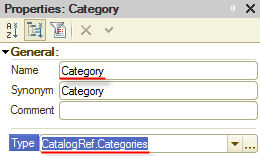
Figure 5-5. Category attribute
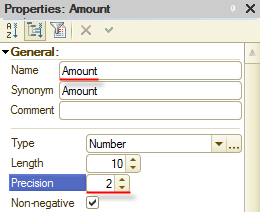
Figure 5-6. Amount attribute
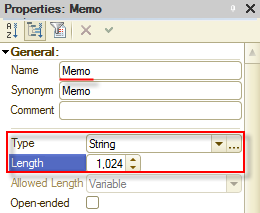
Figure 5-7. Memo attribute
And the final, but the most important step: proceed to the Posting tab.
As it is said above, documents write data to registers, and then you receive data, handy for future processing, from registers. If you just save document data without posting, no register data is changed. To make changes in registers, you have to post the document.
Document register records are records that documents make in registers; in our case, Income document records will be made in the Accounts register.
Expand the Accumulation registers node and select the Accounts accumulation register checkbox. Then click Register records wizard and the platform will assist you in creating the data-writing algorithm for registers.
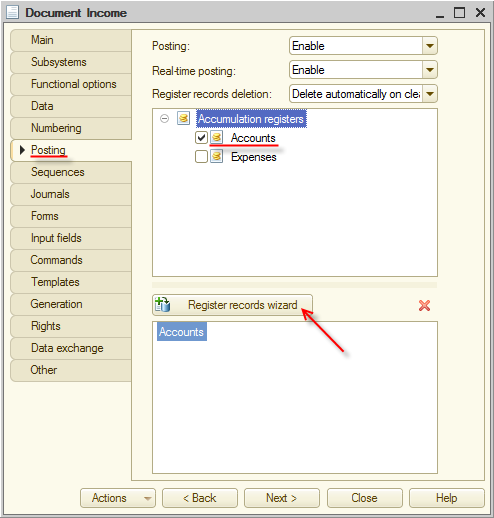
Figure 5-8. Defining document register records
A window of Register Records Wizard will be opened. Leave Register Record Type unchanged, equal to Receipt, since this document is a receipt of money. Then click Fill Expressions.
In the table at the bottom of the window you can see that the platform automatically found the correspondence between the accumulation register attributes and the document attributes. The value of the Account attribute of the document will be placed into the Account register dimension. The value of Amount attribute will be placed into the Amount register resource. The value of Category attribute of the document will be placed into the Category register attribute.
After filling out and verifying the correspondence table, click OK.
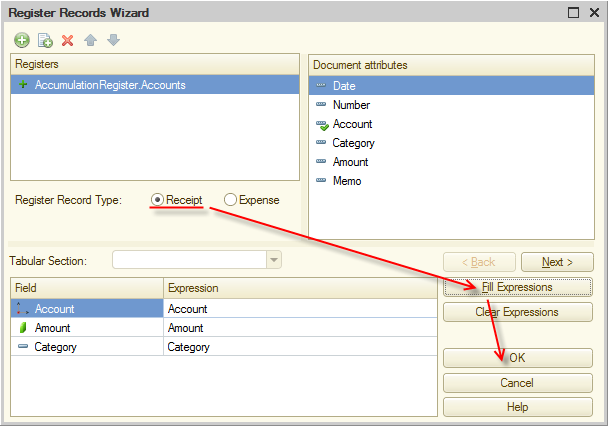
Figure 5-9. Register Records Wizard
The wizard will generate the procedure for writing document register records, in other words, for posting the document, and then display it on the screen.
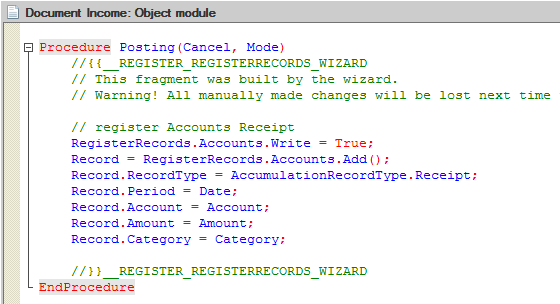
Figure 5-10. Procedure for posting the document
As you can see, the procedure is quite simple: a new record is added to the register and then register data is filled with the data of the corresponding document fields.
You could write this algorithm yourself but to minimize the amount of work it is better to utilize Register Records Wizard. The wizard generated this code automatically, which is mentioned in comments at the beginning and at the end of the procedure.
We are done with Income. However, users also need to track expenses. It seems obvious, that it is necessary to create the Expense document. You could easily create it manually in the same way as you did already with the existing Income document because the structure of these two documents is identical. Another option, however, is to use the 1C:Enterprise 8 feature allowing you to create new configuration objects based on existing ones by simply copying them.
To do this, click the existing Income document in the list of metadata objects and click Add by cloning ![]() (F9).
(F9).
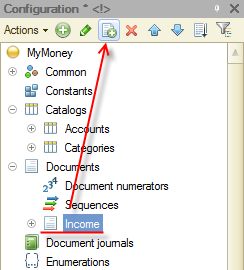
Figure 5-11. Add by cloning
Once you click this button, a new Income1 document appears. It is going to be an exact copy of Income.
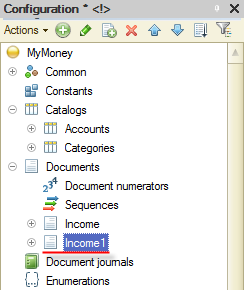
Figure 5-12. A copy of the Income document
The only thing left to do is to rename the document and edit some of its properties. Do it.
First, open the properties editor window and change the name of the document to Expense. Then proceed to the Data tab.
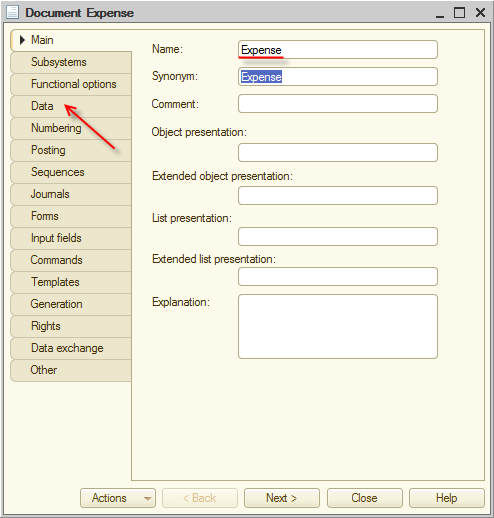
Figure 5-13. Expense document
On the Data tab, using Properties, change the name from Category to the Purpose.

Figure 5-14. Renaming Category to Purpose
A little explanation, users can reflect two operation kinds with the Expense document:
- Transferring funds between accounts
- Spending money
That is the Expense document could register either transferring money between accounts or expensing money by a category.
To implement our idea, select Composite data type: CatalogRef.Accounts and CatalogRef.Categories.
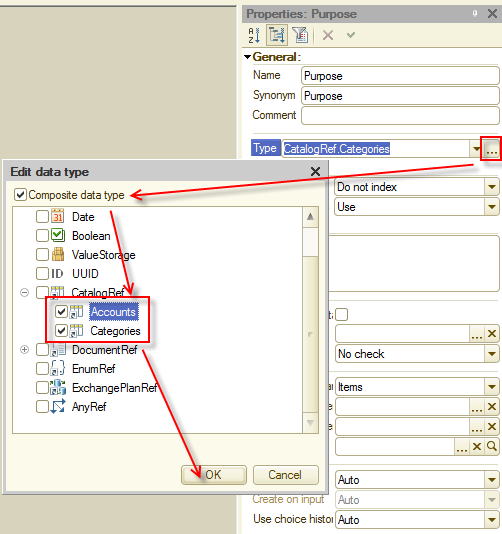
Figure 5-15. Purpose attribute
If the purpose is an account, the document reflects transfer because both the source (Account) and the target (Purpose) are accounts. If Purpose contains a category, the document reflects an expense.
Keep the remaining attributes unchanged as they meet the project requirements.
Proceed to the Posting tab. Here we will change the document posting. For now the posting algorithm is copied from the Income document. That document spores income but the newly created document is designed to store expenses.
Select both Accounts and Expenses registers. Then click Register records wizard. The platform will prompt you to confirm that the existing script is to be replaced. Confirm it.
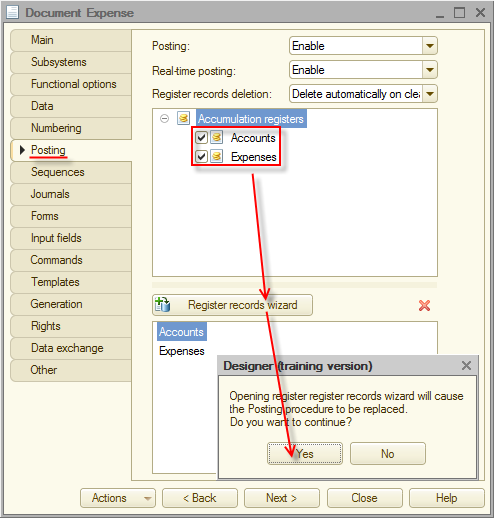
Figure 5-16. Register records wizard
For the Accounts register (it will be selected automatically), fill all fields as in the previous document. Just change the record type to Expense and click Fill Expressions.
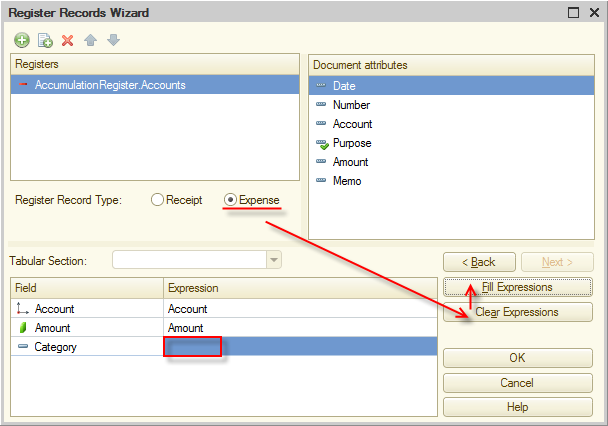
Figure 5-17. Register records wizard
Pay attention to the Category register field, which is left empty. The point is that the wizard compares document attributes and register fields by names. But we have no Category attribute in the Expense document. Help the wizard, click the row with the Category field and then double-click the Purpose attribute in the Document attributes area.
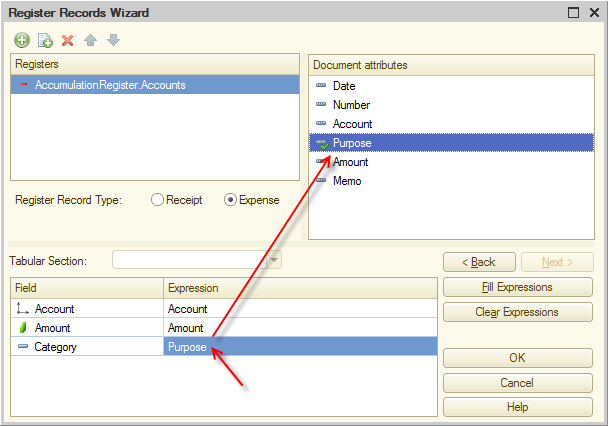 Figure 5-18. Filling the Category field
That is not all we have to do. The Income document adds records only to the Accounts register, but the Expense document has to add records to the Accounts and Expenses registers, that is why, without closing the Register Records Wizard window, you have to add the Category register to the Registers list.
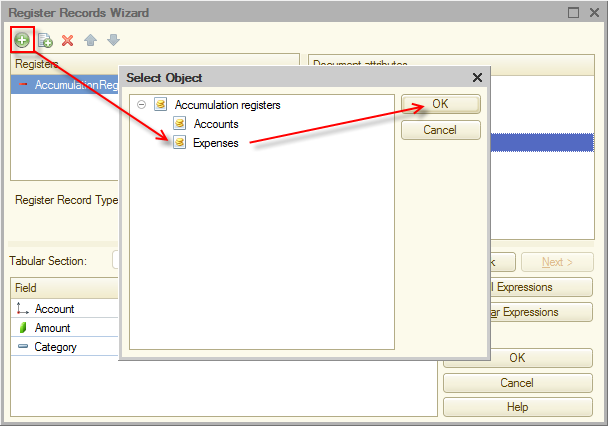
Figure 5-19. Adding the Expenses register
Click AccumulationRegister.Expenses and then click Fill Expressions.
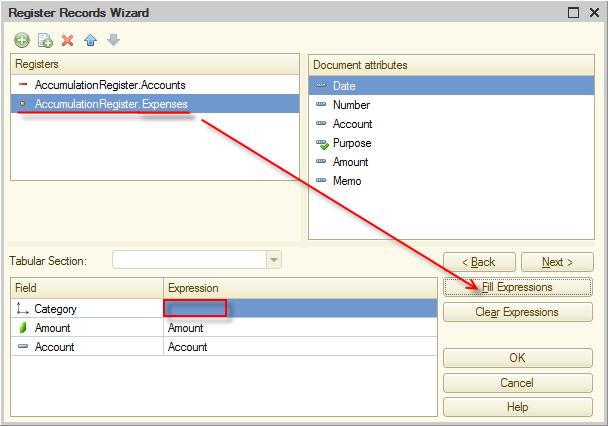
Figure 5-20. Filling the Expenses register records
As in the previous case, the Category field is not filled. Fill it with the Purpose attribute as you did it with the Accounts register field.
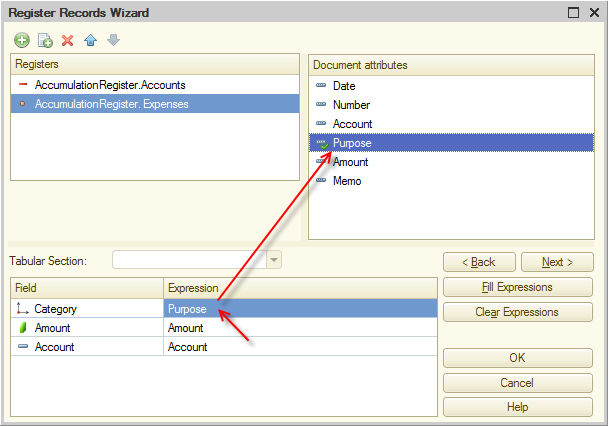
Figure 5-21. Filling the Category register field
Now everything is ready to generate register records. Click OK.
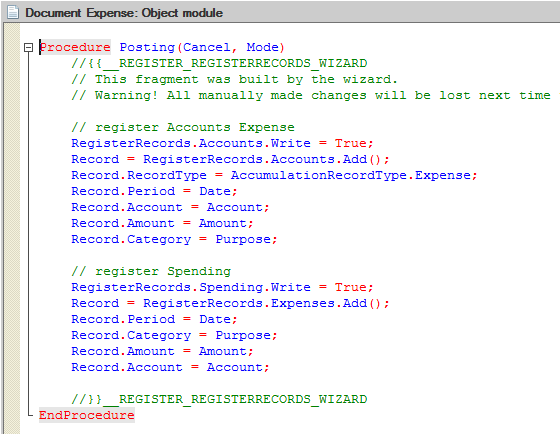
Figure 5-22. Posting procedure generated by a wizard
You can see that concerning the Accounts register there are minimum differences between the two documents. In the Expense document, the record type is Expense. In addition, the Posting procedure contains a script that adds records to the Expenses register. Nothing complicated here.
The only thing requiring explanation is that the current Posting procedure implements only one branch of the document behavior: money spending. As we told before, the document must also support transferring money between accounts.
Here, first time in our master class, we have to customize the script manually.
It is easy to determine the document kind: we can find it out with the Purpose attribute. For this, add a classical If-Then-Else condition.
If the Purpose attribute value type is CatalogRef.Categories, then the document reflects an expense and we already have the posting script (see figure 5-22).
If the Purpose attribute value type is CatalogRef.Accounts, then the document must add transfer records to the Accounts register. One record must decrease the amount of money on one account and another one must add the same amount to the other account. In this case, no record is added to the Expense register.
Once all of the changes are made, the module looks as in figure 5-23.
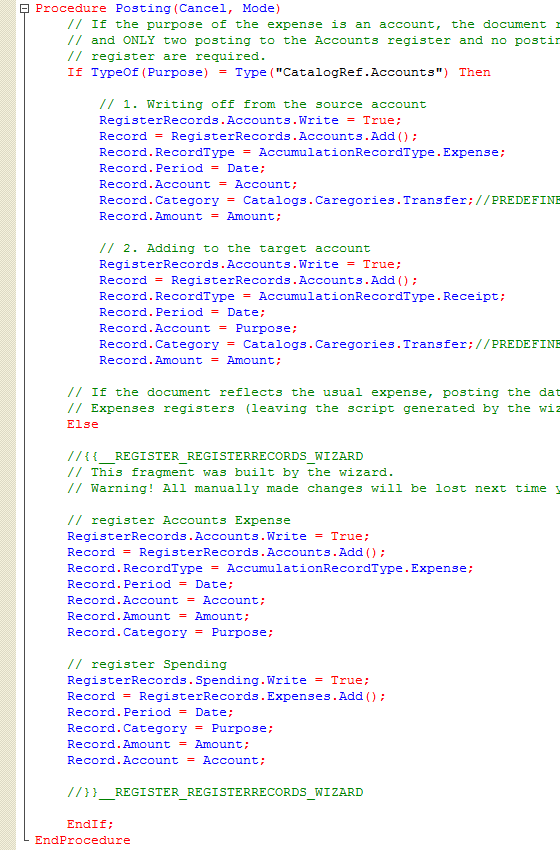
Figure 5-23. Customized Posting procedure
You can find the module text in the Expense document module.txt file in the \demo\ext directory.
Before you proceed to the next step, save your progress. Click Update Database Configuration ![]() (F7).
(F7).
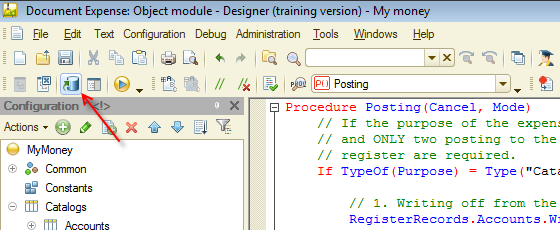
Figure 5-24. Update Database Configuration
The platform shows changes in the configuration, click Accept.
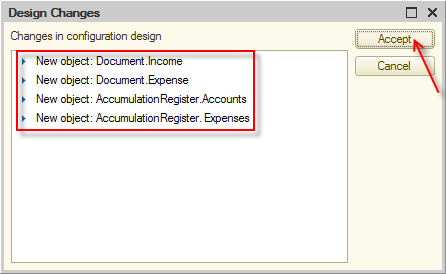
Figure 5-25. Update Database Configuration
Now your configuration has catalogs to store account details and categories of incomes and expenses. It has registers for prompt retrieving of required data and has documents to reflect incomes and expenses.
So, the backbone of your applied solution is ready. It matches the required goals. But would it be easy-to-use? To check it out, start the application in 1C:Enterprise mode by clicking Start Debugging ![]() (F5).
(F5).
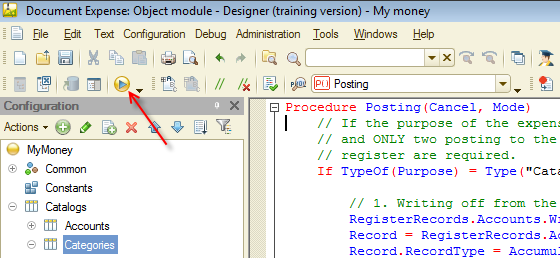
Figure 6-26. Start Debugging
Next page: Desktop