Before you start building the mobile application distribution package, check whether there are all necessary components on your computer.
You need three third-party applications: Apache Ant, Java Development Kit (JDK), and Android SDK.
If you do not have Apache Ant installed on your computer, you can get it at http://www.apache.org/dist/ant/binaries/. Apache Ant is also available in the installation wizard. Click Custom setup, then click 1C mobile application builder and third-party apps, and then click Download Apache Ant.
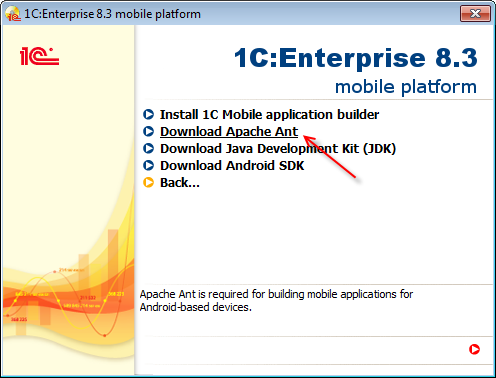
Figure 19-1. Download Apache Ant
To know more about Apache Ant, visit http://ant.apache.org/.
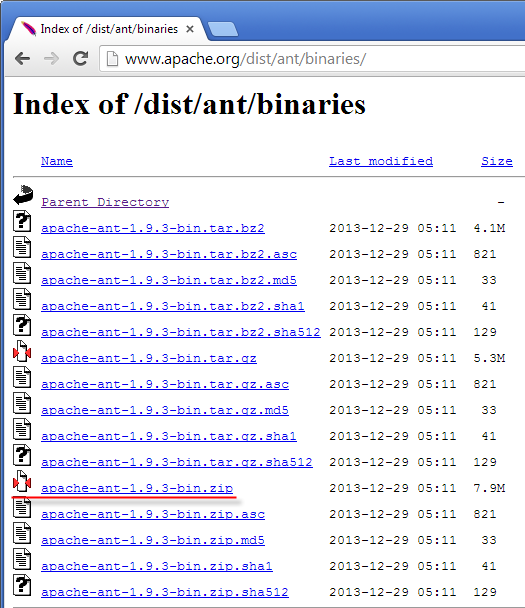
Figure 19-2. Apache Ant
Create a directory C:\mobile.1c on your computer (the letter case is important) to collect all software components you need. When the archive with Apache Ant is on your computer, unpack it to c:\mobile.1c. In the tutorial example it is placed in C:\mobile.1c\apache-ant-1.9.3.
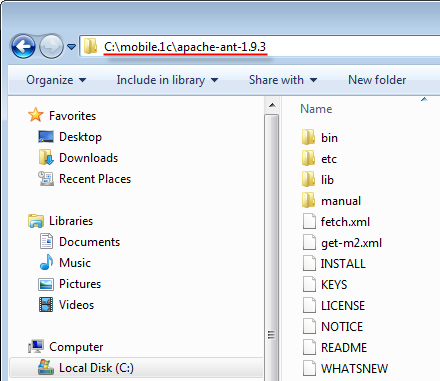
Figure 19-3. Installed Apache Ant
If you do not have JDK installed on your computer, you can get it at http://www.oracle.com/technetwork/java/javase/downloads/. JDK is also available in the installation wizard. Click Custom setup, then click 1C mobile application builder and extra apps, and then click Download Java Development Kit (JDK).
Click Java download.
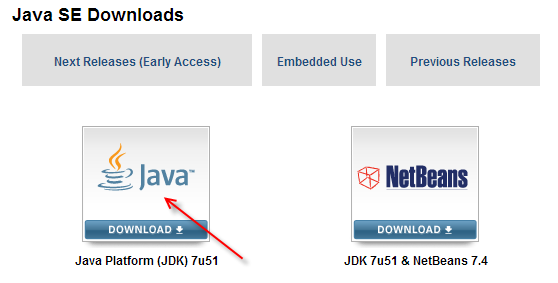
Figure 19-4. Java download
Click Accept Licencse Agreement.
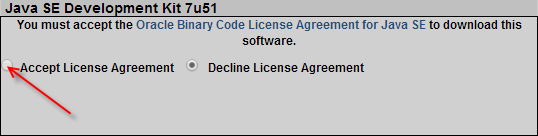
Figure 19-5 Accept License Agreement
Select the distribution package that is suitable for your operating system.
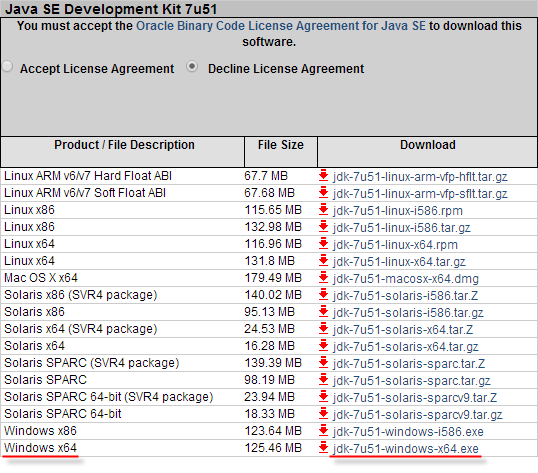
Figure 19-6. JDK distribution package
When the package is on your computer, start the installation and answer in the affirmative for all questions. Remember the path where the component is installed.

Figure 19-7. Installing JDK
To check whether JDK is installed correctly, press Windows logo key + R, type cmd, and click OK. In the Command Prompt window, type java -version and press Enter.

Figure 19-8. Starting the Command Prompt program
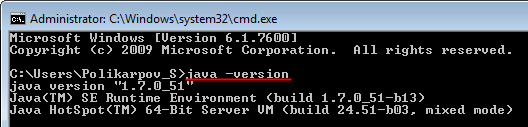
Figure 19-9. Java version
The third required software component is Android SDK.
If you do not have Android SDK installed on your computer, you can get it at http://developer.android.com/sdk/index.html. Android SDK is also available in the installation wizard. Click Mobile platform and then click Android SDK.
Click USE AN EXISTING IDE and then click Download the SDK Tools for Windows.
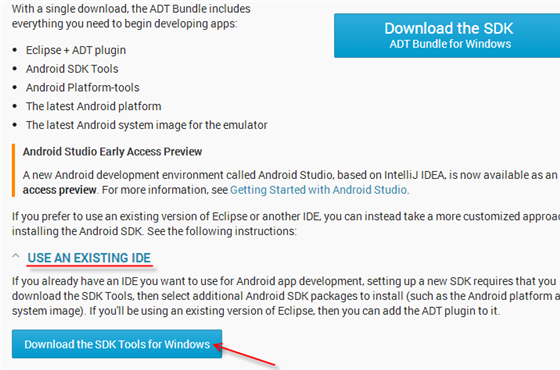
Figure 19-10. Android SDK distribution package
In the Android SDK Tool Setup window, click Next. Set c:\mobile.1c\android-sdk as a Destination Folder and click Next. Then answer in the affirmative for all questions.
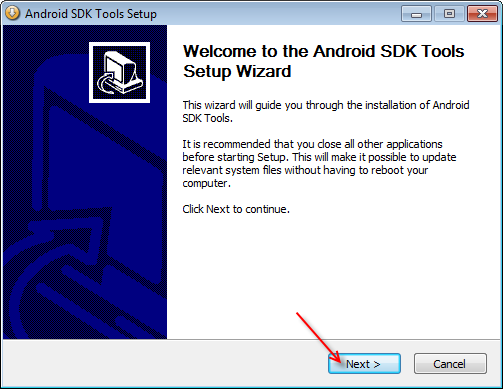
Figure 19-11. Installing the Android SDK
These components must be installed in a strict order. JDK must be installed before Android SDK.
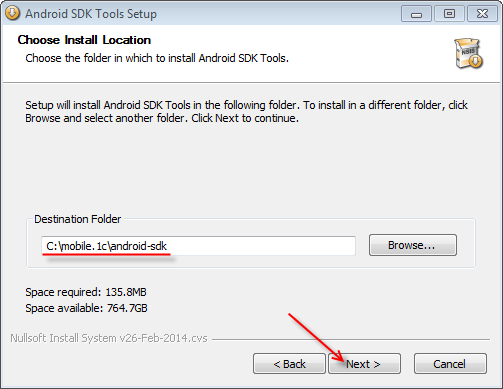
Figure 19-12. Android SDK destination folder
Once Android SDK is installed, the wizard prompts you to start it. If it does not, click Start, click All Programs, click Android SDK Tools, and then click SDK Manager.
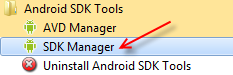
Figure 19-13. Starting SDK Manager
When you start the SDK Manager for the first time, it updates the list of available components (packages). Depends on your Internet connection speed, it may take up to a few minutes.
Important! Some of the SDK manager features require the Internet connection.
When the package list is updated, select the ones that are necessary for compiling the 1C:Enterprise mobile application distribution package.
In the Tools branch, clear all marks and then select only Android SDK Platform-tools and Android SDK Build-tools of the latest revisions.
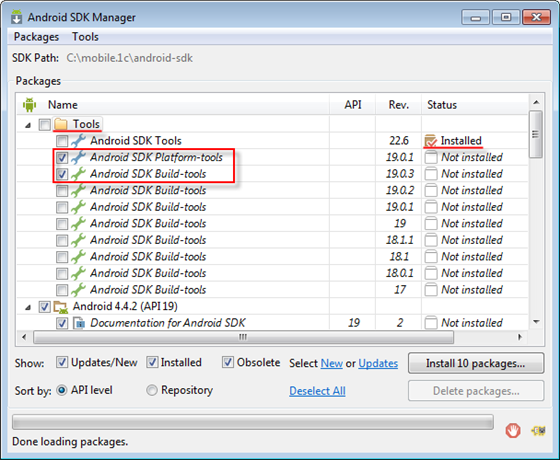
Figure 19-14 Tools branch
Note that, the checkbox of Android SDK Tools is cleared, but its Status is Installed. It is ok. You need this item but it has already been installed.
Proceed to the Android branches. There are several Android branches. You need to select those that meet the requirements of the 1C:Enterprise platform and clear all the rest. Start with clearing all the marks.
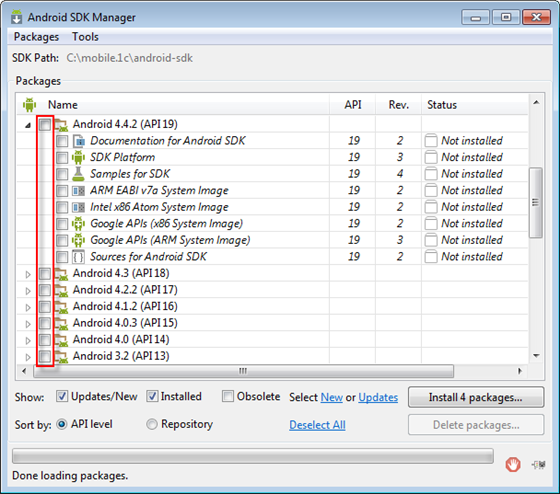
Figure 19-15. Clearing all Android marks
In the Android 4.2.2 (API 17) branch select SDK Platform, ARM EABI v7a System Image, and Intel x86 Atom System Image.
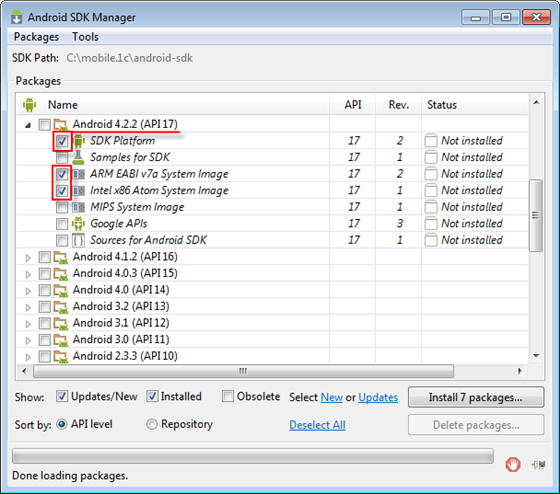
Figure 19-16. Selecting Android 4.2.2 (API 17) components
Proceed to the Extras branch. Select Android Support Library, Google USB Driver, and Intel x86 Emulator Accelerator (HAXM).
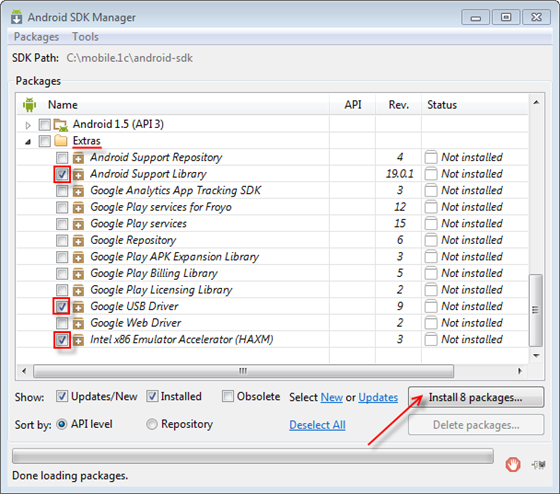
Figure 19-17. Extras branch
Click Install 8 packages and accept the license agreements of all the components you are installing. Then click Install.
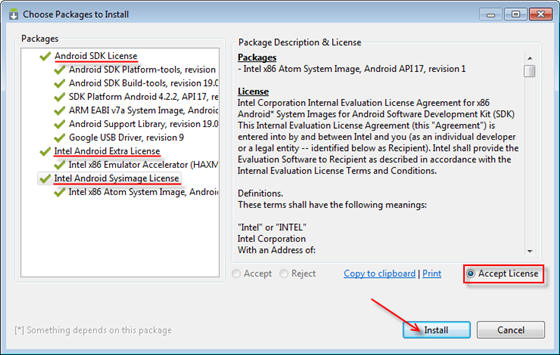
Figure 19-18. License agreements
Once you click Install, the SDK Manager starts downloading and installing the components you selected. It may take a few minutes, depending on your Internet connection speed. You can see the progress indicator and details in the separate window.
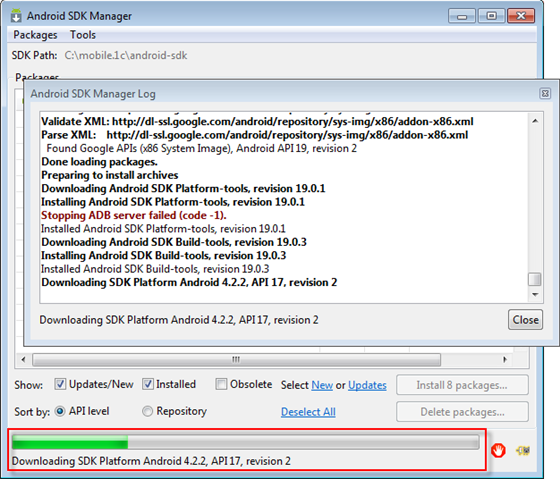
Figure 19-19. Installing the components
Once the components are installed, you can see that Status of these components is changed to Installed, and the checkboxes are cleared.
You can close the SDK Manager now.
Next page: Installing and setting up Mobile application builder