Let us create a predefined item.
- Click the Other tab and then click the Predefined data button.
This opens the list of predefined catalog items. At this point the list is empty. - Click the Add button
 and create a predefined item named Main (fig. 3.69).
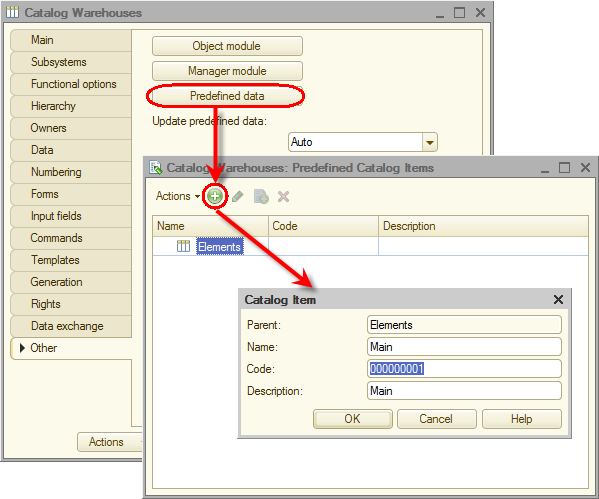
Fig. 3.69. Creating a predefined catalog item
Note that in addition to the description the predefined catalog item has a name.
In the future, when you start learning 1C:Enterprise script, you will be able to refer to this catalog item using the name that you assigned in Designer. While a predefined catalog item description can be edited by users, the name is not visible to users and therefore they cannot edit it.
Before you start 1C:Enterprise, let us configure the applied solution interface to streamline catalog item creation (make the standard warehouse creation command visible in the Inventory section). - In the configuration object tree, double-click the Inventory subsystem and then click the Command interface button.
This opens the Command interface window, which lists all of the subsystem commands. - In the Actions panel.Create group, enable visibility for the Warehouse: create command.
You can also see that the Navigation panel.Normal group contains the Warehouses command, which opens the list of warehouses. The command is visible by default (fig. 3.70).
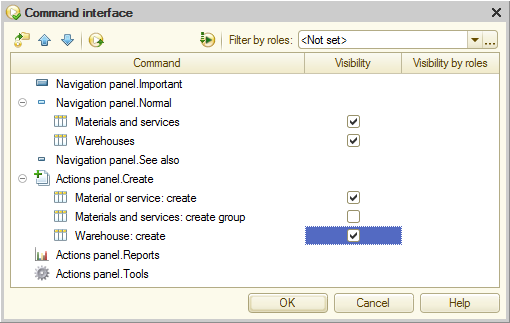
Fig. 3.70. Subsystem command interface settings window - Close the Warehouses catalog editor and start 1C:Enterprise in the debug mode.
- Confirm that you want to update the configuration.
The platform displays the window that lists the changes in the configuration structure (the new Warehouses catalog). - Click Accept (fig. 3.71).
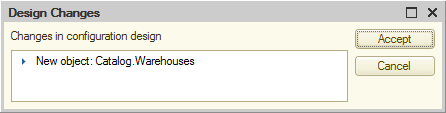
Fig. 3.71. List of changes in the configuration structure