As the first step, you will set icons for subsystems. This is not a difficult task. In Designer mode open the subsystem editor and select the desired image in the Picture field for each subsystem. Start with the Contacts subsystem.
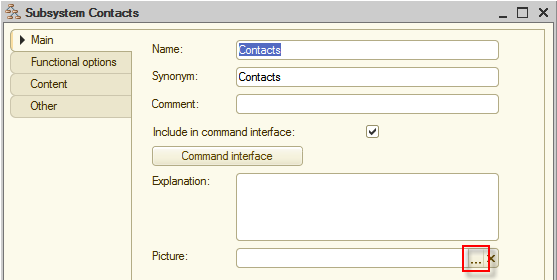
Figure 8-2. Selecting an icon for the subsystem
There are no pictures in the applied solution yet, so the list is blank. To have them available, import images from files. In the opened window, click Add. You can find images in the current distribution, for this, run setup.exe, click Custom setup and then click Hello, 1C additional files. In the opened folder, you can find images. Copy them from that folder to your computer. And then add to the applied solution.

Figure 8-3. Adding an image
Click Select from file.
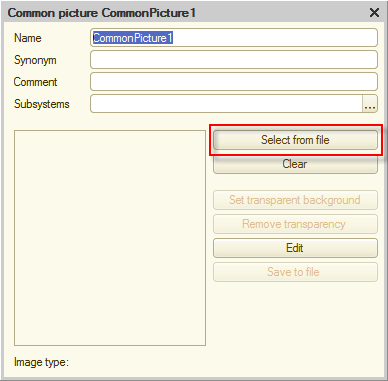
Figure 8-4. Selecting a file
For the Contacts subsystem select ContactsSubsystem.png, and then click Open.
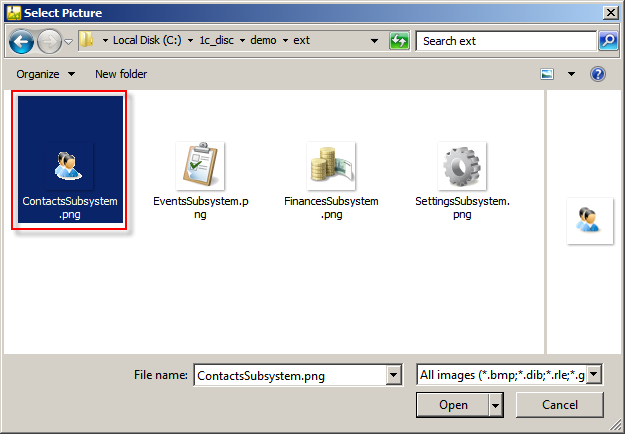
Figure 8-5. Selecting an image
Give the name to the picture, for example, ContactsSubsystem.
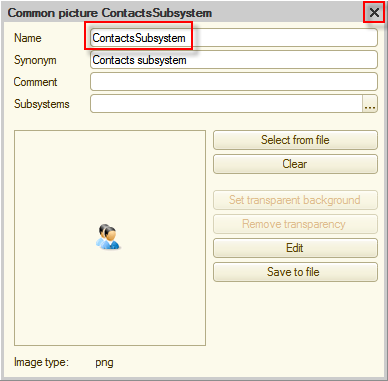
Figure 8-6. Naming the common picture
Now you can close the window with the picture. In the Select picture window select the picture that you have just imported and then click OK.
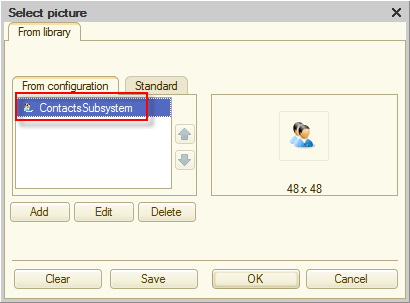
Figure 8-7. Selecting a picture
Now the Contacts subsystem has a unique appearance. Repeating the above steps, select images for the remaining subsystems:
- EventsSubsystem.png for the Events subsystem;
- FinancesSubsystem.png for the Finances subsystem.
As a result, pictures for subsystems will look as follows:
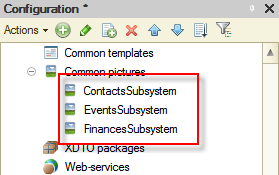
Figure 8-8. Common pictures for subsystems
Start the application in 1C:Enterprise mode and look what you have now.
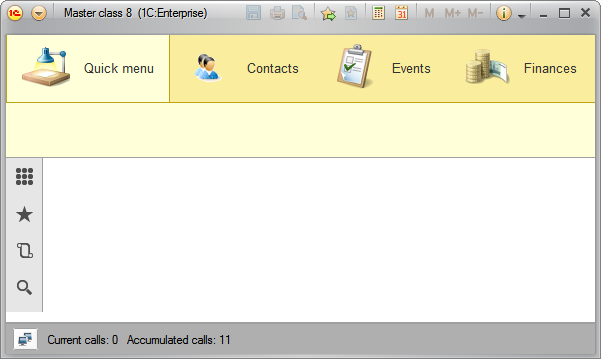
Figure 8-9. Subsystem icons in 1C:Enterprise mode
Next page: Adjusting the subsystem content