Now, when all required software has been installed, it is time to install Mobile application builder, which is included in the 1C:Enterprise mobile platform distribution package. You can find it in the \mobile\MobileAppBuilder directory. You can also start the installation using the link in the installation program.
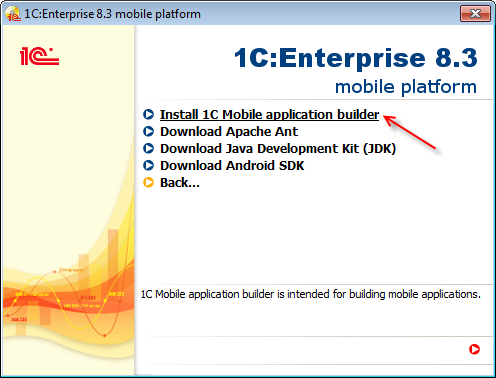
Figure 19-20. Installing the application
When the Mobile application builder is installed, start it in Designer mode to create a user with administrative rights.
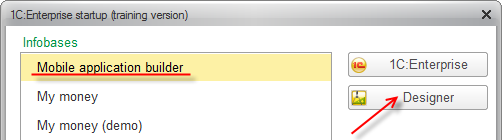
Figure 19-21. Starting the application in Designer mode
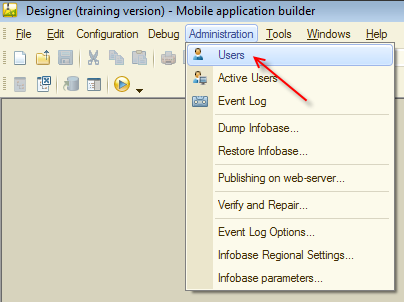
Figure 19-22. Opening the user management window
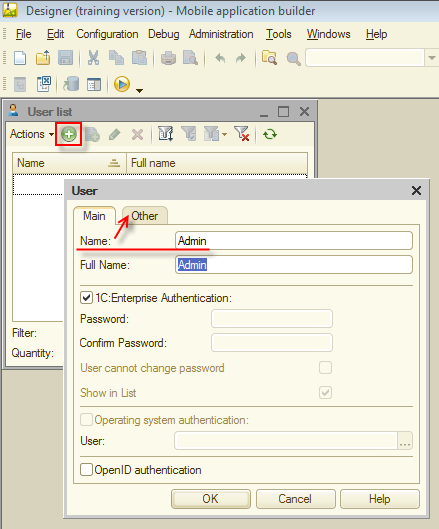
Figure 19-23. Creating a user
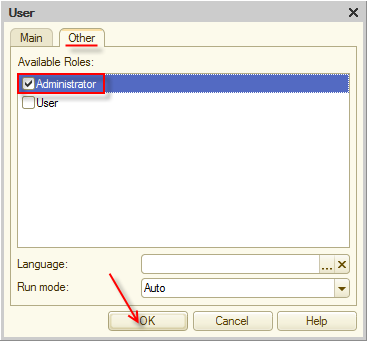
Figure 19-24. Administrative privileges
Once you create the user, exit Designer mode and start the application in 1C:Enterprise mode.
It is time to set up the application parameters. In the Tools menu, click Application settings.
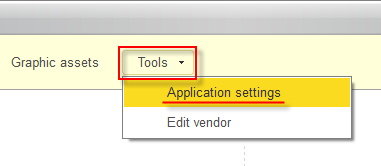
Figure 19-25. Application settings
In the Paths table, click Create and then type the paths to the installed components. Once you have typed all the paths, click Save and close.

Figure 19-26. Application component paths
There are two things that require explanation. Cache is a directory where temporary files are stored. The path you see in figure 19-26 (C:\mobile.1c\Cache) is just an example. You can use any path you want.
In the figure you also can see C:\mobile.1c as a PuTTY path. We do not use PuTTY in the example but Mobile application builder requires all the component paths to be filled, so just type any path.
Note. Most fields in the application have tooltips. To see a tooltip, click a field and press F1.
Proceed to the next step. In the Tools menu, click Edit vendor. Leave Description unchanged. Type the prefix.
Important. Each vendor must have its own Application ID prefix. The application ID is a Java package name, must comply with the rules of Java package naming.
Google also has a recommendation about package IDs:
"The name should be unique. The name may contain uppercase or lowercase letters ('A' through 'Z'), numbers, and underscores ('_'). However, individual package name parts may only start with letters.
To avoid conflicts with other developers, you should use Internet domain ownership as the basis for your package names (in reverse). For example, applications published by Google start with com.google. You should also never use the com.example namespace when publishing your applications."
Source: http://developer.android.com
Specify the platform for which you want to build your application. Select For Android.
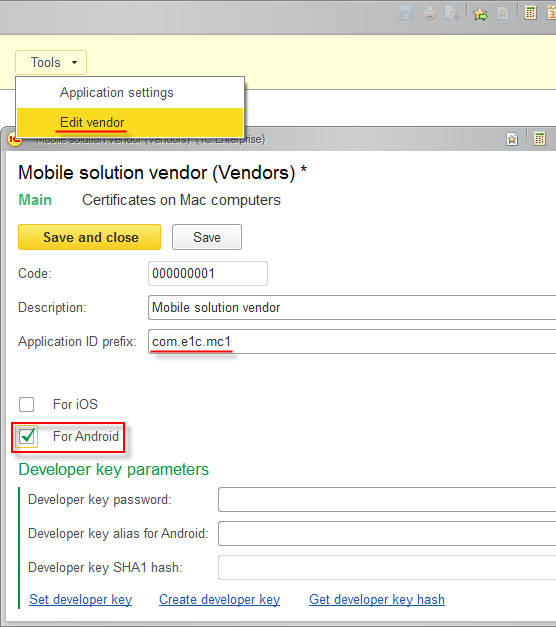
Figure 19-27. Editing vendor
Click Save to save the changes. Now it is time to create a developer key. The developer key is a unique set of parameters to distinguish you from other Android developers. Click Create developer key and fill the field. When the fields are filled, click Generate key.
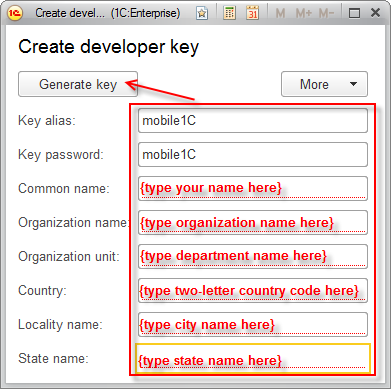
Figure 19-28. Creating developer key
During the key generation, you will see Command Prompt windows. Do not close them! Once the key is generated, the windows are closed automatically, and all Developer key parameters are updated.
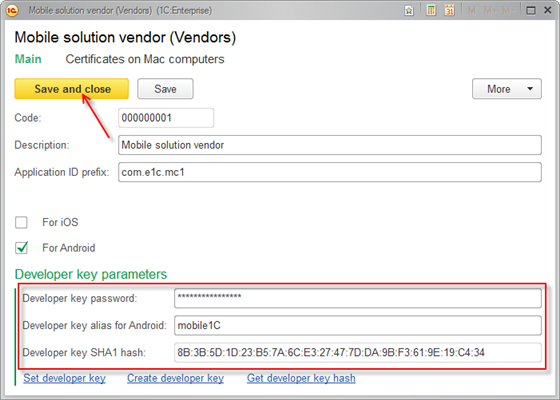
Figure 19-29. Developer key parameters
Click Save and close.
Now you can set up mobile application building parameters: the 1C mobile platform version and the path to graphic assets.
Graphic assets are a .zip archive that contains icons and splashes of the mobile application. Graphic assets for the tutorial are included. You can find them in the mobile\_mobile_icons.zip file.
Click Graphic assets and then click Create.
Fill Description and click Load graphic assets (in the Mobile application builder version 1.0.3.2 and later the link is named Import graphic assets).
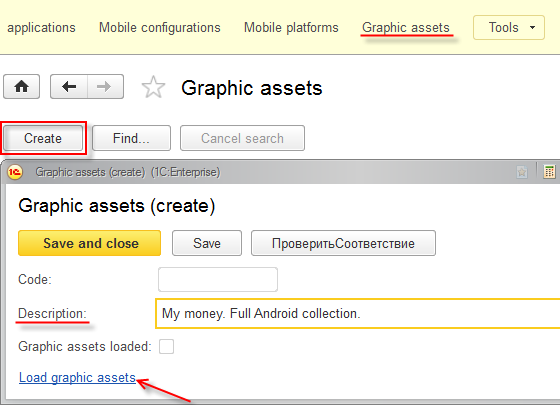
Figure 19-30. Loading graphic assets
Select the mobile\_mobile_icoms.zip file and check whether the assets have been loaded (Graphic assets loaded is selected). Click Save and close.
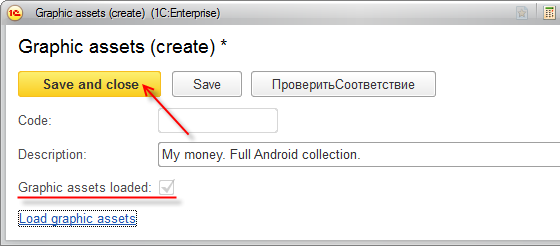
Figure 19-31. Graphic assets are loaded
The mobile platform is a .zip archive that contains a distribution package of the mobile platform on which the application will be run. You can find the mobile platform distribution package in the mobile\_mobile.zip file.
Click Mobile platform and then click Create.
Type the mobile platform version. If you use the platform included in the tutorial, the version is 8.3.4.17. Once you type the version and press Tab or Enter, the description is filled automatically.
Click Load the platform (in the Mobile application builder version 1.0.3.2 and later the link is named Import platform).
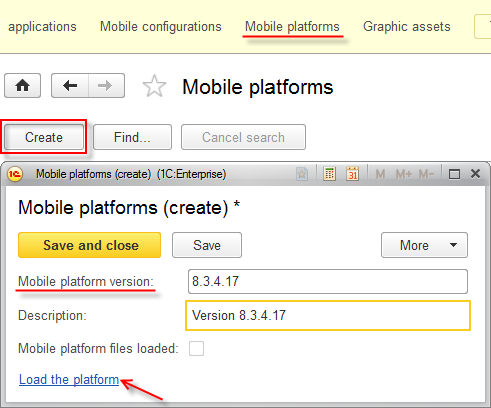
Figure 19-32. Loading the mobile platform
Select the mobile\_mobile.zip file and then check whether the platform has been loaded (the Mobile platform files loaded checkbox is selected). Click Save and close.
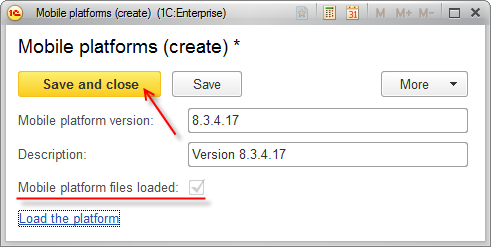
Figure 19-33. Mobile platform is loaded
Now, the most important step: adding the configuration of the mobile application.
Start the My money application in Designer mode and save the configuration to a file.
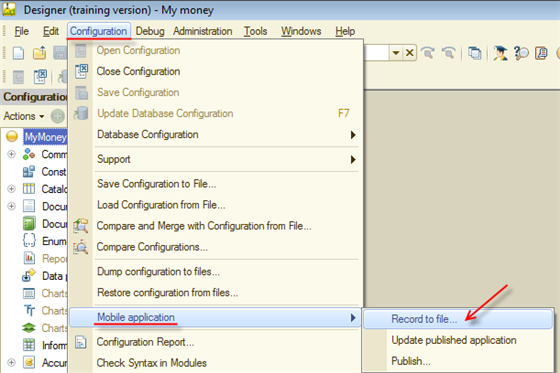
Figure 19-34. Saving the configuration to a file
Set the destination to C:\mobile.1c and the file name to 1cema.xml.
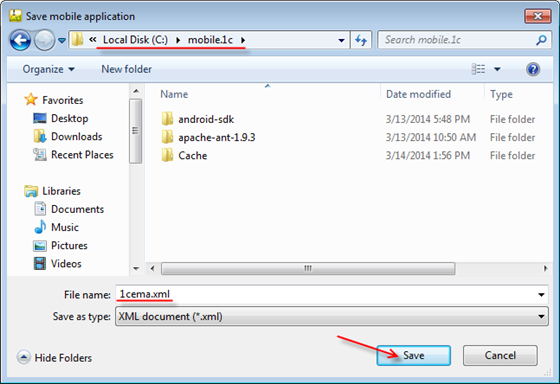
Figure 19-35. Saving the mobile application to a file
When the mobile application is saved to the file, you can close Designer.
In the Mobile application builder, click Mobile configurations and then click Create group. Name the configuration group, it is intended for storing all mobile application versions.
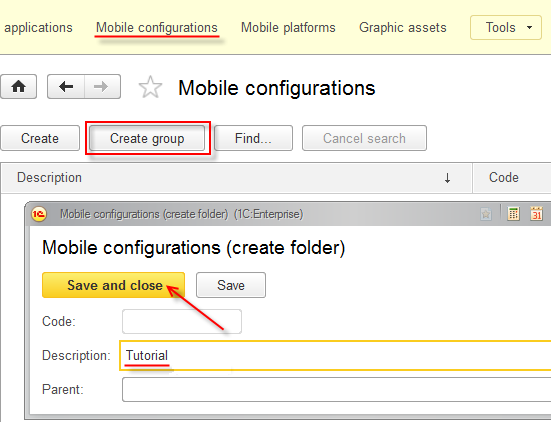
Figure 19-36. Mobile configuration group
Now add the file with the current mobile application version. Click Create and then click Load configuration (In the Mobile application builder version 1.0.3.2 and later the link is named Import configuration).
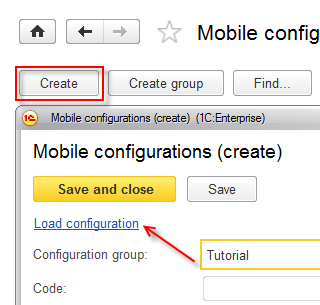
Figure 19-37. Mobile application version
Select the file you saved (C:\mobile.1c\1cema.xml). Once the application is loaded, Description, Configuration version, and Main configuration language are filled automatically based on the loaded configuration data. You can fill Comment. Click Save and close.
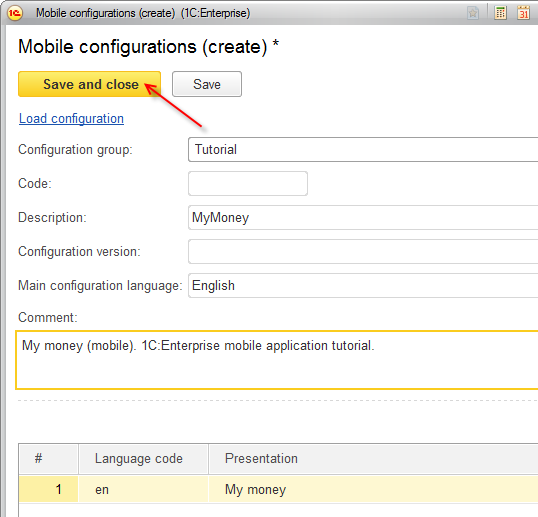
Figure 19-38. Mobile application version
Note. In figures 19-38 Configuration version is not filled because this field is not filled in the configuration.
Next page: Building the application