It is easy to see that the tables are not updated when you post a document. We have already explained the reason why it occurs. Naturally, the application restart is not the answer. It is time to improve the situation. There are many ways to do it. In the tutorial you will implement the one. Give users a tool to update the tables any time they want. In other words, supply the tables with update buttons.
Return to Designer and open the editor of the Desktop common form. If you look at the preview pane, you can see an automatically generated command bar above each table.
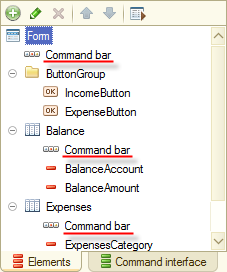
Figure 11-1. Command bars above the tables
If you check the properties of the command bars, you see that Autofill is selected. It means that the bar content is automatically filled based on the item type. This algorithm is convenient for both developers and users because the platform automatically updates the bar content once the item type is changed.
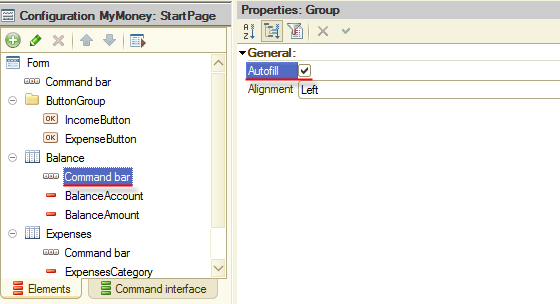
Figure 11-2. Command bar properties
Autofill is ok for you now but you need to add a button to the command bar of each table. Start with the Balance table.
Click Command bar of the Balance table and then click Add ![]() (Ins). Select the Button element type.
(Ins). Select the Button element type.
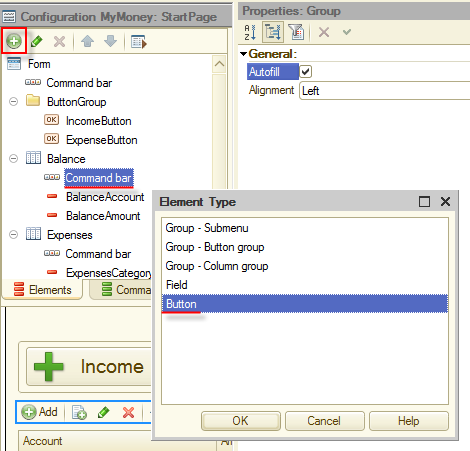
Figure 11-3. Adding a button to the command bar
For the created button (which is placed in the Command bar branch), type a name: BalanceRefresh.

Figure 11-4. New command bar button
Now it is time to create a command to be executed when the button is clicked. Here you will see that the way you attach the command to the button is different from the way you did it with IncomeButton and ExpenseButton.
There you used existing commands that create documents, that is why they were available in the Global commands tab. In the case of the BalanceRefresh button, there is no such command, you have to create it. It is easy to do. Click Commands and then click Add ![]() (Ins).
(Ins).
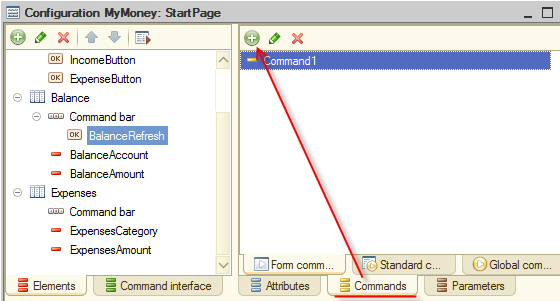
Figure 11-5. Adding a command
Type BalanceRefresh in the Name field in Properties.
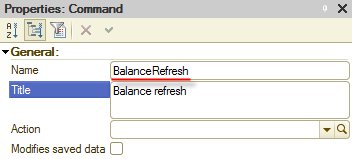
Figure 11-6. Name of the command
After that, select the on-click action for the button. There is no action specified, so click Open ![]() (Ctrl+Shift+F4) to add a new one.
(Ctrl+Shift+F4) to add a new one.
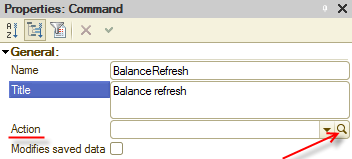
Figure 11-7. Action of the command
The platform prompts you to select where the command handler must be created. Select Create on client and then click OK.
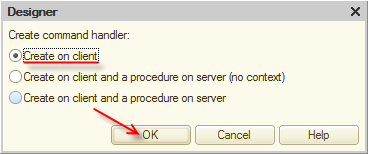
Figure 11-8. Creating a handler
Once you click OK, the form module with the BalanceRefresh() handler is opened.
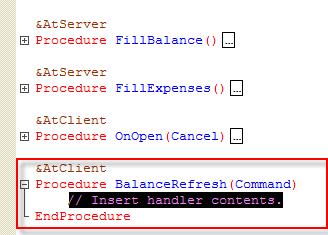
Figure 11-9. New handler in the form module
This is the handler to be executed when a user clicks the button. It has to implement a simple procedure: updating the table data. Use the existing FillBalance() procedure. Type it name in the BalanceRefresh() handler and do not forget to close the line with a semicolon (;).
As a result, the procedure looks as in figure 11-10.
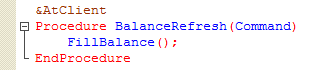
Figure 11-10. BalanceRefresh() procedure script.
Now, set the BalanceRefresh command for the BalanceRefresh form button. In the form editor, right-click the button and then click Properties. Click the Select ![]() button of the Command field, then on the Form command tab click BalanceRefresh, and then click OK.
button of the Command field, then on the Form command tab click BalanceRefresh, and then click OK.

Figure 11-11. Specifying the button command
As a finishing stroke, set the button picture. There is a standard picture for update buttons, use it.
In Properties, click the Select ![]() button of the Picture field.
button of the Picture field.
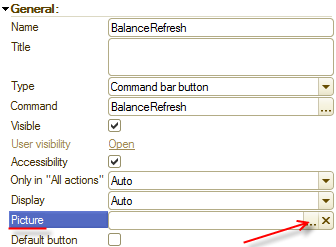
Figure 11-12. Selecting a picture
In the Select picture window, click Standard, find the Refresh picture (you can start typing it name), click it, and then click OK.
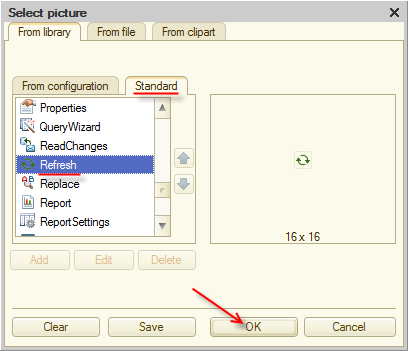
Figure 11-13. Selecting the standard picture
Let us take a look at the new button in 1C:Enterprise mode. Create the Expense document that records a transfer of 10 from Bank account to Cash.
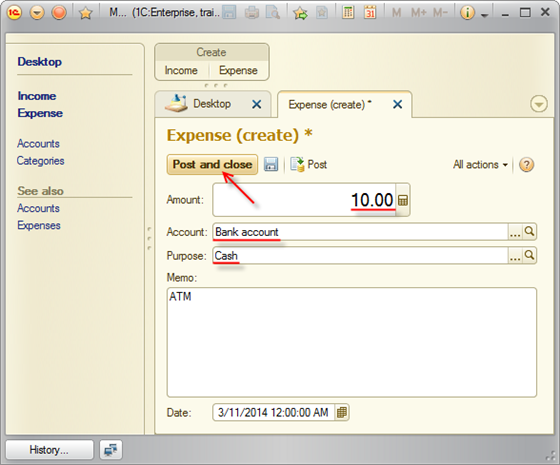
Figure 11-14. Posting a transfer
Close the document and click BalanceRefresh ![]() . The balance has been updated.
. The balance has been updated.

Figure 11-15. Actual balance
Now create a similar button for the Expenses table.
Return to the form editor in Designer. Add a button to the Expenses table command bar.
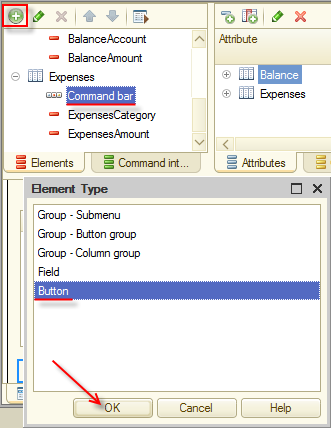
Figure 11-16. Adding a button
Name it ExpensesRefresh.

Figure 11-17. Button properties
Create the ExpensesRefresh form command on client.
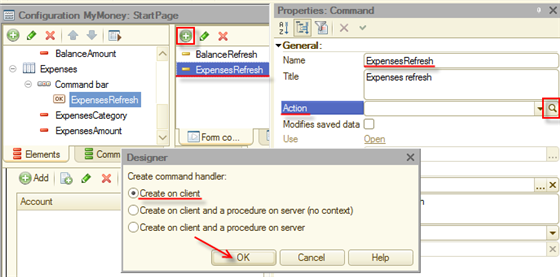
Figure 11-18. New form command
Type the FillExpenses(); call in the command handler as shown in figure 11-19.
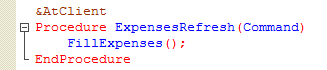
Figure 11-19. ExpensesRefresh() script
Associate ExpensesButton and the ExpensesRefresh command.
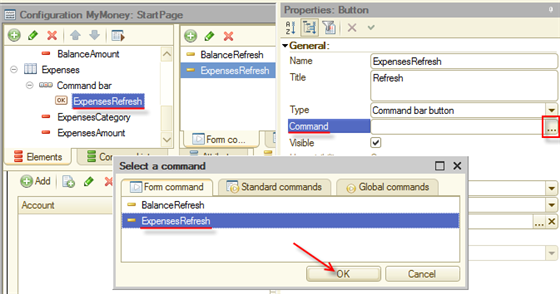
Figure 11-20. Associating the button and the command
Set the standard refresh picture.
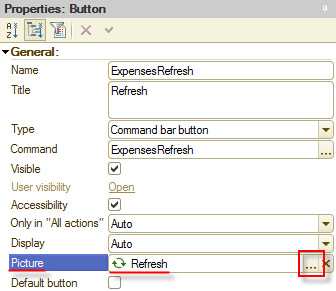
Figure 11-21. Selecting the standard picture
Note. You can find the Desktop form module in the Desktop form module.txt file.
Let us check the button in 1C:Enterprise mode. Create the Expense document that records the expense of 1.50 for Dinner.
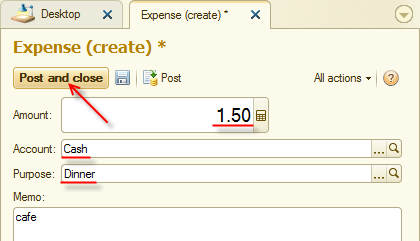
Figure 11-22. Recording the expense
Close the document and click ExpensesRefresh ![]() . The table data is updated.
. The table data is updated.
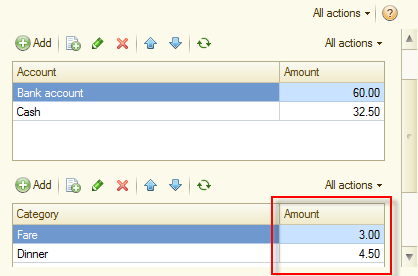
Figure 11-23. Updated expense
So, you improved application usability. Users have two buttons that help to record their activities quickly. In addition, they can see actual balance and expenses.
On the whole, the application became handier, especially on mobile devices.
Next page: Final interface tuning