There are a few strokes left to add to exclude the things that users do not need and emphasize the most important ones.
First, set the view-only mode for both desktop tables. This mode does not affect automatic table filling but prevents changing and deleting table data by a user.
For each table on the form in the property palette select View only.
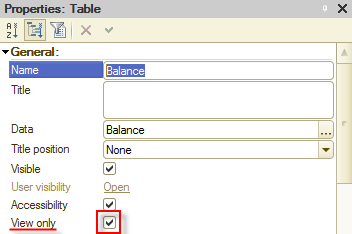
Figure 12-1. Selecting View only
Start the application in 1C:Enterprise mode and check the result. All the command bar buttons that are associated with data changing are disabled, but the update buttons are still enabled and function as required.
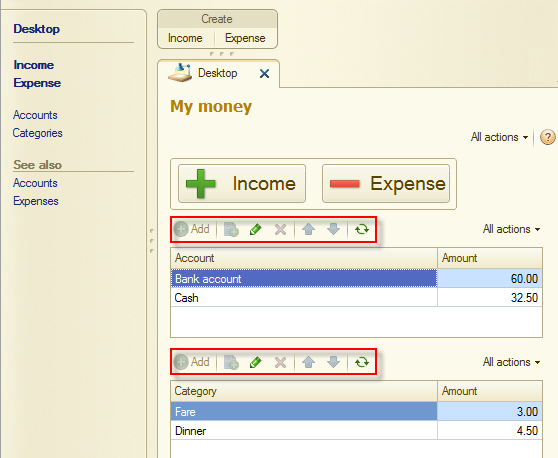
Figure 12-2. Disabled buttons
Return to Designer. Add the table names to the desktop, to make users could what is in the tables without tooltips. Also, set the height of the tables equal to 5 so that users can see both tables on the screen without using a scroll bar.
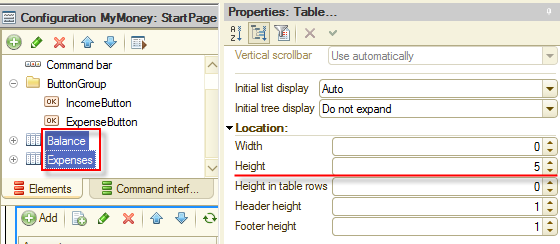
Figure 12-3. Table height
For the Balance table, in the property palette, type the Title: Money balance. Set Title position to Top.

Figure 12-4. Balance table properties
For the Expenses table, in the property palette, type the Title: Expenses by categories. Set Title position to Top.
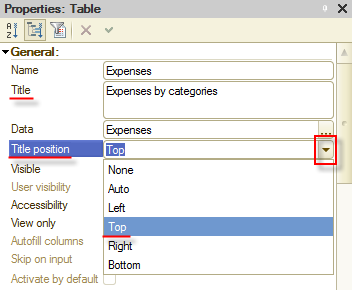
Figure 12-5. Expenses table properties
Now, set up the table fields. You want them to be easily readable on mobile device screens.
In the property palette of the BalanceAccount field of the Balance table, type Account in the Title field. Set Width to 10.
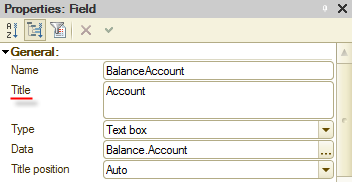
Figure 12-6. BalanceAccount field properties
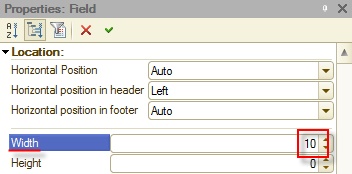
Figure 12-7. BalanceAccount field properties
For the BalanceAmount, type Amount as a Title. Set Horizontal Position to Left.

Figure 12-8. BalanceAmount field properties
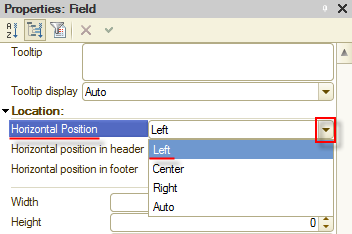
Figure 12-9. BalanceAmount field properties
In the property palette of the ExpensesCategory field of the Expenses table, type Category in the Title field. Set Width to 10.
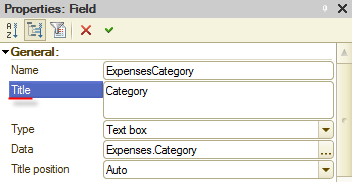
Figure 12-10. ExpensesCategory field properties
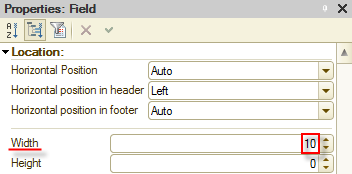
Figure 12-11. ExpensesCategory field properties
For ExpensesAmount, type Amount as a Title. Set Horizontal Position to Left.
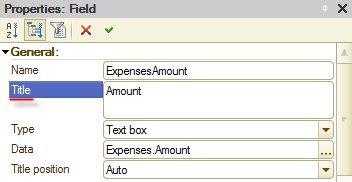
Figure 12-12. ExpensesAmount field properties
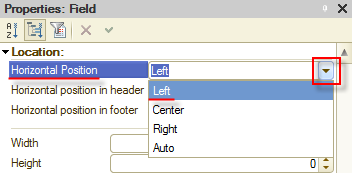
Figure 12-13. ExpensesAmount field properties
Start the application in 1C:Enterprise mode. Check that the items you have just set up are displayed correctly. The tables have titles, column names match their content, and the form is easily readable even on a small screen.
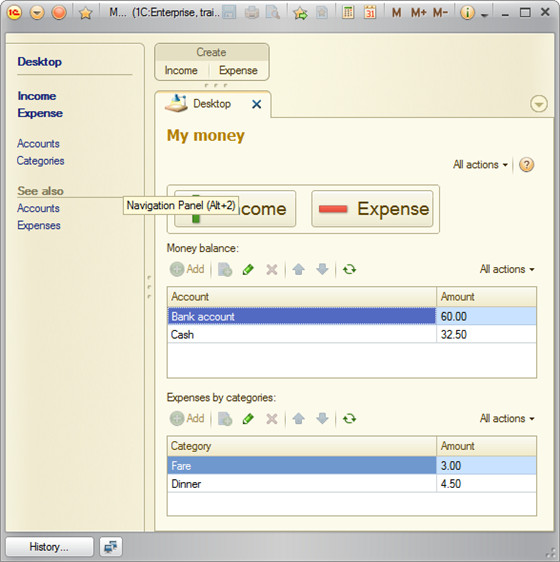
Figure 12-14. Final application appearance
You can record a few more documents and check whether the application responds exactly as you expected.
That is all. Your application is ready. Of course, it is far from a real cash flow recording application, but the tutorial goal is achieved. You can improve your application functionality. In the Homework section of the tutorial, you will find three examples of the application improvement.