Let us create the document.
- In Designer, create a Document object named EmployeeAccruals.
- In the Object presentation field, enter Employee accrual.
- On the Numbering tab, set the number type to Number, and set the number length to 5 (fig. 18.1).
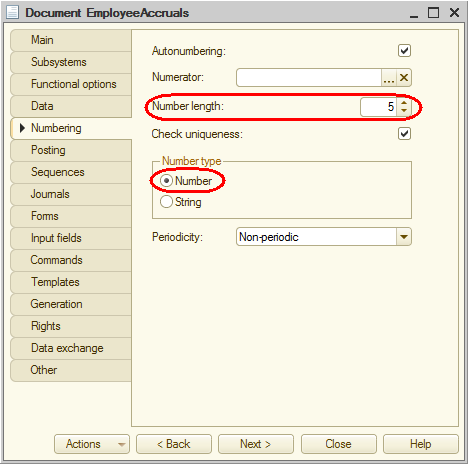
Fig. 18.1. Document numbering - On the Subsystems tab, specify that the document is displayed in the Payroll subsystem.
- On the Data tab, add a tabular section named Accruals with the following attributes:
- Employee. Type: CatalogRef.Employees
- WorkSchedule. Type: CatalogRef.WorkScheduleTypes
- StartDate. Type: Date
- EndDate. Type: Date
- CalculationType. Type: ChartOfCalculationTypesRef.MainAccruals
- Accrual. Type: Number, length: 15, precision: 2
- On the Posting tab, prohibit real-time posting.
- Specify that the document creates records in the Accruals calculation register and run the register records wizard (fig. 18.2).
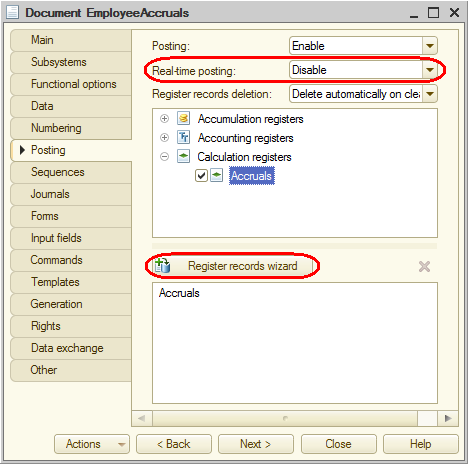
Fig. 18.2. Document register records - In the wizard, select the Accruals tabular section and then click Fill Expressions.
- For the EndOfActionPeriod and EndOfBasePeriod attributes, specify the following expression: EndOfDay(CurRowAccruals.EndDate).
- For the RegistrationPeriod field, specify the following expression: Date.
- For the SourceData attribute, specify the Accrual tabular section attribute.
- For the Result resource, leave the expression field empty (fig. 18.3).
You will calculate this expression later.
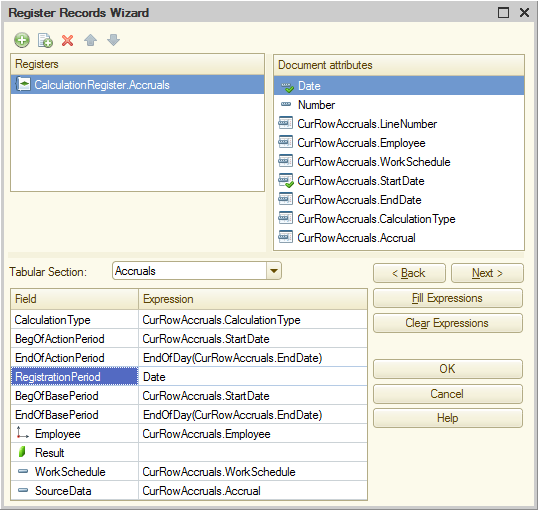
Fig. 18.3. EmployeeAccruals document records in the calculation register - Click OK and review the handler script generated by the wizard (listing 18.1).
Listing 18.1. Handler script generated by the register records wizard
Procedure Posting(Cancel, Mode) //{{__REGISTER_REGISTERRECORDS_WIZARD // This fragment was built by the wizard. // Warning! All manually made changes will be lost next time you use the wizard.// register Accruals RegisterRecords.Accruals.Write = True; For Each CurRowAccruals In Accruals Do Record = RegisterRecords.Accruals.Add(); Record.ReversingEntry = False; Record.CalculationType = CurRowAccruals.CalculationType; Record.BegOfActionPeriod = CurRowAccruals.StartDate; Record.EndOfActionPeriod = EndOfDay(CurRowAccruals.EndDate); Record.RegistrationPeriod = Date; Record.BegOfBasePeriod = CurRowAccruals.StartDate; Record.EndOfBasePeriod = EndOfDay(CurRowAccruals.EndDate); Record.Employee = CurRowAccruals.Employee; Record.WorkSchedule = CurRowAccruals.WorkSchedule; Record.SourceData = CurRowAccruals.Accrual; EndDo; //}}__REGISTER_REGISTERRECORDS_WIZARDEndProcedure
Let us review this script.
In general, it does not have any major differences with other event handlers that create register records.
The only thing we will remind you here is that Accruals is the name of the calculation register so the expressions RegisterRecords.Accruals.Write() and RegisterRecords.Accruals.Add() are intended to call the methods of the register record set.
The line For Each CurRowAccruals In Accruals Do calls the document tabular section by its name (Accruals) and iterates through this tabular section.
The script inside the loop adds a register record and assigns values taken from the document tabular section to the record fields.
The EndOfDay() function is used to assign values to the EndOfActionPeriod and EndOfBasePeriod fields. You did the same thing when you created reports in order to include the last day of a period to a report.
Finally, let us edit the command interface to make the document creation command available in the Payroll section.
- In the configuration tree, right-click the Payroll subsystem and then click Open command interface.
- In the Actions panel.create group, select the check box next to the Employee accrual: create command (fig. 18.4).
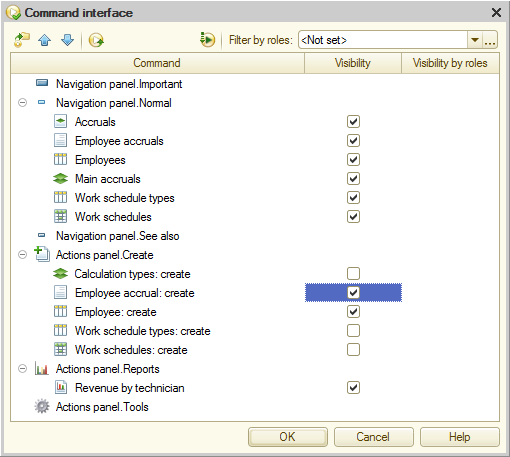
Fig. 18.4. Editing subsystem command interface