Depending on the actions you want to perform on a catalog, you might need to display the catalog in various views. For example, selecting a catalog item is easier when you view the catalog as a list, while modifying a catalog item is easier when you have all of the catalog item attributes in a single form (fig. 3.9).
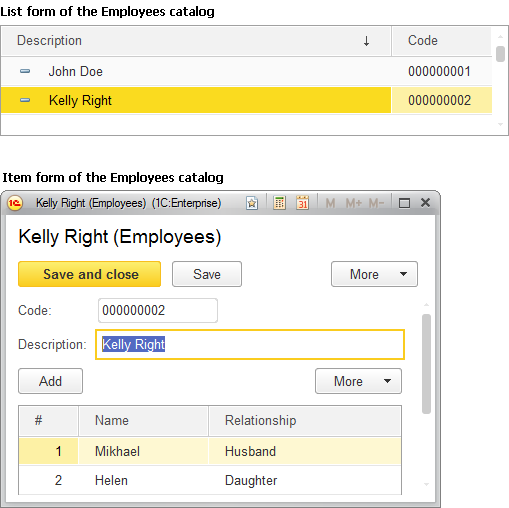
Fig. 3.9. List form and item form of the Employees catalog
All of the forms that you need to view catalog data can be generated automatically. The platform automatically selects the required form.
Catalogs have five form types for displaying their data in various scenarios. Note that a single form can have slightly different names in various Designer windows (table 3.1). The table below lists the form name differences:
- in the catalog pop-up menu, in the configuration tree, and in the catalog property palette,
- in the form wizard,
- on the Forms tab of the catalog editor.
Table 3.1. Catalog forms
| In the pop-up menu and in the property palette (fig. 3.12) | In the form wizard (fig. 3.11) | On the Forms tab (fig. 3.10) |
| Default Object Form | Catalog item form | Item |
| Default Folder Form | Catalog folder form | Group |
| Default List Form | Catalog list form | List |
| Default Choice Form | Catalog choice form | Choice |
| Main group selection form | Catalog folder choice form | Group choice |
This is because configuration object property names are displayed in the pop-up menu and in the property palette. They are the same for all configuration objects. At the same time the form wizard and the Forms tab display property names that are clear to developers. So they vary for different configuration objects (fig. 3.10, 3.11, 3.12).
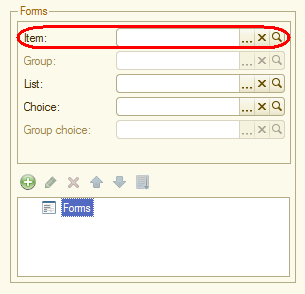
Fig. 3.10. Catalog form names on the Forms tab

Fig. 3.11. Catalog form names in the Form wizard
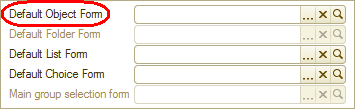
Fig. 3.12. Catalog form names in the property palette
An item form is used to create or edit a catalog item.
A group form is used to create or edit a catalog group. A group normally contains much less information than a regular catalog item, so it requires a separate form that is different from the item form (fig. 3.13).

Fig. 3.13. An item form and a group form of a catalog
A list form is used to display a list of catalog items.
A choice form is used to select one of the catalog items in a form field. The choice form is simpler than the list form because a list form can display a lot of attributes. And when you select an item (for example, in a document), you only need to know its name. That is why a separate simpler form is available for item selection (fig. 3.14).
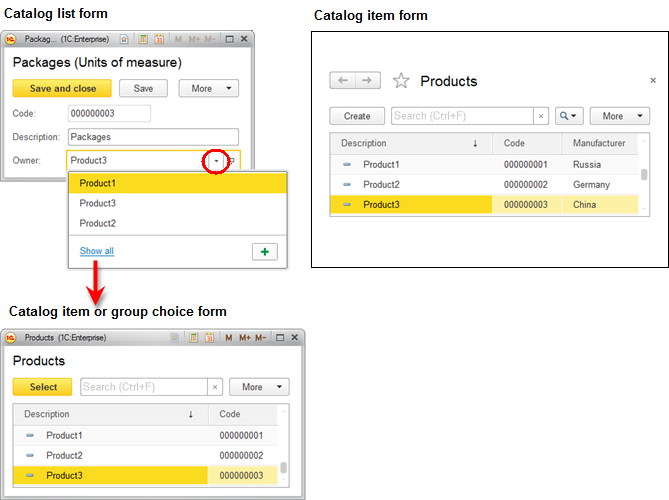
Fig. 3.14. A choice form and a list form of a catalog
A group selection form is used to select one of the catalog groups instead of an item in a form field. A group selection form is simpler than an item choice form because a group normally contains much less data than a catalog item.
Object forms are available for all referential configuration objects (catalogs, documents, and so on) but note that when we mention an object we refer to an infobase object (i.e. one of the items described by this object). For a catalog, it is a catalog item; for a document, it is a document; for a chart of accounts, it is an account, and so on.
You can define forms in Designer. A subordinate Form object is available for this (fig. 3.15).
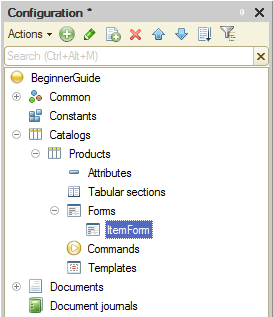
Fig. 3.15. A catalog item form in Designer
As a rule, the Form configuration object is subordinate to one of the applied objects, but it can also exist independently.
Whenever needed, the 1C:Enterprise platform uses the definition stored in the Form configuration object to create the Form script object, and the user will work with this script object.
Hence, forms serve as visual presentations of data stored in the database. Forms present this data in a user-friendly format and provide options for defining algorithms that will assist users in working with the displayed data.
Learn more! For details on the structure of 1C:Enterprise script objects intended for catalog operations, see section Quick developer reference. Catalogs.
Next page: Simple catalogs