You should have no problem installing 1C:Enterprise. For installation details, see 1C:Enterprise Administrator Guide.
You should also have no trouble with running the platform and creating an infobase with an empty configuration, which is described later in this section.
Important! To create the example described in this book, you need an infobase intended to develop a new configuration, rather than an infobase created from a template. Let us create that infobase.
- Run 1C:Enterprise.
The 1C:Enterprise startup window displays the list of available infobases. - If the list is empty, the platform prompts you to create an infobase.
-OR-
If the list is not empty, click Add to create an infobase (fig. 1.2).
The list might not be empty if you installed a configuration earlier (for example, a demo configuration delivered with this book).
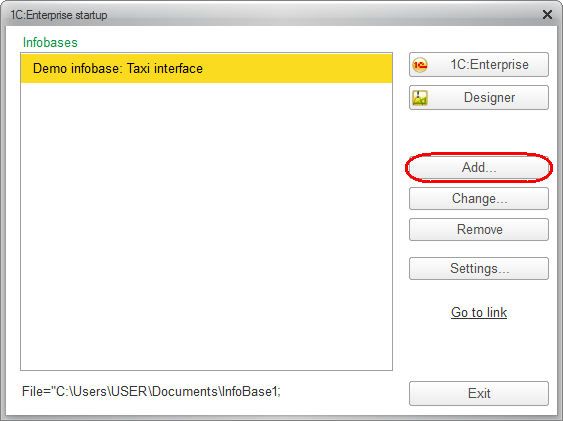
Fig. 1.2. Creating an infobase, step 1 - In the Add infobase/group window, click Create infobase (fig. 1.3).
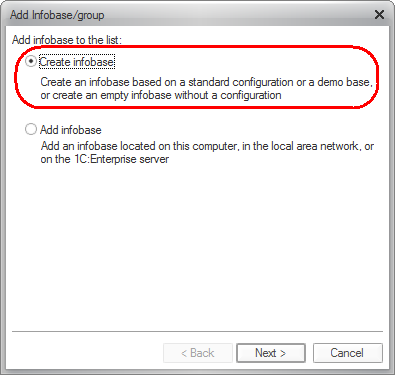
Fig. 1.3. Creating an infobase, step 2 - Click Next, then click Create an infobase without a configuration... (fig. 1.4).
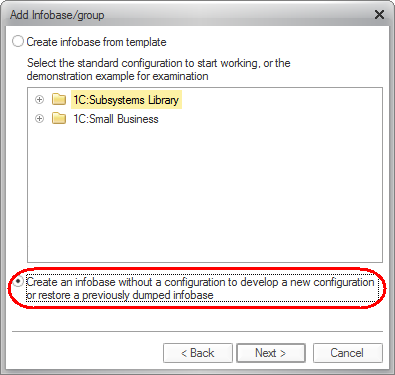
Fig. 1.4. Creating an infobase, step 3 - Click Next, type the infobase name, and click This computer or LAN computer for its location type (fig. 1.5).
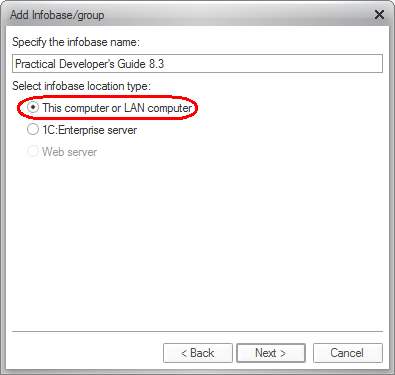
Fig. 1.5. Creating an infobase, step 4 - Click Next and specify the infobase directory. Ensure that English is the default language (fig. 1.6).
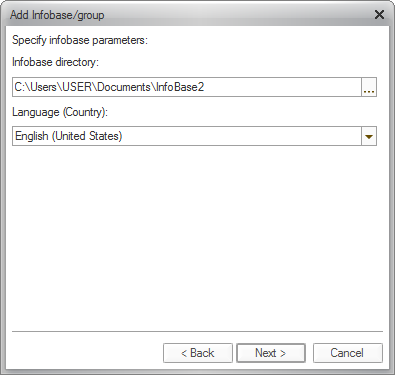
Fig. 1.6. Creating an infobase, step 5 - Click Next, then click Finish (fig. 1.7).
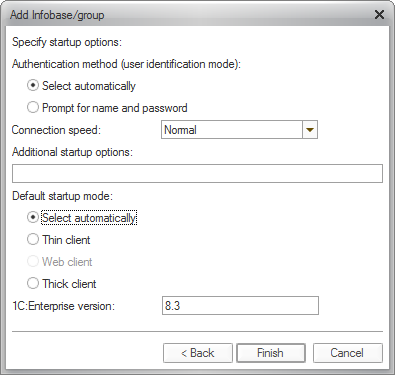
Fig. 1.7. Creating an infobase, step 6
The empty infobase that you created is now added to the list of infobases in the 1C:Enterprise startup window (fig. 1.8).
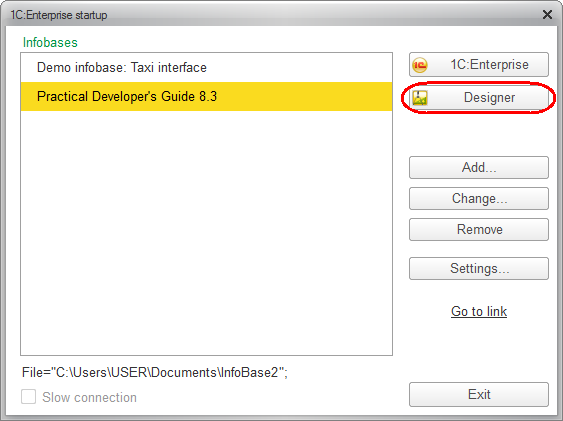
Fig. 1.8. Starting 1C:Enterprise in Designer mode
Next page: In Designer mode