Let us create the subsystems.
- Close the application and return to Designer.
- In the configuration object tree, expand the Common branch by clicking the
 icon to the left of the branch name.
 - Right-click the Subsystems branch and then click Add.
-OR-
In the command bar of the configuration window, click the Add button (fig. 2.3).
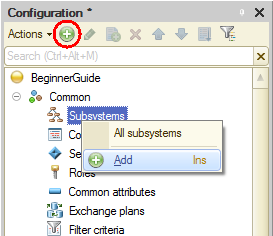
Fig. 2.3. Adding a subsystem to the configuration object tree
This opens the configuration object editor window. The editor provides step-by-step guidance for quick creation of complex configuration objects.
The Next and Back buttons in the bottom part of the editor guide you through the steps. When you move through the wizard pages by clicking Next, you set object properties in the right order (so that you do not skip over to a location where data from a previous step is needed). If you find that you missed something or entered incorrect data, use the Back button.
You can also move between the pages by clicking the tabs (for example, you can fill the object properties on the Data tab). When you open the configuration object editor window, the Main tab is selected.
Note. You might want to open the configuration object editor window later for editing object properties. To open the configuration object editor window, in the configuration object tree, select an object and then, in the configuration window command bar, click the Change current item button , or select the object and press F2, or double-click the object.
 - In the Name field, enter Accounting.
The platform automatically generates the Accounting synonym based on the name (fig. 2.4).
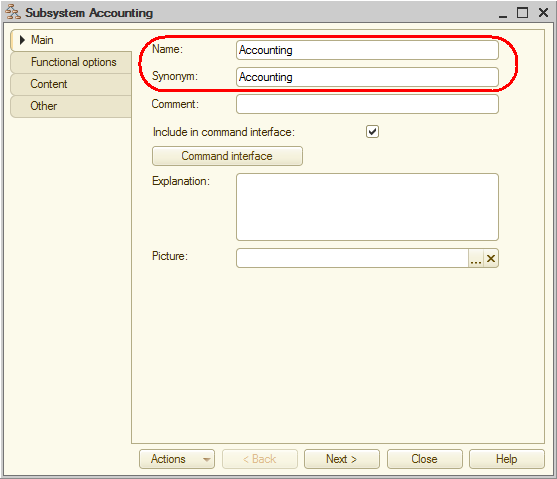
Fig. 2.4. Defining subsystem name and synonym