Let us check the report.
- Start 1C:Enterprise in the debug mode and open the report.
- On the More menu, click Settings.
The user report settings window now includes the Filter and Conditional Appearance settings that you have just implemented (fig. 13.51).
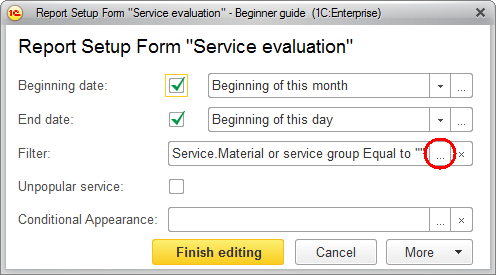
Fig. 13.51. User settings window
Actually, there are two conditional appearance settings in this window.
The first one is the Unpopular service setting that you implemented in Designer. And now that you have added a setting for general conditional appearance, you provided the user with the option to create any number of their own conditions for conditional appearance, just like you have done it in Designer. We will skip it now but you can try it yourself.
Let us specify the report filter to display only services related to washing machine installation. - In the user settings window, in the Filter field, click the Select
 button (see fig. 13.51).
In the Edit filter window that is opened you can see the filter condition that you created earlier in Designer. - In the Value cell, click the Select from list
 button, start typing Washing machines, and select the Washing machines item from the drop-down list (fig. 13.52).
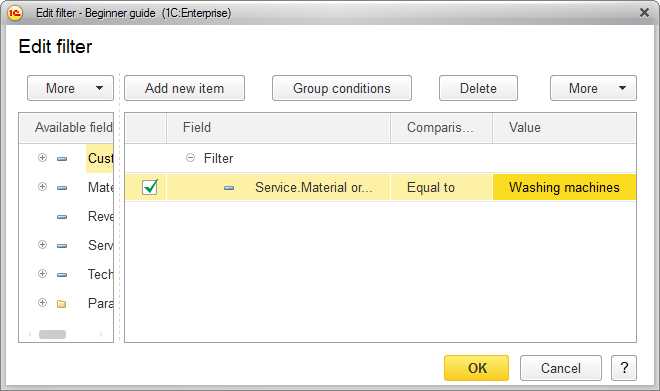
Fig. 13.52. Specifying filter settings - Click OK.
You have defined a filter to display only services that have the Washing machines group of the Materials and services catalog as their parent. - In the user settings window, click Finish editing and then click Create to run the report (fig. 13.53).
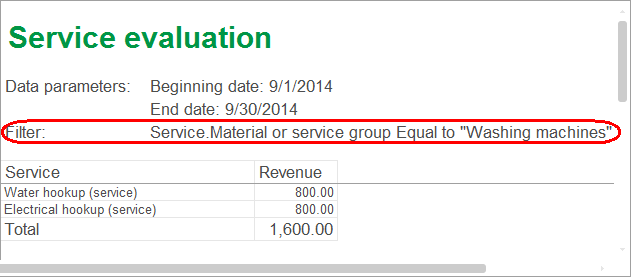
Fig. 13.53. Report execution result
You can see that the report lists only services related to washing machine installation and the report header includes the filter description.
When you close the report, the user settings are saved and they become the default report settings for the current user.
In the user settings window you can clear the filter by clicking the Clear ![]() button, or you can create another condition by clicking the Select button in the Filter field (fig. 13.54).
button, or you can create another condition by clicking the Select button in the Filter field (fig. 13.54).
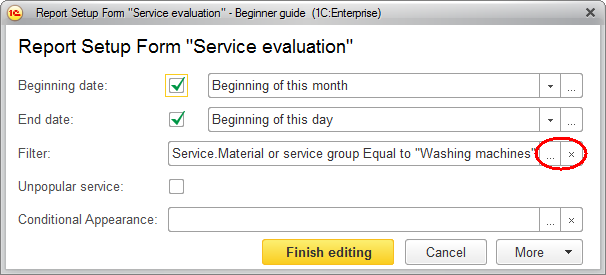
Fig. 13.54. User settings window
So advanced users can customize a lot of settings. And if the users do not need this or do not have required skills, it is better to specify the settings explicitly, so that they can only enable or disable them.
In fact, often the users need just the report period and maybe a few other important settings, and such settings should be obviously located directly in the report form.
If the user priorities of settings usage are different from those implemented by the developer in the data composition schema, users can customize the settings by clicking Change settings assortment on the More menu (fig. 13.55).
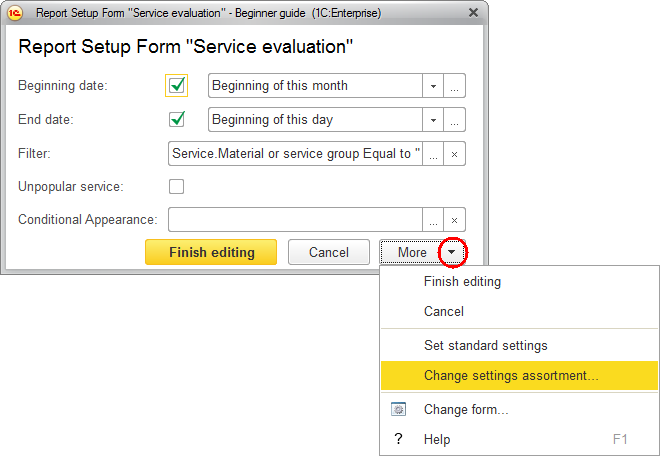
Fig. 13.55. User settings of a report in 1C:Enterprise mode
In the Settings content window that is opened, a user can specify which settings are edited in the report form as quick settings (the list on the right) and which settings are available by clicking Settings on the More menu (the list on the left). They can use the Add and Remove buttons, as well as double-click the list items to move them between the lists.
- Move the filter setting to the quick settings list (fig. 13.56).
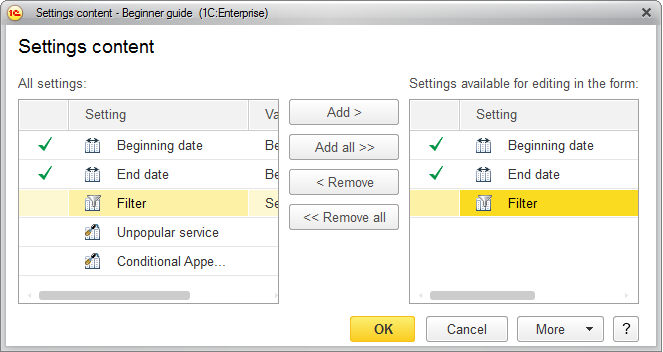
Fig. 13.56. Customizing the settings in 1C:Enterprise mode
The filter setting is now available directly in the report form. - Remove the filter setting from the report window, return to Designer, and clear the usage check box for the filter condition.
You will need this in the next examples.