Let us create a custom document form.
- In Designer, open the editor of the GoodsReceipt document configuration object.
- Click the Forms tab.
As you can see, no default forms are available yet. - In the Document field, click the Open button
 .
.
-OR-
Click the Add button above the list of forms (fig. 4.17).
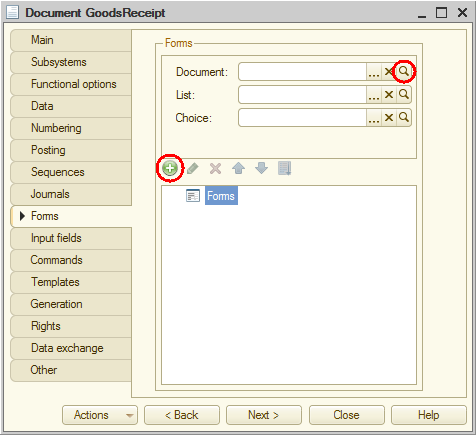
Fig. 4.17. Creating a document form
The platform opens yet another helpful developer tool: the form wizard (fig. 4.18).
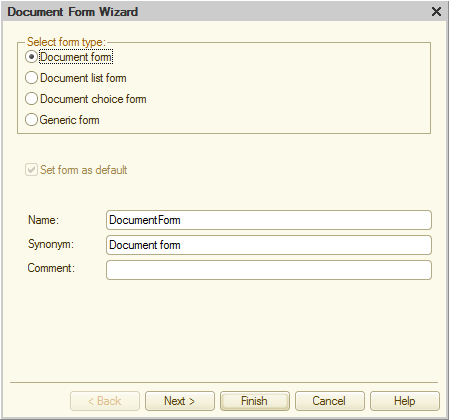
Fig. 4.18. The form wizard
It is a typical wizard where you enter data in a specific order and use the Next and Back buttons for navigation. - Click Document form, keep the default values in all other fields, and click Finish (see fig. 4.18).
Note that the DocumentForm form subordinate object is added to the GoodsReceipt document configuration object (fig. 4.19), and that the form editor displaying this form is now open (fig. 4.20).
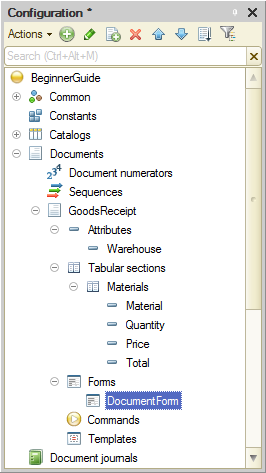
Fig. 4.19. New document form in Designer
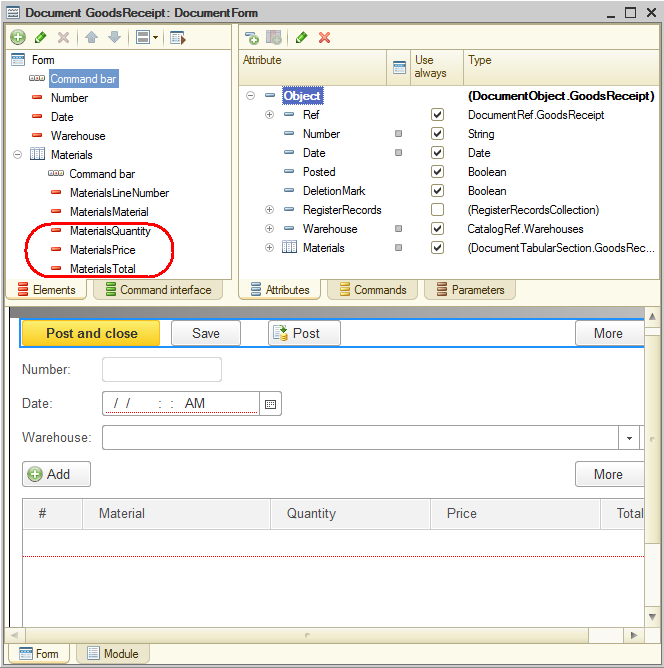
Fig. 4.20. Form editor
The form editor combines multiple windows of interconnected editors. We will not discuss all of the actions available in the form editor and will only cover the issues that are required to complete the basic operations related to our task.
For a detailed description of the form editor, see the "Form Editor" section in the "Development Tools" chapter of 1C:Enterprise. Developer Guide.
For now, we will only discuss the document form preview pane (located at the bottom) and the form controls editor pane (in the top left corner).
When you develop configuration object forms, you cannot simply draw a form. You only can specify the form controls, which are automatically arranged within the form.
Form controls in the upper left pane are arranged in a tree. The controls are arranged top-to-bottom and left-to-right within the form, with higher-priority items going first.
You can edit the tree on the Elements tab. This is how you can edit the form layout.
You see that based on the configuration description of the GoodsReceipt document the platform created a structure of controls that defines the form layout.
These controls serve various purposes and have different behaviors. However, all of them display data stored in the database and provide interaction with that data.
You can drag the tree items to change the positions of form controls (such as tabular section attributes). The result is immediately displayed in the document form preview at the bottom of the form editor. Note that you do not have to think of specific locations (in pixels) for the form controls, their sizes, and dockings to other controls. The platform takes care of this.
You can use the property palette to modify control properties, which can affect their view in the form. You can also modify the structure of form controls: create a field, a group of fields, or a tabular section, and link these controls to form data.
But for now, you do not have to do any of this. You only need to focus on the tabular section items: MaterialsQuantity, MaterialsPrice, and MaterialsTotal (see fig. 4.20).
Every time a user changes a value in the Quantity or Price field, the Total field value should automatically change to Quantity*Price.
Obviously, to do so you have to use 1C:Enterprise script to write a command that executes something like Total = Quantity*Price when a value in the Quantity or Price field is changed. But how are we going to "capture" that point of change?
Next page: Event handler