Let us create the first scheduled job, which updates the index.
- In the Common branch of the configuration object tree, click Scheduled jobs and add a scheduled job object named UpdateIndex (fig. 20.1).
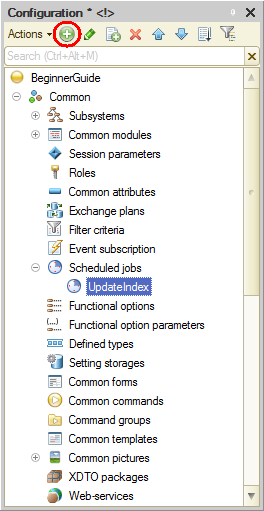
Fig. 20.1. Creating a scheduled job
Let us create a procedure that will update the full-text index of the Infobase.
Any procedure or function of a nonglobal common module can serve this goal, provided that it can be called on the server (the common module should have the Server property set). - Add a common module named ScheduleProcedures to the configuration, and then, in the module properties, select the Server call checkbox.
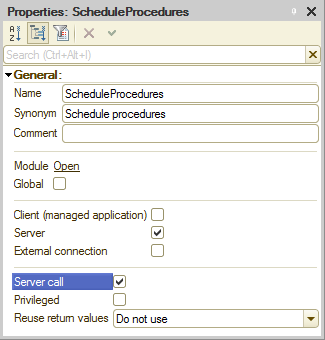
Fig. 20.2. Common module properties
This is required to make its export procedures and functions available for calling (fig. 20.2). - In the property palette of the UpdateIndex scheduled job, for the Method name property, click the Open
 button.
This opens the common module selection window (fig. 20.3).
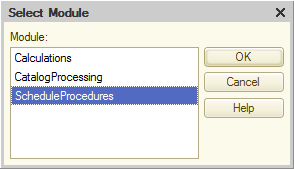
Fig. 20.3. Selecting an event handler - Select the ScheduleProcedures module.
This creates the UpdateIndex() procedure template in the module. - Populate the template as shown in listing 20.1.
Listing 20.1. UpdateIndex() procedure
If FullTextSearch.GetFullTextSearchMode() = FullTextSearchMode.Enable Then
    If Not FullTextSearch.IndexTrue()Then
        FullTextSearch.UpdateIndex( , True);
    EndIf;
EndIf;
First, this procedure checks whether full-text search operations are allowed (as they can be prohibited, for example, interactively, see fig. 19.4).
If full-text search operations are allowed, the procedure checks whether the full-text index is up-to-date (if after the last indexing the data to be included in the full-text indexing has not been changed, the index is still up-to-date and new indexing is not required).
If indexing is required, the procedure calls the UpdateIndex() method of the full-text search manager.
The first method parameter determines whether the indexes should be merged. Its default value is False, this means that the indexes are not merged.
The second parameter defines the volume of data to be indexed: either the entire data volume or batches. Your goal is to make the indexing as fast as possible, so you specify that the indexing is performed in batches (the True value).
The batch size is fixed to 10 000 objects. So if you need to index 15 000 objects, the first method call indexes the first 10 000 objects (the first batch), while the second method call indexes the remaining objects (during the next run of the scheduled job).
Let us proceed to creating a schedule for the scheduled job execution. - In the scheduled job property palette, for the Schedule property, click the Open link.
This opens the schedule editor (fig. 20.4).
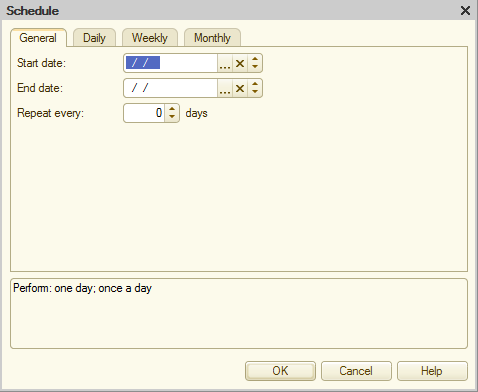
Fig. 20.4. Schedule editor
This dialog box includes multiple tabs to define various schedule types. The bottom of the dialog box displays the full schedule description.
Your goal is to set up the following schedule: daily, every minute. - On the General tab, specify that the job is repeated daily (fig. 20.5).
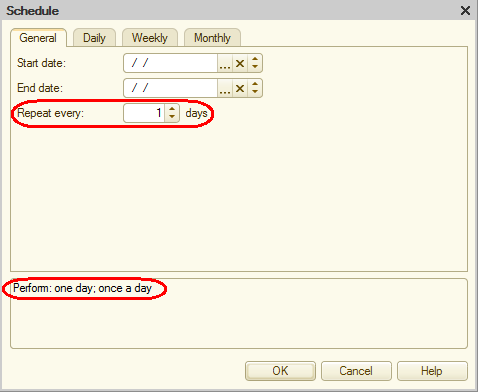
Fig. 20.5. Job schedule: daily - On the Daily tab, specify that the job is executed every 60 seconds (fig. 20.6).
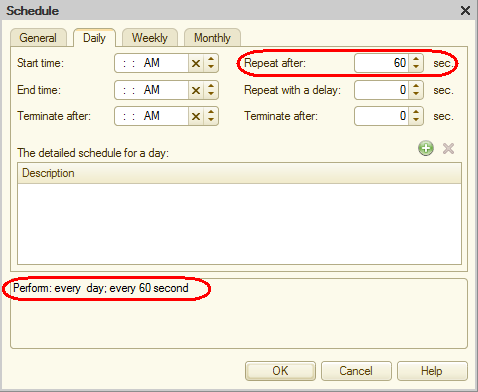
Fig. 20.6. Job schedule: every minute
The bottom of the dialog box displays the description of the created schedule: "Perform: every day; every 60 second".
It seems that you have obtained the result you needed: the scheduled job is executed daily, every minute. But Jack of All Trades does not work 24/7, so executing the job at night is obviously useless because database data is not modified. But some employees might stay late after their workday is over. - In the Start time field, enter 08:00 (fig. 20.7).
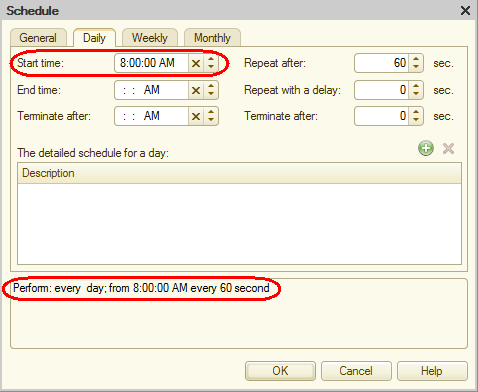
Fig. 20.7. Specifying the execution start time
This specifies that the job is executed starting from 8 a.m. Since no end time is specified, the job execution is stopped when the current day is over. In other words, the job is executed all day except for the interval between 00:00 and 08:00.
Now you are done creating a schedule for the scheduled job. - Click OK.
- In the scheduled job property palette, select the Predefined checkbox (fig. 20.8).
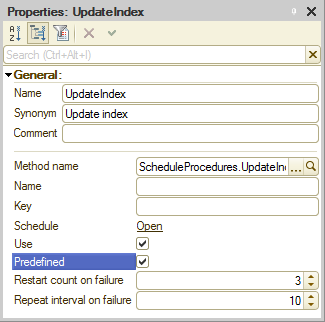
Fig. 20.8. Predefined scheduled job
This means that once the applied solution is started in 1C:Enterprise mode, the platform creates a predefined scheduled job. Otherwise, you would have to create the job using 1C:Enterprise script tools.
This completes the creation of the UpdateIndex scheduled job.
Let us use the same steps to create another scheduled job. - Create a scheduled job named MergeIndexes and then, in its property palette, for the Method name property, click the Open button.
- Select the ScheduleProcedures module.
This creates the MergeIndexes() procedure template in the module. - Populate the template as shown in listing 20.2.
Listing 20.2. MergeIndexes() procedure
If FullTextSearch.GetFullTextSearchMode() = FullTextSearchMode.Enable Then
    If Not FullTextSearch.IndexTrue()Then
        FullTextSearch.UpdateIndex(True);
    EndIf;
EndIf;
This procedure is similar to the one shown in listing 20.1, with the following differences: the indexes are merged during the update (the first parameter is True) and all available data is indexed as a single batch (the default value of the second parameter is False) because in this case indexing time is not vital. - In the job properties, select the Predefined checkbox.
Then let us proceed to editing the schedule. - In the scheduled job property palette, for the Schedule property, click the Open link.
- On the General tab, specify that the job is repeated daily (repeat every: 1 days).
- On the Daily tab, specify the start time 1:00 for the job execution (fig. 20.9).
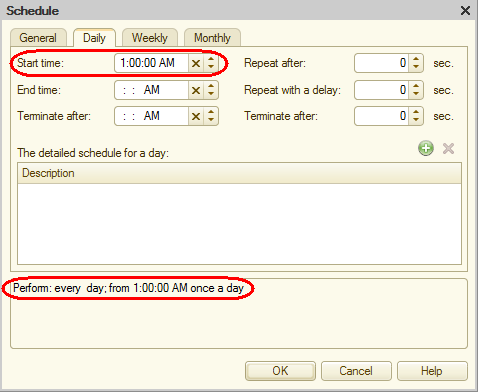
Fig. 20.9. Schedule of the MergeIndex job
This gives you the following schedule: "Perform: every day; from 1:00:00 AM once a day".
You are done creating a schedule for the MergeIndex scheduled job. - Click OK.