1C:Enterprise applications often support form customization. Each user can customize a form to better suit their needs. To customize a form, open the form and then, on the All actions menu, click Change form. This opens the form editor window.
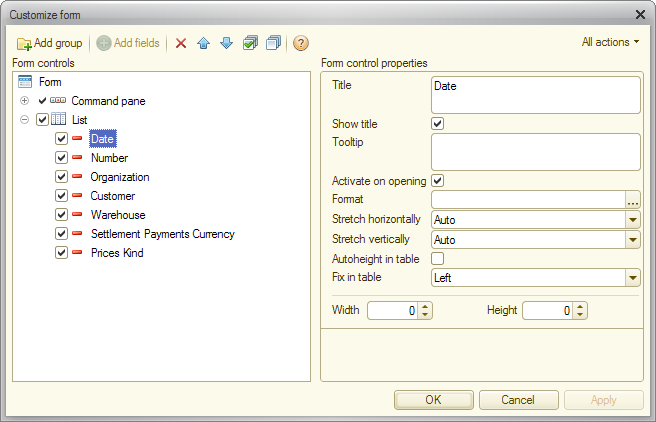
Fig. 202. Form customization
The left part of the window displays a tree of form items. The right part displays the properties of the selected form item.
The content and appearance of a form are defined by the assortment of items included in the form. Items can have the following types:
- Groups (several types)
- Tables
- Fields (several types)
- Buttons
Items have properties that affect their appearance. The item hierarchy defines their positions in a form.
You can change the assortment of items, their positions (relative to each other), their grouping, and properties.
Changing item positions. To change an item position in the hierarchy, use the Move up and Move down buttons or drag the item within the tree.
Changing item properties. To edit item properties, click the item in the left pane and edit its properties in the right pane. The description of the selected property is displayed at the bottom of the right pane.
Changing item visibility. To show or hide form items, select or clear the check boxes near the items. Note that you cannot hide the root Form item and the form customization command. You also cannot hide the command bar that includes the Change form button.
Creating groups. To add a group to a form, click the Form root item in the tree and then click Add group. In the group properties, select the group type (Regular group, Pages, or Command bar).
Adding fields. Some fields may have the Add fields button available. This means that the data displayed in the field/column has attributes that can also be displayed in the field/column. To add the field attributes to the form, click Add fields and select the attributes.
Applying changes. The changes are applied either when you close the editor by clicking OK or when you click Apply. The changes are also saved in the Infobase so that they are applied next time you open the form.
To revert to the default form view, on the All actions menu, click Set standard settings. The default view is not applied immediately and you can continue the customization. The changes are only applied when you click OK or Apply.
Next page: Form customization example