Before you add the tabular section, let us split the form into two tabs. The first tab will display the major document attributes (Number, Data, Customer, and so on) and the second tab will display the table of services.
- In the form controls pane, click Add
 , select Group - Pages, and click OK (fig. 28.21).
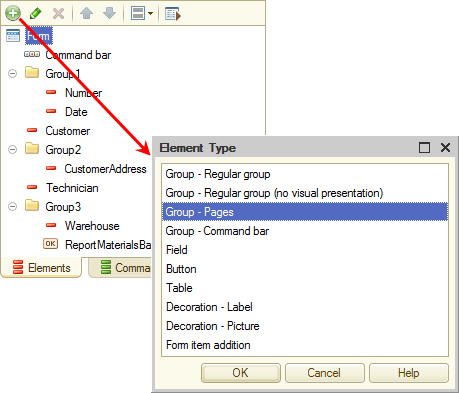
Fig. 28.21. Adding a page group to a form - In the group property palette, in the Title field, enter Pane.
- In the form controls pane, click the Pane group and add another group of the Pages type to it (fig. 28.22).
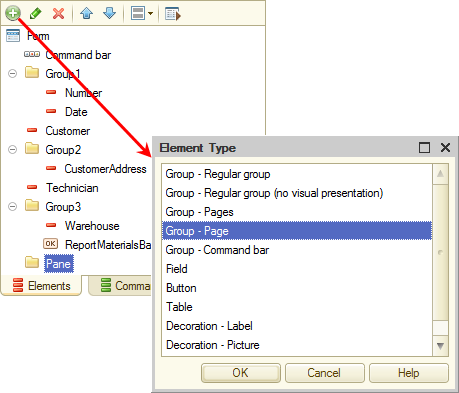
Fig. 28.22. Adding a page to a page group - In the group property palette, set the title to Main.
- Add another group of the Page type with the Services title.
Attention! When you click the Add button, the added control is subordinate to the selected one (in this example this adds a group subordinate to the selected group). - Drag all of the form controls (Group1, Customer, Group2, Technician, and Group3) to the Main group.
The resulting form editor window should look as shown in fig. 28.23.
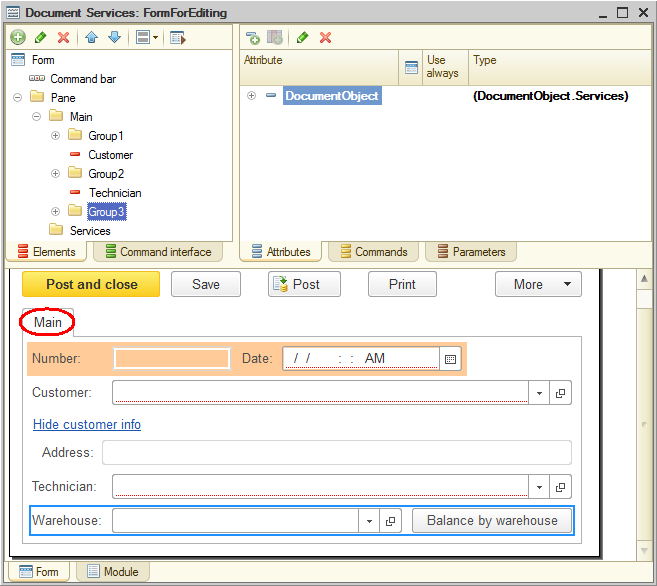
Fig. 28.23. Form editor window
The Services tab is not displayed because it does not contain any controls. - In the form attributes pane, expand the DocumentObject attribute and drag the MaterialsAndServices tabular section to the Services group.
- Confirm that you want to add columns to the table.
This adds the Services tab with a table that displays tabular section data to the form preview (fig. 28.4).
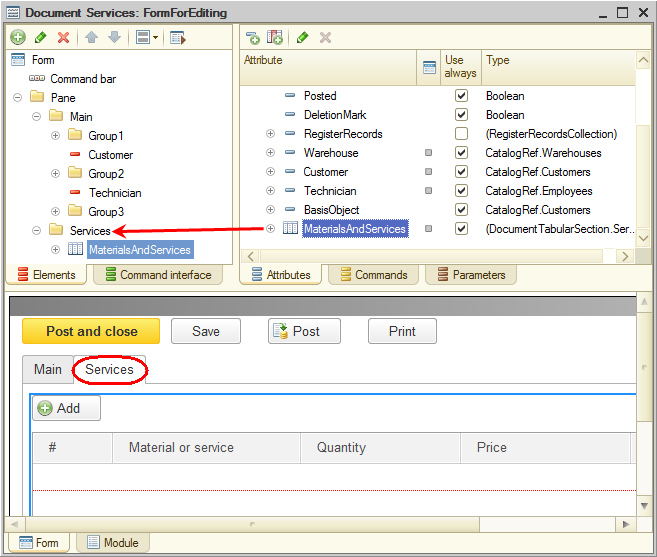
Fig. 28.24. Form editor window
Let us customize the table view. The PropertySet column is not important, so you can delete it. - In the form controls pane, expand the MaterialsAndServices table, click the MaterialsAndServicesPropertySet item, and click Delete current item
 (fig. 28.25).
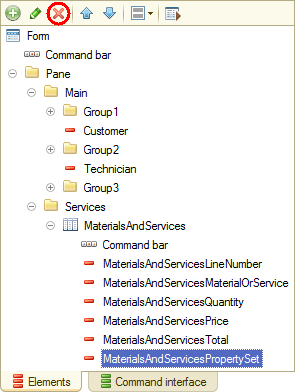
Fig. 28.25. Form controls pane
Then let us apply conditional formatting to the table by highlighting rows with total greater that 300 USD. You need the ConditionalAppearance form property for this. - In the form controls tree, double-click the root Form item.
- In the property palette, in the ConditionalAppearance field, click the Open link (fig. 28.26).
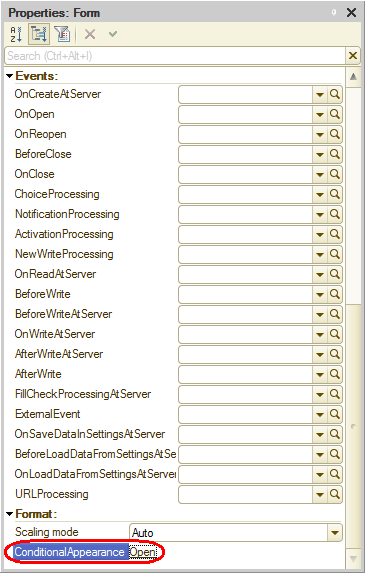
Fig. 28.26. Form property palette - In the Conditional Appearance Settings dialog box, click Add .
First, let us specify the formatting for highlighting fields. - In the Format field, click the selection button and select light blue color for the background.
Then let us specify the condition for the appearance to be applied (when list rows should have light blue color). - In the Condition field, click the selection button.
- In the window that is opened, click the Add
 button and then click New item (fig. 28.27).
 - In the Left value column, select the Total tabular section field.
- In the Comparison type column, select Greater than.
- In the Right value column, enter 300 and click OK.
Finally, let us specify the list of formatted fields.
- In the Formatted fields field, click the selection button.
- In the Formatted Fields dialog box, click Add.
Let us specify that the entire table row (all columns) is highlighted. - Select the MaterialsAndServices table and click OK (fig. 28.27).

Fig. 28.27. Form conditional appearance settings window
You can specify conditional formatting for any form control (field, group, and so on) in a similar manner.