Let us create the department infobase.
- Start 1C:Enterprise in the debug mode.
Let us specify the parameters of the central node (which is a predefined item of the exchange plan). - In the Enterprise section, in the navigation panel, click Departments.
You can see that the list of exchange plans contains a single empty row. This is the predefined infobase node. - Open that row, enter CI for the infobase code and Central infobase for its description, then click Save and close.
- Create an exchange plan node with Dep for the infobase code and Department for its description.
The created node has three buttons available in the command bar of the exchange plan form: Write changes, Read changes, and Create initial image (fig. 24.21).
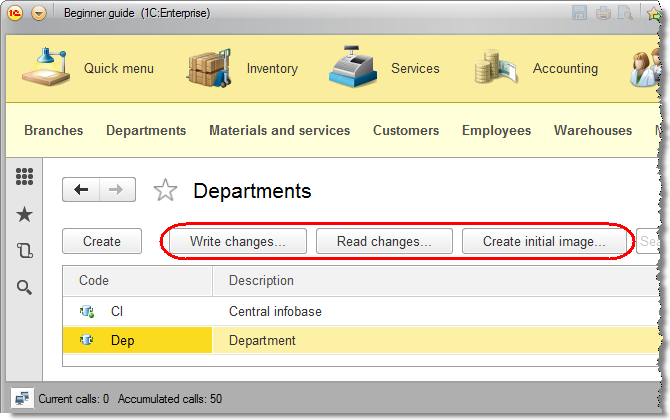
Fig. 24.21. Commands for distributed infobase operations
Let us use one of these buttons to create an initial image of the department infobase. - Create a new directory on the hard disk to store the department infobase.
- In the list of data exchange nodes, click Departments and then click Create initial image.
- In the Create initial infobase image dialog box, specify that the infobase will be located on this computer, and click Create initial image.
- At the next step, click Save and specify the directory that you created for the infobase (fig. 24.22).
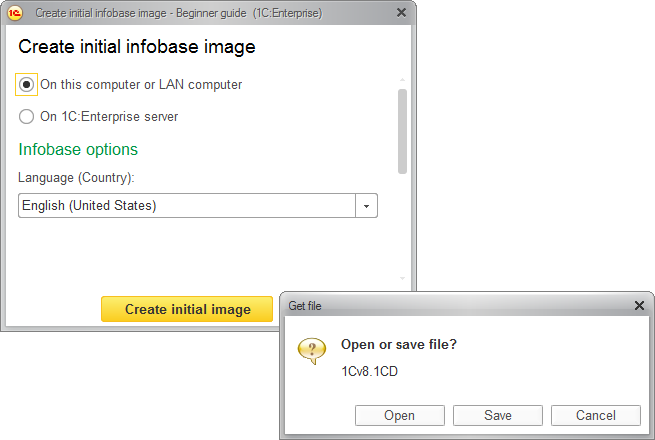
Fig. 24.22. Creating an initial infobase image - Return to the Create initial infobase image dialog box and click Close.
The platform creates the initial image of the department infobase in the specified directory.