Before you proceed to creating users, you first need to update the database configuration.
- On the Configuration menu, click Update database configuration.
-OR-
Click the Update database configuration button on the toolbar.
You need this because a user can only be assigned the roles that exist in the database configuration. - On the Administration menu, click Users.
This opens the list of users available in the system. This list is empty so far. Let us add a user. - On the Actions menu, click Add.
-OR-
Click the Add button (fig. 22.7).
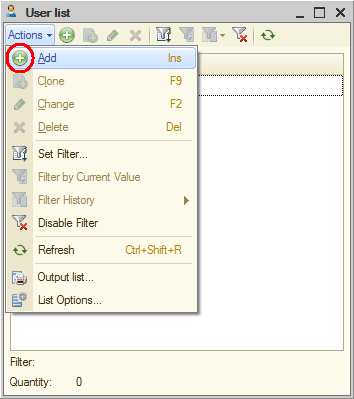
Fig. 22.7. User list
This opens the user editor window (fig. 22.8).
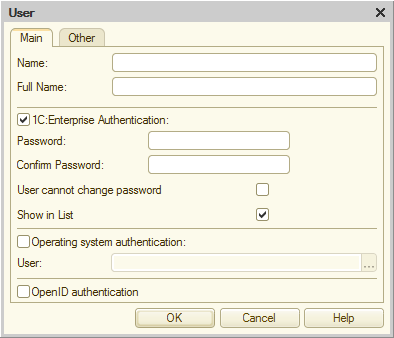
Fig. 22.8. User editor window
Attention! If you use the training version of the 1C:Enterprise platform, you cannot specify user passwords or use OS authentication. These are the limitations of the training version.
Name (the user name) is an identifier that appears in the user selection list when the applied solution is started in 1C:Enterprise mode.
Full Name is a string that can be used within the configuration for displaying various reference data. It is generally recommended that a full name includes the first name, middle name, and last name of a user (without abbreviations).
The next two panes of the window contain authentication settings.
1C:Enterprise Authentication means that during the applied solution startup a user is prompted to select a user name and enter a password. If the provided password matches the one stored in the system for that user ID, the applied solution is started with the rights that have been set for that user. After logging on the user can change their password, unless the User cannot change password checkbox is selected.
Operating system authentication means that during the applied solution startup no additional information is required from the user. 1C:Enterprise determines the operating system account of the user and then searches its own list of users. If a user that corresponds to the current operating system user is found in the list, the Infobase is opened with the rights specified for that user.
Let us proceed to creating users. - In the Name field, enter Administrator.
- In the Full Name field, enter Administrator.
- On the Other tab, select the Administrator role and select English for the configuration language (fig. 22.9).

Fig. 22.9. The Other tab of the user editor window - Click OK.
- Create the rest of the system users as shown in fig. 22.10. For each user select 1C:Enterprise authentication and the English language.
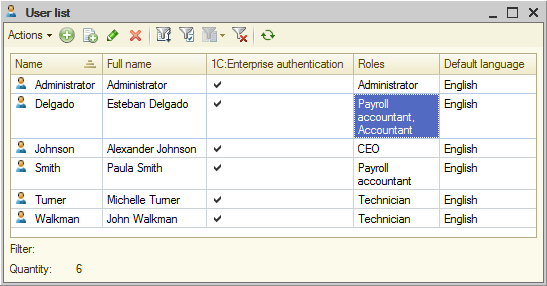
22.10. User list
Note. If some columns, such as Roles, are not visible in the user list, on the Actions menu, click List Options and add the required columns.
Note that the chief accountant Esteban Delgado is assigned two roles: Payroll accountant and Accountant because in addition to accounting operations he might perform payroll calculation operations.
You can also view the list of registered users by clicking Output list on the Actions menu.