Return to Designer. Start with the Income document. Up to now, all configuration object forms were generated automatically when a user required them. The only exception is Desktop, which you describe in Designer. To simplify financial activity registration, create and set up a form of the document.
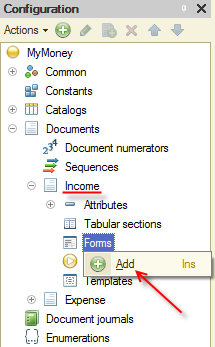
Figure 9-1. Adding a new document form
You already know how to add a new form. Once you click Add, the Document Form Wizard is opened. In our case, select Document form and then click Finish.
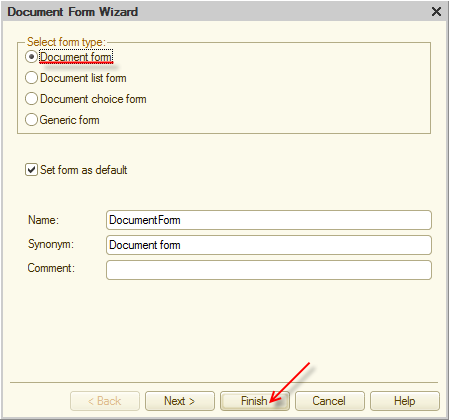
Figure 9-2. Creating a new form
Document Form Wizard generates the default form, similar to the one automatically generated in 1C:Enterprise mode (see figure 6-26).
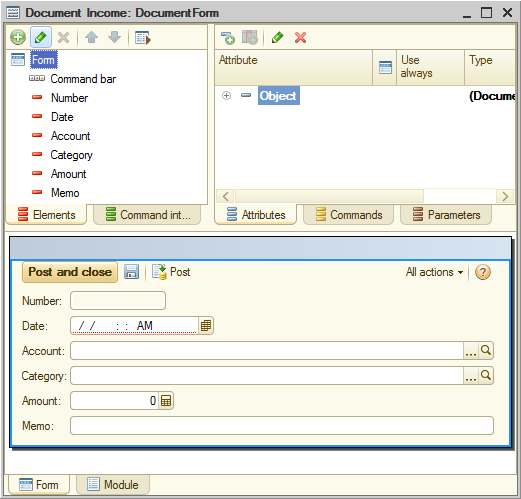
Figure 9-3. Adjusting a managed form
Customize the form to make the data input more comfortable.
Start with removing the item that users do not need: Number. To do it, click the Number item of the form item list (the left upper panel) and click Delete current item ![]() (Del).
(Del).
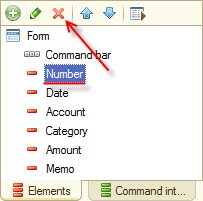
Figure 9-4 Deleting a managed form item
Note. Deleting the form item does not delete the object attribute. In our case, you removed the presentation of a document number, but the document still has a number. You can easily check it, just expand the Object attribute branch of the document attribute list (the right upper pane) and you will see it. Even if the presentation is removed, you still can interact with the attribute, for example, through the script. You can always return the presentation to the form.
Once you delete a form item, the platform redraws the managed form. In our case, the form will look as follows:
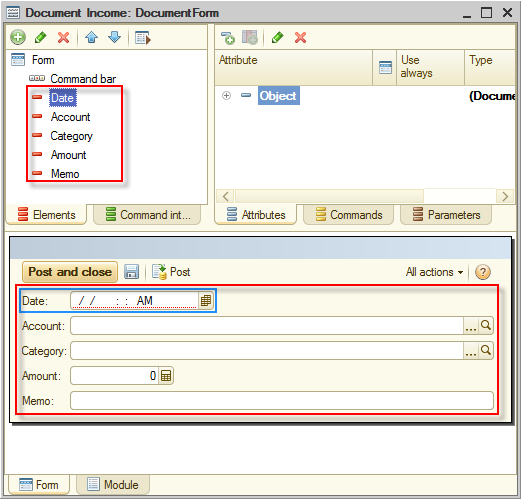
Figure 9-5. Adjusting a managed form
Besides removing unnecessary items, make presentations of other items more clear.
Move Amount to the top of the list.
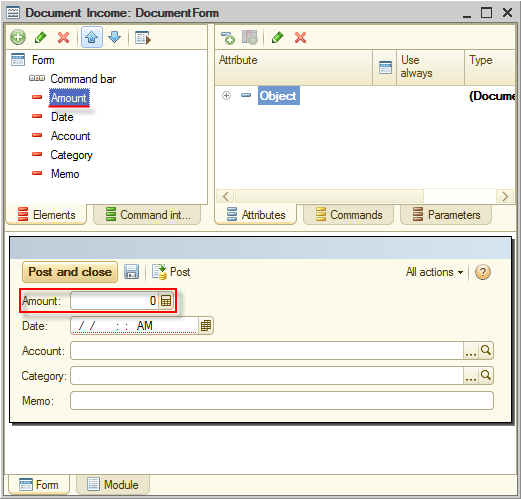
Figure 9-6. Moving Amount to the top
Let us increase the font size of Amount to 14 and make this item activate by default. To set these parameters, open Properties.
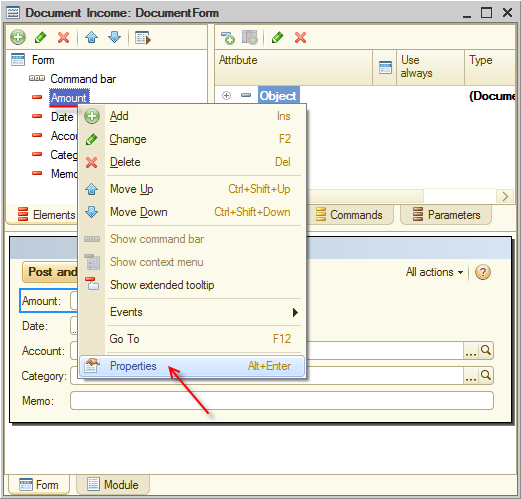
Figure 9-7 Form item properties
To set the font, click the Select ![]() button of the Font field.
button of the Font field.
Note. If you see property names (for example, DefaultItem) instead of property presentations (for example, Activate by default) in the property palette, right-click the property palette and then clear the Display property names check box.
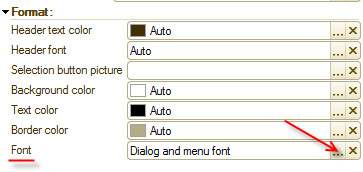
Figure 9-8. Form item font
Clear the From style check box of the font size.
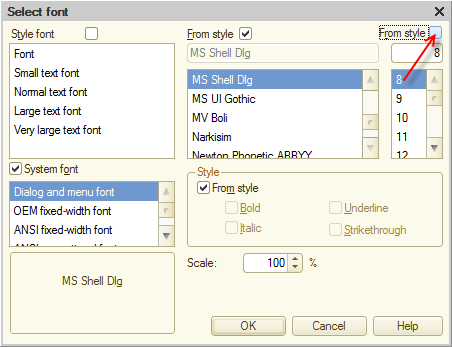
Figure 9-9. Clearing From style
Set the font size to 14, then click Close. Pay attention to the Document Form Wizard. Once you change a font parameter, you can see changes on the form.
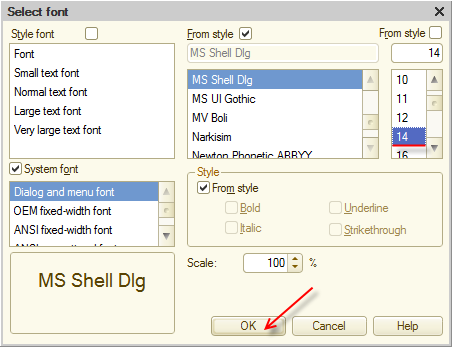
Figure 9-10. Setting the font size
Select the Activate by default check box.
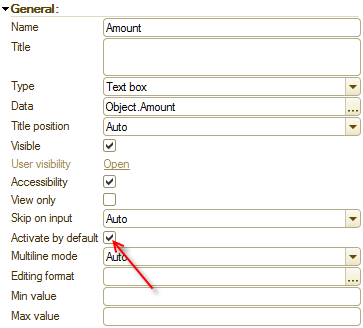
Figure 9-11. The Activate by default checkbox
Move the Date field, which is filled automatically, to the bottom.
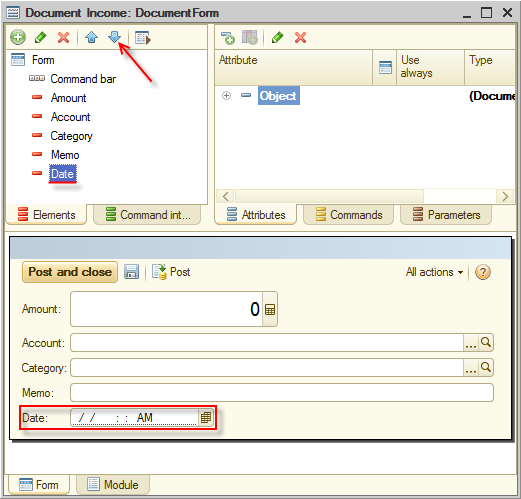
Figure 9-12. Moving Date to the bottom
In the property palette of the Date field, set Skip on input to Yes.
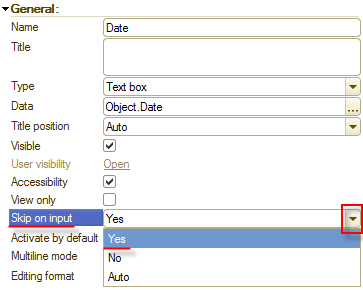
Figure 9-13. Skip on input
Probably the number of user accounts would not be large. Let us block opening a separate window for selecting an account. If Quick choice is set to Use, the 1C:Enterprise platform suggests the user make a choice from a drop-down list. To make the selection with a drop-down list a default way of selection, set Quick choice to Use for the Income document attribute but not for the form item.
Expand Income attributes in the metadata tree.
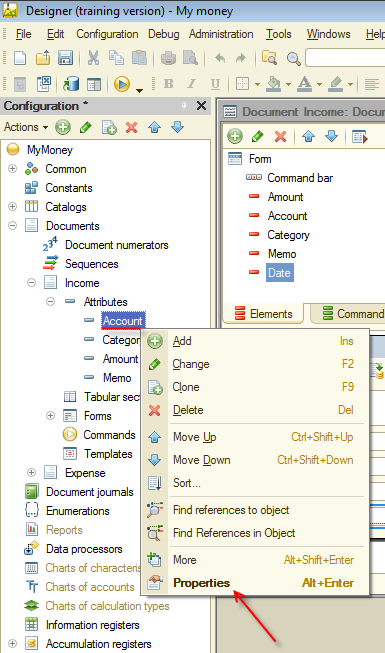
Figure 9-14. Document attributes
Right-click Account and open its property palette.
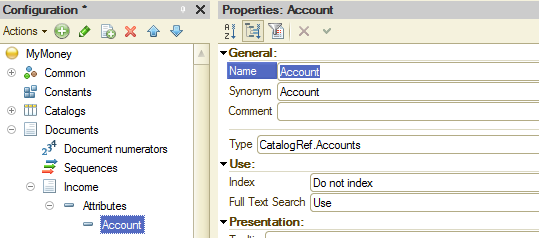
Figure 9-15. Account attribute property
Set Quick choice to Use.
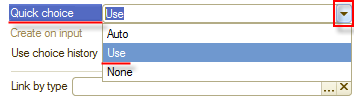
Figure 9-16. Setting whether a quick choice is used
Now set Multiline mode for Memo, it is also set in the property palette.
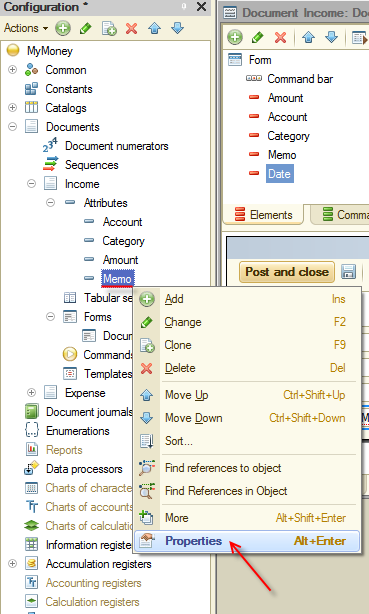
Figure 9-17. Memo attribute properties
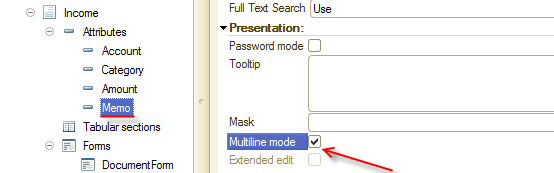
Figure 9-18. Selecting Multiline mode
Look at the preview and note how the Memo field changed.
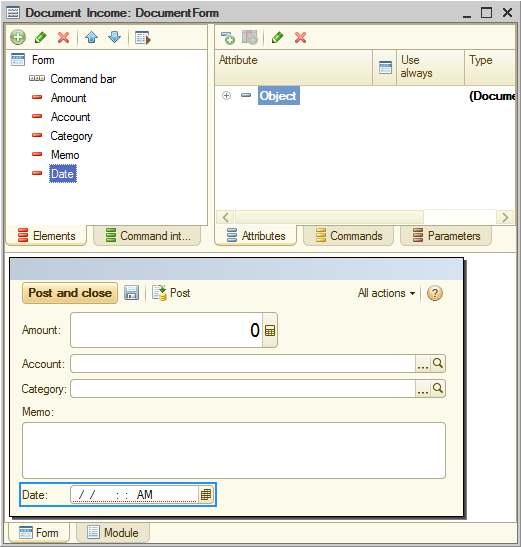
Figure 9-19. Income document preview
Now let us adjust the Expense document form in a similar way.
Create the form.
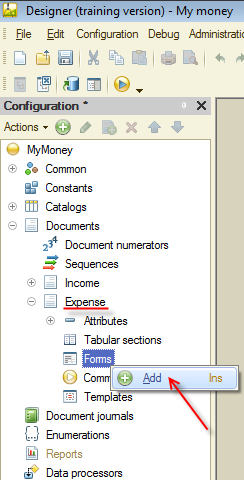
Figure 9-20. Adding the document form
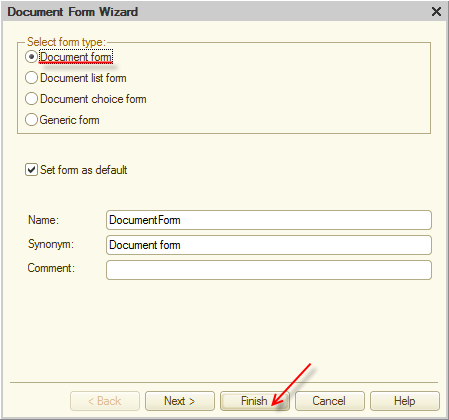
Figure 9-21. The document form
Remove Number.
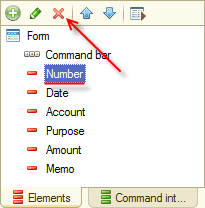
Figure 9-22. Removing the form item
Move Amount to the top of the list. Increase the font size to 14.
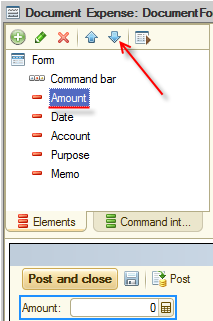
Figure 9-23. Moving Amount
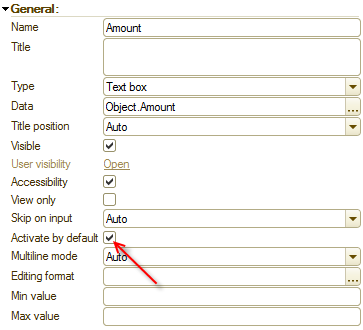
Figure 9-24. The Activate by default checkbox
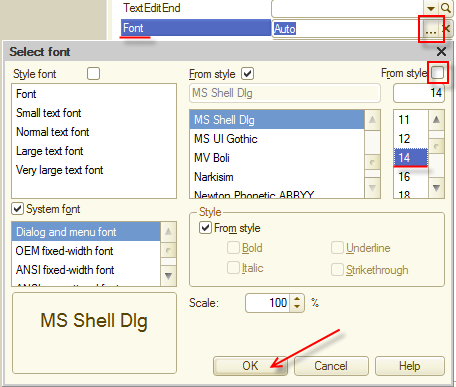
Figure 9-25. Setting a font
Move Date to the bottom and set Skip on input to Yes.
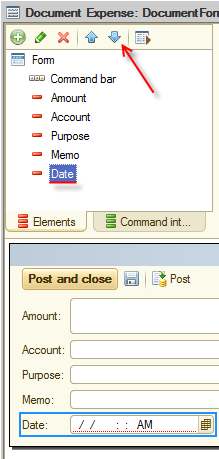
Figure 9-26. Moving Date to the bottom
Set Quick choice of Account to Use.
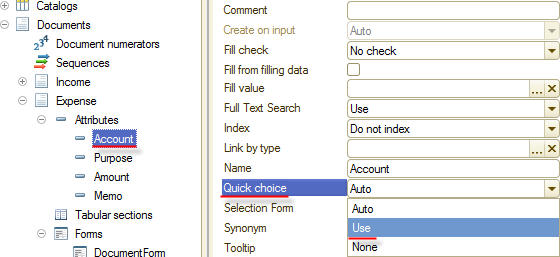
Figure 9-27. Account quick choice
Select Multiline mode for Memo.
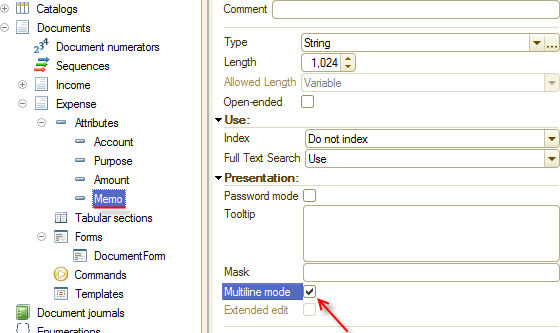
Figure 9-28. Multiline mode
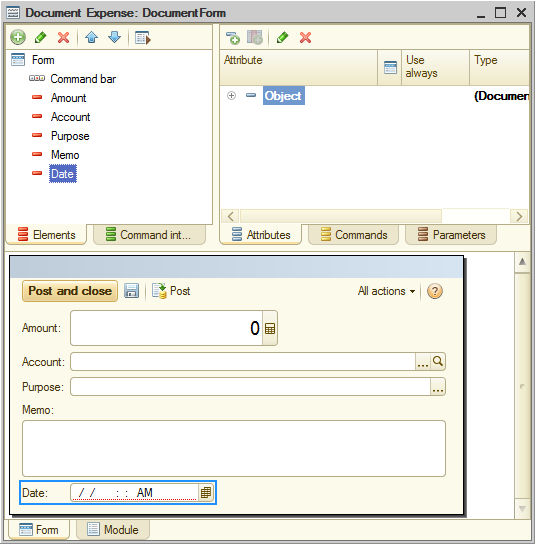
Figure 9-29. Expense preview
When you are done with the form customization, you can start the application in 1C:Enterprise mode and check the result. You can also use a built-in mechanism of Document Form Wizard. In Designer, in Document Form Wizard, click Test ![]() (Ctrl+R).
(Ctrl+R).
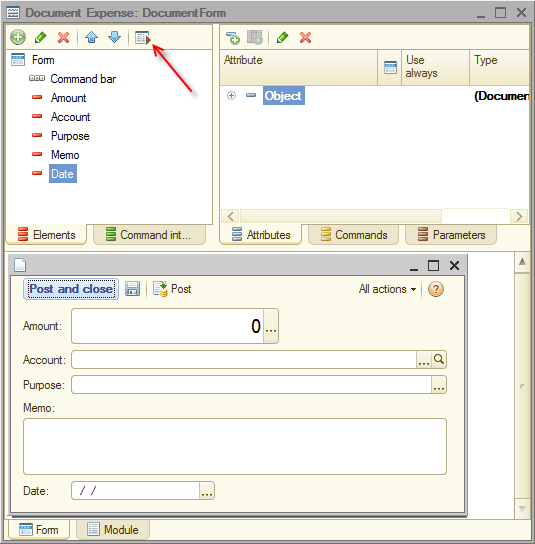
Figure 9-30. Testing the form
Next page: Adding desktop buttons