Let us create the report settings.
- Click the Settings tab.
The upper right pane displays the hierarchical structure of the report. - Right-click Report and then click New grouping.
-OR-
In the command bar of the window, click the Add button and click New grouping.
-OR-
Click Report and then press Insert. - Do not enter the grouping field, simply click OK.
You have specified that the report includes detailed Infobase records, that is, the records that are retrieved when a query is executed without totals (fig. 7.11).
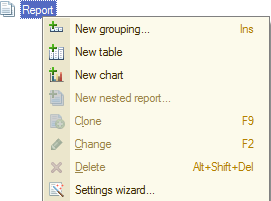
Fig. 7.11. Adding a grouping to a report
The Detailed records grouping is added to the report.
Now let us specify the fields that will be displayed in the report. - In the bottom pane, on the Selected fields tab, drag the following fields from the Available fields list to the Selected fields list:
- Warehouse
- Material
- QuantityOpeningBalance
- QuantityReceipt
- QuantityExpense
- QuantityClosingBalance
to the right of the list of selected fields. You can change the order of selected fields using the Move up  and Move down
  buttons or by dragging them.
Now the report settings window looks as follows (fig. 7.12).
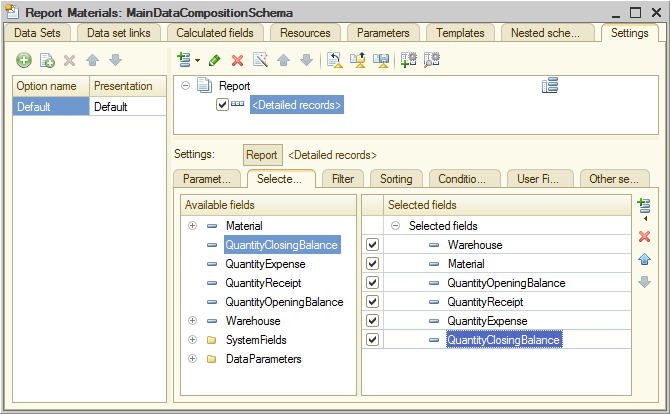
Fig. 7.12. Report settings window - In the bottom pane, click the Parameters tab.
Let us specify that the Begin of period and End of period report parameters are included in the list of custom settings and these settings are located directly in the report form (they will serve as quick settings). - In the lower pane, select the Begin of period and End of period checkboxes.
The checkboxes indicate that both parameters are used in the report. - For each parameter, select it, click the Custom settings item property button
 , and select the Include in custom settings checkbox (fig. 7.13).
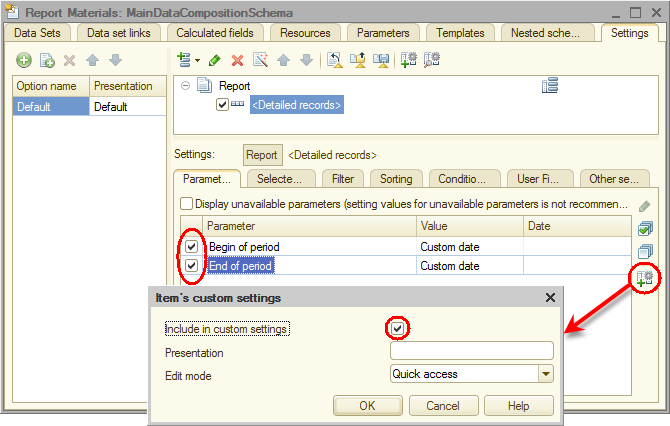
Fig. 7.13. Report settings window
So before a report is actually generated, a user can specify the report period. For detailed explanation of report parameters and custom settings, see Lesson 13. Reports.
Finally, let us specify the subsystems where the report is available. - Close the data composition schema wizard and then, in the editor of the Materials report configuration object, click the Subsystems tab.Select the Accounting, Inventory, and Services checkboxes (fig. 7.14).
- This adds the link that opens the report to the Reports menu in the command panels of these subsystems.
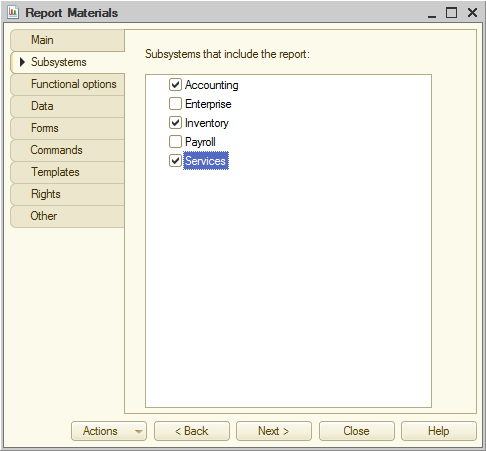
Fig. 7.14. Specifying the list of subsystems where a report is available