Before you begin adding your first configuration objects, note that in order to develop a configuration that automates a company’s economic activity, a developer can use only a limited set of configuration objects that are built into the platform. A developer cannot create custom configuration objects. They only can add standard objects available in the system to a configuration.
Before you begin, you have to learn how to perform some basic actions in Designer.
To open a configuration
- On the Configuration menu, click Open configuration.
To close a configuration
- On the Configuration menu, click Close configuration.
Respective toolbar buttons are available as well.
Once the configuration is open, its content is displayed in the configuration object tree window (see fig. 1.11). You can close this window just like any other window, but if you do so, the configuration itself remains open (in other words, it can still be edited).
To view the configuration tree window
- On the Configuration menu, click Configuration window.
There are several methods of adding configuration objects. You can use any method that you like.
To add configuration objects (method 1)
- Click the required configuration object tree branch, click the Actions button in the configuration window command bar, and then click Add (fig. 1.12).
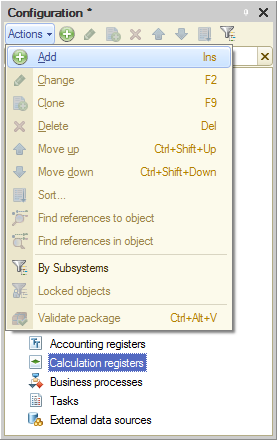
Fig. 1.12. Adding a configuration object
To add configuration objects (method 2)
- Right-click the required configuration object tree branch, then click Add (fig. 1.13).
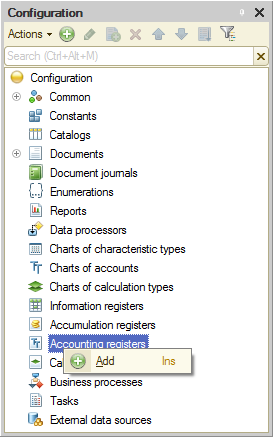
Fig. 1.13. Adding a configuration object
To add configuration objects (method 3)
- Click the required configuration object tree branch, and then click the Add button
 in the configuration window command bar (fig. 1.14).
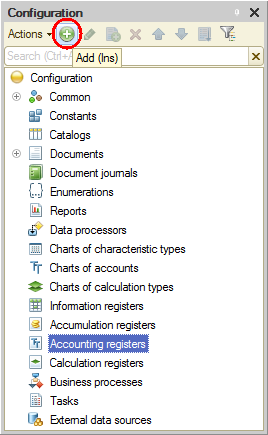
Fig. 1.14. Adding a configuration object
We prefer the last method so we will mainly use it in the future.
Next page: Property palette