Let us prohibit saving goods receipts with empty tabular sections.
- In the Fill check field, select Display error.
In doing so you specify that a GoodsReceipt document must include a tabular section (the list of received materials). Otherwise, an error message is displayed when a user attempts to save the document.
Let us create the attributes for the Materials tabular section. - On the Data tab, click Add attribute
 above the list of tabular sections and add the following attributes (fig. 4.10):
- Material. Type: CatalogRef.MaterialsAndServices
- Quantity. Type: Number, length: 15, precision: 3, non-negative
- Price. Type: Number, length: 15, precision: 2, non-negative
- Total. Type: Number, length: 15, precision: 2, non-negative
- For each tabular section attribute, in the Fill check field, select Display error.
In doing so you specify that when a document is saved, in addition to the availability of tabular section records, the platform checks that all of the attributes of each record are filled.
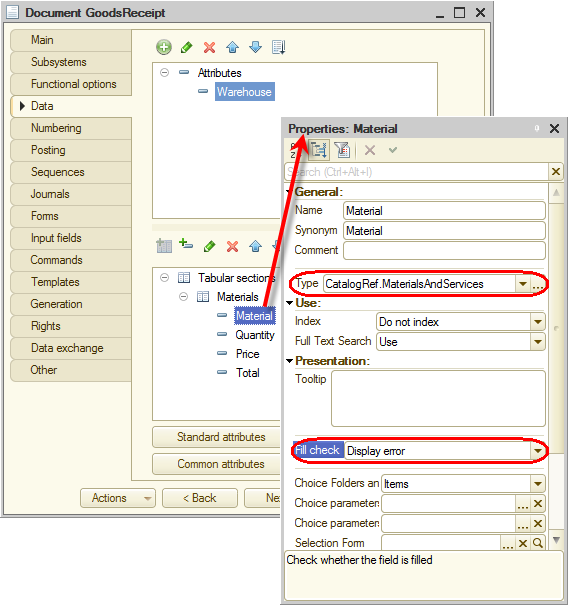
Fig. 4.10. Creating document tabular section attributes - Click the Numbering tab and ensure that the Autonumbering check box is selected.
This property defines the automatic generation of unique numbers for documents that users create.
Finally, let us add the document creation command to the Inventory subsystem. - In the configuration object tree, right-click the Subsystems branch and then click All subsystems.
- In the All Subsystems window, click the Inventory subsystem.
The Command interface list on the right displays all of the commands of the selected subsystem. - In the Action panel.Create group, enable visibility for the Goods receipt: create command (fig. 4.11).
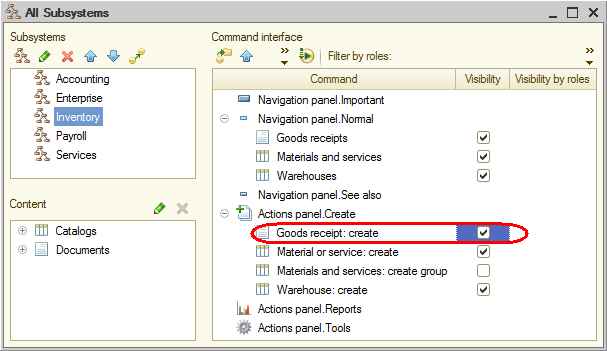
Fig. 4.11. Specifying subsystem command interface settings