First, let us create the Administrator role. This role should include full rights for operations with infobase data.
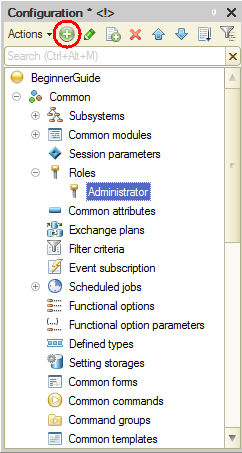
- Expand the Common branch of the configuration object tree, click Roles, and add a new Role configuration object named Administrator (fig. 22.1).

Fig. 22.1. Creating a role
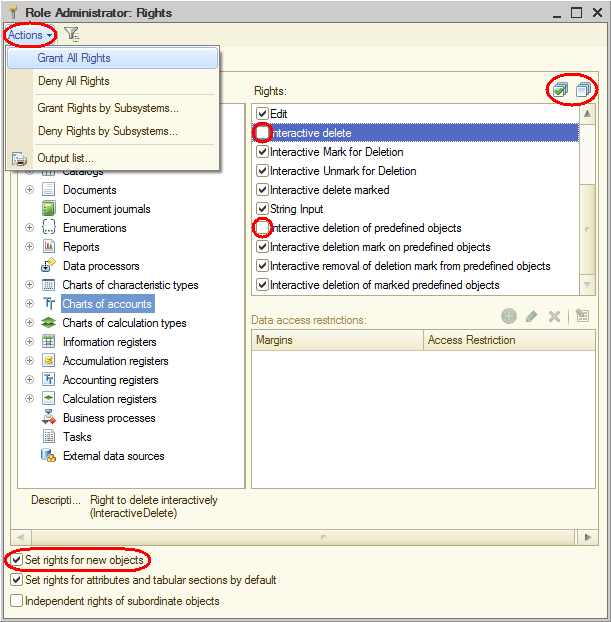
This opens the rights editor for the role (fig. 22.2).

Fig. 22.2. Rights editor window for the Administrator role
The left pane contains the list of configuration objects, grouped by type. The right pane contains the list of rights available for the selected object or object type.
An administrator should have rights for all the objects and all the object types. - On the Actions menu, click Grant All Rights.
This selects all rights for all objects.
You can grant or deny all rights for a specific configuration object using the Mark all elements and Remove marks from all elements
  buttons above the list of rights.
The only thing you have to do is deny the interactive deletion right for all the objects. This is required to prevent an administrator from accidental deletion of database objects. - Scroll through all the configuration object types (Catalogs, Documents, and so on) and clear the Interactive delete check box for each object. Note that this also clears the Interactive deletion of predefined objects check box (see fig. 22.2).
- Select the Set rights for new objects check box (see fig. 22.2).
This grants the administrator full access rights for the objects that you create after setting the rights.
You are done with the creation of the Administrator role.

