You can assign names to spreadsheet cells, cell ranges, and graphical objects.
To manage names, use the Names dialog box.
To name an area, select it and then, on the main menu, point to Table, point to Names, and click Names. In the Names dialog box, enter a name and click Assign.
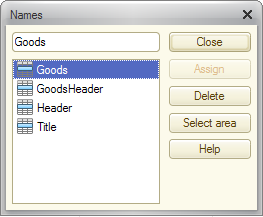
Fig. 241. The "Names" dialog box.
To delete a name, in the Names dialog box, click the name and click Delete. To select a named area, in the Names dialog box, click the name and click Select area. To close the dialog box, click Close.
If a named area is a row, or multiple rows, or a column, or multiple columns, in the Show Named Rows/Columns mode, area names are displayed at the left (for rows) or at the top (for columns). In the Show Named Cells mode, internal named areas are cross-hatched. An area name is displayed in the center of an area.
Spreadsheet document areas that do not have user-assigned names have automatic names. These names are not displayed in the Names dialog box. You can view them in the property palette. You cannot assign a name that matches an automatic name. Automatic names look as follows:
- R5C7. A cell in row 5, column 7.
- R5C7:R8C15. A rectangular cell range in rows 5–8 and columns 7–15.
- R6. Row 6.
- R3:R9. Rows 3–9.
- C2. Column 2.
- C11:C20. Columns 11–20.
- D12. A figure where 12 is the sequential number of a graphical object.
- Т. The entire spreadsheet document.
Area names must be unique for each document. Area names are not case-sensitive.
Next page: Entering cell text