Let us create an accounting register.
- In Designer, create an AccountingRegister object named Primary.
- In the Extended list presentation field, enter Accounting register records.
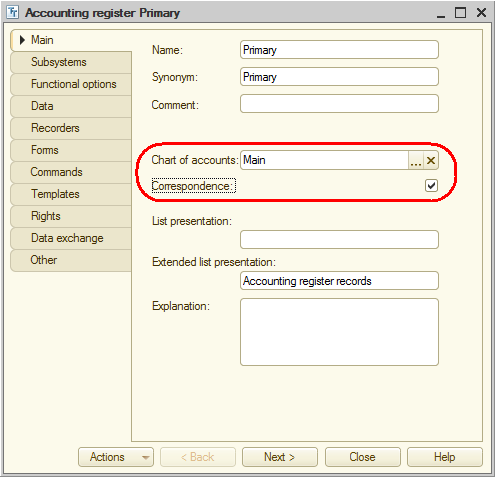
- Specify that the register is linked to the Main chart of accounts.
- Select the Correspondence check box (fig. 16.11).

Fig. 16.11. Main properties of an accounting register
The Correspondence check box indicates that the created register supports account correspondence. That means that each register record has both debit and credit parts, which allows you to get not only balance and turnovers by account, but also the correspondence between accounts.
Registers that do not support correspondence are used when double-entry accounting is not required (which means that balancing between debit and credit accounts within an accounting transaction is not required). - On the Subsystems tab, include the accounting register in the Accounting subsystem.
- On the Data tab, create two resources:
- Sum. Length: 15, precision: 2, Balance
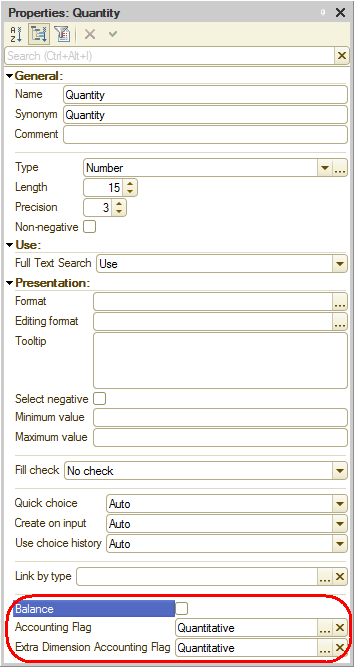
- Quantity. Length: 15, precision: 3, not Balance, accounting flag: Quantitative, extra dimension accounting flag: Quantitative (fig. 16.12).

Fig. 16.12. Properties of the Quantity resource of the accounting register
Finally, let us add the command that opens the register list to the Accounting section, after all other register-related commands. - In the configuration tree, right-click the Accounting subsystem and then click Open command interface.
- In the Navigation panel.Normal group, enable visibility for the Primary command and drag it to the Navigation panel.See also group.
This completes the creation of the accounting register.
Now let us see how you can use the accumulation register.
Next page: Modifying the GoodsReceipt document

